Finding the perfect hairstyle for a high-intensity workout can feel like an endless cycle of trial and error. You want something that keeps your hair completely out of your face, doesn’t pull at your scalp during burpees, and holds up against the inevitable humidity of an hour-long sweat session. While thin, intricate braids look lovely, they often lack the structural integrity required for heavy movement. That is where chunky, thick braids become your best ally. They provide a secure grip, distribute tension evenly, and possess a rugged aesthetic that works just as well in the gym as it does running errands afterward.
Whether you are heading to a heavy lifting session or a long-distance run, the goal is stability without sacrifice. You need a style that stands up to gravity and friction. Chunky braids, by design, use larger sections of hair which means there are fewer points of tension along the scalp. This reduces the risk of headaches caused by pulling too tight while still ensuring your hair doesn’t go flying mid-sprint. It is all about finding that middle ground between a secure foundation and comfortable wear.
The secret to success with these styles often lies in the prep work. If you have fine or silk-textured hair, a little bit of texturizing spray or dry shampoo can make a world of difference. It gives the hair the grip it needs to stay tucked within the weave of the braid. Once you have the right texture, the act of braiding becomes much more intuitive. Let’s look at twenty distinct, chunky ways to keep your hair locked down and ready for action.
1. Classic Three-Strand Dutch Braid
The Dutch braid, often called an inverted French braid, is the gold standard for workout hair because it sits on top of the head rather than sinking into it. By crossing the strands under rather than over, you create a raised, chunky profile that is physically sturdier than its counterparts.
Why It Works for High Impact
Because the braid is raised off the scalp, it resists the friction of your head hitting a yoga mat or a bench. The “under-hand” technique naturally creates thicker, more prominent loops of hair. If you have medium to thick hair, this style will provide enough weight to keep your hair from shifting even during jump rope or HIIT circuits.
Pro Technique for Volume
- Start with a center part for symmetry.
- Keep your grip firm near the hairline to ensure the base doesn’t sag.
- Once you reach the nape of the neck, finish with a traditional three-strand braid.
- Tug slightly on the outer edges of the braid after securing it with a tie to give it that “chunky” aesthetic without compromising the hold.
2. Dual Side-Swept Dutch Braids
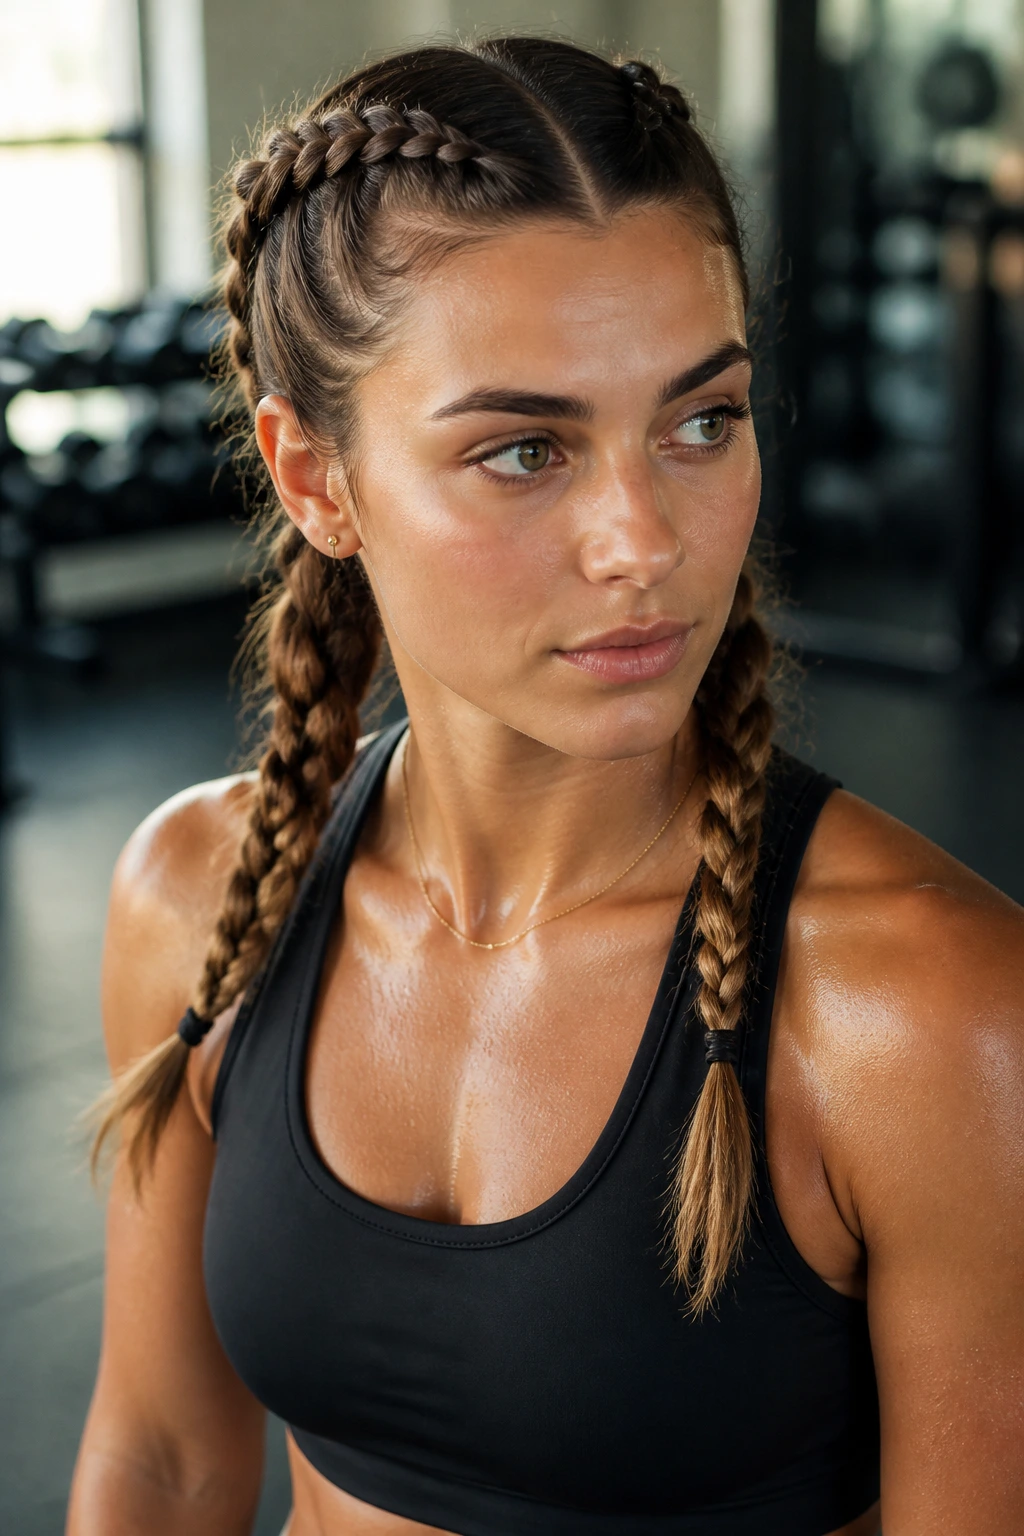
If you prefer a style that keeps the hair off your neck completely, two chunky Dutch braids are the answer. This configuration balances the weight across both sides of your head, preventing the lopsided tugging that happens with a single braid.
Why It’s Better for Cardio
When you are moving quickly, a single braid can act like a pendulum, swinging against your back and causing tangles. Splitting your hair into two sections tethers the weight close to your head. It is a more secure, streamlined approach for runners or cyclists who need to maintain an aerodynamic profile.
Quick Styling Tips
- Apply a small amount of pomade to your palms before you begin.
- Ensure the braids start as close to the temple as possible to catch all those shorter face-framing layers.
- Use seamless silicone hair ties to prevent breakage at the ends, as these are more durable against sweat-induced weakening.
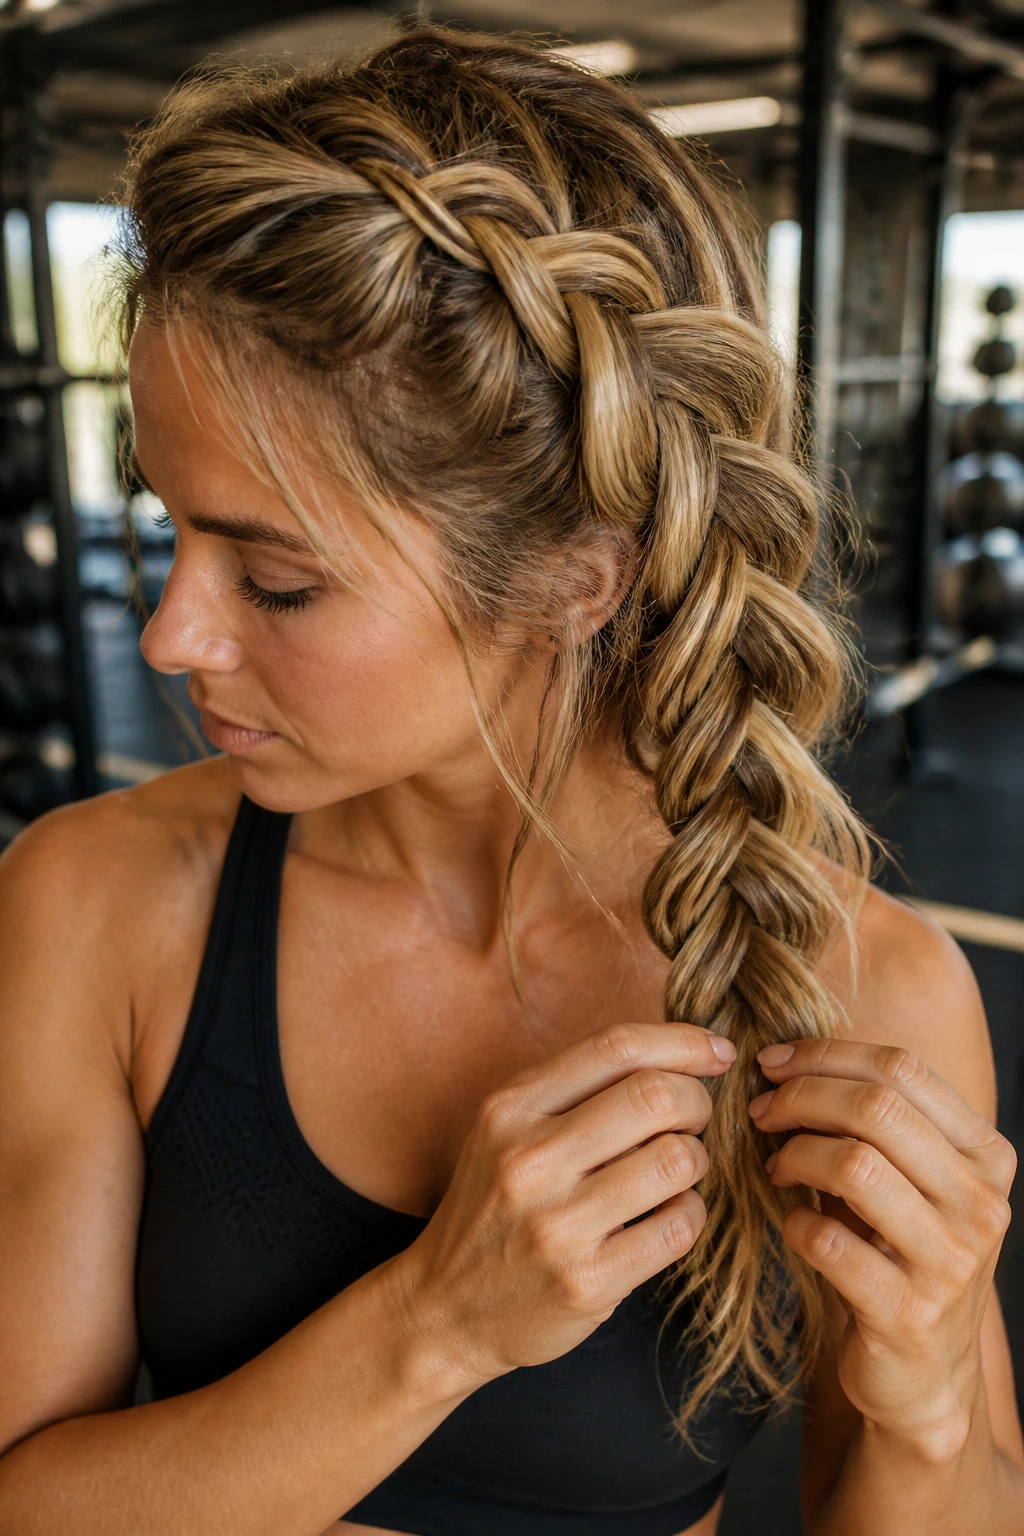
3. The Chunky Fishtail Combo
The fishtail braid looks intricate, but when you use massive sections of hair, it becomes an incredibly chunky, sturdy rope that holds its shape through hours of movement. Unlike traditional braids that rely on three strands, the fishtail weave is essentially a four-part process that creates a much tighter knot.
Mastering the Chunky Weave
To get the chunky look, you have to defy the standard “small strand” advice. Take sections that are about an inch wide. This makes the braid work up faster and creates a thicker, rope-like appearance. It might feel bulky at first, but that density is exactly what prevents it from unraveling mid-set.
Wearability Notes
- This style excels in low-impact activities like yoga or Pilates.
- Because it is tight, it can be a bit heavy if you have very long hair; if that happens, try pulling it into a ponytail first and braiding the tail.
- Avoid using texturizing spray here; you want the hair to be relatively smooth so it slides into the weave without knotting.
4. Reverse French Braid Updo
When you need to keep your hair away from your neck entirely during hot yoga or heavy lifting, a reverse French braid is the solution. You start at the nape of the neck and braid upward toward the crown, eventually rolling the remainder of the hair into a top-knot.
The Physics of the Reverse Braid
By working against gravity, you are training the hair to sit securely against the skull. This style is virtually immovable. It is the ultimate “set it and forget it” hairstyle for someone who hates having hair tickling their back or sticking to the back of their shirt during a sweat-drenched workout.
How to Execute the Transition
- Flip your head upside down to begin.
- Create two side-by-side braids or one central one depending on your hair volume.
- Secure the ends at the crown with a firm elastic.
- Wrap the remaining hair into a messy bun, tucking the ends under to hide the rubber band.
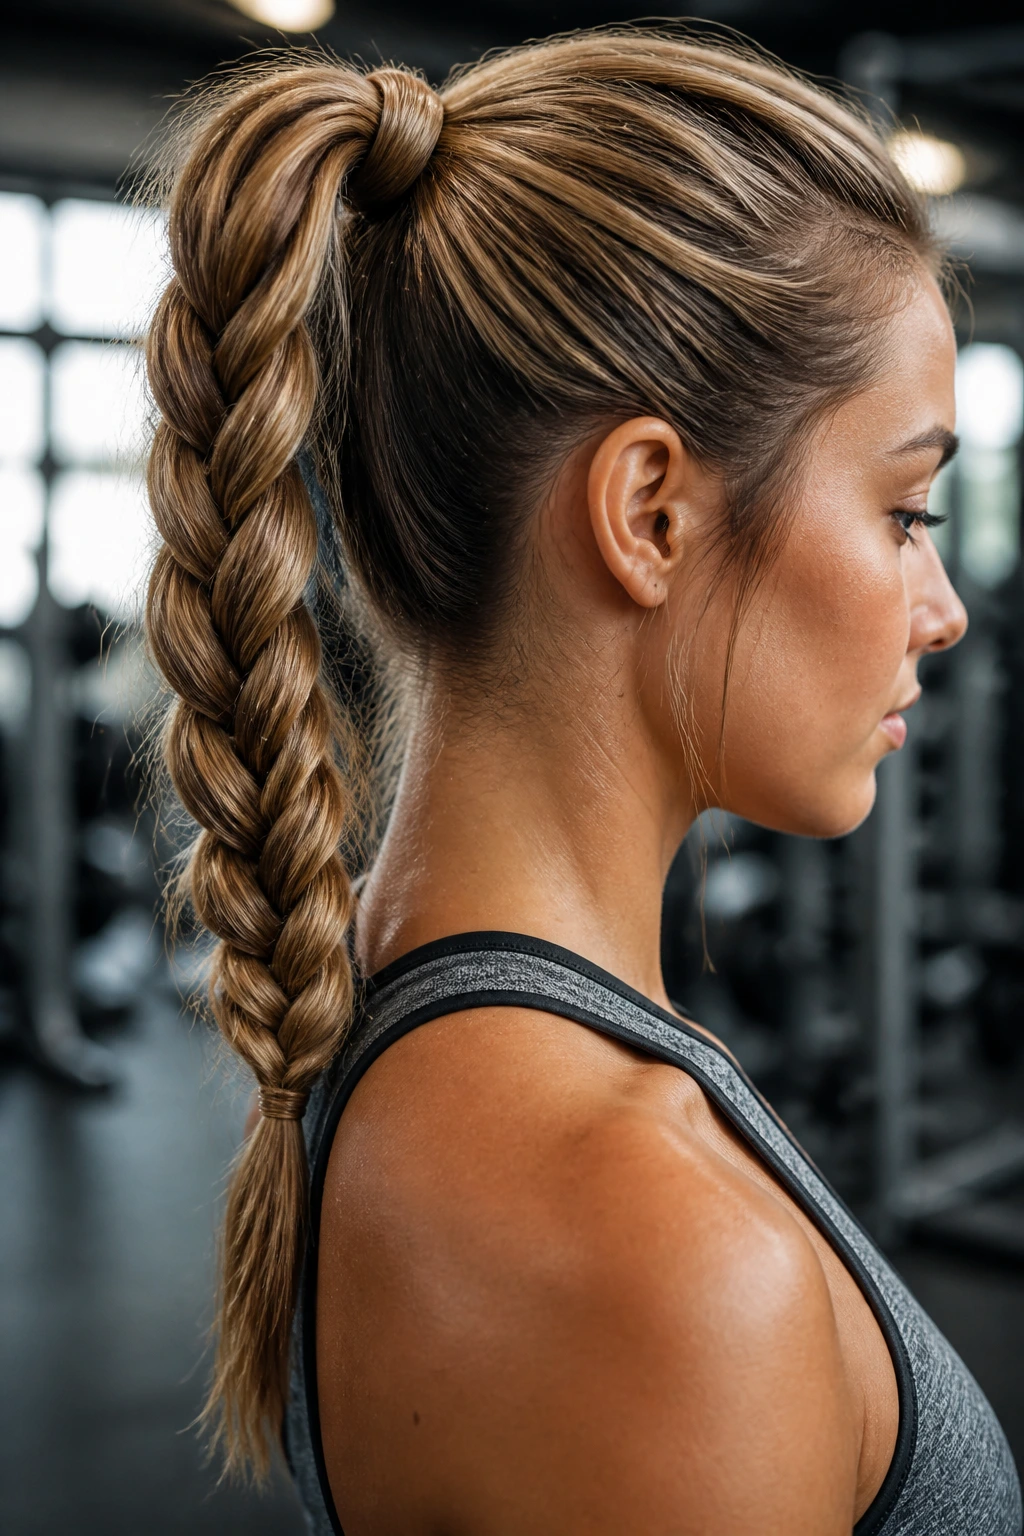
5. The Pull-Through Braided Ponytail
If you are intimidated by actual braiding, the pull-through method is your best friend. It mimics the look of a thick, chunky braid by using a series of strategically placed mini-ponytails and tucking them through one another.
Why This Beats Traditional Braiding
It creates a wider, flatter profile than a standard braid, which is perfect if you want to lean your head back against a bench during a shoulder press. It doesn’t have the “lumpy” texture of a regular plait, so it feels very comfortable against a helmet or a high-backed seat.
Key Steps for Success
- Create a high base ponytail.
- Add small hair ties every two inches down the length.
- Create a hole in the middle of each section and pull the subsequent ponytail through it.
- Gently tug the sides of each “loop” to create a thick, voluminous finish.
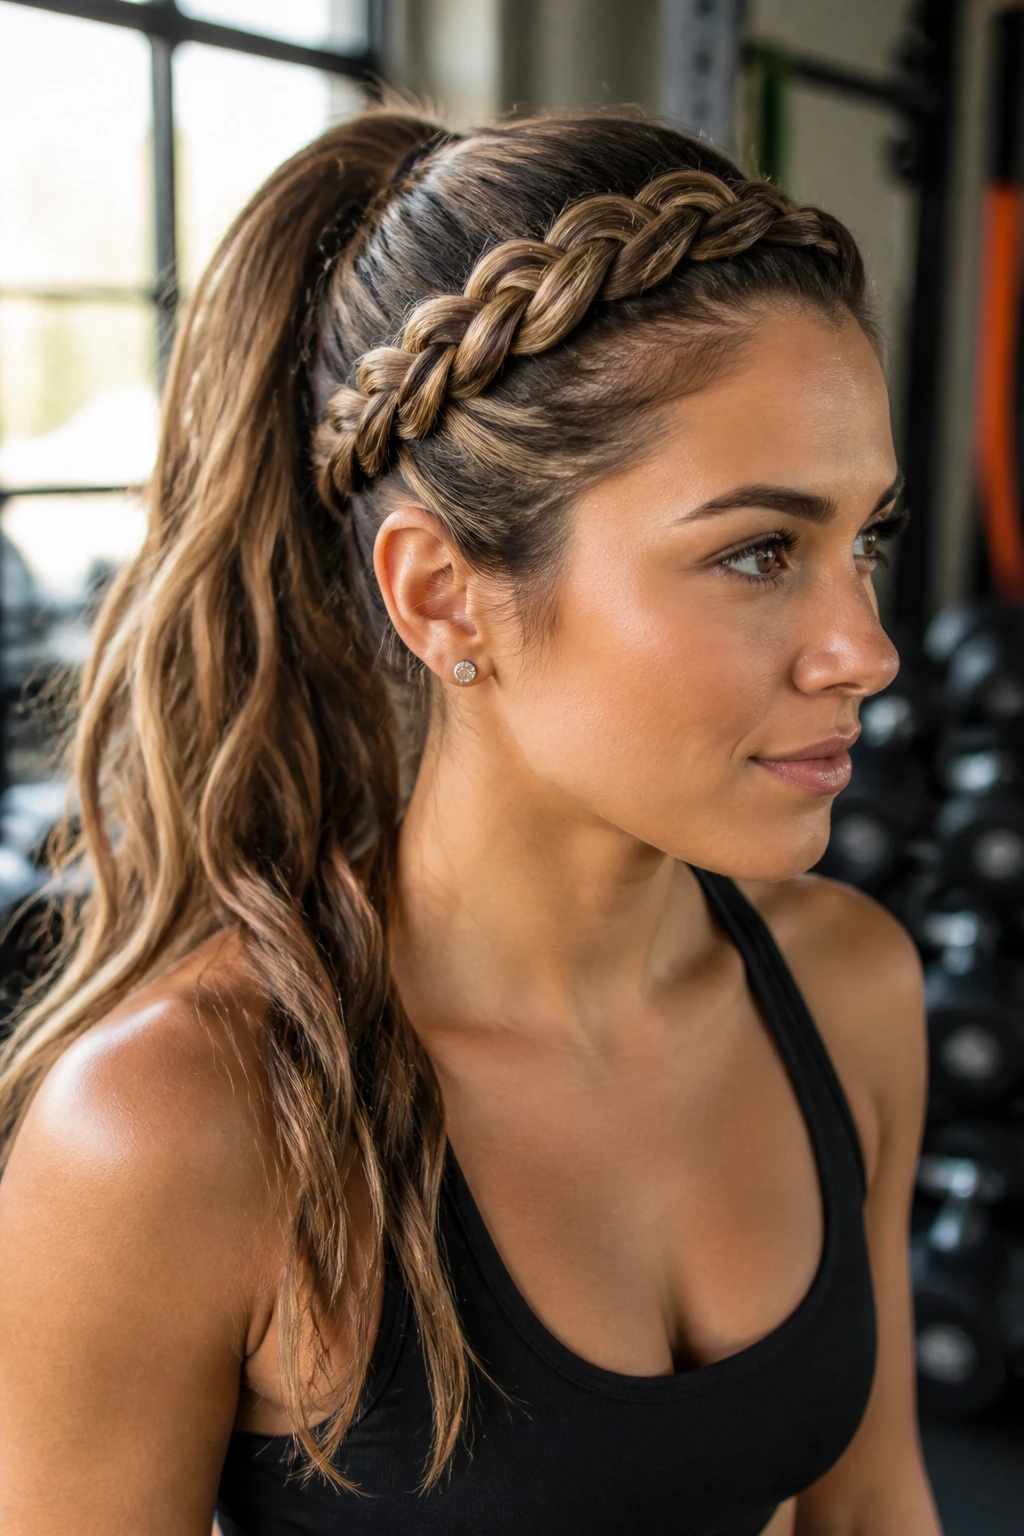
6. Crown Braid with a Twist
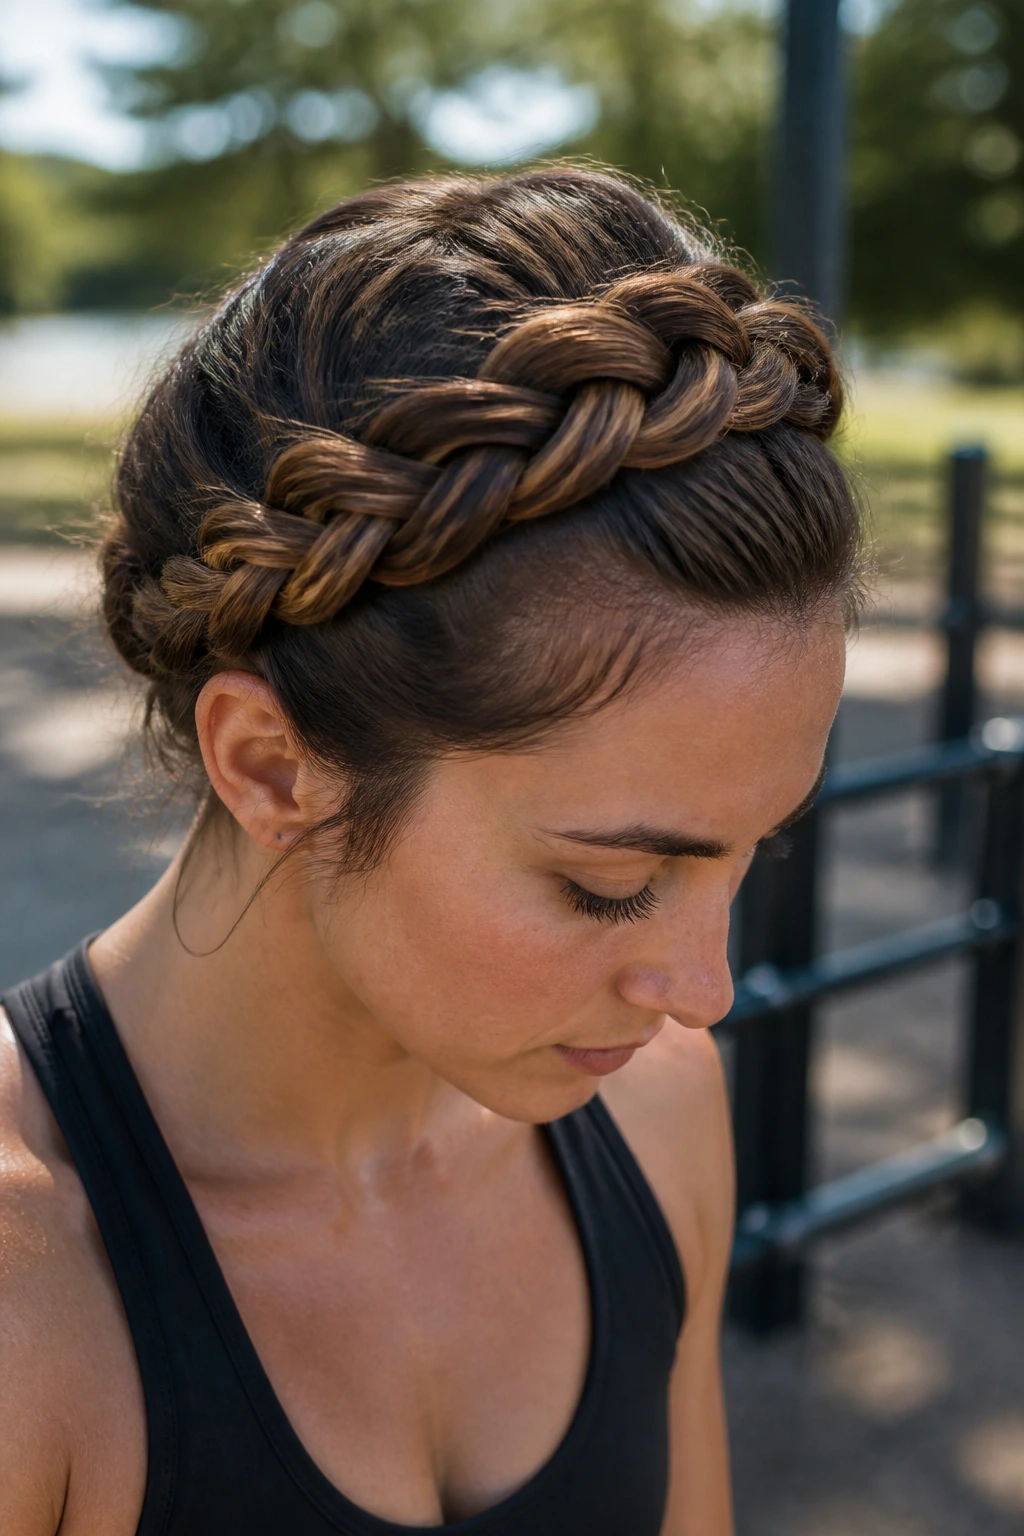
A crown braid—often called a halo braid—is essentially a French braid that circles the entire perimeter of your head. For a chunky variation, don’t worry about being too neat. A looser, thicker crown braid looks intentionally rugged and holds better than a tight, flat version.
Why It Works for Athleticism
It effectively pins every stray hair against your scalp. There is zero chance of hair falling into your eyes while you are doing push-ups or mountain climbers. The hair is effectively “locked” into the circular weave, making it one of the most secure styles in existence.
Managing Hair Texture
- If your hair is prone to flyaways, use a light-hold gel along the hairline before you begin.
- Don’t try to braid too tightly; the thickness comes from the slack you leave in the loops.
- Use bobby pins that match your hair color to secure the tail of the braid into the base seamlessly.
7. Side-Swept Viking Braid
This look features a very large, chunky Dutch braid that travels diagonally across the head, starting near one ear and ending at the opposite shoulder. It provides a unique balance, keeping one side of the face totally clear while adding a bit of flair.
The Aesthetic-Utility Balance
This style is common among combat sports athletes because it keeps hair out of the line of sight without creating a bulky lump at the back of the head. It is aesthetically bold but functionally sound for high-motion activities like boxing or kickboxing.
Tips for Diagonal Braiding
- Keep your head tilted toward the side where you are starting the braid to ensure the tension is even.
- As you braid, keep your hands positioned so that you are always pulling the hair toward the direction of the braid’s path.
- Once you hit the nape, let the rest of the hair hang loose or secure it into a side ponytail.
8. The Chunky Boxer Braid Knot
Take two standard chunky Dutch braids and tie them together at the ends. It is a simple modification that prevents your braids from flapping around and creates a unified, strong structure.
Why It’s Ideal for Team Sports
If you play soccer or volleyball, you need your hair to stay out of the way for sudden, explosive movements. Tying the ends together ensures your braids move as a single unit, which is much more stable than having two separate tails slapping against your shoulders as you run.
Structural Considerations
- Make sure both braids are approximately the same tightness so the knot sits centered at the nape of your neck.
- Use a thick, fabric-covered hair tie to secure the junction; avoid thin elastics which can snap under the pressure of the combined hair weight.
9. Waterfall Braid Headband
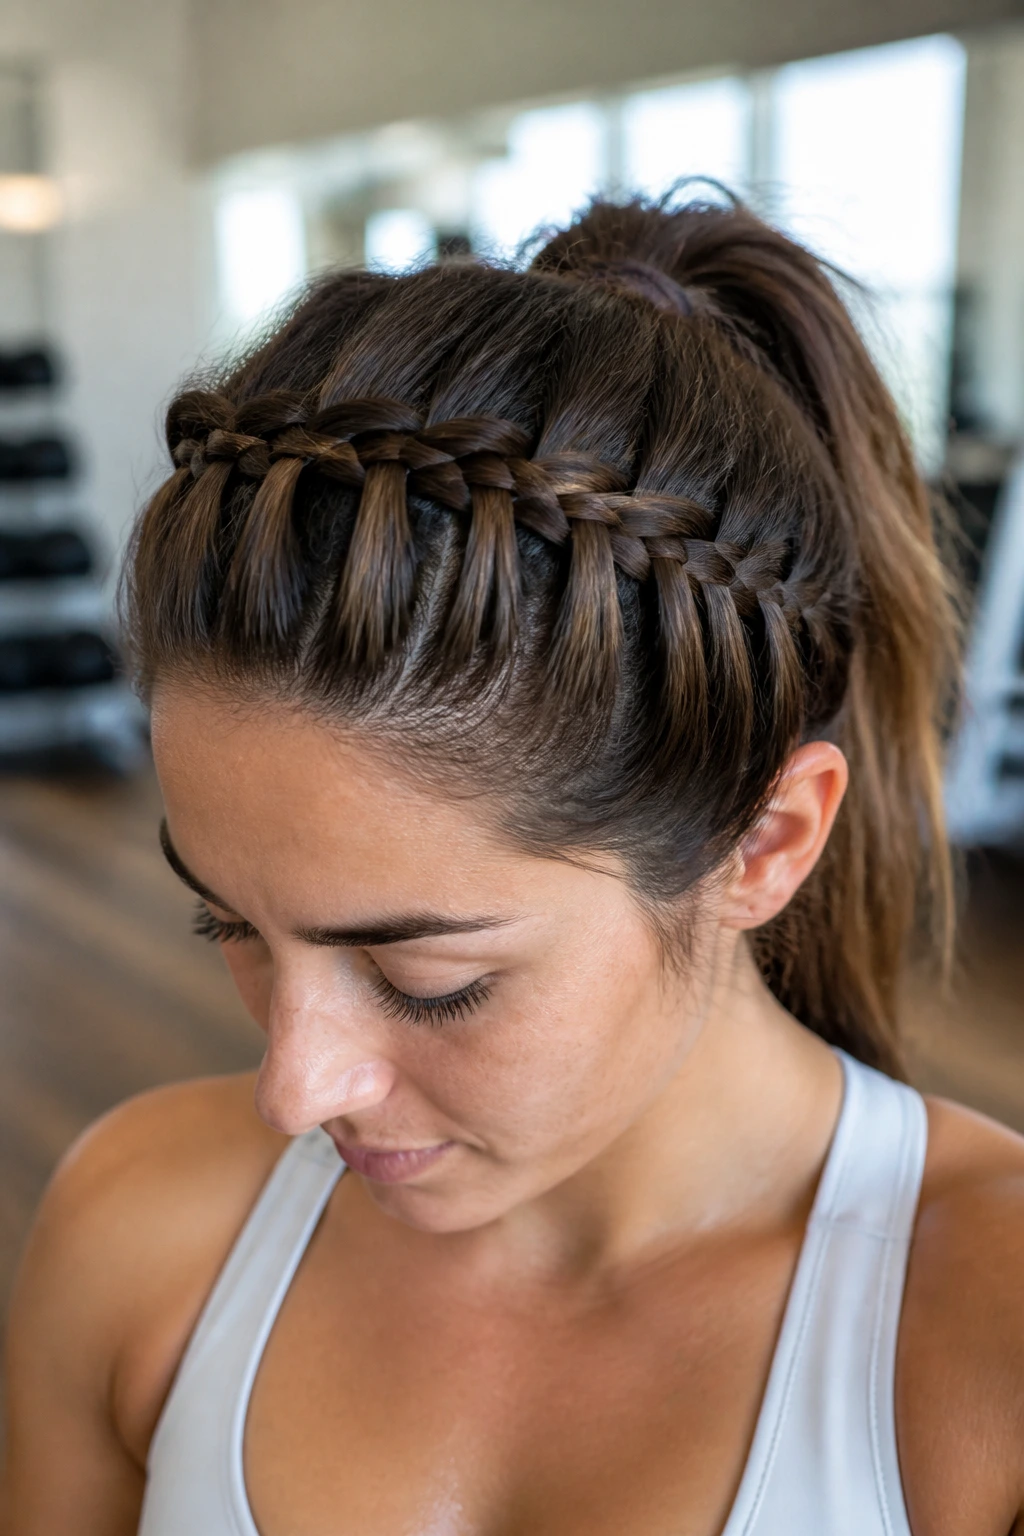
For low-intensity workouts like yoga, a waterfall braid acts as an integrated headband. You incorporate hair from the front of your hairline into a braid that travels across the top of your head, keeping bangs and shorter layers under control.
When to Choose This Style
It’s perfect for gym-goers who want to keep their hair down but need to manage the front sections. It is light, airy, and won’t cause the scalp tension that a full-head braid might. It allows your hair to breathe while keeping your forehead clear of sweat-soaked strands.
Quick Styling Hack
- French-braid the front section as you move across the head, dropping a strand every time you move to the next section.
- Secure the end with a small pin tucked behind your ear.
- If you have layers that slip out, spritz them with a firm-hold hairspray immediately.
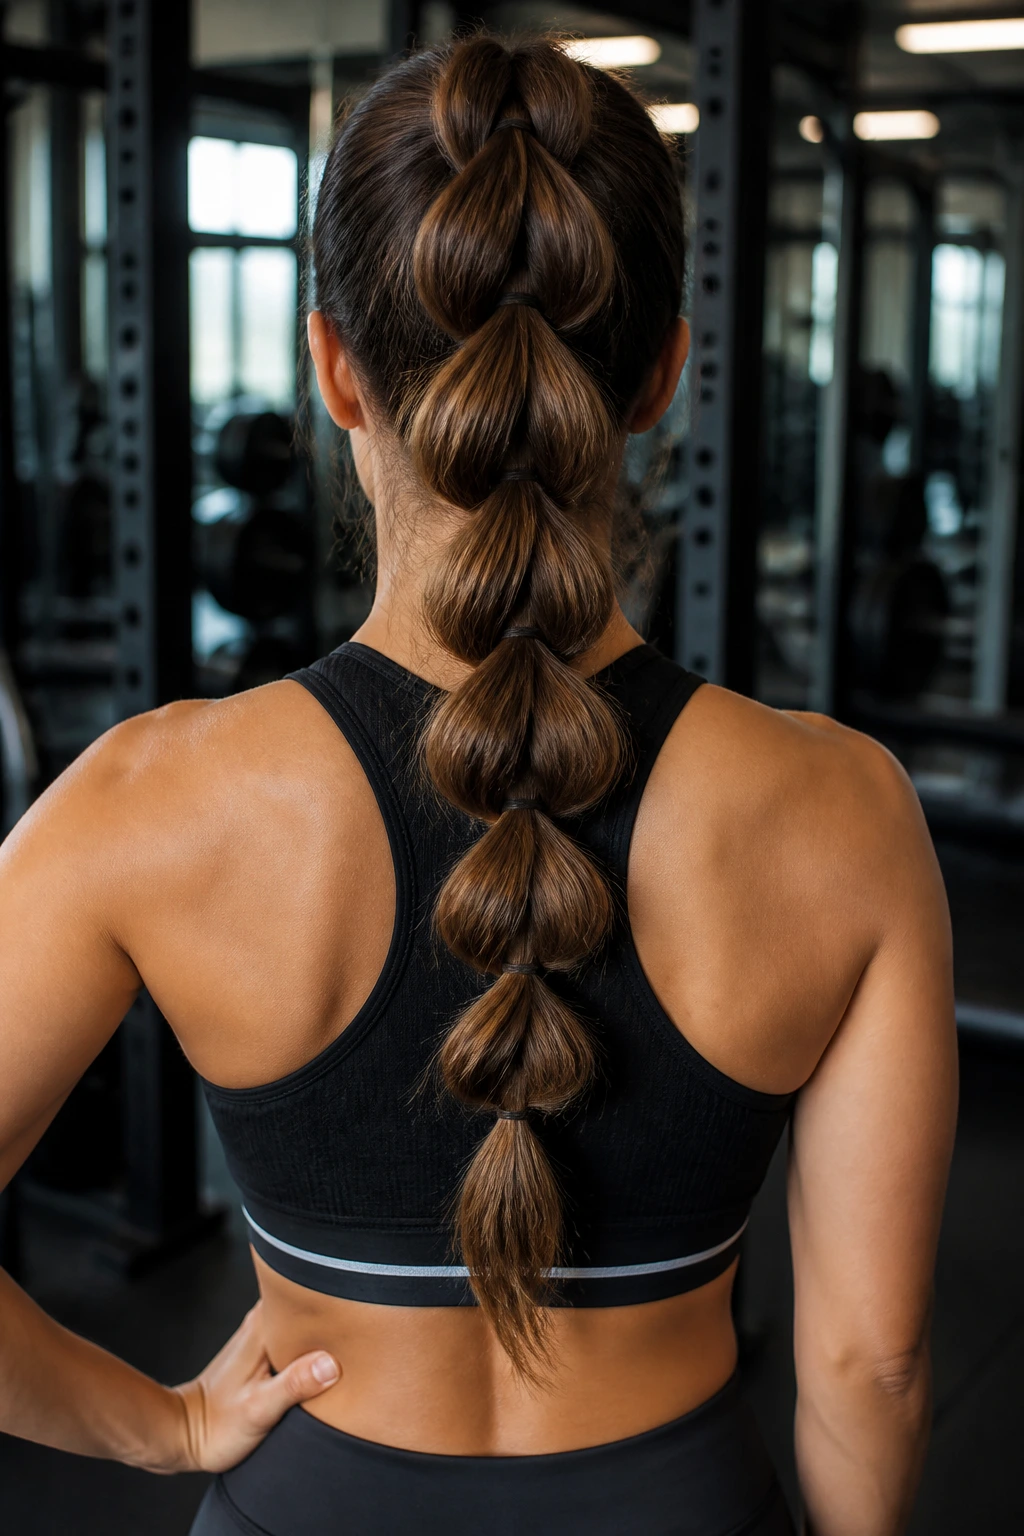
10. The Bubble Braid
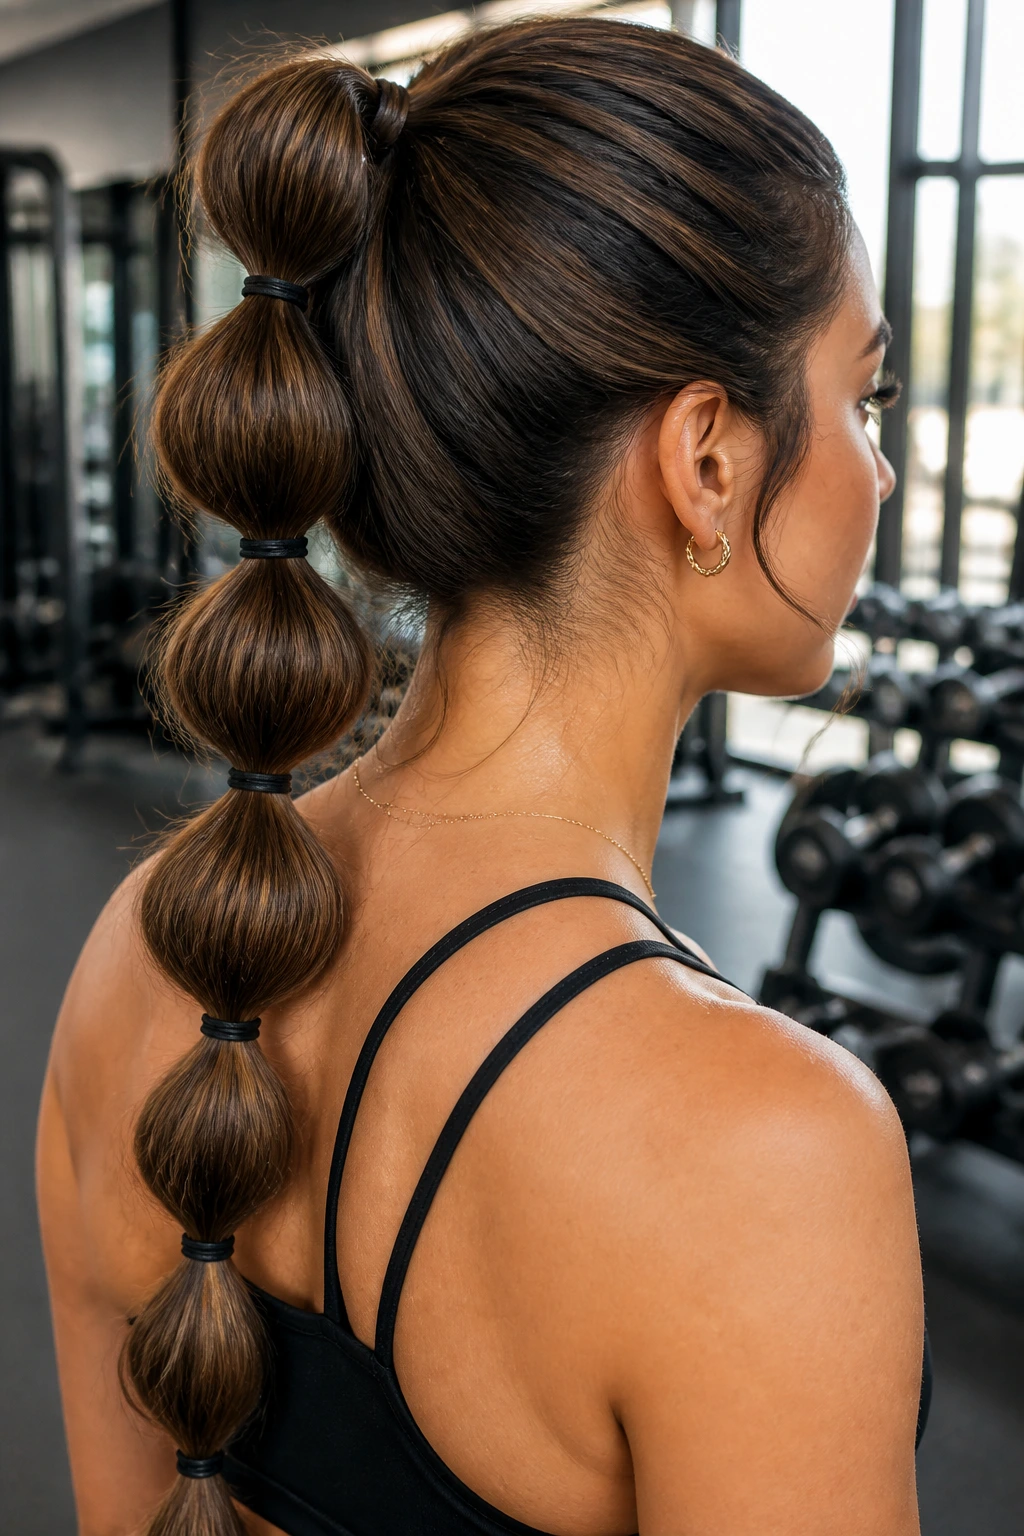
Technically, a bubble braid is not a braid, but it is one of the most popular alternatives for a workout because it requires zero dexterity. You create a series of sections in a ponytail and pull the hair between the ties outward to create “bubbles.”
Why It’s Great for Beginners
If you struggle with hand-eye coordination for French braiding, this style gives you the chunky appearance of a braid with half the effort. It is lightweight, durable, and easily adjustable if a section feels too loose halfway through your routine.
Maintenance During Exercise
- Bring extra small hair ties in your gym bag. If one snaps during a heavy squat set, you can easily replace it without redoing the entire hairstyle.
- Use clear ties if you want the “bubble” look to be more visible, or colored ones to match your workout gear.
11. Cornrow-Inspired Chunky Braids
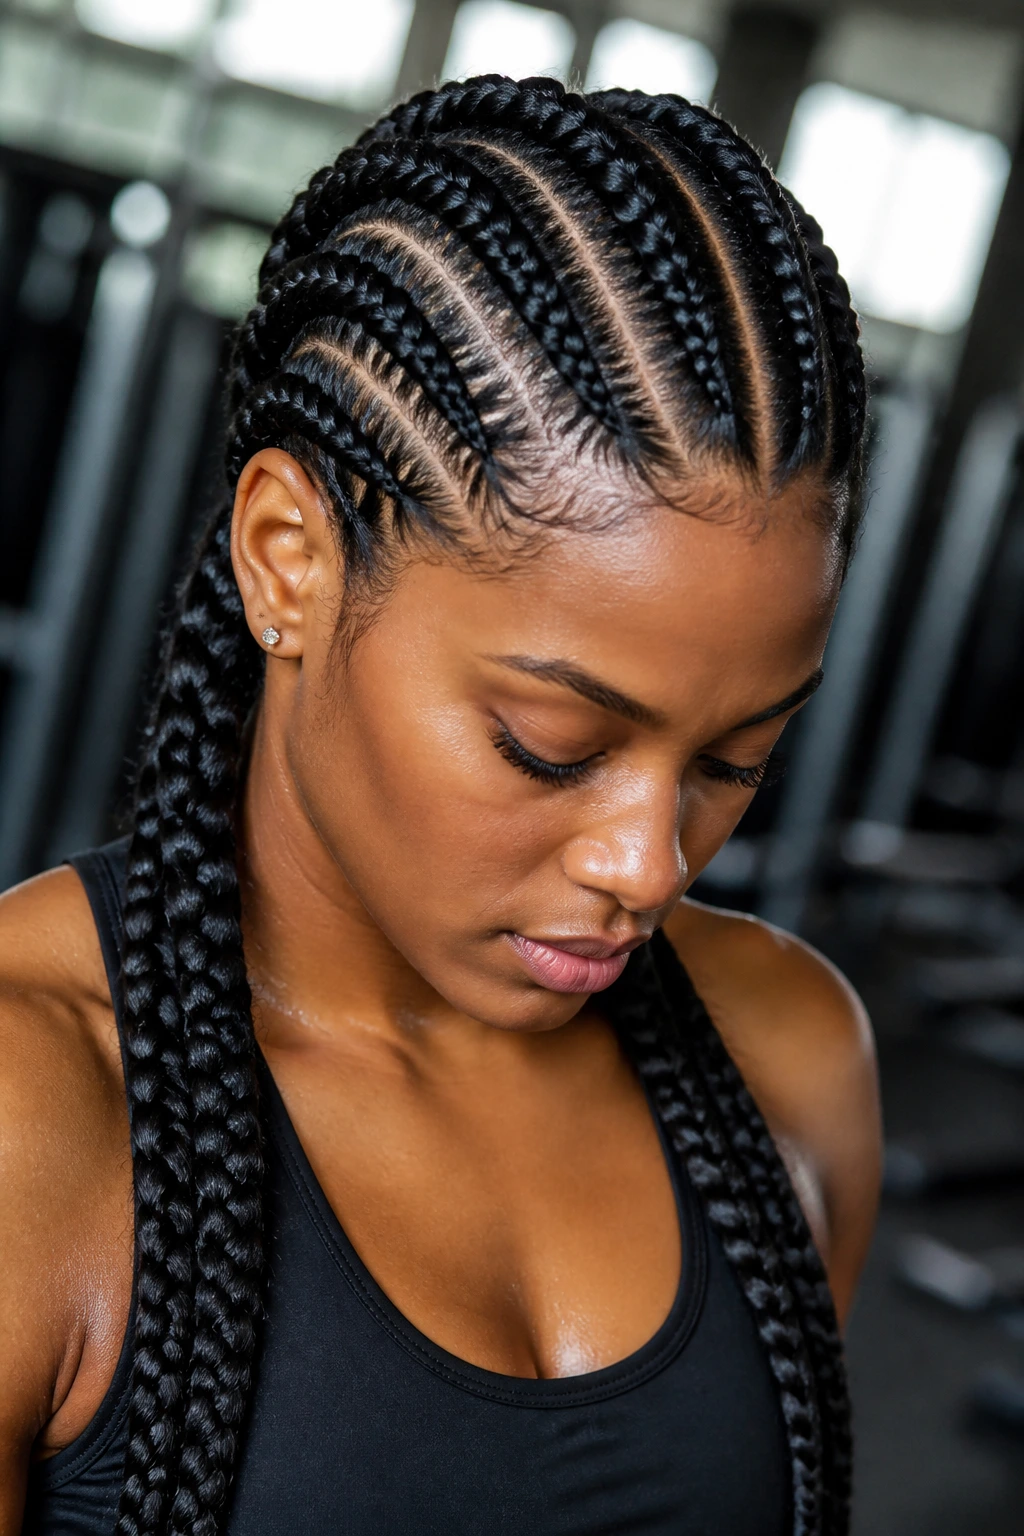
If you have natural or textured hair, large, chunky cornrows—often called feed-in braids—are the ultimate protective, high-performance style. They are braided flat against the scalp and can last for several sessions at a time, making them a time-saving solution for frequent gym-goers.
Longevity and Security
This is the most secure style you can choose. Because the hair is braided directly to the skin, there is no movement, no swinging, and no tangling. You can go from the weight room to the shower to the office without your hair losing its integrity.
Care for Active Scalps
- Keep your scalp hydrated with a light oil or spray, especially if you sweat heavily.
- Wear a satin headband during workouts to minimize the friction of sweat-wicking materials against your hairline.
- Ensure the braids are not installed too tightly to avoid traction alopecia, especially near the temples.
12. The Triple-Threat Braid
Start with three distinct Dutch braids at the front of your hairline and weave them together into one massive, thick braid at the crown of your head. This looks incredibly intricate but offers the rock-solid security of a three-part structural system.
Why It Excels for Heavy Intensity
The multiple points of entry for the hair mean the tension is spread across the entire scalp, not just a single line. This is much more comfortable for long workouts where you might otherwise get a headache from the weight of your hair pulling on one spot.
Styling Logic
- Begin your three braids about an inch apart.
- Braid them back toward the center of your head for about three inches.
- Merge the three braids into one single, massive braid that hangs down your back.
- If you find the ends getting messy, tie them off with a scrunchie for extra security.
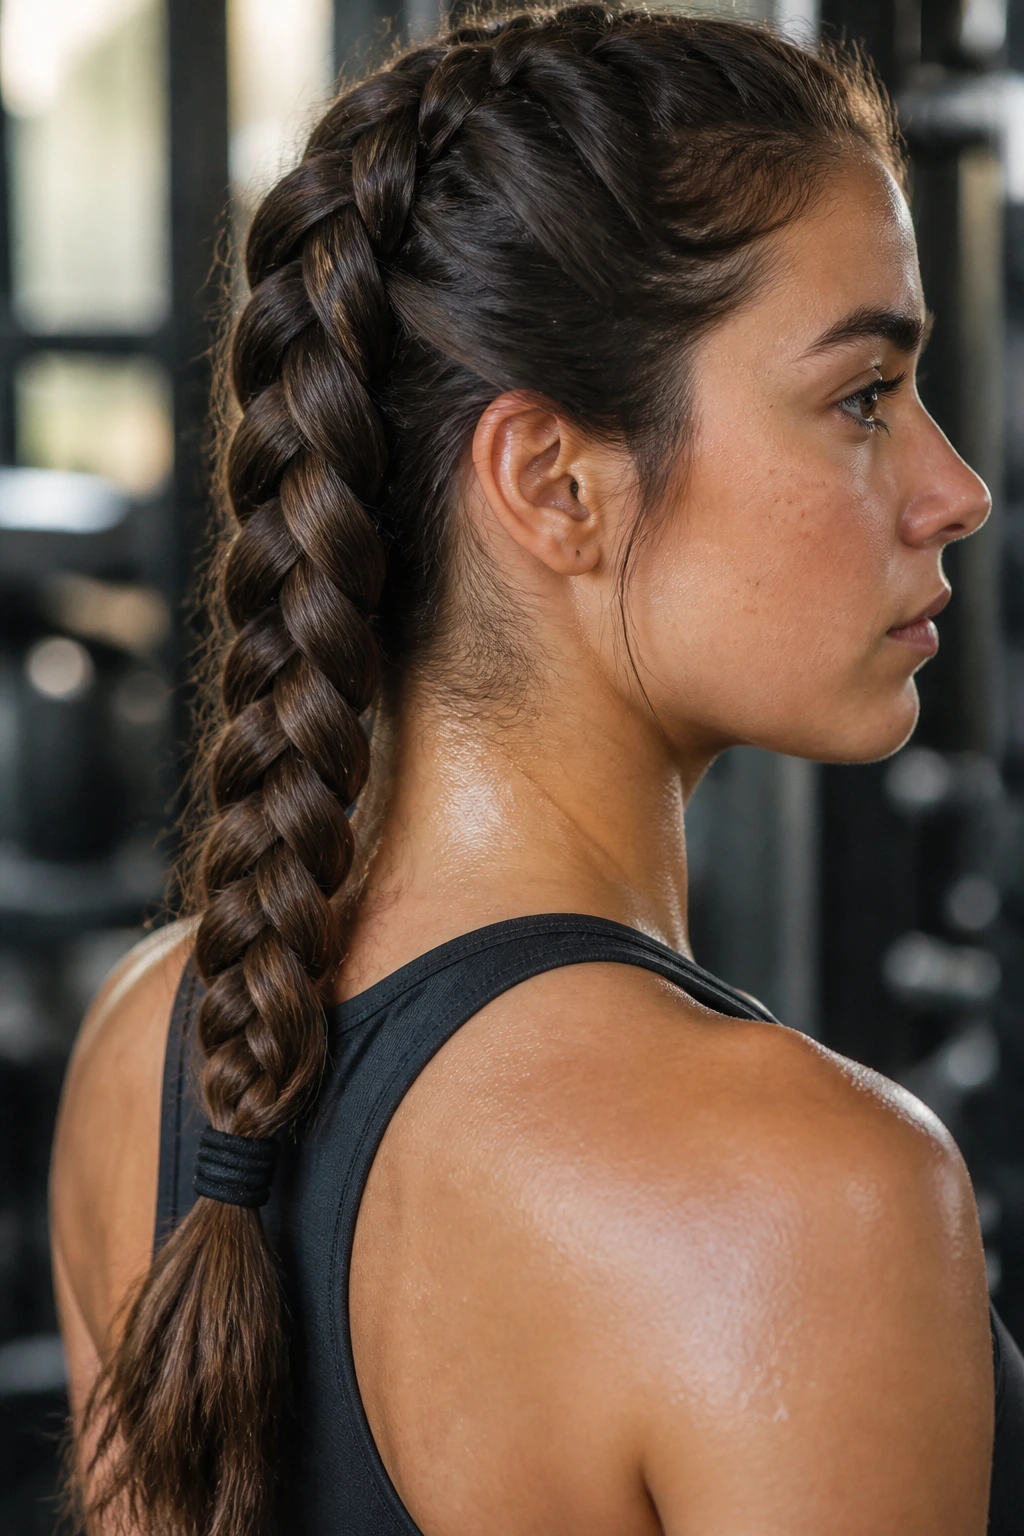
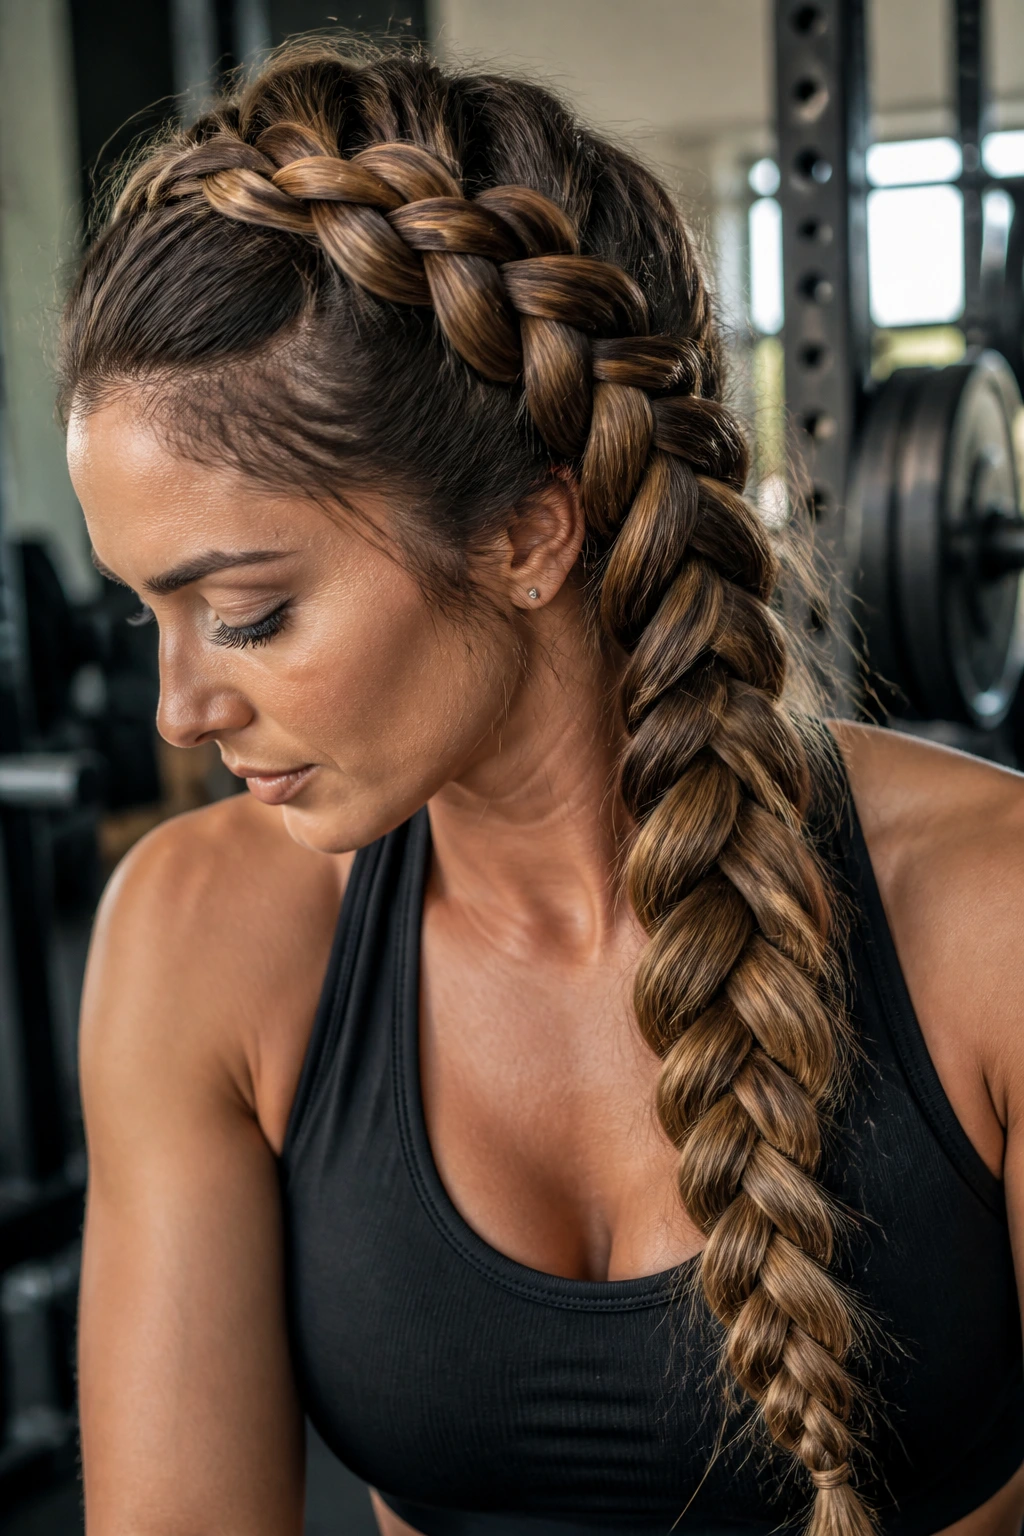
13. The Side-Part Chunky Plait
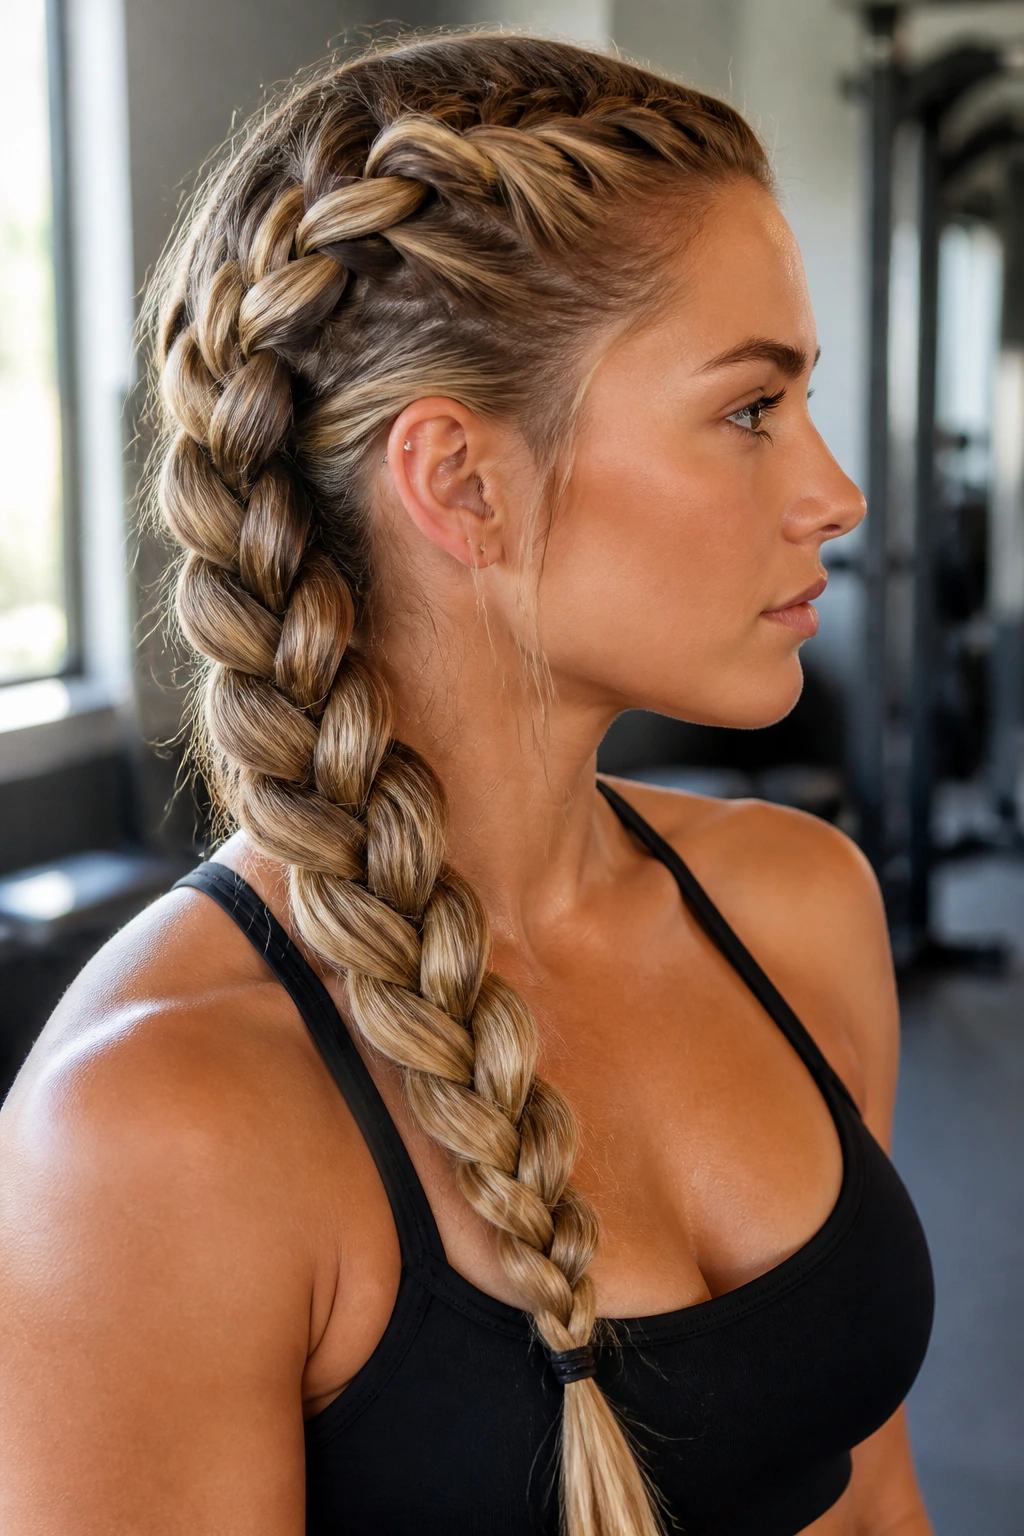
Sometimes, simple is better. A single, side-parted Dutch braid that flows over one shoulder is a classic for a reason. By creating a deep side part, you naturally pile more hair into the braid, making it inherently chunkier and more secure.
The Practicality Factor
It is incredibly fast to execute. If you have five minutes before your spin class, this is the style to reach for. The side-part allows you to sweep your hair off your face in one swift motion, securing it in a braid that won’t distract you while you’re in the saddle.
Tips for Success
- Use a comb to get a clean, sharp side part; it makes the braid look intentional rather than messy.
- Ensure you pull the braid taut at the beginning, but feel free to let the ends be a bit looser.
- If your hair is very long, wrap the braid around the base of your ponytail to turn it into a side-bun.
14. Wrapped Ponytail Braid
Instead of a standard braid, braid a thin piece of hair separately and wrap it around the base of your ponytail, then braid the remaining length. It is a subtle detail that adds a professional touch to your gym look while keeping the ponytail base locked down.
Stability Benefits
The wrapped strand acts as an anchor for the elastic. If your ponytail usually sags after twenty minutes of running, the extra wrap adds grip and reinforces the strength of the hair tie. It keeps your ponytail high and tight for the duration of your training.
How to Execute
- Put your hair in a high ponytail.
- Separate a quarter-inch section of hair.
- Wrap that section around the base to hide the elastic, pinning it with a bobby pin.
- Braid the main length of the ponytail into a chunky, loose plait.
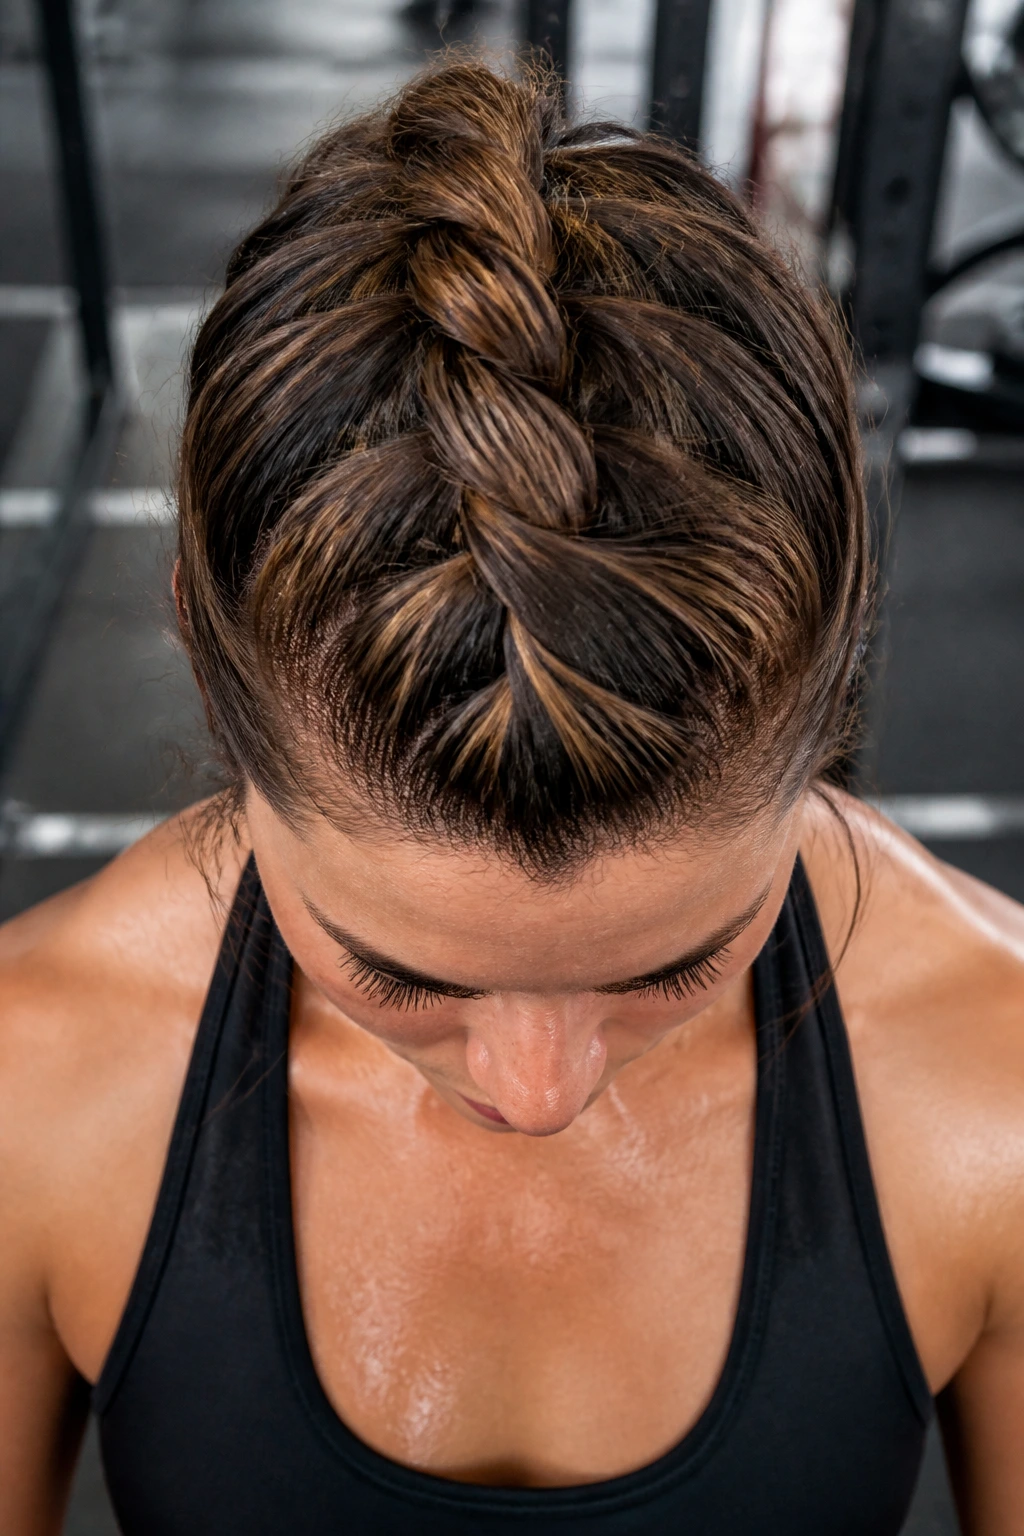
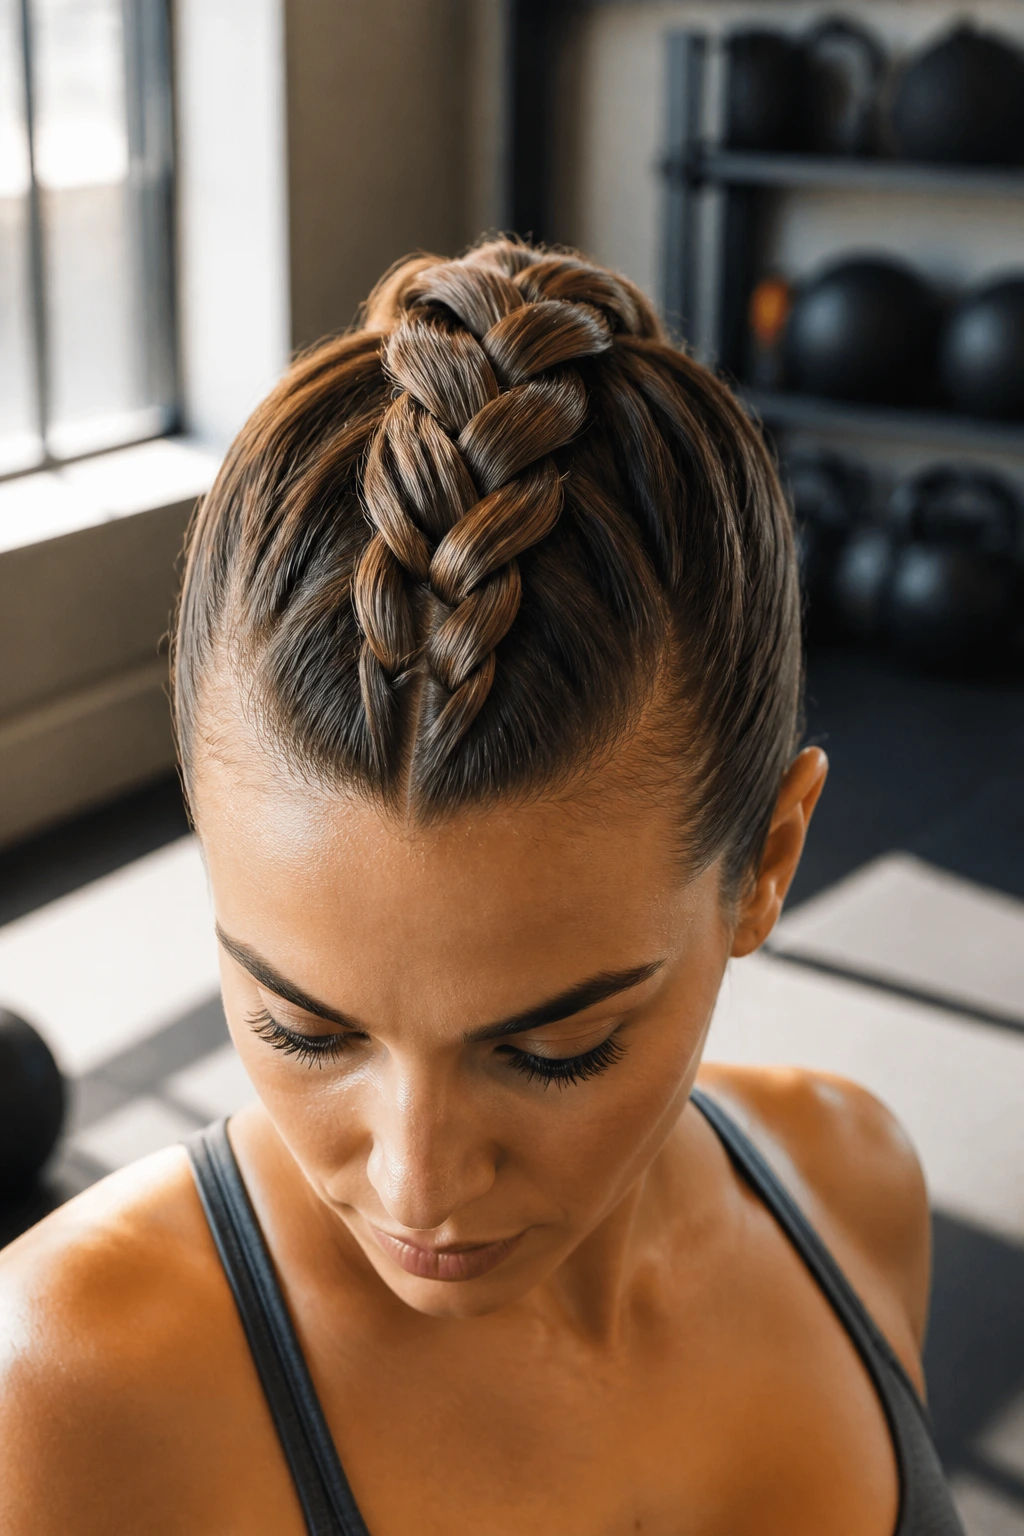
15. The Faux-Hawk Braid
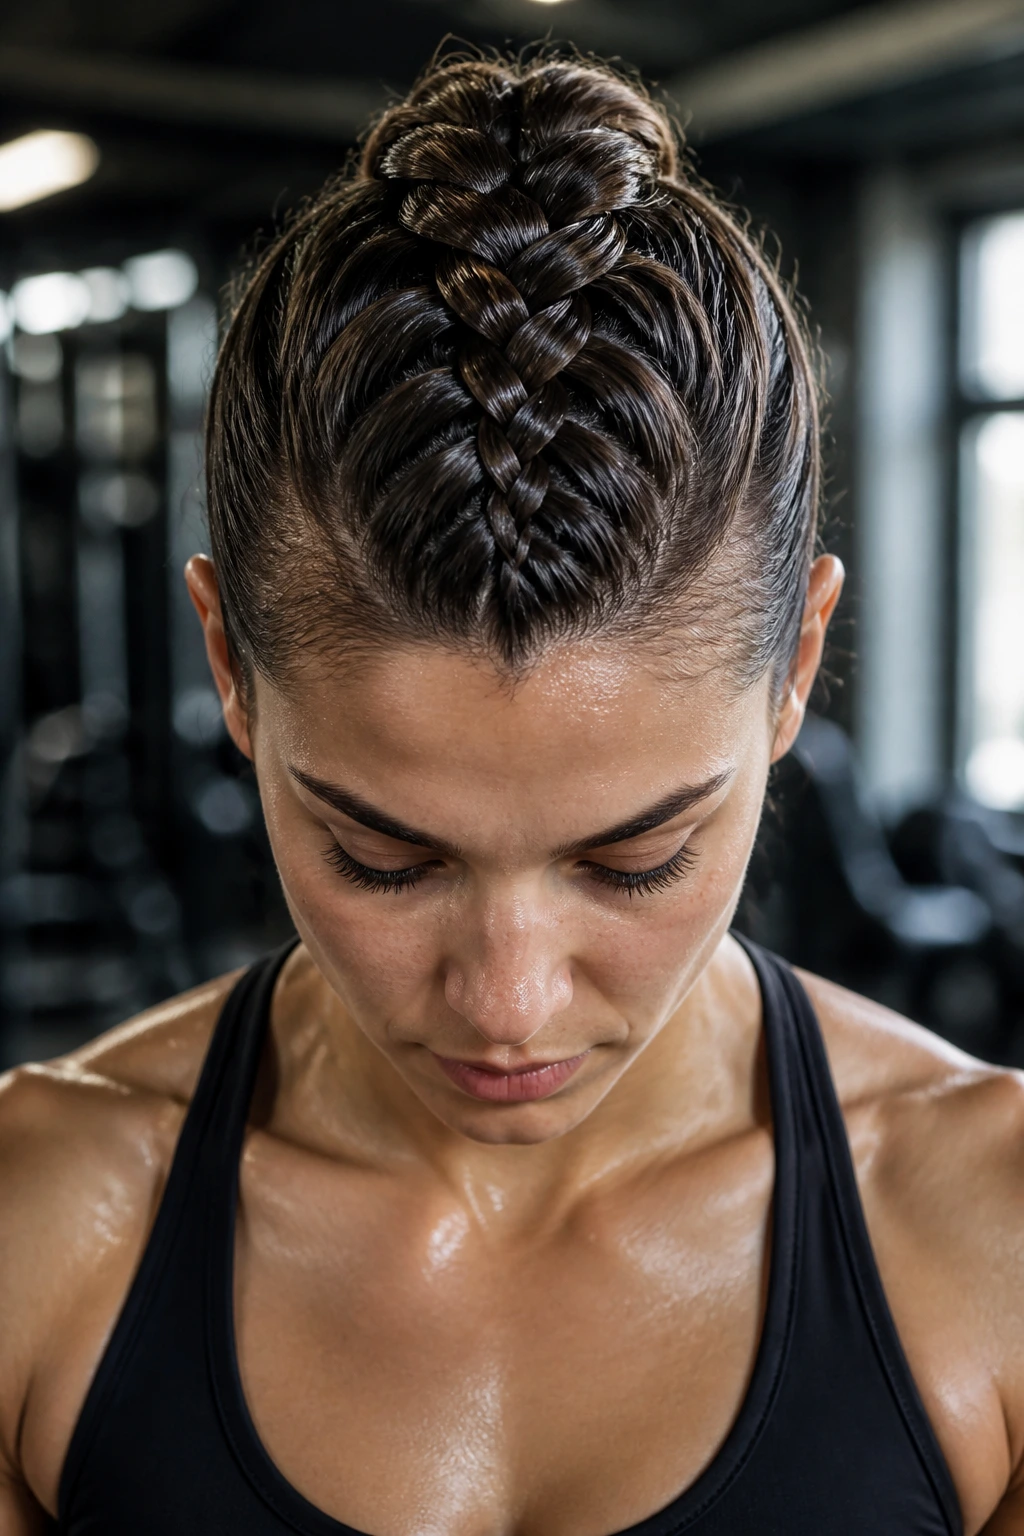
Create a large, raised Dutch braid right down the center of your head, essentially creating a “faux-hawk” of hair. This keeps everything centered and completely clears your ears, which is ideal if you like to wear oversized headphones or ear-buds while working out.
Why This Fits the Gym Vibe
It is a very athletic, high-energy style. It screams focus and intensity. Because the braid is centered, it doesn’t get in the way of your arms when you are doing overhead presses or lateral raises.
Technique Nuance
- Start at the very front of the hairline.
- Add hair from both sides as you work toward the back.
- Use a bit of texturizing powder at the roots to ensure the “hawk” stays elevated.
- End at the base of the skull and secure in a ponytail, or continue the braid all the way down.
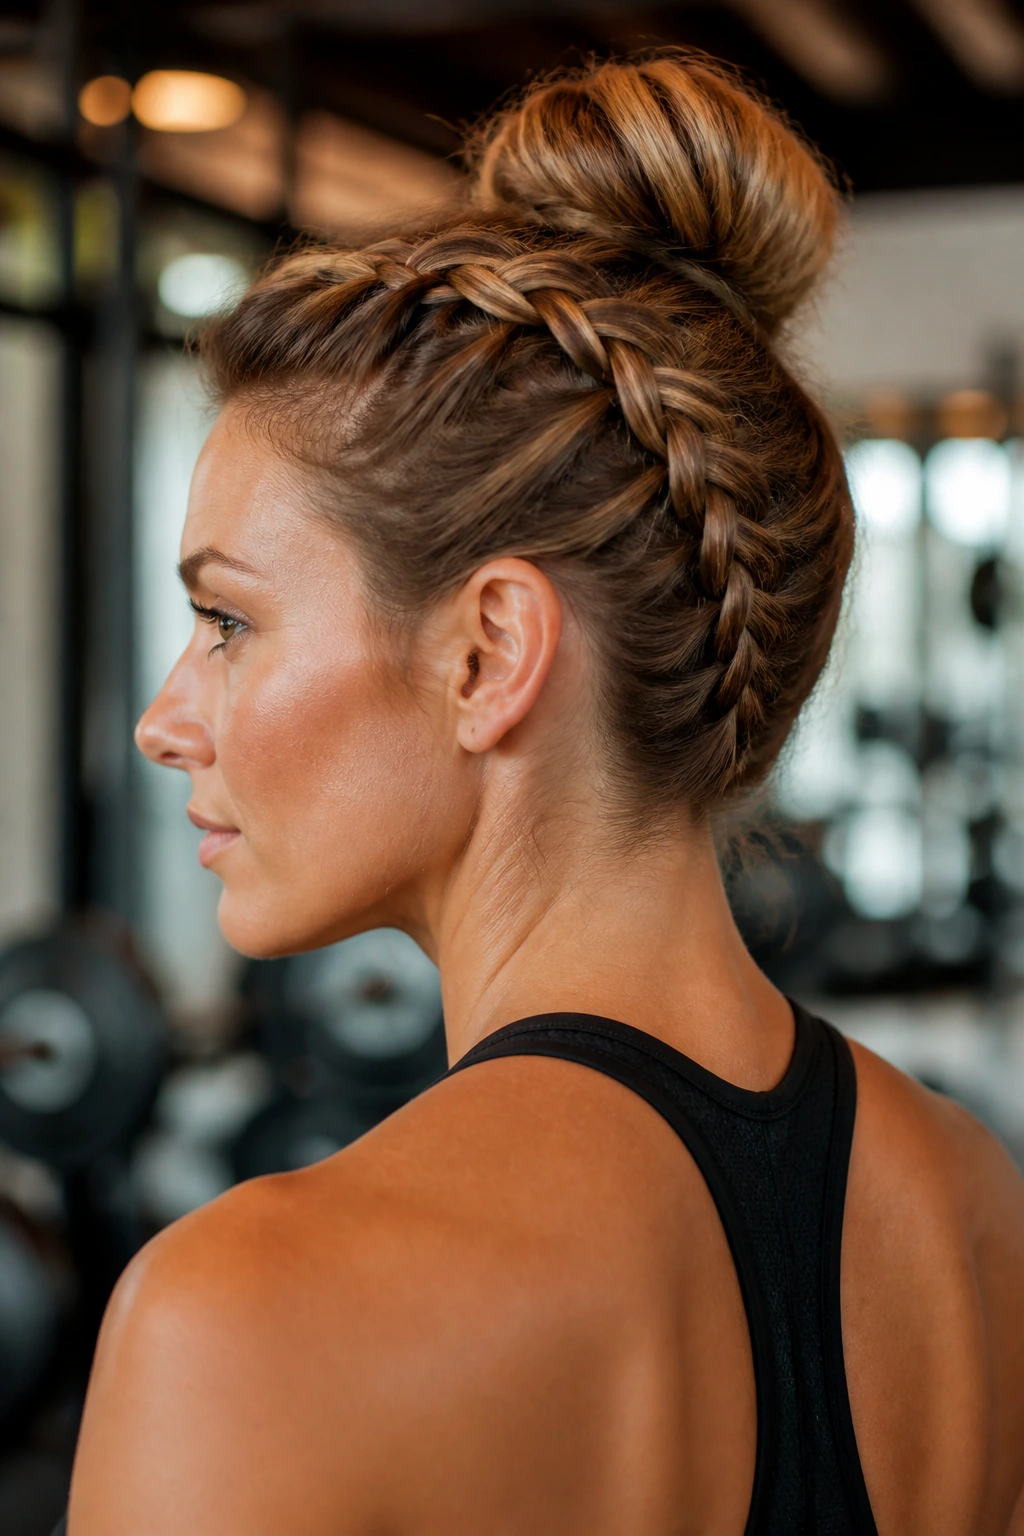
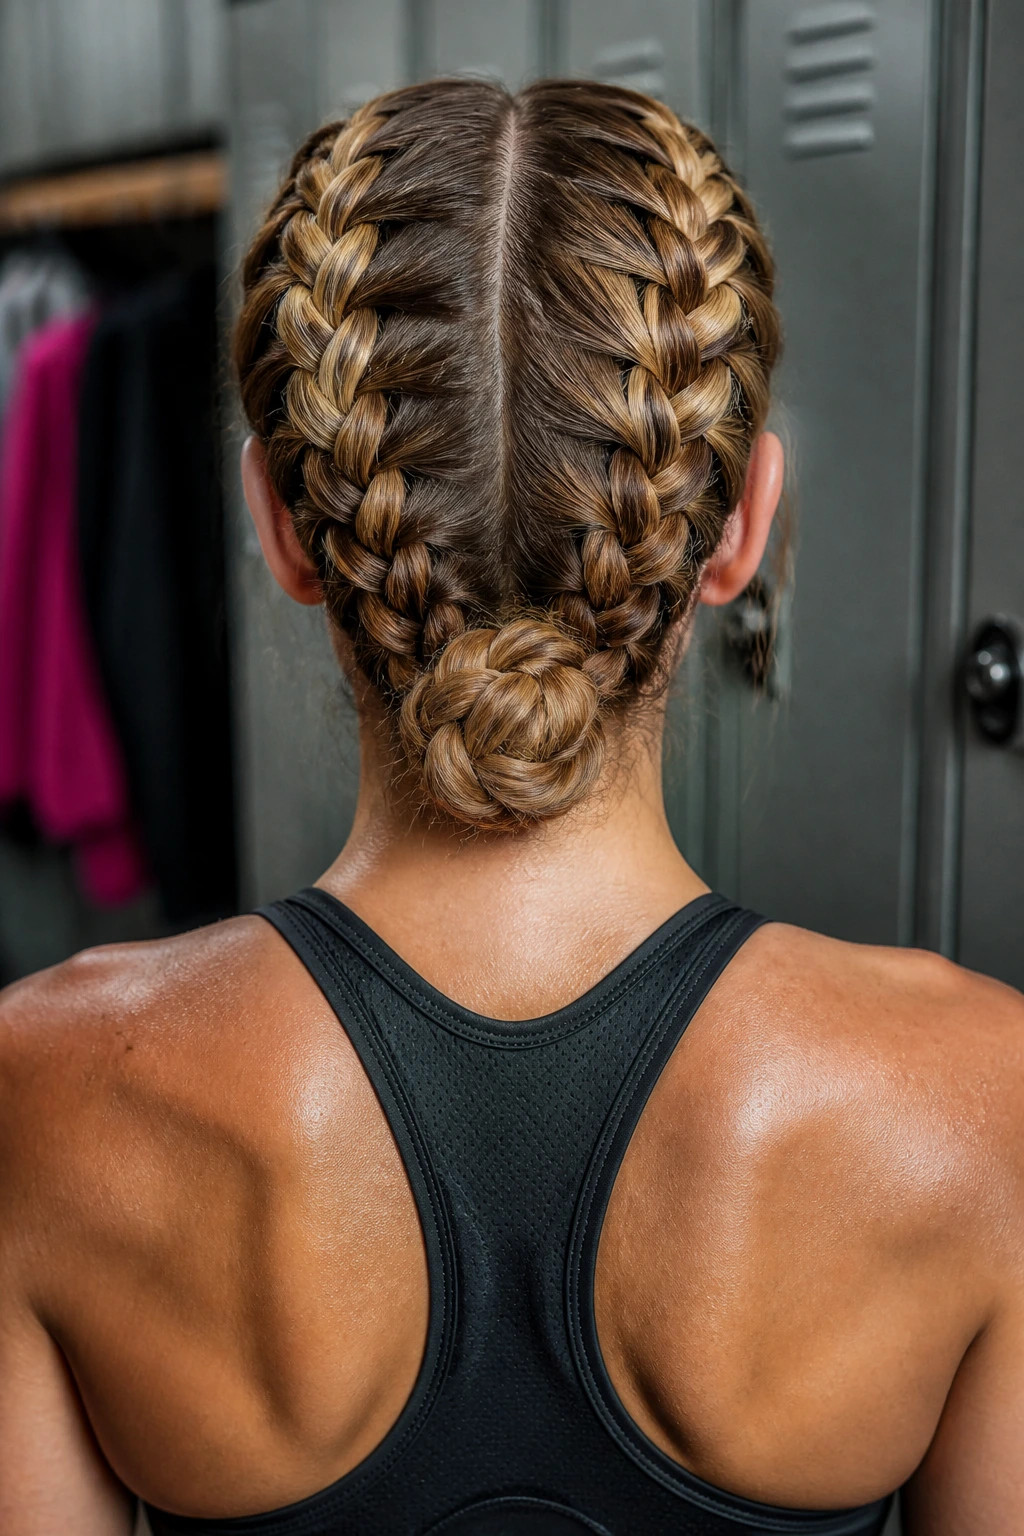
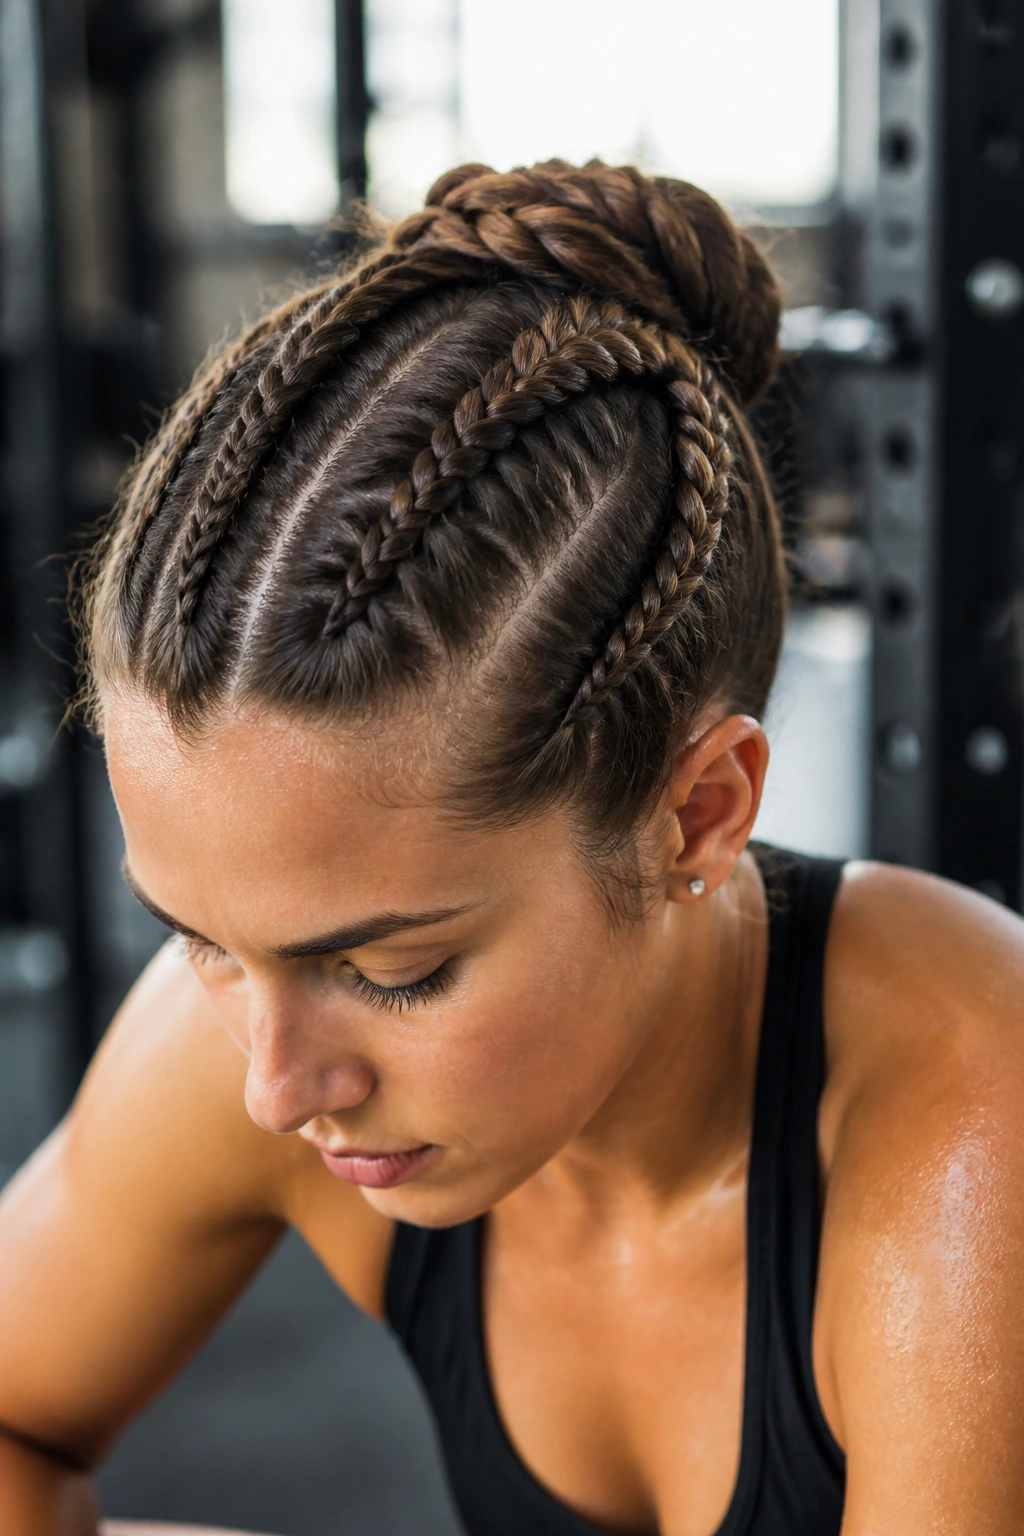
16. The Braid-Into-Bun
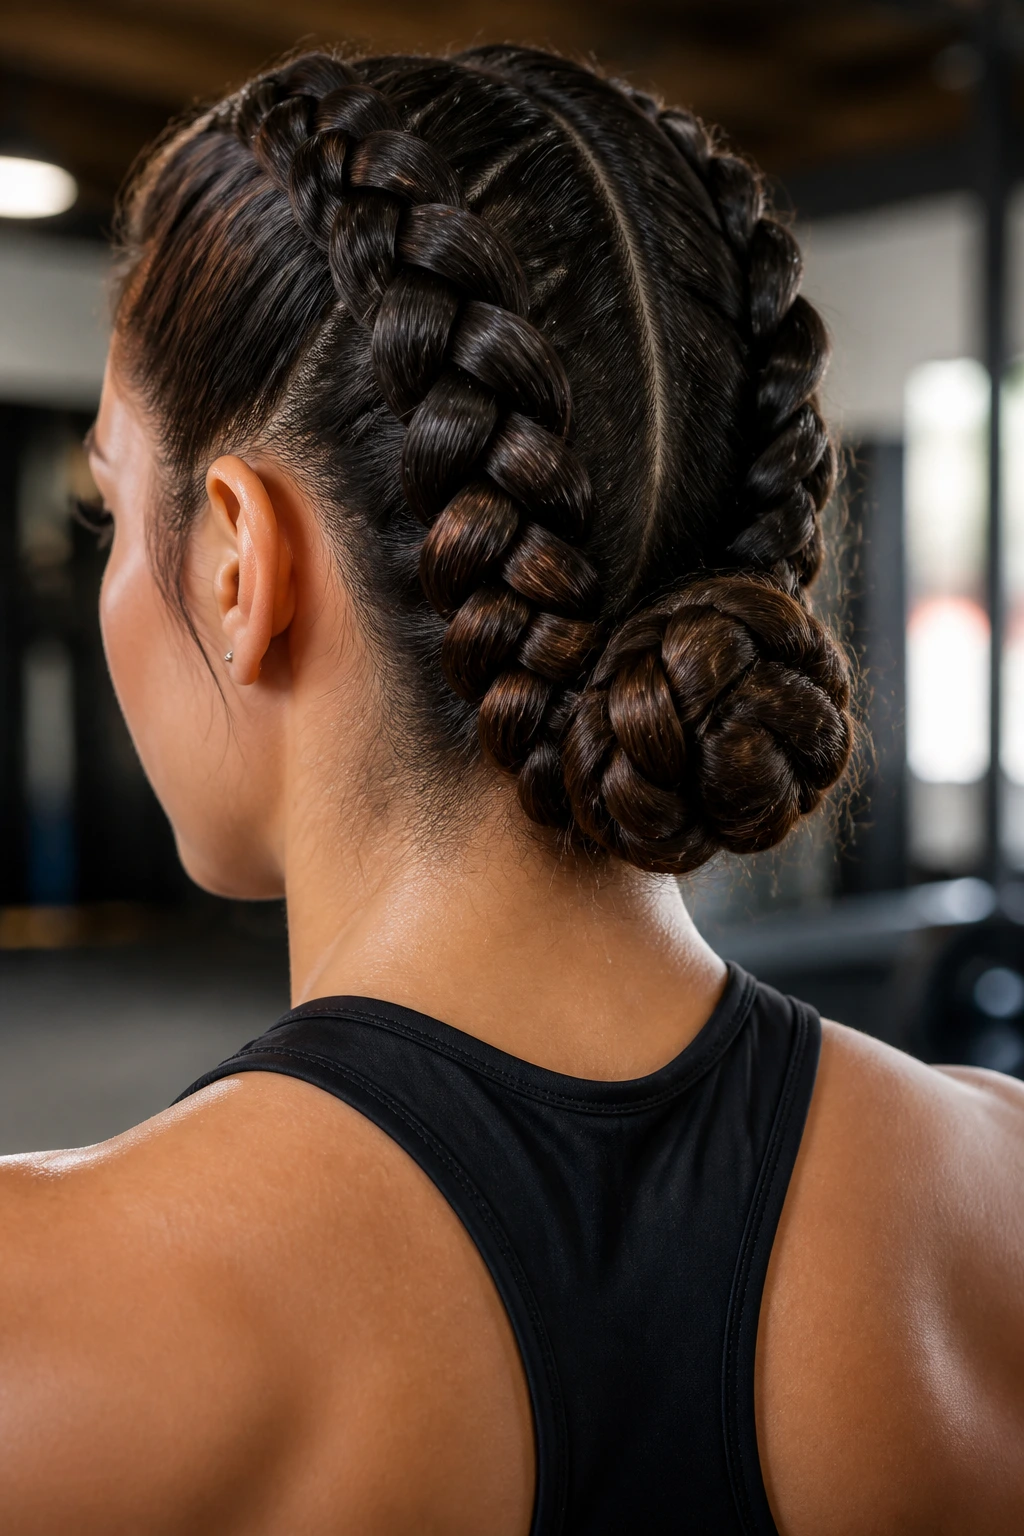
Braid your hair into two chunky Dutch braids that start at the hairline and terminate at the mid-back, then fold those braids up and secure them into a bun. This is a great way to combine the security of a braid with the “off-the-neck” benefits of a bun.
Benefits of the Hybrid
Braids are great for keeping hair tight, but buns are better for keeping hair off your skin. This style gives you the best of both worlds. It is effectively a “locked-in” style that won’t move, even if you are doing floor work or tumbling.
How to Style
- Do your two Dutch braids.
- Twist the tails together at the base of the neck.
- Coil them into a bun and use a large, strong hair clip or two heavy-duty elastic ties to hold it in place.
- If you have thick hair, this may be heavy, so ensure your hair ties are high quality.
17. The Twisted Rope Braid
A rope braid—where you twist two large sections of hair around each other—is incredibly sturdy for heavy movement. It creates a thick, rounded braid that looks like a heavy-duty cable. It is surprisingly simple to make and looks very architectural.
When to Use This
This is ideal for activities that involve a lot of head movement, like boxing. Because there is no “plaiting” motion, it is easier to keep the tension even throughout the length of the braid. It’s also very easy to adjust—if it feels loose, you just twist it a little tighter.
Execution Tips
- Split your hair into two equal halves.
- Twist both sections in the same direction (e.g., clockwise).
- Twist the two sections around each other in the opposite direction (e.g., counter-clockwise).
- Secure the end tightly with a rubber band; rope braids tend to unravel if not tied off securely.
18. Braided Headband with Loose Length
For workouts that aren’t overly intense, such as light jogging or strength training, you can braid just the front of your hair into a thick band and leave the rest in a ponytail or loose. This keeps your face clear while allowing for some movement of the hair.
The Low-Tension Advantage
If you are prone to scalp soreness, this is the most comfortable style. You aren’t putting any tension on the hair at the back of your head. It’s a great way to look put-together while minimizing the “pull” that happens with full-head braids.
Making It Secure
- Braid the front section as tightly as you can.
- When you reach the back, secure the braid with a pin behind your ear, and then pull the rest of your hair into a tight, high ponytail.
- The combination of the tight headband braid and the high pony ensures your hair stays put.
19. The Dutch Braid Pigtail Hybrid
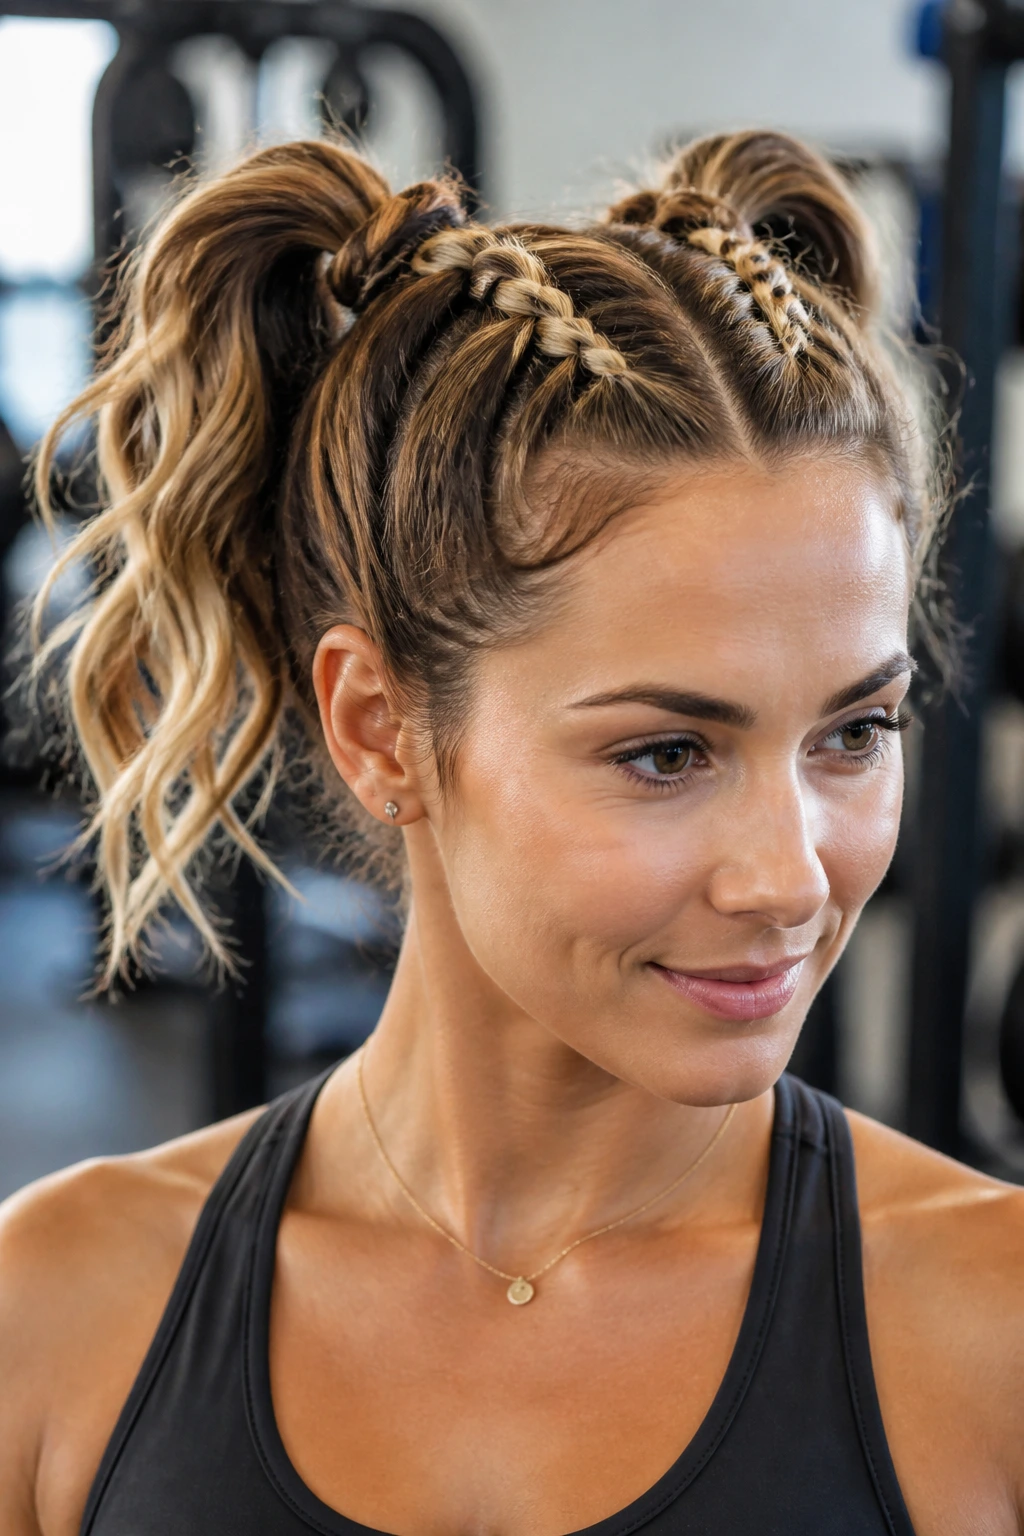
Take two Dutch braids and, instead of braiding them all the way down, stop at the crown and let the hair finish in two chunky, high pigtails. This keeps the hair tight against the scalp but allows the “tails” to have movement and bounce.
Athletic Utility
This is a classic “gym look” for a reason. It is playful, keeps the hair out of your face, and is very simple to fix if it gets messy. It’s perfect for HIIT classes or any workout where you are jumping or moving quickly.
Maintenance Notes
- Ensure your part is straight for a polished look.
- Use colorful scrunchies to add a bit of fun to your gear if you’re feeling adventurous.
- Keep the pigtails at the crown of your head to prevent them from hitting your face while you are doing floor exercises.
20. The “Messy” Chunky Braid
Finally, sometimes the best workout hair is the kind you don’t overthink. A loose, chunky Dutch braid that you intentionally pull apart with your fingers creates a soft, voluminous look that still holds because of the tight underlying weave.
Why It Works for Everyone
It hides imperfections. If you have shorter layers or bangs that usually stick out, this “messy” style makes them look intentional. It feels very relaxed, making it a great style to transition from the gym to a coffee shop or a grocery store run.
The “Pull-Apart” Technique
- Complete a standard, tight Dutch braid first.
- Secure the end.
- Use your thumbs and index fingers to gently tug on the edges of each loop, starting from the bottom and working your way up to the top.
- Don’t overdo it—just give it enough slack to look lived-in, not falling apart.
Final Thoughts
When choosing a braid for your next workout, always prioritize the security of the base. No matter how intricate a style is, it will fail if the foundation at the hairline is loose. A chunky braid gives you a robust structure that resists friction and stays in place through the most demanding movements.
Experiment with these styles before your next big session. You might find that a high-intensity workout calls for the total lockdown of a double Dutch braid, while a restorative stretching session prefers the lightness of a headband plait. Pay attention to how your hair reacts to sweat and tension; with a bit of practice, you will find your own signature style that keeps you focused on your performance rather than your ponytail.