Festival hair is a paradox. You want it to look effortless, yet it needs to survive eight hours of dancing, humidity, erratic wind, and perhaps a stray glitter bomb or two. Most people approach styling with the goal of looking “boho-chic,” but they forget the mechanical reality of a music festival. If you aren’t accounting for the structural integrity of your style, you will find yourself in a bathroom line, frustrated, trying to salvage a matted mess with nothing but a handful of dry shampoo.
True festival style isn’t about trends; it’s about endurance. It’s about choosing textures that improve as they get a little gritty and styles that don’t lose their shape after an hour in the sun. Whether you are aiming for whimsical, edgy, or purely practical, the best looks are the ones you can execute in under fifteen minutes and then forget about entirely. Here are twenty-five ways to master the art of festival hair without losing your sanity.
1. Double Dutch Braids with Glitter Parting
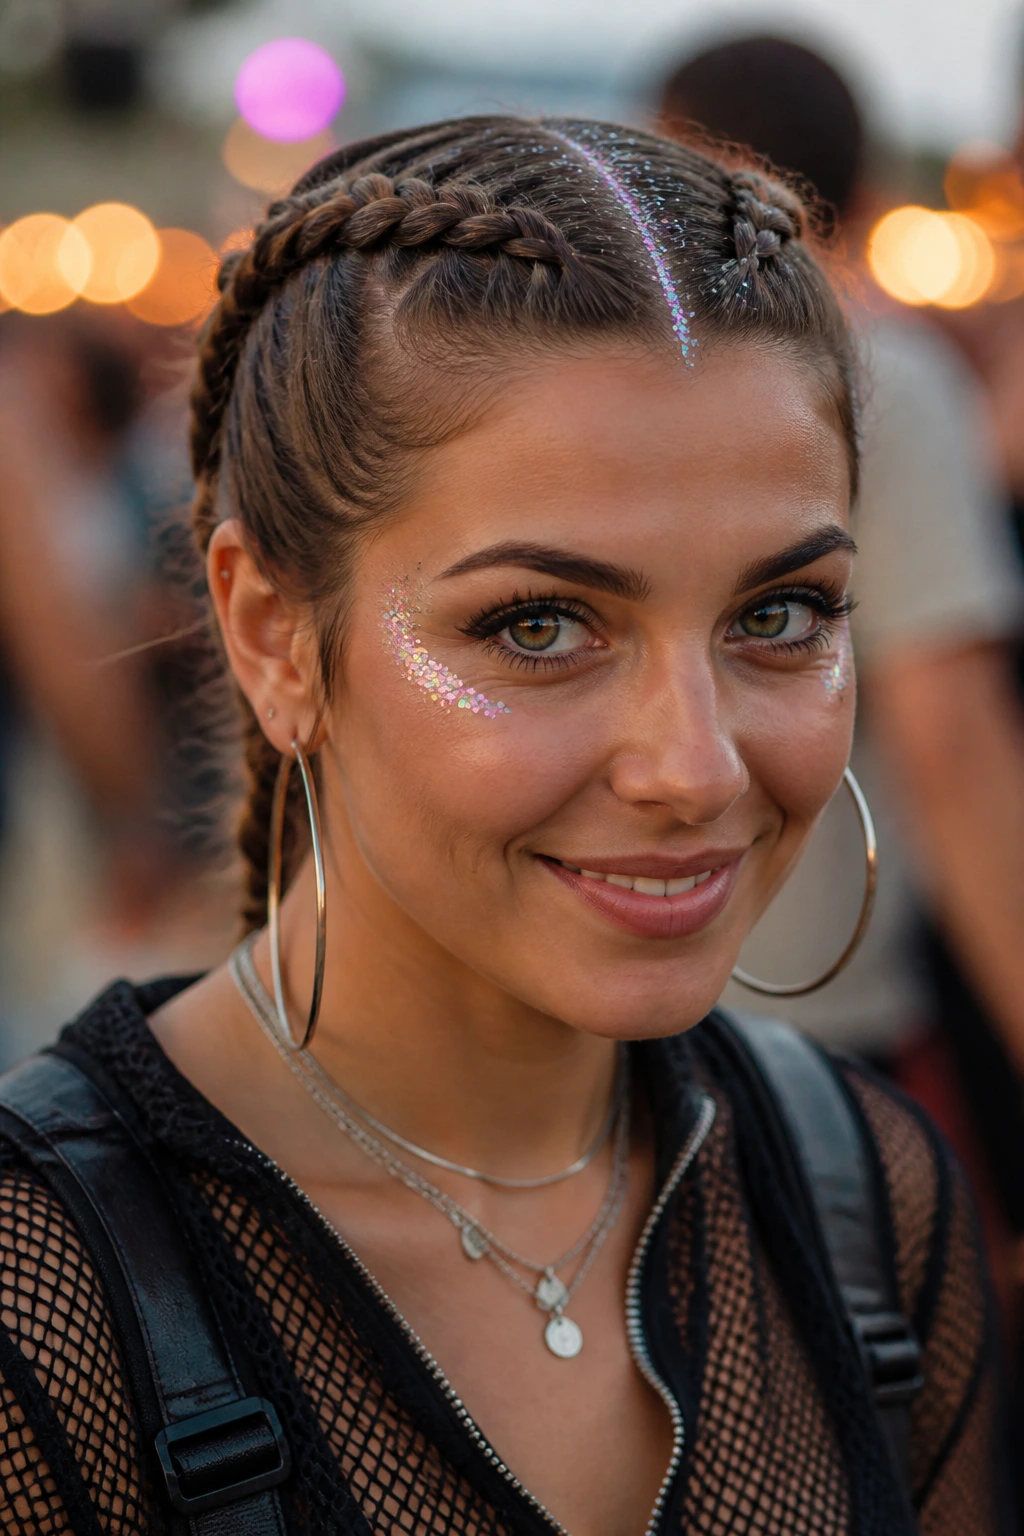
The classic Dutch braid is the workhorse of festival fashion. By braiding from the hairline toward the nape of the neck, you secure the hair so tightly that even the most vigorous jumping won’t loosen it. To elevate this look from “gym class” to “main stage,” focus on the parting. Once your braids are secured with clear elastics, use a small makeup brush to apply hair-safe glitter directly along the center part. The contrast between the clean, tight scalp lines and the shimmering pigment creates a look that is both disciplined and festive. If your hair is fine, use a lightweight texturizing spray before you start braiding to give your fingers something to grip. This adds volume, making the braids look thicker than they actually are.
2. Messy Space Buns with Face-Framing Tendrils
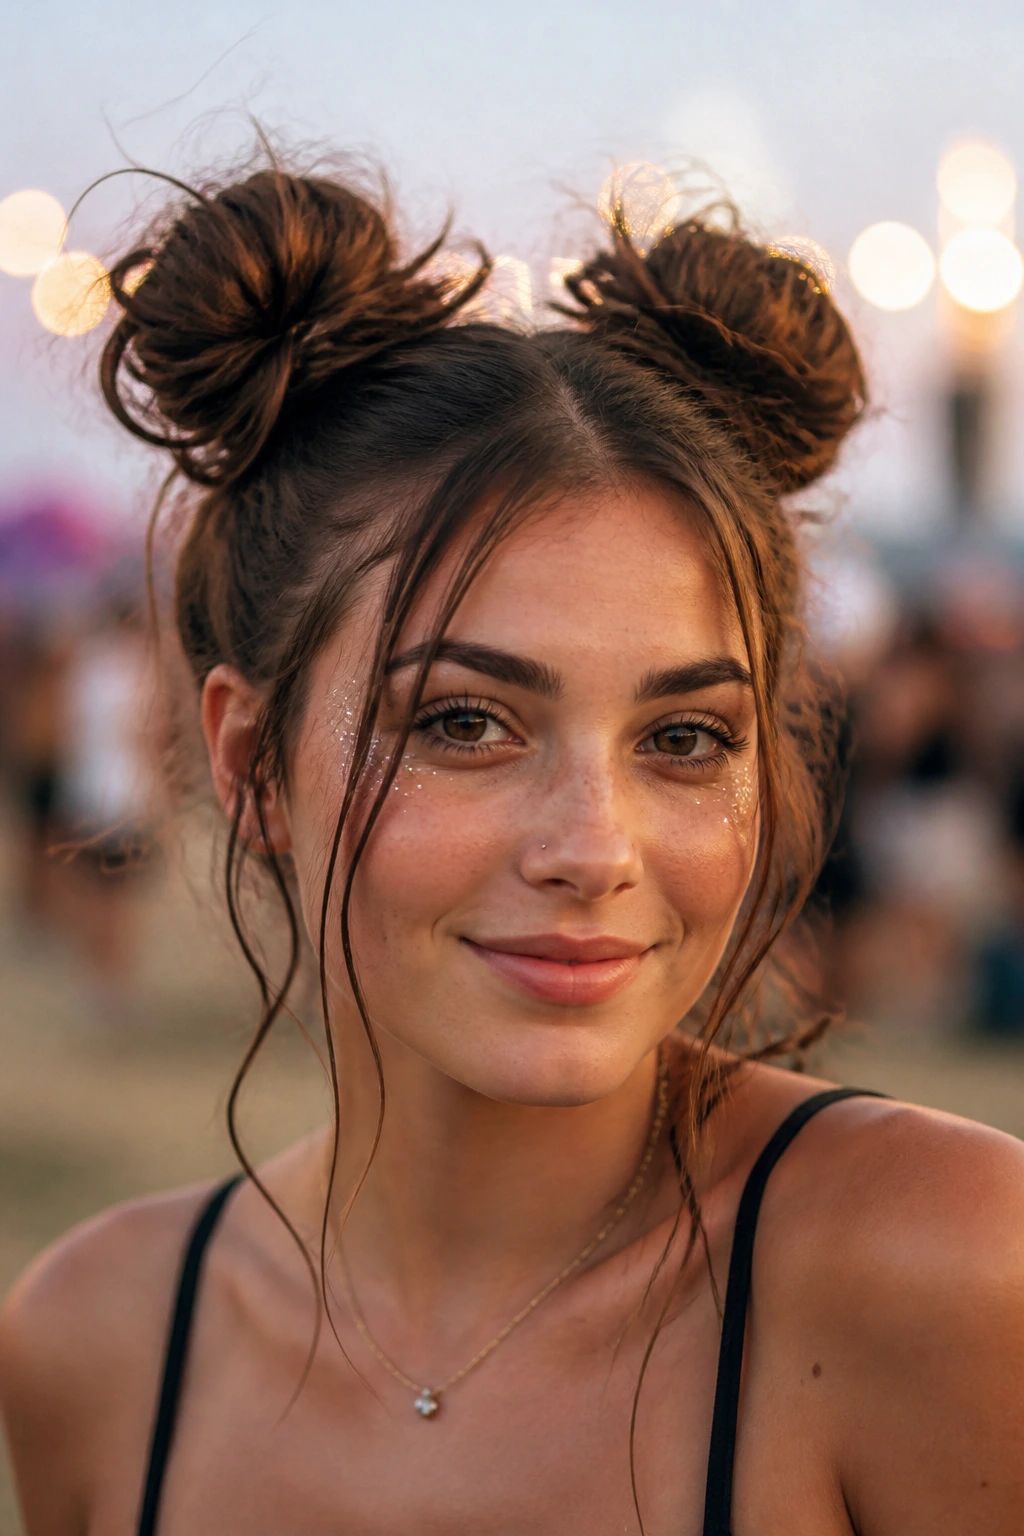
Space buns are iconic for a reason; they keep hair off your neck during high-heat sets and look excellent in photos. The secret to avoiding the “Mickey Mouse” vibe is to embrace the mess. Do not aim for perfect, slicked-back symmetry. Instead, pull your hair into two high pigtails, tease the lengths until they look like a bird’s nest, and twist them loosely into buns. Secure with U-shaped hairpins rather than tight elastics; this allows the buns to move naturally without pulling at your scalp. Leave two thick, face-framing pieces out in front. You can curl these with a wand or leave them straight and sleek for a sharp, intentional contrast to the chaotic buns.
3. High Ponytail with Wrapped Silk Scarf
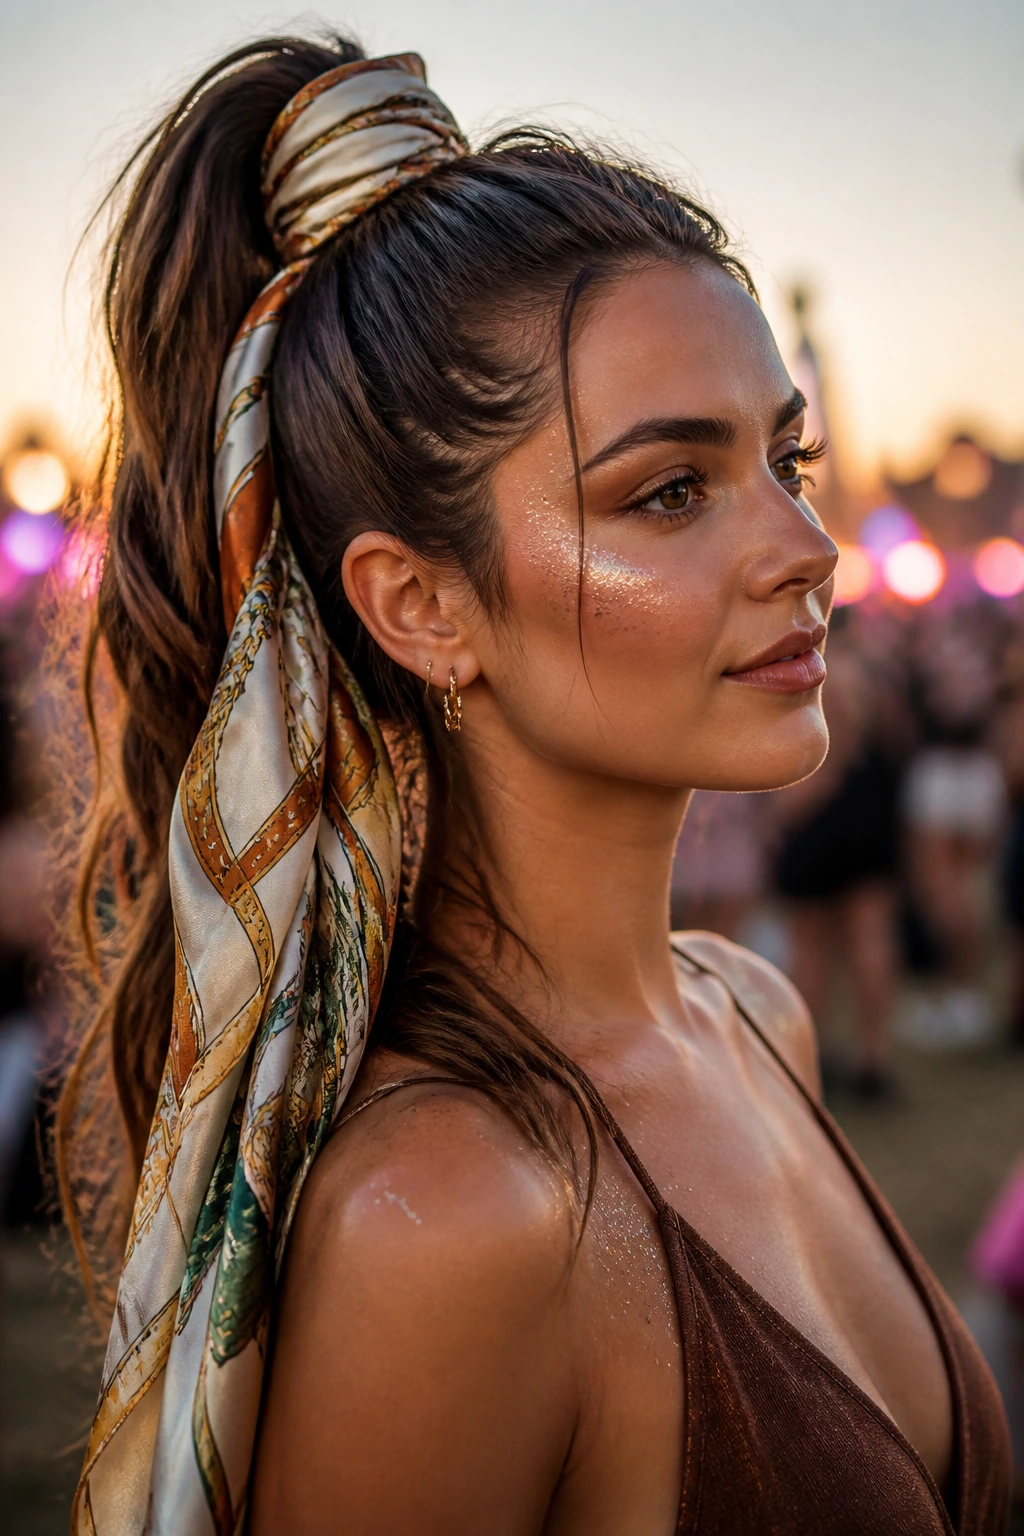
Sometimes you just need to get the hair off your face, but a simple elastic feels too plain. A vibrant silk scarf is the ultimate festival accessory because it doubles as a headband if your hair starts to feel heavy. Start by gathering your hair into a sky-high ponytail. Take a long, skinny silk scarf and knot it at the base of the pony, then weave the two long ends through your hair as you wrap it around the base to hide your hair tie. Let the excess scarf flow down alongside your hair. This adds a pop of color and a bit of bohemian movement that catches the wind while you dance.
4. Half-Up Top Knot with Crimped Texture
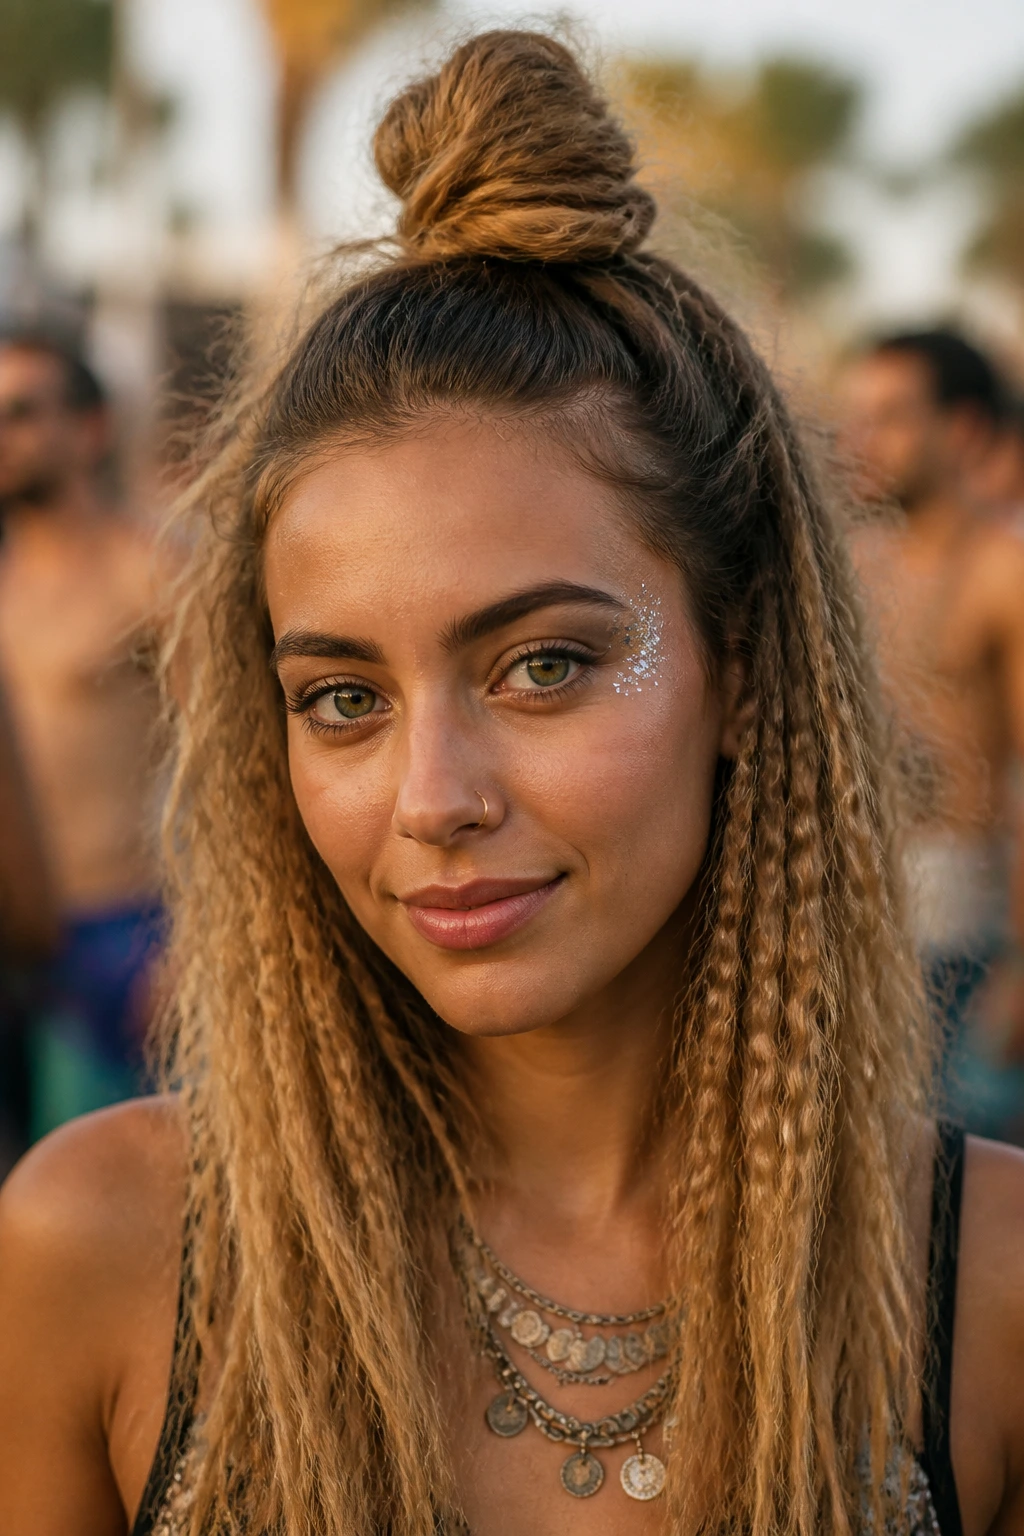
Crimping is back, and it is a festival necessity because it creates a base of permanent volume. Before you style, use a three-barrel iron to crimp your hair from roots to ends. This transforms limp, thin strands into a voluminous mane that holds shape better than any other texture. Once crimped, gather the top third of your hair and twist it into a small, tight knot at the crown of your head. Secure it with a few pins and let the rest of your crimped hair flow freely. The crimped texture will prevent the hair from going flat, keeping the style looking fresh well into the evening hours.
5. Crown Braid with Dried Wildflowers
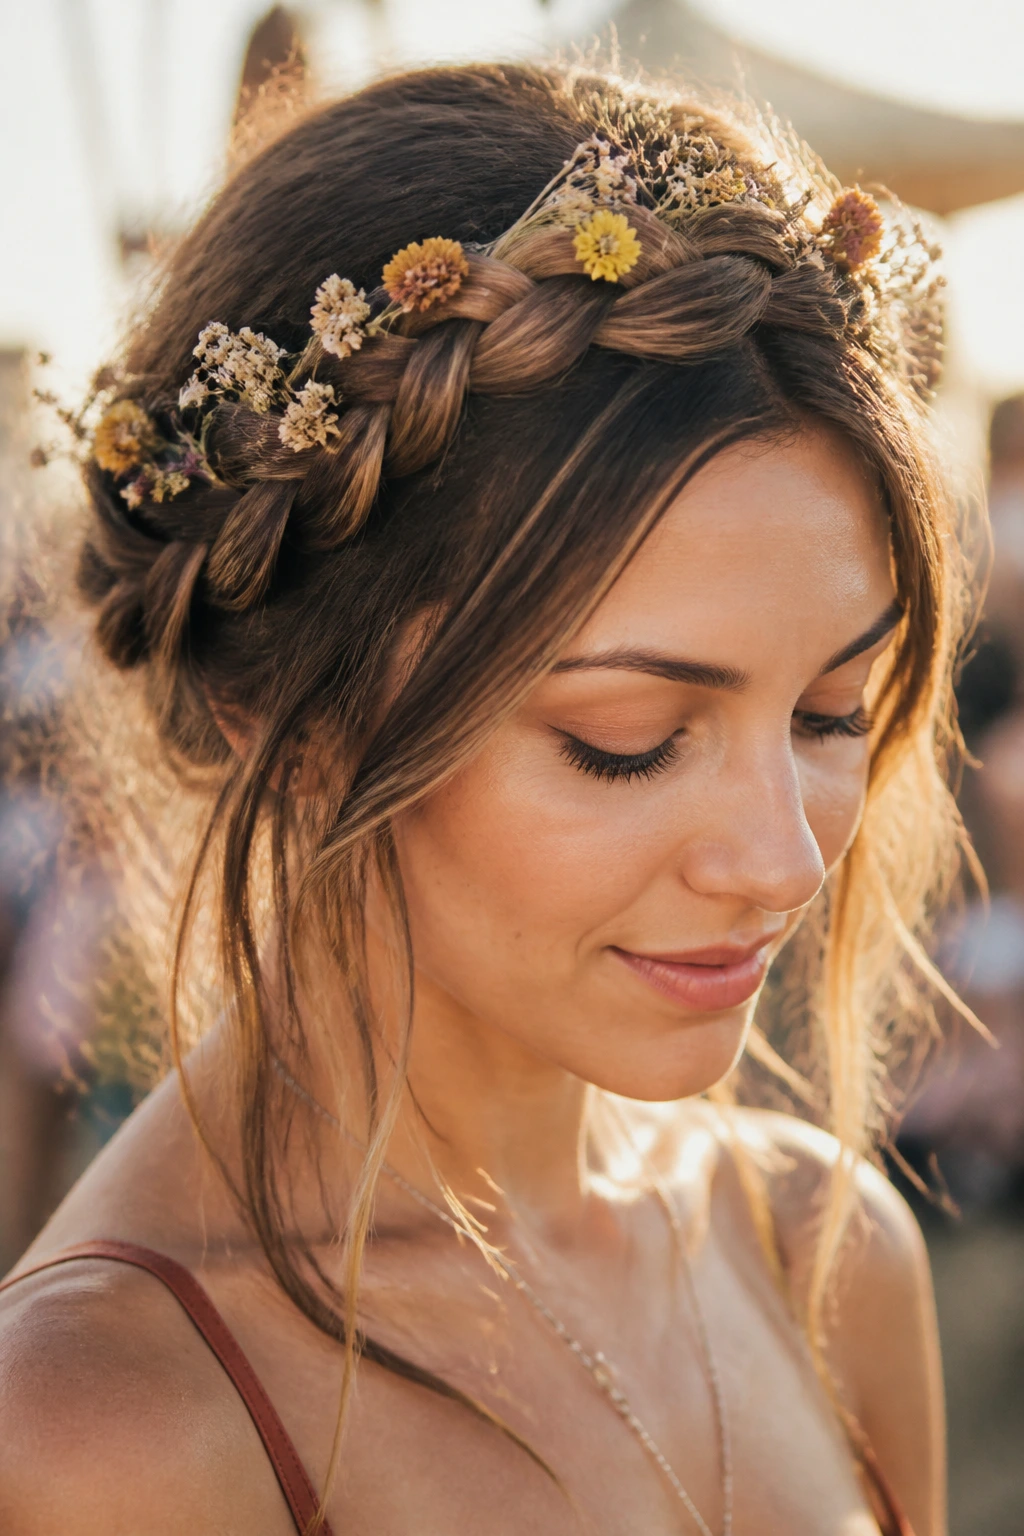
If you have a long day ahead and want a style that feels romantic and ethereal, the crown braid is your best bet. It is essentially a halo of hair that sits flat against the scalp, making it the most comfortable style for wearing a hat or headpiece. Start by parting your hair deeply to one side and beginning a French braid along the hairline. Continue braiding around the circumference of your head, picking up hair as you go, until you tuck the tail under the beginning braid. Once pinned, weave in small, dried wildflowers or sprigs of baby’s breath. These are durable, won’t wilt in the heat, and look far more sophisticated than synthetic flower crowns.
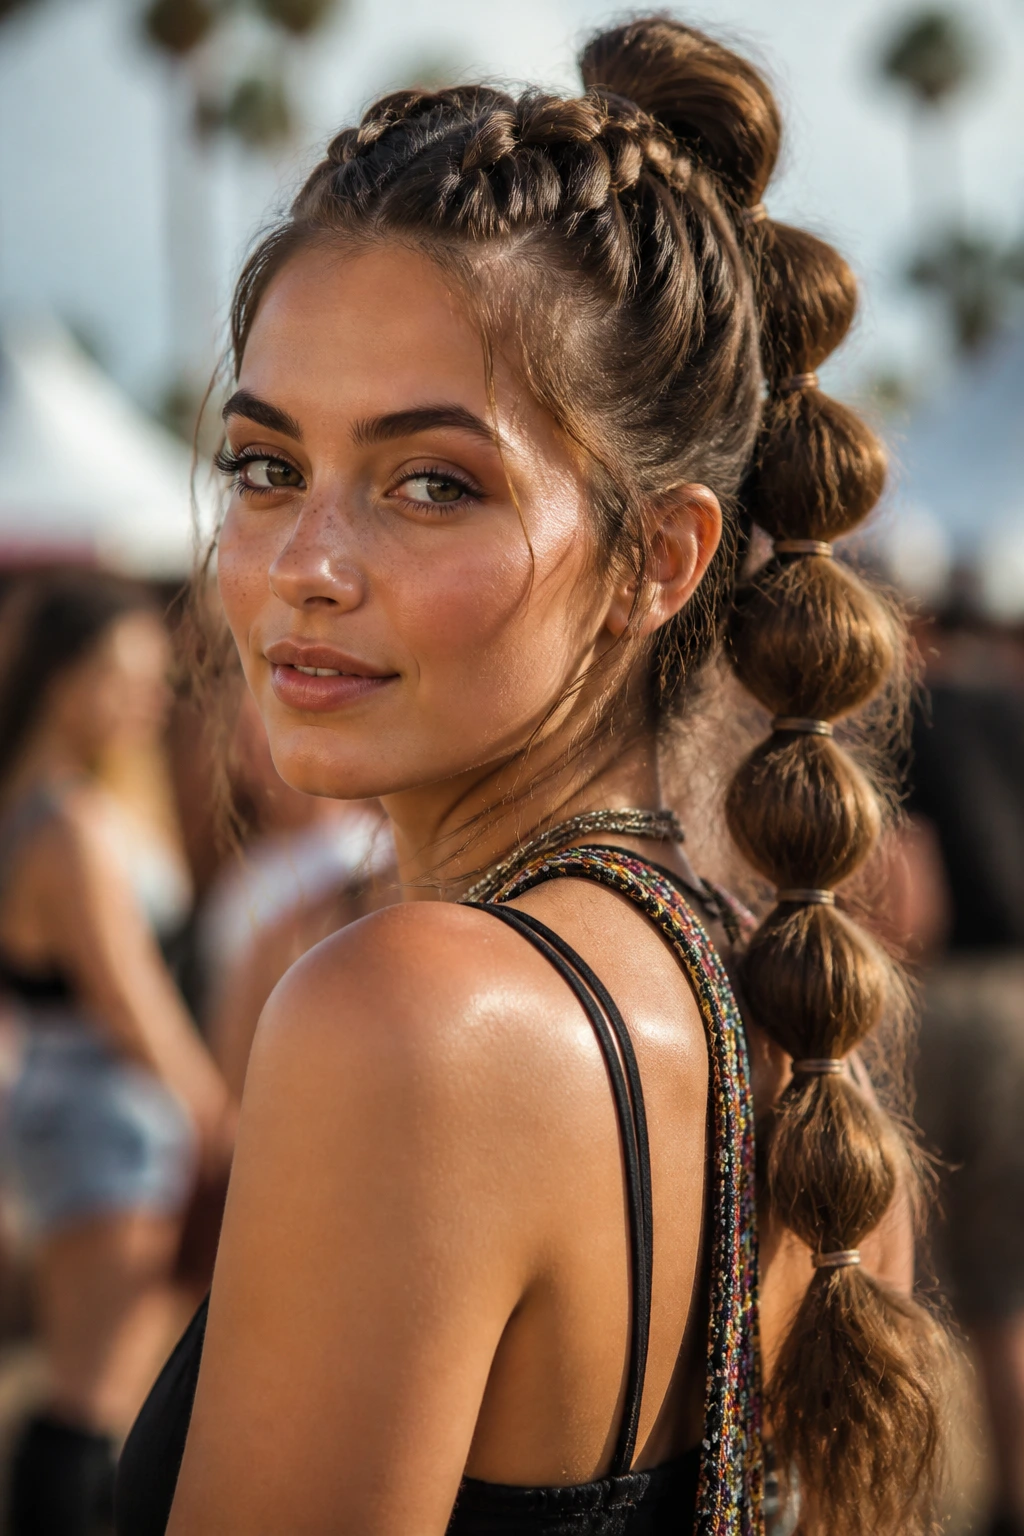
6. Bubble Braid Ponytail
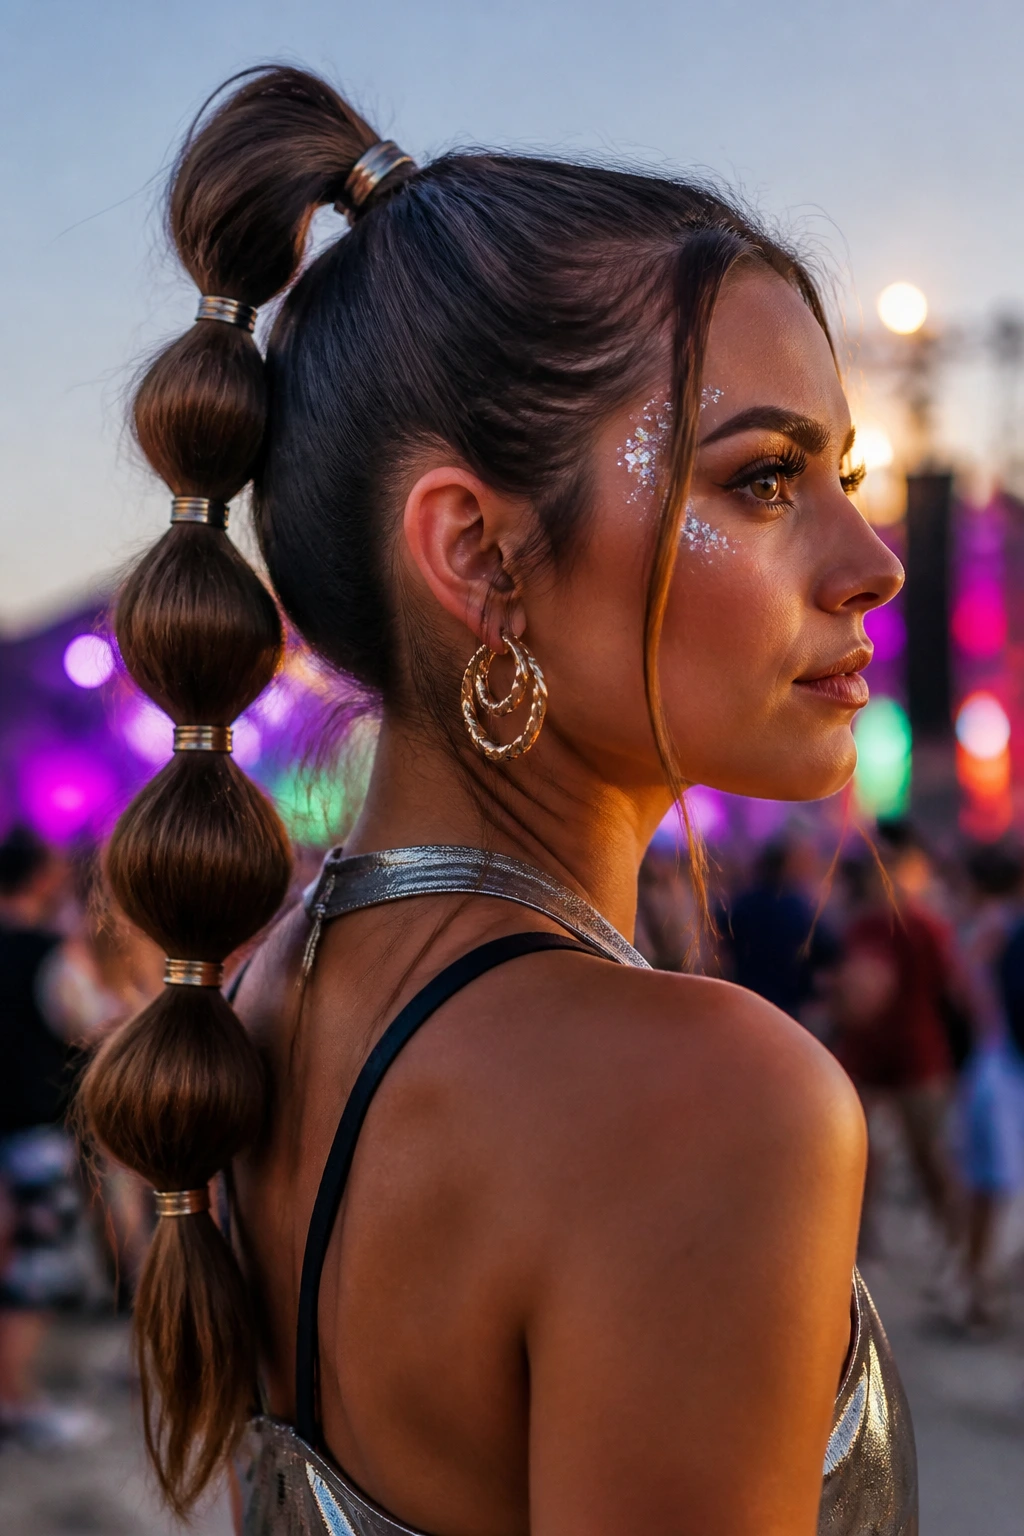
The bubble braid is a modern classic for a reason—it’s deceptively simple. Pull your hair into a high, secure ponytail. About two inches down the length, add another clear elastic. Gently tug on the hair between the two elastics to puff it out into a “bubble.” Repeat this process until you reach the ends of your hair. This is a fantastic option for anyone with layers that keep falling out of traditional braids, as the frequent elastics act as anchors. If you want to make it look even more festive, add small metallic rings or charms to each elastic. It’s an instant upgrade that requires zero advanced styling skills.
7. Boho Beach Waves with Beaded Accents
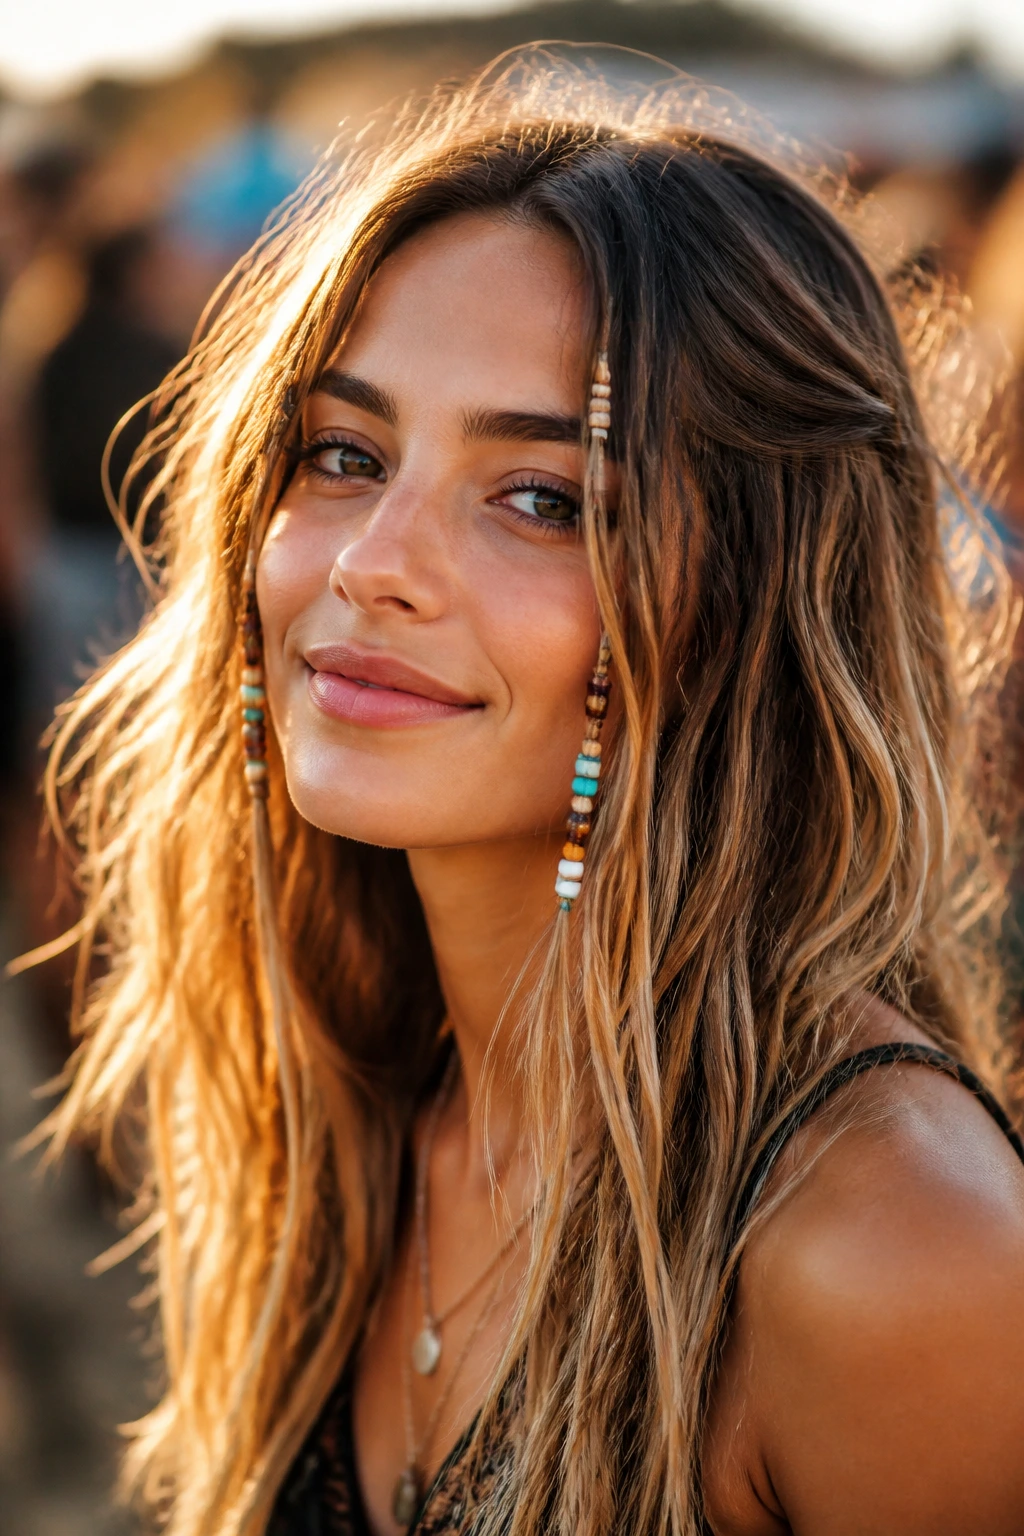
Texture is the foundation of festival hair, but clean beach waves can look a bit too “coastal vacation.” To make them feel like festival hair, you need grit. Spritz your hair generously with a sea salt spray and twist large sections while they dry, or use a wide-barrel curling iron to create loose, irregular waves. The key here is the accessories. Take four or five small sections of hair near your face and thread them with wooden or colorful plastic beads. This is a subtle nod to seventies aesthetics and keeps the waves from looking too uniform or “done.”
8. Sleek Low Bun with Gold Leaf Detailing
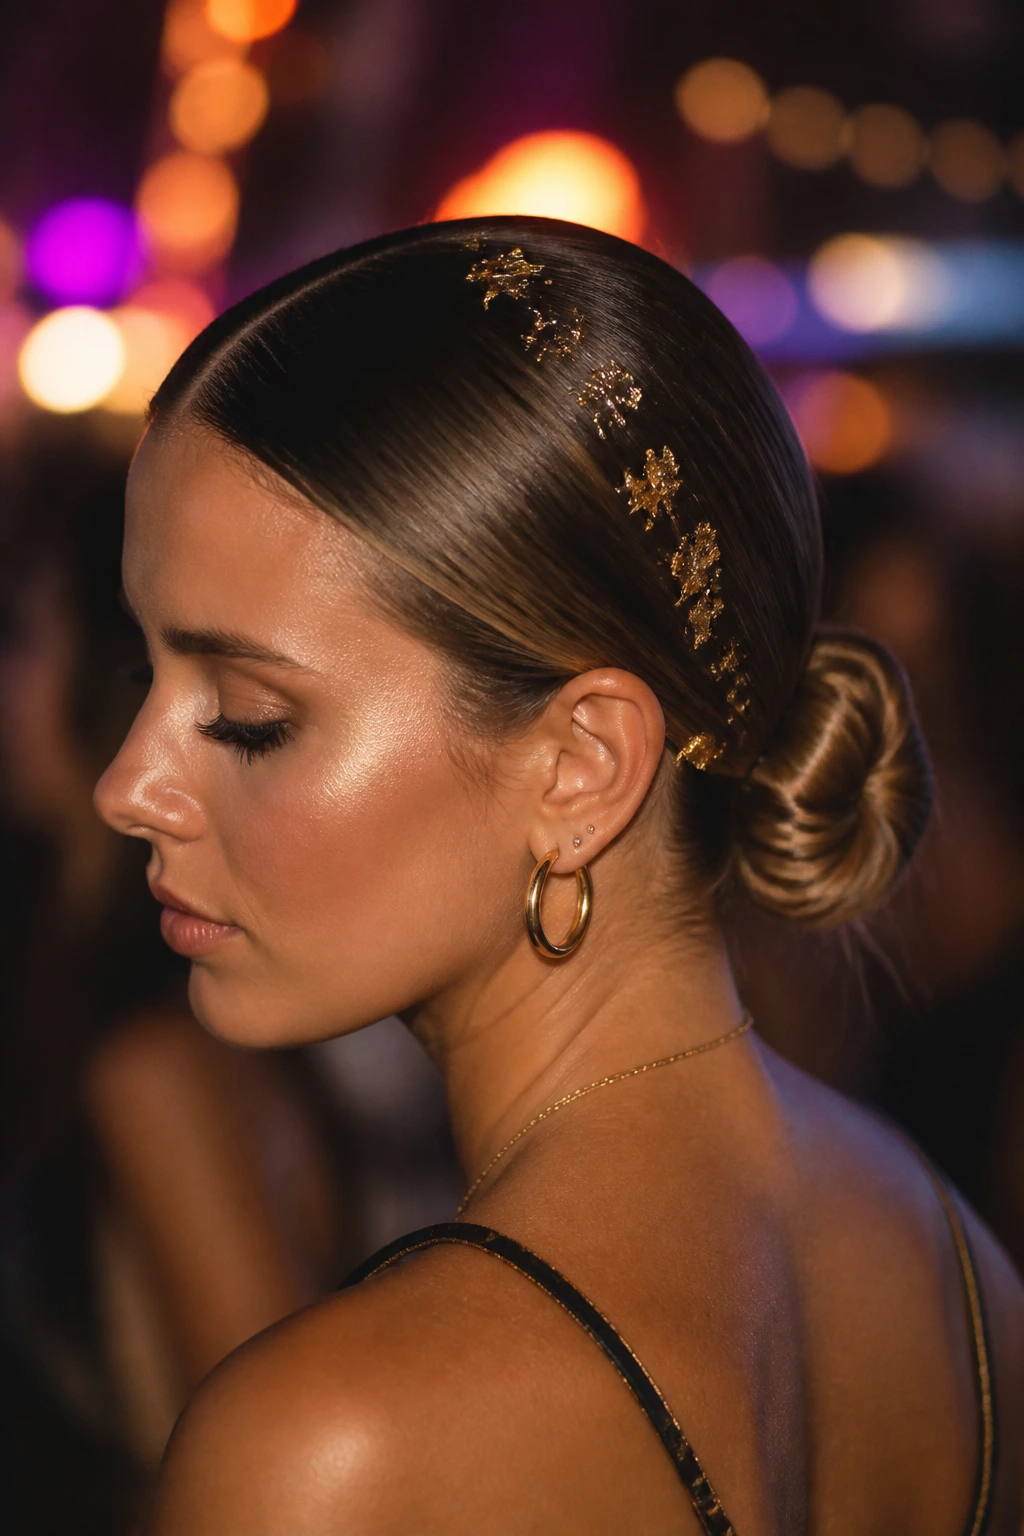
If you prefer a cleaner, more minimalist aesthetic, the sleek low bun is your best approach. Part your hair sharply down the center and apply a generous amount of styling pomade to tame flyaways, pulling it into a tight, low knot at the nape of your neck. To give it the festival edge, apply small flecks of gold leaf to the part line and the sides of your head. Use a small amount of hair gel as an adhesive. It is a stunning, sophisticated look that stands out against the typical “messy bohemian” styles found at most events.
9. Rope-Twisted Half-Up Style
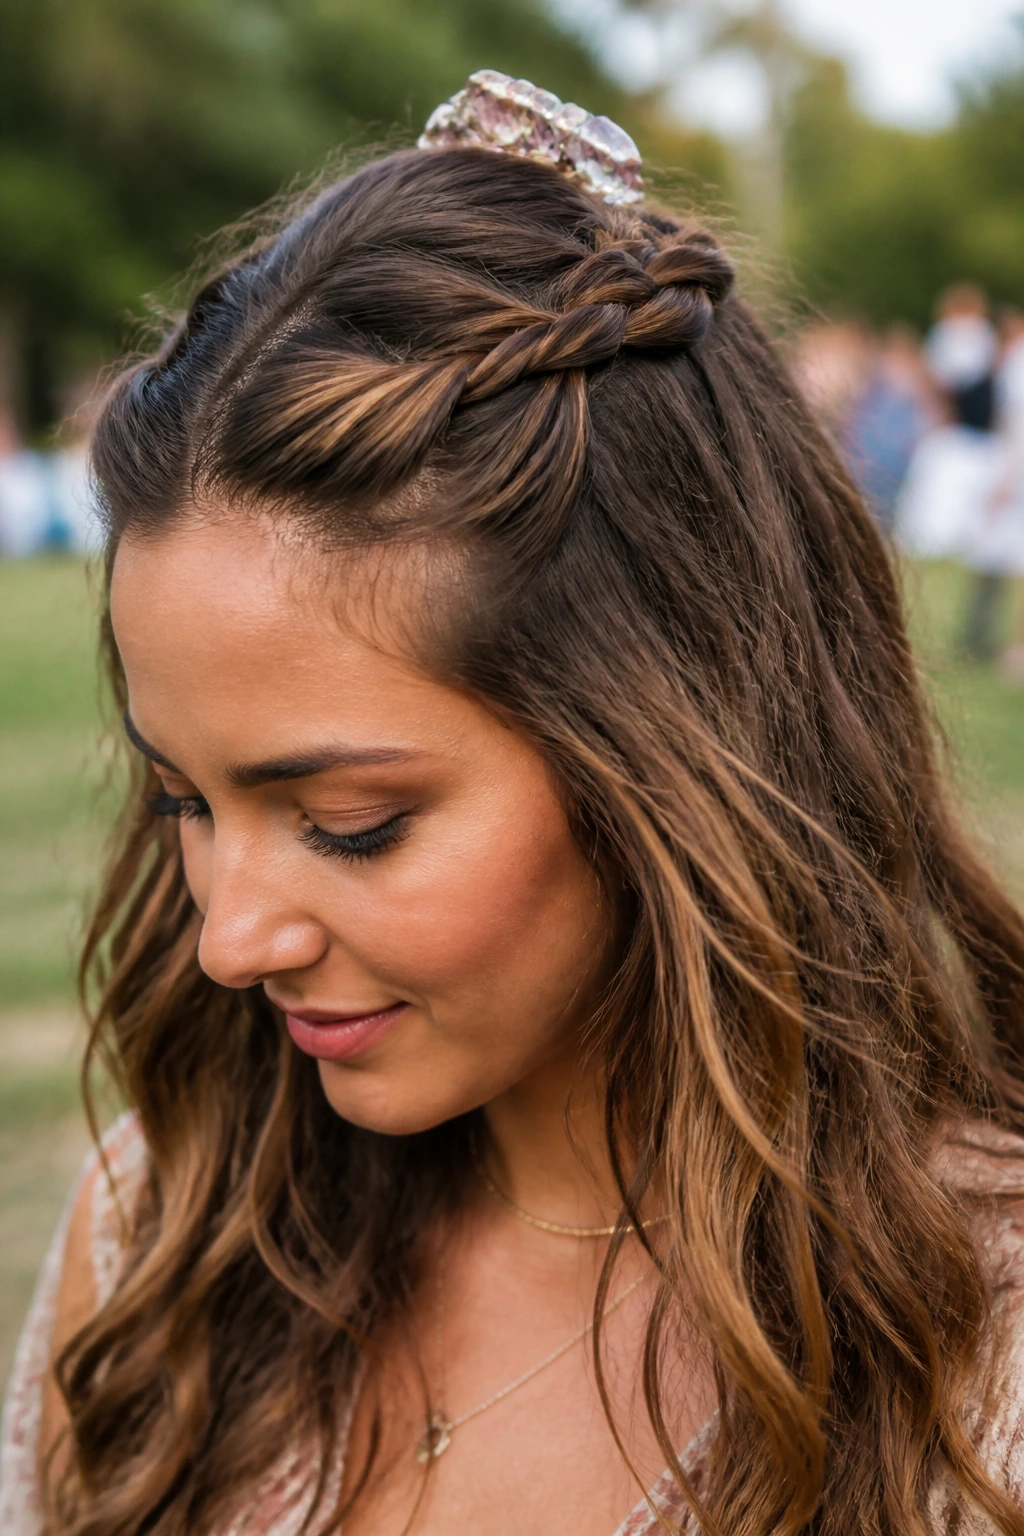
Rope braids look much more intricate than they actually are. Instead of weaving three strands, you simply split a section into two and twist both strands in the same direction, then cross them over one another. For this look, pull two sections from your temples and create rope braids, pulling them back to meet at the center of your head. Secure them with a decorative clip or a ribbon. It’s a clean, elegant style that keeps hair away from your face while showing off your length. It’s also incredibly easy to fix if the wind starts to get to you.
10. Mohawk Braid with Tiny Braided Details
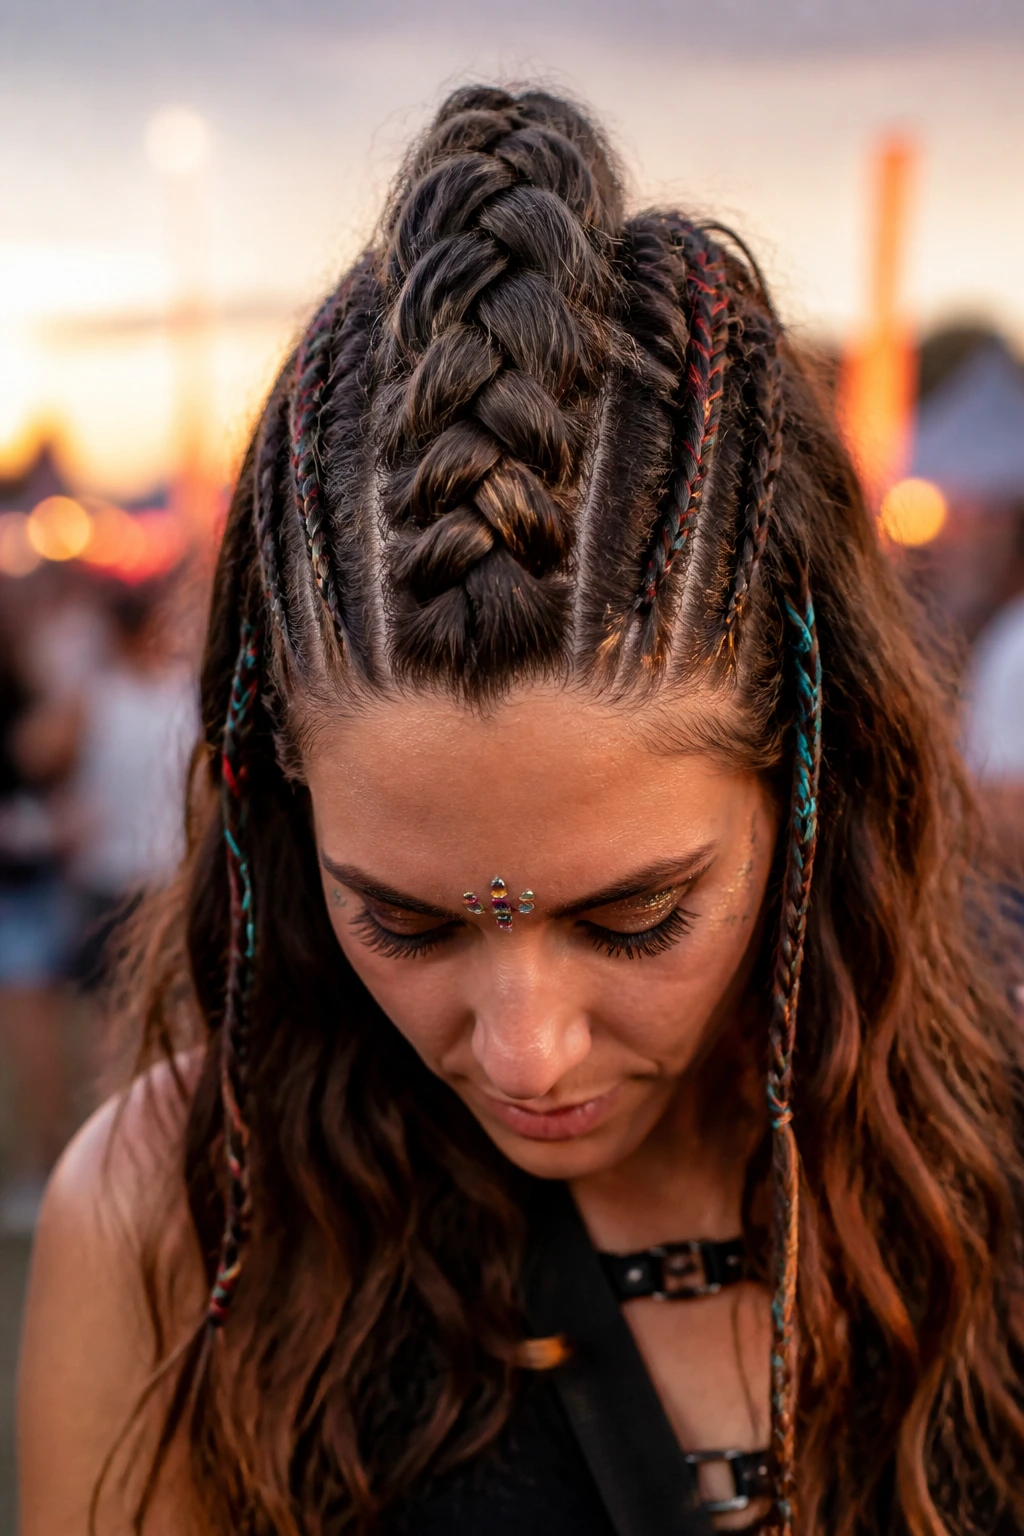
Take the mohawk trend and make it wearable by braiding the center strip of your hair. Create a tight French braid running from your forehead to the crown, leaving the sides of your hair loose and textured. To add character, create a few tiny, thin braids throughout the loose hair on either side, securing them with thin colored thread or neon elastics. This creates a high-contrast style that feels rebellious and edgy. It works particularly well if you have dyed hair, as the braiding highlights the different tones throughout your lengths.
11. Scarf-Braided Fishtail

A fishtail braid can be time-consuming, but incorporating a thin silk scarf makes it faster and more visually interesting. Start by tying a scarf to a hair elastic, then pull your hair into a low ponytail at the nape of your neck. Divide your hair into two sections, using the scarf as part of one of the sections. Fishtail braid the scarf into the hair until you reach the bottom. This adds thickness and vibrant color to a style that can otherwise look a bit sparse. The scarf also ensures that even if your braid starts to loosen, it doesn’t unravel completely.
12. Pigtail Braids with Neon Thread
Take inspiration from traditional embroidery by weaving neon-colored embroidery thread into your standard three-strand pigtail braids. Start by anchoring a long piece of thread at the root with a bobby pin, then treat it as one of the three sections of your braid. The thread adds a rigid, colorful element that looks striking against natural hair colors. This is a highly durable style that can easily last for two or three days, which is ideal if you are camping at a festival and have limited access to styling tools and mirrors.
13. Messy Chignon with Oversized Hairpins
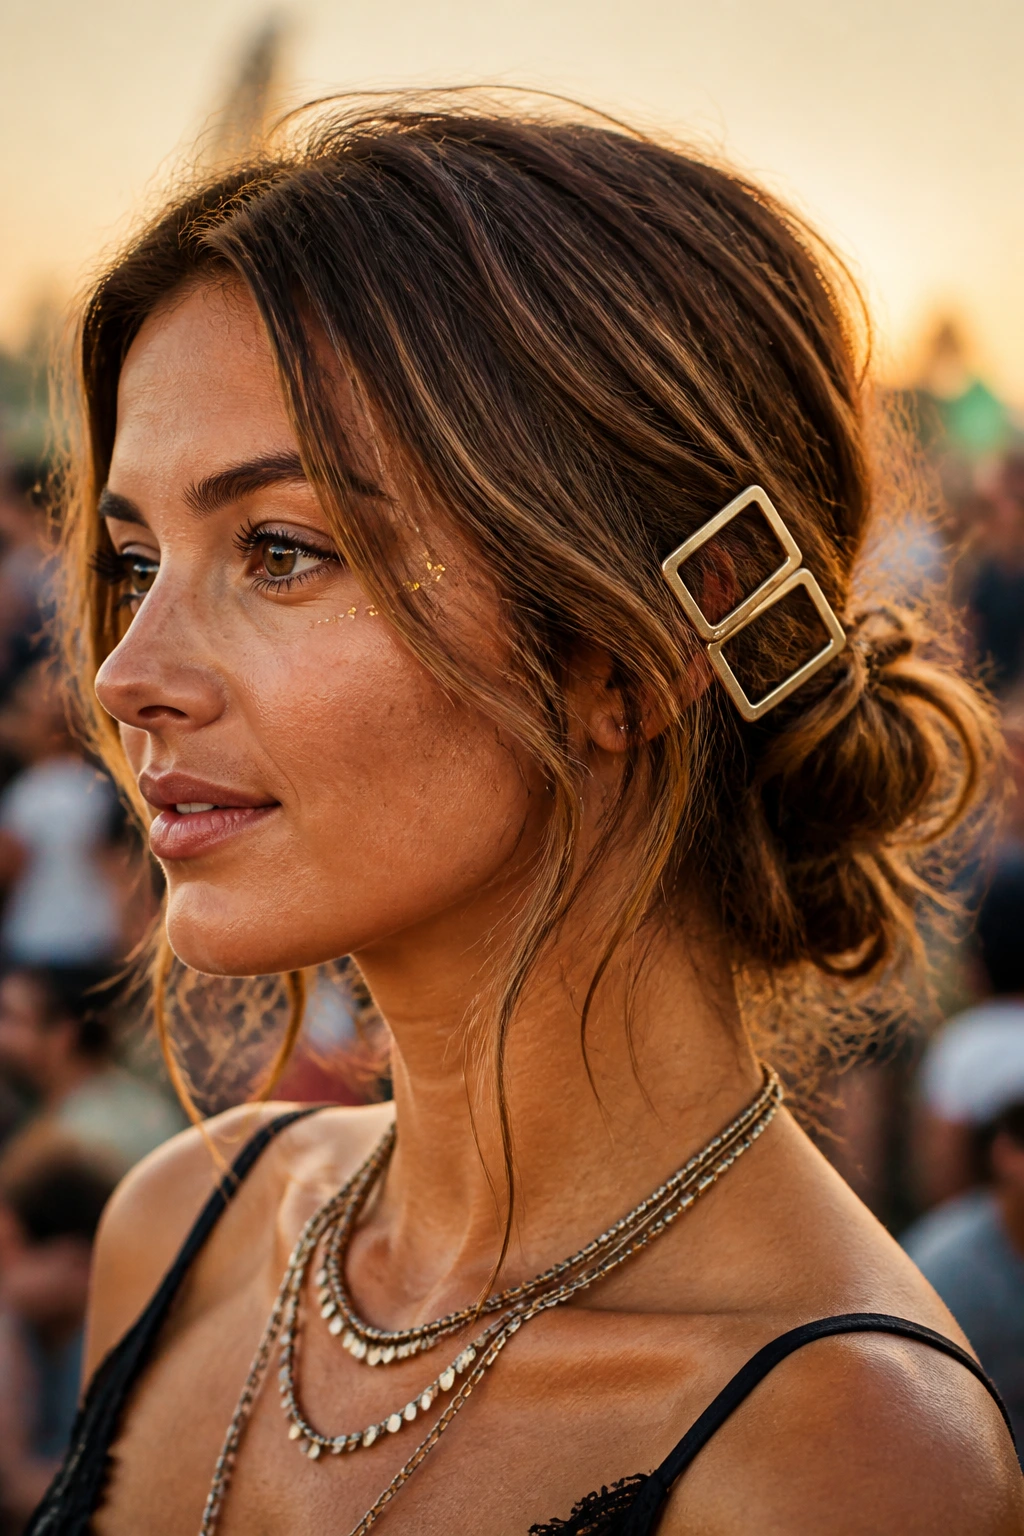
Oversized hair accessories are having a moment, and they are perfect for festivals because they do all the heavy lifting. Create a loose, low bun, pinning it in place with bobby pins. Then, take two or three oversized, sculptural hairpins—think geometric shapes or large pearls—and slide them into the side of the bun. This looks incredibly intentional and polished but takes less than thirty seconds to execute. It’s the ultimate “I didn’t try, but I look great” style. Just make sure the pins are high-quality, as cheap ones tend to slide out if you’re dancing.
14. Pull-Through Braid
If you want the fullness of a complex braid without the headache of intricate weaving, the pull-through braid is your solution. You create a series of small, stacked ponytails and then pull the hair through them to create a full, voluminous effect. It mimics the look of a braid but holds much more securely because of the layered elastics. Use clear elastics to keep the focus on the volume and texture of the hair rather than the hardware. This style holds up brilliantly in the wind and looks better as it gets a little messier throughout the day.
15. The “Faux” Undercut with Side Braids
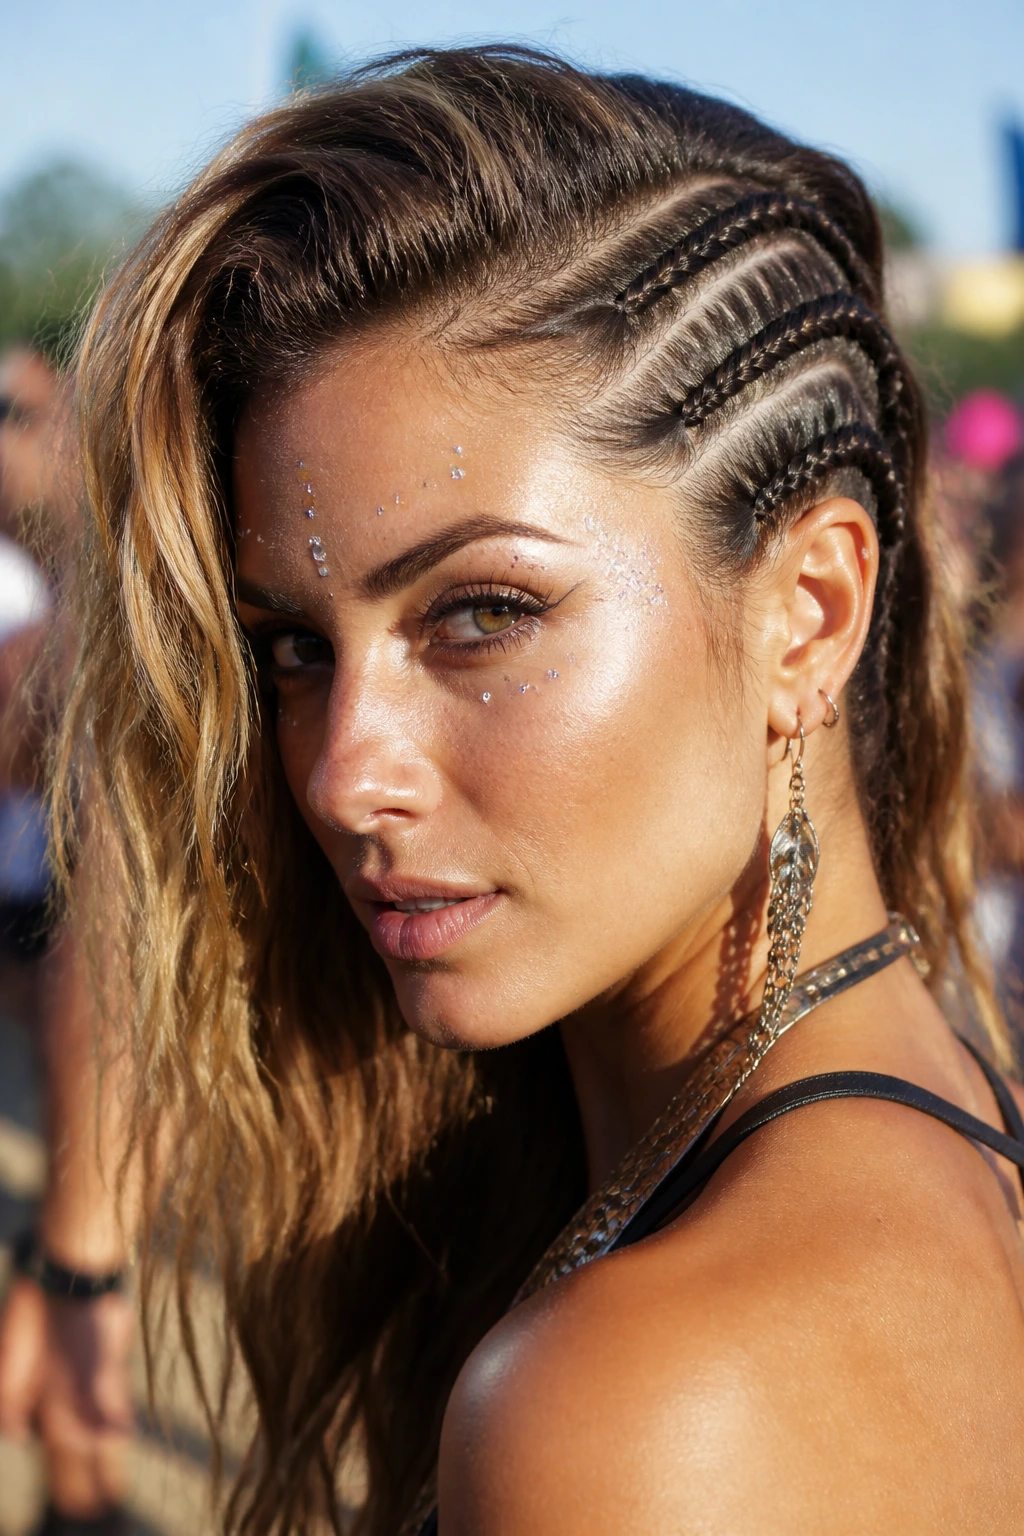
You don’t need to shave the sides of your head to get the punk-rock undercut look. Simply part your hair deeply to one side and create three tight, tiny French braids along the side with less hair. Keep the braids close to the scalp and secure them with tiny, hidden pins behind your ear. Flip the rest of your hair over to the opposite side to create a dramatic, voluminous swoop. This creates the illusion of an undercut and keeps one side of your face clear, which is great for showing off statement earrings or glitter makeup.
16. Half-Up Messy Buns with Glitter Roots
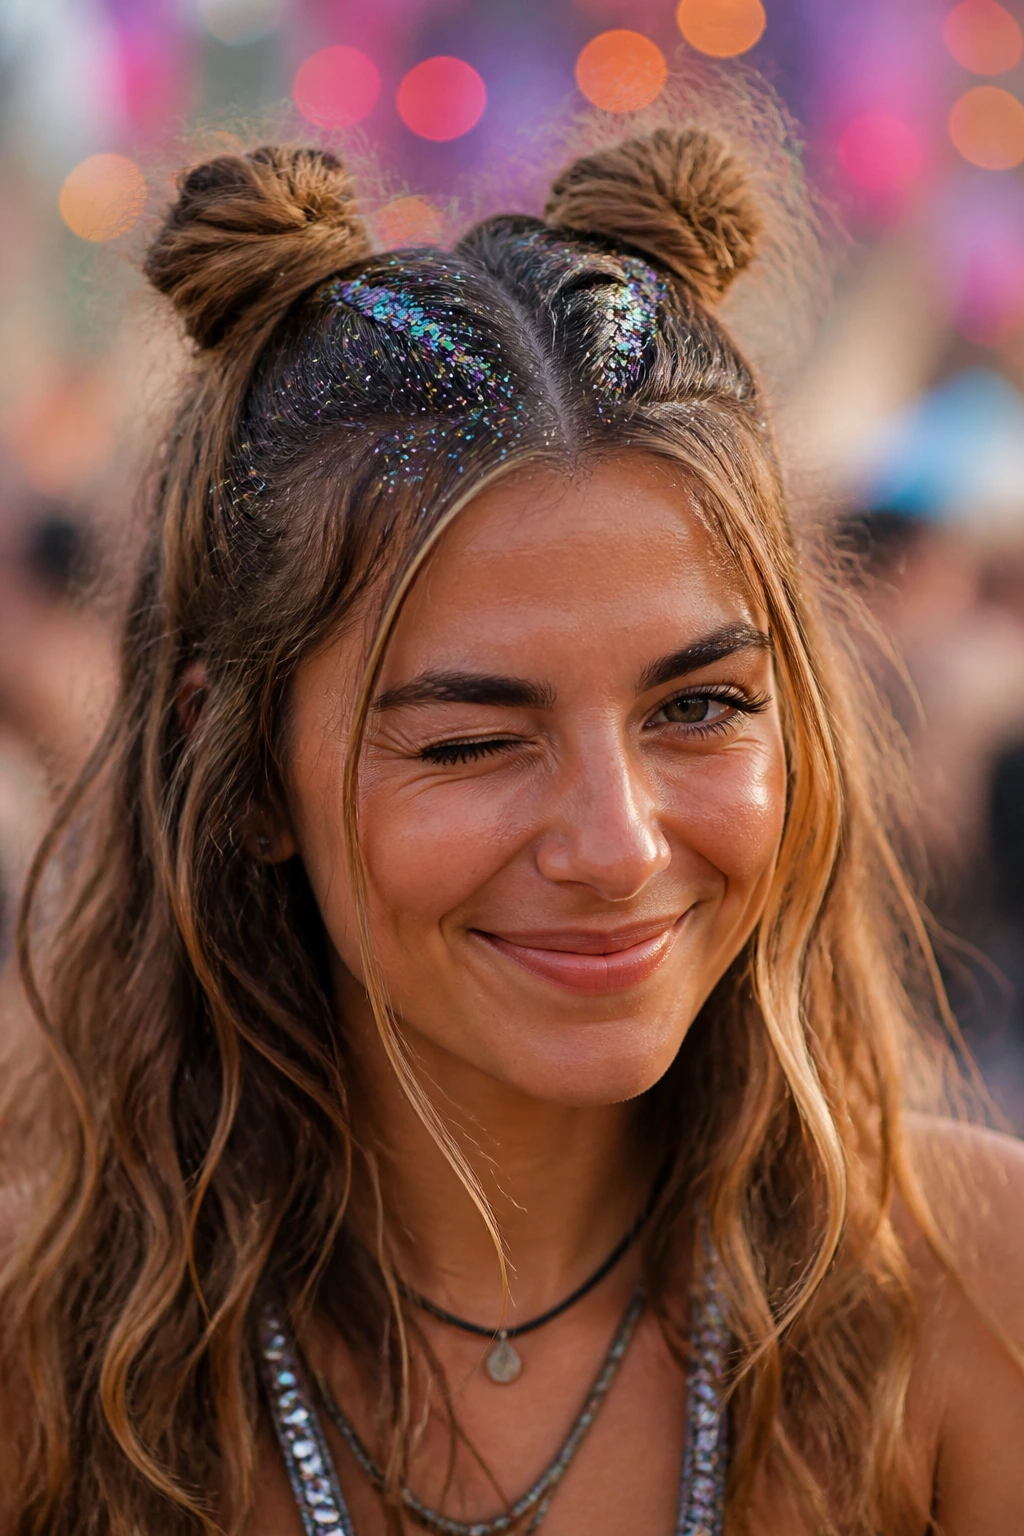
Take the space bun concept and apply it to a half-up style. Gather the top section of your hair—the crown—and split it into two small buns. Use a generous amount of hair glitter or chunky gel-based sparkles directly on the roots leading up to the buns. This look is playful, youthful, and high-energy. Since only the top half of your hair is styled, you still get to show off your length, which is a great balance if you aren’t ready to go for a full-updo but want to keep hair away from your eyes.
17. Headband Braid with Loose Waves
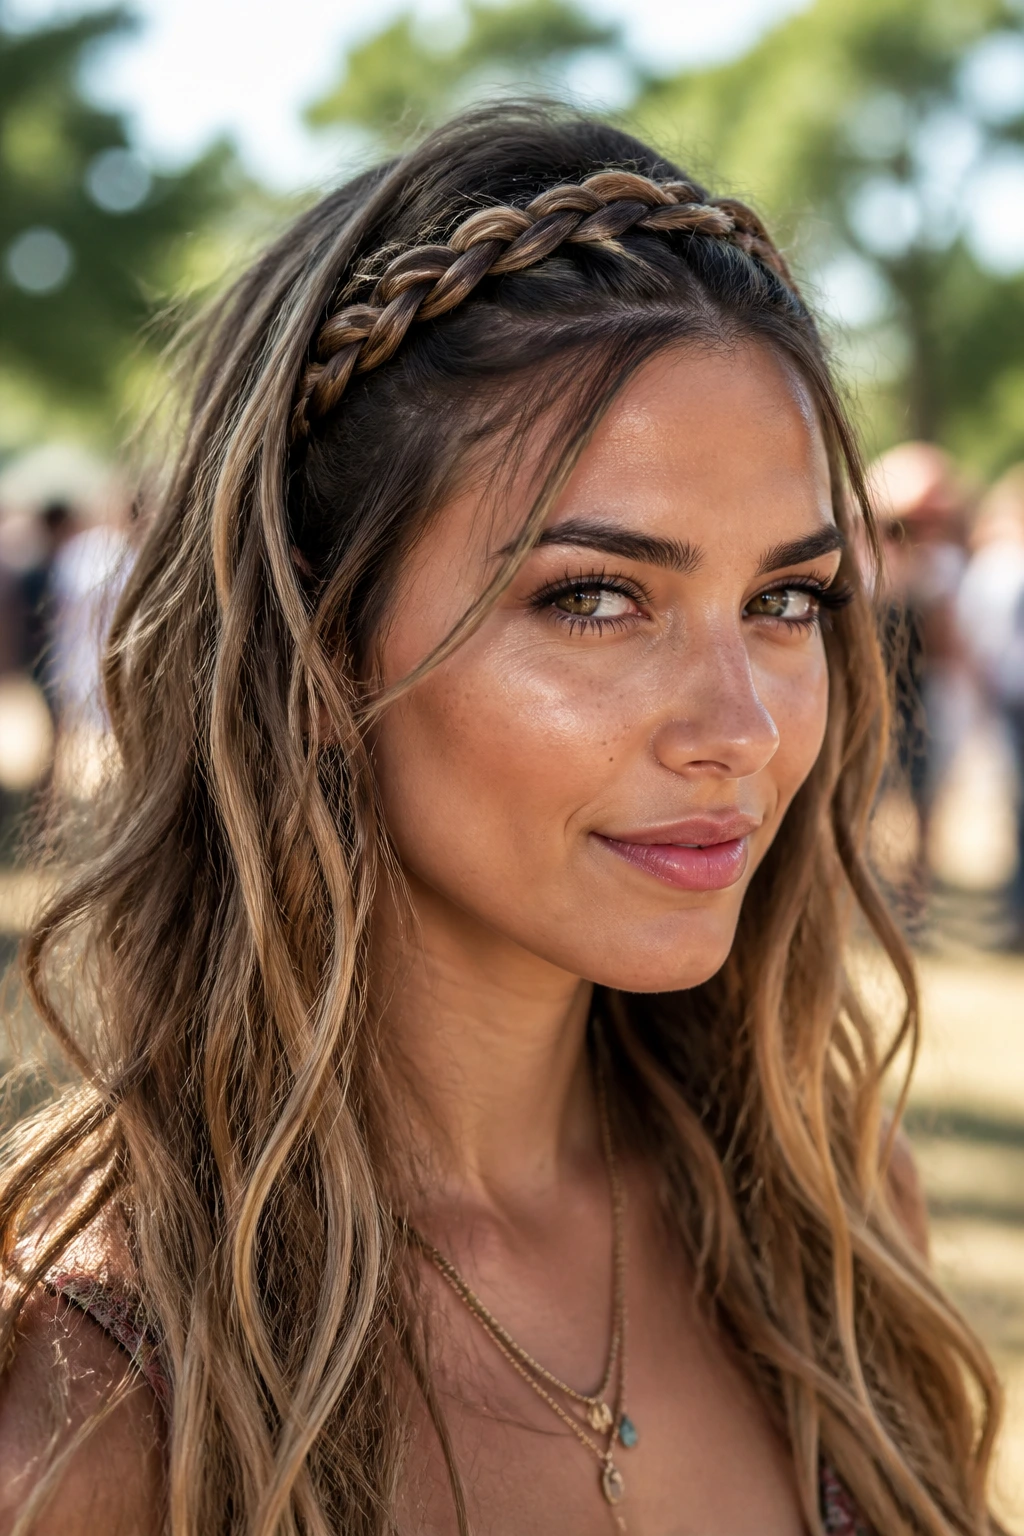
A classic headband braid is essentially a French braid that follows the hairline. It’s timeless, effective, and always looks polished. To keep it from feeling too formal, pair it with loose, messy waves. Once the braid is finished, use your fingers to gently pull at the loops of the braid to loosen it—this is called “pancaking.” Pancaking makes the braid look wider and softer. The contrast between a perfect headband braid and soft, undone waves is the height of festival chic.
18. Wrapped Ponytail with Leather Cord

Leather cording is a fantastic festival accessory because it feels more durable and earthy than ribbons or silk. Create a medium-height ponytail and wrap a long piece of thin leather cord around the base, spiraling it down the length of the ponytail for a few inches. This is a quick way to add a bit of “warrior” energy to a simple look. The leather holds the ponytail shape better than an elastic and doesn’t crease the hair as much as traditional ties. It’s perfect if you plan on headbanging or moving around quite a bit.
19. Crown Braid with Star Patches
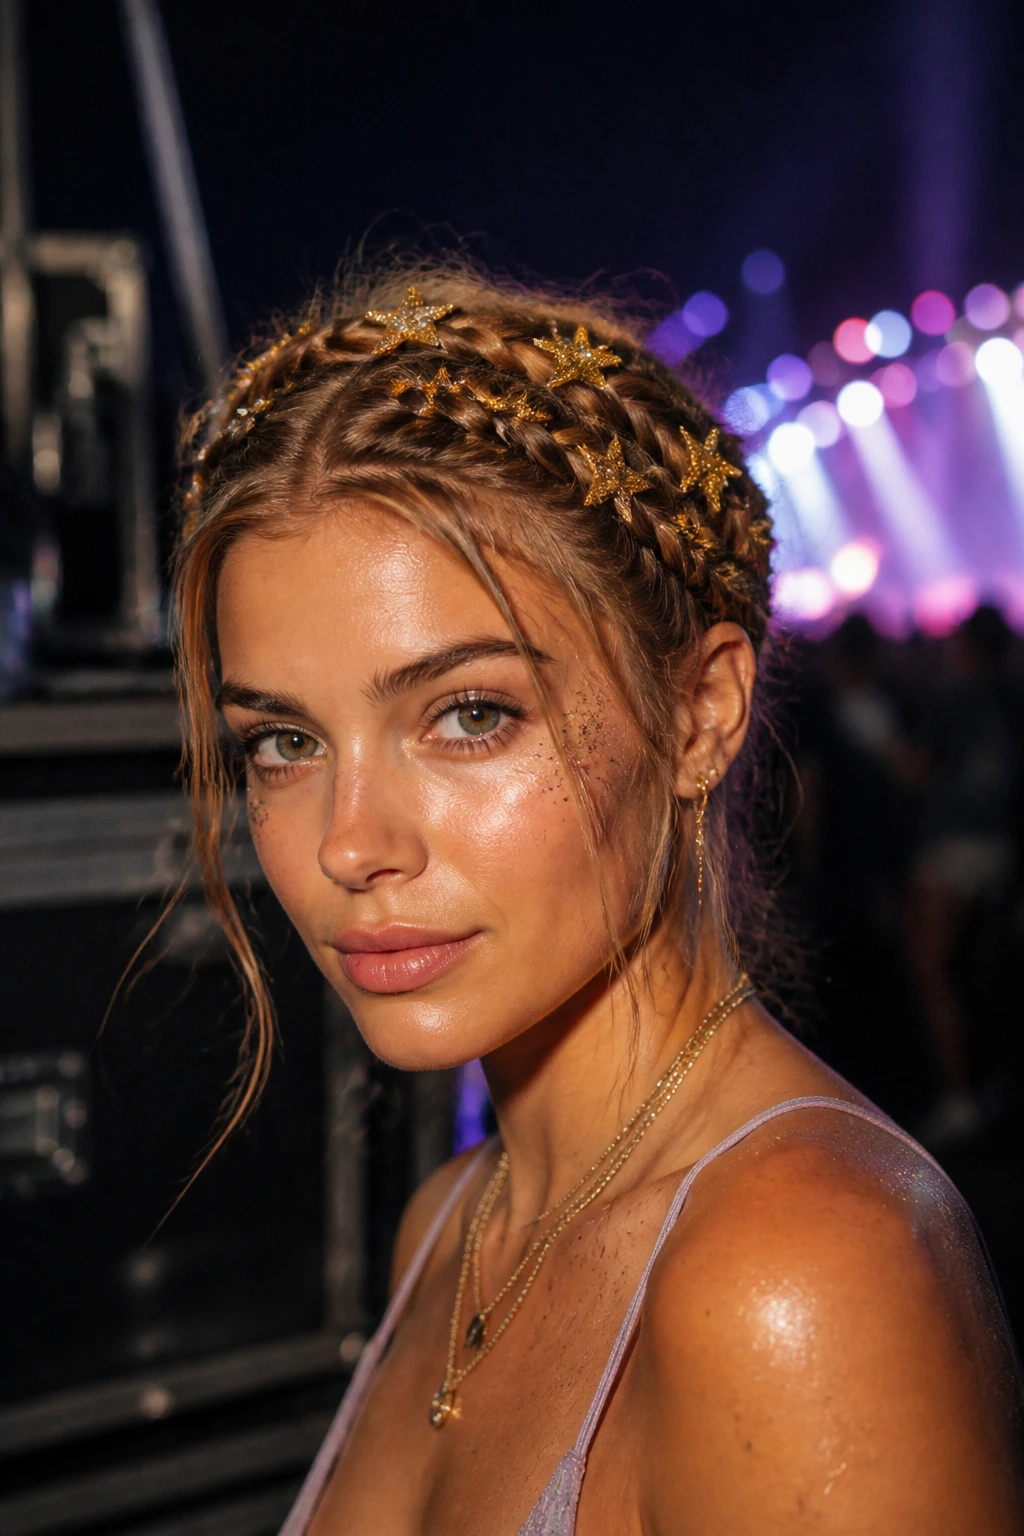
For a celestial theme, create a double-braid crown—two braids wrapped around your head instead of one. Once the braids are secure, use hair-safe temporary adhesive to attach small star-shaped foil patches onto the braids themselves. This is a look that screams “night show.” It’s highly visual, stays put, and looks great under stage lighting. If you can’t find patches, you can use heavy-duty hair glitter gels to paint stars directly onto your scalp along the partings.
20. Double French Braid into a Low Pony

If you like the security of braids but hate the feeling of long, heavy braids hitting your back, this hybrid is the answer. Start two French braids at the front of your head and continue them until you reach the mid-crown. Instead of braiding all the way to the ends, gather all your hair into a low ponytail. You get the intricate detail at the front and the ease of a simple ponytail at the back. It’s a very practical, athletic style that is perfect for hot, dusty environments.
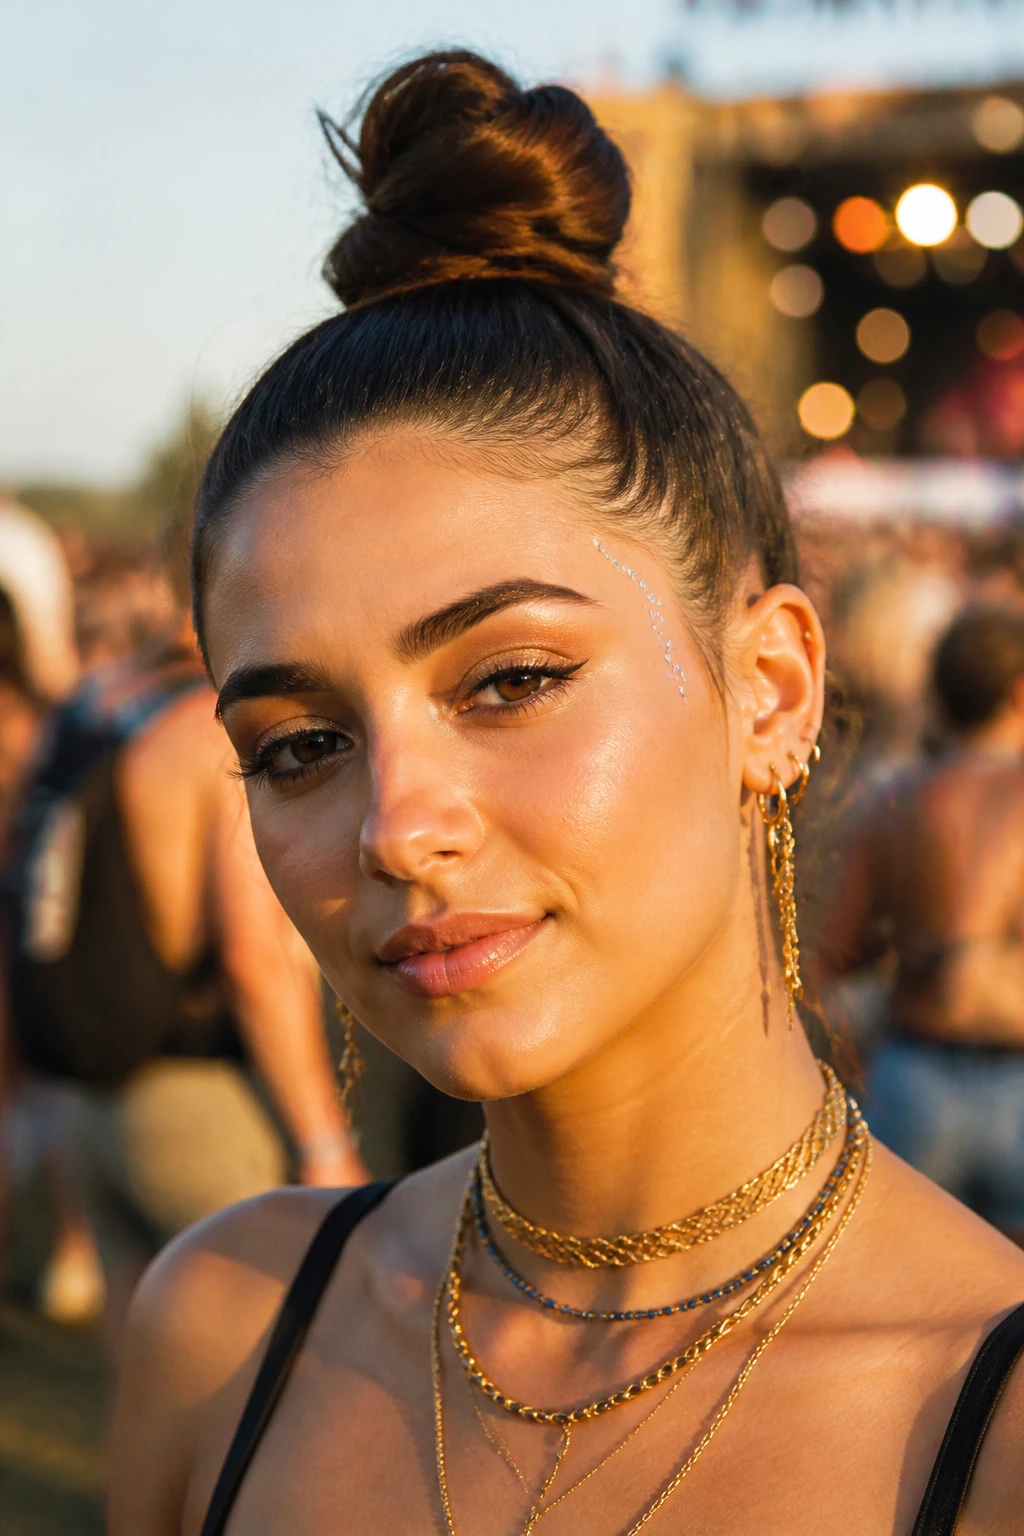
21. Triple Top Knots
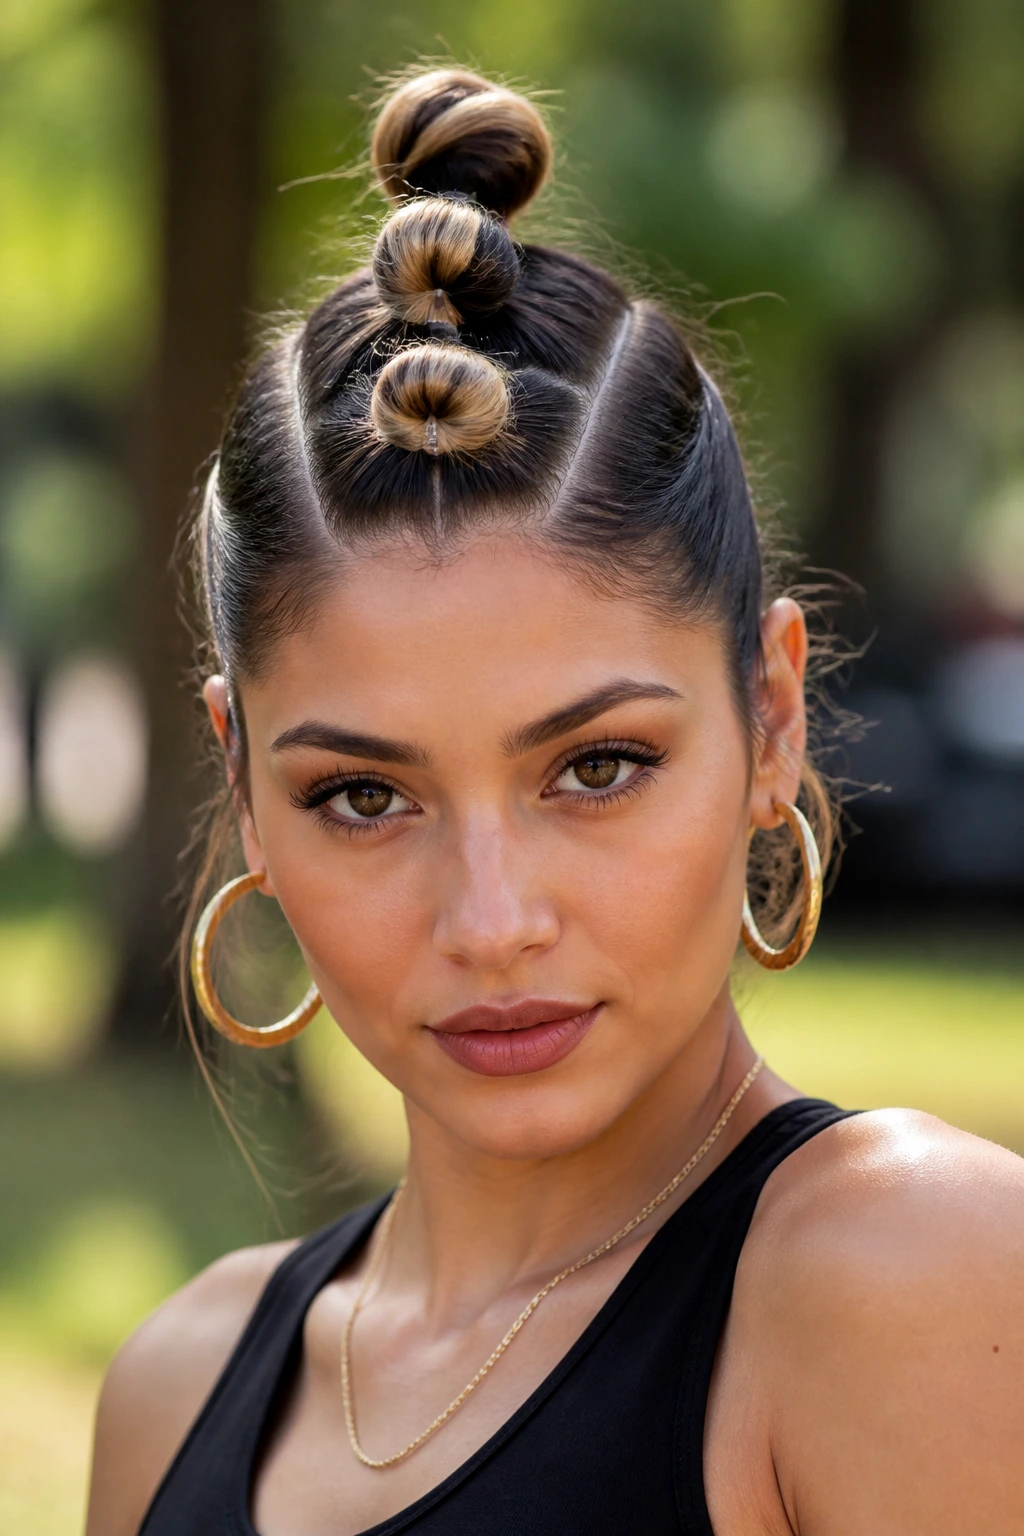
Take the space bun idea and push it further by creating three smaller knots in a row along the center of your head. It’s a bold, sculptural look that draws eyes upward and keeps hair completely off your face and neck. Use small, clear elastics for each knot and secure with U-pins. This style has a futuristic, high-fashion edge that separates you from the usual sea of boho waves. If you have dyed hair, the contrast of the colors at the roots will look incredibly sharp in this configuration.
22. Braided Headband with Sleek Ends
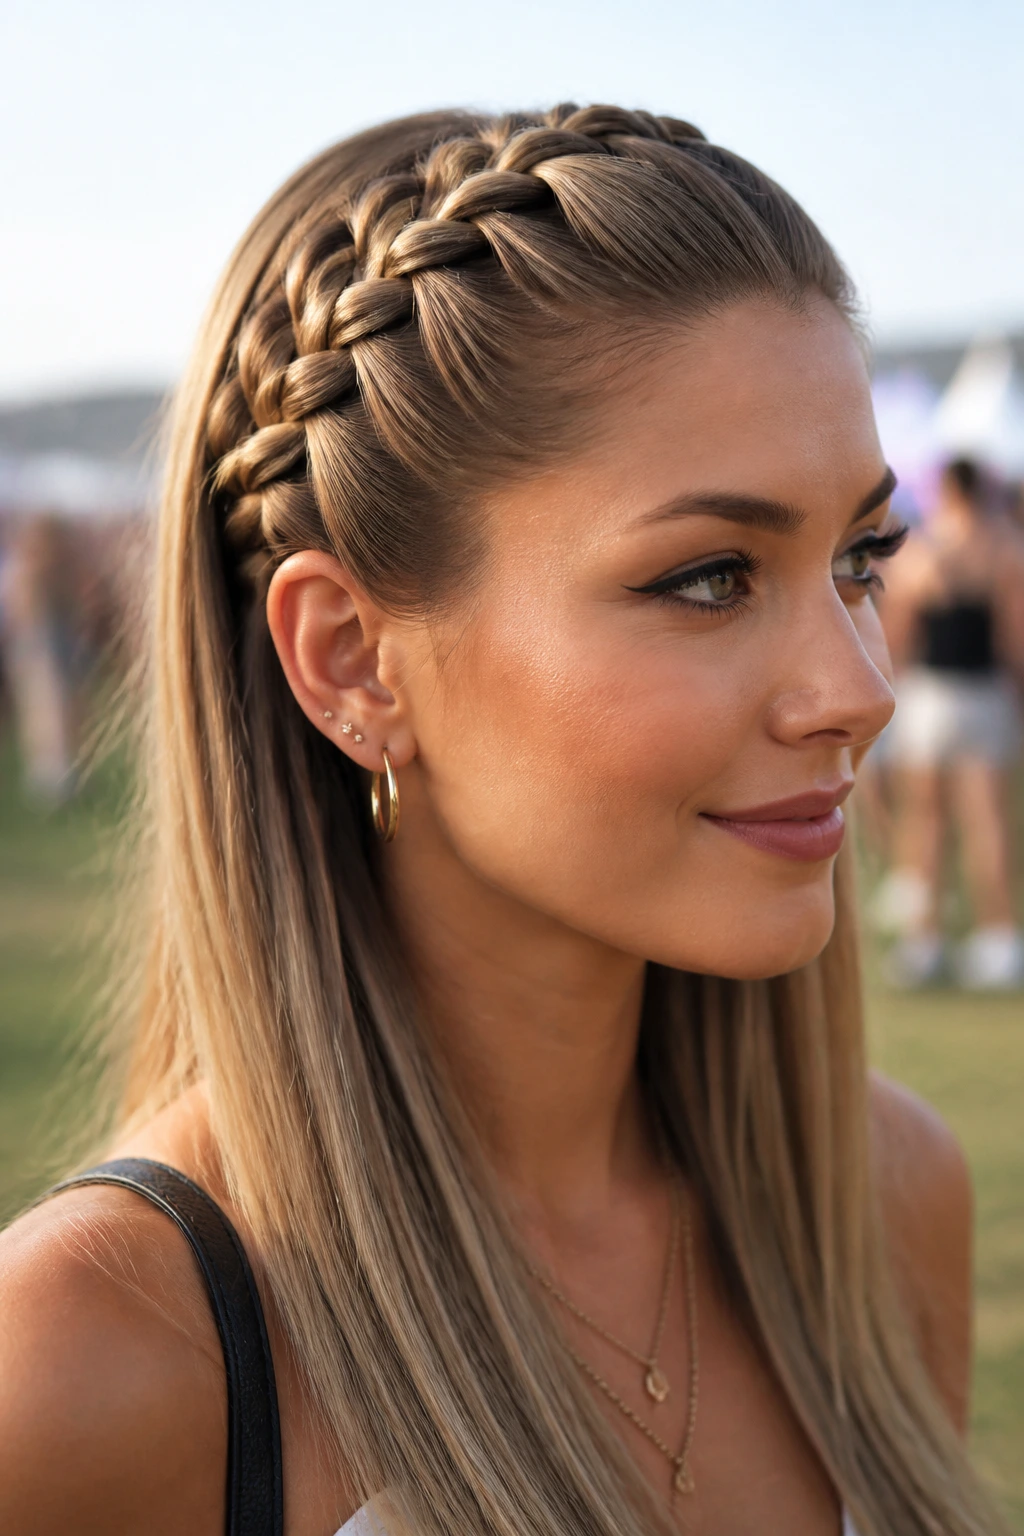
Sometimes the best festival look is just a clean, well-executed braid. Create a small Dutch braid along the crown of your head and secure it behind your ear, leaving the rest of your hair completely sleek and straight. Use a flat iron to get the lengths perfectly smooth, and apply a bit of shine spray. This is a sophisticated “model off-duty” look that works well if you want your hair to look intentional but simple. It’s a great way to manage thick hair without having to put all of it up.
23. Fishtail Ponytail
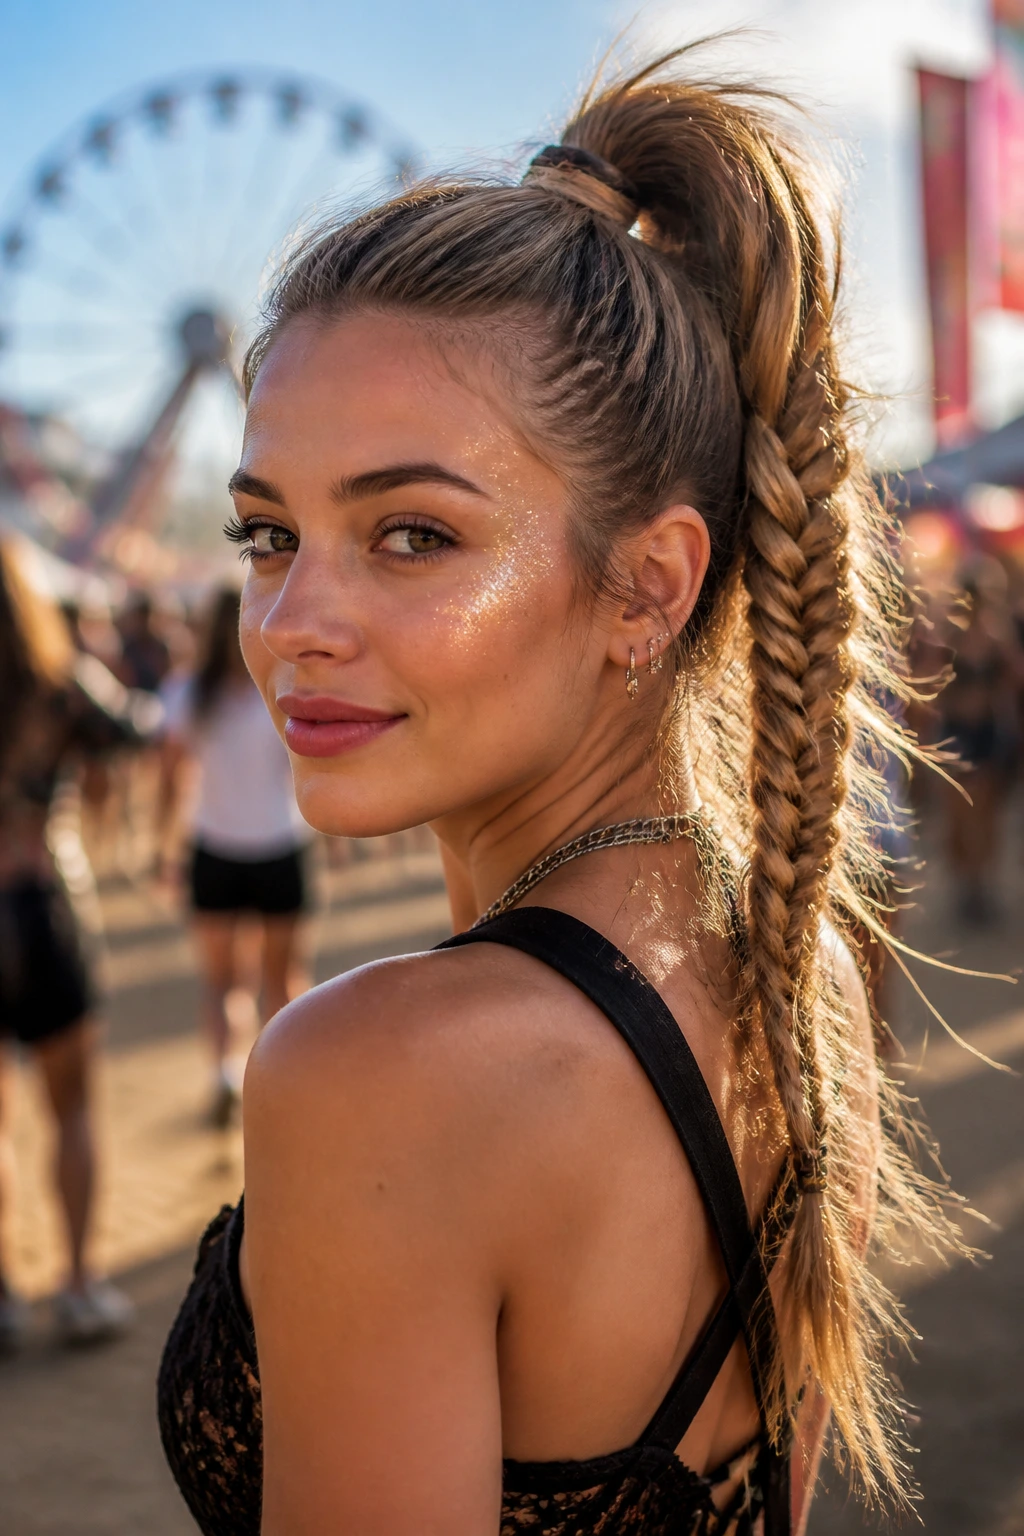
If you are skilled at fishtail braiding, don’t stop at the nape of the neck. Tie your hair into a high ponytail, then fishtail braid the length of the pony. The tension of the ponytail base makes the fishtail much easier to create because you don’t have to worry about the hair slipping. Because fishtails are naturally tighter and more compact than standard braids, they are virtually windproof. They look even better when they’re slightly fuzzy and lived-in at the end of the day.
24. Low Braided Bun with Floral Pins
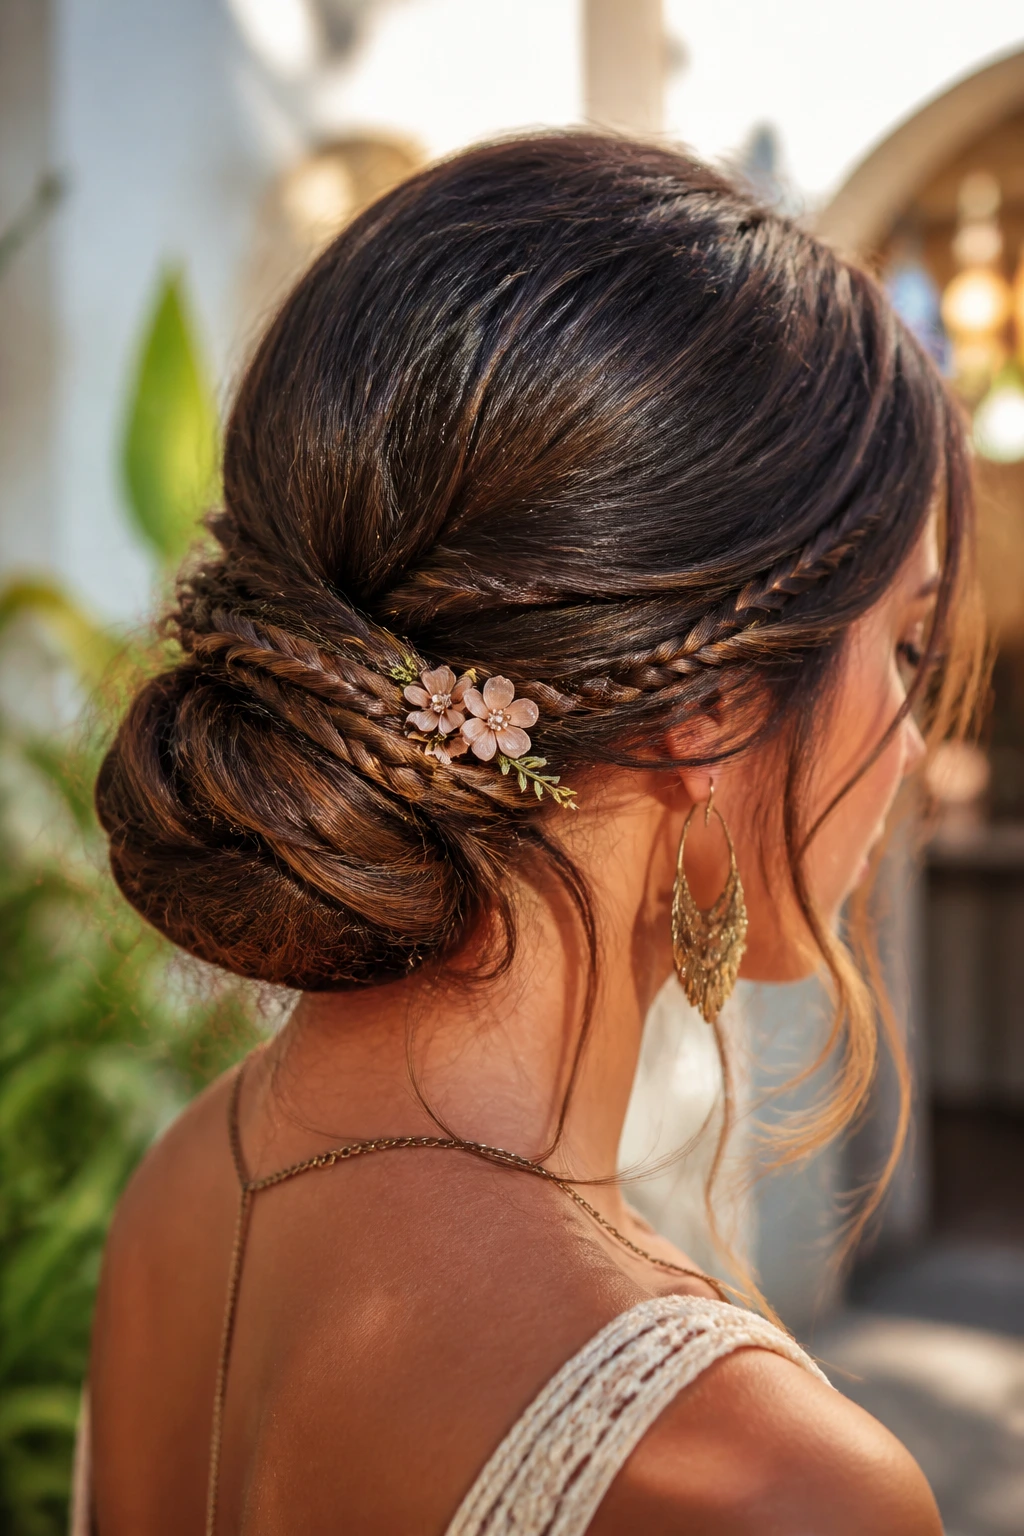
For a more understated festival look, pull your hair back into a low, messy bun and then wrap two thin, pre-made braids around the base. Use ornate, flower-shaped bobby pins to secure the ends of the braids. It’s a soft, romantic look that pairs beautifully with maxi dresses or vintage-inspired festival wear. The pins provide the sparkle, while the braids provide the structure, ensuring that your bun stays intact even after dancing for hours.
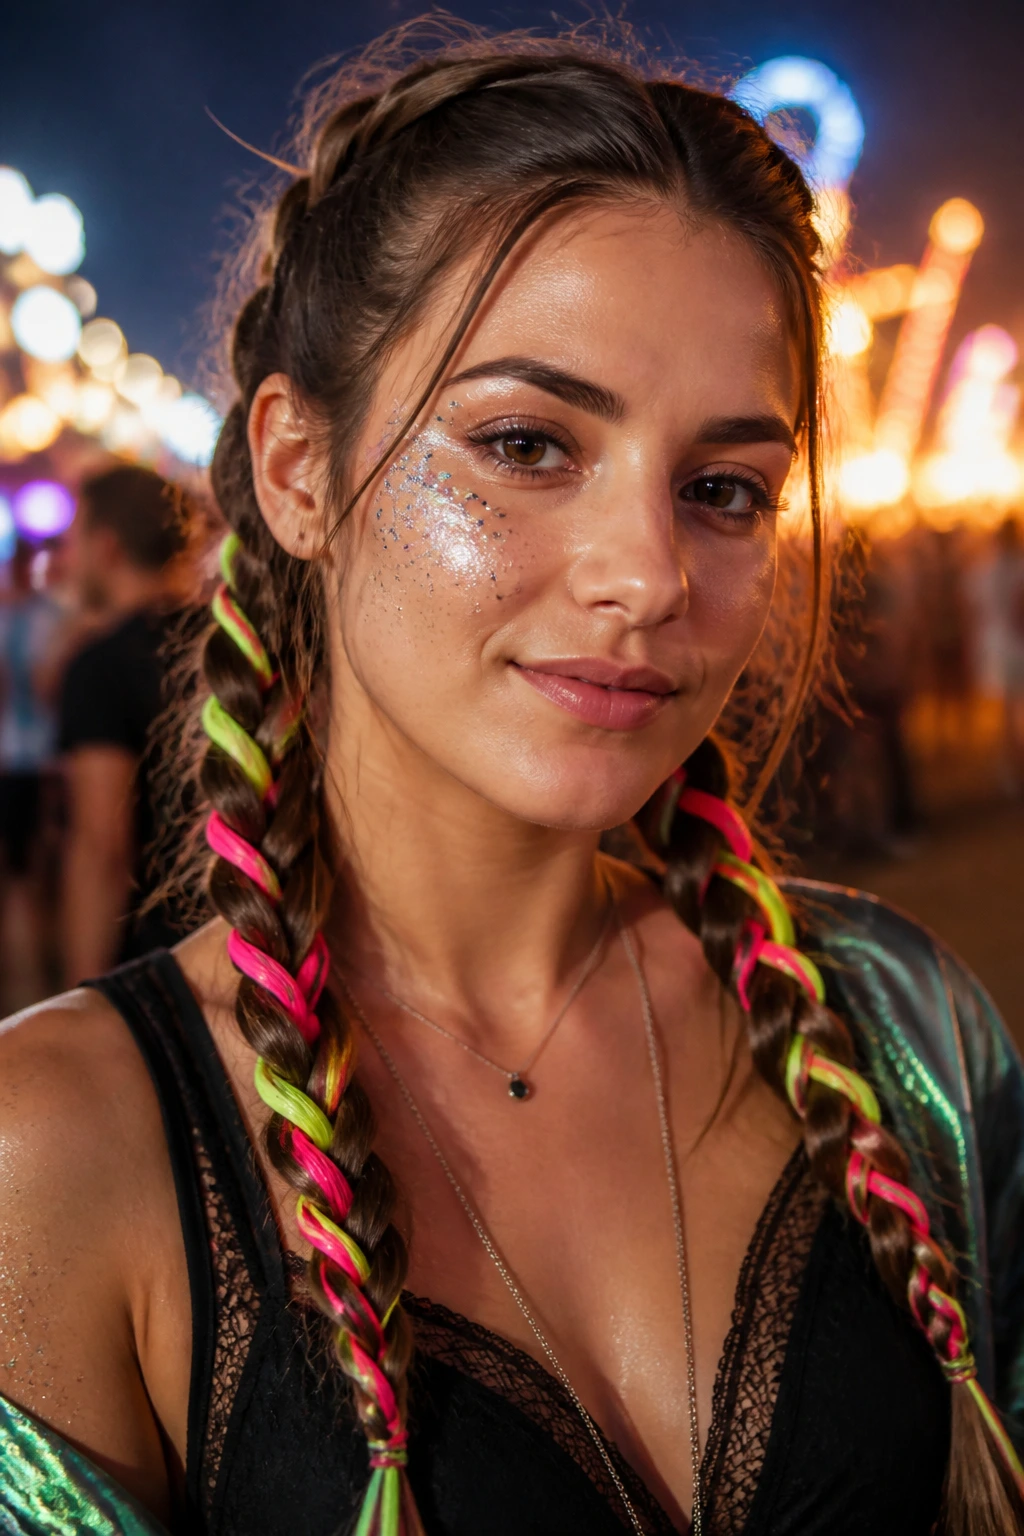
25. High Braid with Neon Hair Extensions
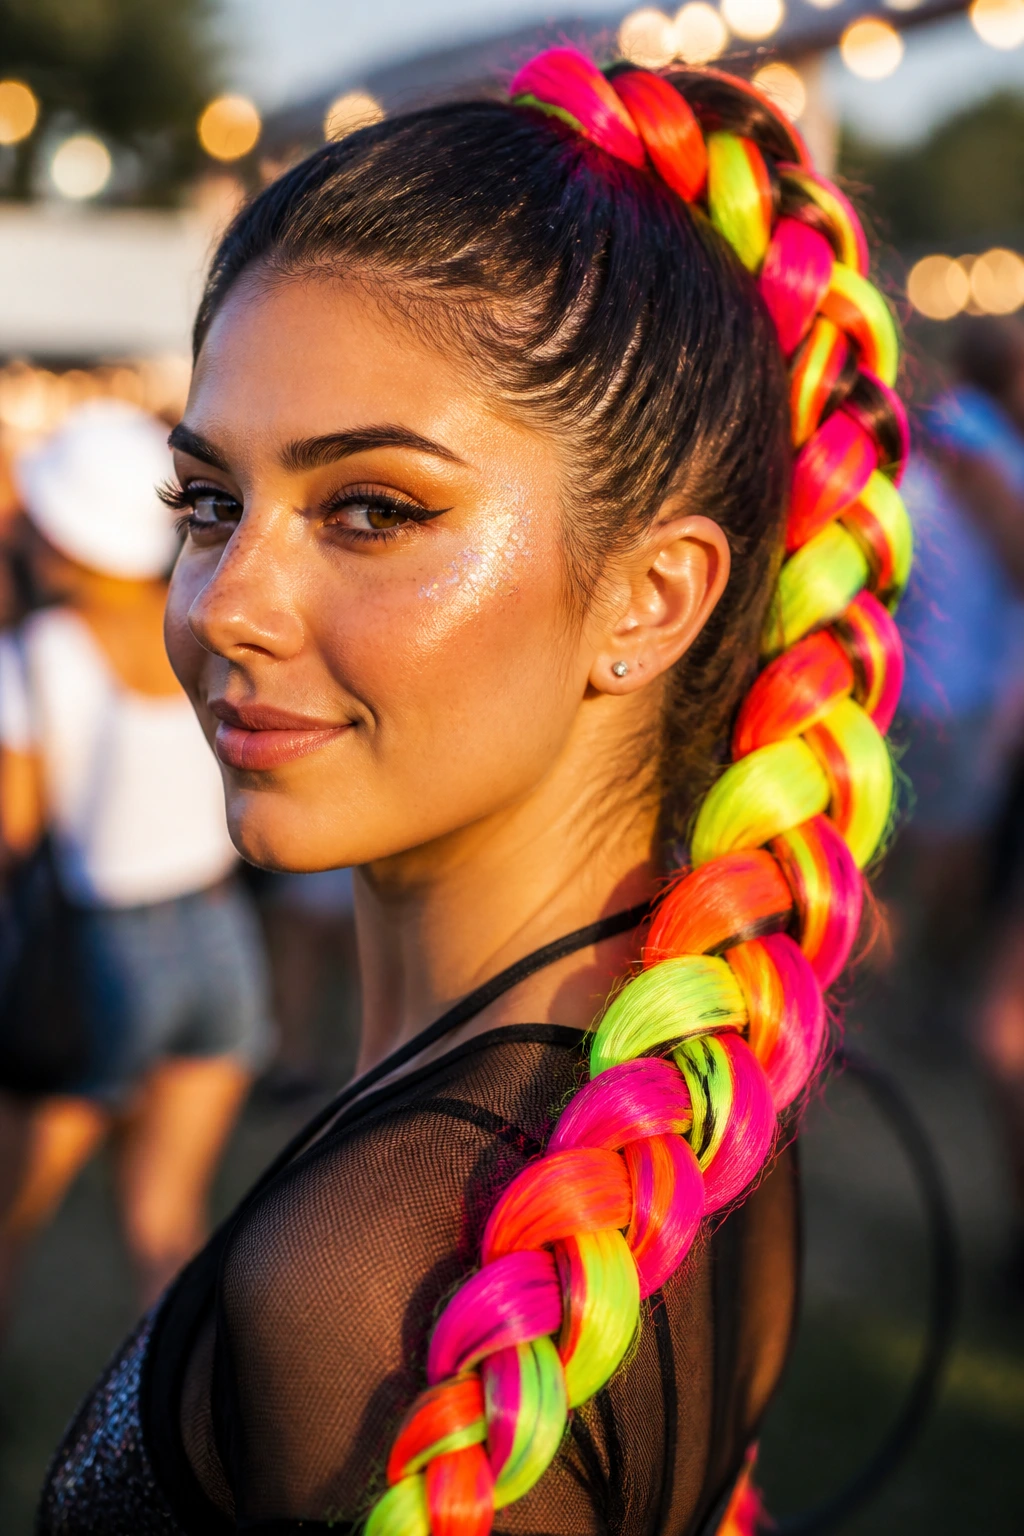
If your natural hair isn’t long or thick enough for the braid of your dreams, use clip-in neon extensions. Start by pulling your hair into a high ponytail, clipping in the extensions, and then braiding them into your own hair. The combination of your natural color and the vibrant extension color creates an incredible, multi-tonal effect that looks like professional styling. This is the ultimate festival hack for getting that massive, thick braid you see in photos.
The Bottom Line
When it comes to festival hair, the goal should always be a balance of security and self-expression. Don’t stress if a few strands come loose or if your waves fall a little flat; that’s the reality of a three-day outdoor event. The most important thing is that you feel comfortable enough to focus on the music rather than your reflection.
Choose a style that matches your tolerance for heat and humidity. If you know you get hot easily, stick with the high buns or tight braids. If you prefer to let your hair down, lean into the textures—crimp it, salt-spray it, and add accessories that can handle a bit of dust. At the end of the day, your hair is just an extension of your festival experience. Make it fun, keep it simple, and enjoy the show.