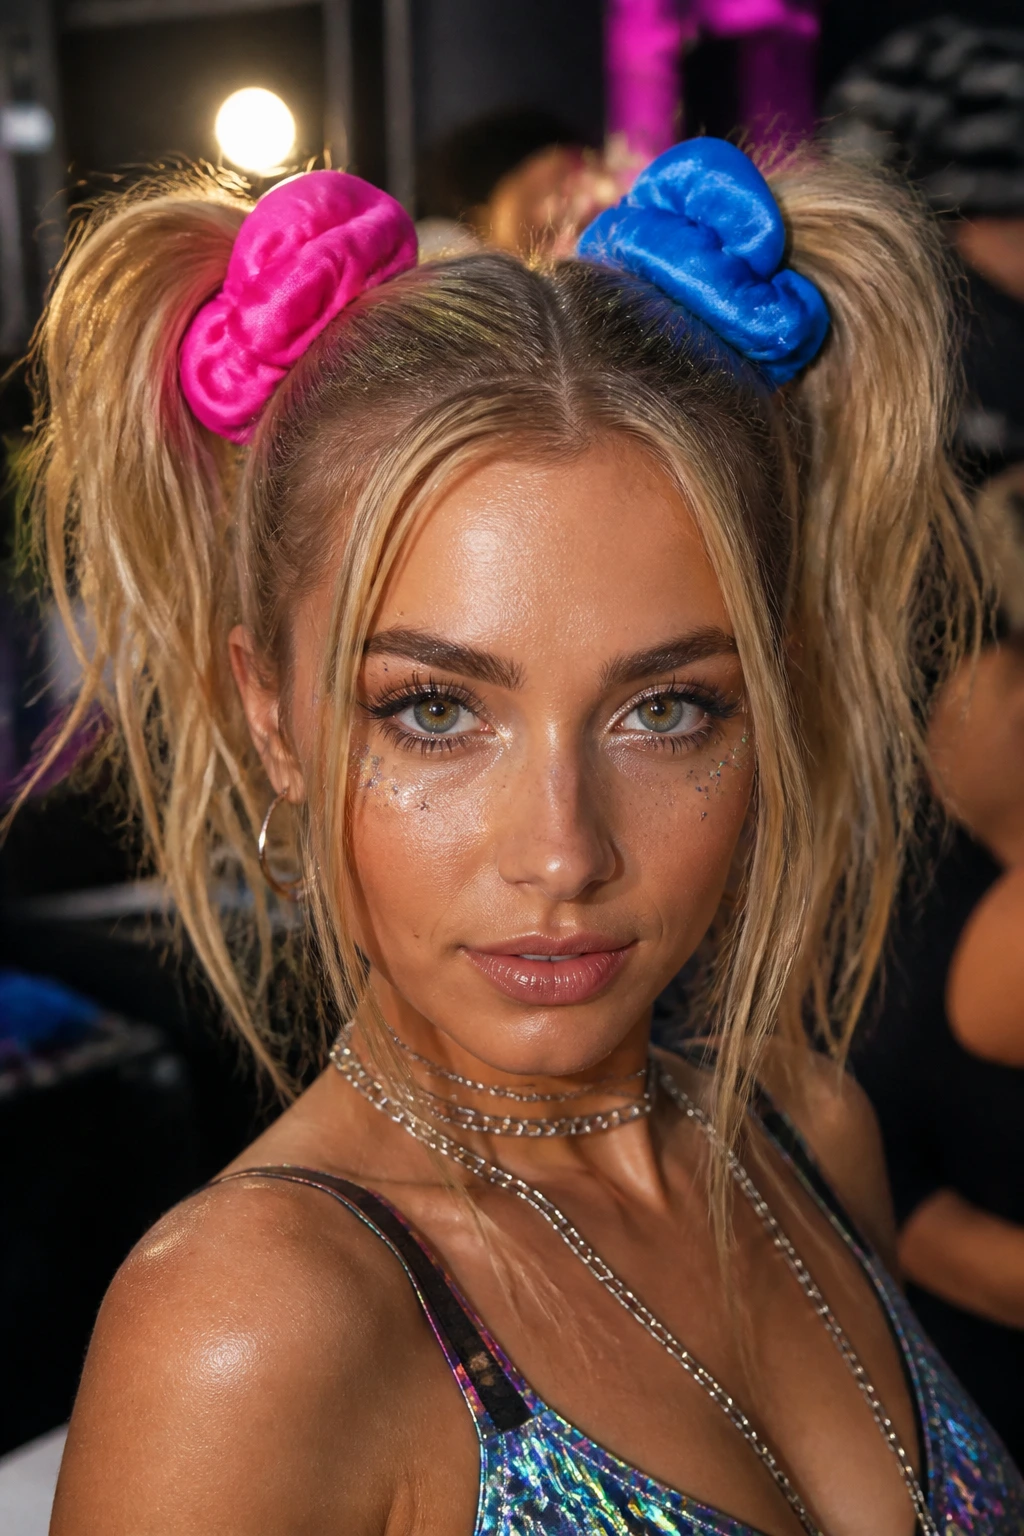
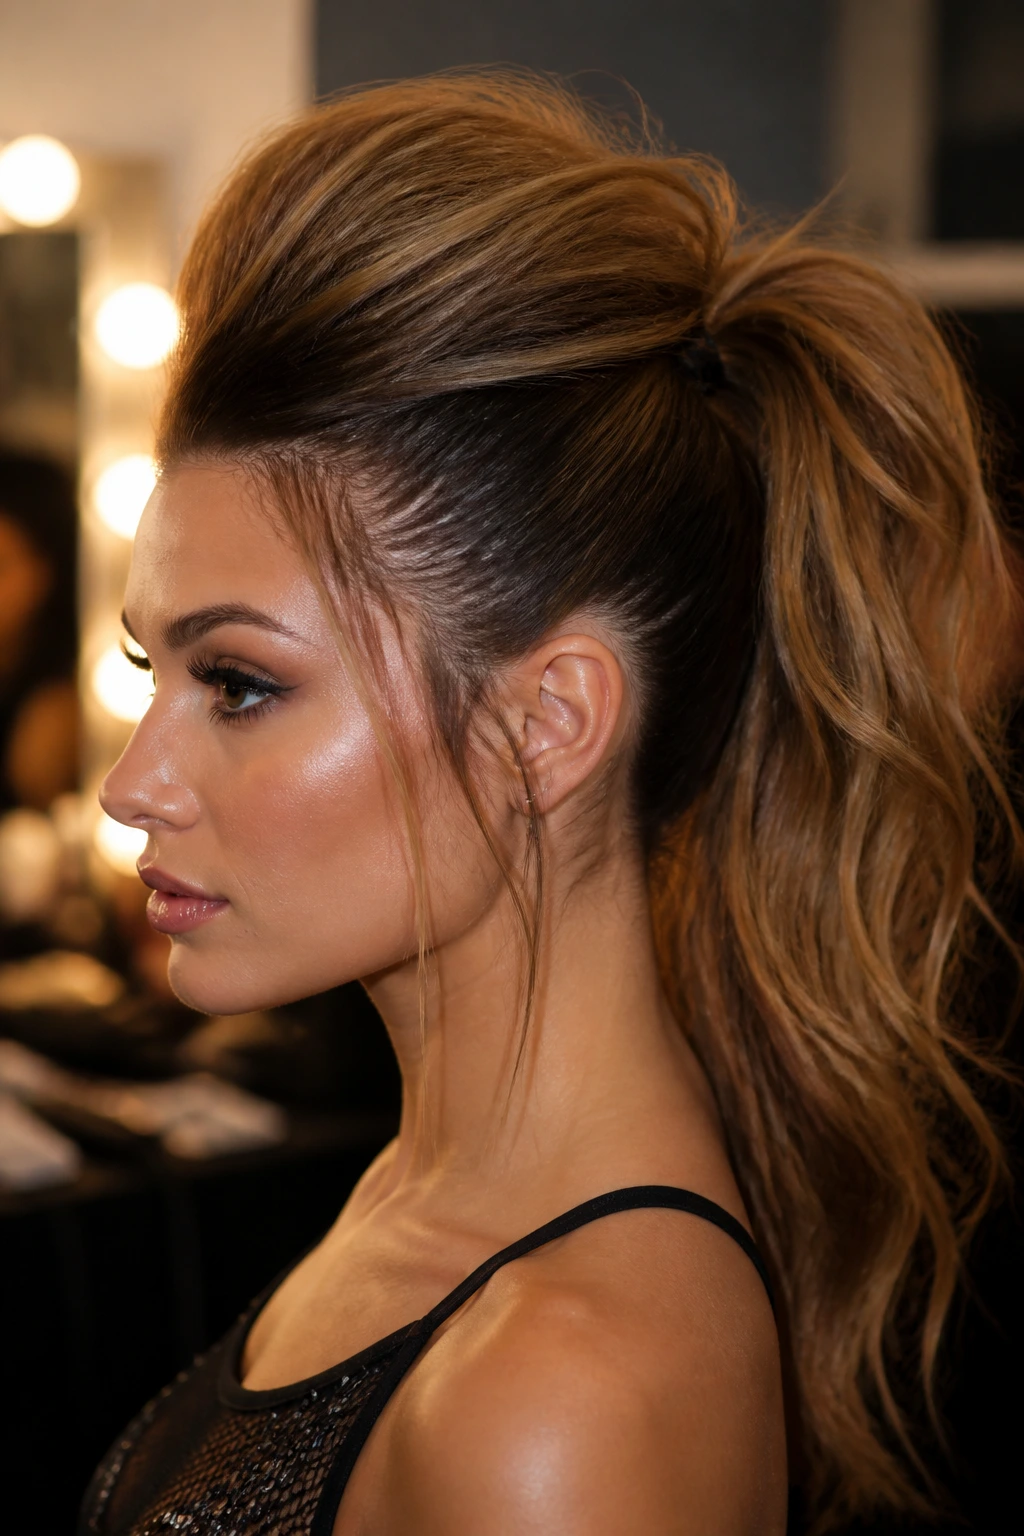
The pulse of a bass drop isn’t just something you hear; it’s something you feel in your marrow, and when you’re standing in a sea of neon lights at a festival, the right look completes that sensory experience. If you are working with fine hair, however, the challenge of styling for a multi-day event can be daunting. You want a look that survives hours of dancing, humidity, and the occasional dust storm, but most heavy-duty styles seem designed for hair twice as thick as yours. The secret isn’t more product—which often weighs down fine strands and leads to a flat, greasy look by the second day—but rather the right structural foundation.
Working with fine hair in a high-energy environment requires a shift in perspective. You aren’t just looking for volume; you are looking for grip. Fine strands are naturally slippery, so the first step in any successful rave style is creating a texture that allows your hair to hold its shape. Whether you are aiming for whimsical space buns, intricate braids, or sleek high-fashion looks, the following strategies will ensure your hair remains a highlight of your festival attire. We are going to explore styles that leverage the natural characteristics of fine hair while keeping things practical, durable, and unmistakably vibrant.
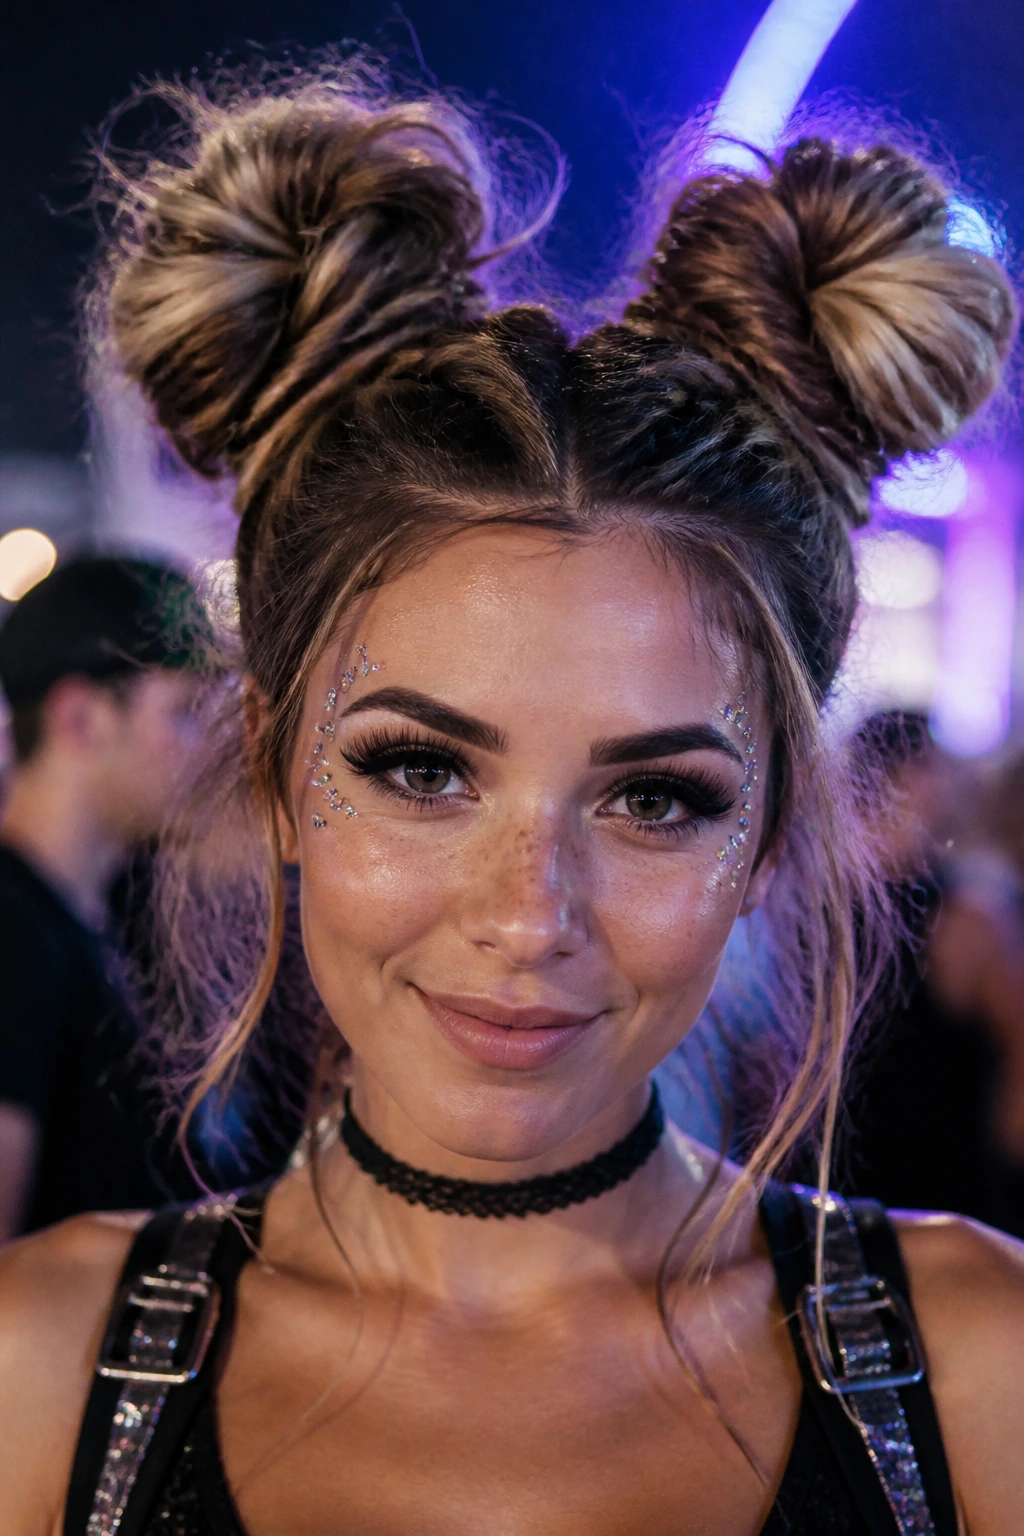
1. Textured High Space Buns
Space buns are the quintessential rave hairstyle, but for fine hair, they can often end up looking like two tiny, sad knots on top of your head. The trick is to build massive volume before you even reach for the hair ties. Start by spraying a generous amount of sea salt spray or a lightweight dry texturizing spray through your lengths. Instead of pulling your hair tight, use a teasing brush to backcomb the sections you intend to bun.
Building Volume for Buns
- Section the top half of your hair into two even pigtails.
- Backcomb the length of each pigtail thoroughly to create a “cushion” of hair.
- Twist the hair loosely rather than wrapping it tightly; a looser twist creates the illusion of more mass.
- Secure with clear elastics, then gently pull at the edges of the bun to “pancake” it into a wider, fuller shape.
Pro tip: Hide the ends of your hair by tucking them into the elastic base and securing them with a small U-pin for a polished, seamless finish.
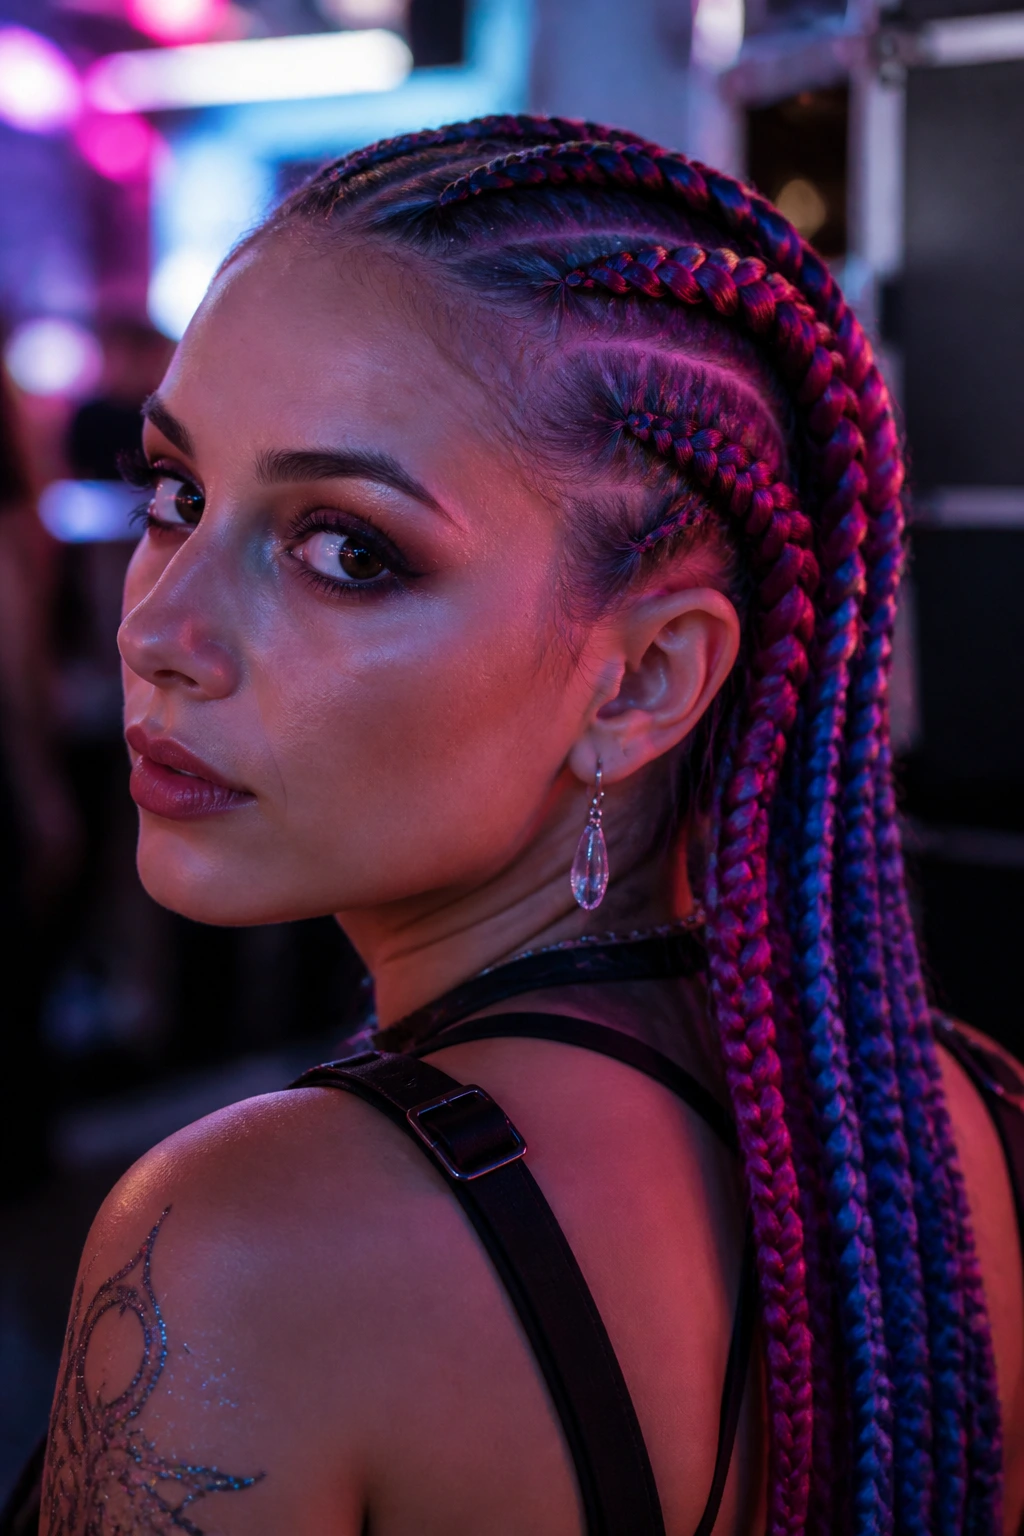
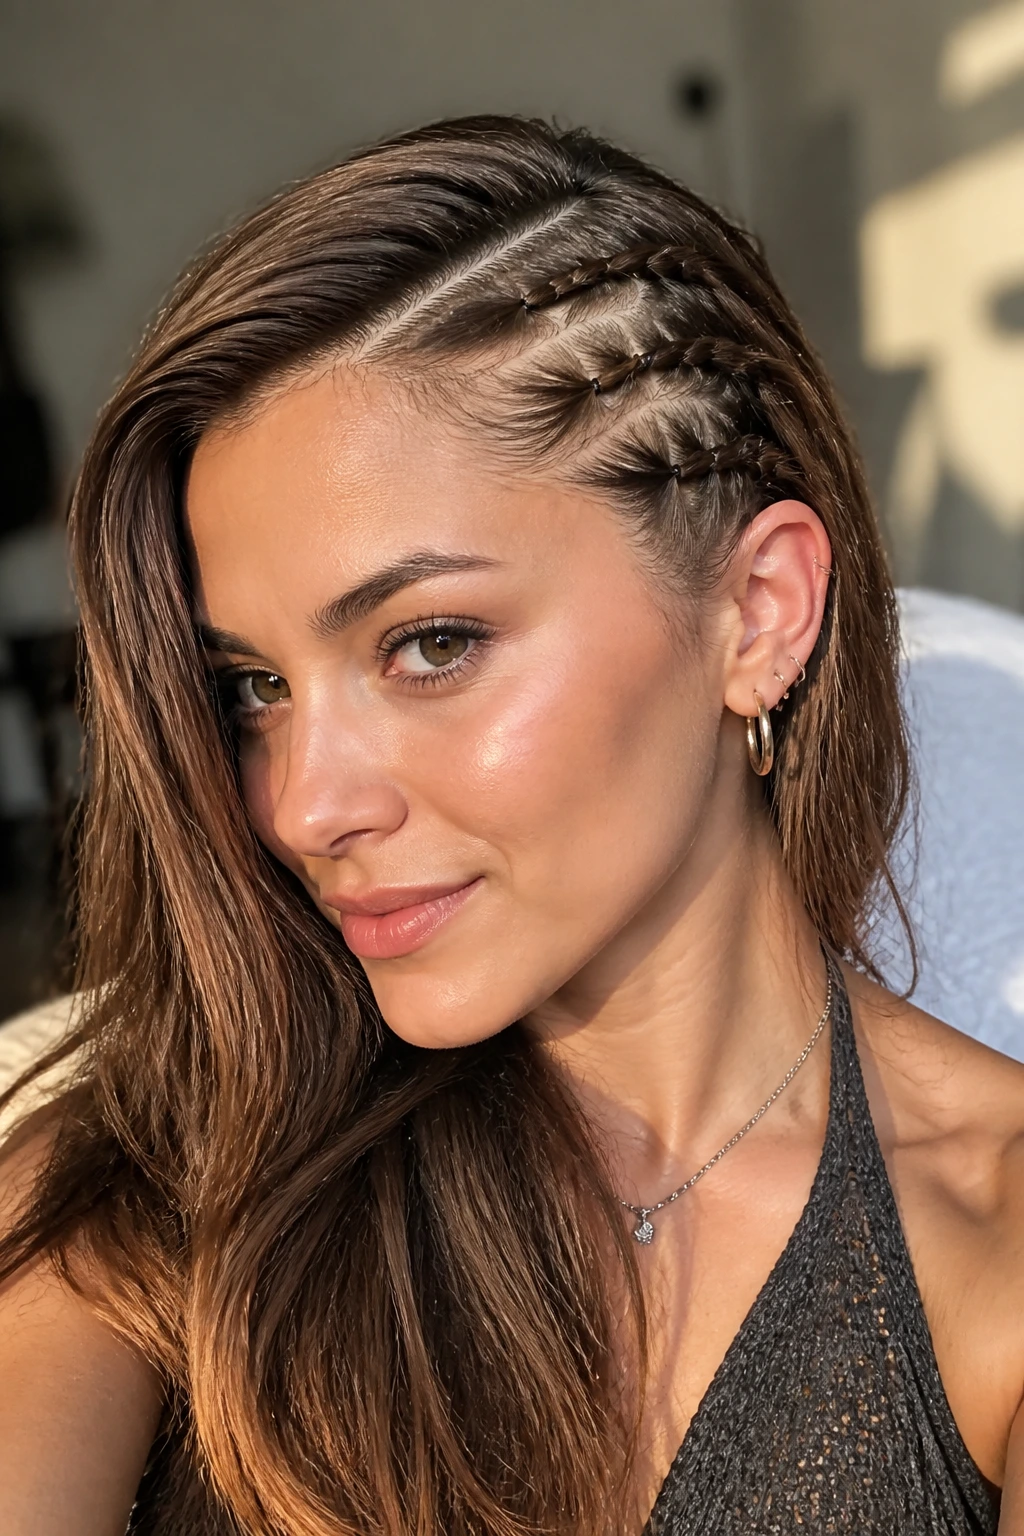
2. Dutch Braided Pigtails with Glitter Roots
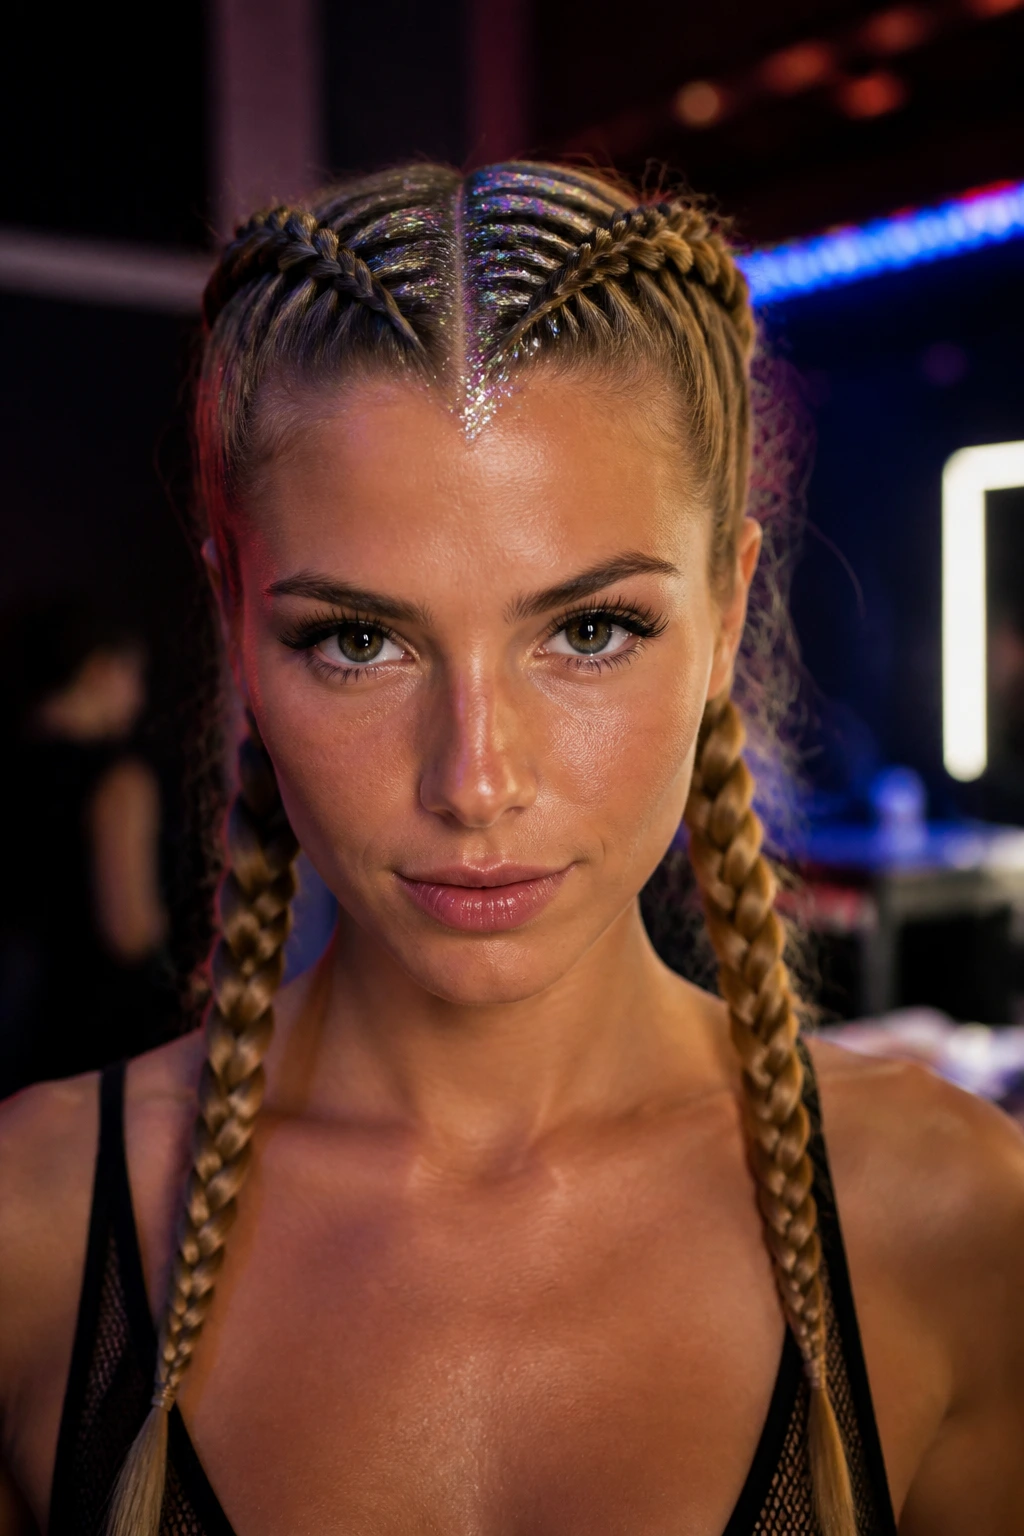
Dutch braids are incredibly functional because they lock fine hair into place, preventing tangles during intense sets. By placing the braids tightly against the scalp, you create a structured look that is less prone to drooping. Adding glitter to the part is not just an aesthetic choice; the heavy concentration of gel used to adhere the glitter acts like a light-hold styling product that keeps flyaways at bay.
Achieving the Perfect Dutch Braid
Unlike a French braid where you cross strands over each other, in a Dutch braid, you cross them under. This pops the braid out, making it look thicker and more three-dimensional. Since your hair is fine, don’t worry if it doesn’t look like a thick rope immediately. Once you’ve secured the ends, go back through the braid and tug on the outer loops—this process, often called “pancaking,” will instantly double the visual size of the braid.
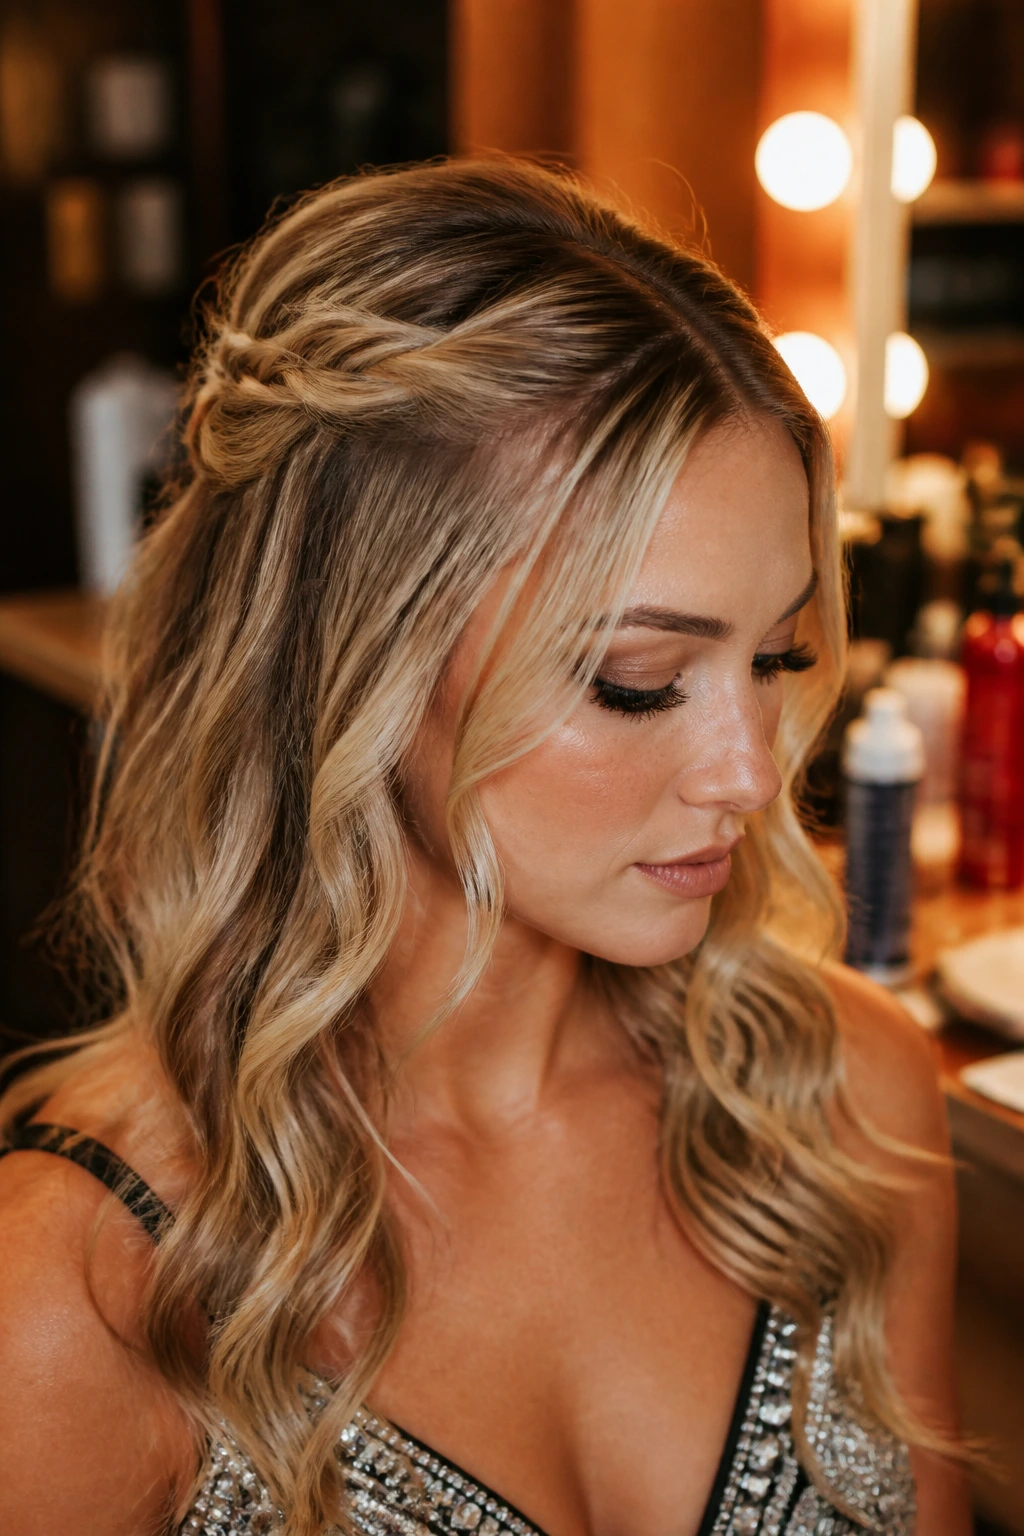
3. Half-Up Top Knot with Crimped Lengths
Crimping is a lifesaver for fine hair because it literally alters the shape of the hair follicle, making it physically wider and more resistant to falling flat. By crimping the bottom half of your hair and pulling the top into a messy top knot, you achieve a balance between structured style and flowing, voluminous texture.
Why Crimping Works
Crimping creates a zigzag pattern that prevents hair from sitting perfectly flat against the scalp or against itself. This creates tiny air pockets throughout the hair, which boosts volume without the need for heavy mousses or backcombing. Use a ceramic crimper on a medium heat setting to avoid heat damage, as fine hair is more susceptible to breakage than thicker textures.
4. Double Bubble Ponytails
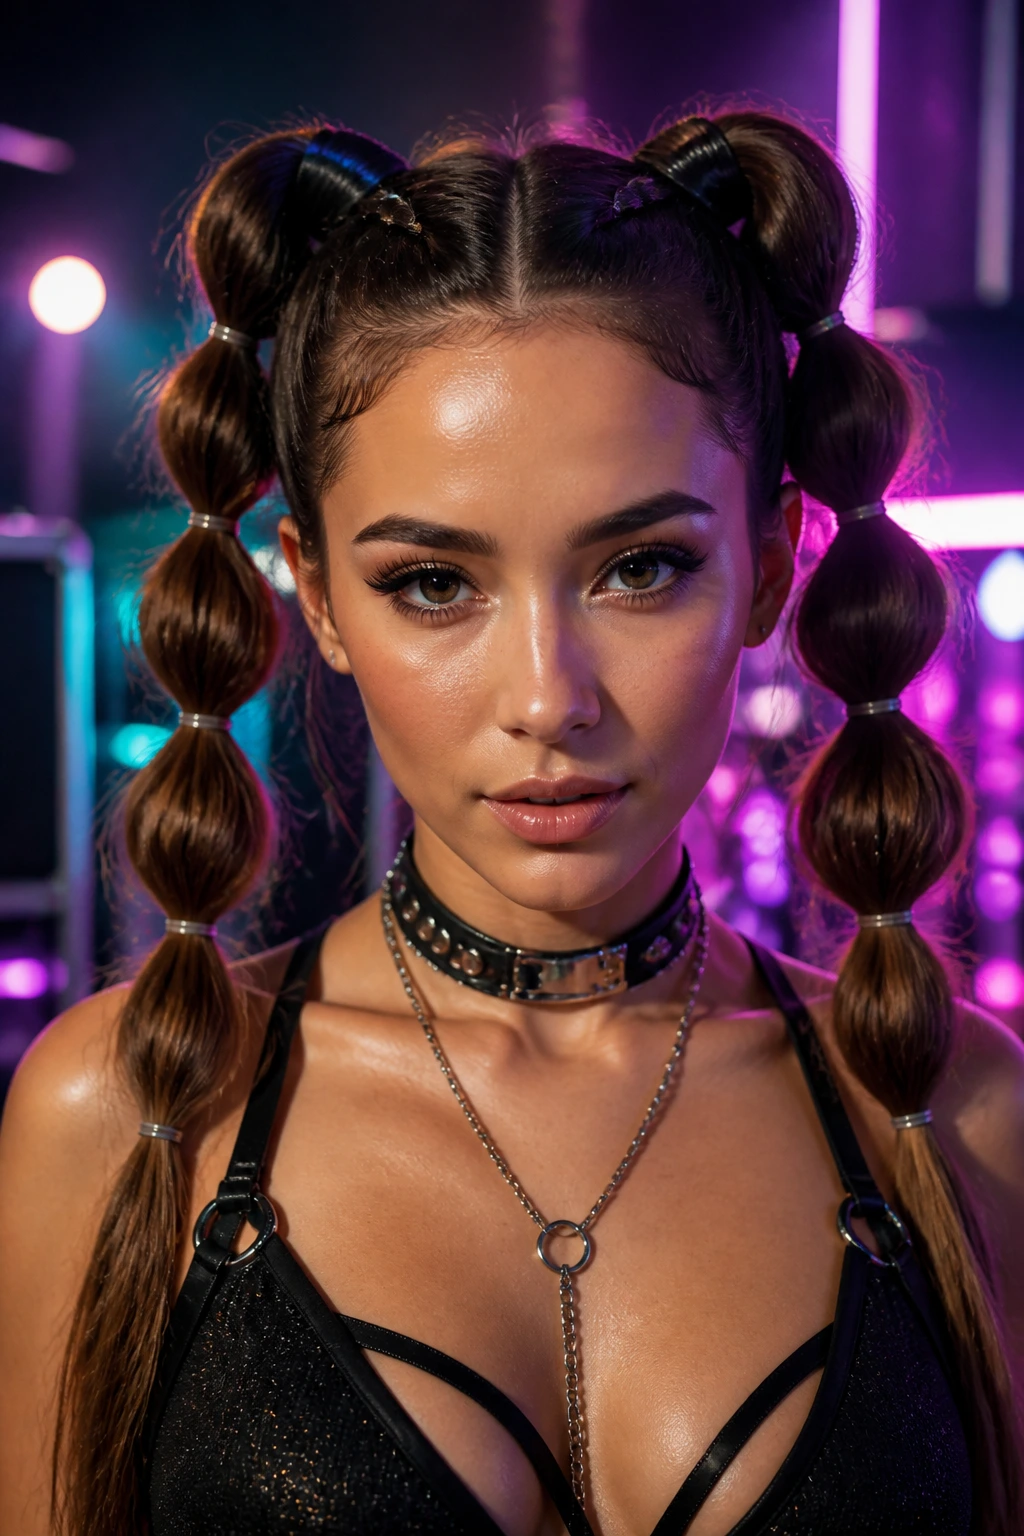
If braids feel too time-consuming, bubble ponytails are an excellent alternative that provides a fun, playful silhouette. They are surprisingly effective for fine hair because they rely on elastics to create “balls” of hair, effectively cheating the appearance of thickness.
The Construction Process
- Gather your hair into a high ponytail and secure it with a sturdy, snag-free band.
- Place a second elastic about two inches down the length of the ponytail.
- Gently pull at the hair between the two elastics to puff it out into a “bubble.”
- Repeat this process down the length of the pony.
- Crucially, pull the sides of each section horizontally to make the bubble rounder and more voluminous.
5. Sleek High Pony with Neon Extensions
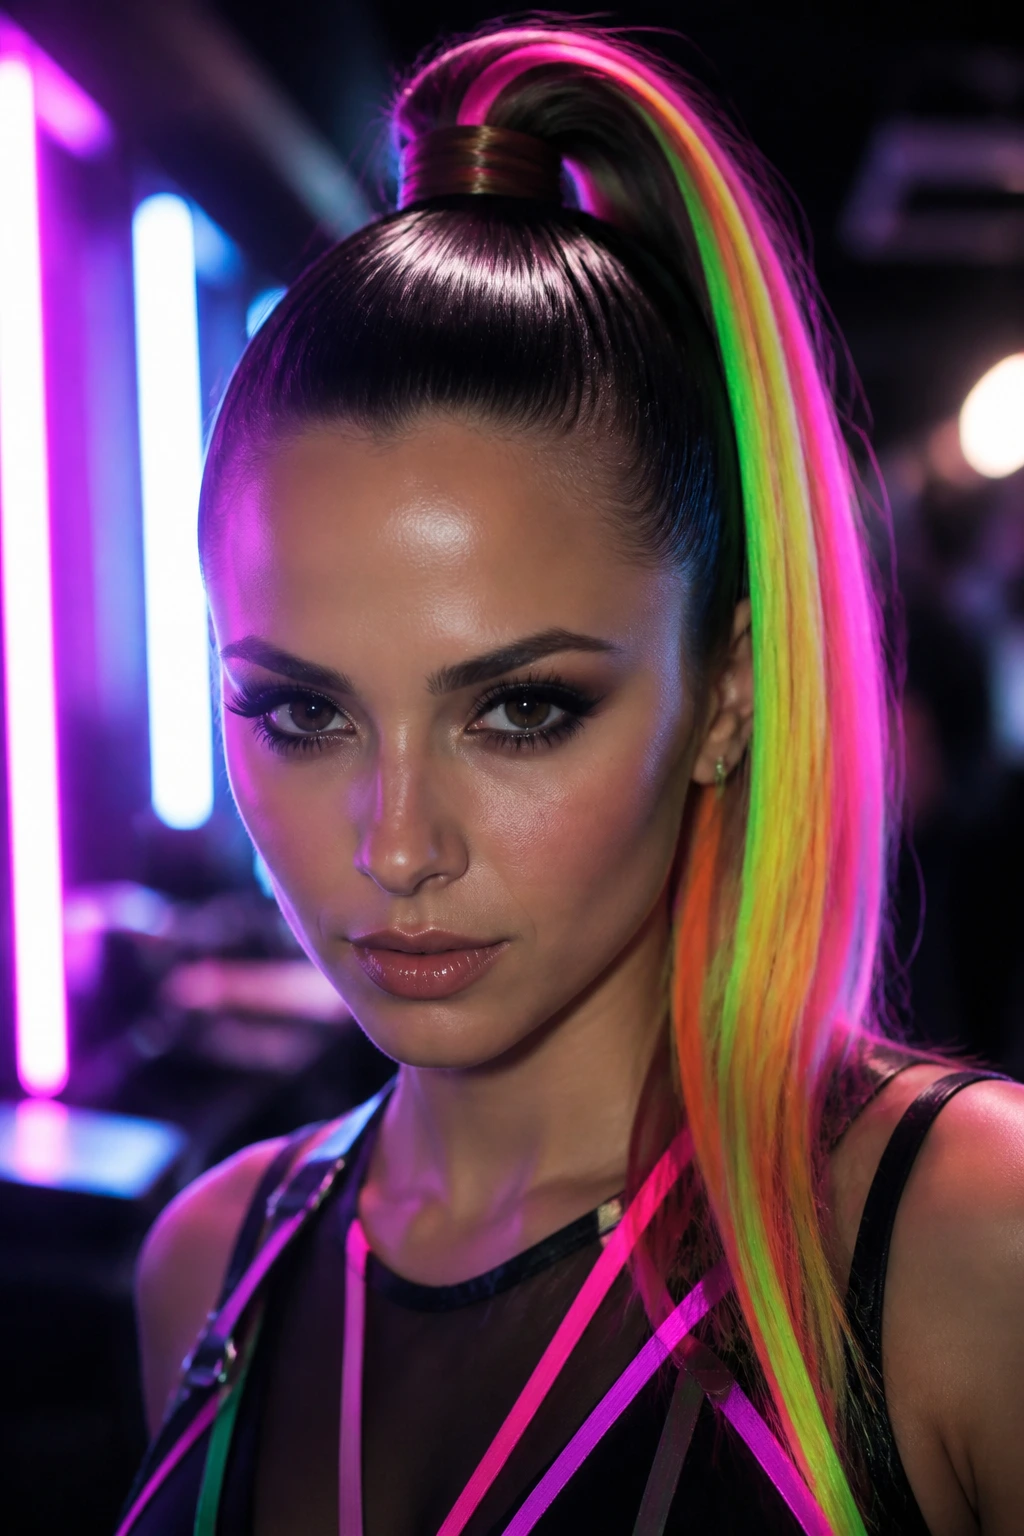
Sometimes, the best way to deal with fine hair is to augment it. A high, sleek ponytail looks incredible, but if your ponytail feels a bit thin, adding a clip-in extension or a synthetic wrap-around pony is a game-changer. Choose a high-contrast neon shade to match your outfit and let the hair be the accessory itself.
Managing Sleekness without Greasiness
To get that glass-hair look, use a light smoothing oil rather than a heavy wax. A tiny drop of jojoba or argan oil rubbed between your palms and smoothed over the surface of the hair will tame frizz without making your fine strands look like they haven’t been washed in a week. Secure the pony with a bungee cord hair tie rather than a standard elastic for maximum tension.
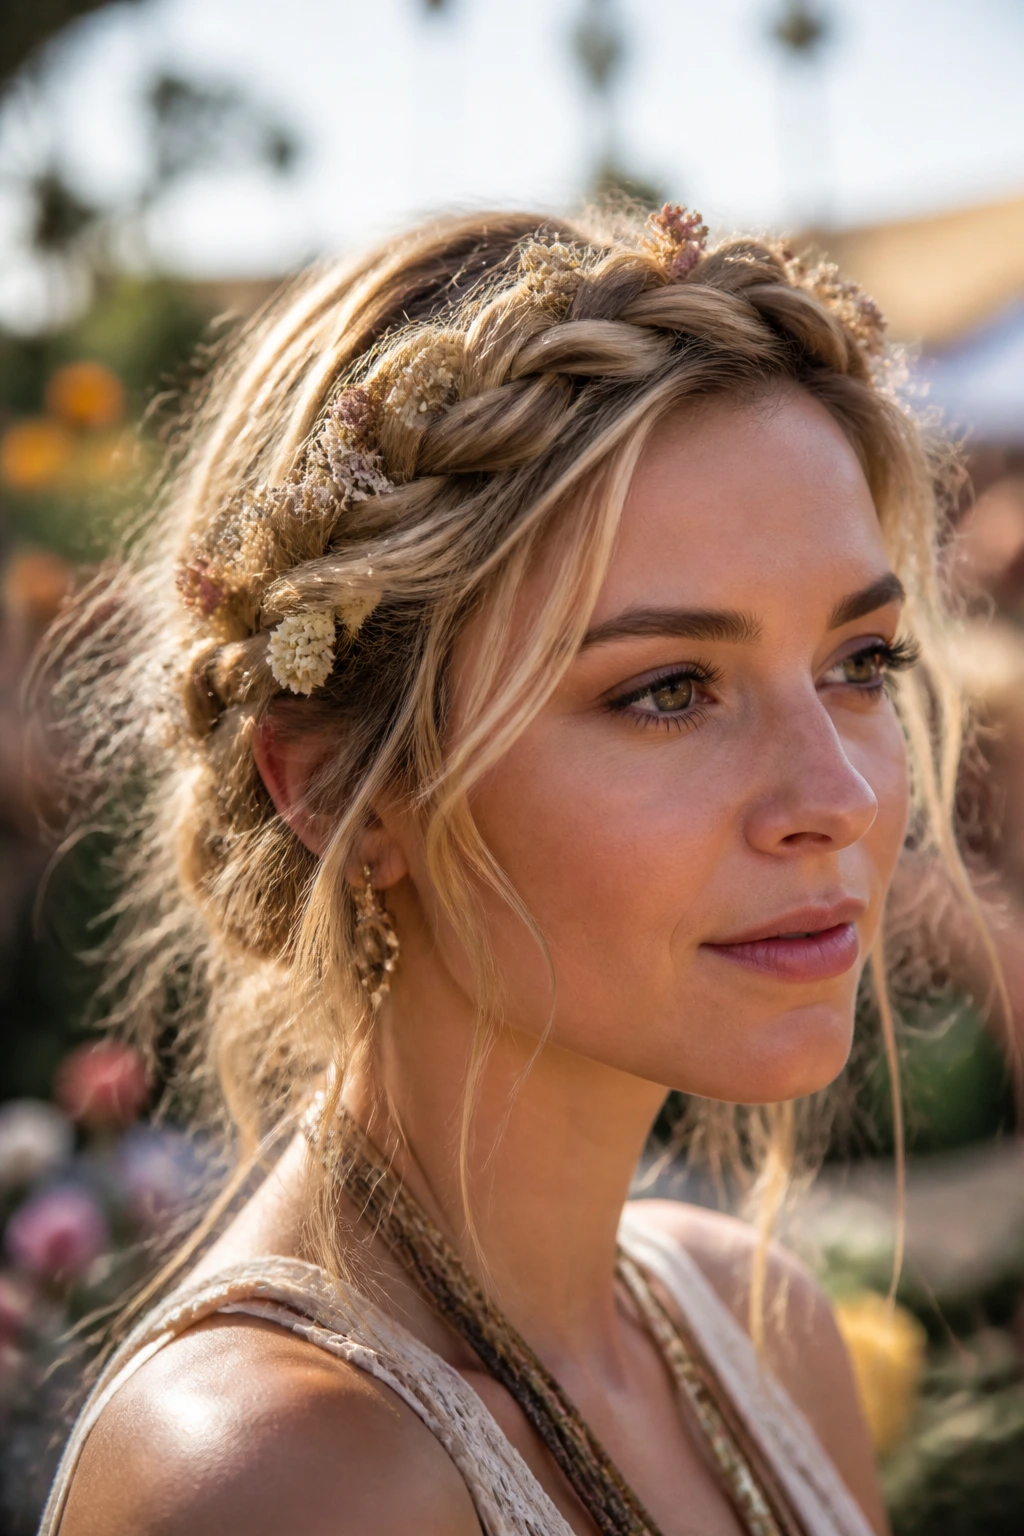
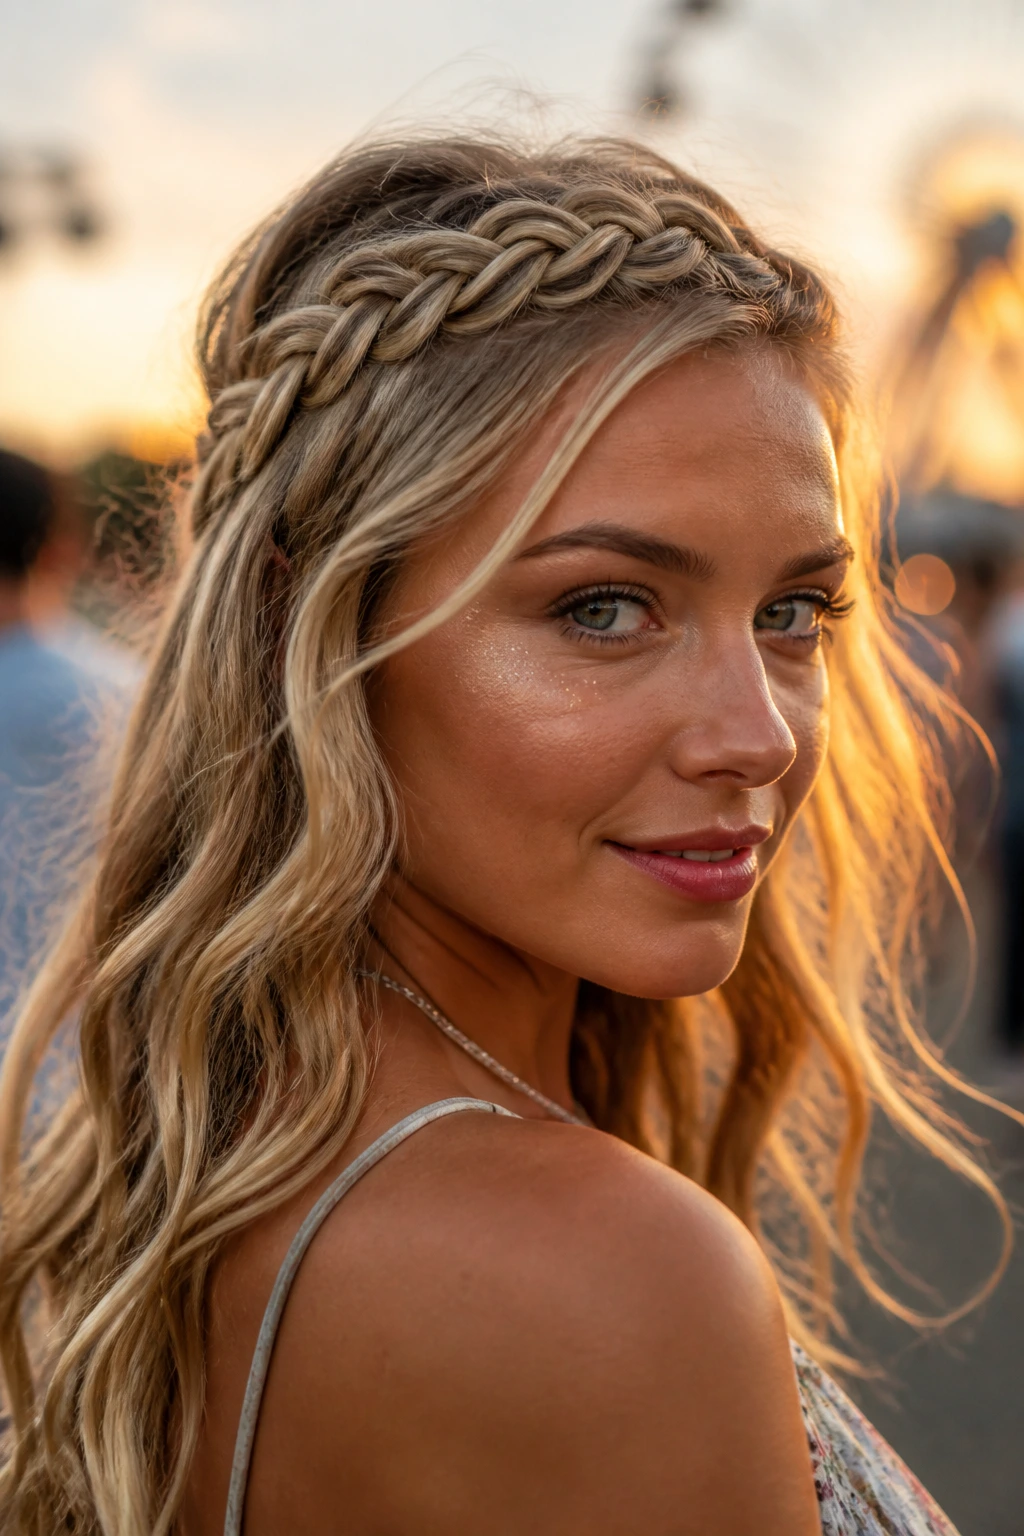
6. Messy Crown Braid with Dried Flowers
Crown braids are the height of festival elegance, and they are brilliant for keeping hair off your neck during hot, crowded nights. By working a small amount of root-lifting powder into the hair before you start braiding, you provide the necessary grip to keep the braid from slipping backward.
Adding the Floral Touch
Once the braid is secure, weave in small stems of baby’s breath or individual faux daisies. The flowers provide extra visual interest and also help “camouflage” any areas where the braid might be thinner. Make sure to use bobby pins that match your natural hair color; you don’t want the hardware to distract from the delicate floral work.
7. Chunky Side Braid with Rings
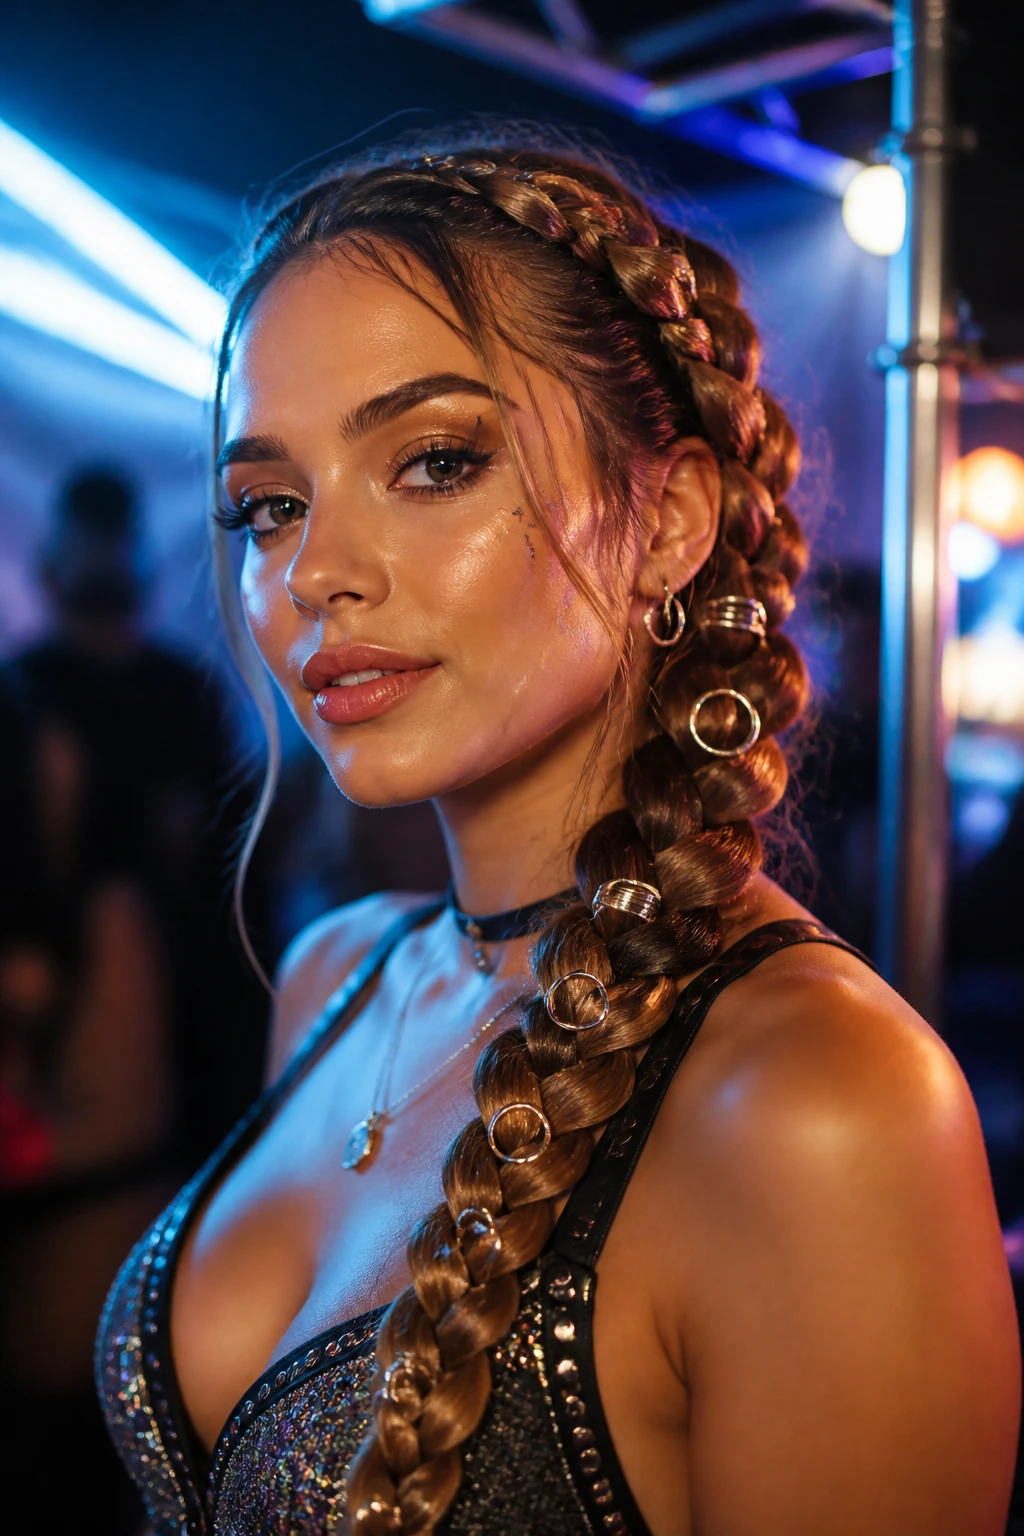
Adding metal rings or cuffs to a braid is a classic rave aesthetic that looks great with fine hair because it adds weight and structure to the braid itself. The metal cuffs keep the hair loops from loosening, ensuring the style holds up for the duration of a long event.
Choosing Your Cuffs
Use gold or silver jump rings that are easily bendable. Slide them onto the finished braid at varying intervals. If you feel like your braid is too thin to hold them securely, wrap a small, clear elastic around the braid at the spot where you want the ring to sit, then thread the ring over that elastic. It’s a small trick that prevents the rings from sliding down or falling out during a dance-heavy night.
8. High-Contrast Two-Tone Braids
Using colored hair wax—which washes out—can add depth to fine hair. If you have blonde or light hair, use a dark temporary wax; if you have dark hair, opt for a vibrant neon. The pigment adds a slight physical coating to the hair, which creates a surprising amount of texture and grit, making the hair easier to style and manipulate.
How to Apply Color Wax
- Wear gloves to prevent staining your hands.
- Take a small amount of wax and warm it between your fingers until it becomes creamy.
- Apply it to the sections of hair before you braid.
- Once the hair is braided, the color will be locked in, and the wax will act as a texturizing agent to prevent the style from loosening.
9. The “Cyberpunk” Half-Up Spikes
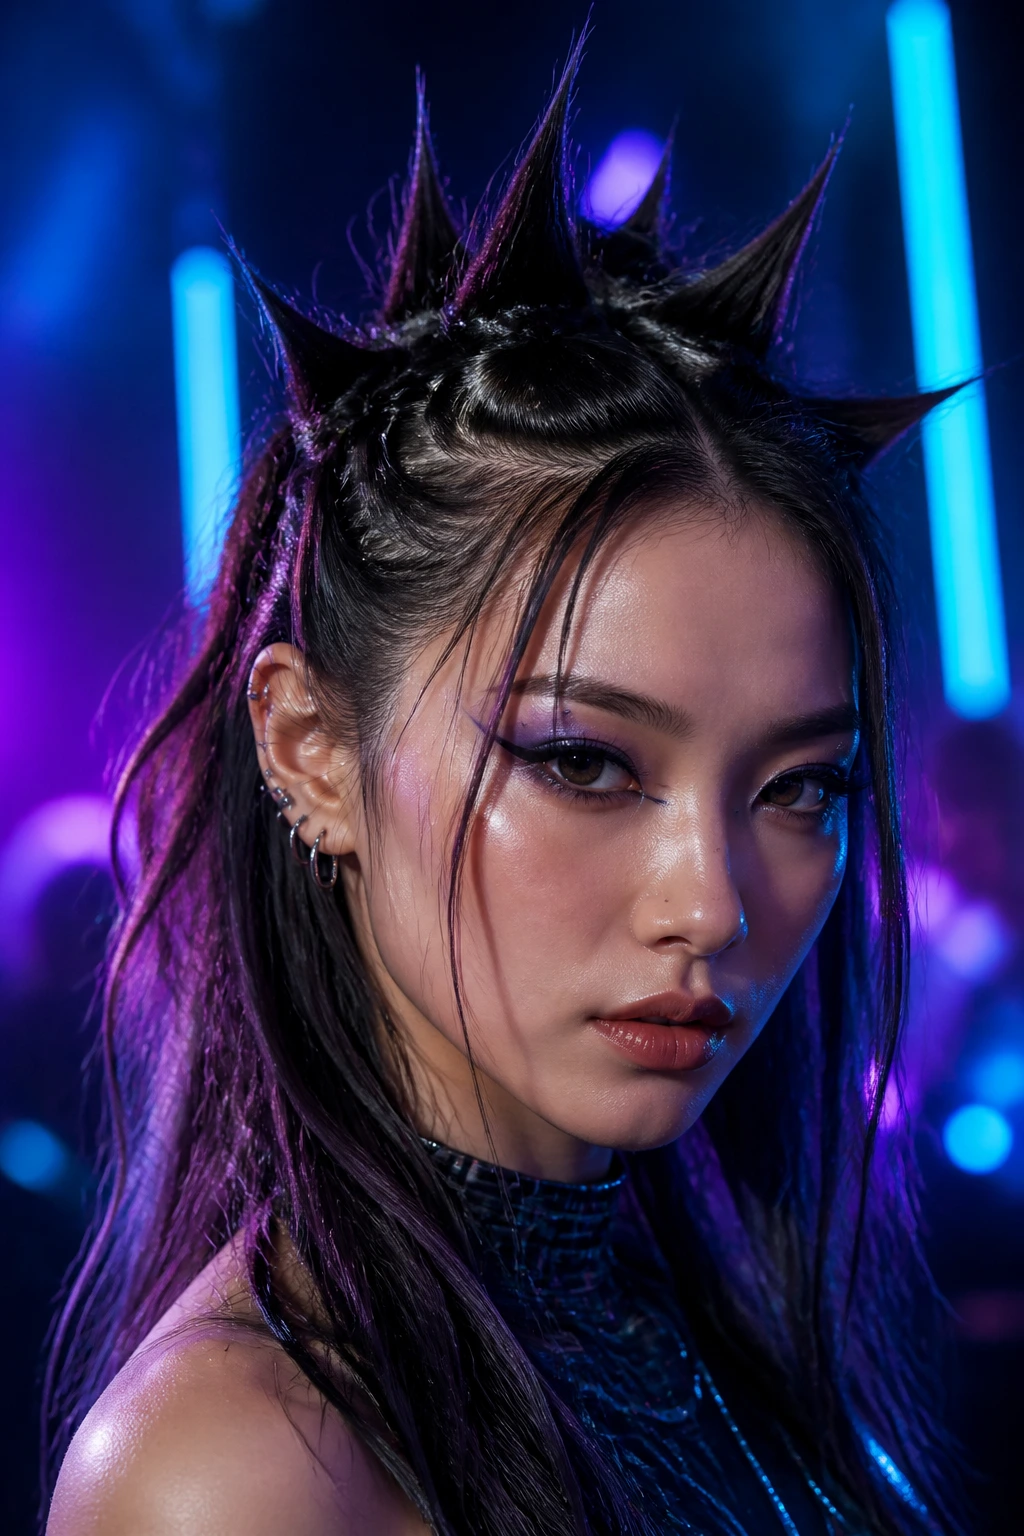
For those who prefer a more futuristic, edgy aesthetic, spikey buns are a great way to showcase fine hair. Use a high-hold gel to create small, deliberate spikes at the top of your head, leaving the rest of your hair loose and textured.
Executing the Spikes
The key to a good spike is a strong-hold, water-based gel. Take small, inch-wide sections of hair and twist them tightly from the root to the tip, applying the gel as you go. Because your hair is fine, it will hold this twisted shape much better than thick, heavy hair might. Use a blow-dryer on a low-heat setting for a few seconds to “set” the gel, and you will have spikes that last through the most aggressive headbanging.
10. Twisted Side-Swept Accents
You don’t always need to pull all your hair back. A side-swept style with a series of small, tight twists pinned back with bobby pins creates a focal point that draws attention to the side of your face, while the rest of your hair remains loose and wavy. This is great for fine hair because it doesn’t require pulling your entire head of hair into a tight structure.
The Twist Technique
- Part your hair deep on one side.
- Take thin, horizontal sections starting at the hairline.
- Twist each section away from your face.
- Pin the twist behind your ear with a pin that has a decorative head, such as a rhinestone or a tiny star.
- Repeat three or four times to create a “cascading” effect.
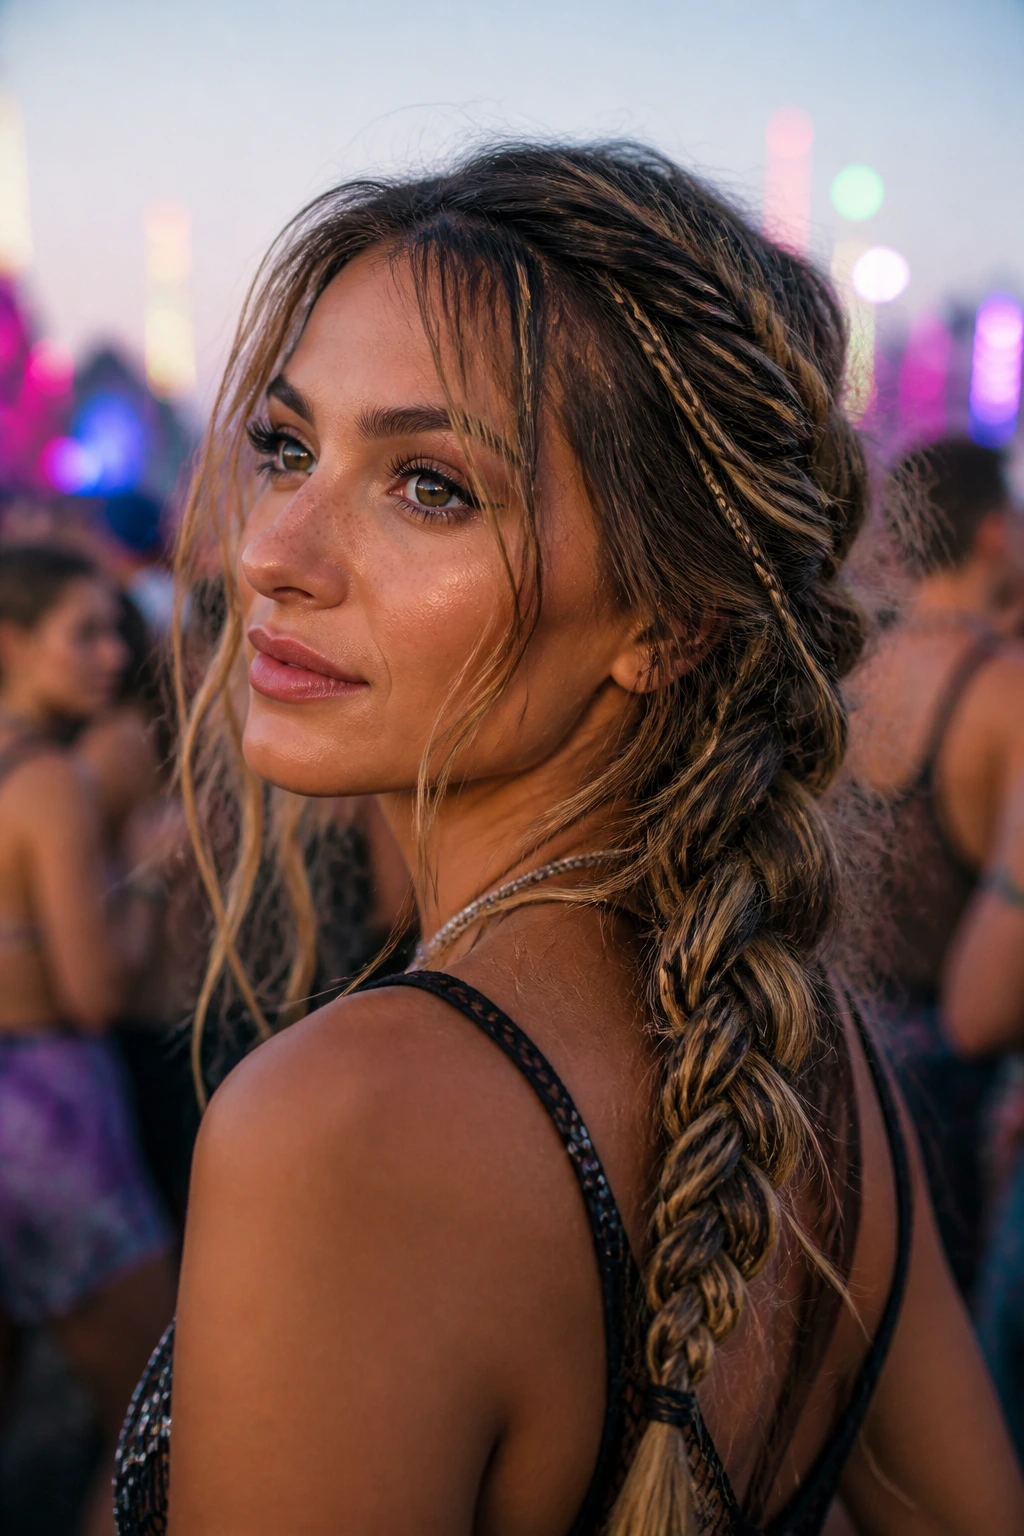
11. Scarf-Braided Ponytail
A silk or satin scarf can be braided directly into your hair. This is fantastic for fine hair because the fabric of the scarf takes up space, making the braid look much larger than it would on its own. Choose a holographic or neon scarf to lean into the festival vibe.
Integrating the Fabric
Fold your scarf into a long, thin strip. Tie it securely to the base of your ponytail using a clear elastic. Divide your ponytail into two sections, using the scarf as the third “strand” of a braid. As you braid, keep the scarf flat against the hair to ensure it stays centered. Secure the bottom with a clear elastic, and you’ll have a high-volume braid that is also a major fashion statement.
12. Headband-Locked Messy Bun
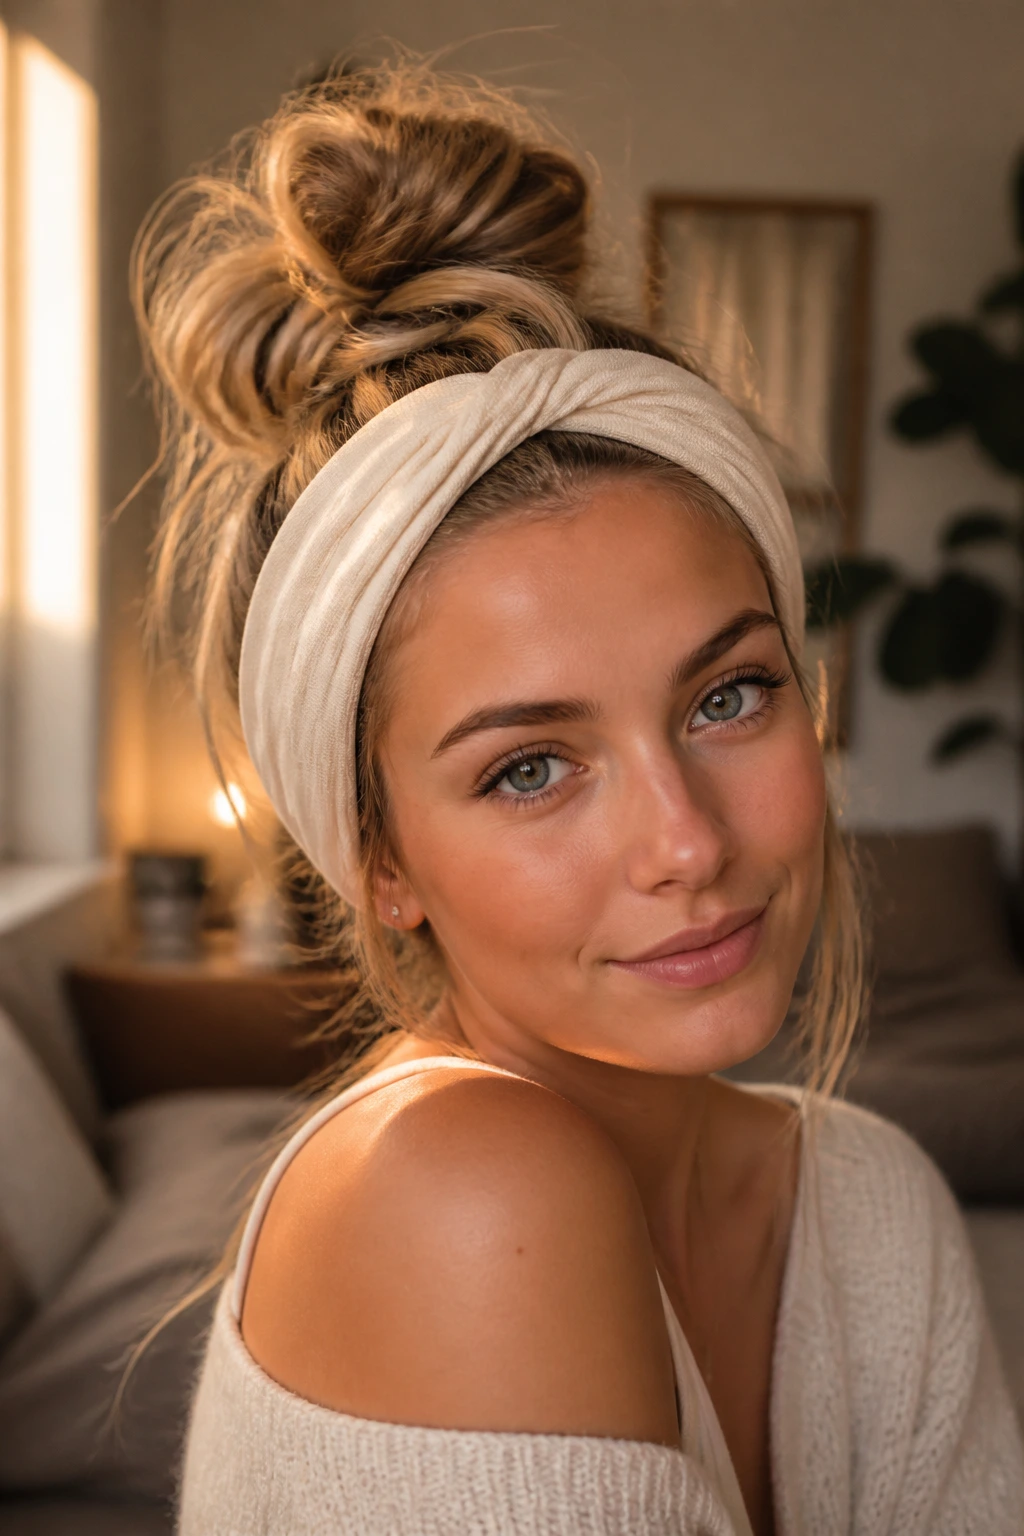
Sometimes the simplest solution is the most effective. A wide, elasticized fabric headband is a perfect base for a messy bun. It covers the hairline, provides grip, and adds a layer of volume that acts as a structural anchor for your hair.
Positioning for Maximum Impact
Slide the headband over your head so it sits around your neck. Pull your hair up into a high, loose bun, and then pull the front of the headband up to your hairline. Tuck any flyaways underneath the band. The band keeps everything secure, and because it sits at the roots, it gives your hair an instant “lift” that lasts for hours.
13. Double-Braided Mohawk
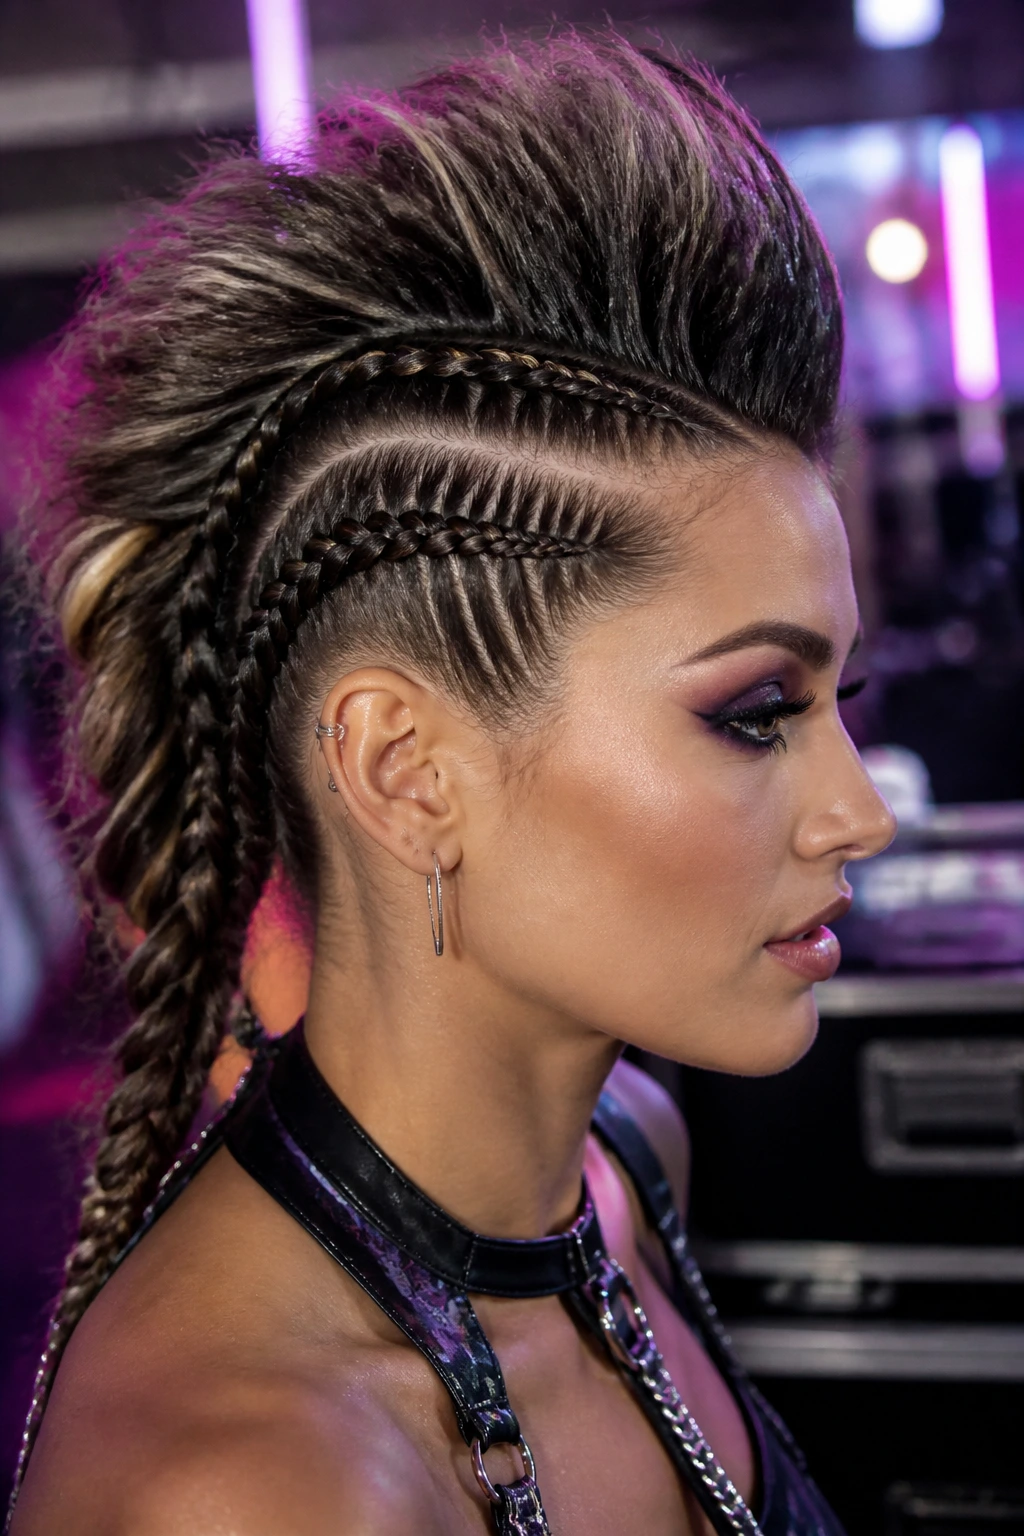
A mohawk style created by braiding the sides of the head tightly and leaving the center voluminous is a bold look that works particularly well with fine hair. Fine hair is much easier to pin into tight, flat braids along the sides of the head than coarser hair, which can be bulky and difficult to manage.
Managing the Center
Once the sides are braided tightly against the scalp, use a wide-tooth comb to gently tease the center section of hair. Apply a light-hold hairspray to the roots of this section to ensure it stands up tall. If you want even more volume, use a small crimper just on the roots of the center section before styling.
14. Retro-Inspired Space Pigtails
Think of this as a younger sibling to the space bun—pigtails that are teased to the extreme. Instead of trying to smooth your hair, lean into the “messy” look. Use a teasing brush to create a bird’s nest of volume at the roots of each pigtail before securing them with colorful, oversized scrunchies.
Why Scrunchies Are Key
Scrunchies are much gentler on fine hair than thin rubber bands, and their volume helps mask the fact that your pigtails might be thin. Match your scrunchies to your outfit’s color scheme to create a cohesive look. Because the hair is teased, the scrunchies will have more “surface area” to grip onto, meaning they won’t slide down your head while you are moving around.
15. The “Waterfall” Braid with Neon Extensions
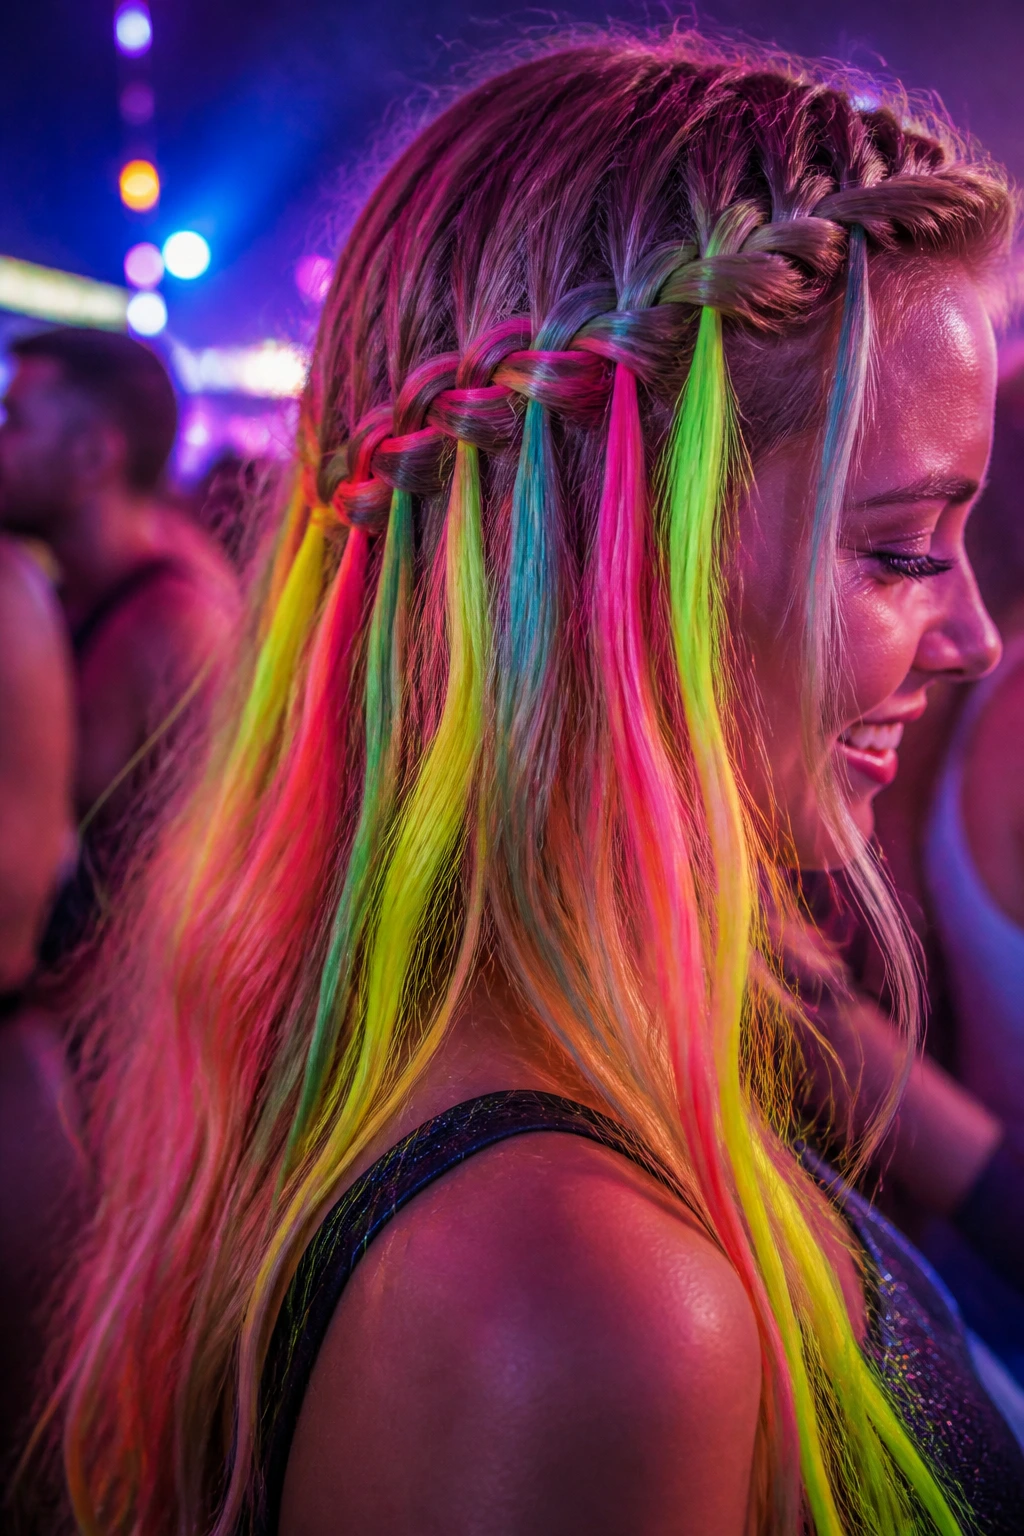
A waterfall braid is one that allows hair to hang down through the braid instead of incorporating it all in. This is perfect for fine hair because it keeps the majority of your hair loose and visible. By weaving in synthetic neon clip-ins before you start the braid, you add density that makes the braid look professional and intricate.
Placing the Extensions
Attach the extensions near the roots where you plan to start the braid. As you braid across the back of your head, incorporate the extension hair into the weave. This hides the clip-in mechanism completely and ensures that the extra weight of the extensions is distributed evenly across the braid, preventing any tugging or discomfort.
16. Criss-Cross Headband Braid
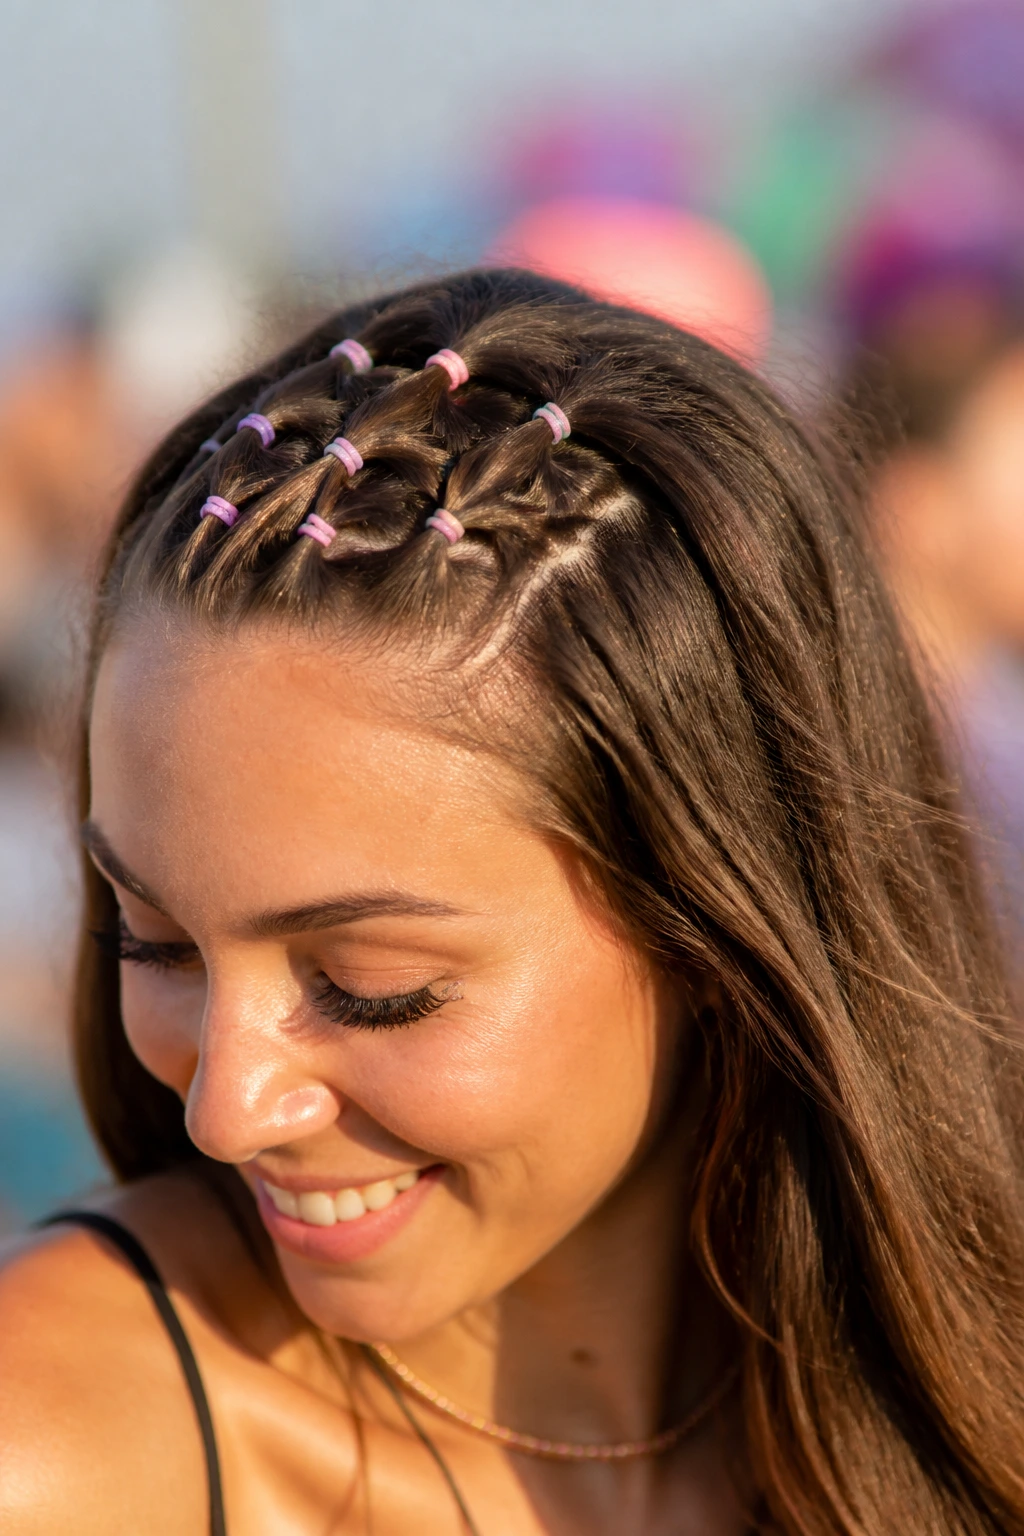
Create a “fenced-in” look by sectioning the front of your hair into small squares and securing them with small, colorful elastic bands in a criss-cross pattern. This is a very popular style because it keeps hair completely out of your eyes and requires very little maintenance once it’s done.
Ensuring Longevity
The secret to this look is using high-quality elastic bands that won’t snap. Since fine hair can be brittle, avoid cheap plastic bands that can cause breakage when you remove them. If you’re worried about the elastics sliding, apply a tiny bit of hair wax to your fingers when sectioning; the wax adds the perfect amount of grip to keep the squares tight and aligned.
17. The Twisted Mohawk Braid
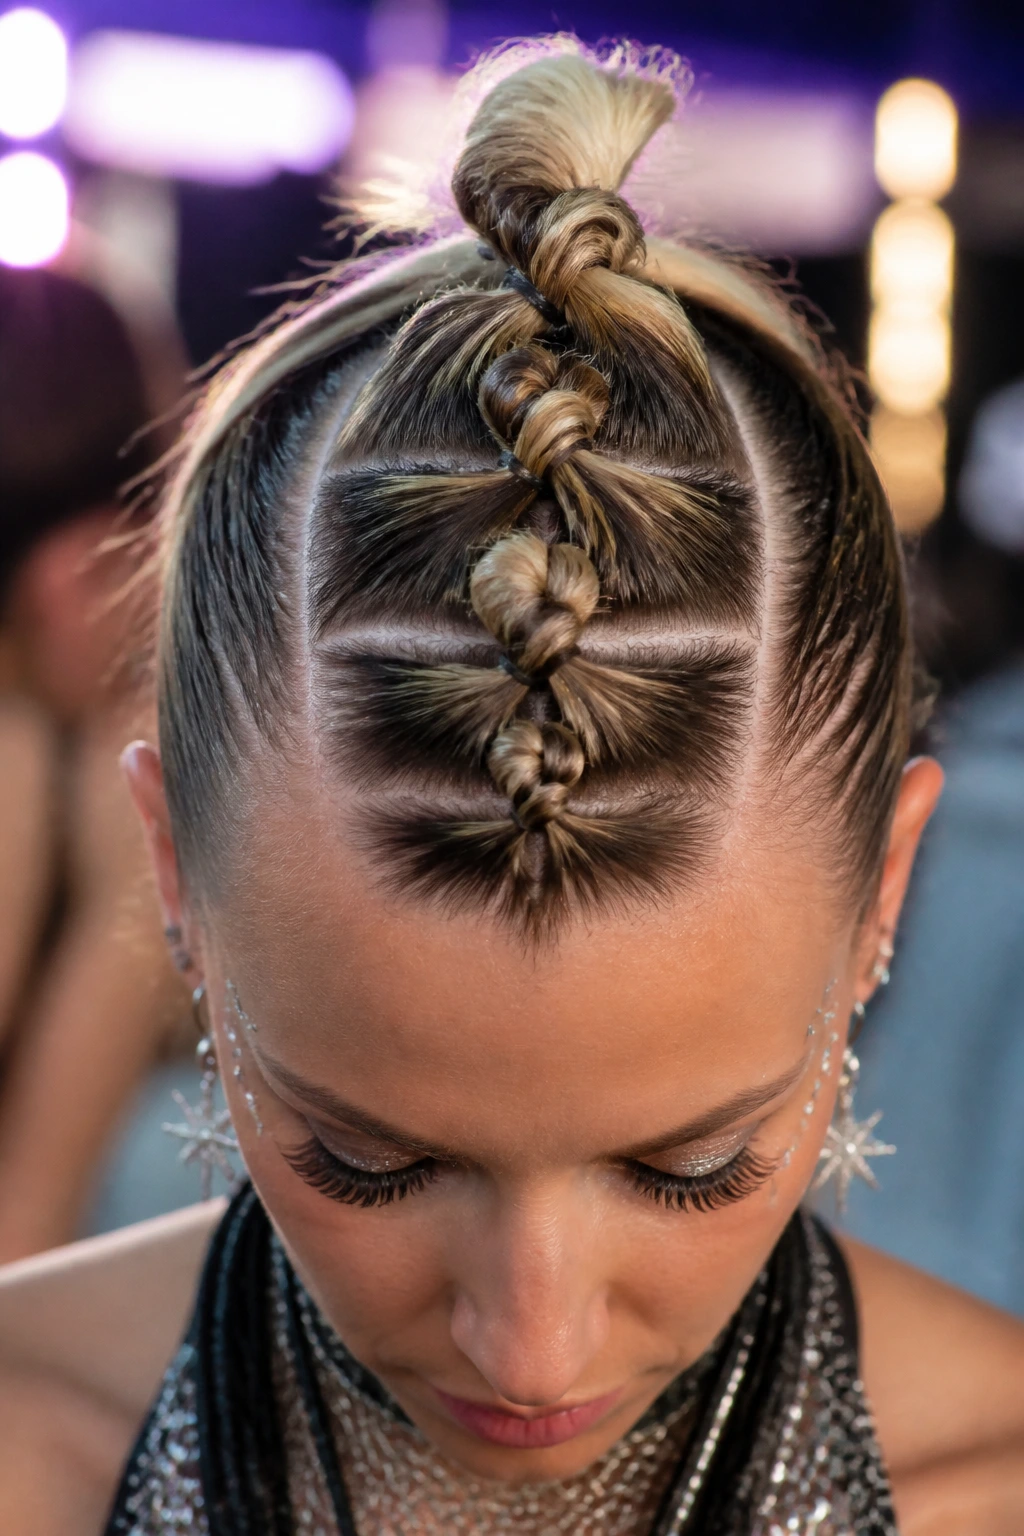
If you struggle with intricate braiding techniques, the twisted mohawk is your best friend. Instead of braiding, you simply create a series of small, secure ponytails down the center of your head and twist each one into a knot.
The Twist Method
- Create a line of small ponytails from your forehead to the nape of your neck.
- Take the first ponytail, twist it into a tight knot, and pin it.
- Take the second ponytail, combine it with the tail of the first, twist, and pin.
- Continue down to the bottom.
- The result is a structured, sculptural look that keeps fine hair perfectly in place while looking like you spent hours on a complex braid.
18. Braided Headband with Loose Waves
A simple braid wrapped around the head like a headband is classic for a reason. To make it work for fine hair, pre-curl your hair with a large-barrel iron. The curls provide the necessary volume and texture to make the braid look substantial.
Curling for Hold
When curling, work in small sections and immediately spray each curl with a light-hold spray. Let the curls cool completely before you start braiding; this “cooling phase” is crucial for fine hair to hold a curl for an entire day at a festival. Once the curls are set, braid a small section from behind one ear and pull it across the top of your head, pinning it behind the other ear.
19. Ribbon-Wrapped High Pony
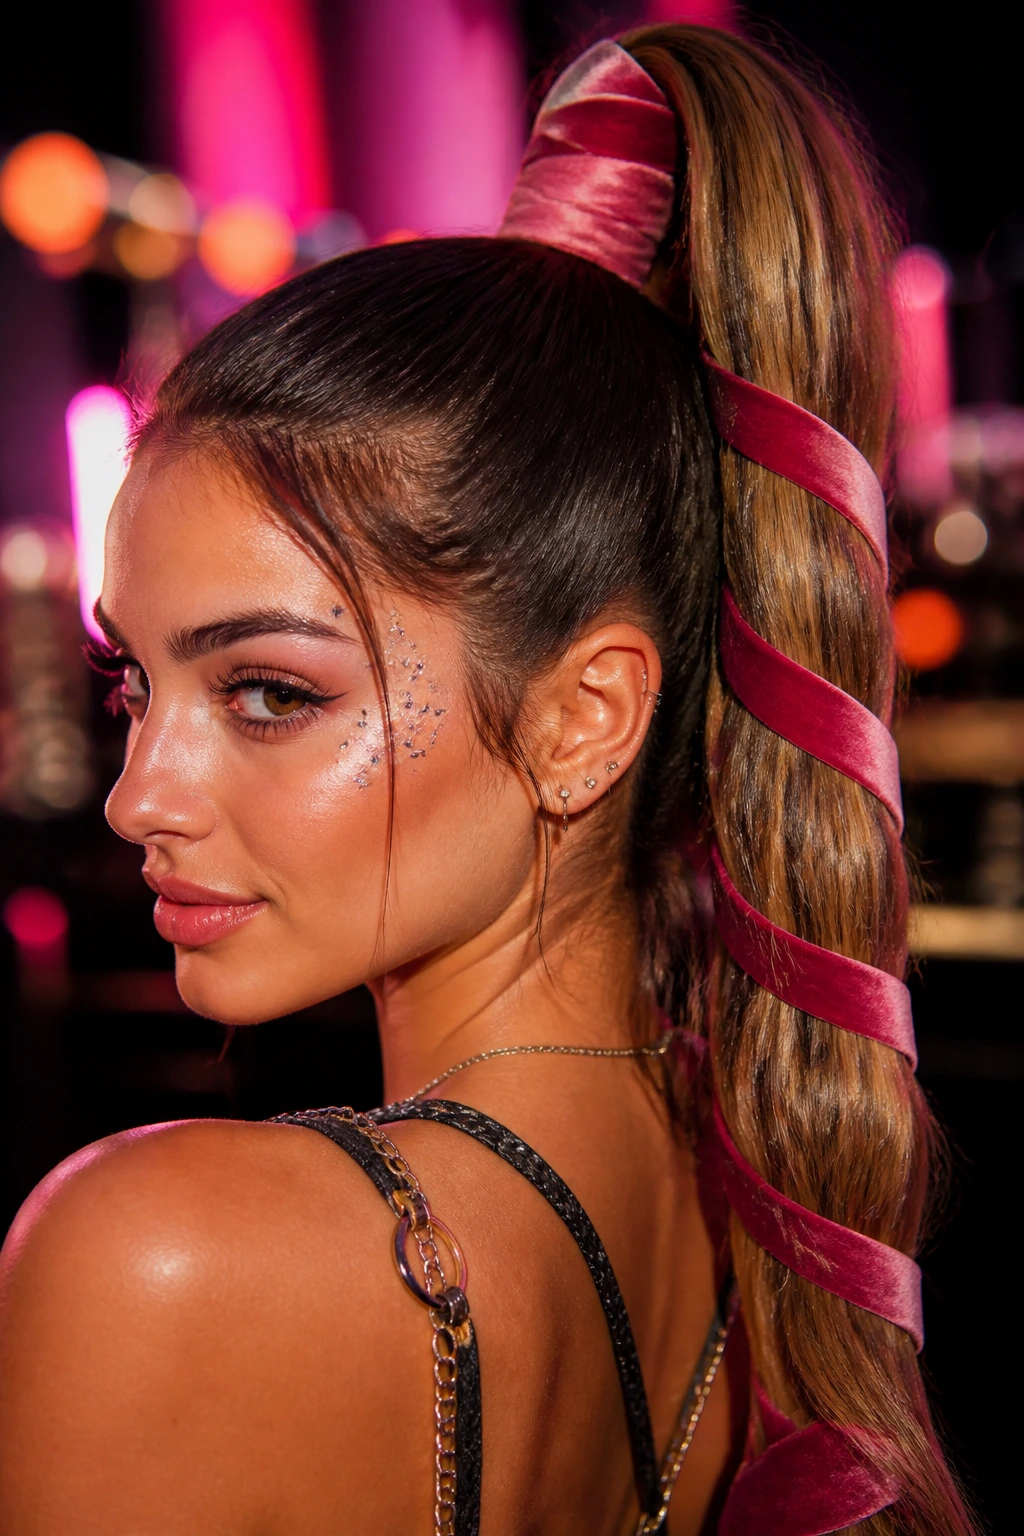
Similar to the scarf-braid, wrapping a ribbon around a high ponytail is a quick way to add mass. Because ribbons are thin and come in a variety of materials—like velvet, satin, or organza—they allow you to add volume without the bulk of a heavy extension.
Selecting Your Ribbon
Choose a ribbon that matches your vibe—a velvet ribbon feels luxurious, while a sheer organza ribbon adds a lighter, ethereal quality. Wrap it starting from the base of the pony and work your way down in a spiral pattern. Secure the ends with a small, clear elastic tucked under the last wrap.
20. The “Faux-Hawk” with Glittered Roots
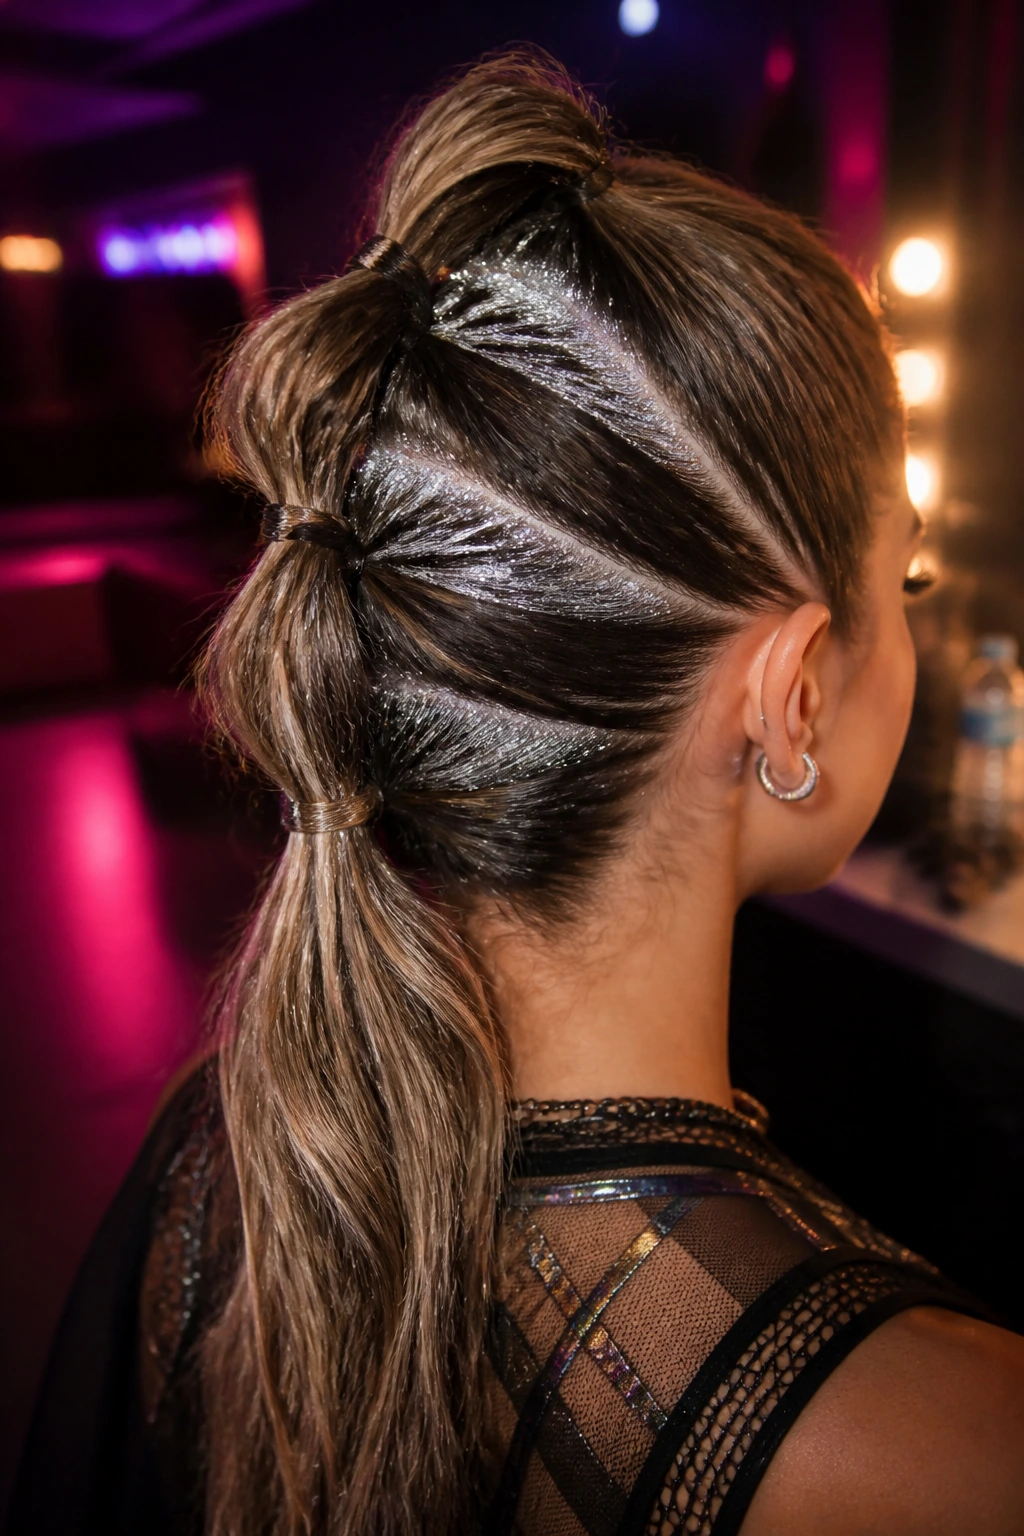
This is essentially a high ponytail, but you divide it into three separate sections down the back of your head. This adds volume to the center-back and prevents the hair from hanging flat. Use glitter gel to highlight the parts between the sections to make the structure of the style the focal point.
Applying Glitter Gel
Apply the glitter gel carefully using a small makeup brush. You want the glitter to be dense, so don’t be afraid to layer it. The gel is essentially a strong-hold styling product, so as it dries, it will lock the three sections of hair into a firm ridge that mimics the look of a mohawk.
21. Tiny Bantu Knots
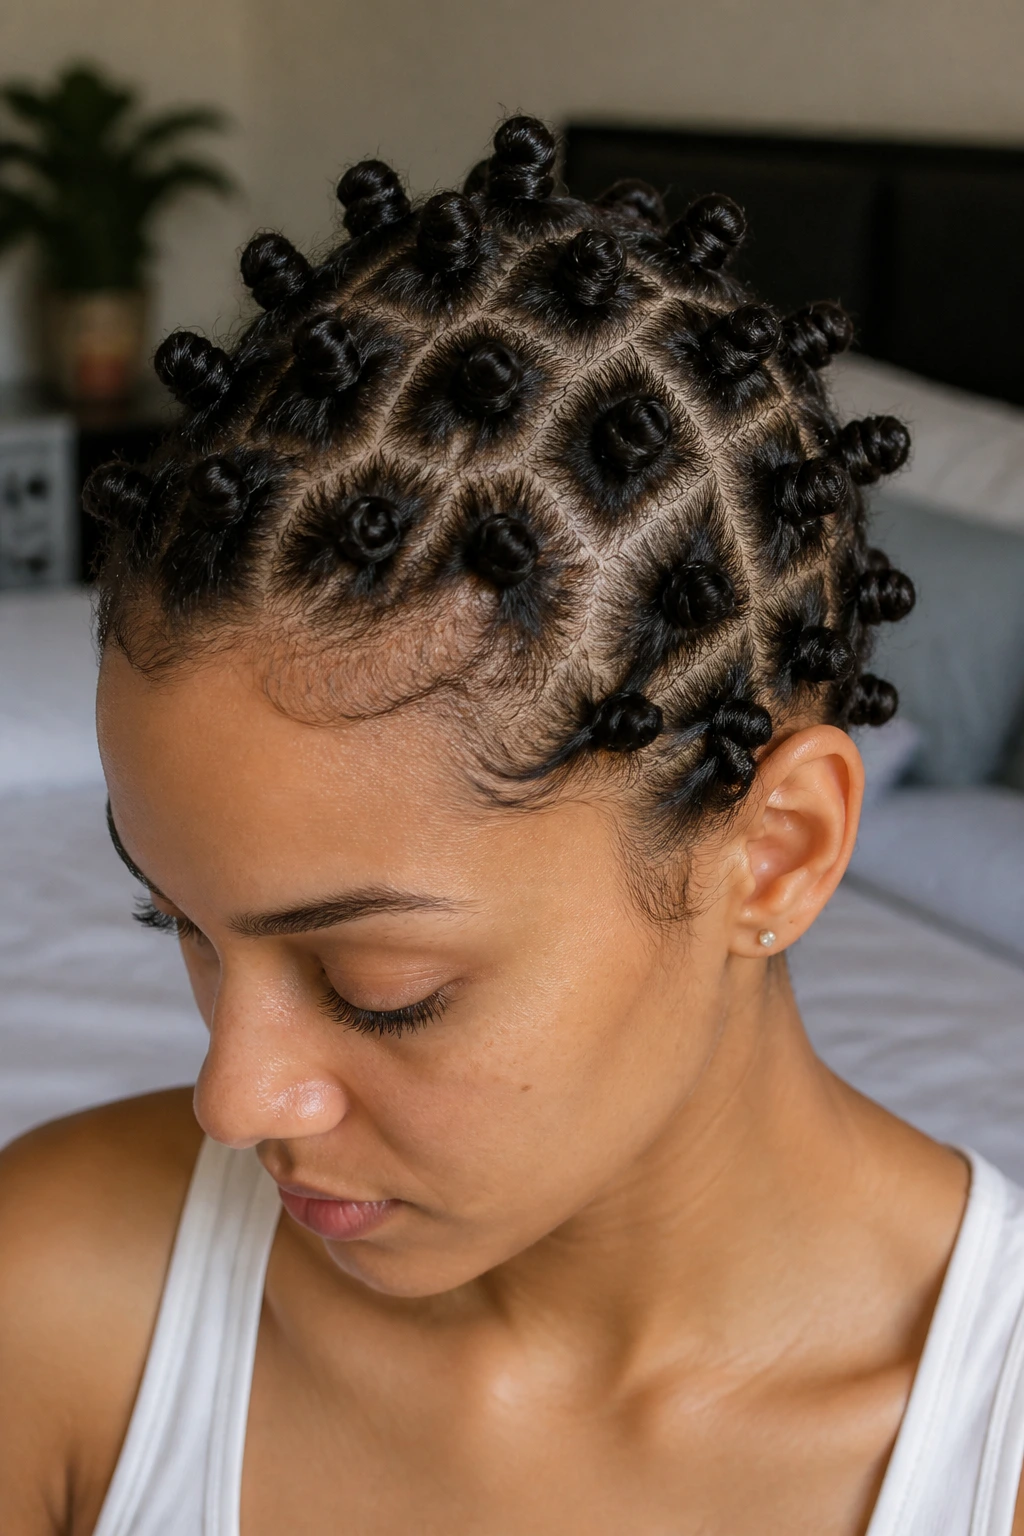
Bantu knots are usually associated with thicker hair, but they work beautifully on fine hair if you keep them small. By creating many small, tight knots, you create a fun, edgy look that keeps your hair completely secured and off your face.
Securing the Knots
Because fine hair is slippery, ensure each knot is secured with a base elastic before you wrap the hair around it. Once you’ve wrapped the hair, use two bobby pins in a cross pattern to secure the ends. The cross pattern provides double the hold, ensuring that the knots don’t unravel during hours of dancing.
22. High-Volume Teased Ponytail
Never underestimate the power of a good teaser. For a high-volume ponytail, section the hair into the crown, the sides, and the back. Tease the crown section heavily before smoothing it over into a ponytail. This “bump” at the crown changes the entire silhouette of the style.
The Teasing Technique
Always use a dedicated teasing brush—not a comb—for the best results. Hold the hair section straight up and brush downward toward the root in quick, short strokes. Once you have enough volume, use the smooth side of the brush to lightly comb over the top layer so it looks polished. Apply hairspray only after the ponytail is pulled into place to avoid making the hair heavy.
23. Double-Braided Pigtails with Neon Ties
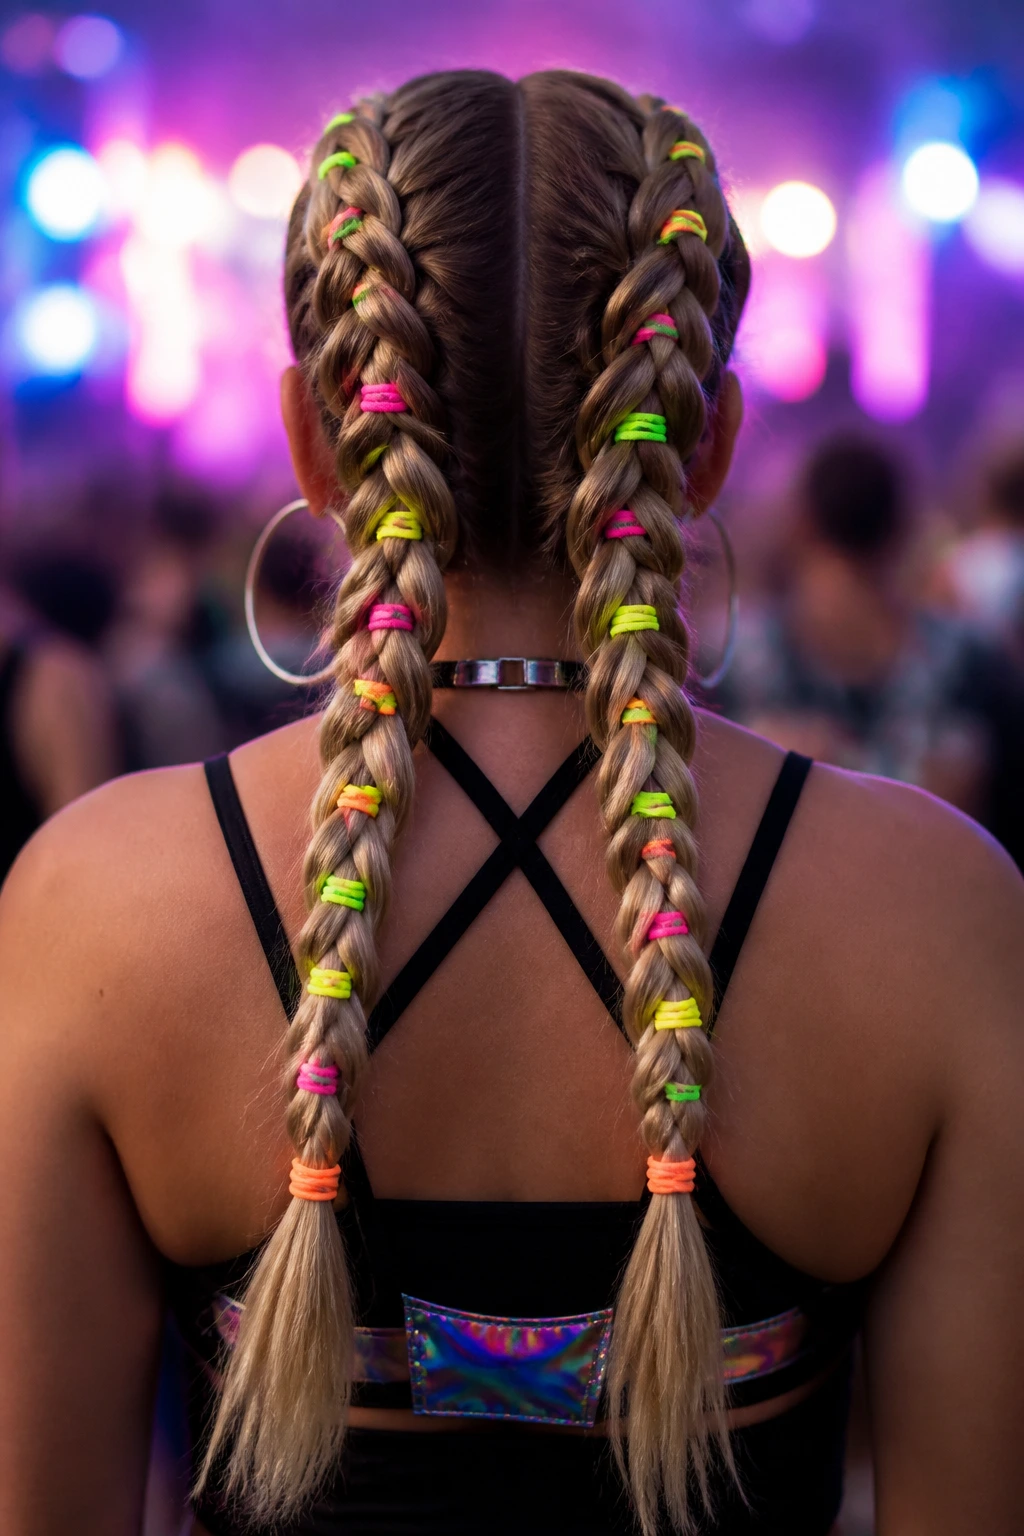
If you want something bright and fun but don’t want to spend time on complicated braids, keep the braiding simple and focus on the accessories. Dutch braid your hair into two pigtails and use neon-colored rubber bands at every inch of the braid.
Why Multiple Ties Help
The multiple ties act as mini-anchors. If one part of the braid loosens, the rest stays intact. Plus, the neon colors create a pop-art look that is very popular in the rave scene. Use a variety of colors in each braid for a more vibrant, chaotic feel that perfectly fits the energy of the crowd.
24. Sleek Bun with Metallic Hair Rings
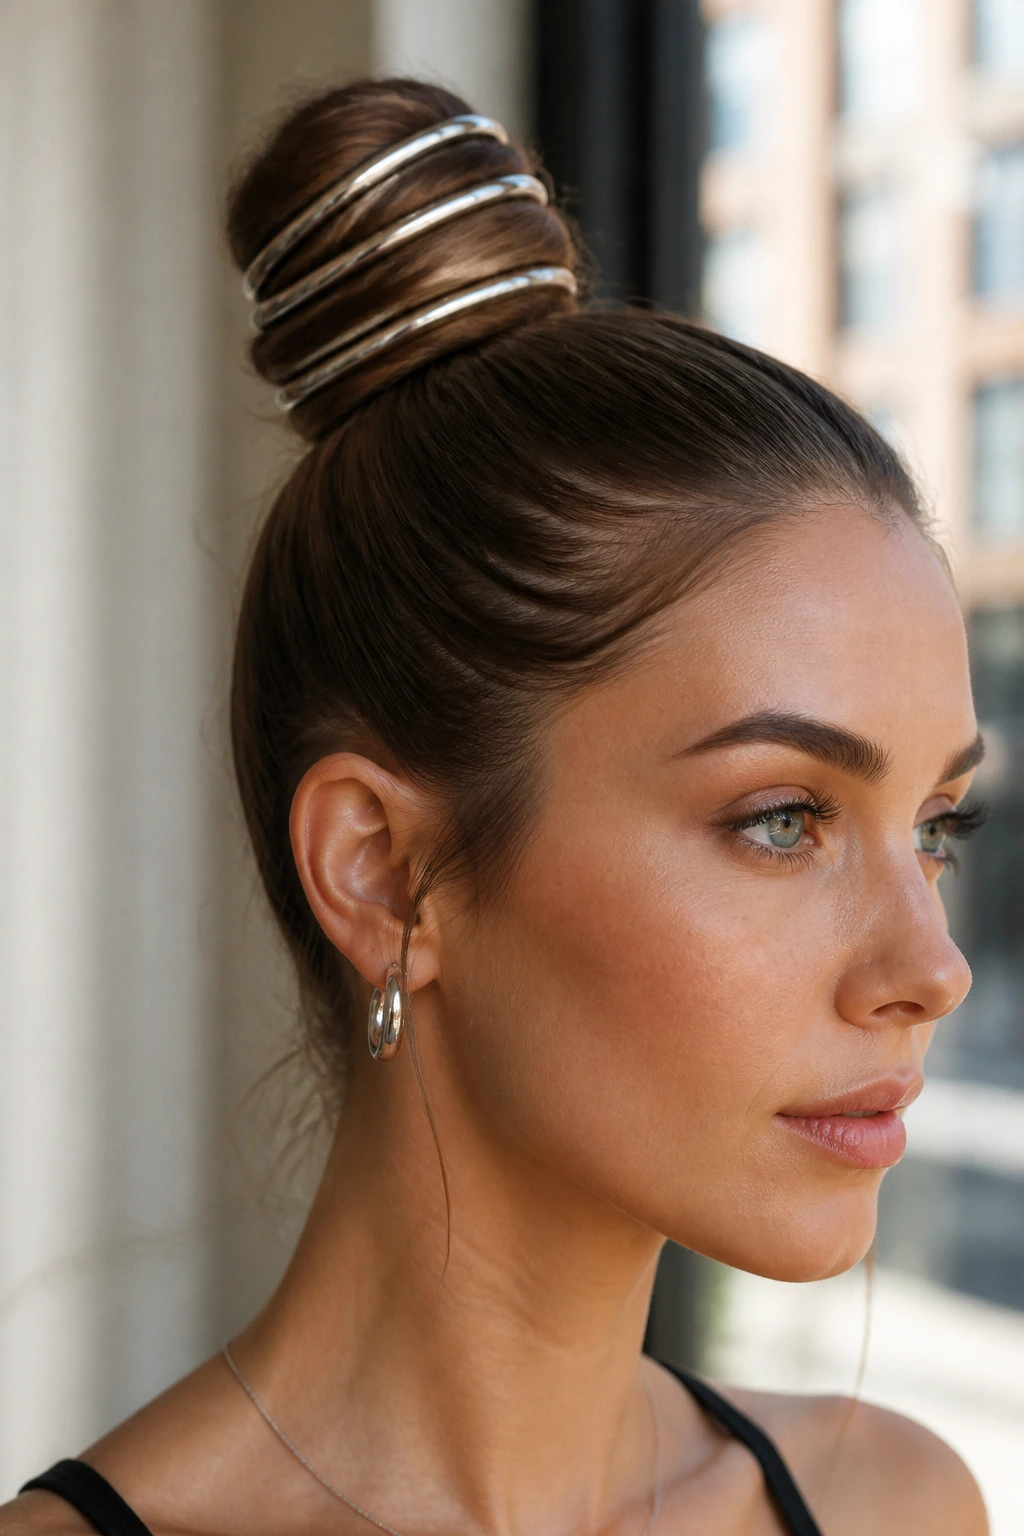
A sleek, high bun is the ultimate “clean” rave look, but fine hair can make it look small. Fix this by using a hair donut. Place your hair through the donut, cover it with the hair, and secure it. Then, decorate the bun with large metallic hair rings.
Hiding the Donut
If your hair is very fine, make sure you match the color of the hair donut to your natural hair color as closely as possible. If the donut shows through, it breaks the illusion. Use extra bobby pins to pull hair from the sides of your head to fully cover the donut before securing the bun.
25. The Waterfall Twist
Instead of a waterfall braid, use a waterfall twist. Section off small pieces from the top, twist them, and pin them back, allowing the hair to drop down. This style highlights the natural texture of your hair while keeping the front section controlled and polished.
Mixing Textures
This style looks incredible if you’ve curled your hair first. The contrast between the sleek, twisted roots and the loose, wavy ends creates a very sophisticated look. If you are worried about the twists sliding out, use a light dusting of texturizing powder on your fingertips before you begin twisting; it provides the grip needed for the hair to stay coiled.
26. Side-Pinned Space Pigtails
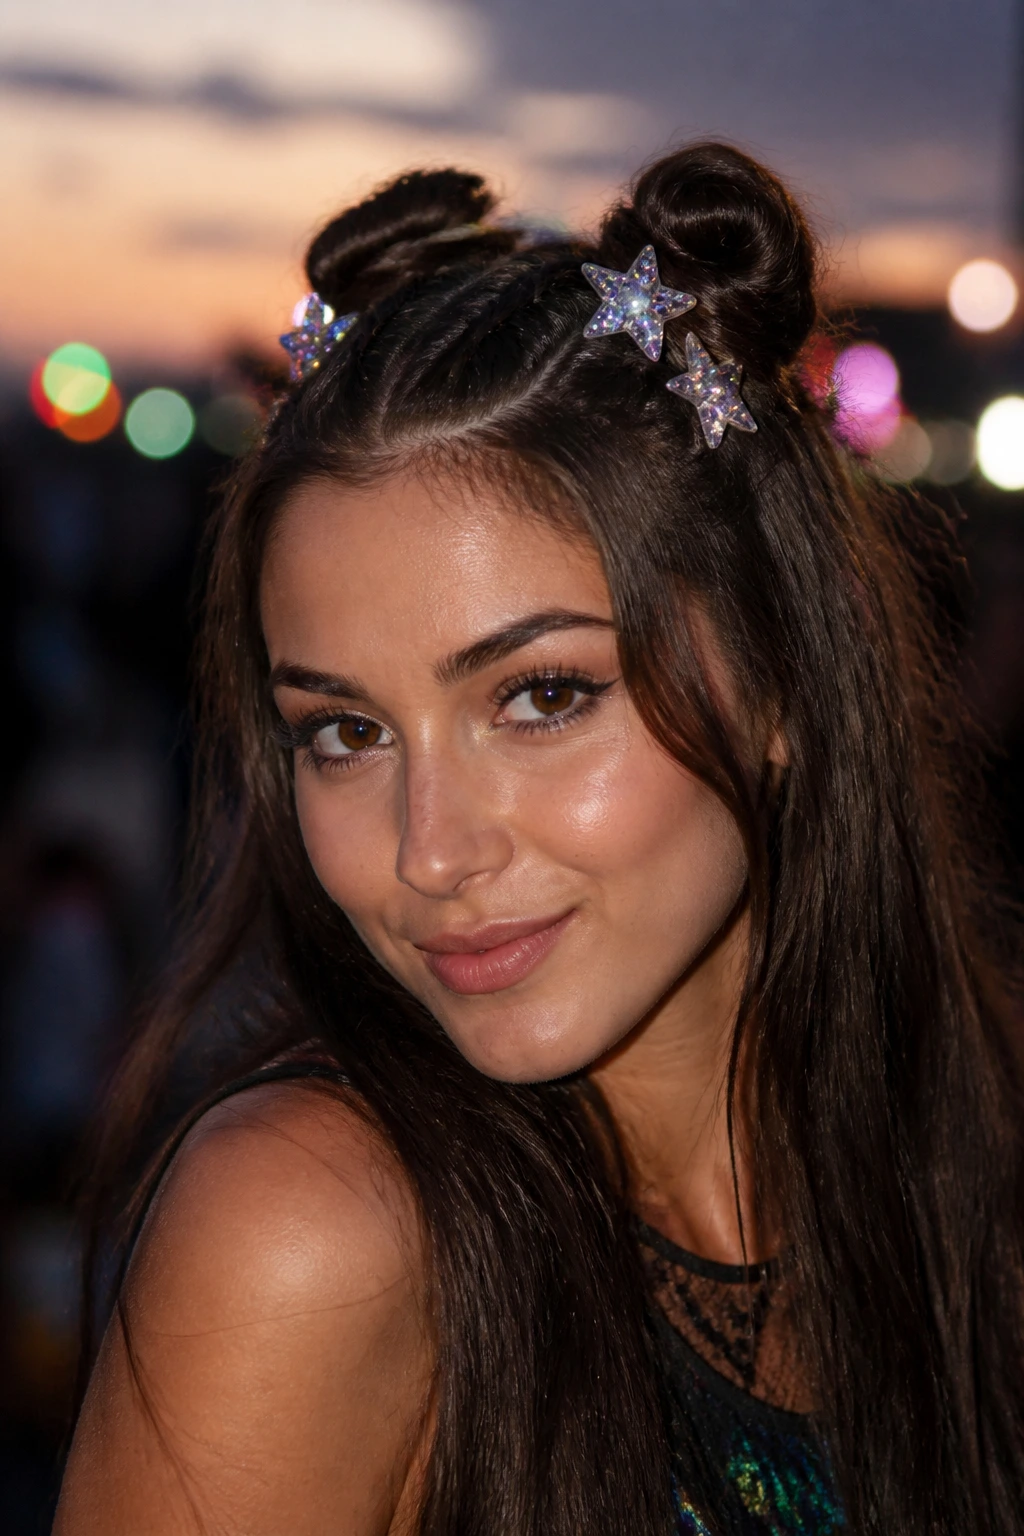
If full buns feel too heavy, try “half-space” pigtails. Only take the top half of your hair and put them into pigtails, leaving the rest down. Use large, eye-catching hair clips—like acrylic stars or neon clips—to pin the pigtails down toward your head so they sit flat.
Clip Placement
Place your clips at a 45-degree angle. This keeps the pigtails secure but also prevents them from looking like they are sticking out at awkward angles. Using decorative clips is a great way to add “bulk” to the style without actually adding more hair weight.
27. Messy Braid with Micro-Braids
Sometimes a braid looks thin, but adding micro-braids changes the entire look. After you have finished your main braid, go back and pull out a few thin sections to braid into tiny, tight micro-plaits.
Why It Works
The micro-braids add a level of detail that distracts the eye from the main braid’s thickness. It looks intentional and bohemian, and it adds texture that prevents the main braid from looking too “perfect” or flat. Plus, the tighter micro-braids act as reinforcements for the larger structure.
28. The Slicked-Back “Wet Look”
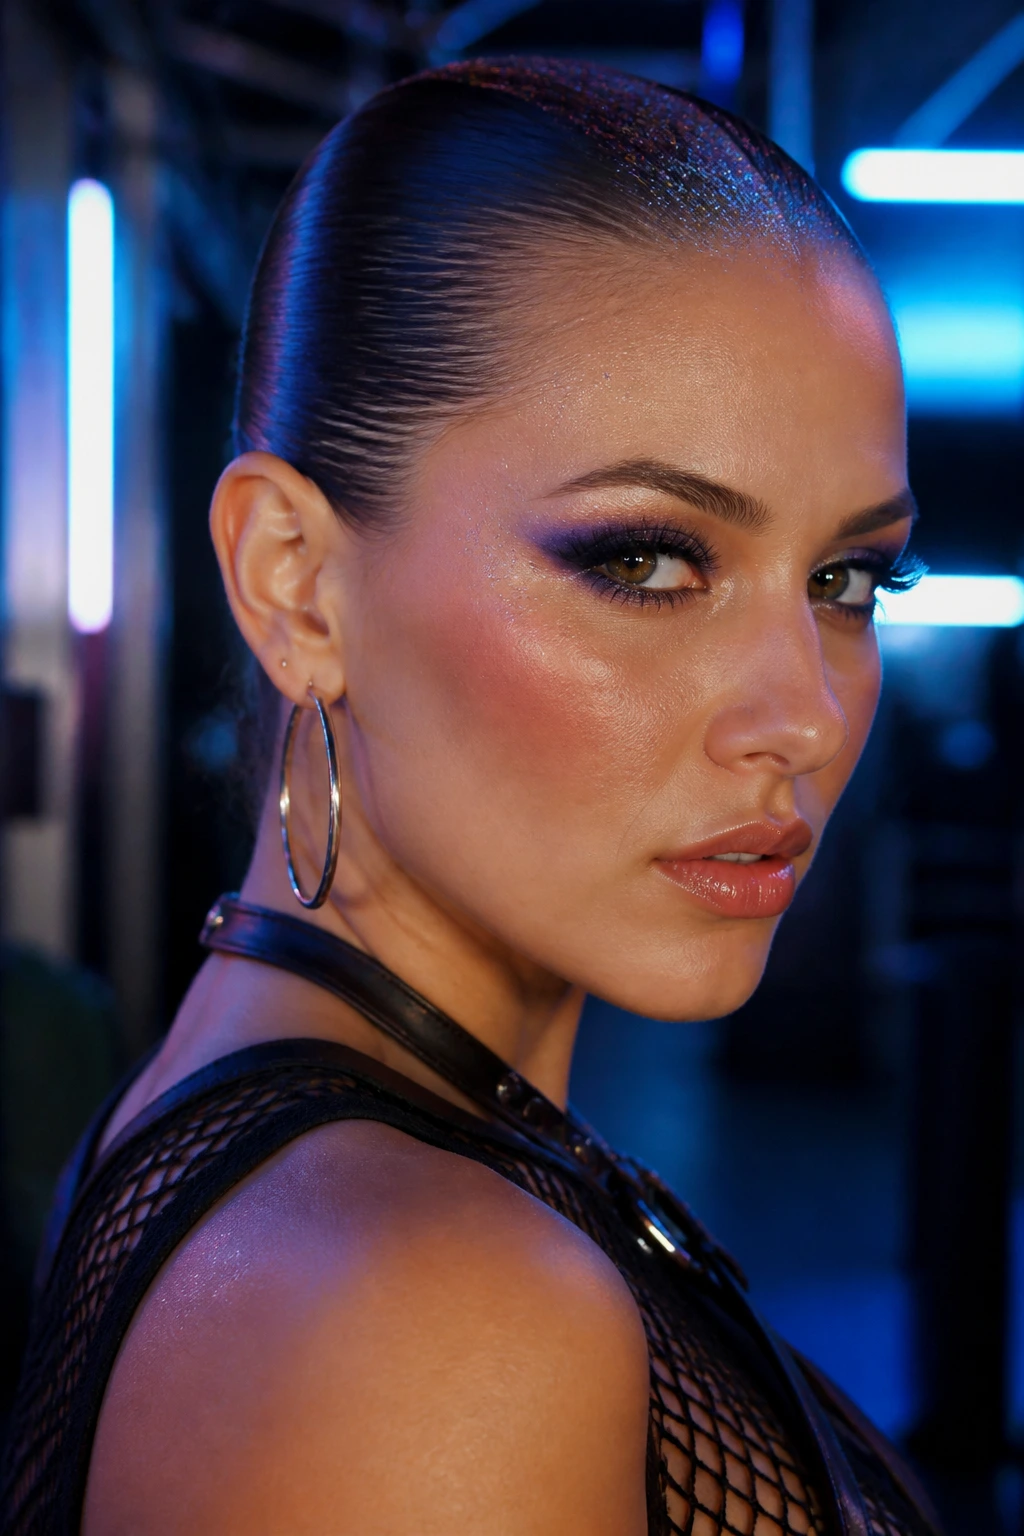
The wet look is high-fashion, easy to achieve, and perfect for fine hair. Use a strong-hold gel to slick your hair back into a tight bun or ponytail. Because fine hair is naturally flatter, you don’t have to fight against volume to get that sleek, editorial finish.
Creating the Wet Look
Apply a generous amount of clear, alcohol-free gel to damp hair. Use a fine-tooth comb to distribute the product from your forehead all the way to the ends. If you want to add an extra rave touch, sprinkle some holographic glitter along the part line while the gel is still wet. As the gel dries, the glitter will be locked in place for the rest of the night.
Final Thoughts
When you are styling fine hair for an environment as demanding as a festival, the goal is always durability balanced with personality. You do not need to rely on heavy products that kill your volume. Instead, focus on the power of texture, the strategic use of accessories like ribbons and rings, and the occasional well-placed extension to give your hair the support it needs to last through the weekend.
Remember that the most important part of any festival look is that it makes you feel confident and ready to hit the dance floor. If a braid starts to loosen, lean into the messy aesthetic—it usually just looks like part of the vibe. The best rave hair isn’t necessarily the most perfect; it’s the hair that survived the night while still looking like you put intentional effort into your self-expression.