There is something profoundly satisfying about the geometry of a fresh set of cornrows. It is a protective style that manages to be both architectural and deeply personal, grounding your natural hair in a pattern that is as functional as it is aesthetic. When we talk about four-braid cornrows, we are discussing a minimalist masterpiece. These styles are clean, efficient, and offer a level of versatility that is often overlooked in the world of intricate, multi-braid designs. Whether you are aiming for a classic, straight-back look or something with a bit more structural movement, the four-braid approach forces you to focus on the health of your scalp and the precision of your partings.
For those of us working with natural hair, these styles act as a reset button. They provide a reprieve from daily manipulation, allowing your hair to grow in peace while still presenting a polished exterior. However, the beauty of the four-braid configuration lies in its simplicity. You do not have the luxury of hiding a jagged part or a stray hair beneath a sea of tiny braids. Every section of your hair is on display, which means the foundation—the moisturizing, the detangling, and the tension control—is everything. Let’s break down the seventeen ways you can interpret this style, keeping the health of your strands at the center of the conversation.
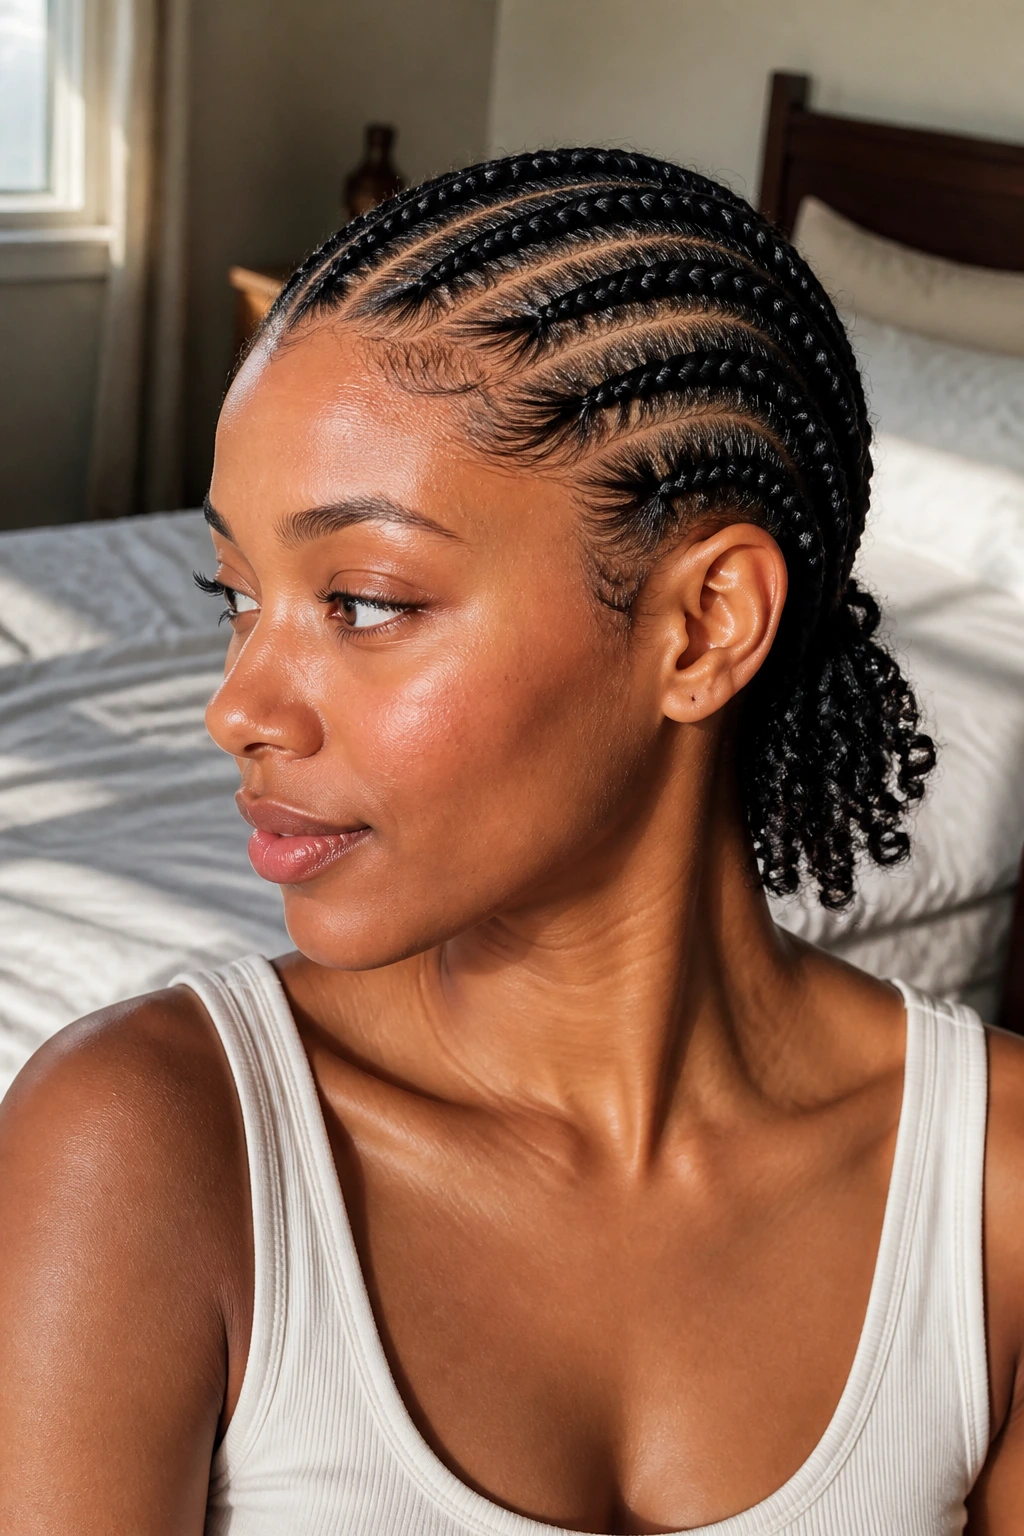
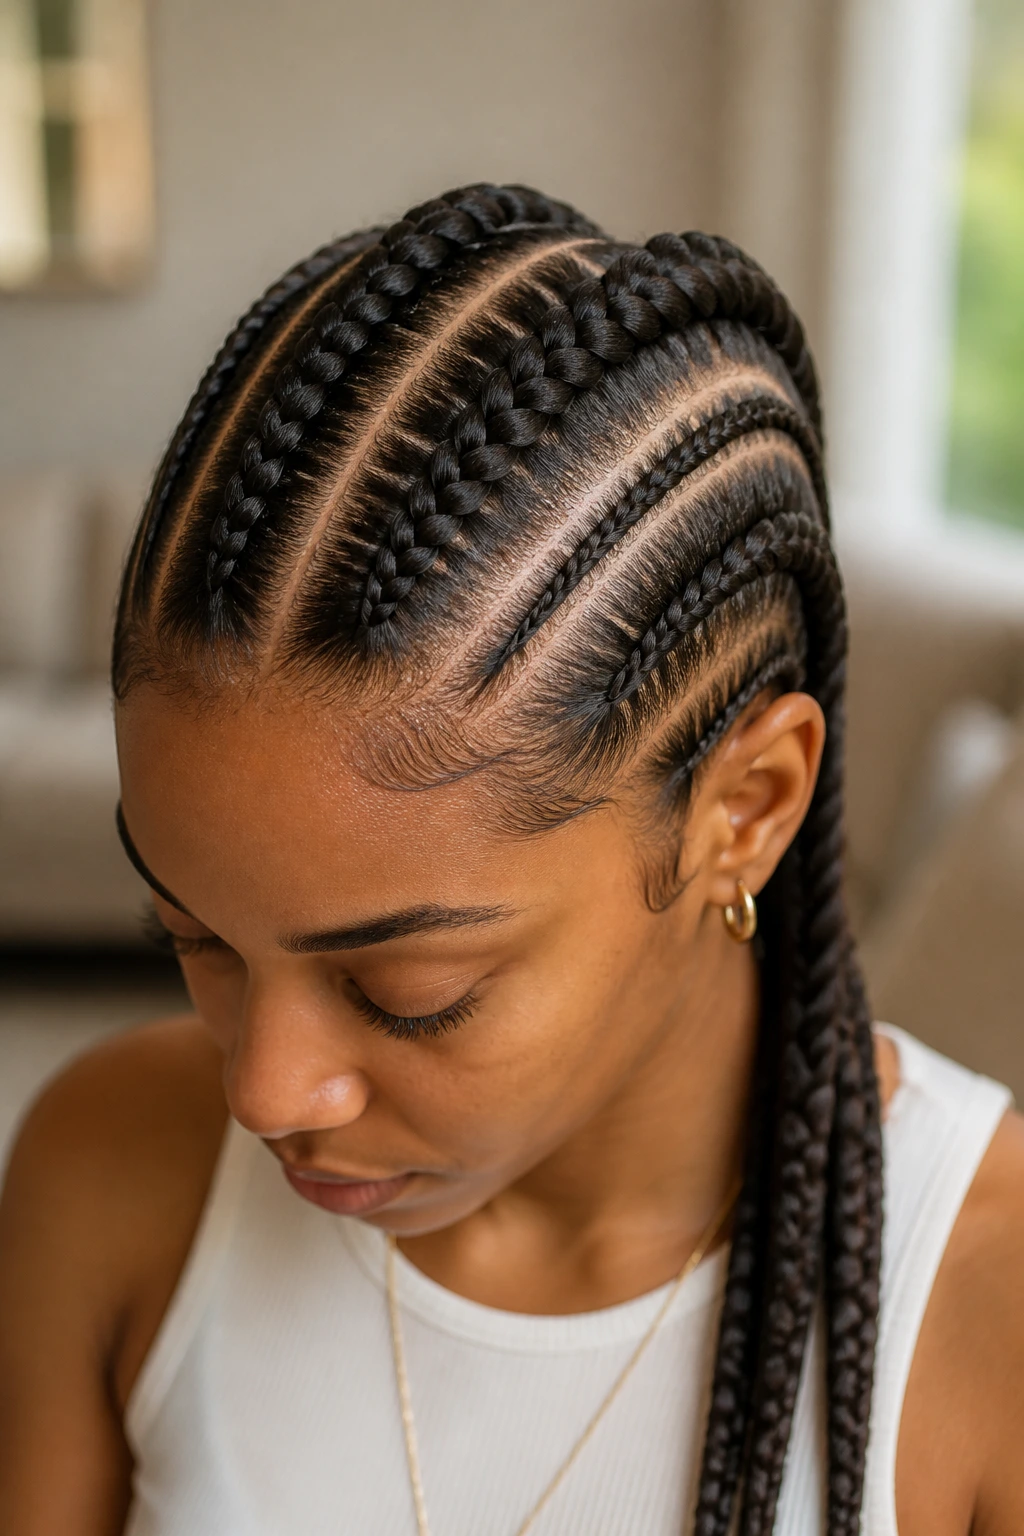
1. Classic Straight-Backs
The classic straight-back style is the baseline for all cornrow designs. It involves sectioning the hair into four equal, parallel rows running from the forehead to the nape of the neck. This style is the gold standard for those who want a sleek, uniform look that emphasizes the face. Because there are only four braids, you have to be mindful of the thickness of each part. If your hair is dense, you can easily create wider, more substantial braids that protect the ends without excessive tension.
Achieving Uniformity
The key to a high-quality straight-back look is consistency. When you part your hair, use a rat-tail comb with a metal end to ensure the lines are sharp enough to cut glass. If the parts are crooked, the entire visual impact is compromised. Use a light pomade or styling cream along each part to keep flyaways at bay and ensure the braids stay neat for the duration of the style.
Pro Tip for Longevity
Tie your hair down with a silk or satin scarf every single night. Even if you think your hair is short, the friction against a cotton pillowcase can lead to frizz, which ruins the sharp lines of your four-braid style within days.
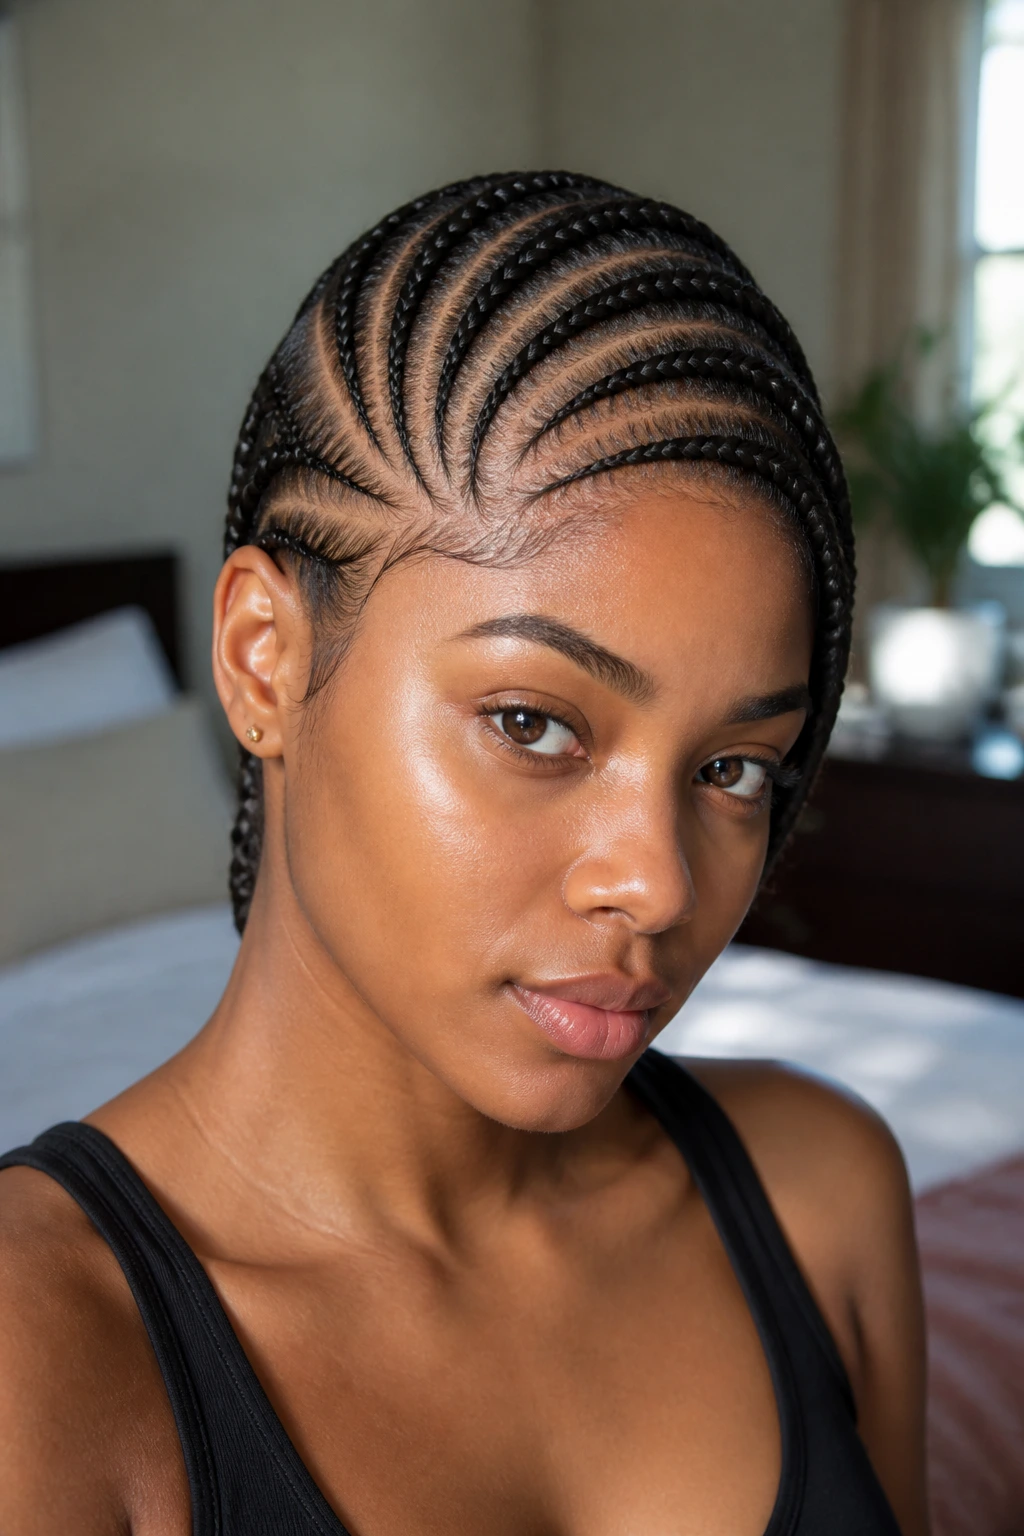
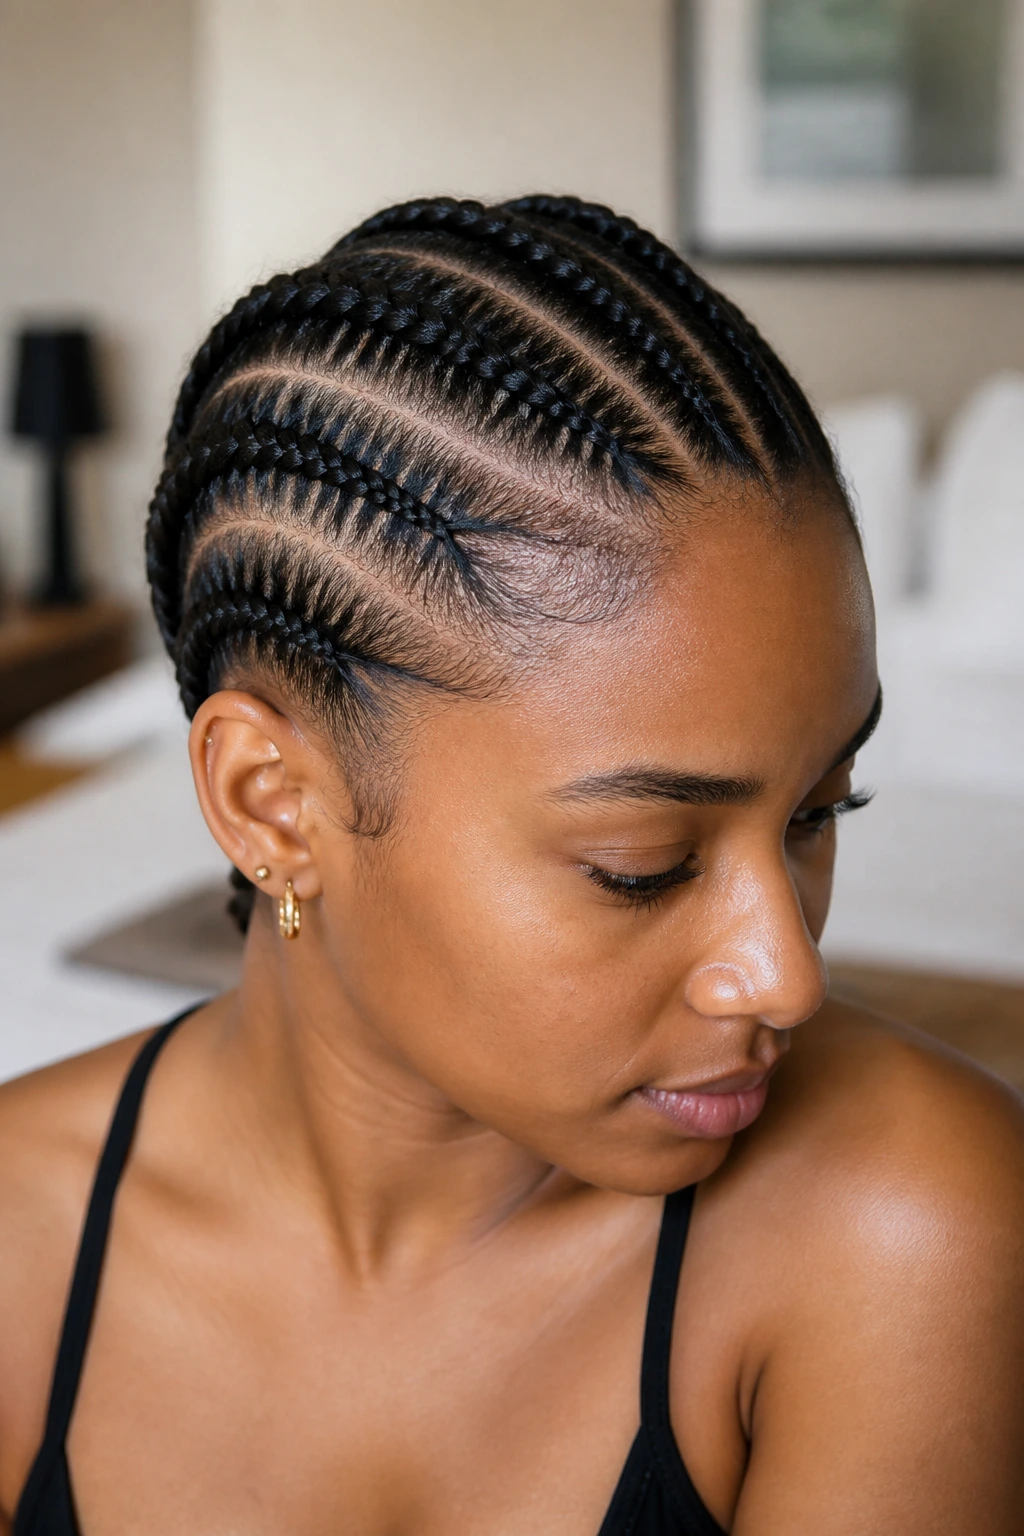
2. The Curved Goddess Pattern
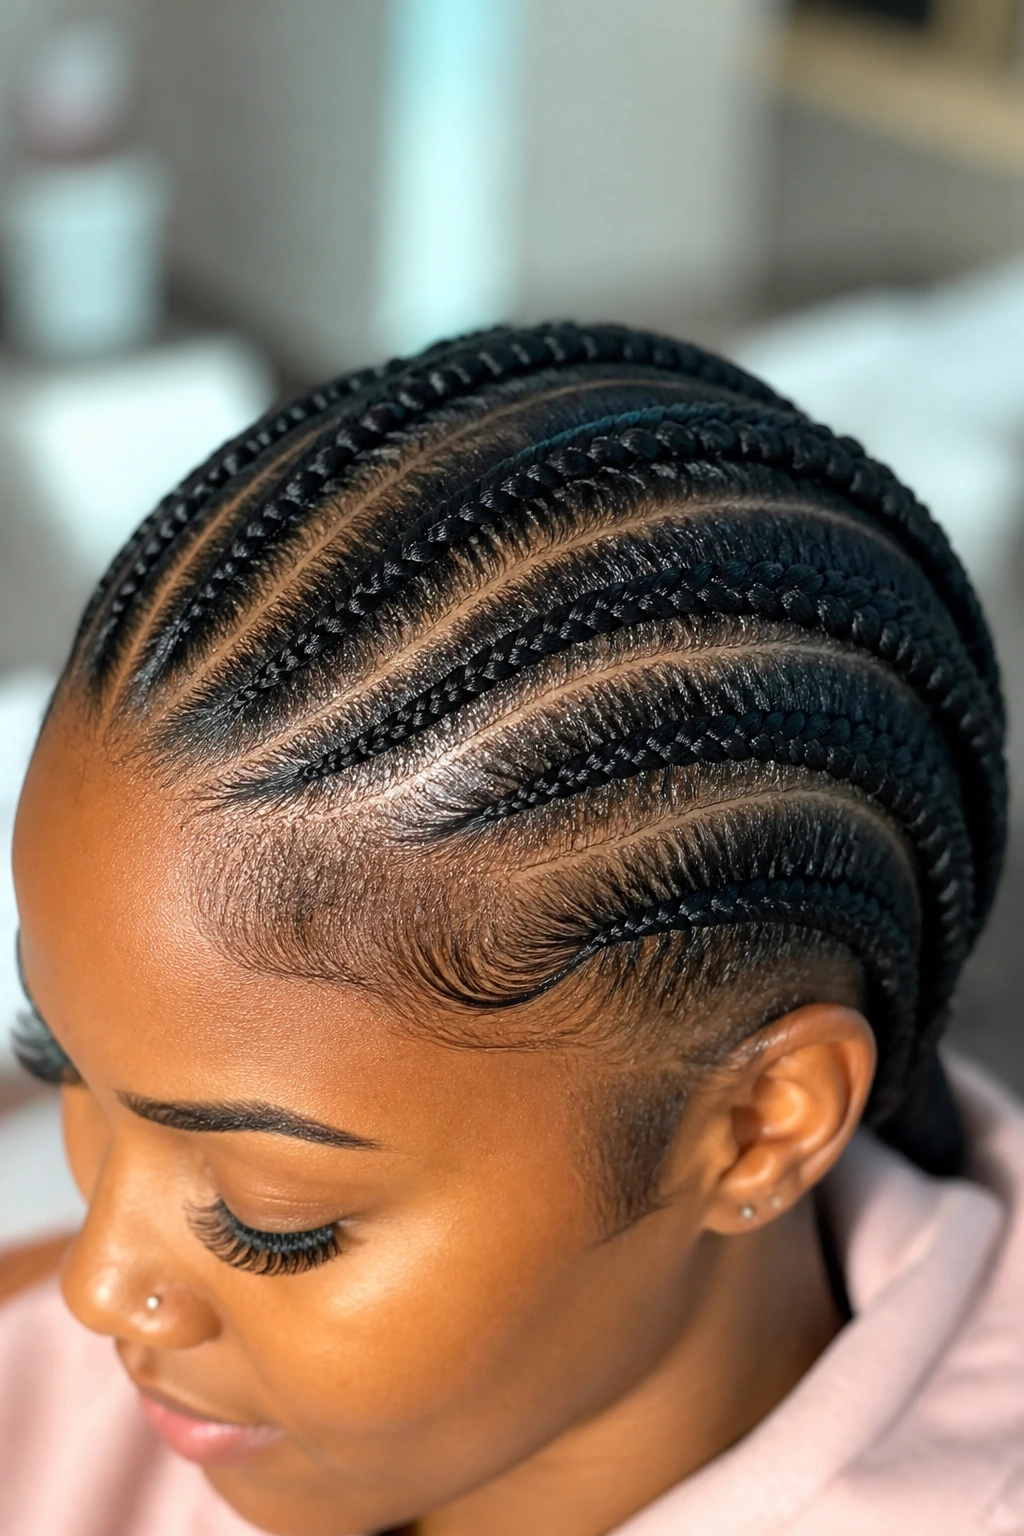
Unlike the rigid lines of straight-backs, the curved goddess pattern introduces movement to the scalp. Here, the four braids follow a gentle arch, often starting near the temple and sweeping across the head toward the opposite ear or nape. This style feels more organic and less like a standard protective design, making it a favorite for those who want a bit of softness in their aesthetic.
Why It Works for Natural Hair
Curves allow for a more natural distribution of tension. Straight parts can sometimes pull too hard on specific hair follicles if the braiding angle isn’t perfectly perpendicular. By curving the braid, you distribute the weight of the hair more evenly across the scalp, which is a major win for those with finer edges or a sensitive crown.
How to Style the Edges
Since the braids are curved, your edges become the primary focus. Keep your baby hairs hydrated with a water-based moisturizer before applying a light, non-flaky edge control. Avoid the temptation to glue your edges down with heavy products, as this can cause them to thin out over time.
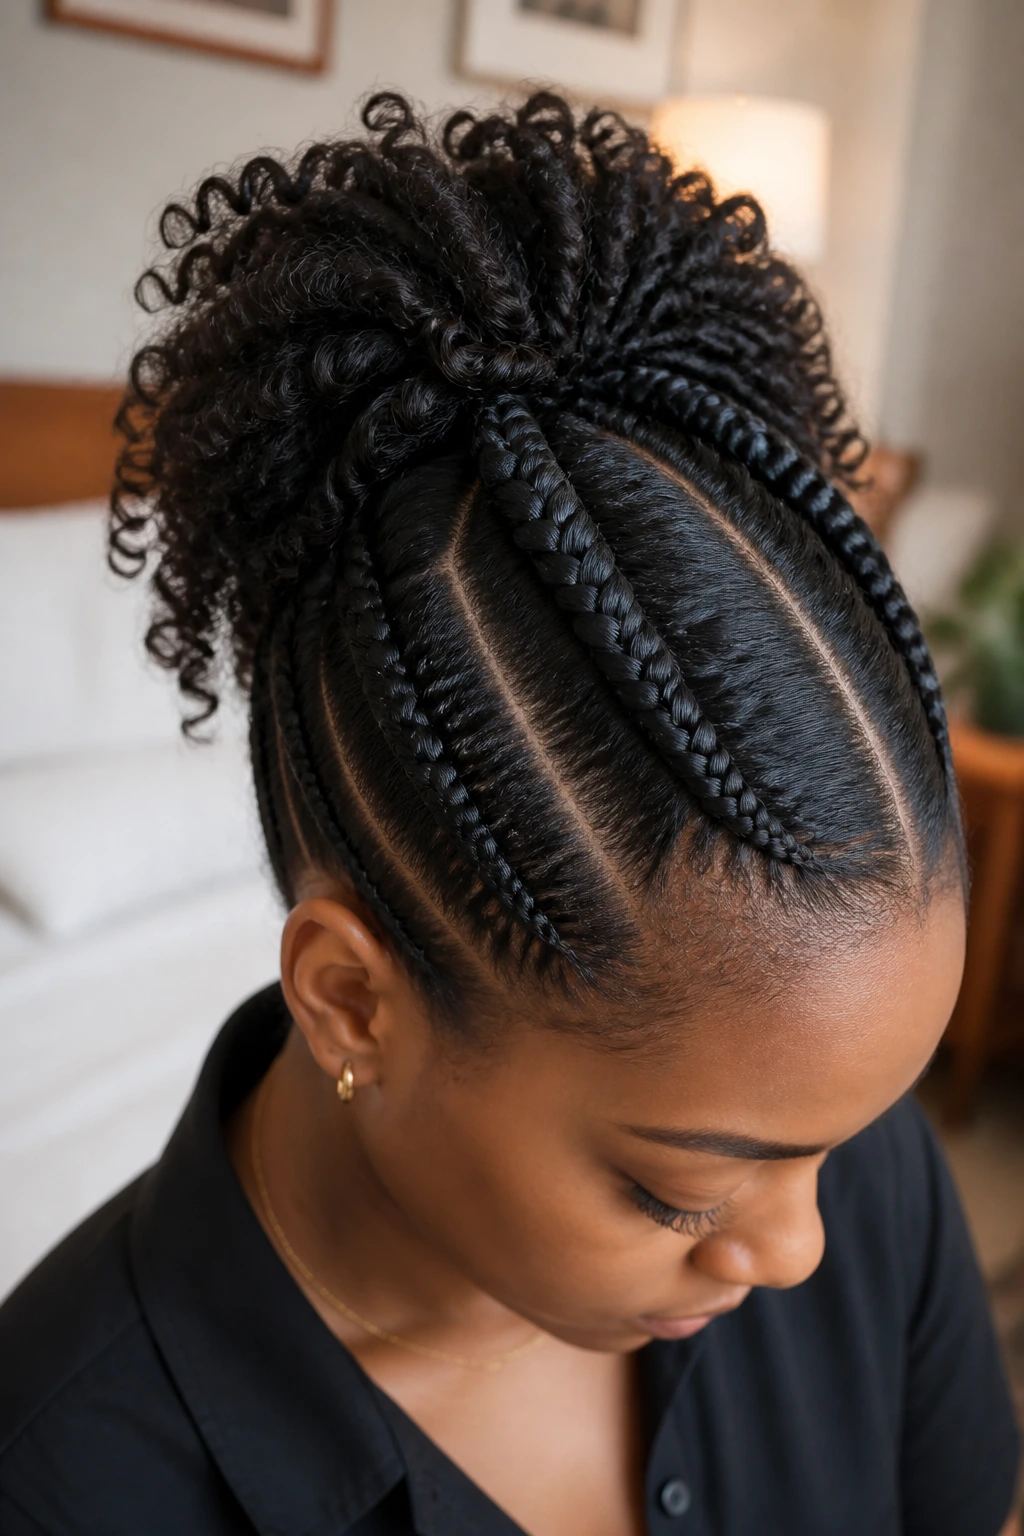
3. High-Ponytail Base
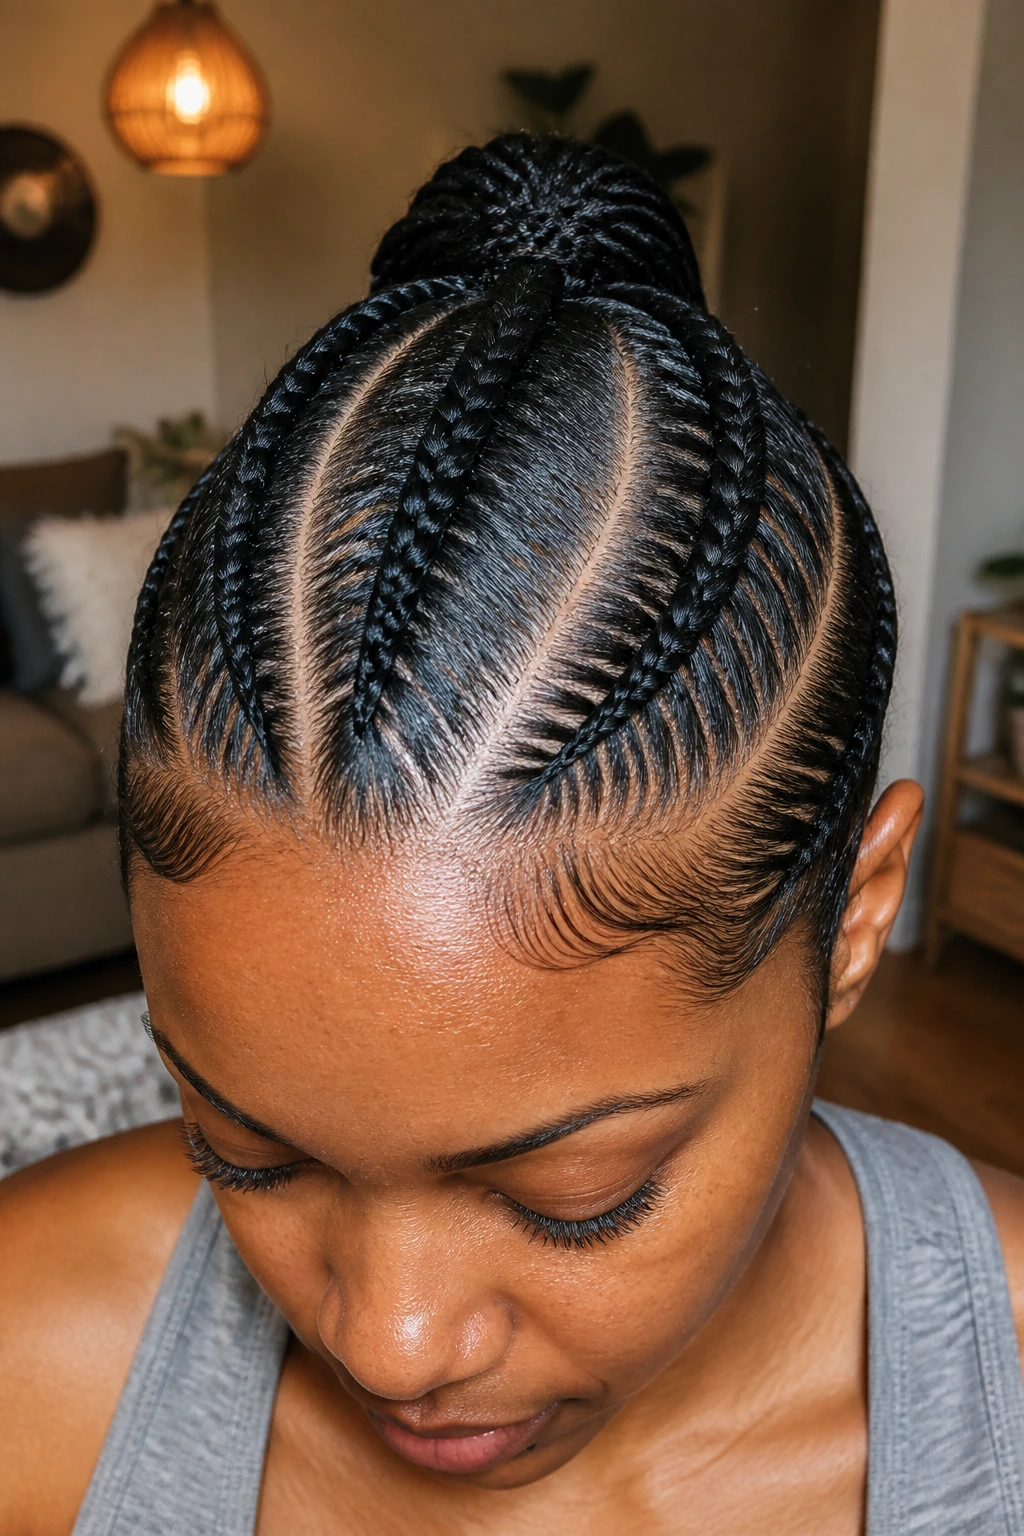
If you want the convenience of an updo, this pattern is your best friend. Instead of pulling everything back toward the nape, all four braids are directed toward the crown of the head. This creates a natural base for a high ponytail or a bun. It’s an incredibly functional style for those who live active lifestyles or simply prefer having their neck clear.
Managing the Tension at the Base
The biggest risk with a high-ponytail base is the pull on your nape and the front hairline. Because all the hair is being directed upward, you need to ensure the starting point of each braid is loose enough to allow for movement. If the braids are too tight at the root, you will feel that familiar, uncomfortable “pull” that leads to headaches and tension bumps.
Adding Volume
Once the four braids meet at the crown, you can wrap them into a high bun or attach a drawstring ponytail extension. This gives you the sleek look of cornrows with the dramatic volume of a full ponytail, blending the best of both worlds without requiring a complex hairstyle.
4. The Mohawk-Inspired Silhouette
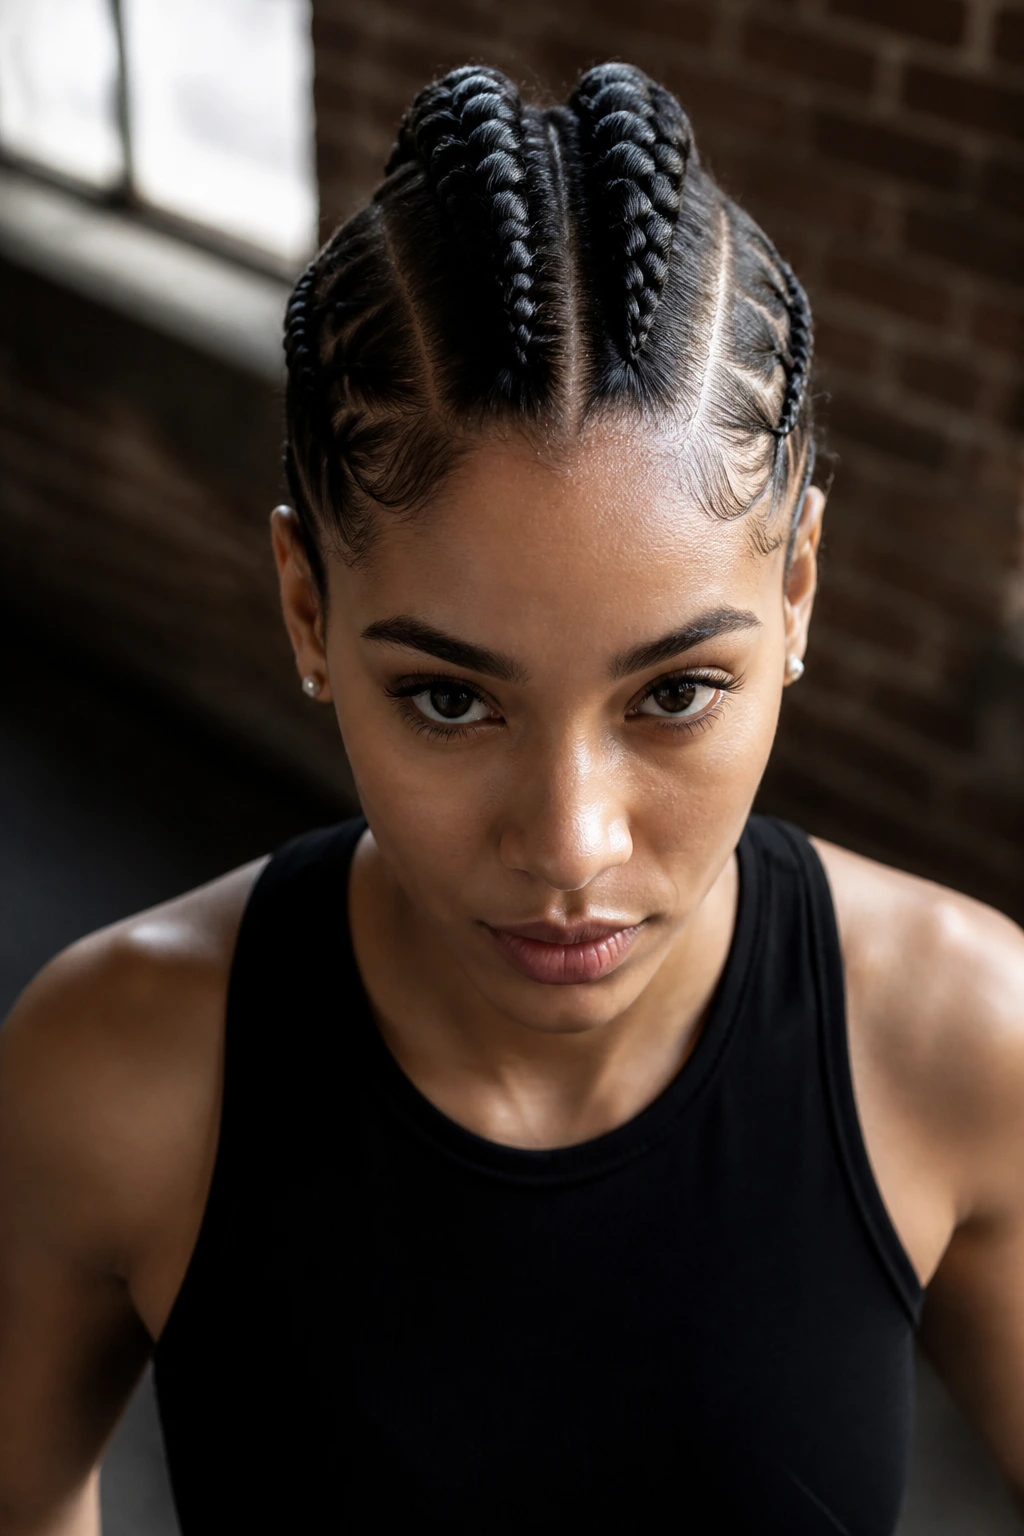
A mohawk-inspired look uses the four-braid structure to create height and drama. In this version, two braids are placed on the sides, and two are placed down the center of the head. This leaves the sides looking tight and clean while the center braids can be styled to stand up or hang long. It mimics the aggressive, bold shape of a mohawk without requiring you to actually cut your hair.
Structural Considerations
To make this look work, the side braids need to be significantly smaller than the center ones. This visual contrast draws the eye toward the center, creating the illusion of a thicker, more voluminous crest. Use a firm-hold gel for the side sections to ensure they remain flush against your head, as any loose hair here will ruin the silhouette.
Styling the Center
Leave the ends of the two center braids long and tuck the side braids securely at the nape. This keeps the focus squarely on the central “mohawk,” which you can accessorize with gold cuffs or beads to add a touch of personality to the design.
5. Criss-Crossed Geometric Design
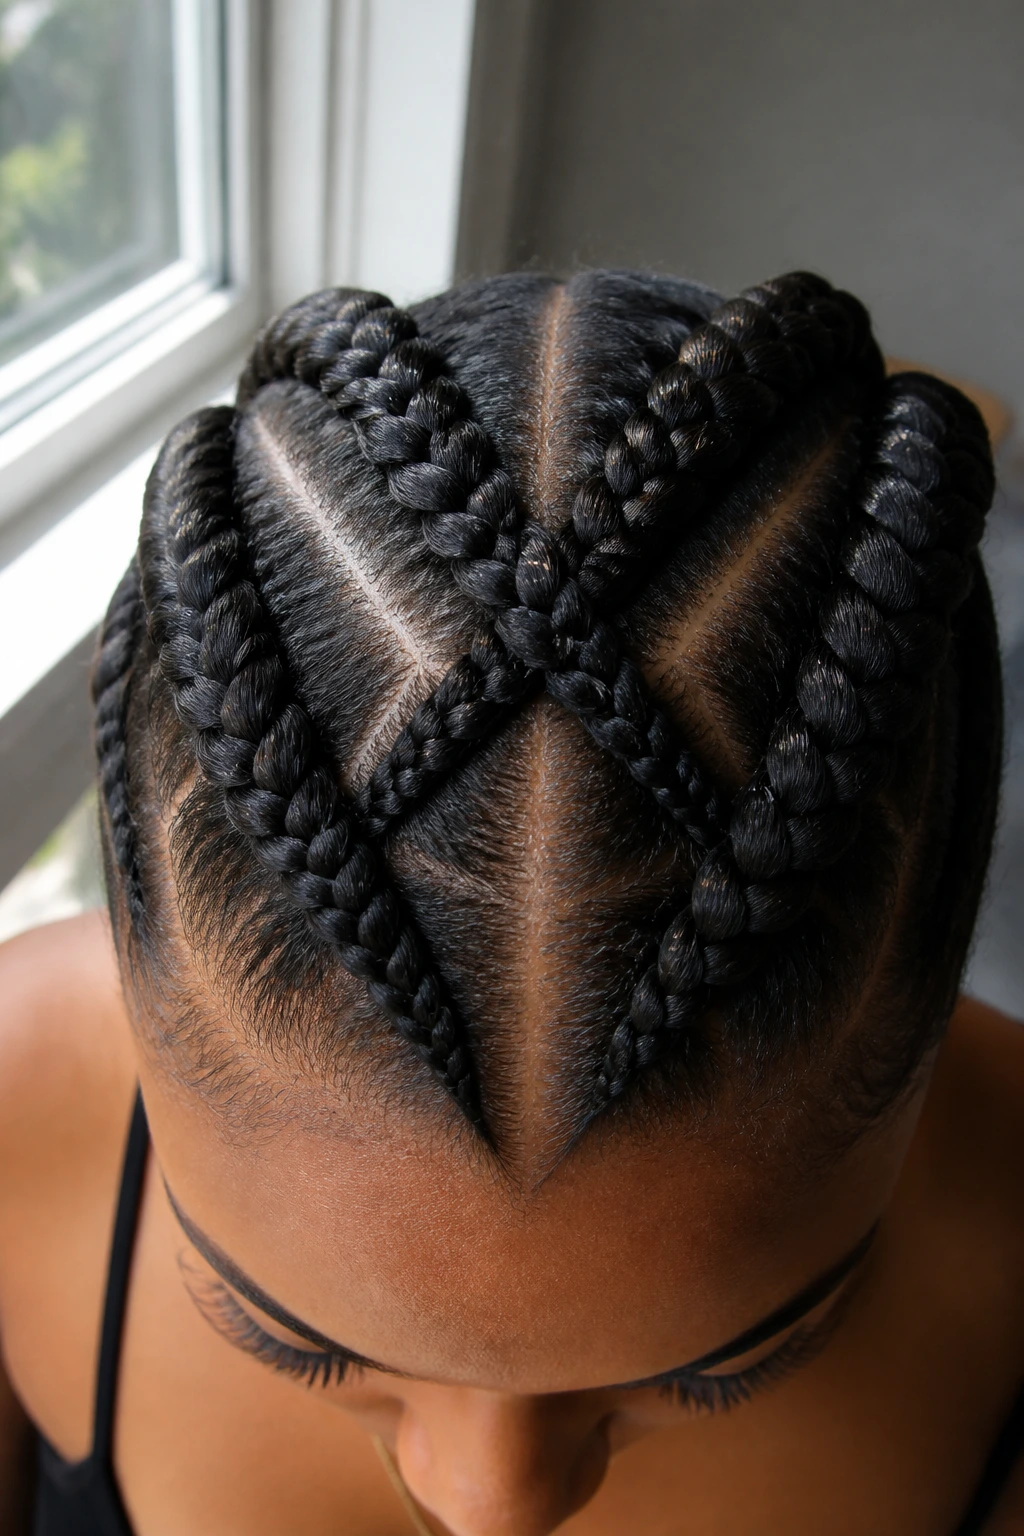
Geometric patterns aren’t reserved for small, intricate designs; they work beautifully with four large cornrows as well. By crossing the braids over one another in the middle of the scalp, you turn a simple protective style into a statement. This requires a bit more planning because you have to make sure the crossovers aren’t bulky.
The Secret to Flat Braids
Bulky braids occur when the hair is gathered too aggressively at the cross-over points. Use a small amount of product at these junctions to keep the hair smooth. If the braids are too thick, the “cross” will look like a bump rather than a clean intersection. Take your time to flatten the hair at the point of intersection before continuing the braid.
Who Should Choose This Look
This is ideal for those with medium-to-long natural hair. Shorter hair may struggle to “cross” without coming undone, but if you have a few inches of length, the geometric style is one of the most visually striking options available.
6. Half-Up, Half-Down Variation
This style utilizes the four-braid structure by splitting the head horizontally. The top two braids are cornrowed back to the crown, while the bottom two are braided to the nape. You are left with the look of a structured crown while the rest of your hair hangs free or is tucked into a loose low bun. It’s a great way to show off your natural texture in the back.
Balancing the Sections
Make sure the parting line across the back of your head is perfectly straight. If it is crooked, the two sections of braids will look disjointed. Use a mirror to check the back, or have a friend help you ensure the part is sharp before you start braiding.
Maintaining the Loose Hair
The hair that remains loose needs special attention. Since it isn’t protected by a braid, it is vulnerable to snagging and breakage. Use a leave-in conditioner and a light oil on these loose sections daily to keep them from drying out or knotting up.
7. The Side-Swept Asymmetry
For a look that exudes effortless cool, try the side-swept pattern. All four braids start at one side of the head and sweep across the crown to the other side. This creates a deep side part effect that frames the face beautifully. It is particularly flattering for those with round or square face shapes, as the diagonal lines help to elongate the appearance of the face.
The Parting Technique
The success of this look depends entirely on the angle of your parts. Instead of parallel lines, your parts should be radiating from the side of your head. This creates a fan effect that looks sophisticated and purposeful.
Accessories
Because this style is so focused on one side of the head, it is the perfect canvas for accessories. Consider placing hair rings or decorative cuffs along the side-swept braids to draw attention to the asymmetry. A single large cuff on the topmost braid can anchor the entire look.
8. Tribal-Inspired Large Cornrows
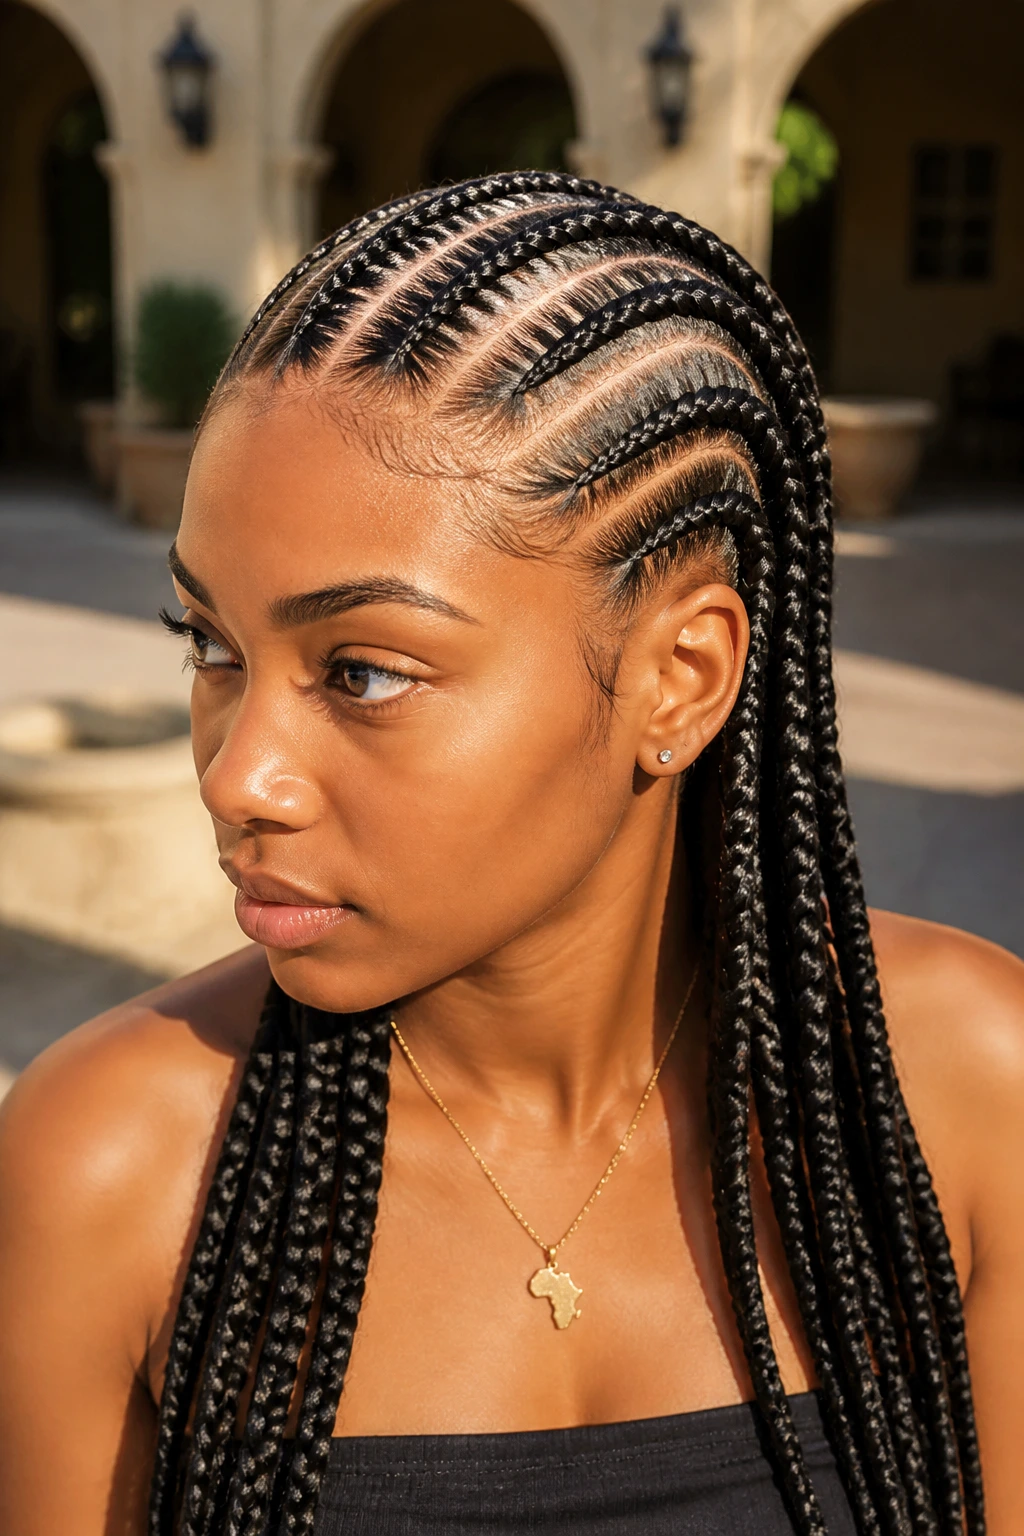
Tribal styles typically involve big, bold braids that utilize a lot of hair. When you limit this to four braids, the result is a clean, modern interpretation of traditional patterns. You can incorporate “feed-in” techniques, where you add extensions as you braid, to create a consistent, thick look from root to end.
Feed-In Basics
If your natural hair isn’t thick enough to produce the desired “large” look, feed-in braiding is the answer. Start the braid with your natural hair and gradually add small pieces of extension hair as you move down the scalp. This creates a seamless transition that looks like your own hair, just fuller.
Managing Weight
Large cornrows can be heavy. If you are using a lot of synthetic hair, ensure the braids aren’t starting too close to your hairline, where the weight can cause traction alopecia. The health of your follicles should always take precedence over the thickness of the braid.
9. The Zig-Zag Part
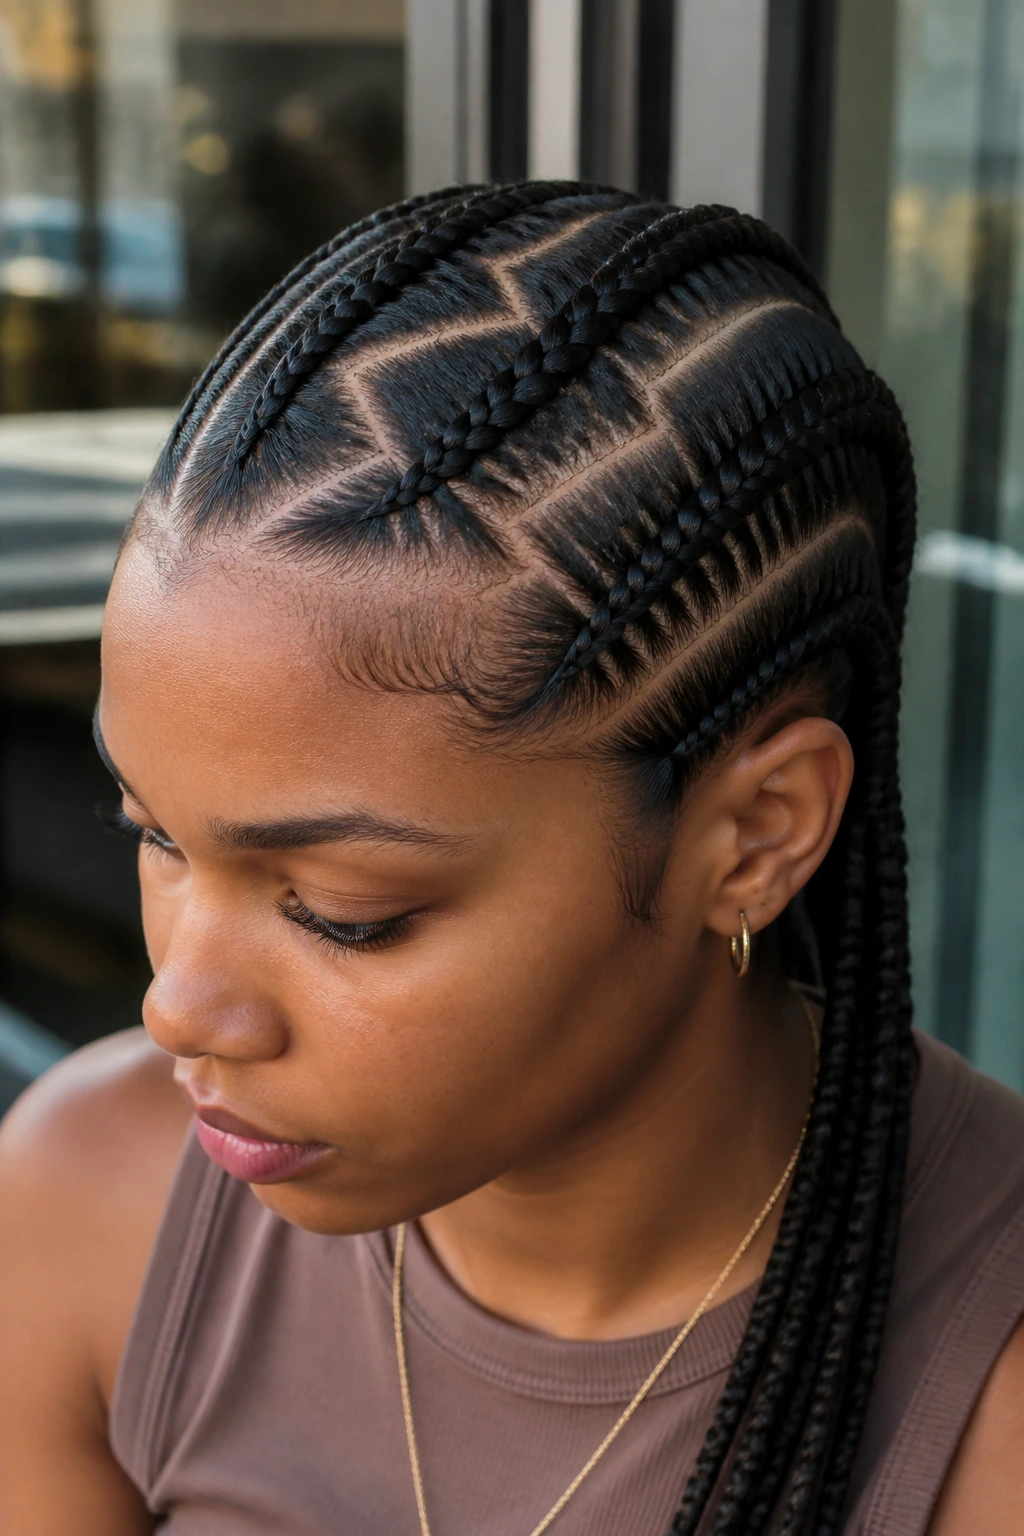
Sometimes, the braid itself is simple, but the parts are where the artistry happens. A zig-zag part between your four cornrows adds a playful, modern twist to an otherwise traditional style. It’s a great way to add visual interest to the scalp without making the braiding process significantly more difficult.
Creating Sharp Angles
The trick to a perfect zig-zag is to go slow. Use the metal tail of your comb to draw the zig-zag slowly, pressing the hair to the side as you go. If you rush, you will end up with messy lines that look more like waves than sharp angles.
Product Selection
Use a clear styling gel with a strong hold for the parts. This will ensure the zig-zag pattern remains visible and crisp throughout the day. Avoid heavy waxes, which can leave a white residue in the part that makes the style look dusty or unkempt.
10. The Crown-Wrap Style

The crown-wrap is one of the most elegant ways to wear four braids. Two braids are cornrowed back, while the other two are wrapped around the front of the head like a halo. It is a regal, face-framing style that works perfectly for formal occasions or when you simply want to feel a bit more elevated.
Securing the Halo
To keep the front-wrapping braids in place, use bobby pins that match your hair color. Place them strategically at the underside of the braid so they remain hidden. You don’t need a dozen pins; just three or four placed at key curves will hold the shape securely.
Avoiding Tension
The hair at the front hairline is the most fragile. When wrapping the braids around the front, ensure you aren’t pulling the hair too tight. The braid should sit comfortably against the hairline without creating any tension or pain. If it feels tight, loosen the braid slightly before pinning.
11. Ends-Out Cornrows
If you want to showcase your natural curl pattern, the ends-out look is a fantastic compromise. The cornrows stop at the nape of the neck, and the remaining hair is left as loose twists or braids that are allowed to hang free. This gives you the protection of cornrows with the freedom of a loose style.
Blending the Transition
The point where the cornrow stops and the loose hair begins needs to be secure. Tie off the base of the cornrow with a small, seamless hair tie or a clear elastic band. This ensures the braid doesn’t unravel while you sleep or move throughout the day.
Styling the Ends
Because the ends are exposed, they are prone to dryness. Keep them hydrated with a light curling cream or a drop of jojoba oil. This will help maintain the definition of your curls and prevent them from becoming frizzy or tangled.
12. Minimalist Gold-Cuff Accents
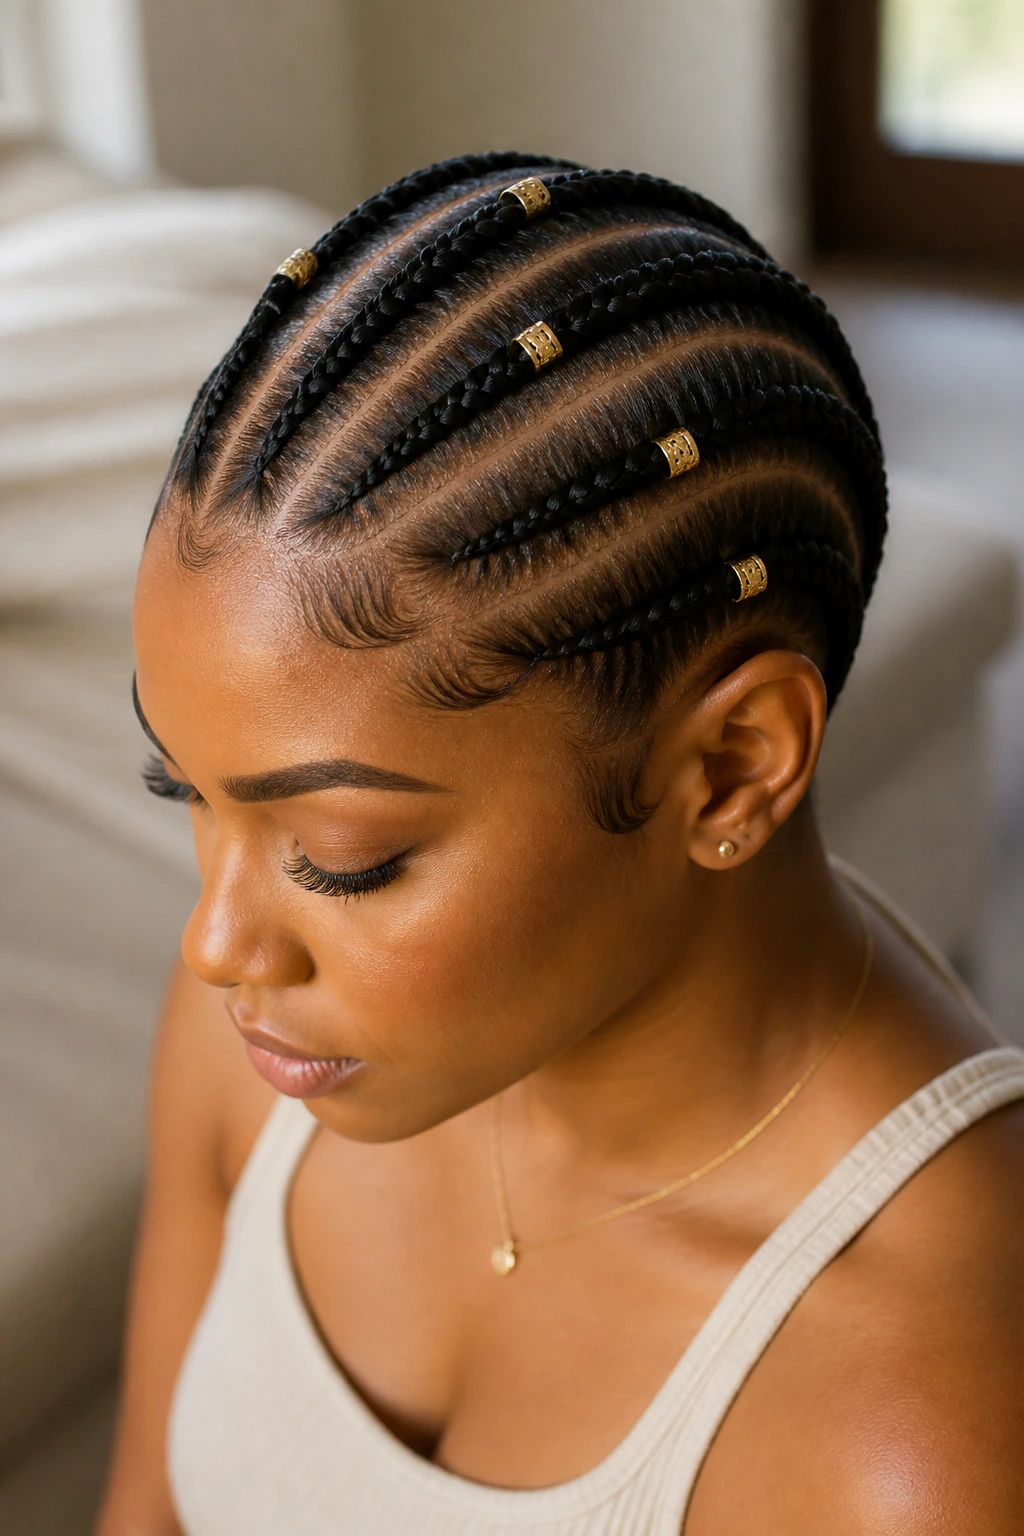
If you are sticking to a very simple four-braid straight-back, accessorizing becomes your primary tool for style. Gold or silver hair cuffs placed at equal intervals down the braids can transform a basic protective style into a high-fashion look. The metallic shine against dark hair is a timeless combination.
Placement Strategy
Don’t clutter the braids. Use a consistent pattern—perhaps three cuffs per braid, spaced evenly. This deliberate placement makes the style look intentional and professional.
Choosing the Right Cuffs
Always opt for cuffs that have a smooth interior. Rough or sharp edges on cheap metal can cut your hair or snag on your coils, leading to breakage. If you find a cuff that feels sharp, take a file to the inside edge before putting it in your hair.
13. The Two-Tone Effect
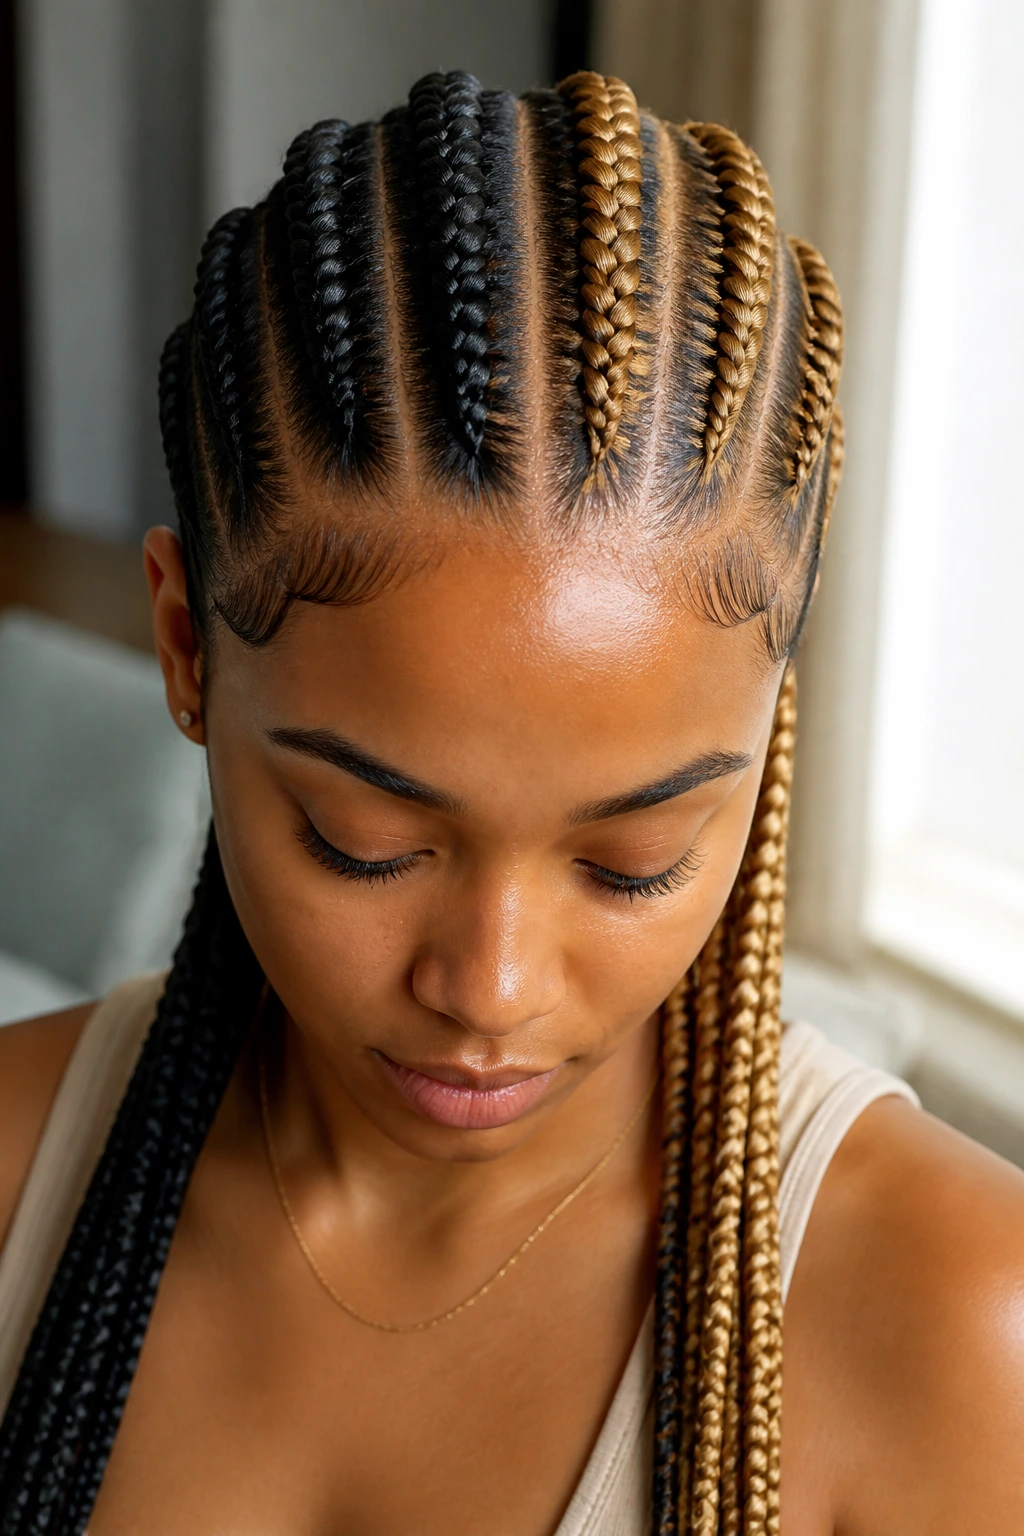
Who says your four braids all have to be the same color? By using hair extensions, you can create a two-tone effect. Perhaps the two braids on the left are a natural black, while the two on the right incorporate a honey-blonde or copper shade. This bold choice creates a striking, modern appearance.
Color Matching
The transition between colors is crucial. If you are feeding in hair, start with your natural color at the root and gradually introduce the lighter color as you move down the braid. This creates a natural gradient that looks more polished than an abrupt switch.
Maintenance
Colored extensions tend to dry out faster than natural hair. Make sure to keep the braid saturated with a leave-in moisturizer, especially toward the ends. A light spray of water and glycerin works wonders for synthetic hair that starts to look a bit brittle.
14. The Low-Bun Base
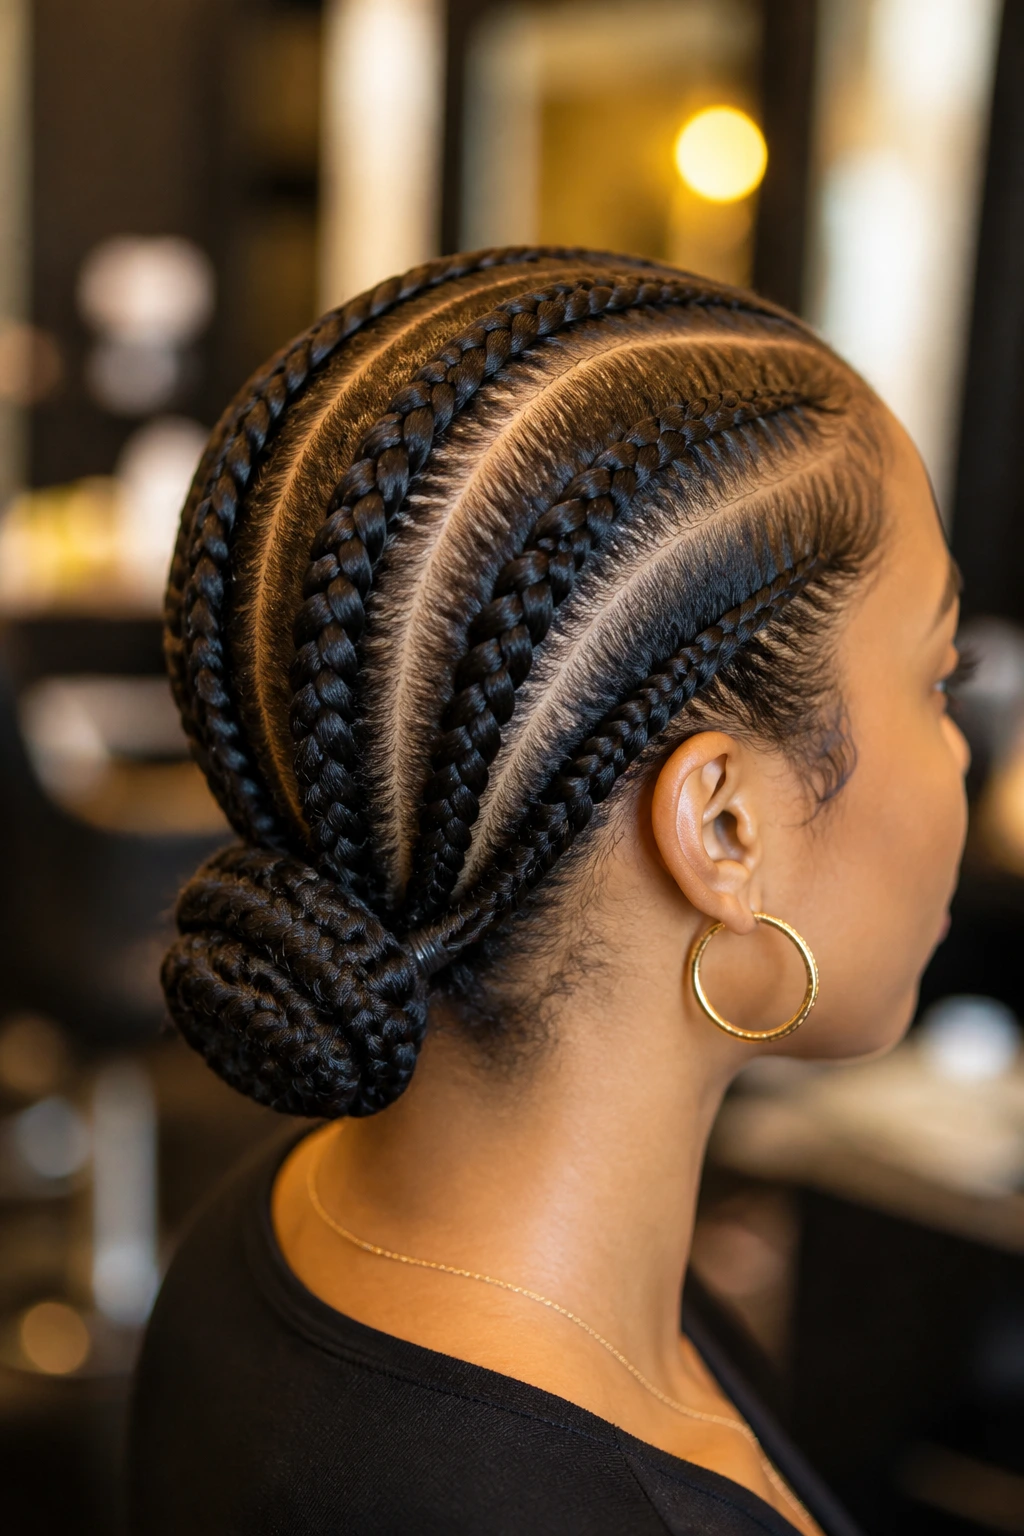
Similar to the high-ponytail base, the low-bun variation directs all four braids toward the nape of the neck. This is a more understated, mature look that is perfect for professional settings. Once the braids meet at the nape, you can gather them into a simple, tight bun that stays securely at the back of your head.
The Low Bun Advantage
Low buns are better for long-term hair health because they exert less pressure on the hairline than high styles. The gravity of the bun pulls downward toward the neck rather than pulling upward toward the scalp, reducing the risk of tension-related hair loss.
Securing the Bun
Use a sturdy elastic band to secure the bun. If your braids are thick, you might need two loops. Avoid pulling too hard on the base of the braids when securing the bun; keep the tension distributed so you don’t end up with a headache by the end of the day.
15. The “S” Pattern

This pattern involves creating an “S” shape with each of the four braids. Instead of going straight back, each braid wiggles as it travels to the back of the head. It is a visually rhythmic style that catches the light and adds a bit of flair to a standard cornrow design.
Maintaining the Wiggle
To keep the “S” shape sharp, you need to use a consistent tensioning technique. If you pull too hard on the inner curve of the “S,” the braid will flatten out and lose its shape. Keep the tension even throughout the entire braid to maintain the curve.
Scalp Health
These patterns often require slightly more manipulation of the scalp. Make sure you are using a light oil, like peppermint or tea tree, to soothe the scalp after braiding. It prevents that tight, itchy feeling that often comes with intricate braiding patterns.
16. Thick and Thin Alternation
For a visual depth that simple braids can’t provide, try alternating the thickness of your four braids. Two large, thick braids flanked by two smaller, tighter braids create a balanced, complex look. The variation in size adds a layer of texture that keeps the style from looking repetitive.
Measuring the Sections
Precision is key here. You need to section your hair carefully to ensure the two large braids have exactly the right amount of hair and the two smaller braids have significantly less. Use a clip to separate the sections before you start, so you don’t accidentally pull hair from a “thick” section into a “thin” one.
Balancing the Aesthetic
When you have different braid sizes, the visual weight of the hair shifts. Ensure the thinner braids are tight enough to stay neat for a long time, as they will have less hair to hold their shape compared to the larger ones.
17. The Sleek “Space Buns” Finish
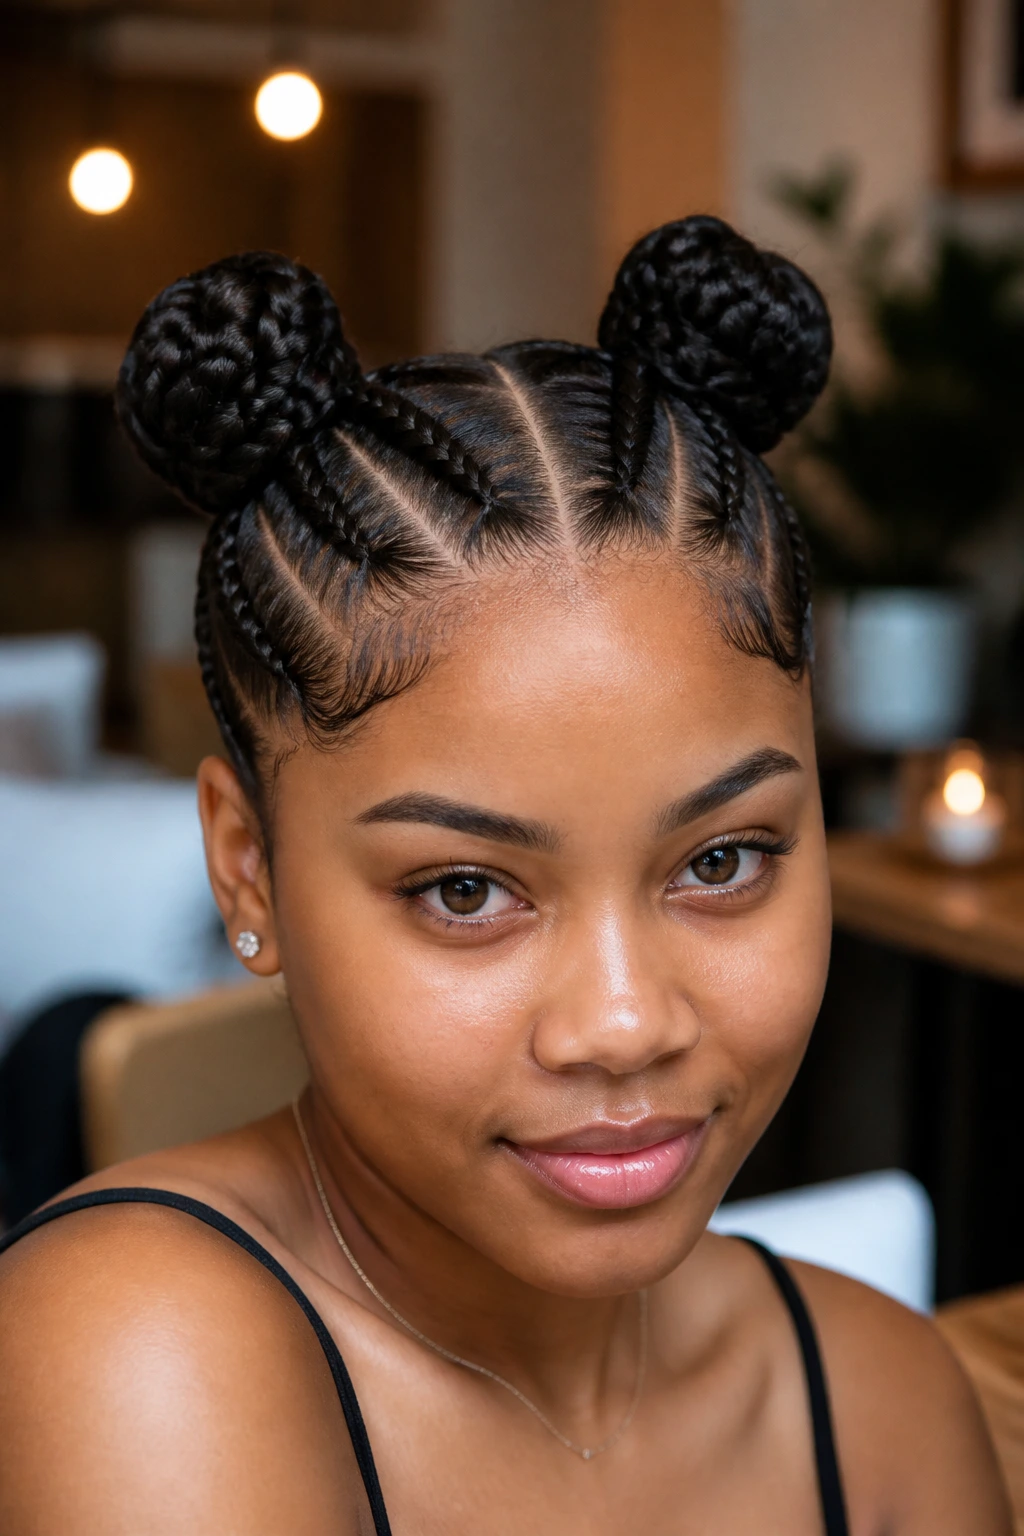
Once your four braids reach the crown of your head, split them into two pairs and secure them into two separate buns. This space-bun variation is playful and youthful. It utilizes the four-braid foundation to create a symmetrical, fun aesthetic that is perfect for casual outings.
Managing the Split
The split between the two pairs of braids needs to be symmetrical. If one side has more hair than the other, one bun will inevitably look bigger than the other. Use a mirror to ensure the split is perfectly centered at the top of your head.
Protecting the Ends
Since the ends are tucked into the buns, they are already protected. However, make sure you aren’t folding your hair too sharply when you create the buns. A loose, coiled bun is much better for your ends than a tight, twisted one that can snap the hair at the bend.
Final Thoughts
Four-braid cornrows on natural hair are a testament to the idea that simplicity is the ultimate sophistication. By focusing on the health of your scalp, the crispness of your parts, and the proper maintenance of your braids, you can turn a basic style into a refined look that protects your hair and highlights your features. Remember that the longevity of these styles depends almost entirely on how you treat them between salon visits. Keep the scalp clean, keep the hair hydrated, and always prioritize tension relief. Whether you go for the classic straight-back or a more intricate geometric design, these styles will serve as a reliable foundation for your natural hair journey. Treat them with care, and they will return the favor with growth and style.