



Imagine standing in front of your bathroom mirror at 7:00 AM, holding a cup of lukewarm coffee, staring at a front section of hair that refuses to cooperate. We have all experienced this frustration. The front of your hair is the first thing people notice, acting as the frame for your face. Yet, many daily routines fall into a boring cycle of either ignoring this crucial zone or scraping it back into a tight, scalp-stretching ponytail. Finding a balance between effortless morning styling and a polished appearance is entirely possible.
Over the years, experimenting with various styling creams, pins, and hair ties has shown that a few strategic tucks, parts, or twists can completely change how your hair sits. You do not need to spend forty minutes with a round brush and a hot blow dryer to look put-together. In fact, some of the most charming looks rely on your hair’s natural movement and a few simple tricks.
Taking control of your look starts with understanding how the front of your hair behaves. This area is exposed to more touching, washing, and heat styling than the rest of your head, meaning it requires a gentler touch and smarter styling choices. By focusing on simple, heat-free or low-heat styling methods, you can protect these delicate strands while maintaining a fresh look throughout the week.
Let us look at some of the most reliable and stylish front hair options for everyday wear that can transform your morning routine in five minutes or less.
How Face Shapes Match With Front Hairstyles
Choosing a style for your front hair is not just about copying what looks good on someone else; it is about working with the natural architecture of your face. Your jawline, cheekbones, and forehead height all play a massive role in how a front hairstyle will drape and settle. When you understand these proportions, styling becomes a matter of balance rather than luck.
For rounder face shapes, the goal is often to create the illusion of length. High-volume styles, deep side parts, or long, diagonal sweeps work wonders here because they draw the eye upward and outward rather than cutting across the face. On the other hand, if your face is long or oval, blunt-cut bangs or soft, horizontal sweeps can help visually shorten the face, making everything feel more balanced.
Square faces benefit immensely from softness. Harsh, straight lines can sometimes make a strong jaw look heavy, so opting for wispy tendrils, curved curtain bangs, or soft twists helps round out those sharper corners. Heart-shaped faces, which are wider at the forehead and narrower at the chin, look spectacular with side-swept fringe or piecey curtain layers that bulk up the area around the cheekbones and eyes.
1. Wispy Curtain Bangs
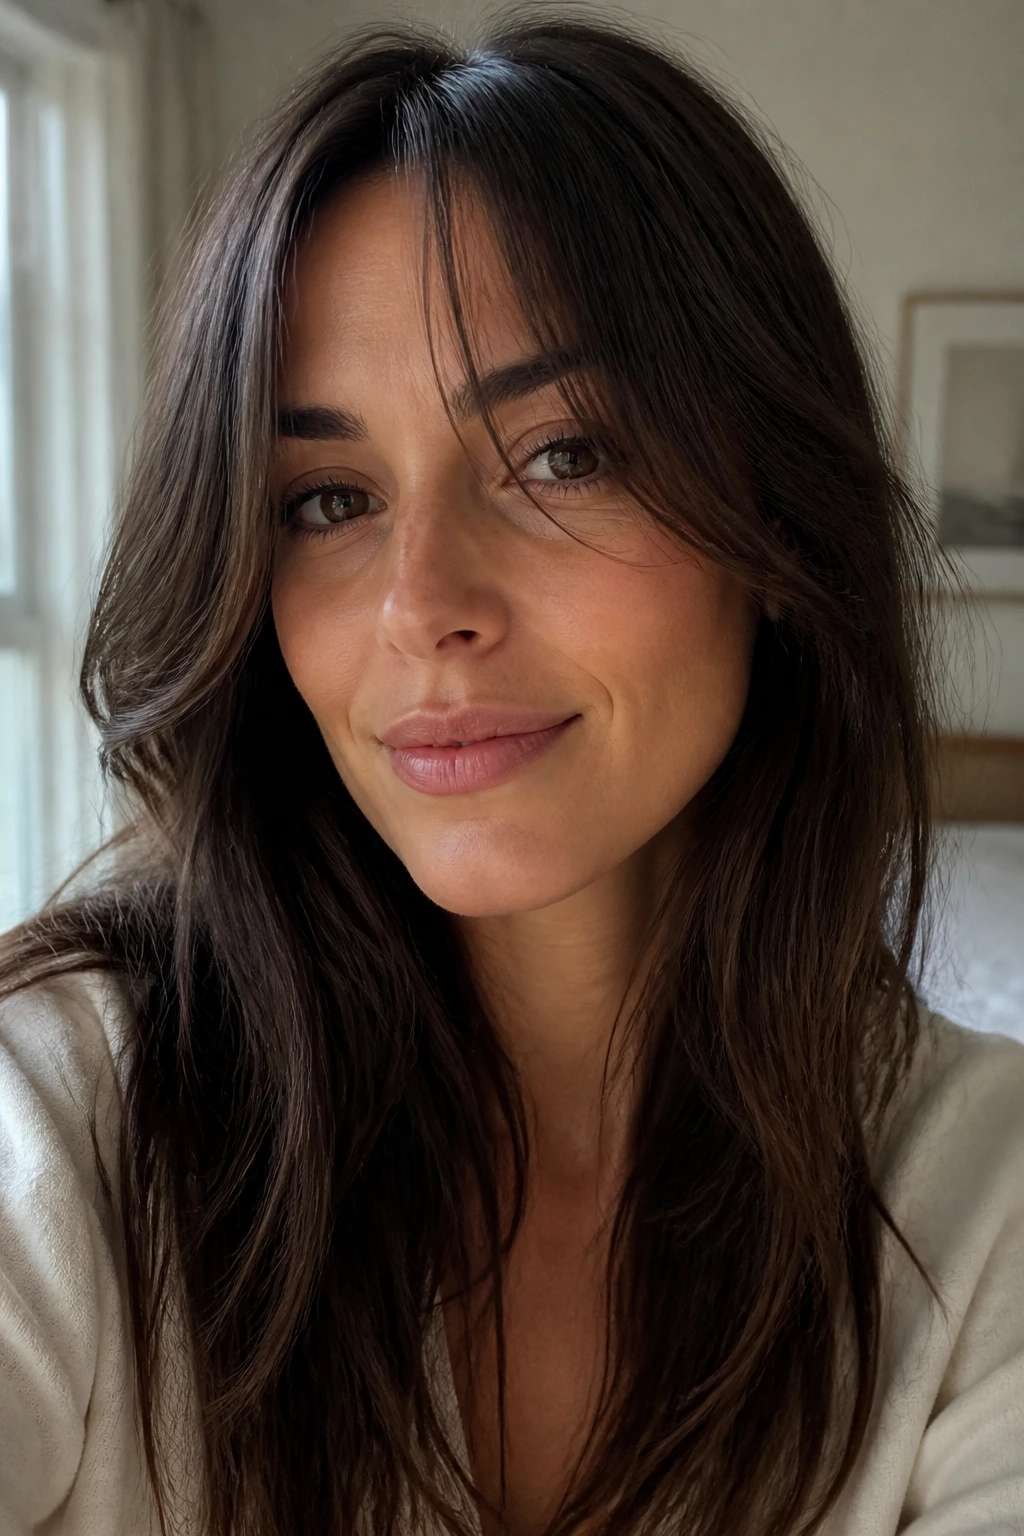
Soft, face-framing fringe that splits down the middle is the easiest way to add shape to your hair without committing to a full forehead cover. Curtain bangs have remained a classic choice because they grow out beautifully and do not require monthly trims to look decent. They sit like open drapes on either side of your eyes, drawing attention to your cheekbones and softening a high forehead.
The Soft Split Method
The secret to curtain bangs is the way they taper. They should be shortest in the middle—roughly hitting the bridge of your nose—and gradually get longer as they sweep outward toward your ears. This gradient allows them to blend into the rest of your hair, whether you wear it down or pull it back into a casual claw clip.
Styling Steps for Daily Bounce
- Dampen the front section of your hair with a spray bottle filled with plain water.
- Wrap the bangs around a medium-sized round brush, rolling them away from your face.
- Aim your blow dryer downward onto the brush for ten seconds on medium heat.
- Let the hair cool completely on the brush before releasing it to set the curl.
- Separate the fringe down the center using your fingers, letting the pieces fall naturally.
Pro tip: If your curtain bangs get greasy before the rest of your hair, wash just this front section in the sink with a pea-sized drop of shampoo to save time.
2. Deep Side-Part Sweep
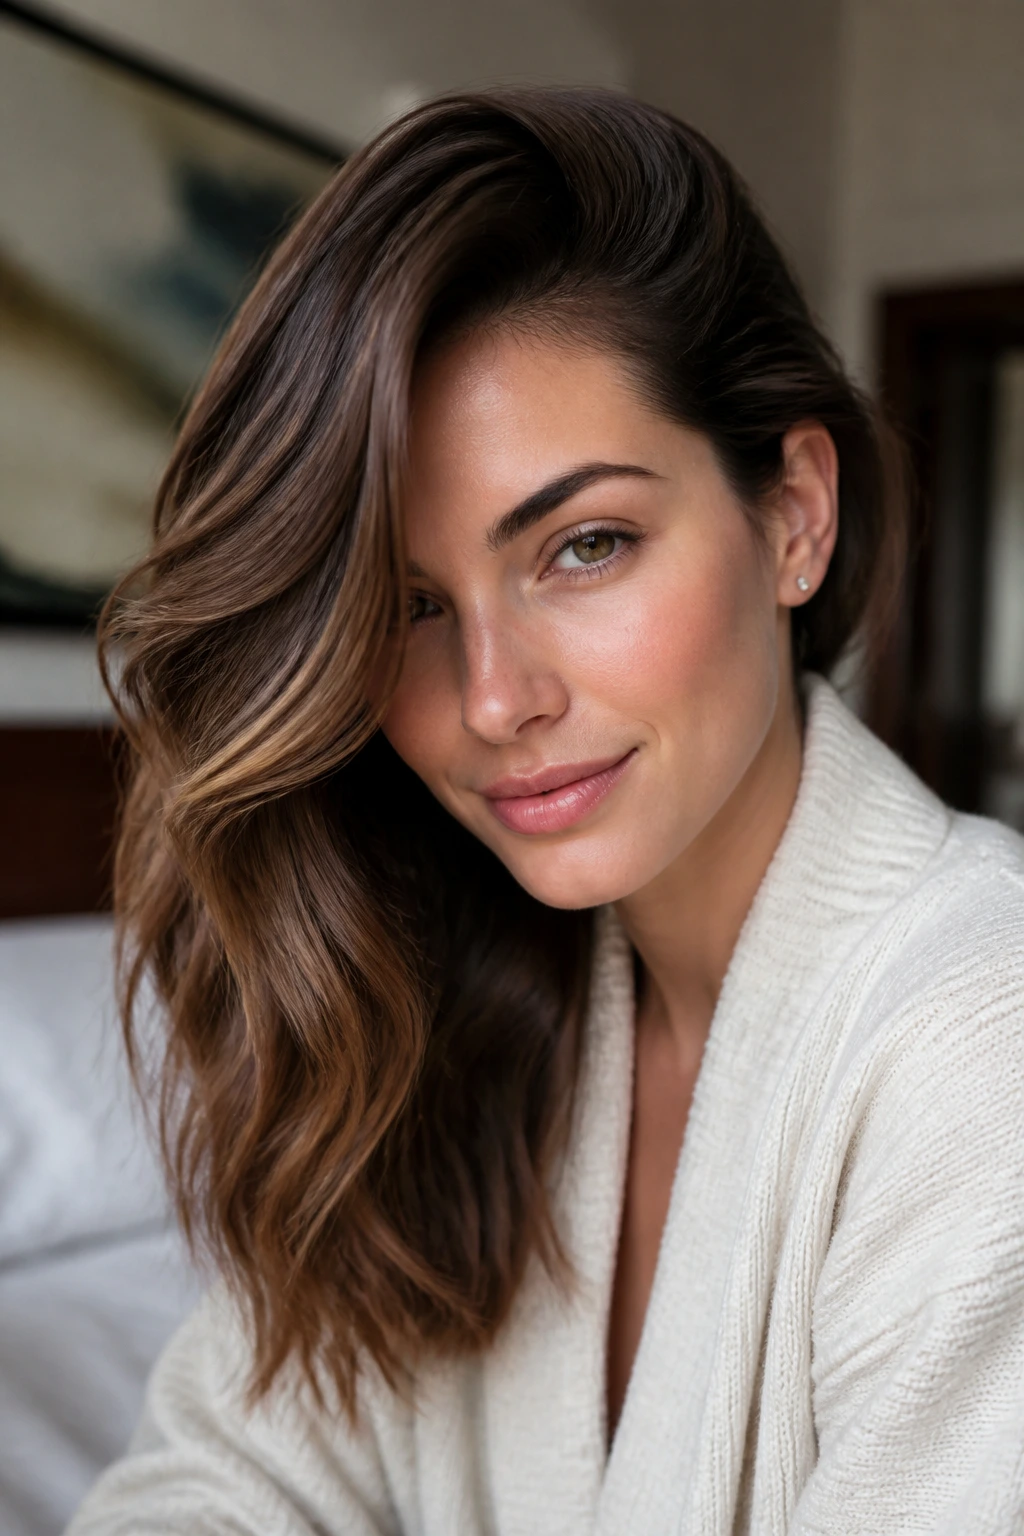
A dramatic side part can instantly shift your entire look, giving the illusion of volume at the roots even on day-three hair. This style involves taking a section of hair from the very edge of your eyebrow and sweeping it all the way across your forehead. It is a fantastic trick for anyone dealing with flat hair or stubborn cowlicks along the front hairline.
To make this look stay put without feeling stiff, you need to use the right styling aid. Skip the heavy hairsprays, which can make the sweep look like a crunchy helmet, and opt instead for a lightweight texturizing spray or a tiny dab of hair wax rubbed between your palms.
This style works on almost every hair length, from a short bob to waist-length waves. It is particularly useful on windy days because you can tuck the heavier side behind your ear, securing it with a single bobby pin hidden beneath the top layers of your hair.
3. Twisted Face-Framing Tendrils
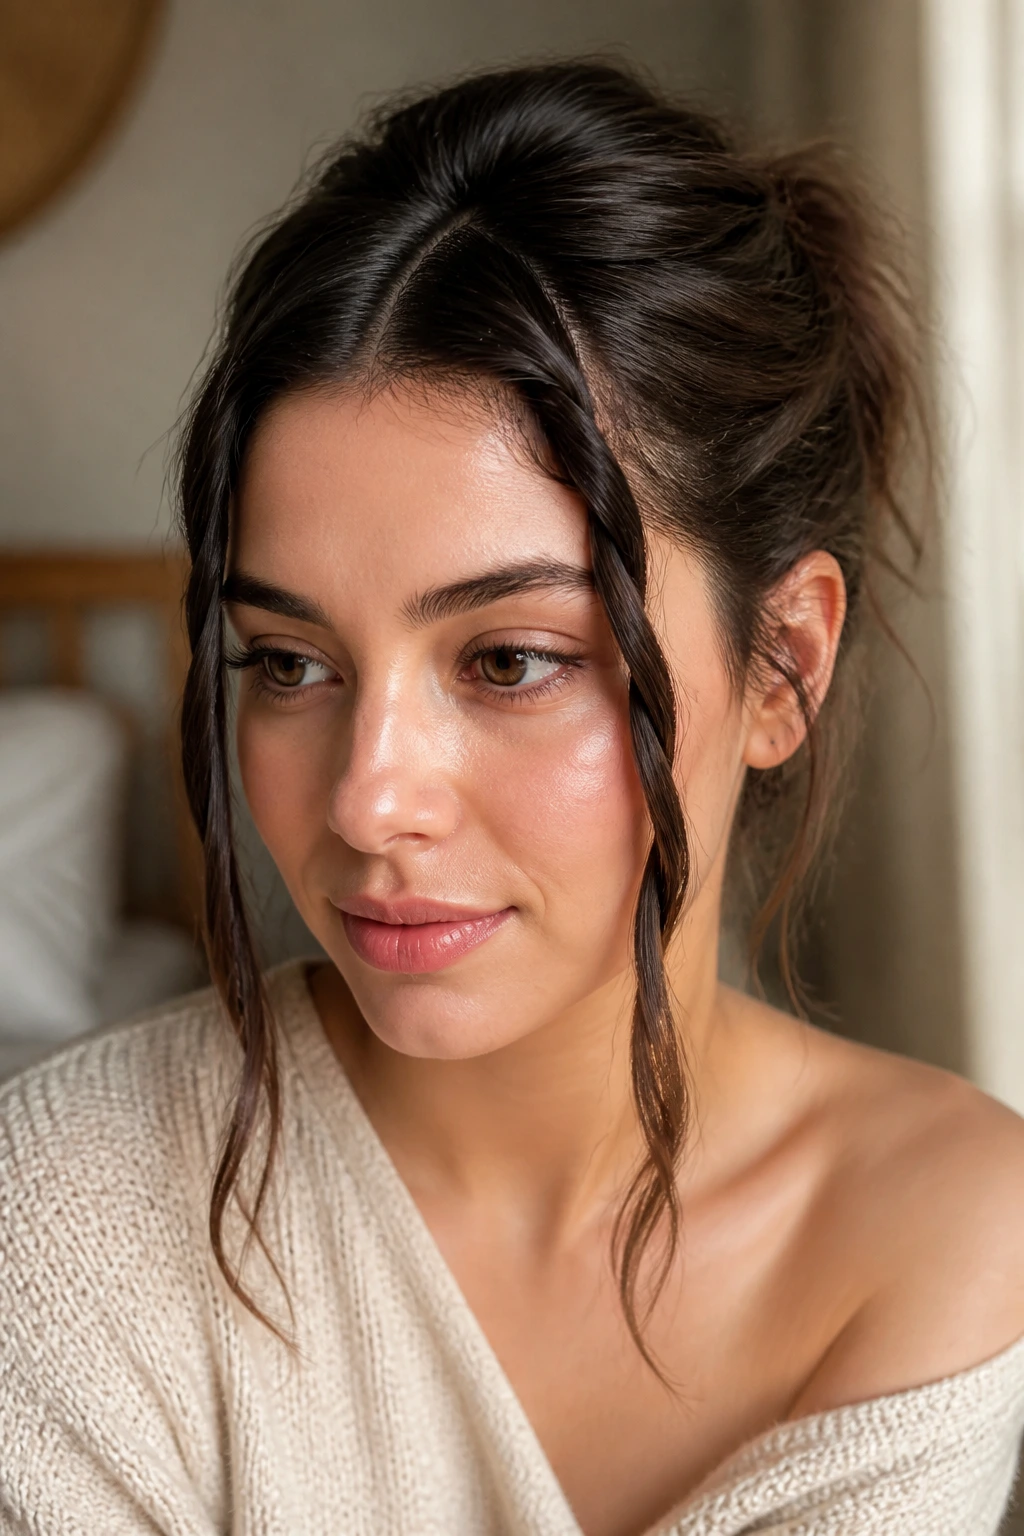
Why does this simple technique work so well when you are in a rush? Because twisting takes a fraction of the time that braiding does, yet it looks incredibly detailed and intentional. By taking two small sections of hair right at your temples and twisting them away from your face, you keep your eyes clear while letting the rest of your hair flow naturally.
How to Twist for Maximum Hold
You want to start with clean parts on either side of your head. Take a one-inch section of hair, split it into two, and wrap them around each other, adding a tiny bit of hair to the bottom strand as you move back toward your ear. This is similar to a French braid but requires half the finger coordination.
Once you reach the back of your ear, secure the twist with a small, clear elastic band or a bobby pin pushed in upward against the direction of the twist. If you want a softer, more bohemian feel, gently pull at the outer edges of the twist to loosen it up and create a fuller appearance.
This style is a lifesaver for hiding grown-out bangs that are in that awkward middle phase where they are too long to wear down but too short to tuck behind your ears.
4. Micro-Braid Accents
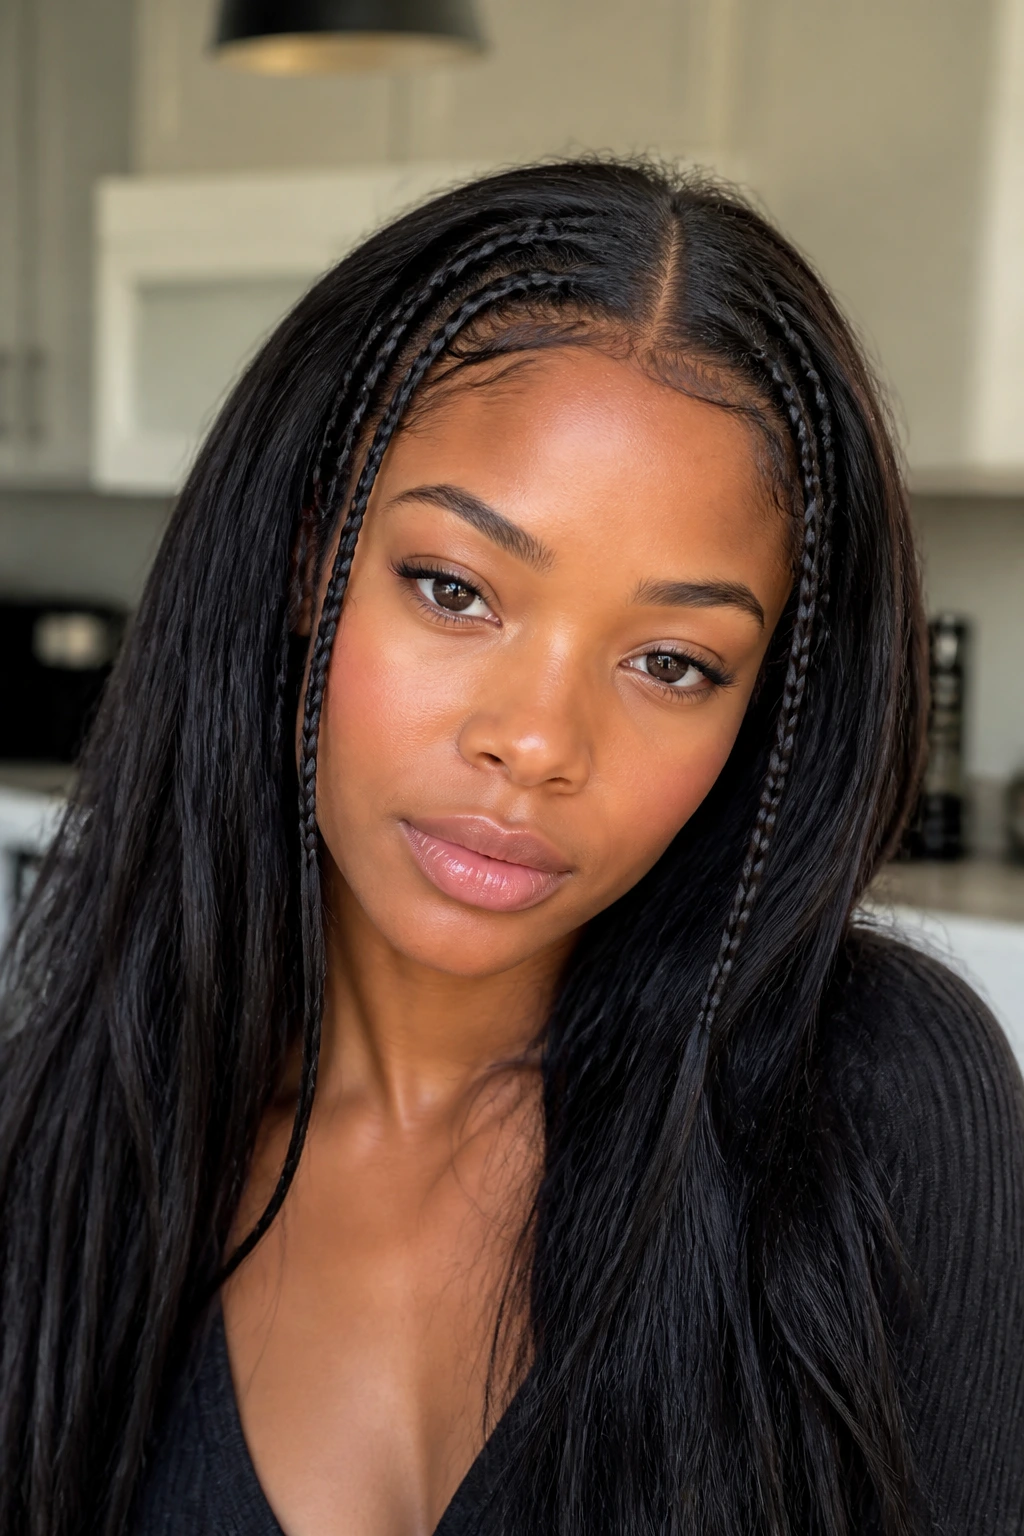
Picture a warm summer morning when your hair keeps getting caught in your lip gloss. Micro-braids are the ultimate solution for keeping those troublesome front strands locked away while adding a subtle, playful texture to your overall look. These tiny, three-strand braids sit right at the front of your hairline, dangling down alongside your cheeks.
The Face-Framing Mechanism
By braiding only the outermost half-inch of your hair on either side of your part, you create a natural frame that highlights your eyes. Because these braids are so small, they do not require any heat styling, making them incredibly gentle on your hair.
- Use a rat-tail comb to section out a tiny sliver of hair right next to your face.
- Braid the section tightly, keeping your hands close to your face to prevent the braid from bulging outward.
- Secure the end with a colorful mini-elastic or simply backcomb the tips slightly to keep them from unravelling.
- Repeat the process on the opposite side of your part, checking in the mirror to ensure they are even.
This look works best on hair that has a bit of natural texture, as the braids will grip better and stay in place without sliding out halfway through your afternoon.
5. Half-Up Topknot Lift

Pulling the top-front section of your hair straight up keeps it out of your eyes while giving your face an instant visual lift. This style is incredibly practical for office work or studying, as it physically prevents any stray hairs from falling forward when you bend over your desk.
Start by placing your thumbs at your temples and drawing them back until they meet at the crown of your head. This isolates the top section of your hair. Comb this piece upward to smooth out any bumps, then twist it into a small bun right on top of your head.
Secure the bun with a silk scrunchie rather than a standard rubber band to prevent hair breakage. Let the remaining hair at the back and sides drape down over your shoulders to keep the look casual and balanced.
6. Bubble-Braid Pigtail Frames
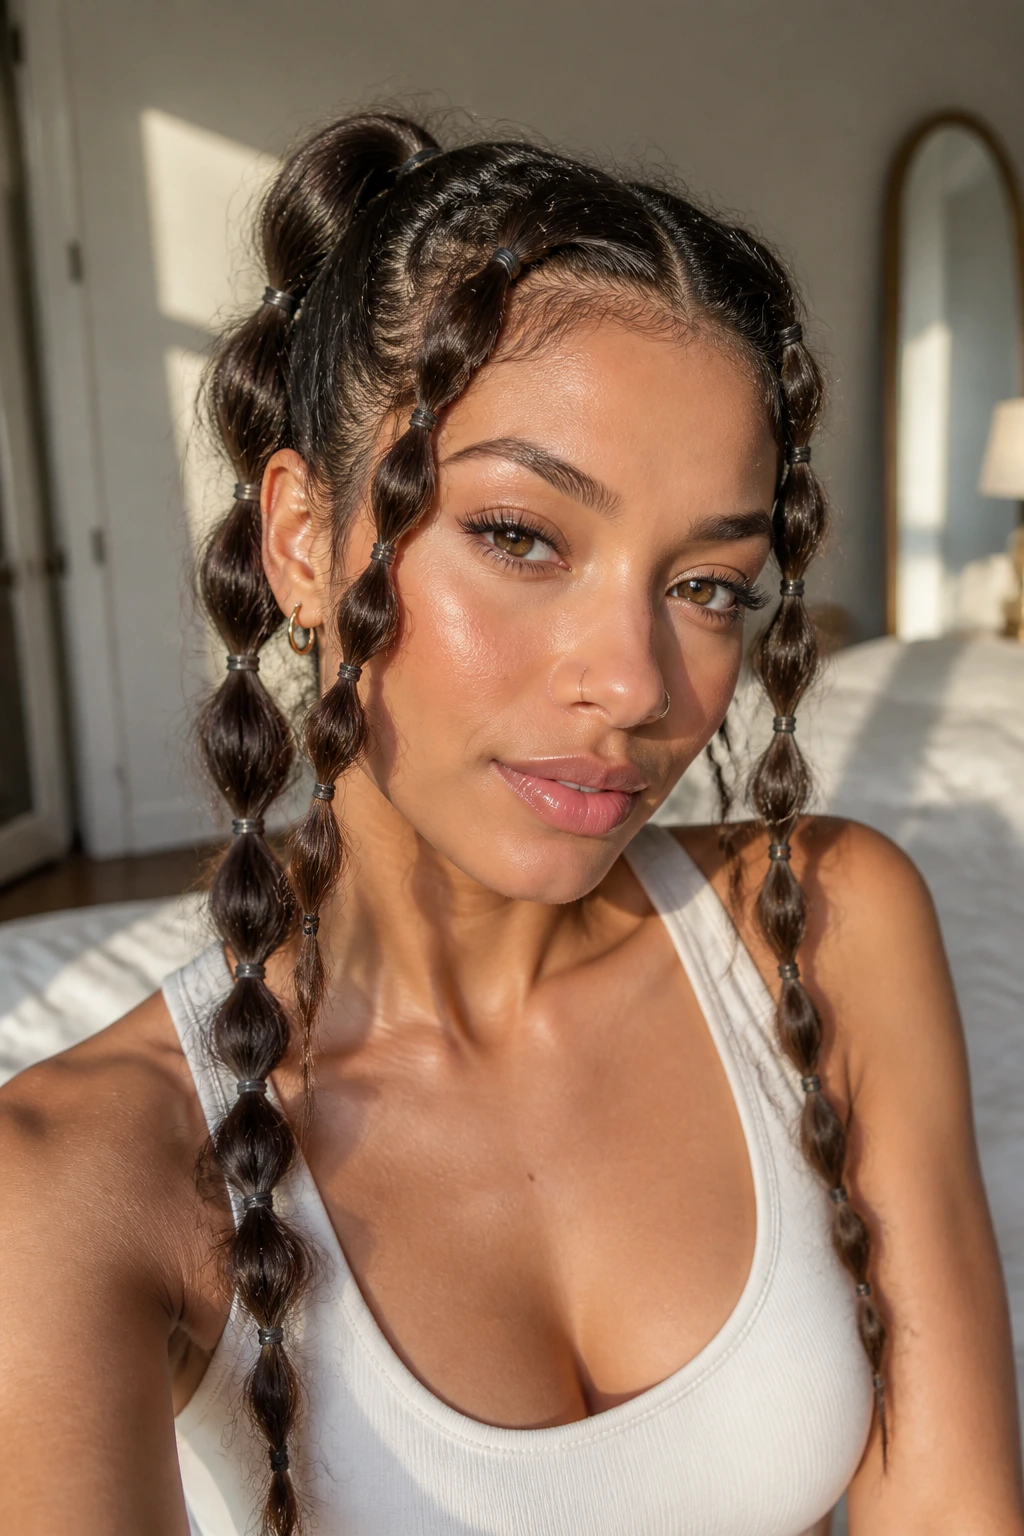
Unlike traditional braids that can feel heavy or look too childish, bubble braids offer a lightweight, modern alternative. They are created by placing small elastic bands down the length of two front ponytails and gently pulling the hair outward between the bands to create “bubbles.”
This style is perfect for high-activity days, such as when you are heading to the gym or running errands. The multiple elastic bands ensure that even short, layered pieces of hair stay locked in place, preventing them from slipping out when you sweat.
If you have very fine hair, you can spray a bit of dry shampoo onto the sections before bubbling them. This adds the necessary friction and volume to keep the bubbles from looking flat or deflated.
7. Slicked-Back Wet Look Front
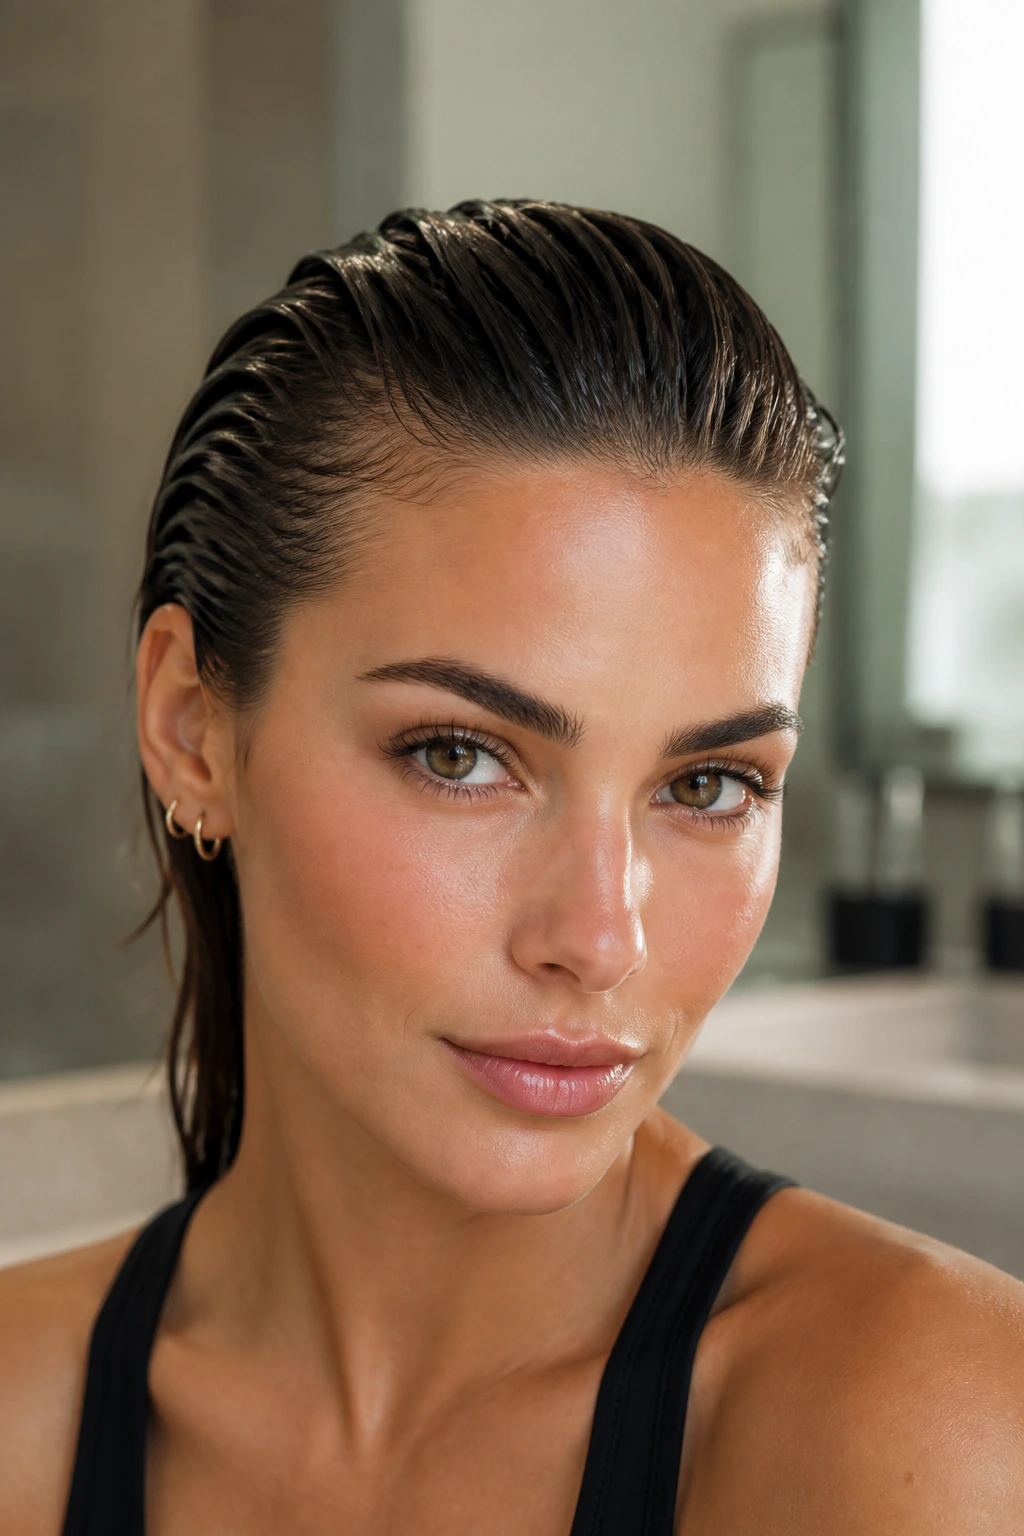
There is something undeniably confident about a sharp, high-shine front section that stays exactly where you put it all day. The wet-look front is a fantastic option for those mornings when you simply do not have the energy to wash your hair, as it utilizes your hair’s natural oils to create a sleek, polished finish.
Choosing the Right Styling Gel
You want to avoid cheap, alcohol-heavy gels that dry down into white, flaky dust. Instead, look for a nourishing styling cream or a pomade that contains natural oils. These products keep the hair looking wet and shiny while keeping the strands soft and pliable.
- Comb your hair thoroughly to remove any knots or tangles.
- Rub a dime-sized amount of styling cream between your hands.
- Smooth your hands over the top and sides of your hair, pushing everything back from your forehead.
- Use a fine-tooth comb to press the hair flat against your scalp, creating clean comb lines.
- Set the style with a quick blast of cool air from your blow dryer to lock the product in place.
Pro tip: If your hair is naturally very thick, you can use two flat bobby pins behind your ears to keep the sides from puffing out as the day goes on.
8. Classic French Braid Crown
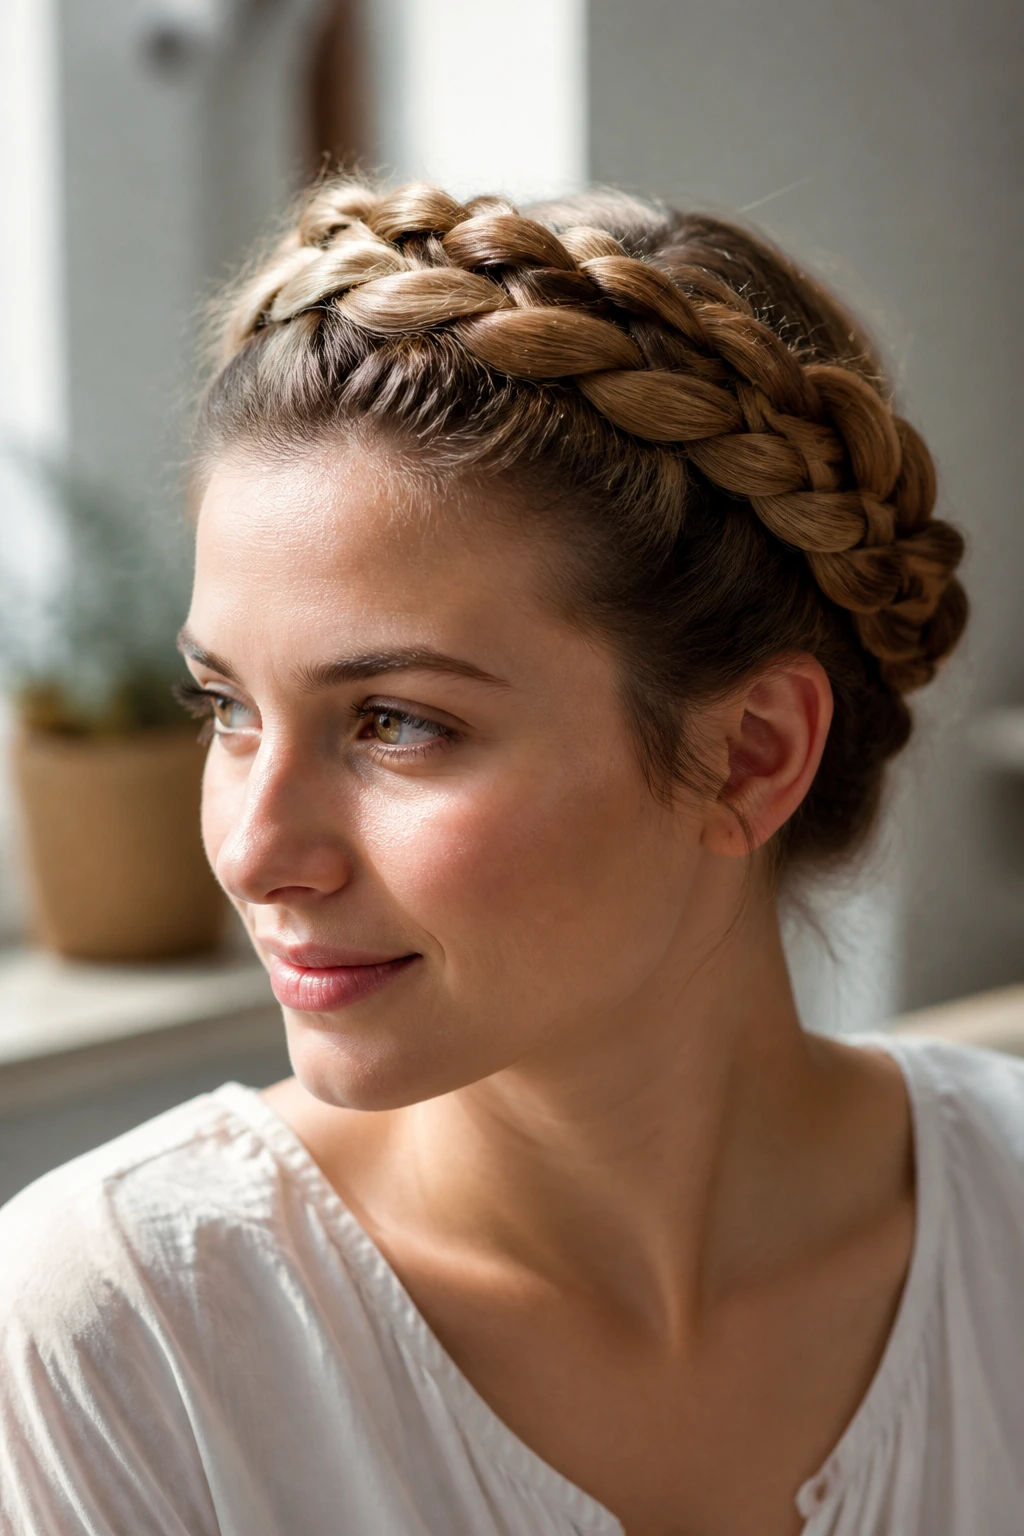
A classic French braid that sweeps across your hairline is the closest thing to a natural headband you can create. This style is beautiful, incredibly secure, and keeps every single hair firmly out of your face from morning until night.
Start with a deep side part, then take a three-inch section of hair on the heavier side. Begin braiding along your hairline, pulling in small pieces of hair from the crown and the forehead as you move toward your ear. The closer you keep your hands to your face, the tighter and more secure the braid will be.
Once you reach the top of your ear, you can transition into a standard three-strand braid and secure it behind your head with a bobby pin. This style looks complex but becomes second nature once you practice the finger movements a few times.
9. Bottleneck Fringe
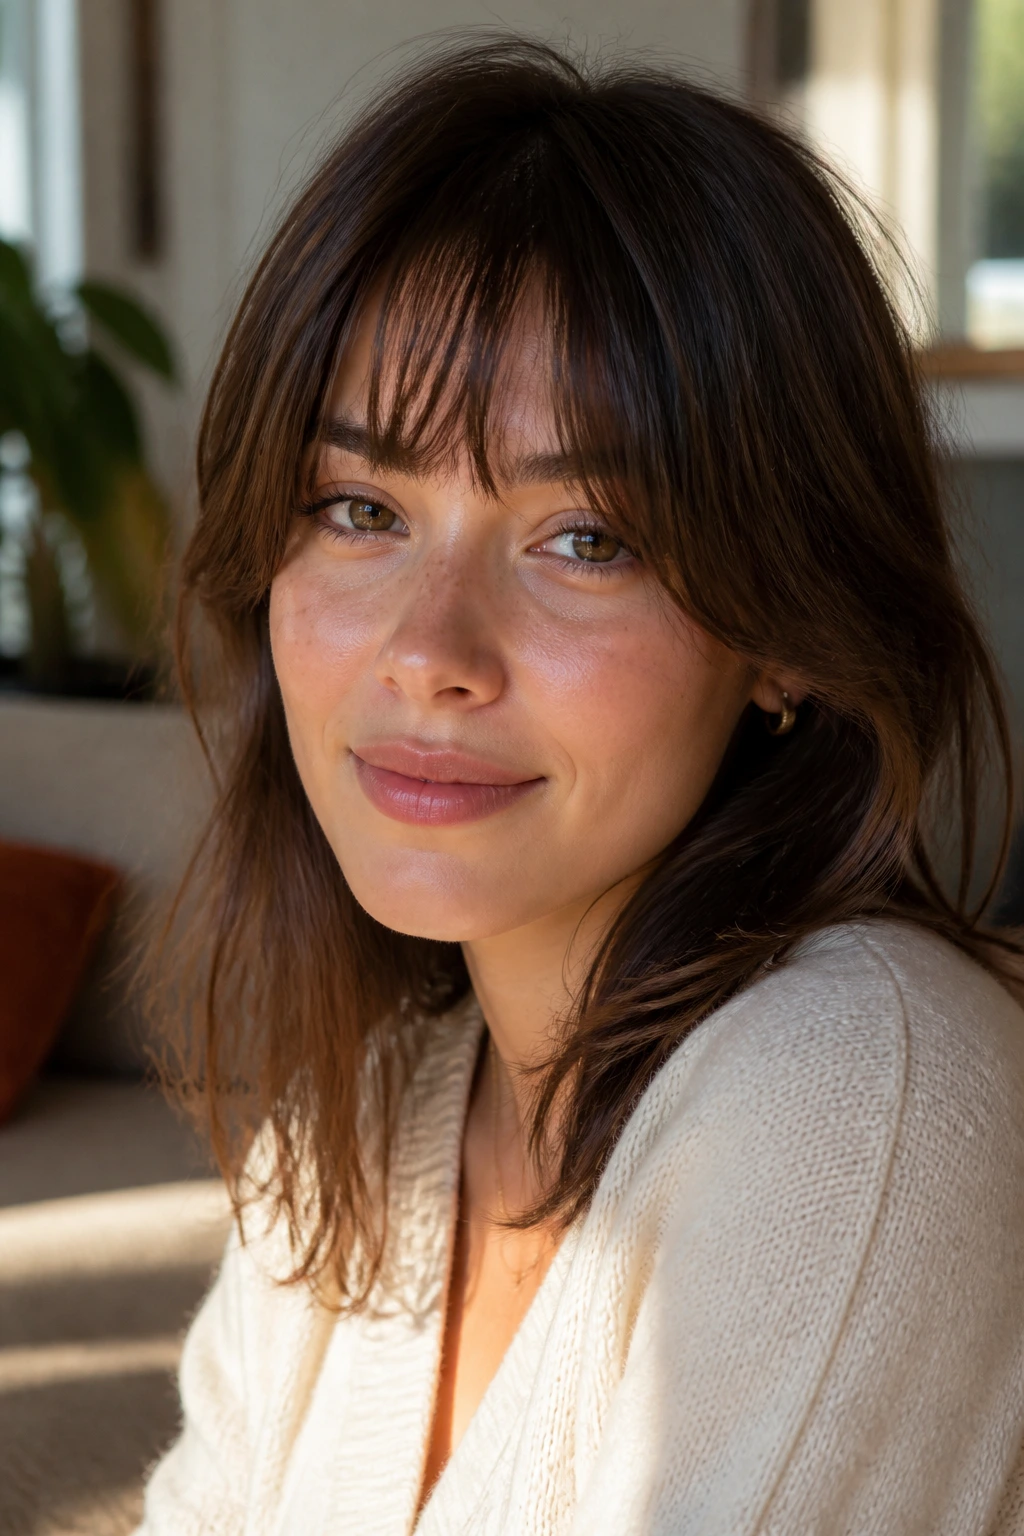
Are you torn between full, blunt bangs and long curtain layers? Bottleneck bangs are the perfect middle ground, featuring a narrow, pinched shape at the top of the forehead that flares out around the eyes and cheekbones, resembling the neck of a classic glass bottle.
Trimming and Styling the Pinch
The magic of this style lies in the center section, which is cut short and straight to sit just above your eyebrows. The sides then curve sharply downward, hugging the outer corners of your eyes before blending into your longer face-framing layers.
Because of this unique shape, bottleneck bangs require very little styling. A quick run-through with a flat iron, curving the iron slightly inward toward your nose, is all it takes to make them look perfectly placed.
This style is exceptionally forgiving for those with cowlicks, as the weight of the longer side pieces helps pull the shorter center section down, keeping it flat against your forehead.
10. Flat-Twisted Halo Front
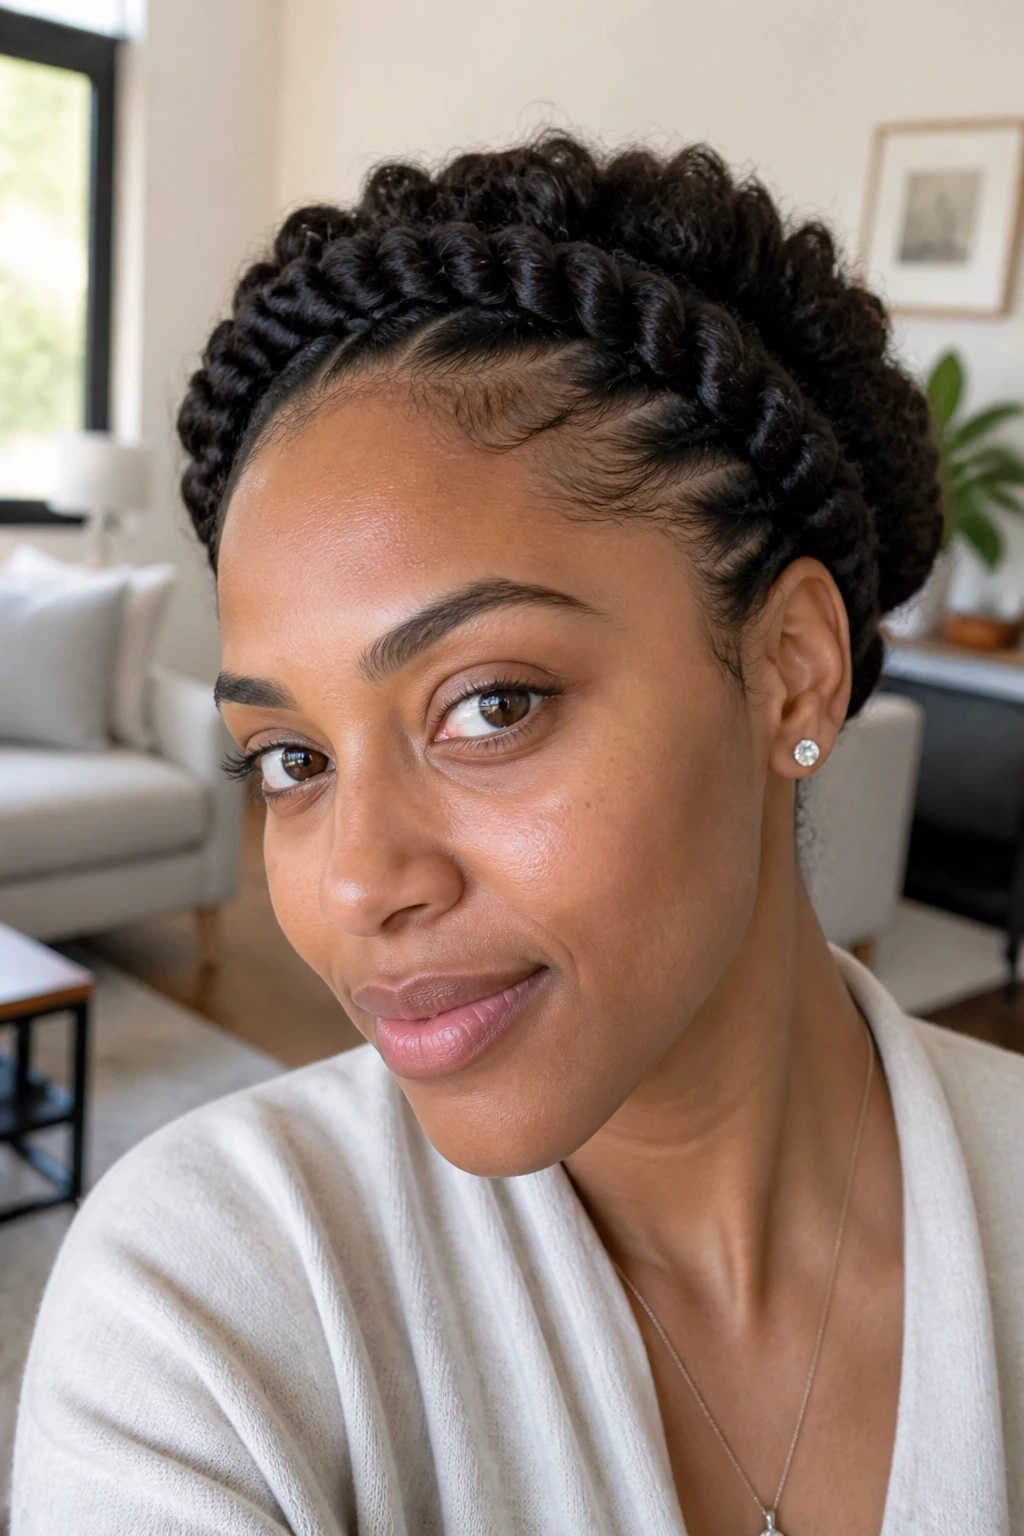
You might have noticed how curly and coily hair textures can sometimes lose definition near the forehead throughout the day. A flat-twisted halo is a gorgeous way to protect these delicate edge hairs while showing off your natural curl pattern.
The Protective Twist Method
Flat twisting is a two-strand technique where the hair is twisted flat against the scalp, pulling in more hair as you go. It is gentler on your scalp than tight braiding, making it an excellent option for protecting your edges from tension damage.
- Part your hair down the center or slightly to one side.
- Apply a moisturizing leave-in conditioner or a twisting butter to your front hairline.
- Begin twisting two small strands of hair near your part, adding more hair from the hairline with each twist.
- Continue twisting along the curve of your head until you reach the back of your ear.
- Secure the end with a small bobby pin, hiding it beneath your curls.
This style can be left in for several days, keeping your front hair protected and neat while you sleep.
11. 90s-Style Chunky Face-Framing Pieces
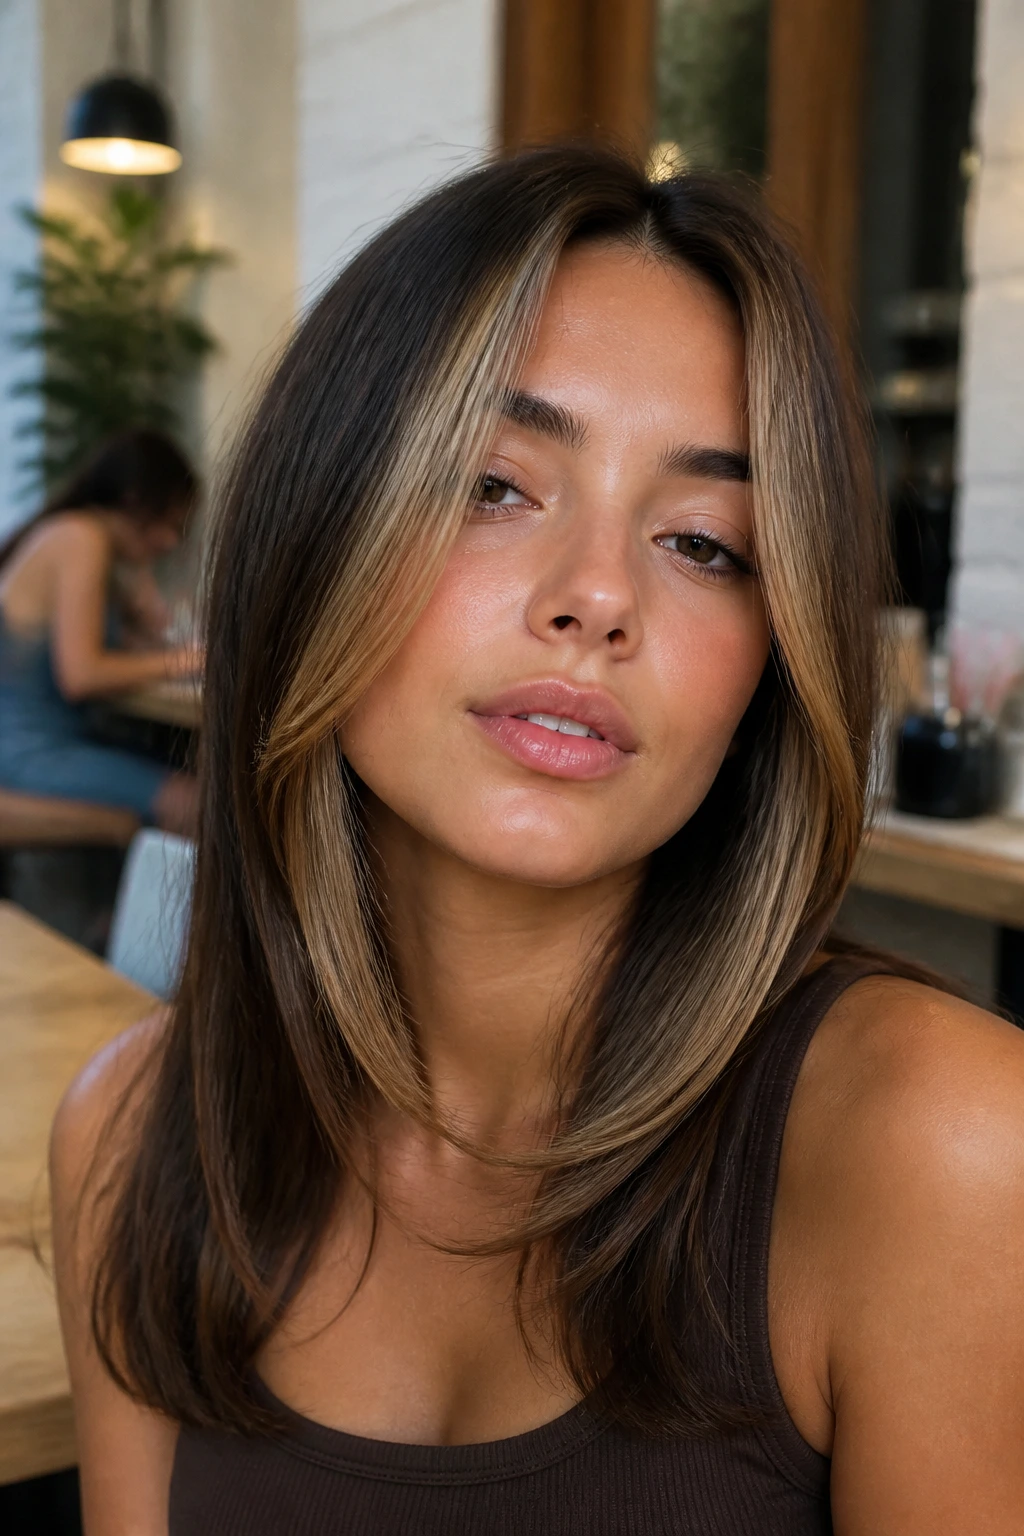
Bringing back the decade of chunky, straight-down front panels is the easiest way to frame your face when wearing a messy bun. This look relies on releasing two thick, symmetrical sections of hair from either side of your part, letting them dangle straight down past your chin.
These pieces should be about an inch thick—anything thinner can look like accidental flyaways, while anything thicker can overwhelm your face. Use a flat iron to get them perfectly straight, curving the ends slightly inward toward your jawline.
This style is particularly great for high-necked clothing, like turtlenecks or thick winter scarves, as it prevents your face from getting lost in all the fabric.
12. Pin-Up Victory Roll Front
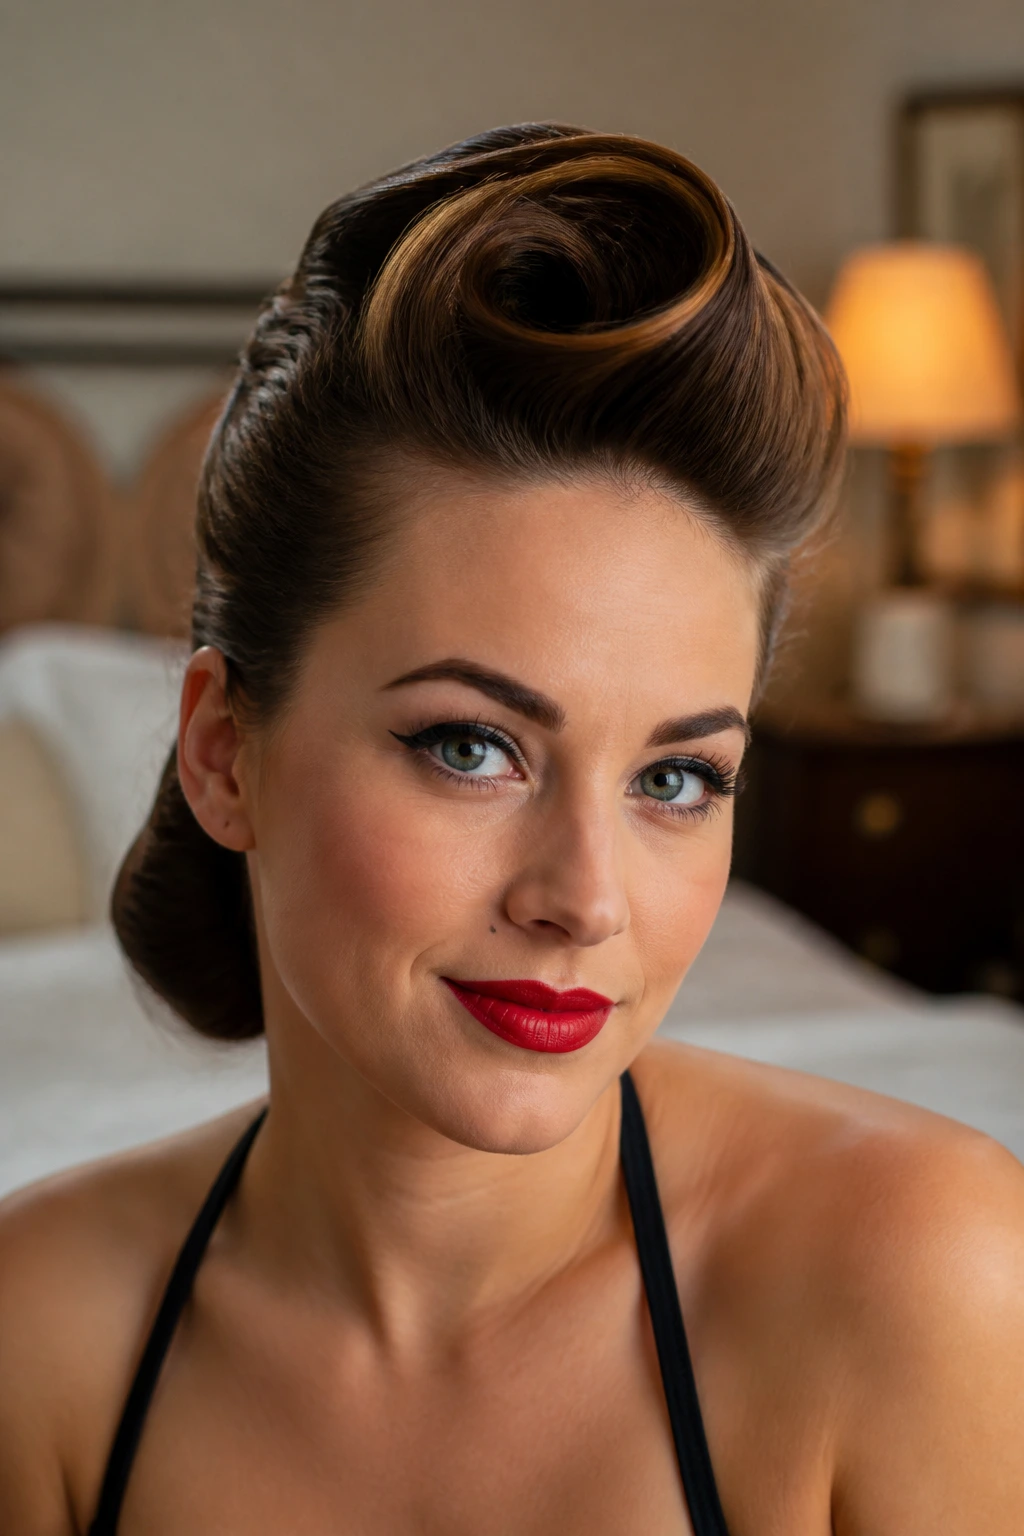
Unlike modern flat sweeps, retro victory rolls focus on creating three-dimensional height right above your forehead. It is a fantastic option for vintage lovers or anyone who wants to add some retro flair to a simple daily outfit.
To create a victory roll, section off the front triangle of your hair. Backcomb the back of this section to create a solid cushion of volume, then smooth the front with a boar-bristle brush. Loop the hair around your fingers to create a hollow roll, then pin it flat to your head from the inside.
This style requires a bit of hairspray to stay upright, but the structural look it provides is well worth the effort. It works beautifully on both straight and wavy hair types.
13. Sleek Middle-Part Low Ponytail Sweep
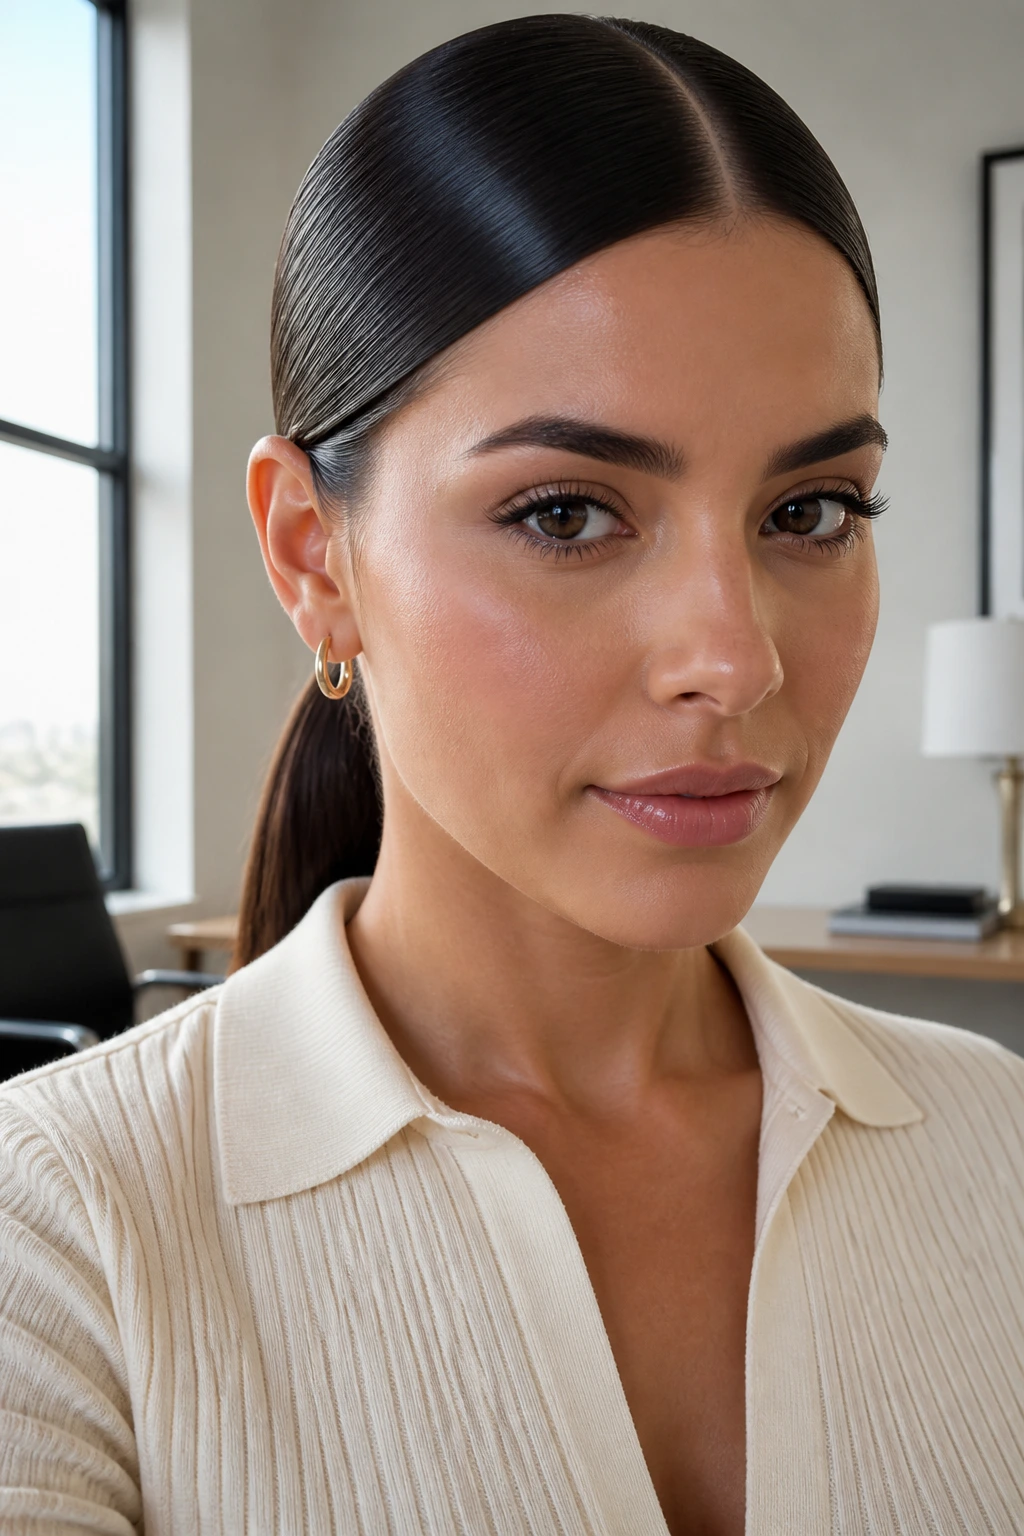
A razor-sharp center part combined with flat-ironed side pieces is the gold standard for clean, professional styling. It looks incredibly expensive and polished, yet takes less than three minutes to execute.
Getting the Perfect Center Line
The key to this look is precision. Use the bridge of your nose as a guide to draw a straight line back through your hair with a rat-tail comb. Split the hair down this line and comb each side flat, pushing it down and behind your ears.
Apply a small dab of hair oil or serum to the palms of your hands and smooth it over the front sections to eliminate any frizz. Tie the rest of your hair into a low ponytail at the nape of your neck to keep the focus on that clean center part.
This hairstyle is highly versatile and works just as well for a formal job interview as it does for a casual lunch with friends.
14. The Messy Pouf
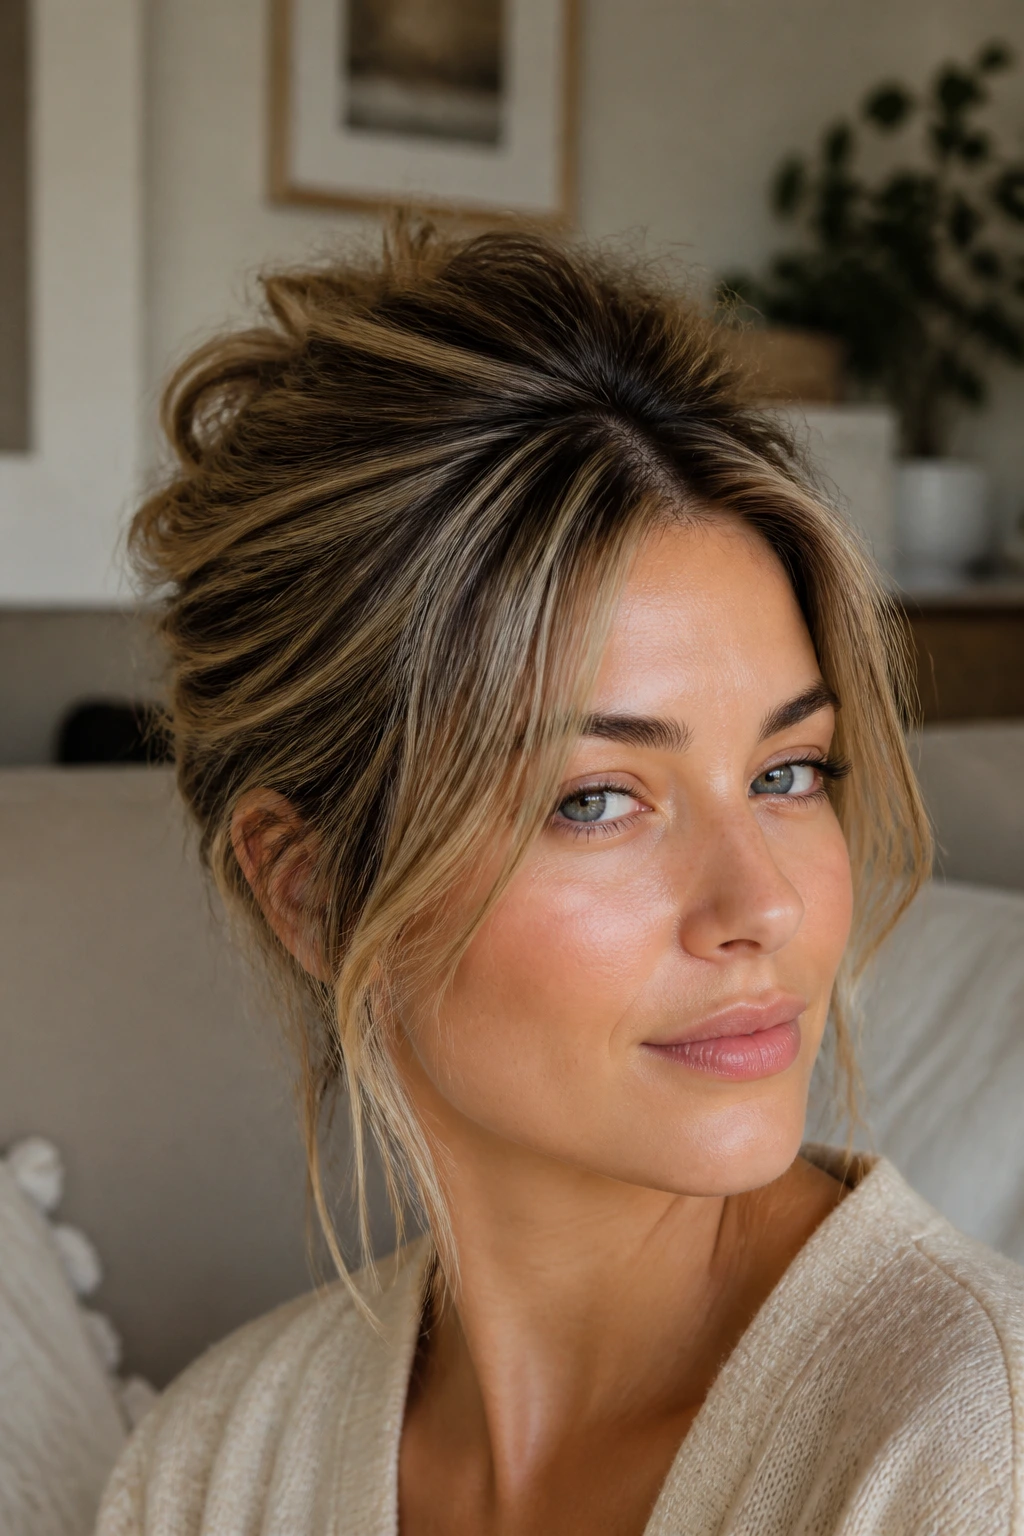
Backcombing a small section at your crown is the fastest way to escape the curse of flat, lifeless hair. The pouf is a classic styling trick that involves lifting the front section of hair, teasing the roots slightly, and pinning it back to create a gentle dome of volume.
This style is incredibly useful if you have a round face, as the added height at the crown helps visually elongate your features. It is also a great way to keep your hair out of your face without using any hair ties or elastics.
To keep the pouf looking modern, avoid making it too large or stiff. A gentle push forward before inserting your bobby pins will create a soft, natural lift that looks effortless.
15. Side-Swept Dutch Braid
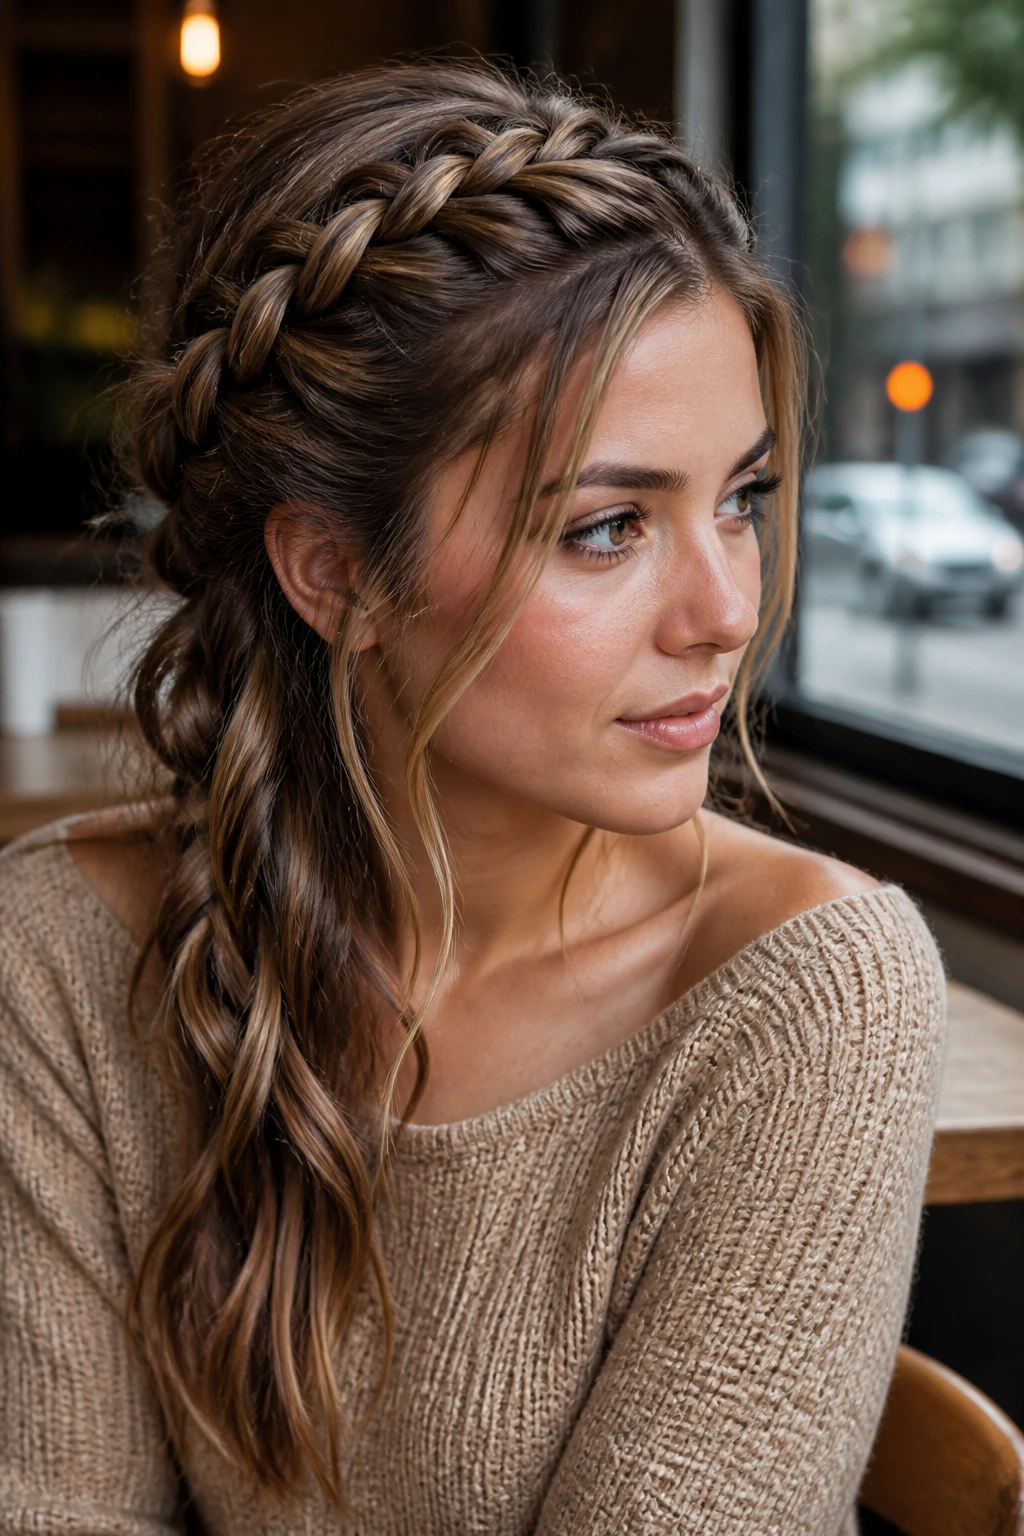
Why do some front braids look flat and greasy, while others have beautiful, chunky texture? The answer is often the technique used. A Dutch braid, where you cross the strands under rather than over, sits on top of the hair like a 3D ribbon, creating instant volume.
The Underhand Braid Technique
By braiding under, you lift the hair up off the scalp, which prevents the braid from looking glued to your head. This is incredibly helpful for anyone with fine or thin hair who wants to create the illusion of thickness.
- Take a three-inch section of hair on one side of your part.
- Split it into three equal pieces.
- Cross the left strand under the middle strand, then cross the right strand under the new middle strand.
- Add a small section of loose hair to each strand before crossing it under.
- Continue down your hairline, keeping the braid loose and pulling the edges outward once finished to add fullness.
This style is incredibly charming and looks even better as it gets slightly messy throughout the day.
16. Textured Pixie Wisps
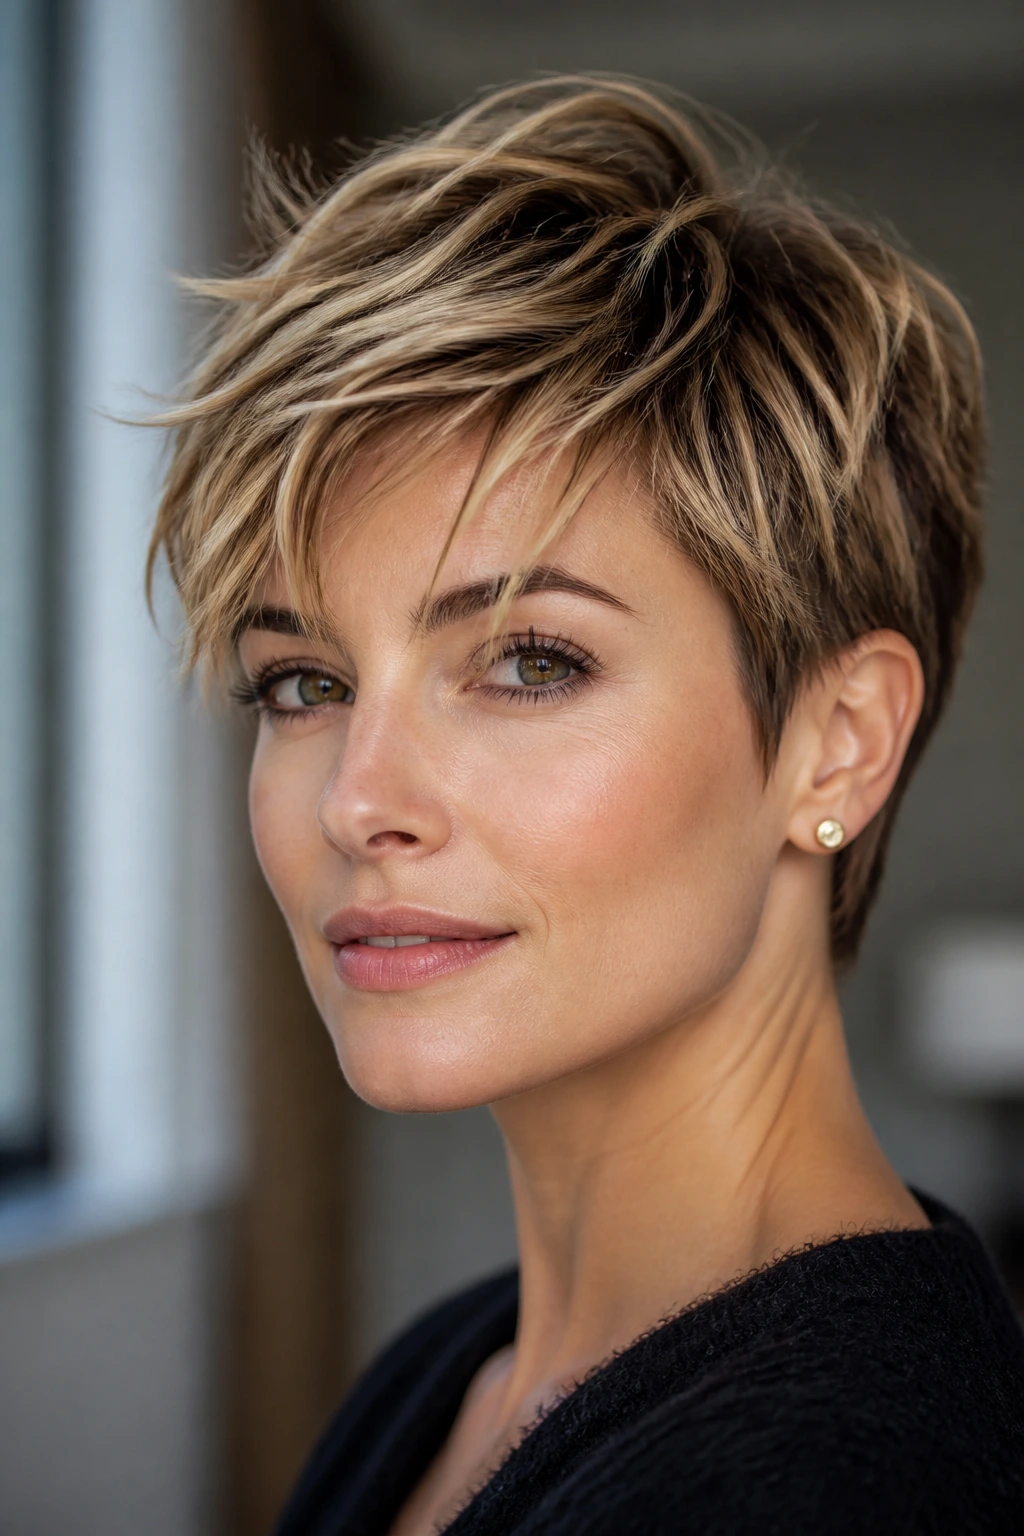
Short haircuts present a unique challenge: you cannot simply pull the front back into a ponytail when you are busy. Instead, you have to rely on texture and styling products to keep your hair looking styled and intentional.
Using a texturizing paste or clay, work a small amount through the front section of your pixie cut, pinching the ends to create piecey, defined wisps. Sweep them forward and slightly to one side to frame your forehead.
This look is incredibly low-maintenance and can be refreshed throughout the day simply by running your damp fingers through your hair to reactivate the styling product.
17. Double Claw-Clip Side Pulls
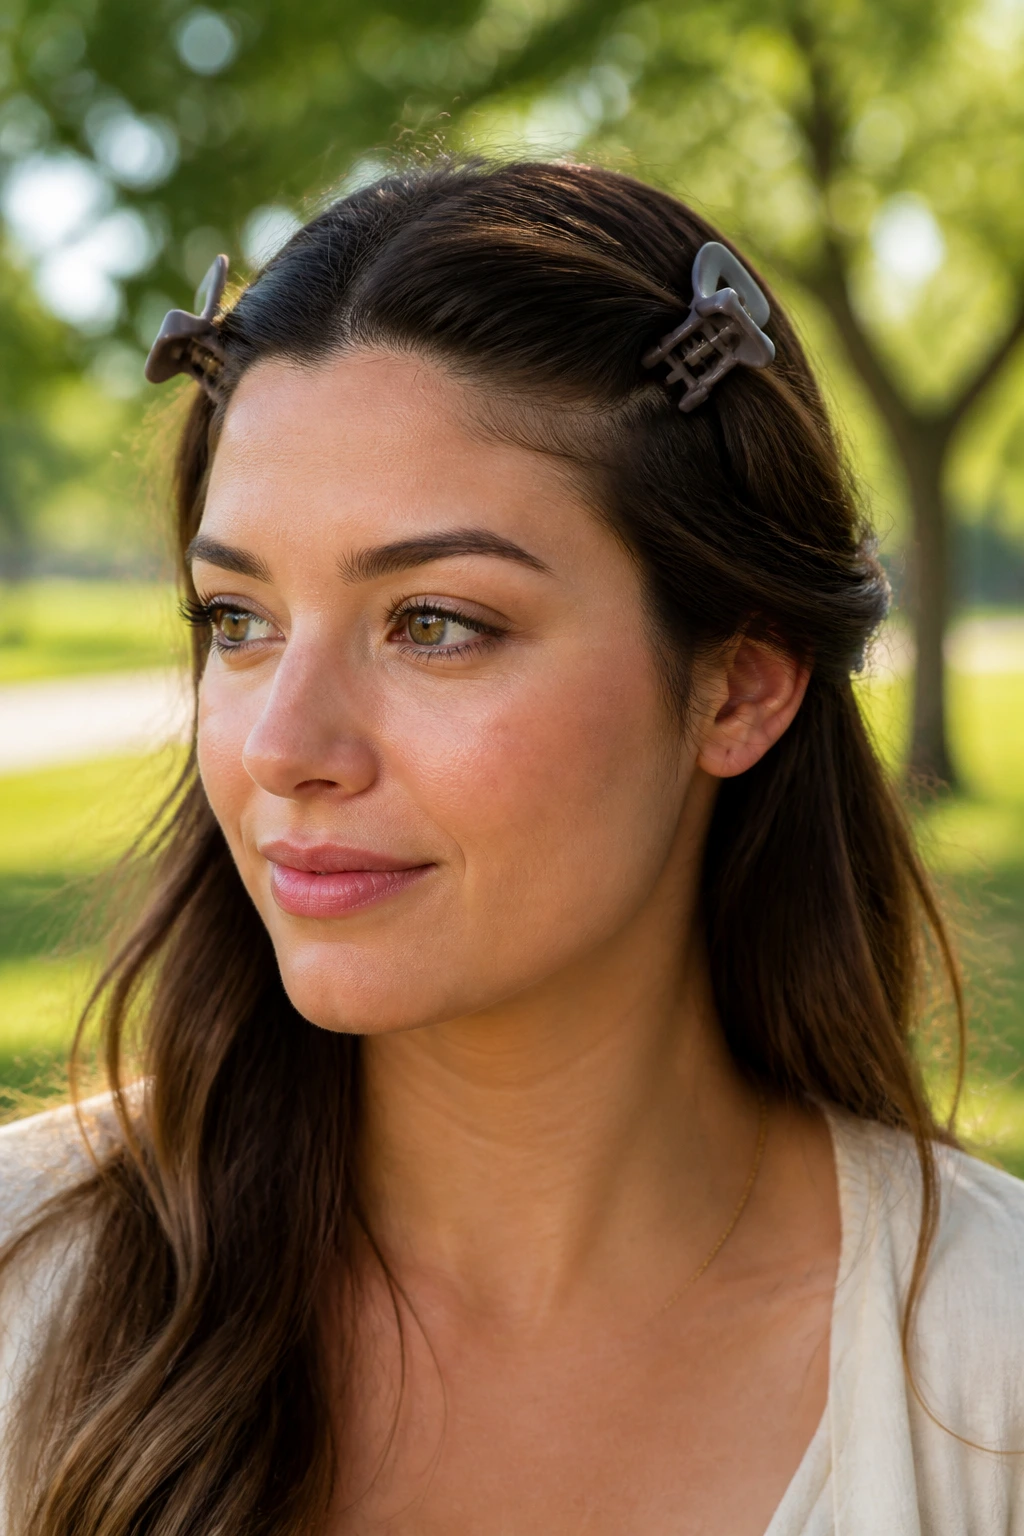
Symmetrical mini claw clips are no longer just for schoolgirls; they are a highly practical way to secure your hair during active days. By pulling the front sections back from your temples and clipping them in place, you create a sweet, half-up style that stays secure for hours.
Look for matte, neutral-toned clips that match your hair color for a subtle look, or choose bright, colorful options to add a fun pop to your outfit.
This style is incredibly gentle on your hair, as claw clips do not squeeze or pull the hair shaft the way traditional elastic hair ties do.
18. Curly Pineapple Spill
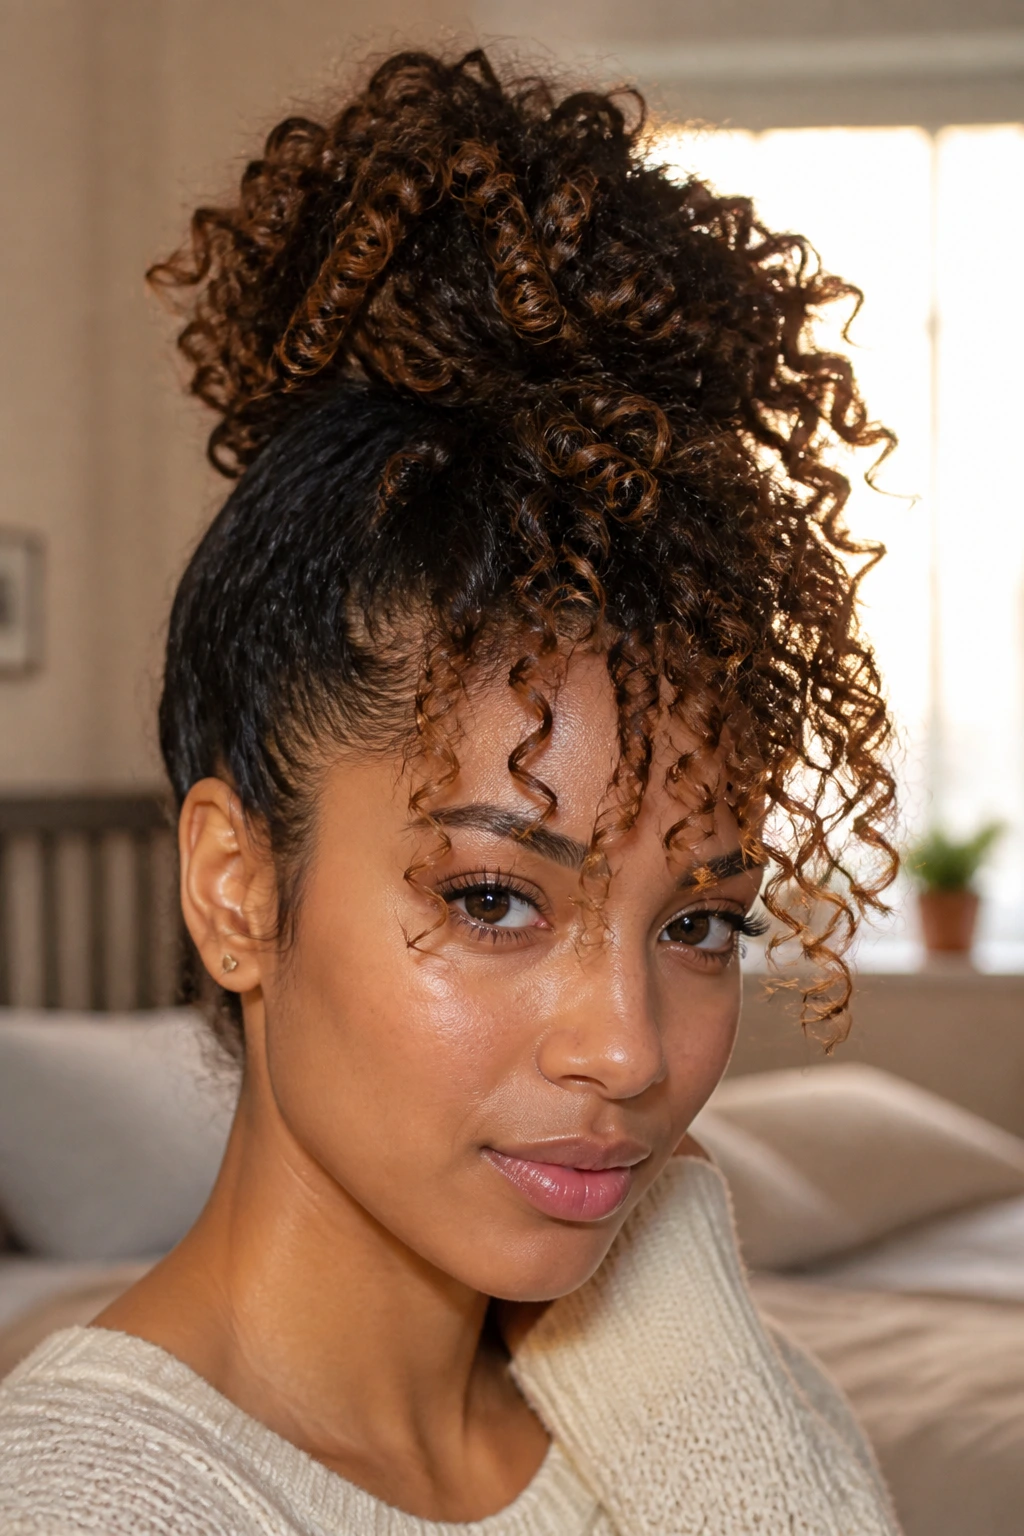
Unlike straight hair that needs to be coerced into framing the face, curly hair naturally wants to tumble forward when piled high. The “pineapple” is a classic curly technique where the hair is gathered into a very high ponytail at the front of the crown, allowing the curls to spill forward over the forehead.
This style serves a dual purpose: it looks incredibly stylish and voluminous for daily wear, and it protects your curl pattern while you sleep by keeping your curls off your pillow.
Use a soft fabric scrunchie to tie the hair loosely, ensuring you do not crush the curls or create a crease at the roots.
Essential Tools for Styling Front Hair Quick
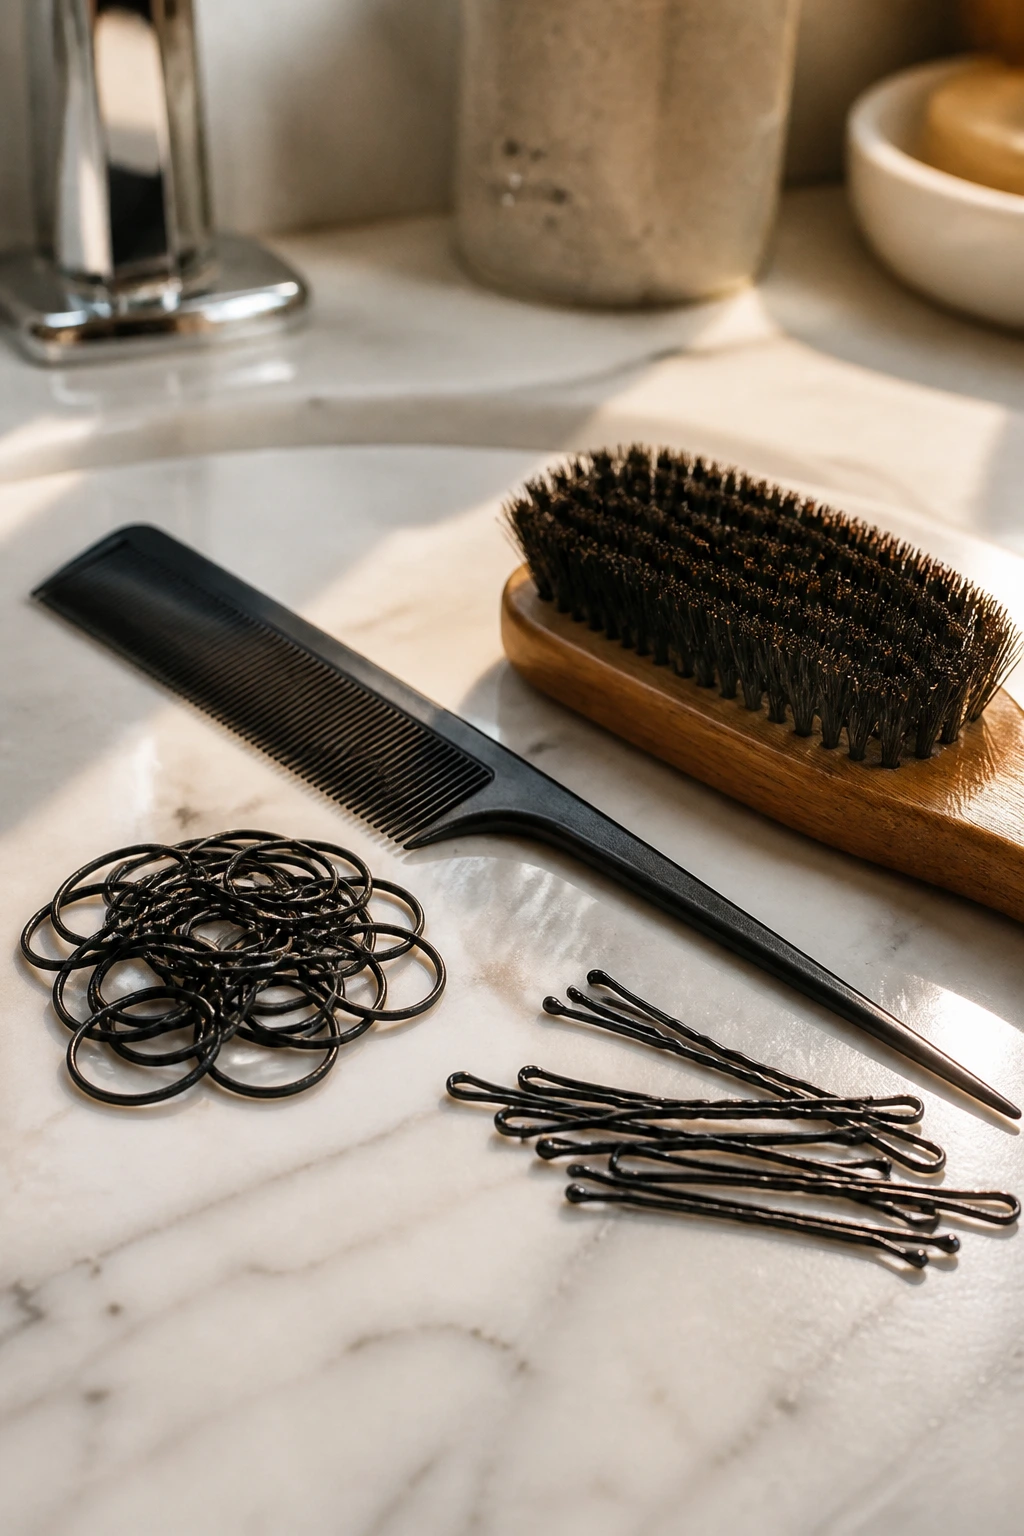
Having the right tools on hand can mean the difference between a five-minute morning routine and a stressful twenty-minute struggle. You do not need a drawer overflowing with expensive gadgets, but investing in a few high-quality basics will make styling your front hair significantly easier.
The first essential tool is a professional-grade rat-tail comb. The thin, pointed metal handle is unmatched for creating razor-sharp parts and separating clean sections of hair. A regular plastic comb simply cannot match the precision of a metal tip, which is crucial when you are trying to get symmetrical braids or a perfect center part in a rush.
Next, keep a collection of seamless elastic bands and matte bobby pins in your vanity drawer. Avoid cheap bobby pins with missing plastic tips, as the exposed metal can scrape your scalp and tear your delicate front strands. Look for pins that match your hair color and have a textured finish, which helps them grip the hair tightly without sliding out.
Finally, a boar-bristle smoothing brush is a must-have for slicked-back or swept styles. The dense natural bristles help distribute your hair’s natural oils from root to tip, smoothing down flyaways and creating a high-shine finish without the need for heavy styling products.
How to Maintain Front Hair Health and Growth
Because the front of your hair is constantly touched, styled, and exposed to environmental damage, it is often the first area to show signs of breakage and thinning. Protecting these delicate strands requires a consistent care routine that focuses on nourishment and low-tension styling.
First and foremost, be mindful of heat styling. Since the front of your hair frames your face, it is tempting to run a flat iron or curling wand over it every single morning. Over time, this daily heat exposure destroys the keratin proteins in the hair shaft, leading to split ends and frizzy, unmanageable texture. Try to embrace heat-free styling methods, like overnight twists or braids, at least three days a week to give your hair a break.
Additionally, avoid tight hairstyles that pull heavily on your hairline. Styles like high, tight ponytails or tight braids can cause a condition called traction alopecia, where constant tension pulls the hair follicle out of the scalp. Opt for looser styles, use soft silk scrunchies, and never sleep in tight hairstyles.
Finally, keep up with a regular trimming schedule. Getting the front of your hair trimmed every six to eight weeks prevents split ends from traveling up the hair shaft, keeping your layers looking healthy, bouncy, and full of life.
The Bottom Line

Taking control of your front hair does not have to be a chore. By incorporating a few of these simple, stylish techniques into your daily routine, you can save time in the morning while looking polished and put-together. Work with your hair’s natural texture rather than fighting against it.
Whether you choose the soft sweep of curtain bangs, the security of a French braid, or the effortless look of twisted tendrils, the key is consistency and care. Treat your delicate front strands with kindness, avoid excessive heat, and do not be afraid to experiment with different parts and styles until you find what makes you feel most confident. Your hair is your ultimate accessory—have fun with it!
