



Getting out of the shower with dripping locks and exactly ten minutes to spare is a daily reality for many of us. You need reliable wet hair hairstyles that look deliberate rather than rushed. Trying to blow-dry your hair when you are already running late is a recipe for frizz and frustration.
Damp hair possesses a unique elasticity that makes it highly responsive to styling. It is also at its most fragile. When wet, the hydrogen bonds in the hair shaft are temporarily broken, making the strands susceptible to stretching and snapping under too much tension. Securing wet hair for busy mornings requires techniques that protect your hair cuticle while keeping you looking put together.
Choosing the right tools makes all the difference. Ditch the standard fine-tooth plastic combs and harsh rubber bands that tear through wet cuticles. Instead, keep a wide-tooth wooden comb, a soft boar-bristle brush, and a collection of seamless silk scrunchies or acetate claw clips nearby. These tools allow you to style damp strands gently, preventing breakage and avoiding the dreaded tension headaches.
The styling products you use on wet hair will determine how it dries throughout the day. A lightweight leave-in conditioner acts as an excellent styling primer, smoothing out tangles and locking in moisture. For styles that require a sleek, controlled finish, a small dollop of alcohol-free styling cream or natural hair oil will prevent the hair from drying into a frizzy cloud.
1. The Triple-Twisted Low Chignon
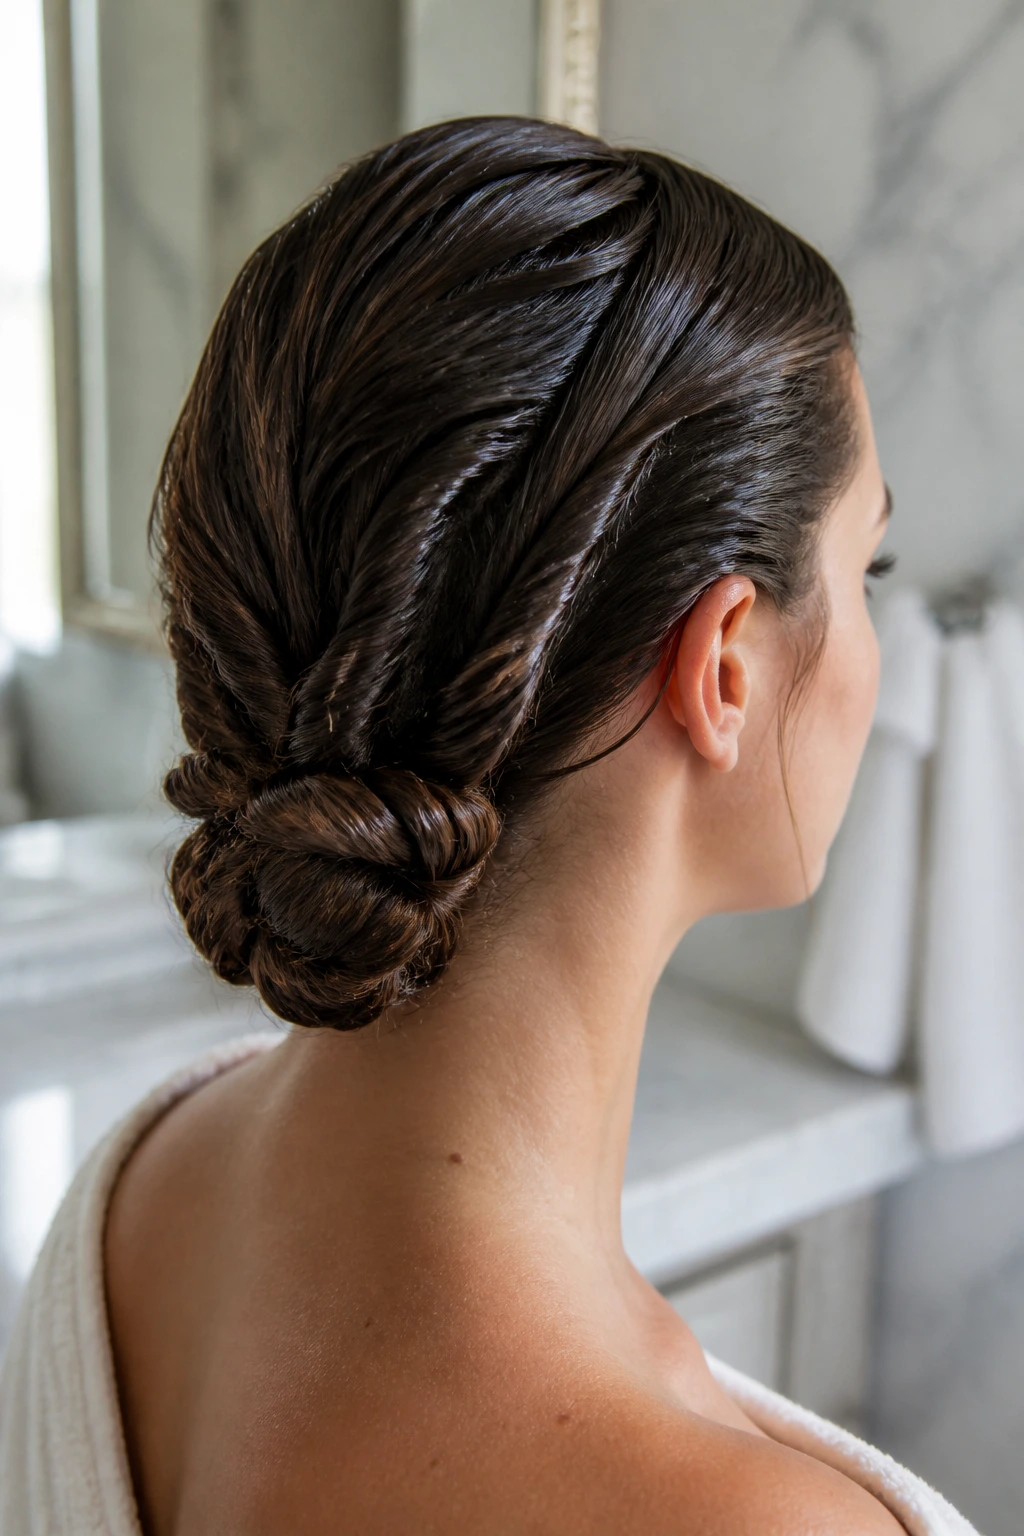
This style takes the traditional low bun and elevates it by splitting the hair into three distinct twisted segments. By separating the weight of damp hair into three sections, you minimize the tension on your scalp and secure the hair far more effectively. It creates a beautiful, coiled pattern at the nape of your neck that looks like it took half an hour to assemble.
Why It Works for Wet Hair
Damp strands hold a twist much better than dry, slippery hair. The moisture acts as a natural setting lotion, keeping the twists tight and neat without requiring heavy gel or hairspray. As the hair dries, these twists lock into place, preventing loose flyaways from escaping the main bun.
Quick Prep Steps
- Detangle your damp hair thoroughly using a wide-tooth comb, starting from the ends and working your way up to the roots.
- Divide your hair into three equal vertical sections at the nape of your neck.
- Twist the center section tightly down to the ends, coil it into a small circular bun, and secure it with a U-shaped hairpin.
- Repeat the twisting and coiling process with the left and right sections, wrapping them around the central bun and securing them tightly.
Pro tip: Apply a dime-sized amount of hair oil to your palms before twisting to seal your ends and prevent frizz as your hair dries.
2. The Dutch Sidedraft Braid
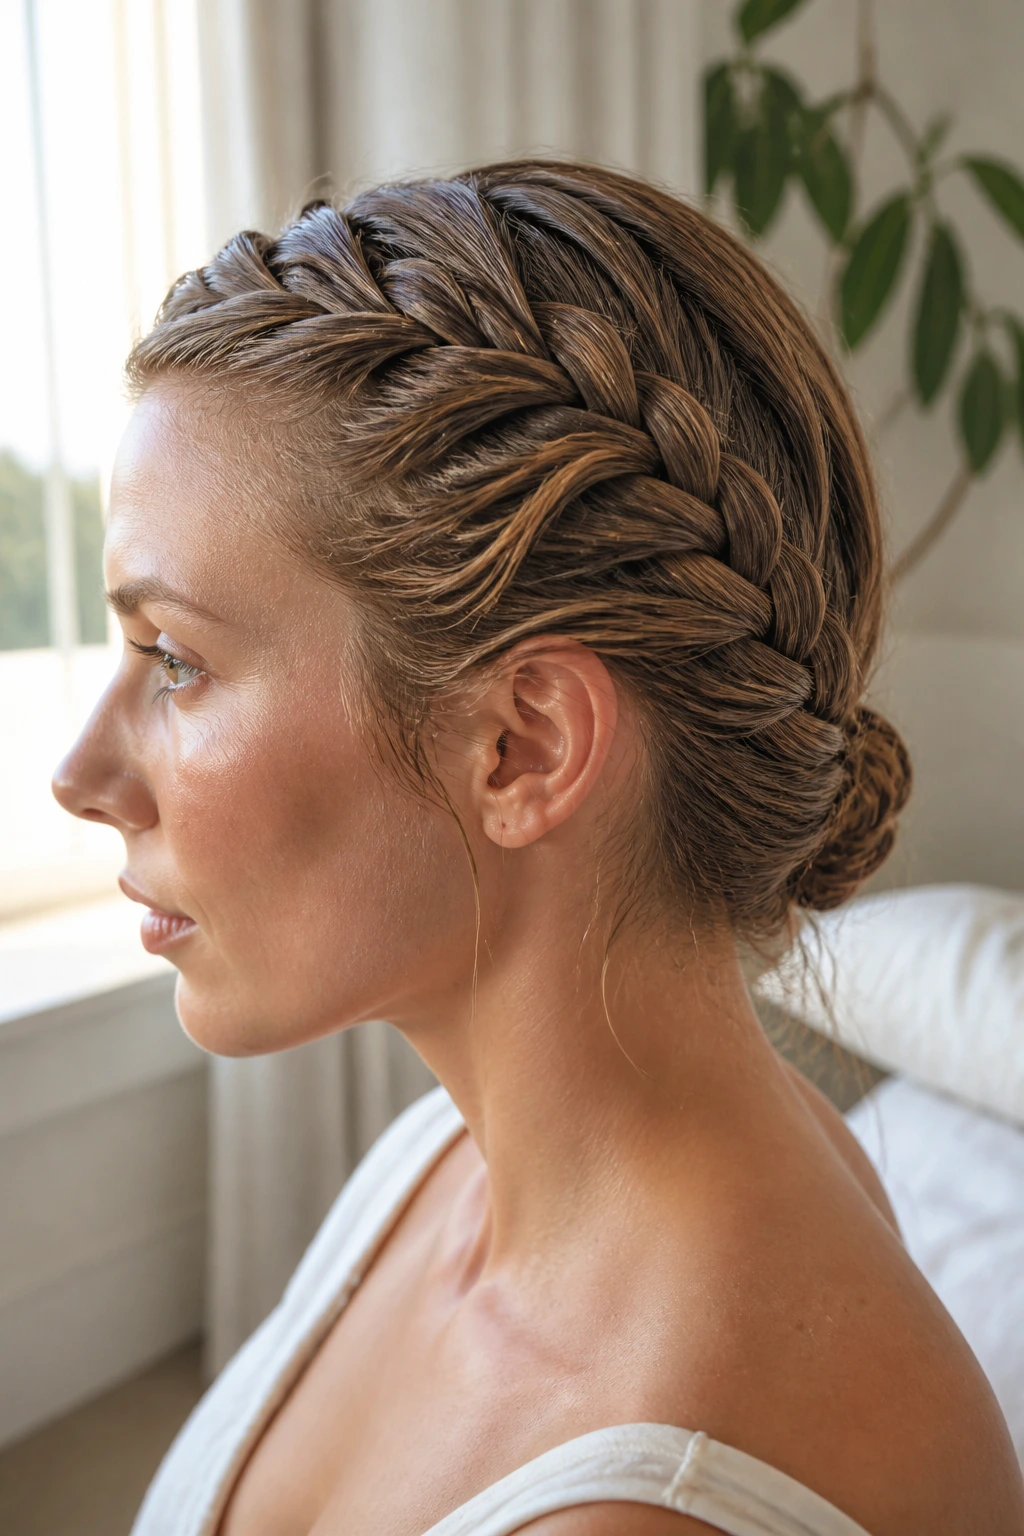
Plaiting damp hair is one of the oldest tricks in the book for a reason. A Dutch sidedraft braid keeps wet hair completely off your face while creating a beautiful, raised texture along the side of your head. Unlike a standard French braid, the Dutch braid crosses sections under rather than over, which lifts the braid off the scalp for a more dimensional look.
You do not need perfect braiding skills to make this work. In fact, damp hair is much easier to control because you do not have to worry about static or loose hairs slipping out of your hands. Begin by parting your hair deeply on one side, then sweep the bulk of your hair over the opposite shoulder. Start the braid at your temple, keeping your tension firm but not tight enough to cause discomfort.
As you work your way down to the nape of your neck, gradually pull in hair from the opposite side. This diagonal path secures the hair snugly against the back of your head, preventing the wet weight from pulling the braid loose during your morning commute. Secure the tail with a small, clear elastic band. When you take this braid down later in the day, you will be left with soft, heat-free waves.
3. The High Slicked-Back Topknot
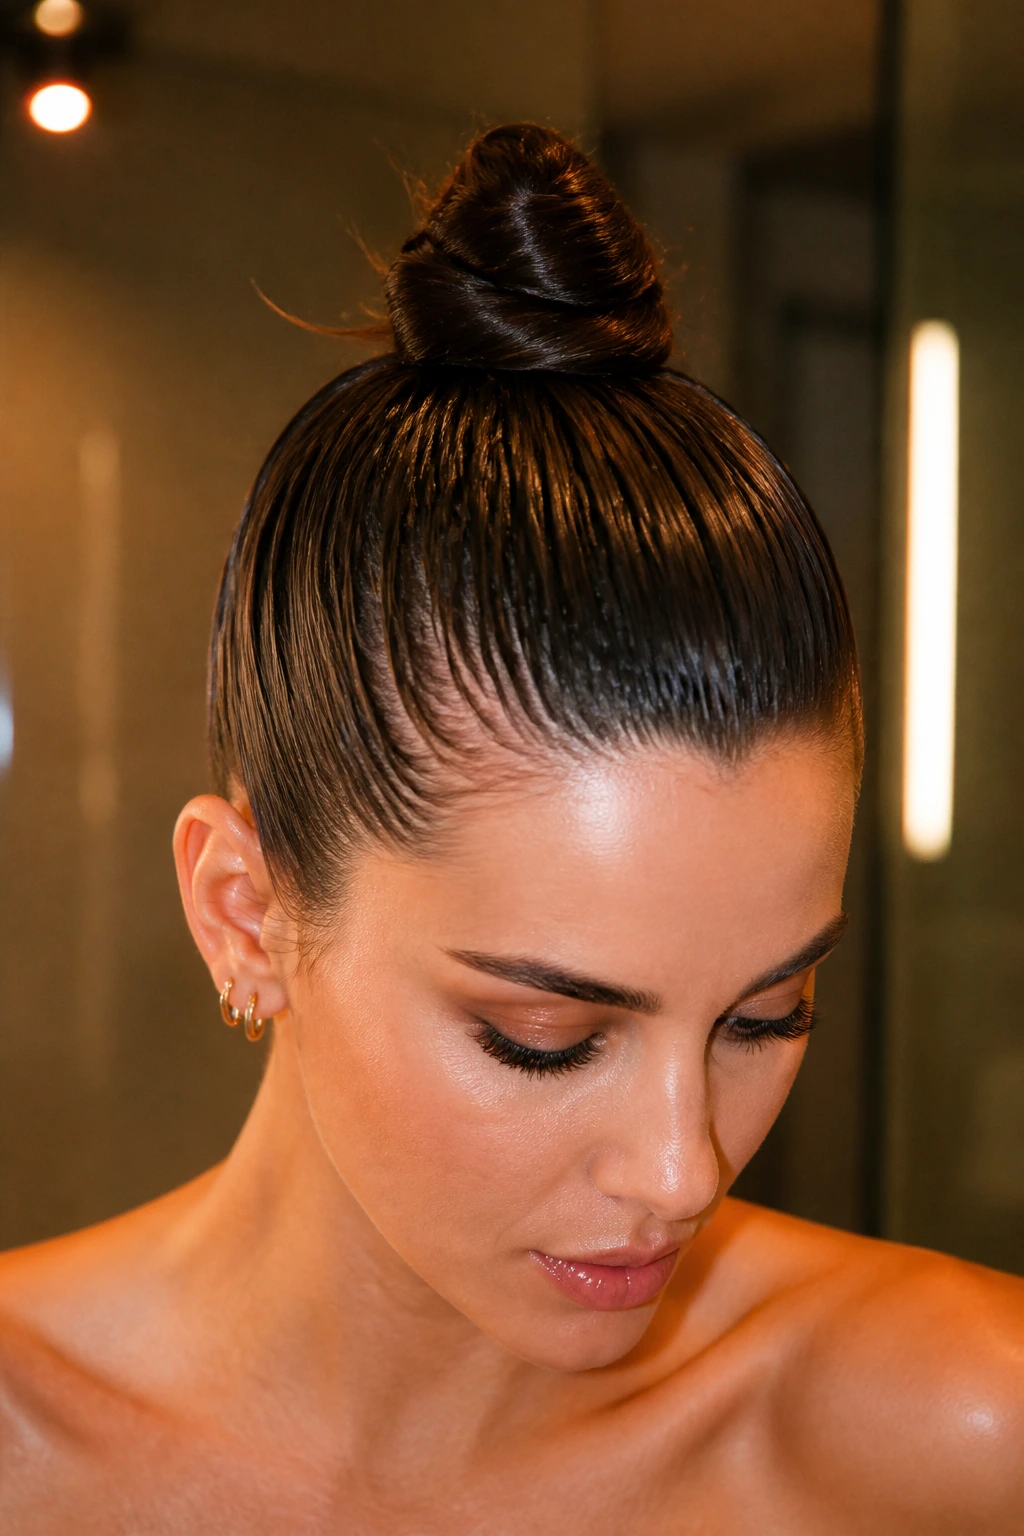
For mornings when your hair is soaking wet but you need to look completely polished, a high slicked-back topknot is your best option. It uses the natural weight of wet hair to create a clean, minimalist silhouette. It is an excellent choice for second-day hair that you decided to rinse quickly without washing.
Are you worried about hair breakage when pulling wet hair up high? The secret lies in using a wide-tooth comb and a gentle fabric scrunchie rather than a tight, thin elastic.
How to Secure It Safely
First, apply a generous layer of leave-in conditioner from the mid-lengths to the ends of your damp hair. This provides a slippery barrier that protects the hair shaft from friction. Flip your head upside down and gather your hair at the crown of your head, smoothing the sides with your hands.
Use a wide-tooth comb to gently smooth any bumps before securing the hair into a high ponytail with a silk scrunchie. Twist the ponytail loosely around its base to form a topknot. Tuck the ends under the scrunchie, or use a few curved bobby pins to keep the bun in place. Do not pull the hair too tight at your hairline—your follicles are delicate when wet, and constant pulling can lead to traction alopecia over time.
4. The Bubble Ponytail with Segmented Elastics
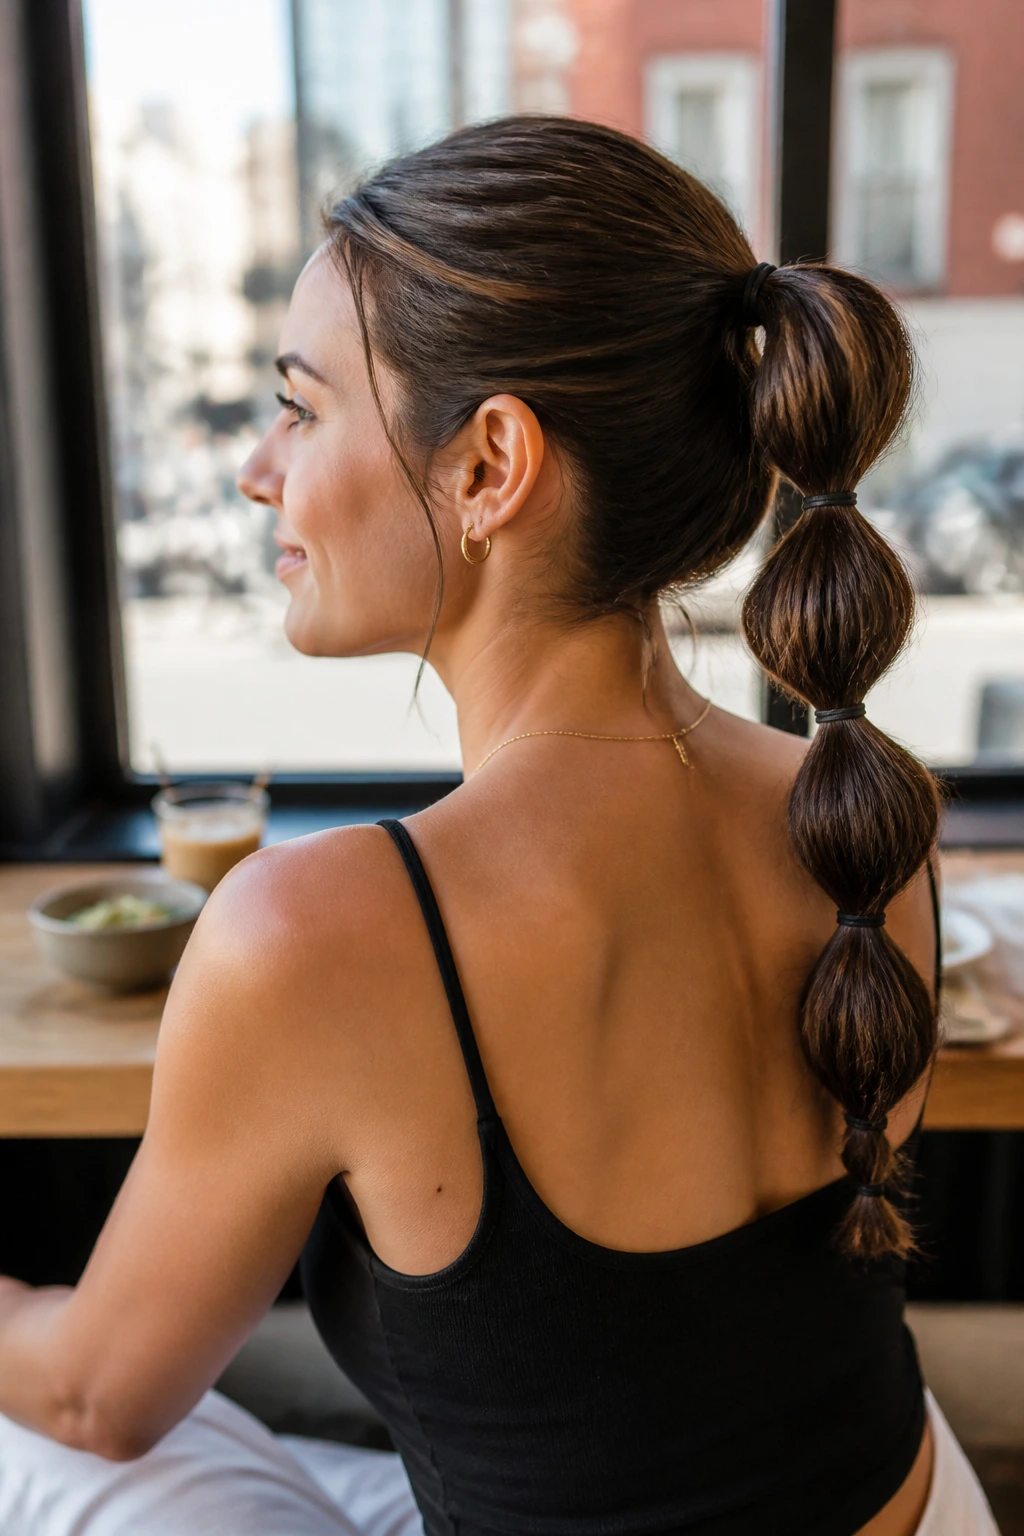
If you find standard ponytails boring, the bubble ponytail offers a playful, modern alternative that works incredibly well on damp hair. It keeps your wet length secure and prevents it from whipping around or getting caught under coat collars. This style is particularly useful for those with long, thick hair that takes hours to dry.
The Segmenting Technique
- Start by pulling your damp hair into a standard mid-height ponytail at the back of your head and securing it with a soft elastic.
- Place another small elastic band about two to three inches down the length of the ponytail.
- Gently pull at the edges of the hair section between the two elastics to create a rounded, bubble-like shape.
- Repeat this process down the entire length of your ponytail, spacing the elastics evenly until you reach the ends.
Using damp hair for this style is incredibly helpful because the water weight keeps the bubbles smooth and uniform. You will not have to deal with the uneven puffiness that often occurs when attempting this style on dry hair.
5. The Wrapped Low Ponytail with a Hair Strand Collar
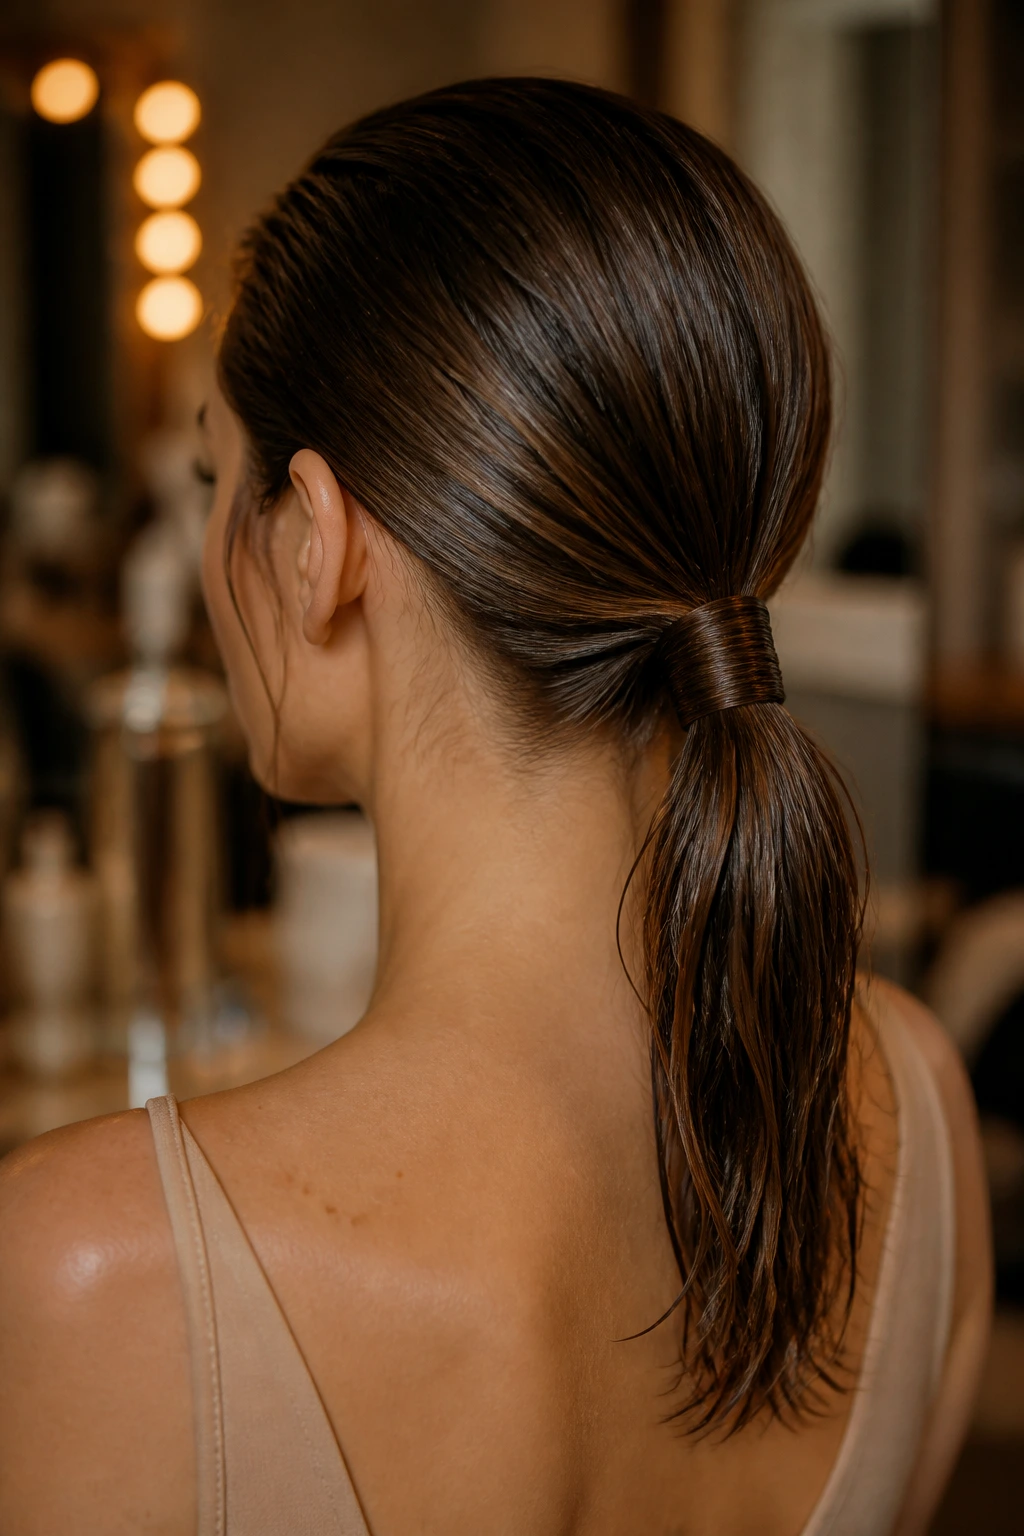
A simple low ponytail can sometimes look like an afterthought, but wrapping the base with a strand of your own hair instantly transforms it into a chic style. This look is perfect for professional environments where you need to look refined but have very little time to get ready.
Start by applying a small amount of styling cream through your damp hair, using a boar-bristle brush to create a clean center part. Gather your hair at the very nape of your neck, ensuring it sits flat against your scalp. Secure the ponytail with a small, sturdy elastic band that matches your hair color.
Before letting the ponytail drop, separate a thin strand of hair from the underside of the pony—about the width of a pencil. Wrap this strand tightly around the elastic band until the band is completely hidden from view. Use a single bobby pin inserted vertically upward into the base of the ponytail to secure the end of the wrapped strand.
This simple addition hides the utility of the elastic and creates a seamless, sculptural look. Because wet hair naturally clings to itself, the wrapped strand will stay flat and secure throughout the day without needing hairspray or pins to keep it from unraveling.
6. The Half-Up Folded Loop Bun
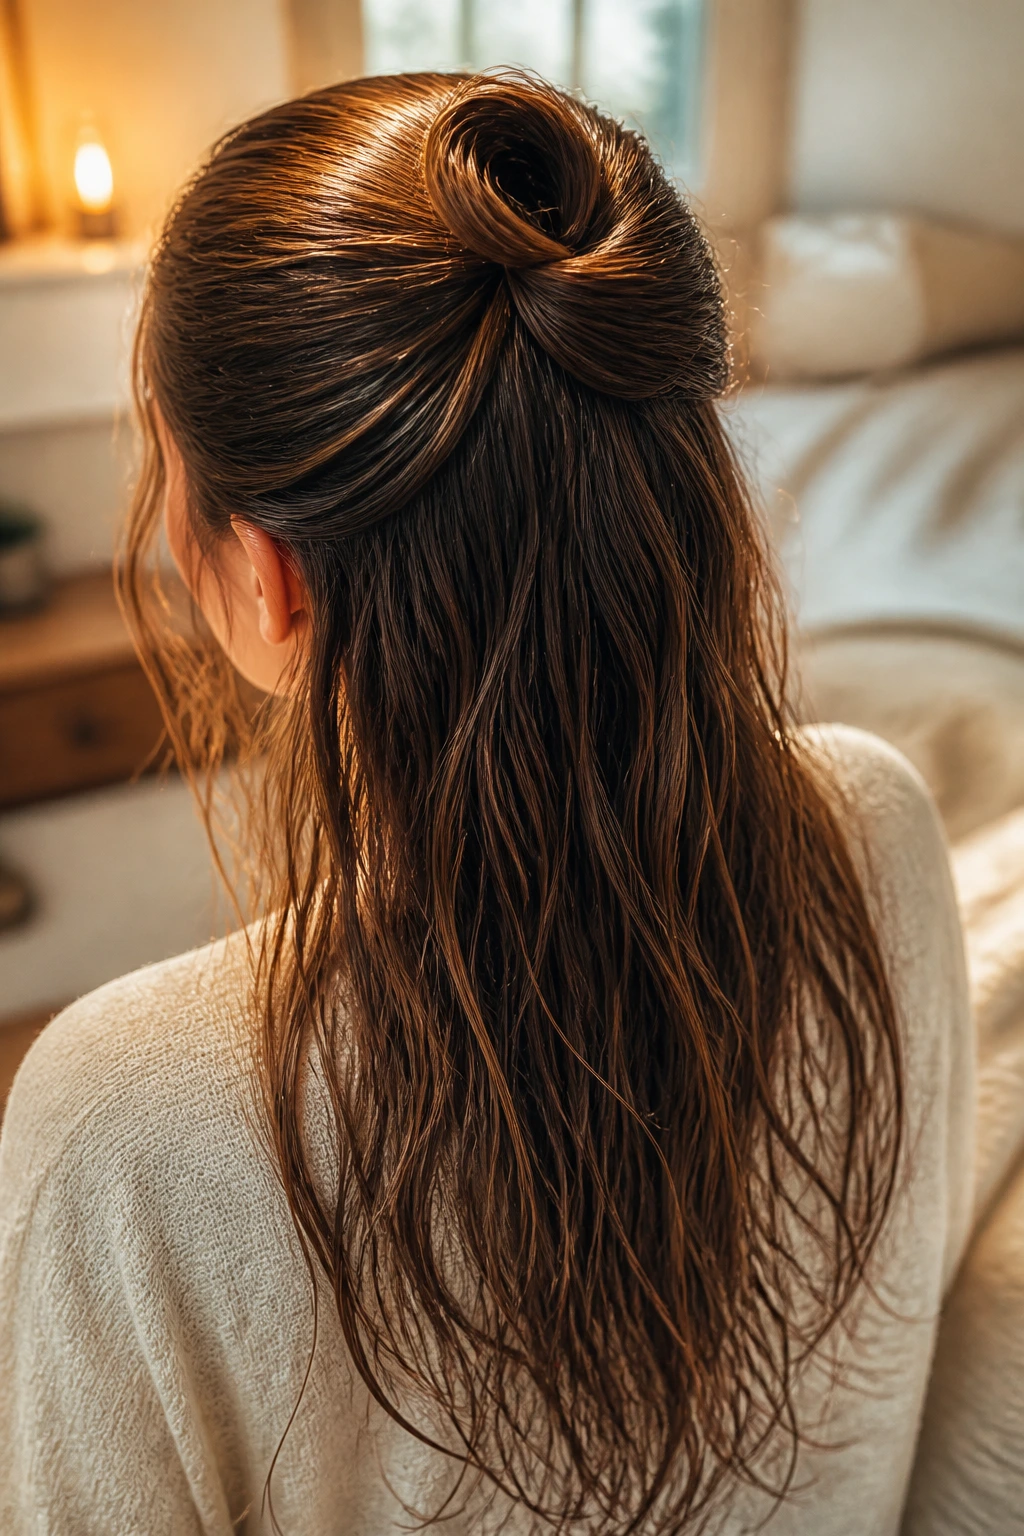
When you want to keep your hair out of your face but still want to show off some length, a half-up style is the perfect compromise. The folded loop bun is a modern take on the classic half-up half-down look. It is designed specifically to handle the weight of damp hair without sagging.
Unlike dry hair, which can look flat in a half-up style, wet hair provides a naturally sleek crown that contrasts beautifully with the damp texture of the lower half. Gather the top section of your hair—roughly from the temples up—and pull it back toward the crown of your head.
Instead of pulling the hair all the way through the elastic on the final pass, leave it folded over to create a neat loop. Let the remaining damp tail drape naturally over the lower portion of your hair. This style keeps the bulk of your wet hair away from your skin, allowing your scalp to breathe and dry comfortably.
7. The French Twist with a Claw Clip Grip
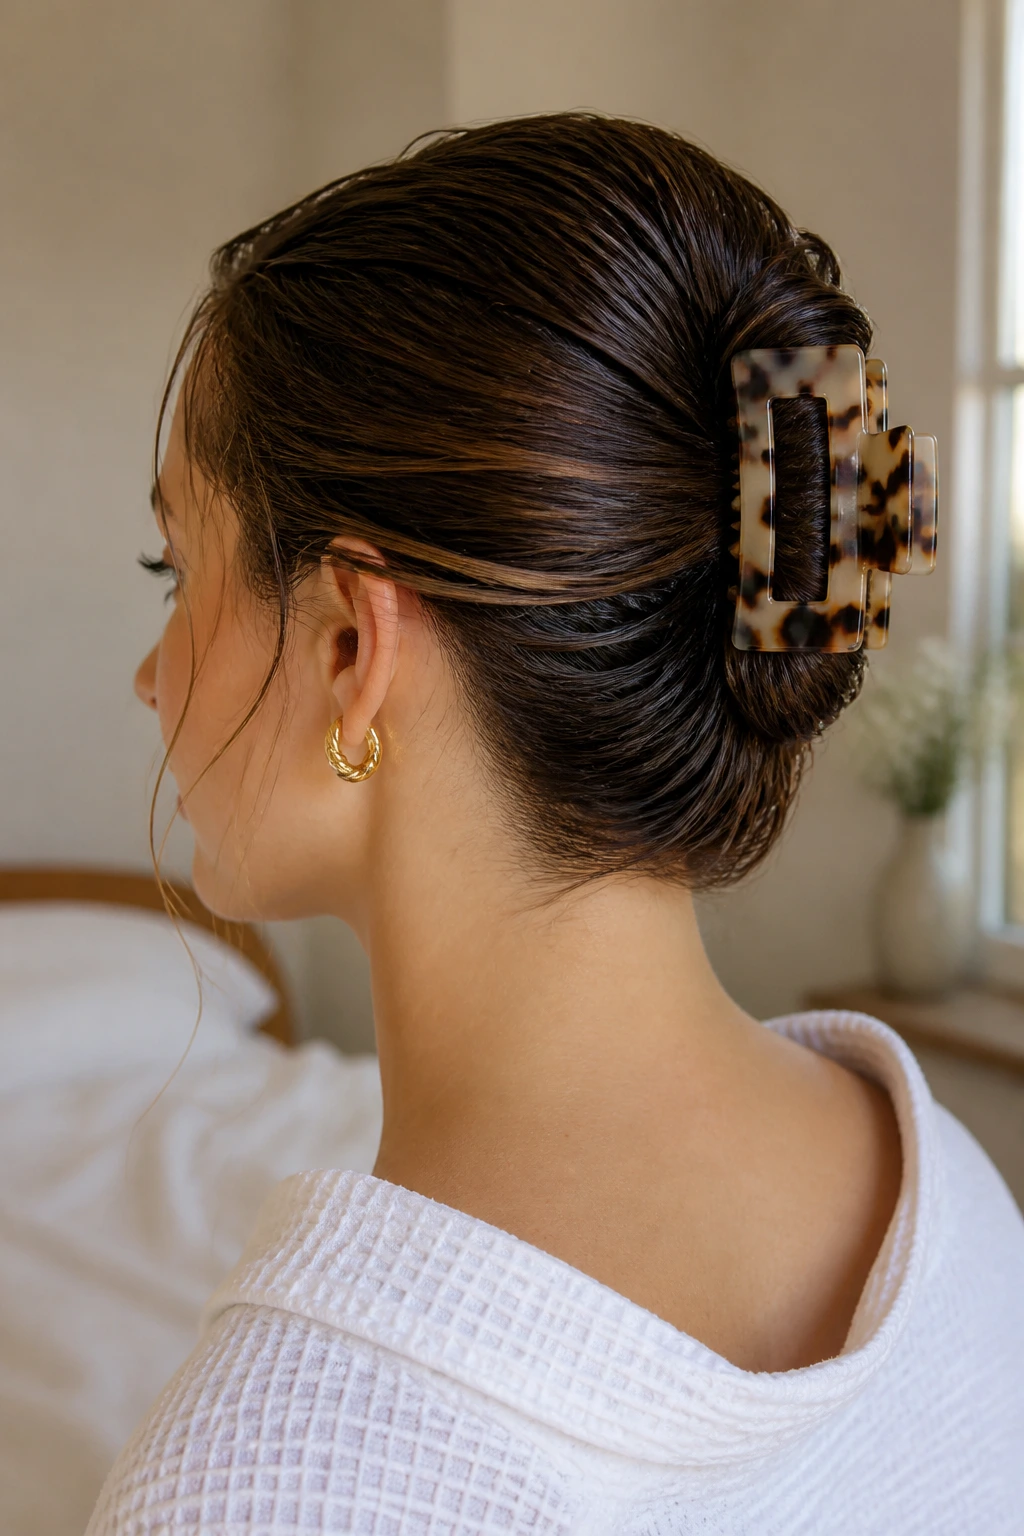
The claw clip remains one of the most useful hair accessories ever invented, especially for busy mornings with wet hair. A French twist secured with a modern acetate claw clip is elegant, takes less than a minute to execute, and puts zero tension on your hair follicles.
The Structural Hold of a Claw Clip
Claw clips distribute the weight of your hair evenly across your scalp, unlike elastics which concentrate pressure on a single point. This makes them much healthier for damp, fragile hair.
Steps to Secure Your Twist
- Gather all of your damp hair at the nape of your neck as if you were making a low ponytail.
- Begin twisting the hair tightly in an upward direction, lifting the length of your hair against the back of your head.
- Fold the remaining loose ends back down over the main twist if your hair is very long.
- Place a large, sturdy claw clip over the center of the twist, capturing both the twisted hair and the hair flat against your scalp.
Pro tip: Look for claw clips with rounded teeth and a strong spring mechanism to ensure they can hold the heavy weight of wet hair without slipping out of place.
8. The Double Boxer Braids into Low Buns
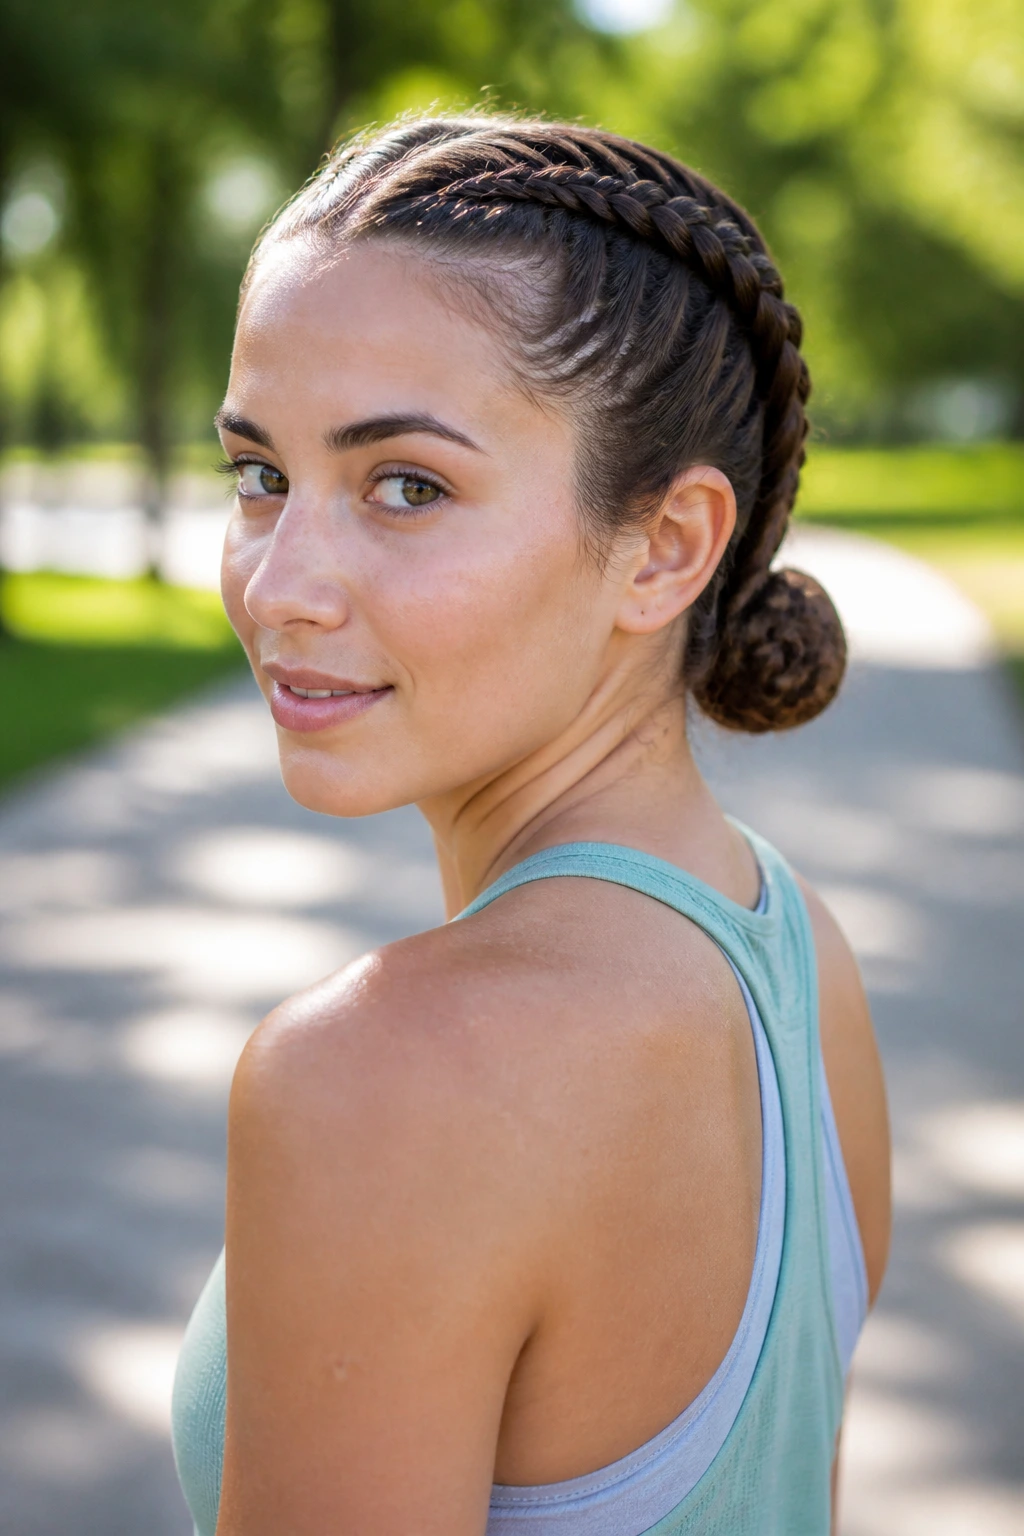
If you have a highly active day ahead, you need a wet hair hairstyle that will not budge. Double boxer braids—also known as double Dutch braids—start close to your hairline and run down the back of your head. They keep every single strand locked in place, making them perfect for humid weather or busy outdoor days.
Many people hesitate to try boxer braids because braiding all the way to the ends of long hair can be time-consuming. You can save time by stopping the braids at the nape of your neck. Secure each braid with an elastic, then twist the remaining damp tails into two matching mini-buns.
This hybrid style keeps the intricate, athletic look of boxer braids at the front while saving you precious minutes in the morning. The tight braiding pattern protects your hair from environmental friction and locks in leave-in treatments beautifully.
9. The Scarf-Wrapped Crown Band
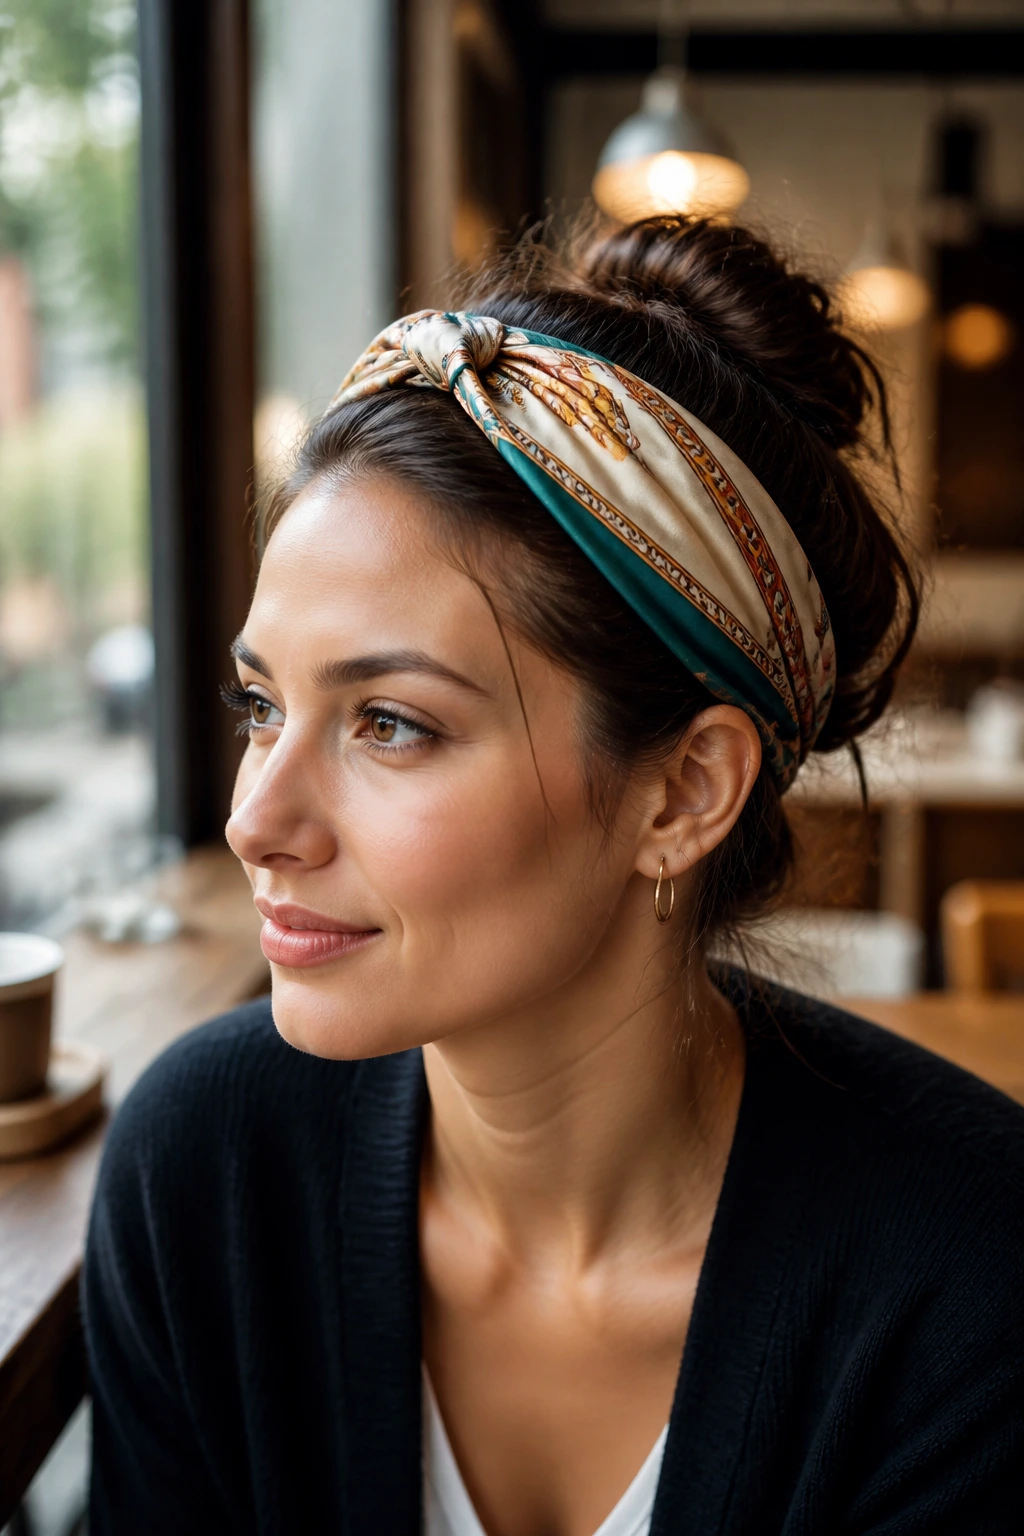
Accessories are a busy person’s best friend. A silk or satin hair scarf can easily hide damp roots while adding a pop of color to your outfit. The scarf-wrapped crown band is an excellent technique for concealing wet hair while it dries naturally beneath the fabric.
Choosing the Right Fabric Scarf
Avoid heavy polyester or cotton scarves, as they can absorb too much moisture from your hair and cause dryness. Opt for silk or high-quality satin, which allows your hair to slide smoothly against the fabric without creating friction or absorbing natural oils.
Styling with a Scarf
- Apply a leave-in conditioner to your damp hair and comb it straight back from your hairline.
- Fold a square silk scarf into a long, narrow band about two inches wide.
- Place the center of the scarf band at the nape of your neck, underneath your hair.
- Bring the ends up to the top of your head, tie them into a neat double knot just behind your hairline, and tuck the loose ends under the band.
This look keeps your damp hair pulled back and looking deliberate, while the scarf absorbs any excess moisture around your hairline, preventing wet patchiness on your forehead.
10. The Slick Side-Parted Low Bun
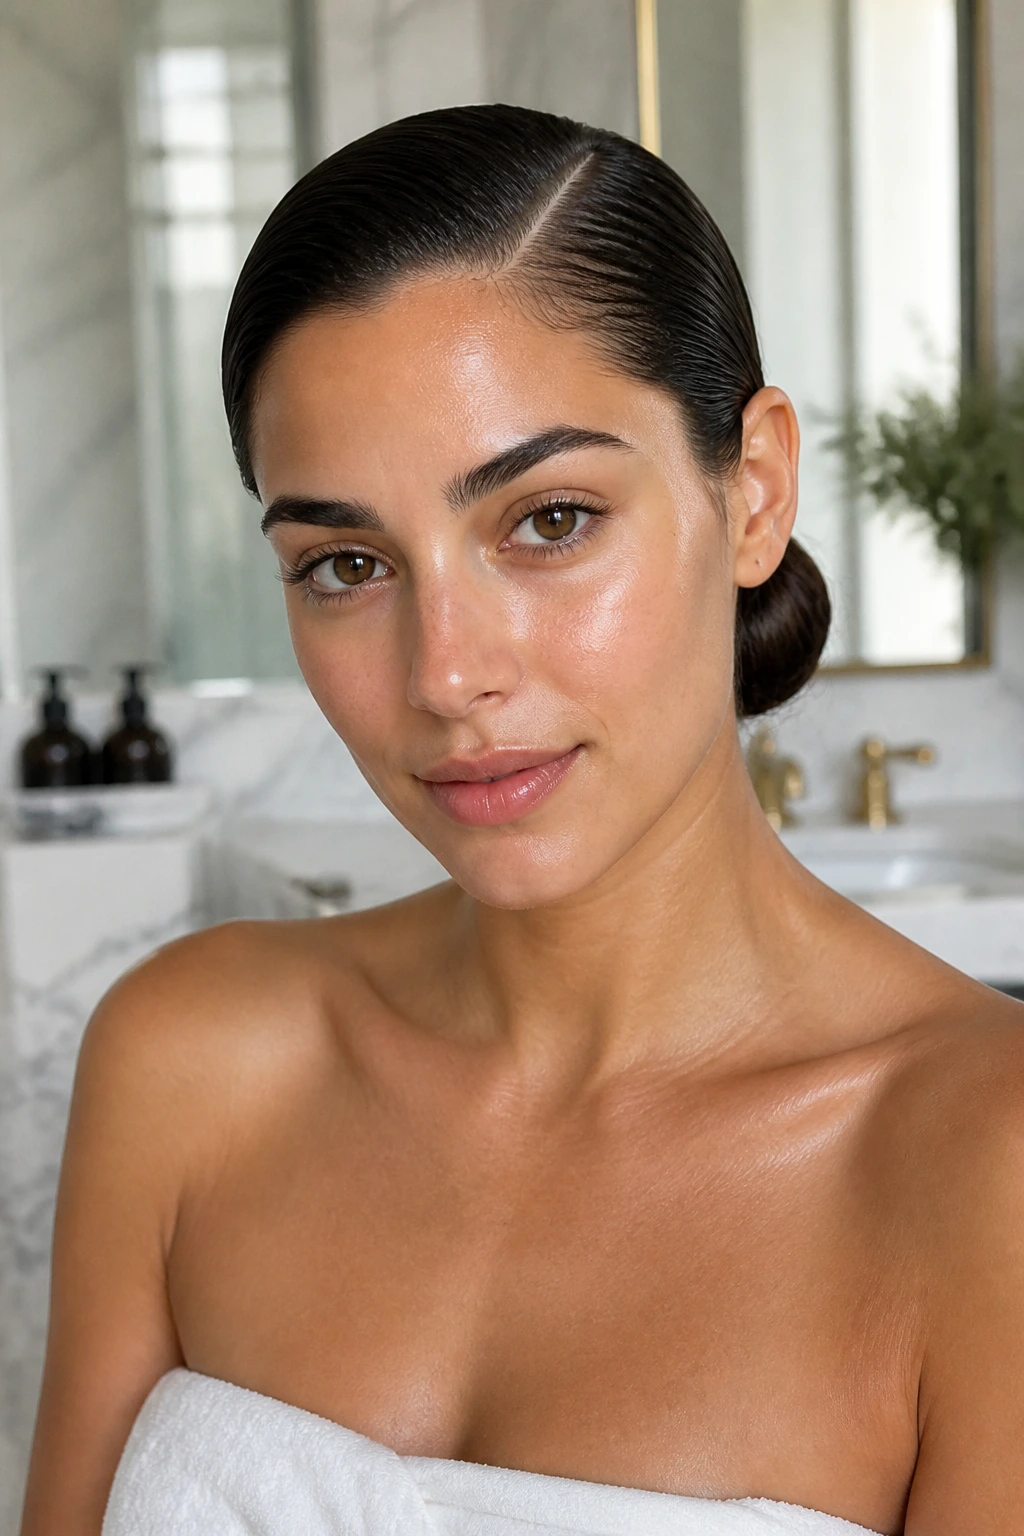
A low bun is a timeless hairstyle, but a deep, sharp side part makes it look like you stepped straight out of a professional salon. This style is highly effective for wet hair because the dampness allows you to create an incredibly clean part line that stays in place all day.
Creating the Perfect Part Line
Use the arch of your eyebrow as a guide for where to place your side part. Use a tail comb to draw a straight line from your hairline back toward your crown, separating the hair cleanly.
Securing the Style
- Comb the hair flat on either side of the part, smoothing it down toward the back of your neck.
- Gather the hair into a low ponytail and secure it with a soft elastic band.
- Twist the ponytail tightly into a rope, coil it around the elastic base, and secure it with a few U-shaped hairpins.
- Smooth any baby hairs along your hairline using a toothbrush coated with a tiny amount of hair gel.
The dampness of your hair will help the side part stay sharp without needing a heavy gel, which can leave your hair feeling crunchy once it dries.
11. The Fishtail Plait with Damp Texture
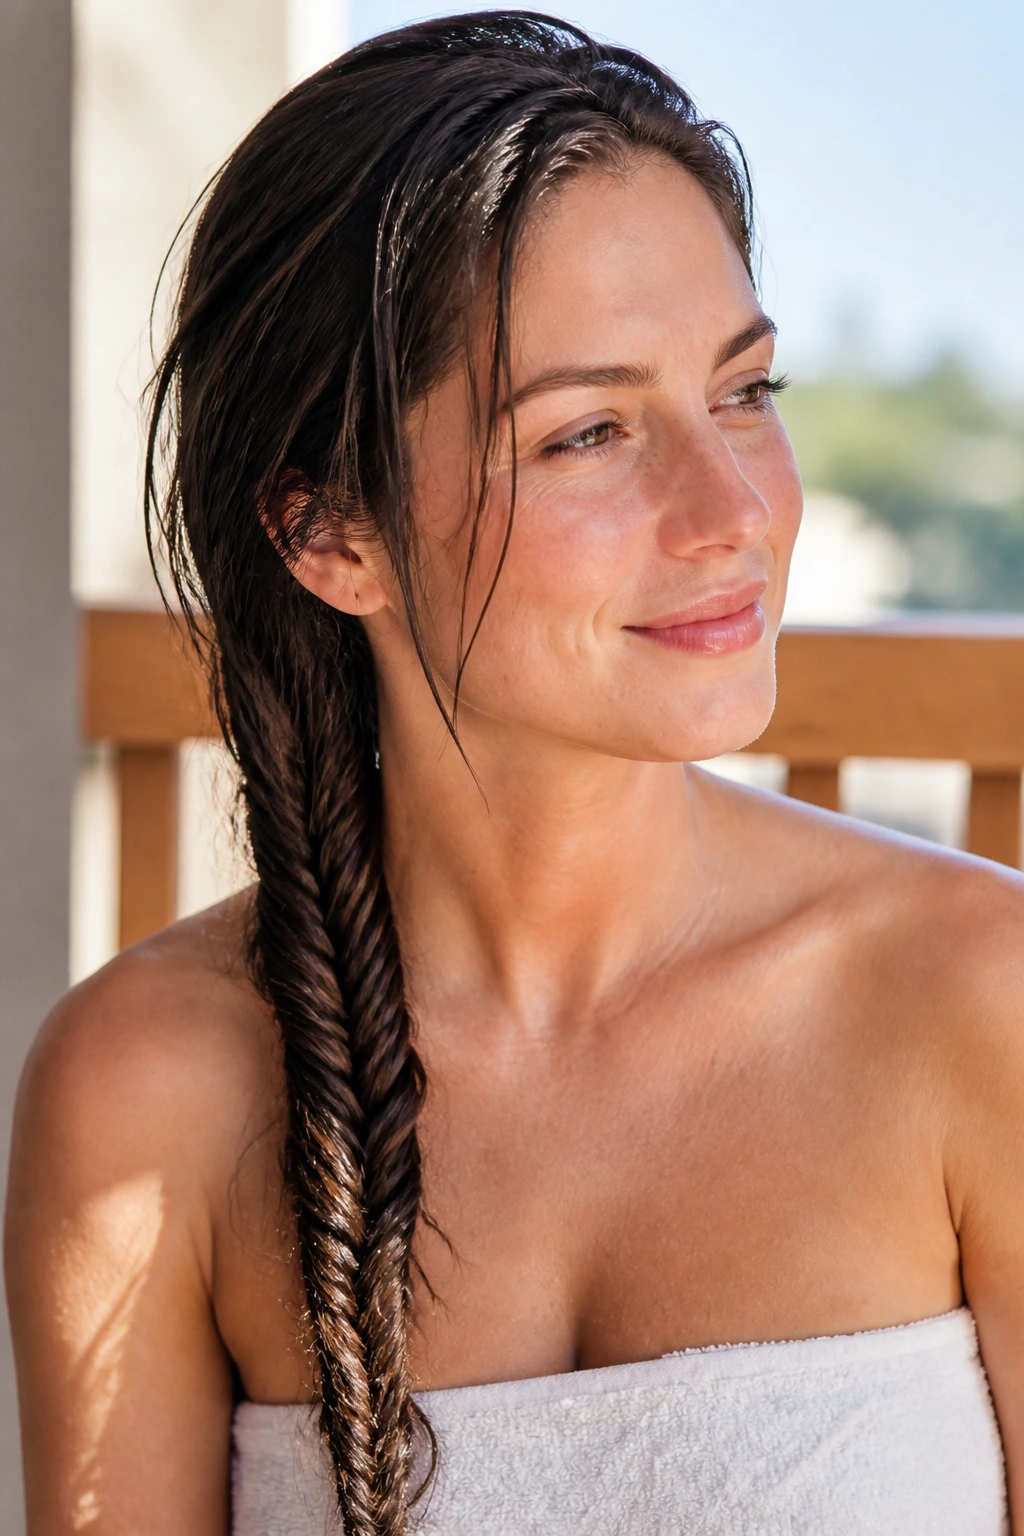
The fishtail plait is a beautiful, intricate braid that looks far more complicated than it actually is. On dry hair, a fishtail can quickly become fuzzy and loose. On damp hair, however, the two-strand weaving technique creates a sleek, rope-like texture that stays neat and defined for hours.
To start, gather your damp hair to one side and split it into two equal sections. Take a small, thin strand of hair from the outer edge of the left section and cross it over to join the right section. Then, take a small strand from the outer edge of the right section and cross it over to join the left section. Repeat this alternating pattern down the entire length of your hair.
Because damp hair has more grip than dry hair, you will find it much easier to keep the sections separated and tensioned correctly. Do not worry about making the strands perfectly even—the slight variations in size add a beautiful, handcrafted texture to the braid. Secure the end with a small elastic.
12. The Multi-Elastic Segmented Pigtails
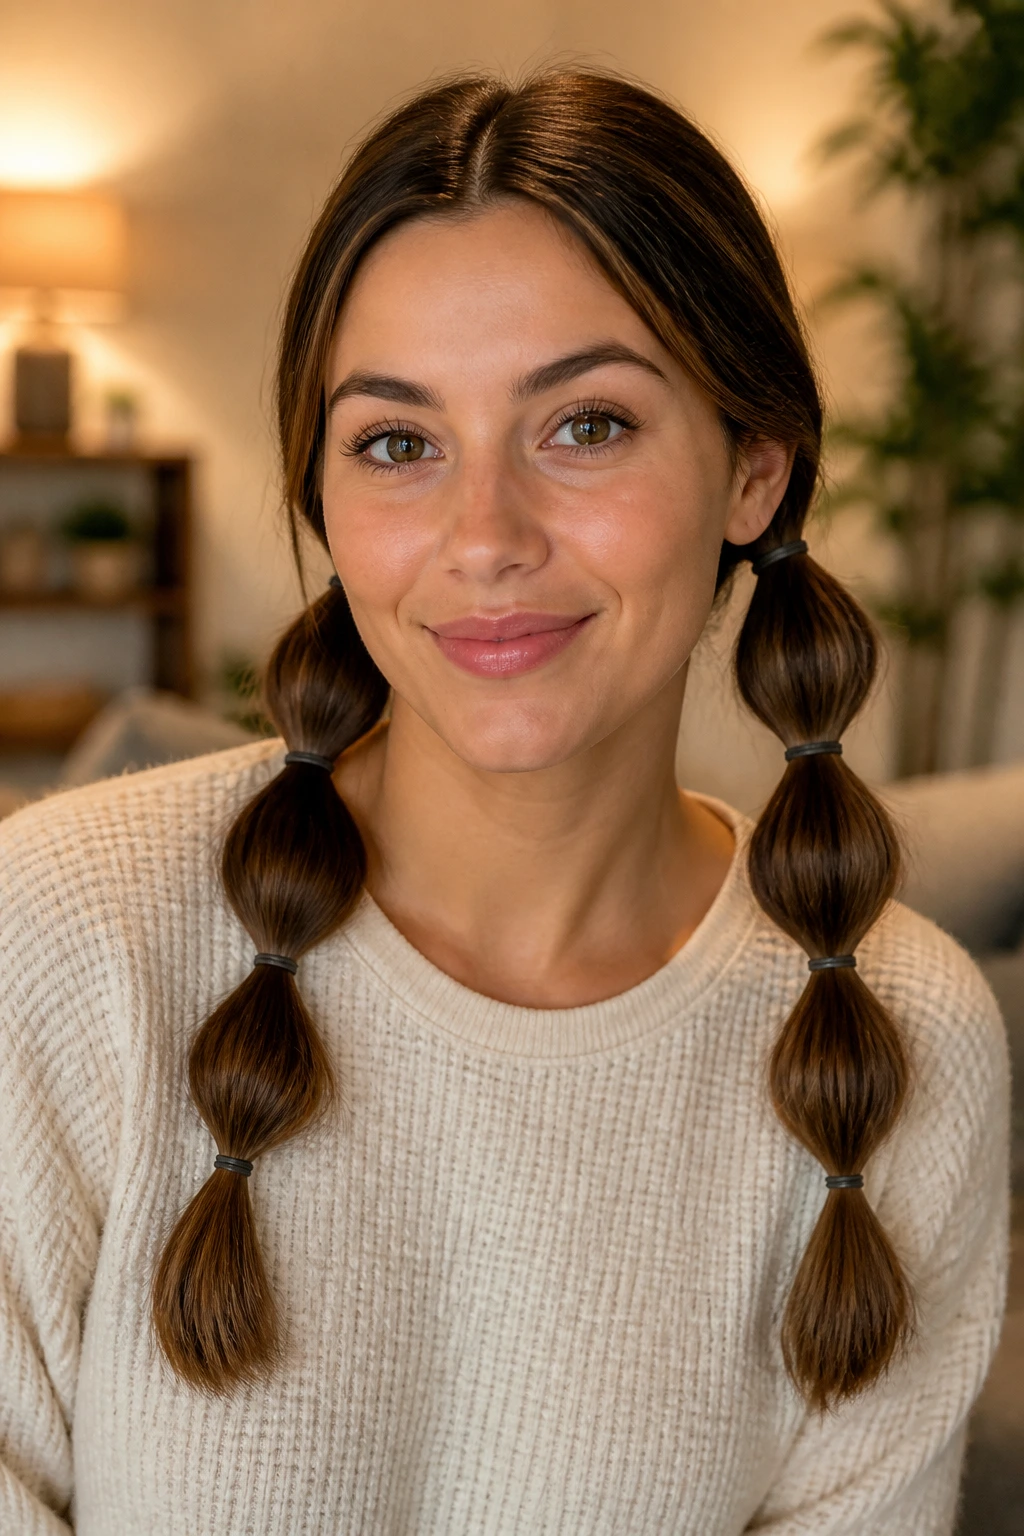
For a casual, youthful look that takes less than two minutes, segmented pigtails are a fantastic option. This style is incredibly helpful for parents styling their children’s wet hair before school, but it looks equally stylish on adults looking for a fun weekend look.
Compared to a single bubble ponytail, double pigtails distribute the hair’s weight across two points, which reduces tension on your scalp. This makes it an exceptionally comfortable option for long, thick hair that is heavy when wet.
Split your damp hair down the middle into two equal sections. Secure each section into a low pigtail behind your ears. Place small elastics down the length of each pigtail at two-inch intervals, gently tugging the hair outward between each band to create small, rounded segments. The result is a highly structured, playful style that keeps damp hair secure.
13. The Deep Side Part with Sleek Flat-Pin Waves
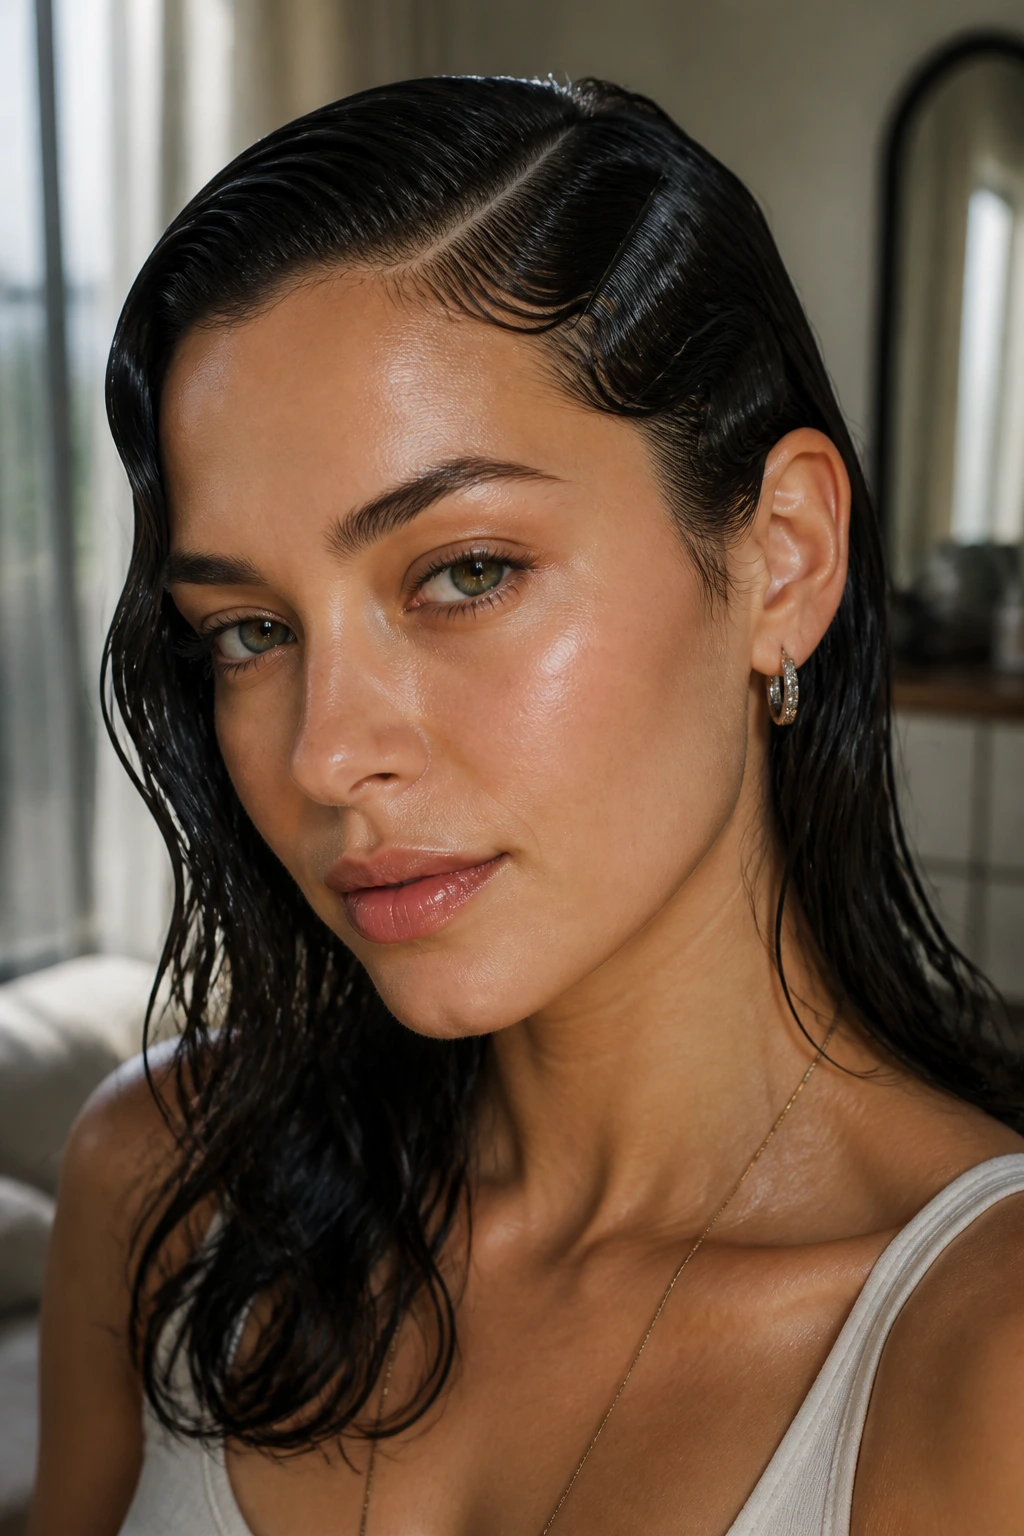
If you prefer to wear your hair down but want to avoid the frizzy fluff that often occurs when wet hair dries naturally, flat-pin waves are the perfect solution. This vintage-inspired technique uses flat metal double-prong clips to set your damp hair into smooth, controlled waves around your face.
Start by creating a deep side part in your damp hair. Apply a generous amount of styling cream or mousse to the front sections of your hair, smoothing it flat against your scalp. Use your fingers to push the hair near your hairline forward slightly, creating a soft C-shape curve, and secure it flat against your head using a crease-free hair clip.
Repeat this process a few inches down to create a second wave pattern. Allow the rest of your hair to hang loose and dry naturally over your shoulders. Before you leave the house—or once you arrive at your destination—simply slide the clips out to reveal smooth, frizz-free waves that frame your face beautifully.
14. The Braided Halo Updo
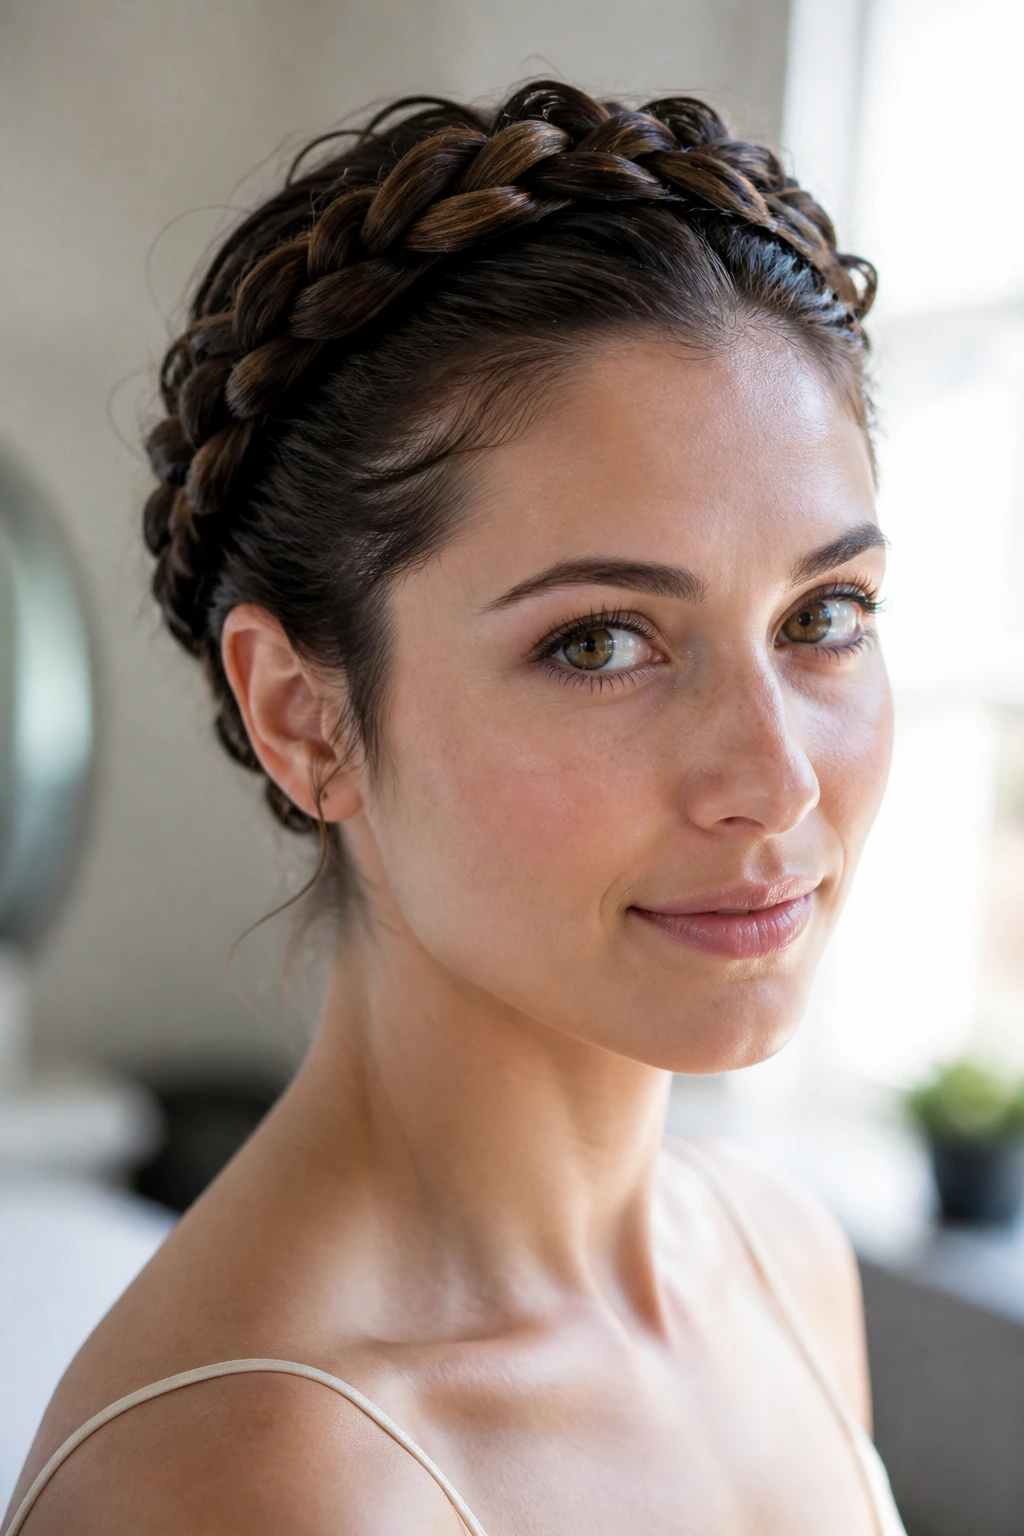
The braided halo is the ultimate protective style for damp hair. By weaving your hair into a crown that sits on top of your head, you protect your ends from environmental friction and keep your neck completely cool and dry throughout the day.
Start by splitting your damp hair down the center into two equal sections. Braid each section into a simple three-strand plait, starting at the nape of your neck and working down to the ends. Secure the ends of each braid with a small, clear elastic band.
Take the left braid, wrap it over the top of your head just behind your hairline, and secure the end flat against your scalp with a few bobby pins. Repeat this process with the right braid, crossing it over the top of your head in the opposite direction and tucking the ends underneath the first braid. The result is a beautiful, seamless crown of braids that holds its shape all day long.
15. The Rope-Twisted High Ponytail
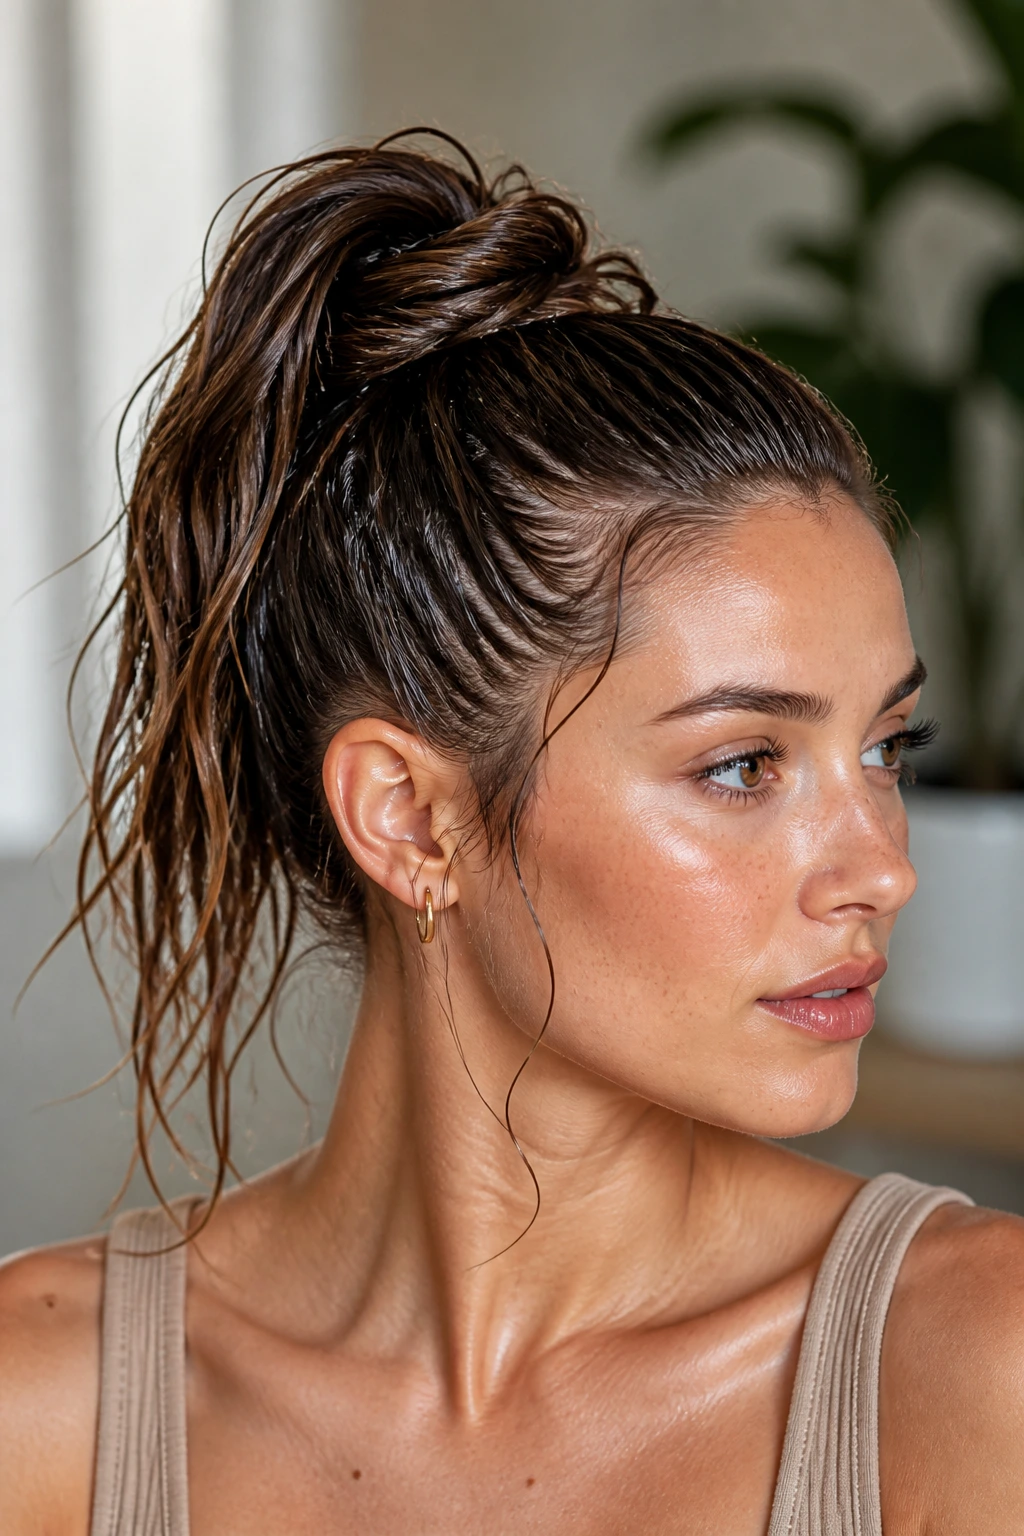
If you love the high ponytail but hate how a wet pony can look limp and stringy, the rope-twisted variation is your answer. This style takes the classic high ponytail and twists it into a dense, structural rope that looks incredibly modern and sleek.
The Two-Strand Twist Method
- Pull your damp hair into a high ponytail at the crown of your head and secure it tightly with a fabric hair tie.
- Split the ponytail into two equal sections.
- Twist each section individually in a clockwise direction.
- Wrap the two twisted sections around each other in a counter-clockwise direction, securing the bottom with a clear elastic.
Twisting the individual strands in one direction and wrapping them in the opposite direction creates a self-locking mechanism. This prevents the rope twist from unravelling, even as your hair dries and expands slightly.
16. The Criss-Cross Sectioned Low Bun
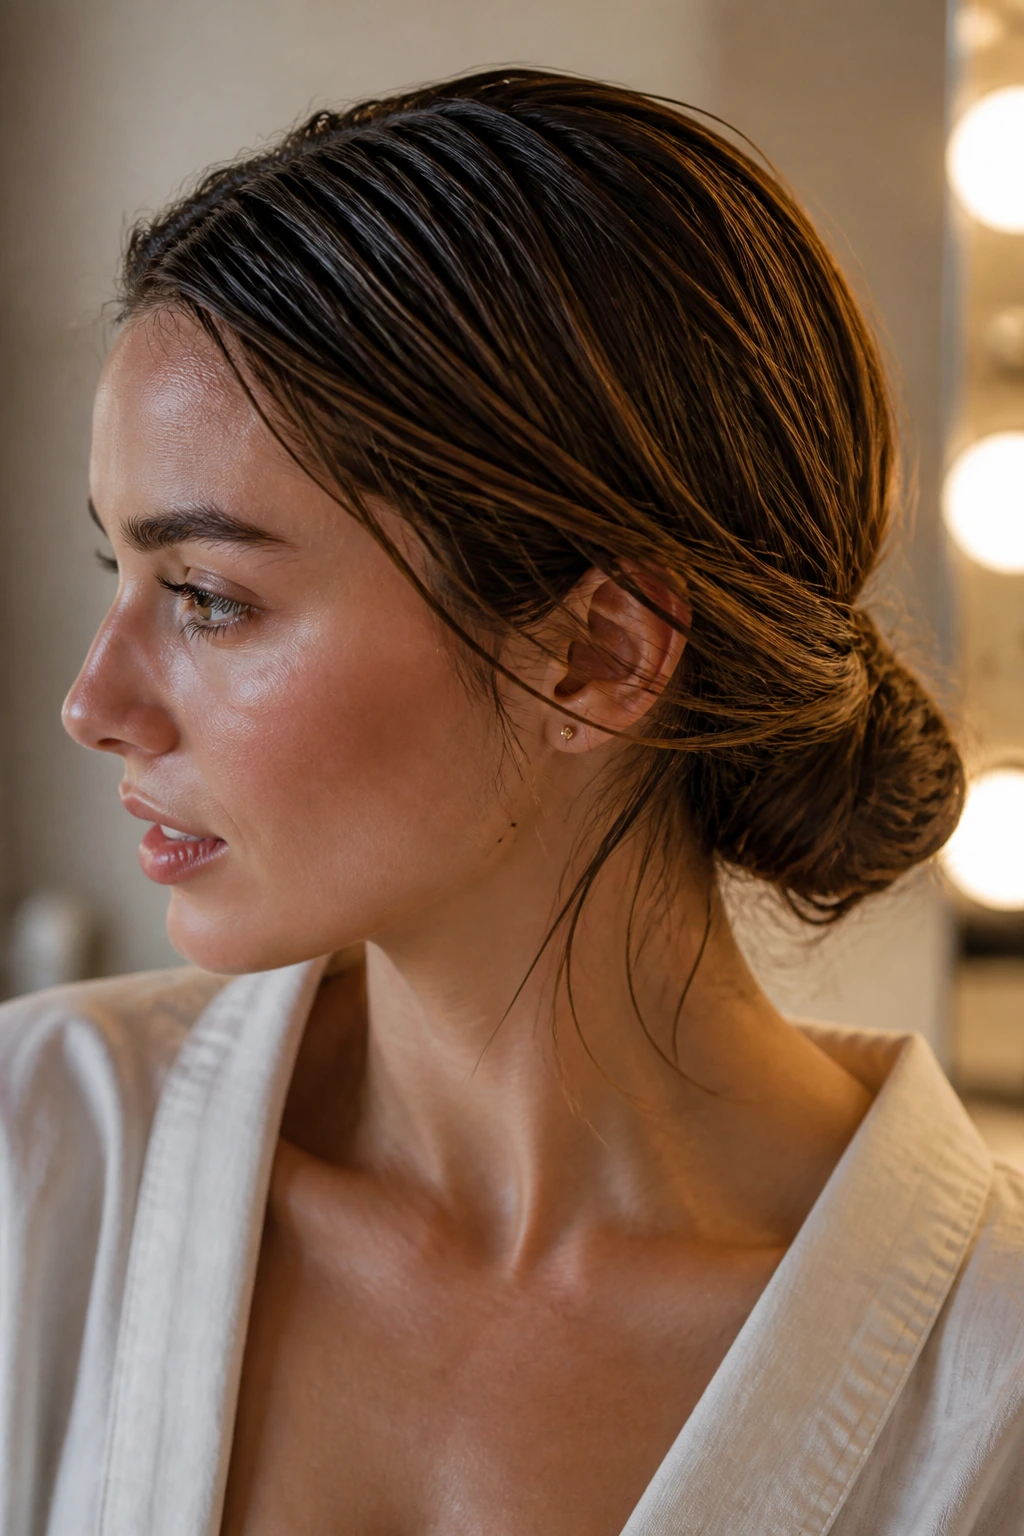
This style is perfect for those who want a low bun with a bit of architectural interest. By sectioning the hair at the crown and crossing it over the bun, you create a beautiful criss-cross pattern that adds visual detail to an otherwise simple style.
Divide your damp hair into three sections: a large section at the back containing the bulk of your hair, and two smaller sections at the temples. Pull the back section into a neat low bun at the nape of your neck and secure it with a hair tie.
Take the left front section, pull it back across the top of the bun, and wrap it around the base, securing it with a bobby pin. Repeat this process with the right front section, crossing it over the first strand in the opposite direction. This simple crossing technique covers your hair tie and adds a beautiful, structured detail to your low bun.
17. The Wet-Look Finger Waves with Pomade
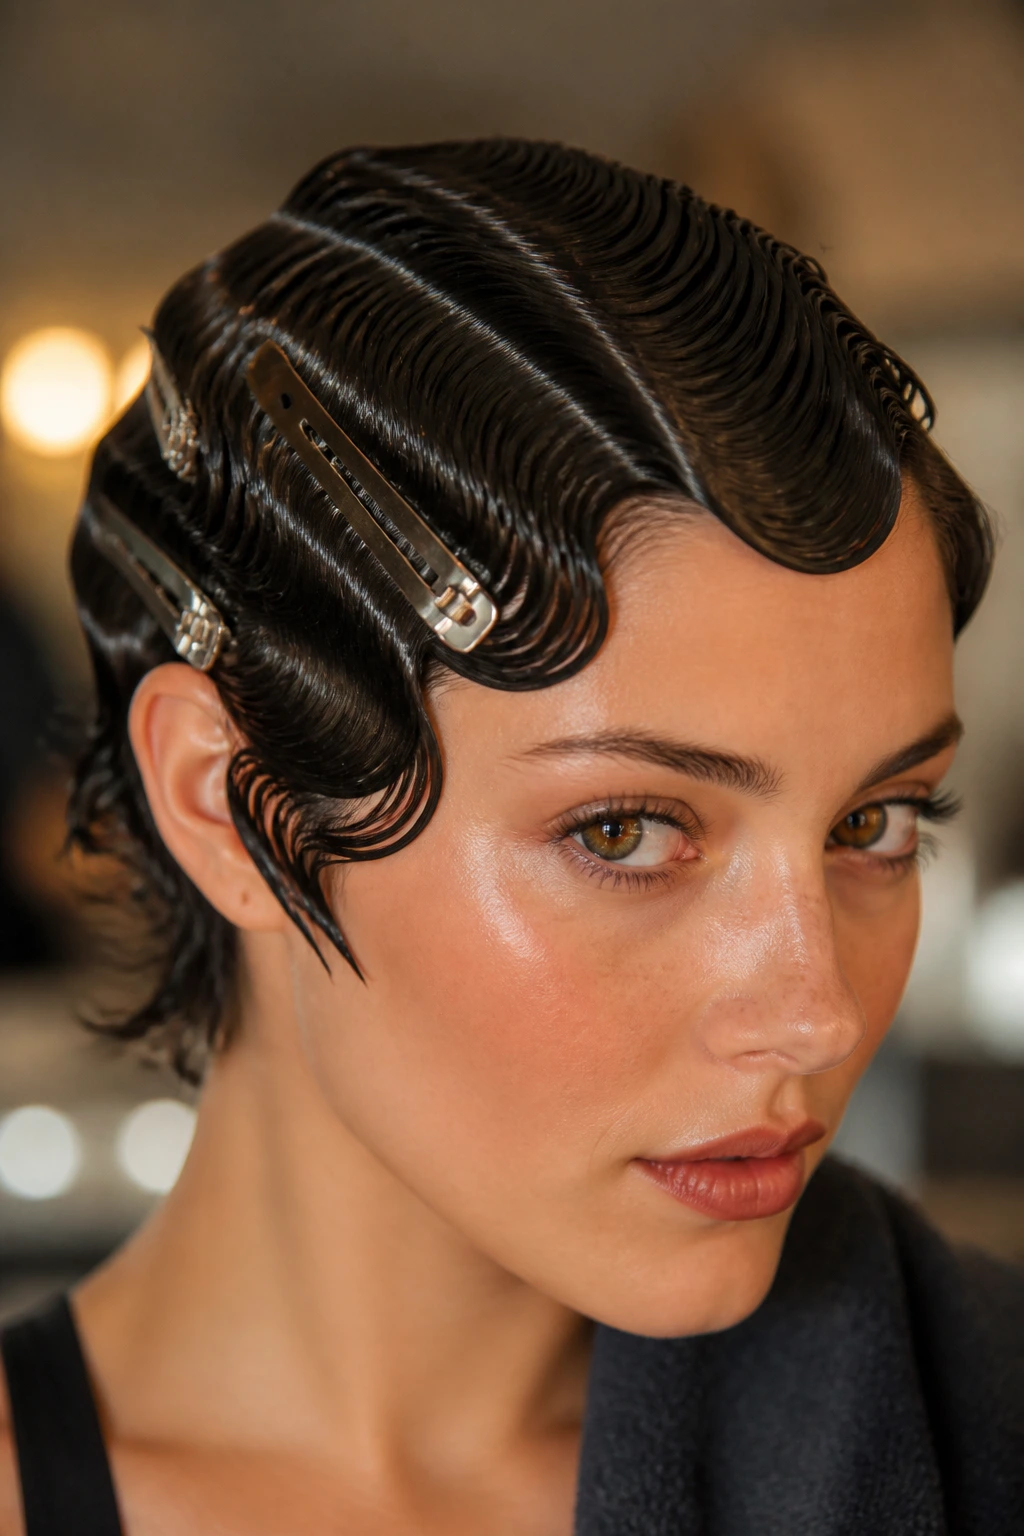
For short haircuts like pixies or bobs, styling wet hair can sometimes feel challenging. The wet-look finger wave style uses the natural dampness of your hair to create a high-fashion, vintage texture that looks incredibly chic on shorter lengths.
Apply a generous amount of high-shine pomade or alcohol-free gel through your damp hair, ensuring even distribution from roots to ends. Use a fine-tooth comb to create a deep side part.
Using your comb and your fingers, press the hair near your hairline into flat, alternating S-curves against your scalp. Secure each curve with a flat, crease-free clip while you finish getting ready. Remove the clips before leaving the house to reveal a high-shine wave pattern that stays perfectly in place all day long.
18. The Loose Pineapple-Tied Top Loop
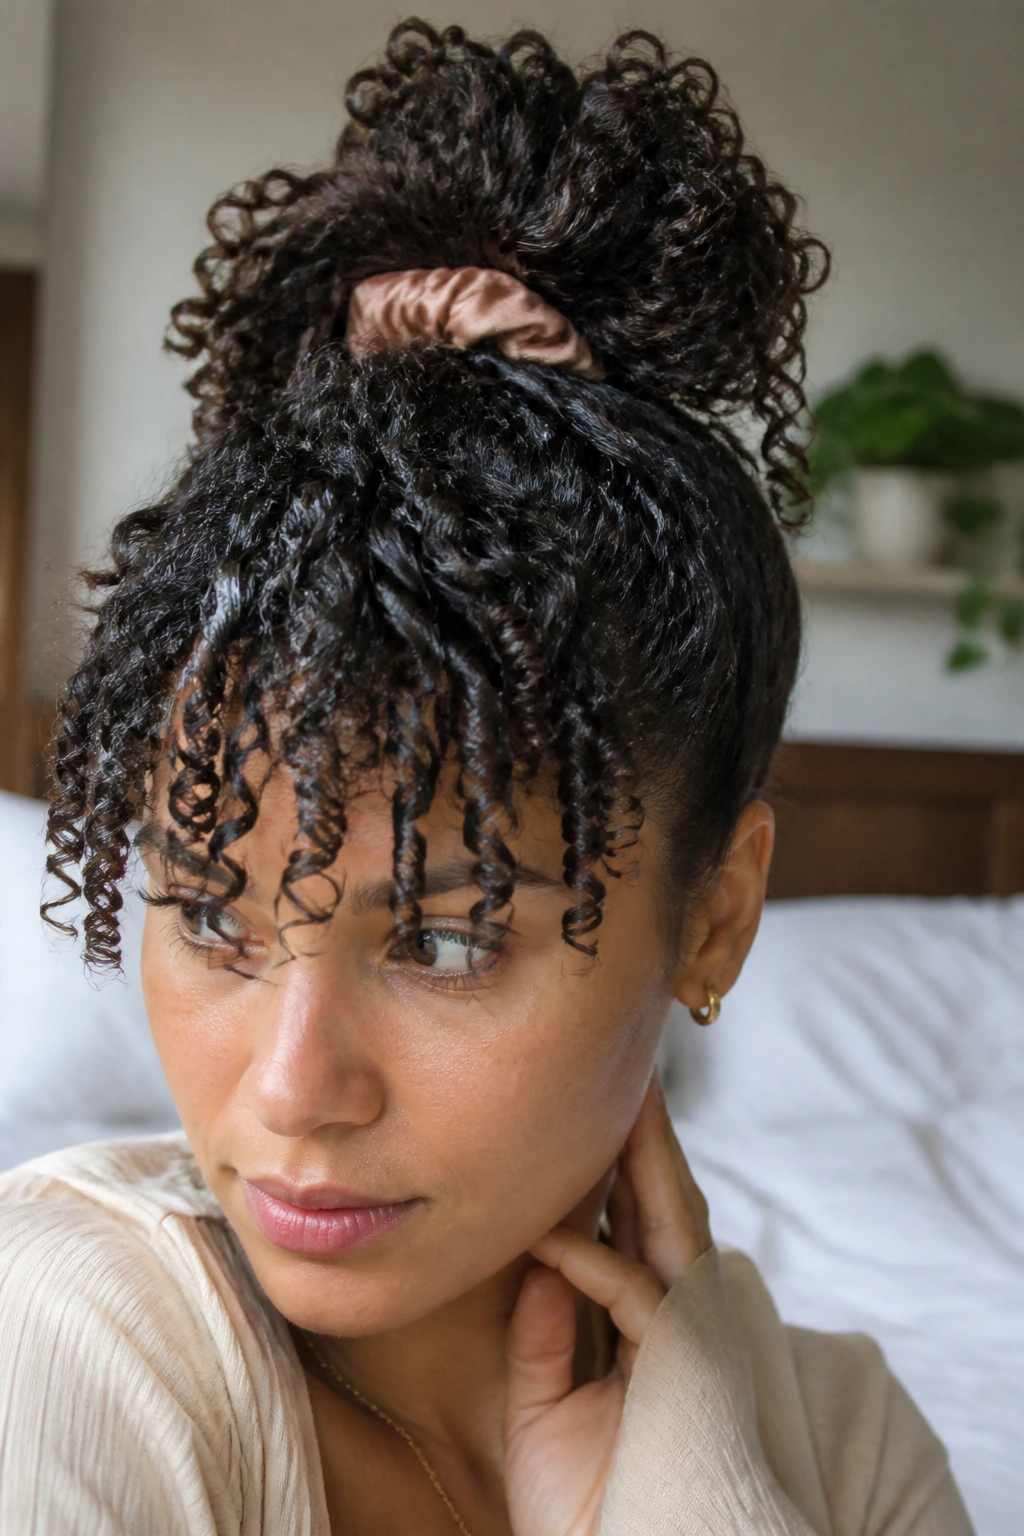
If you have naturally curly or coily hair, styling it wet is often the best way to preserve your curl pattern and prevent frizz. The pineapple-tied top loop is a classic technique that gathers your curls at the very top of your head, protecting them from flattening as they dry.
Apply your favorite leave-in conditioner and curl-defining cream to your damp curls, scrunching gently to encourage their natural shape. Flip your head upside down and gather all of your hair at the very top of your forehead.
Secure the hair loosely with a satin scrunchie, pulling the hair through only once or twice to avoid crushing your curl pattern. Let the ends of your curls cascade forward over your forehead like a pineapple. This style keeps your curls completely protected, allows your scalp to dry quickly, and leaves you with beautiful, voluminous curls when you let it down later in the day.
Wrapping Up
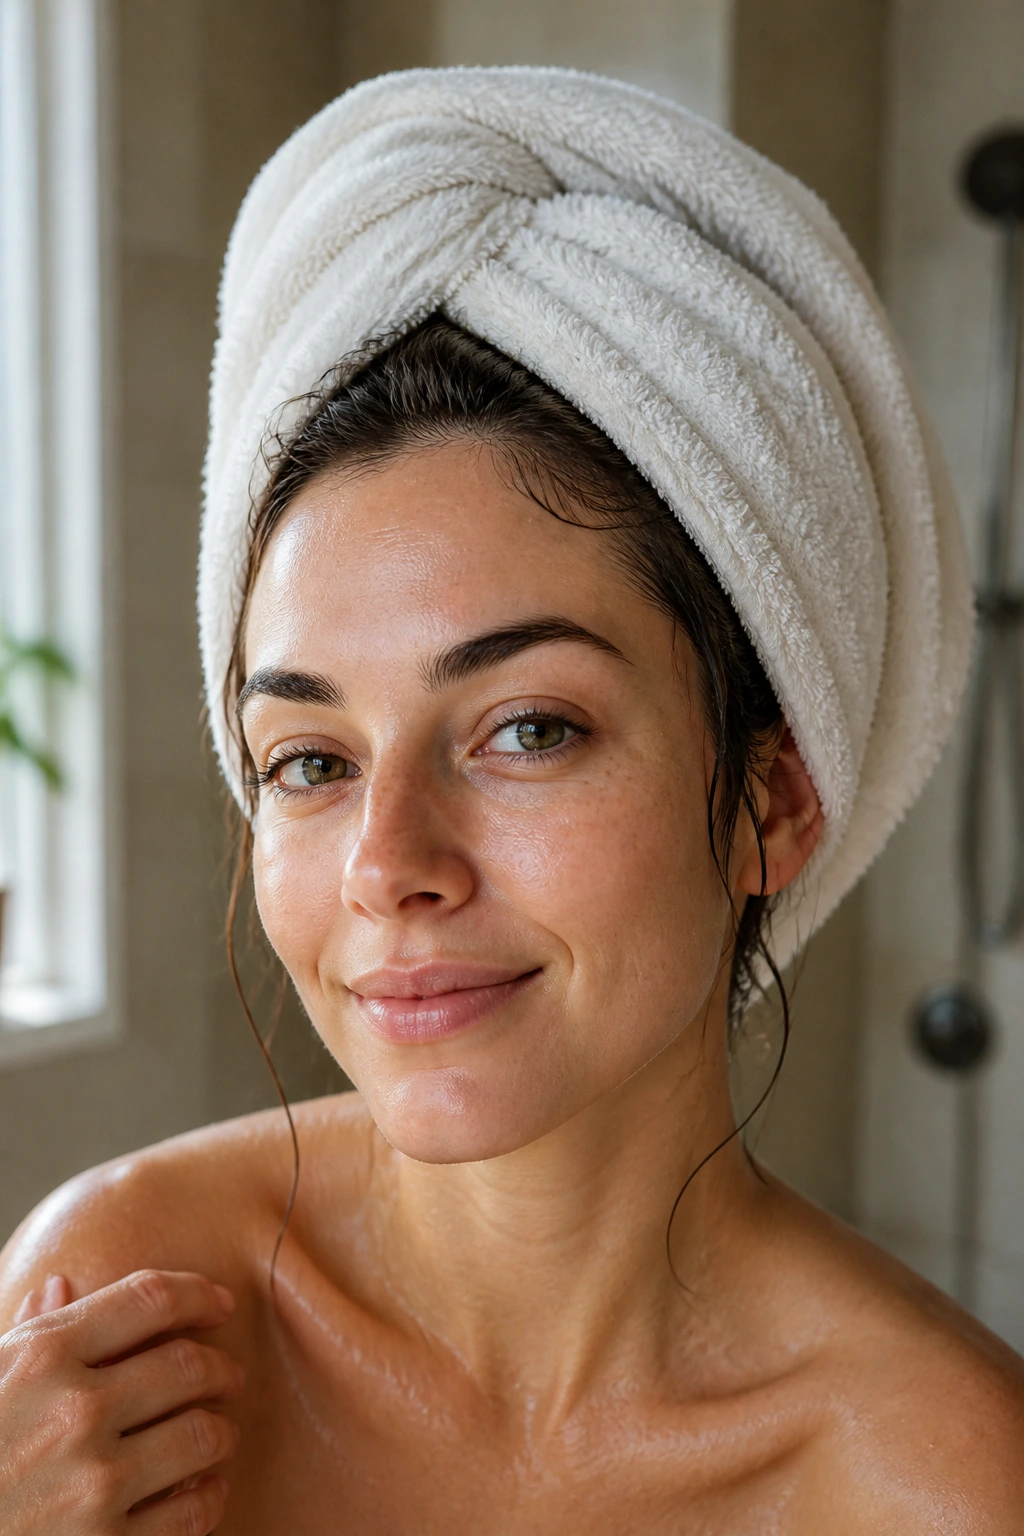
Managing wet hair on busy mornings does not mean you have to sacrifice your personal style or damage your hair health. By choosing gentle techniques and the right tools, you can easily turn wet strands into structured, beautiful hairstyles that hold up all day.
Remember to treat damp hair with the care it deserves. Avoid tight elastics that cause tension, use nourishing products to lock in moisture, and let your hair dry naturally within these protective styles. With these simple options in your routine, you can step out the door with confidence, knowing your hair looks deliberate, polished, and healthy.
