Waking up at six in the morning is rarely a high-energy experience, especially when you are staring at a mirror and trying to decide what to do with your hair before the first bell rings. You want something that looks intentional, sharp, and put-together, but you are not looking to spend forty minutes with a blow dryer and a round brush while the bus is waiting outside. The quiff has become the ultimate savior for those mornings. It occupies that perfect middle ground between “I rolled out of bed” and “I have a professional hair stylist on retainer.” It is a classic for a reason—it pulls hair away from your face, gives you height, and manages to look clean whether you are heading to a lecture hall or a gymnasium.
Mastering the quiff is less about perfection and more about understanding the texture of your specific hair. If you have fine hair, you are chasing volume; if you have thick, coarse hair, your battle is against weight and gravity. The good news is that the structure of the style is incredibly forgiving. You do not need a salon-grade finish to make it work. A little bit of grit, some quality styling product, and the right technique will see you through a full day of classes, practices, and lunchroom chaos. We are moving away from the stiff, gravity-defying sculptures of the past and toward something a bit more lived-in and relaxed.
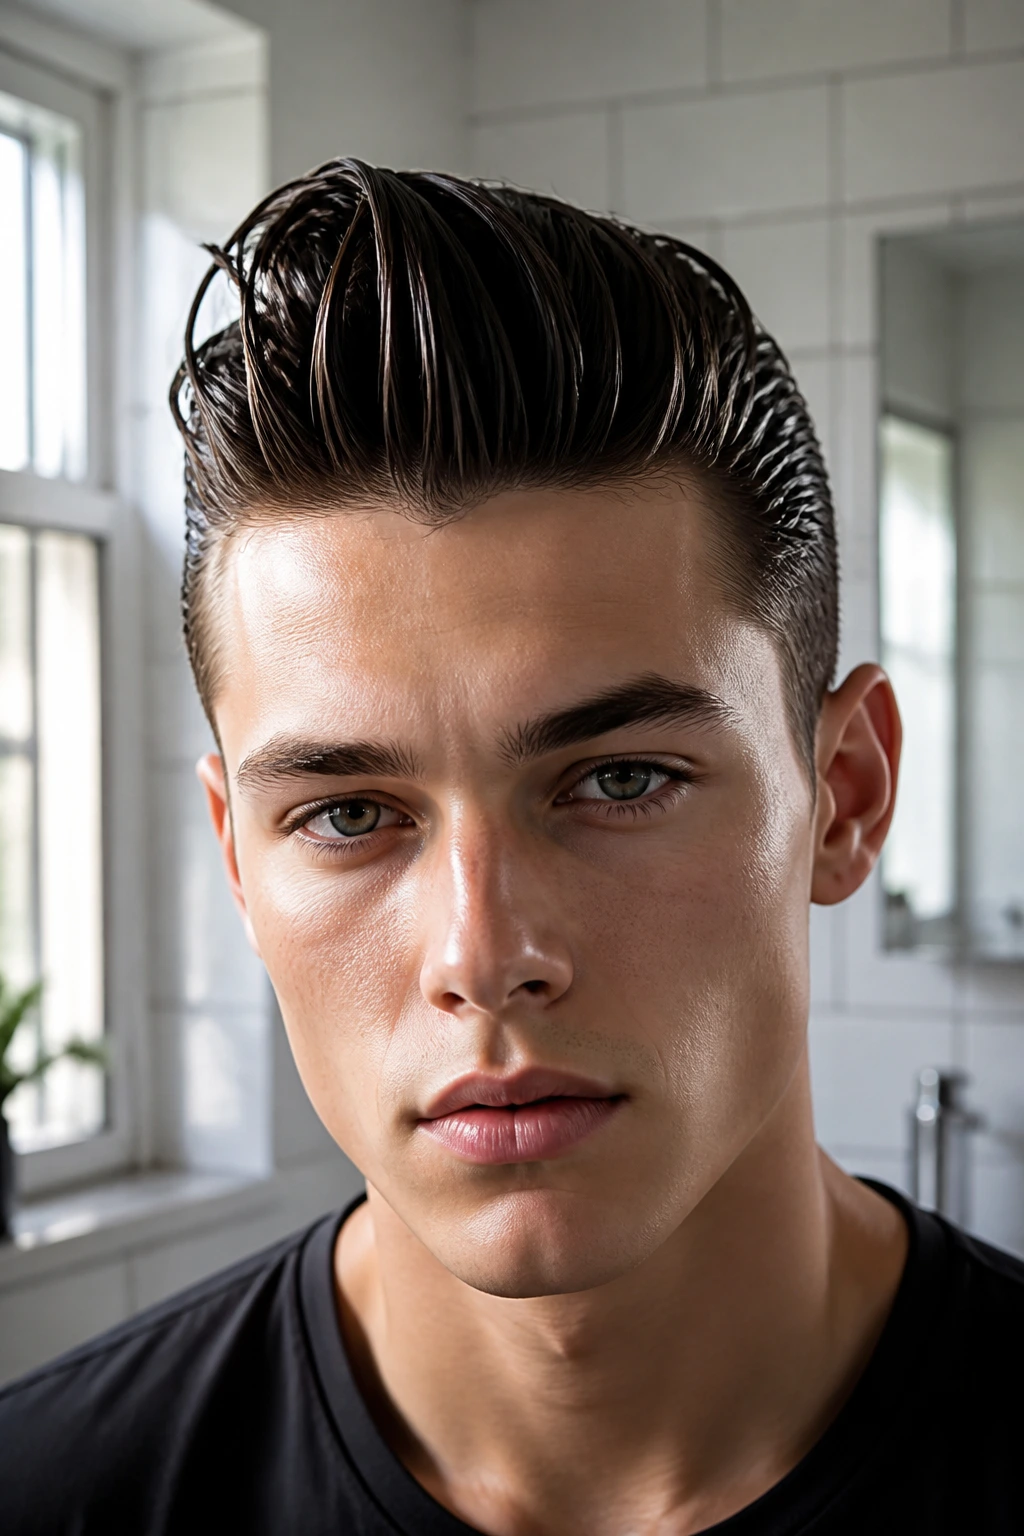
1. The Classic Short-Sides Quiff
This is the foundational look that serves as the entry point for most students. It involves keeping the hair on the sides and back significantly shorter than the top, creating a dramatic contrast that naturally pushes the eye toward your face. The transition doesn’t need to be a skin fade; a simple taper often looks more natural for a school environment. You want the top section to be about three to four inches long so you can actually push it back and up.
Why This Style Works
It is virtually maintenance-free. Because the sides are kept short, you do not have to worry about unruly growth or cowlicks in the back for a few weeks between barber visits. You can wake up, run a bit of matte paste through the top section, and have the style set in under sixty seconds. It is the definition of efficiency for a busy morning.
How to Style
- Towel-dry your hair until it is just slightly damp, not dripping.
- Take a dime-sized amount of matte styling clay and warm it between your palms.
- Apply it starting from the roots of the front section.
- Use your fingers to lift the front hair upward and back, creating a gentle arc rather than a vertical spike.
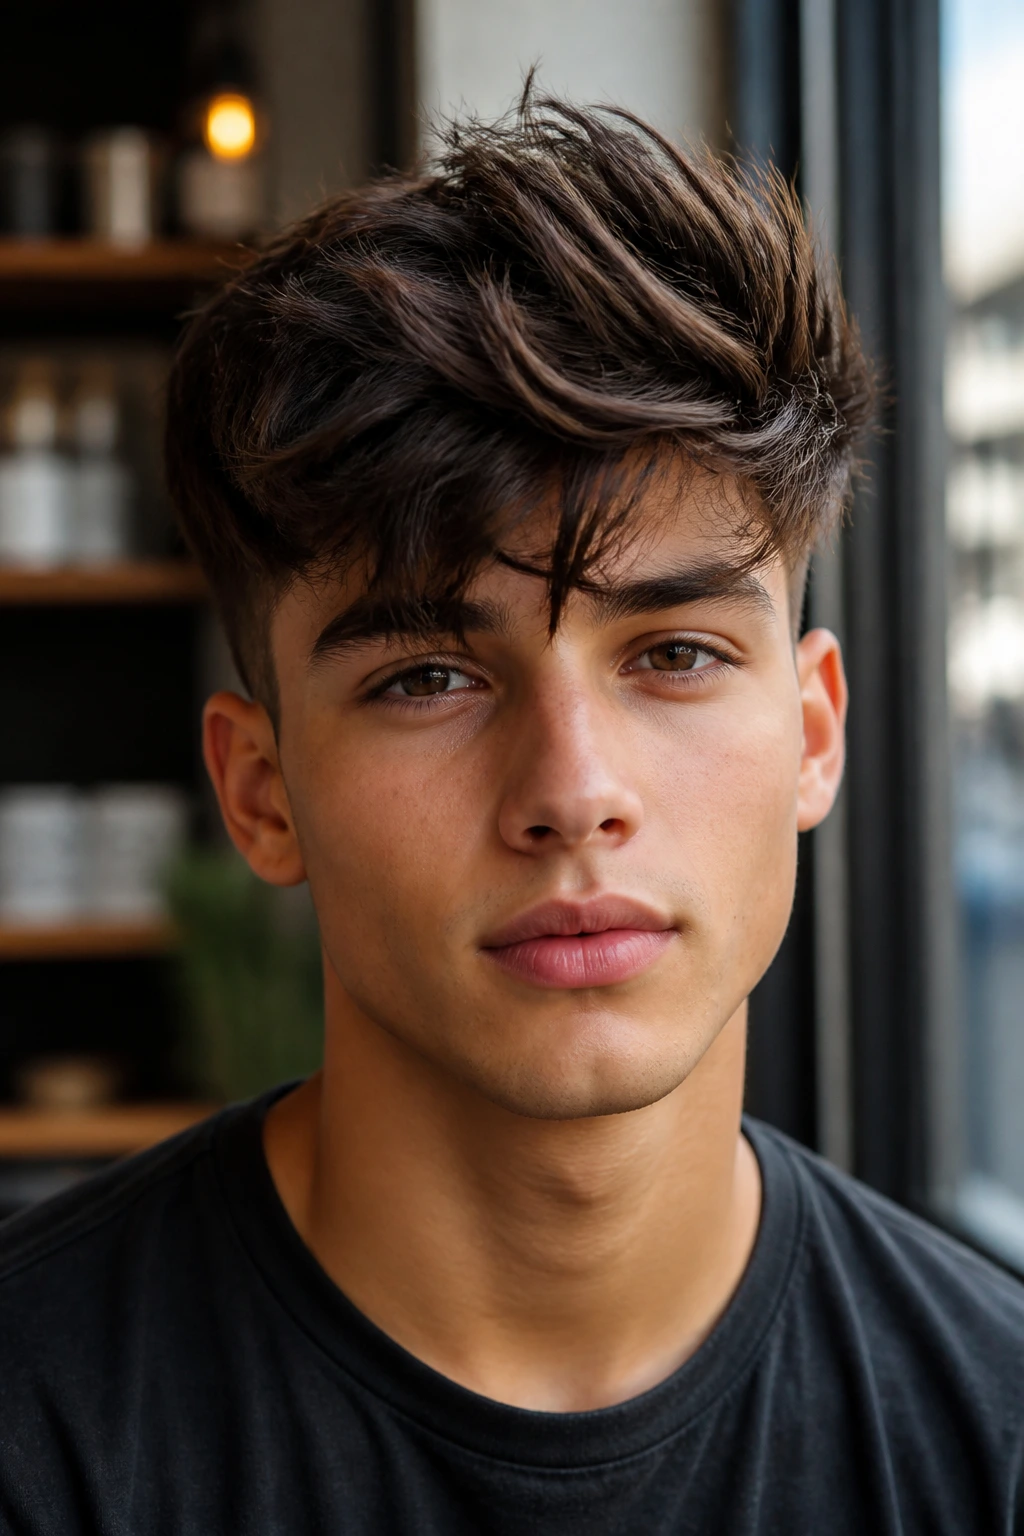
2. The Textured Messy Quiff
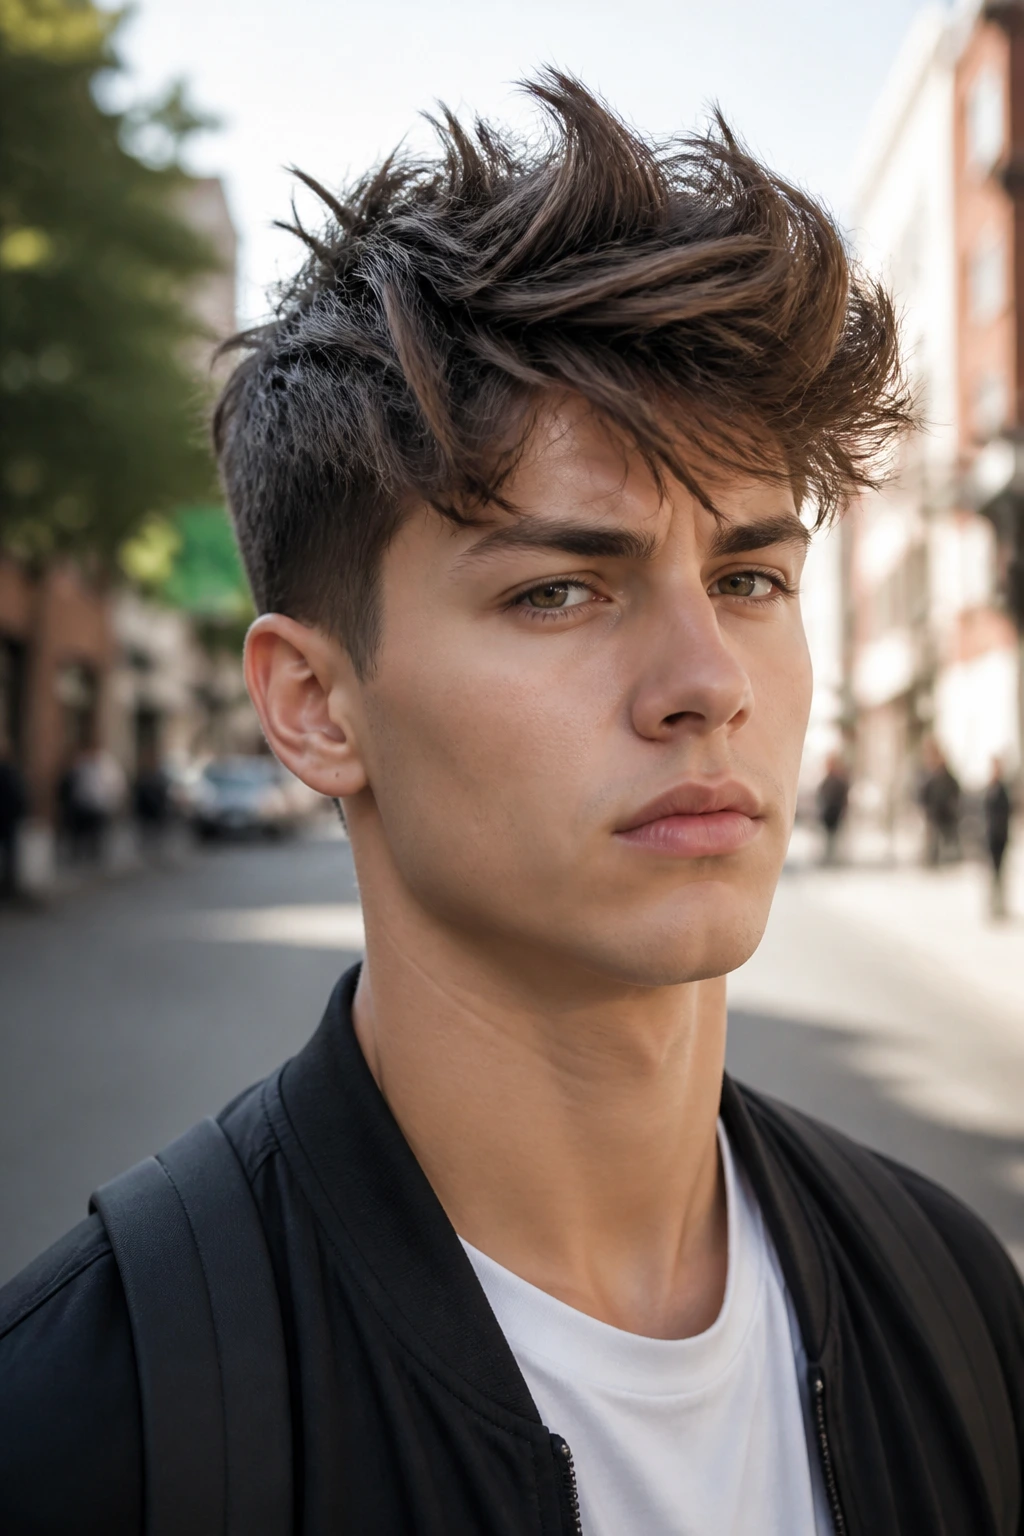
If you aren’t a fan of the “perfectly groomed” aesthetic, the textured quiff is your best friend. This version relies on sea salt spray and texturizing powder to create a rugged, wind-blown finish. It is less about a smooth, uniform surface and more about creating individual spikes and waves that catch the light. This style is perfect for those who want to look like they spent time on their hair without looking like they tried too hard.
Getting the Texture Right
The secret here is volume-building products. If your hair is naturally flat, skip the heavy pomades that contain oil; they will weigh your hair down and make it look greasy by third period. Instead, opt for lightweight mousses or dry texturizing sprays. These products add “grit” to the hair shaft, allowing it to hold shape without becoming brittle or stiff.
The Daily Routine
- Apply a generous amount of sea salt spray to damp hair.
- Blast your hair with a hair dryer on a medium-heat setting, moving your fingers through the hair to create volume.
- Once dry, sprinkle a small amount of texture powder at the roots.
- Ruffle the hair with your hands until you achieve the desired level of chaos.
3. The Side-Swept Quiff

The side-swept quiff is for those days when you want a bit more sophistication. Instead of pushing everything straight back, you angle the hair toward one side. It softens the look of the face and is particularly flattering if you have a square or round jawline. It feels slightly more formal, making it an excellent choice for presentation days or school events where you want to look polished.
Balancing the Angle
The key to a good side-swept look is preventing it from looking like a flat comb-over. You still need volume at the base of the front hair. If you flatten the root, the entire style loses its energy. Use a fine-tooth comb to guide the hair while using your free hand to lift the front section away from the forehead.
Pro Maintenance Tip
Keep a travel-sized bottle of light-hold hairspray in your backpack. Since side-swept styles rely on a specific direction, a quick mist at the front during a bathroom break ensures that your hair doesn’t fall flat or drift back toward the center as the day progresses.
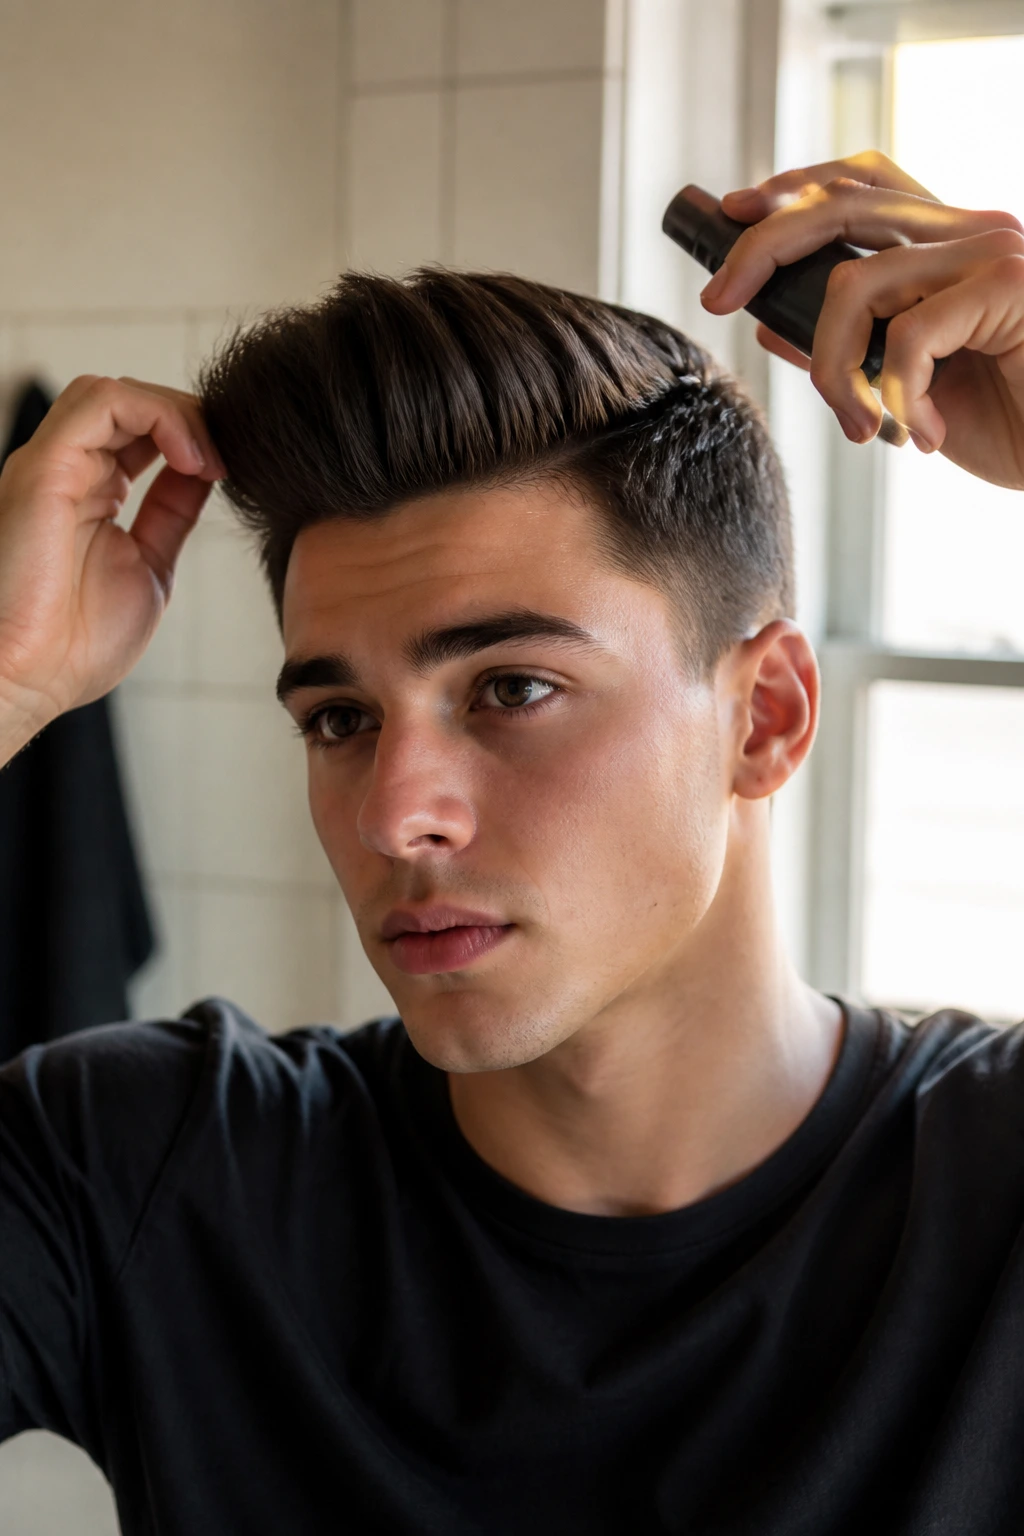
4. The Modern Pompadour Quiff
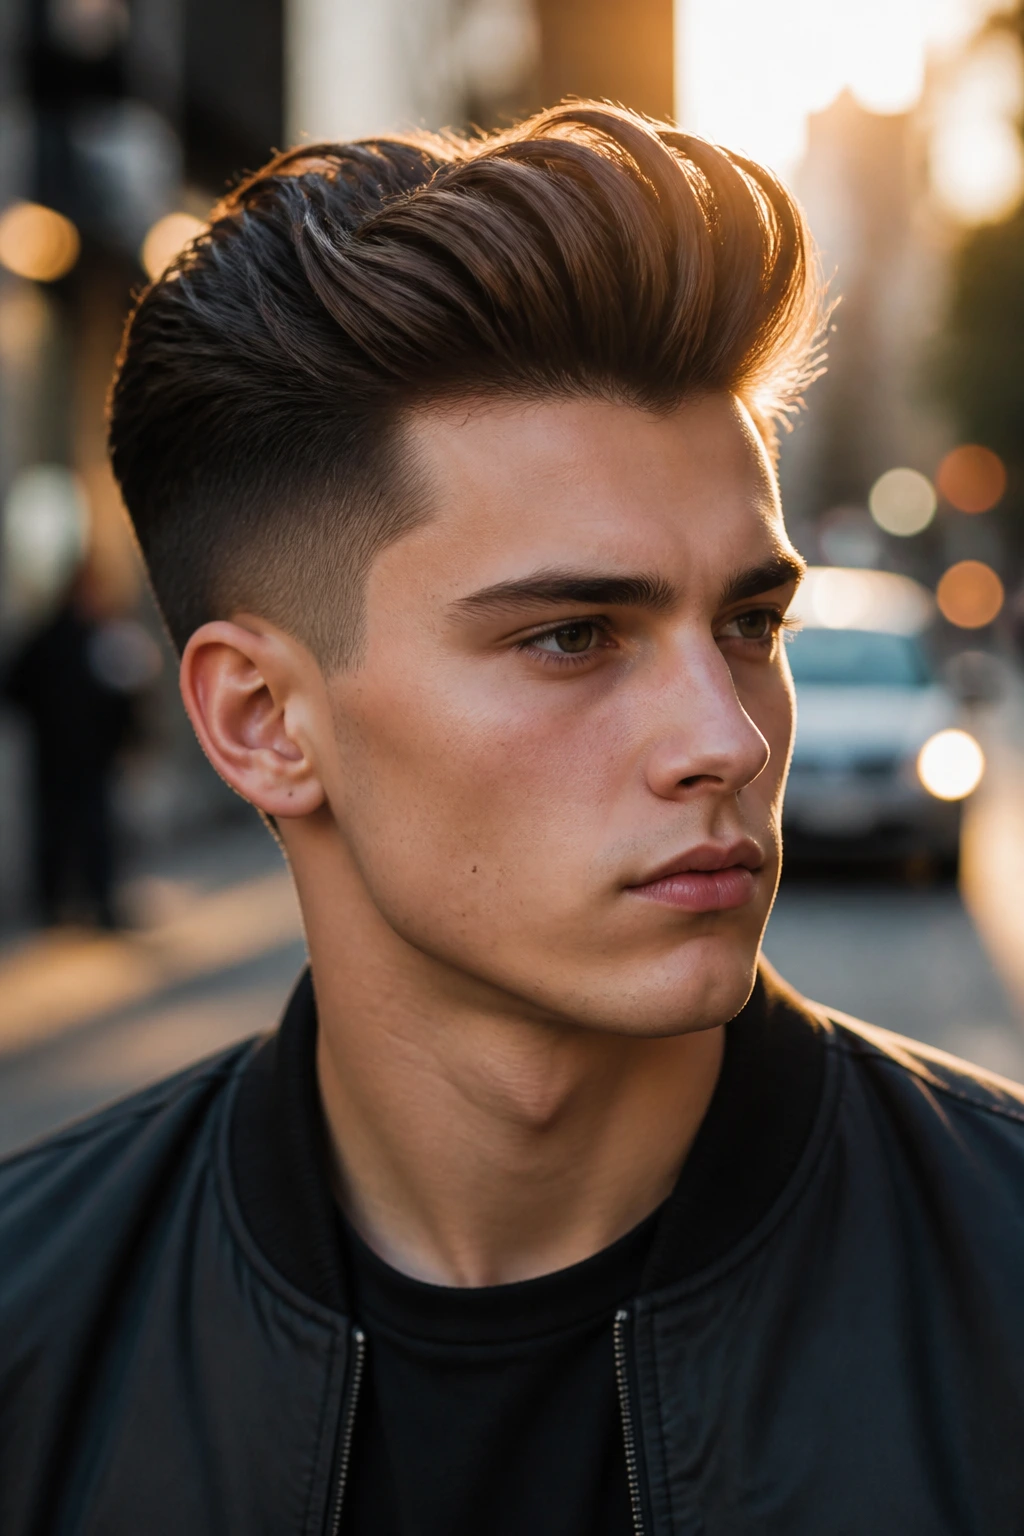
This is the big brother of the standard quiff. It incorporates more volume and a tighter, slicker finish. While it might look like it requires a movie star’s vanity, it is actually quite achievable with a decent comb and a strong-hold pomade. The goal is a clean, continuous line from the forehead to the crown of the head.
The Volume Factor
You cannot fake this level of height with product alone. You need to use a round brush or your fingers while blow-drying to force the hair up and over. If you try to force it while the hair is completely dry, you will likely just create a permanent crease or a messy clump. Always work while the hair is warm and pliable from the heat of the dryer.
Choosing Your Product
- For a high-shine finish, reach for a water-based pomade.
- For a more natural look, use a medium-hold cream.
- Never use wax-heavy products if you plan to re-style throughout the day; they become impossible to manage once they harden.
5. The Curly Top Quiff
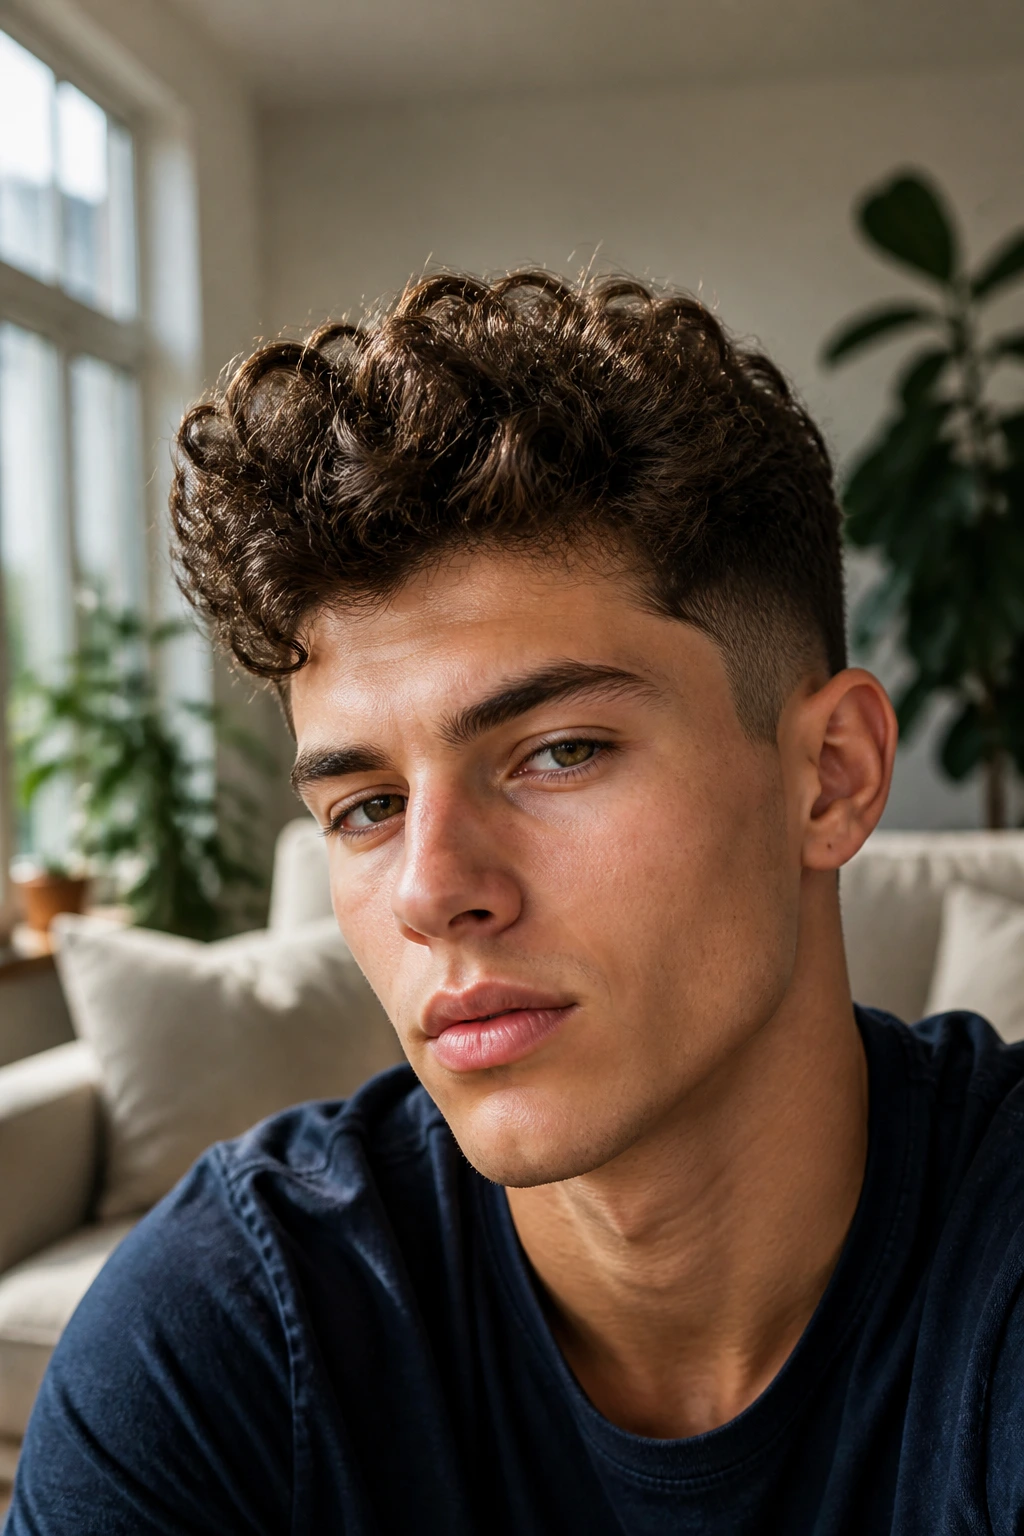
If you have naturally curly or wavy hair, you have a distinct advantage: built-in volume. You don’t need to do much to get the height, so your focus should be on definition and control. Trying to force curls into a flat, straight style is a losing battle that will only lead to frizz. Instead, embrace the bounce.
Managing Frizz
Curls require hydration. Use a leave-in conditioner as a base before you add any styling product. This prevents the hair from sucking up moisture from the air, which is the primary cause of the “frizzy halo” look. When you apply your pomade or curl cream, distribute it evenly throughout the curls to ensure every strand is accounted for.
How to Style
- Gently scrunch your hair while it is wet to encourage the natural curl pattern.
- Air-dry until eighty percent finished, then use a diffuser on your hair dryer to finalize the shape.
- Use a small amount of matte clay just on the tips of the curls at the front to define the height of the quiff without losing the texture of the curl.
6. The Undercut Quiff
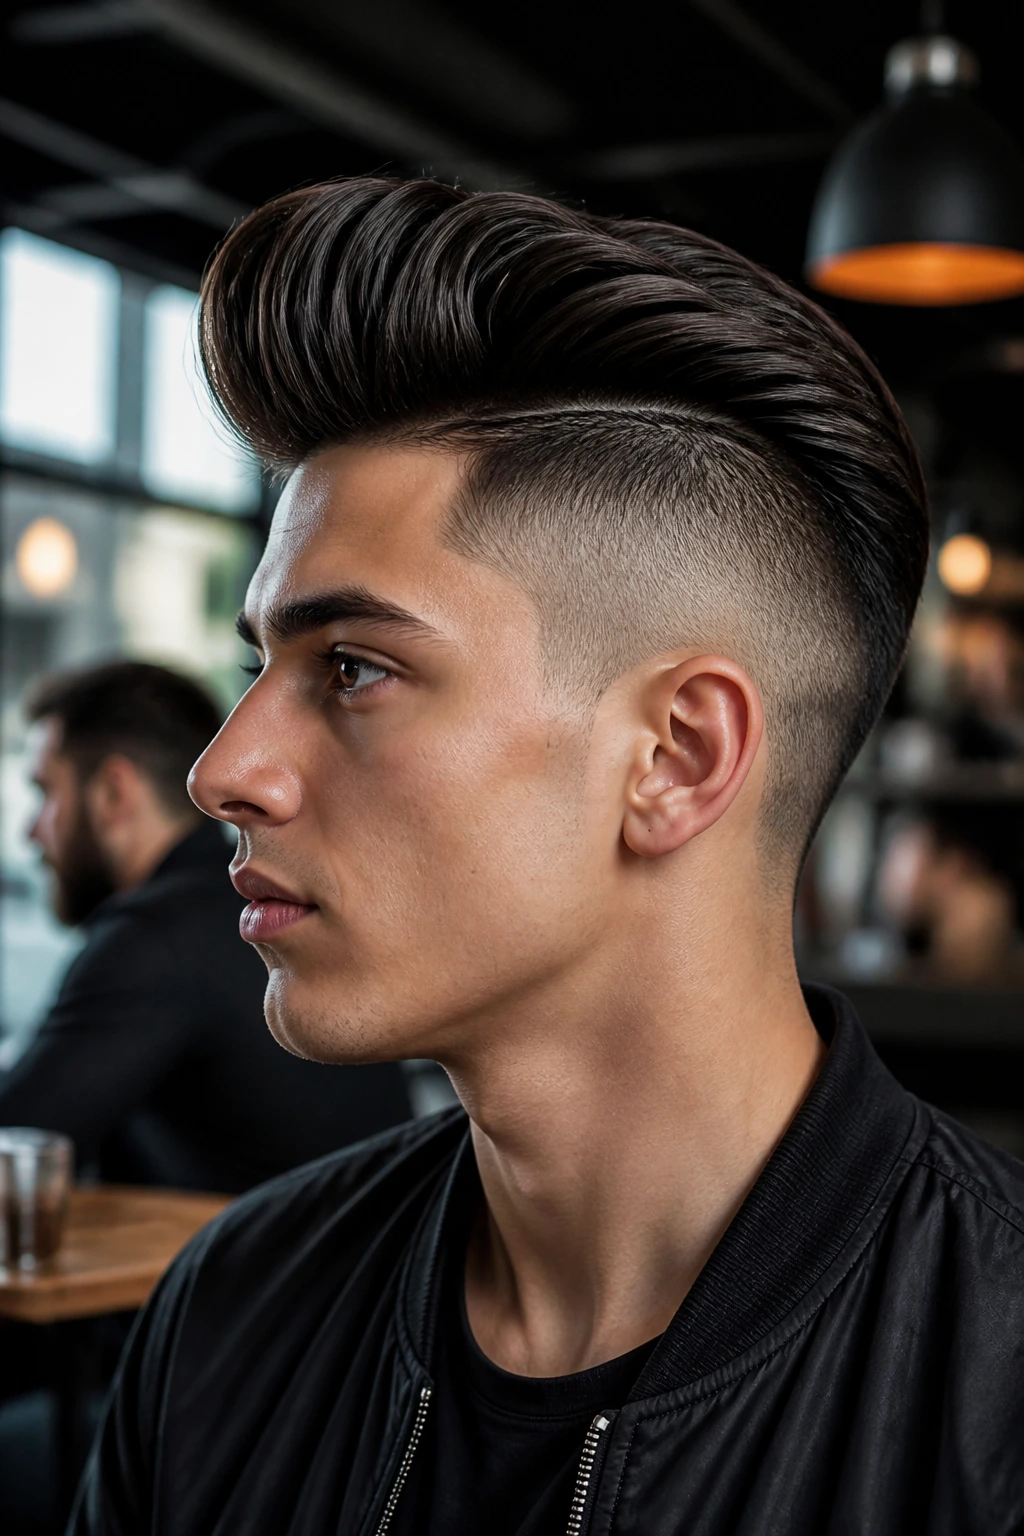
The undercut quiff pairs a long top with a very short, often shaved, bottom section. It is a bold, high-contrast look that commands attention. Because the sides are so short, the focus is entirely on the top. This makes it a great choice if you have great facial features you want to highlight, as there is absolutely nothing around the sides to distract the eye.
Why It’s Efficient
You save time because you aren’t doing anything to the sides of your hair. You focus your energy strictly on the top section. You can wake up, splash water on your face, spend two minutes on the top of your head, and be ready to head out the door. It is the ultimate “low effort, high impact” hairstyle.
Managing the Regrowth
Since the undercut is so short, it will look unkempt much faster than a standard taper. You will likely need to visit the barber every two to three weeks to keep the lines sharp. If you enjoy doing your own grooming, invest in a pair of high-quality trimmers so you can touch up the neckline and the sides of the undercut at home between professional cuts.
7. The Relaxed “Bedhead” Quiff

This style is for the minimalist who values sleep over styling time. It is a softer, more rounded version of the quiff that doesn’t aim for sharp angles or high, structural lifts. It looks like you just woke up, brushed your hair once with your fingers, and headed to school. It is approachable, youthful, and incredibly easy to maintain.
When to Choose This Look
This is the perfect style for casual days or weekends. It doesn’t look out of place when you are wearing a hoodie, and it doesn’t require a mirror to touch up. It’s a great style to adopt if your hair is beginning to thin or if you have a very soft, fine texture that doesn’t hold heavy styling products well.
Key Products
- A light texture paste or a grooming cream.
- Avoid gels, as they will make your hair look wet and crunchy, which ruins the “natural” vibe of the bedhead look.
8. The Spiky Quiff
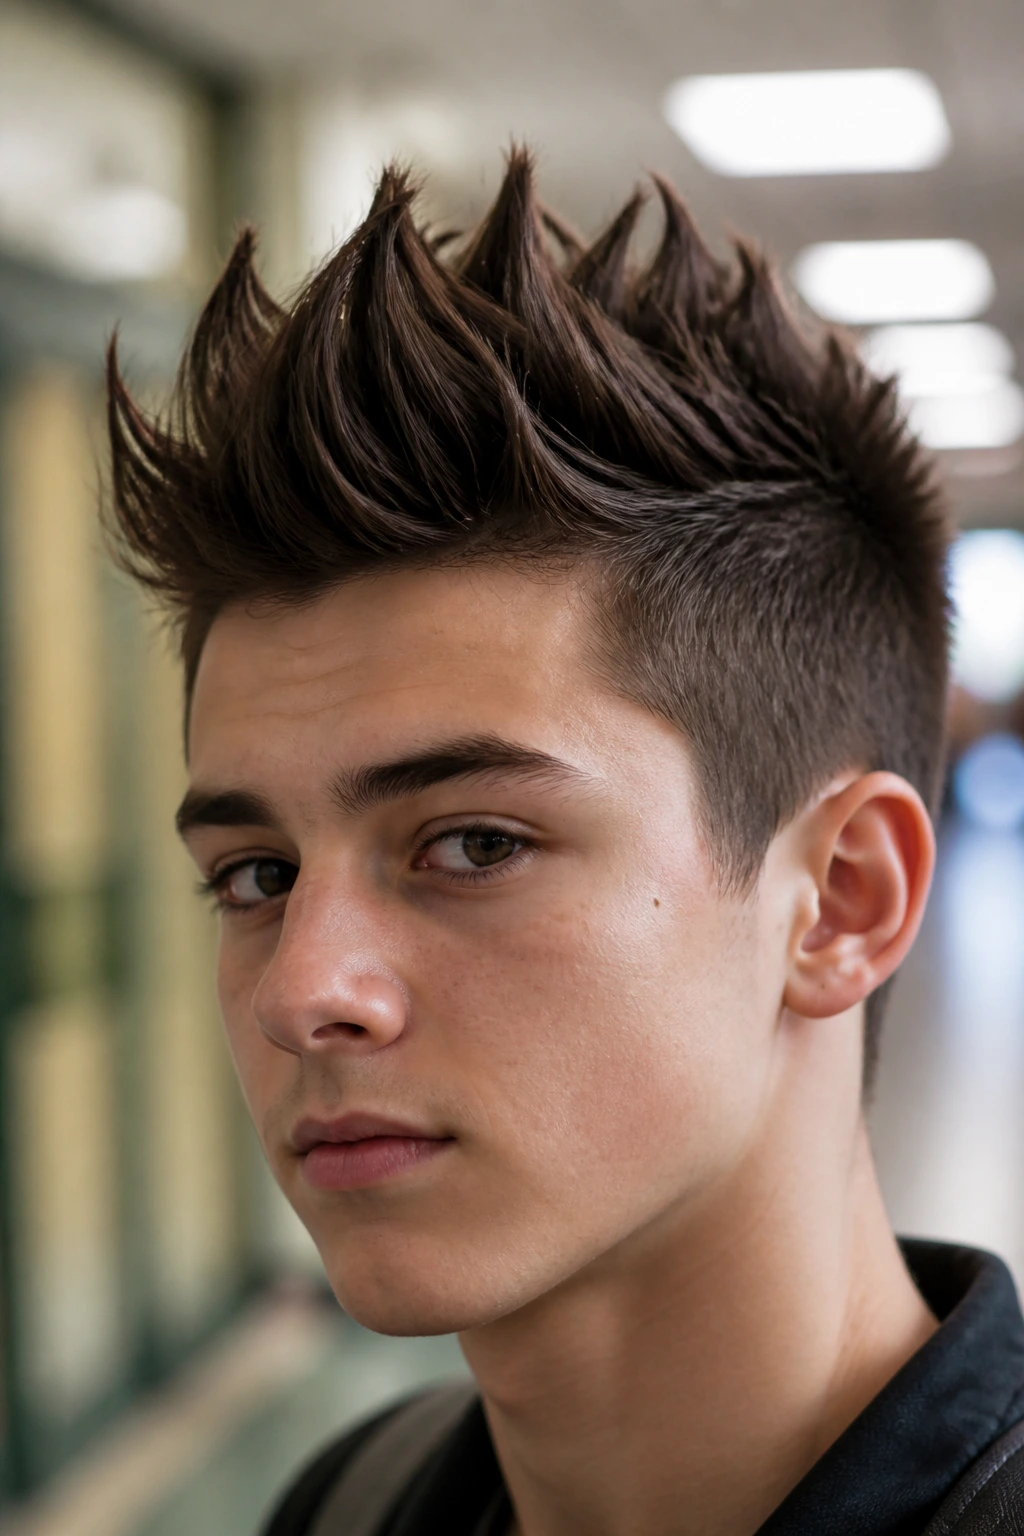
If you grew up in the era of bold, defined spikes, this is a refined version of that memory. It creates a quiff that is broken up into individual, sharp spikes rather than a singular mass. It adds a bit of edge and personality to your style. You will want a high-hold product to keep the spikes in place throughout the school day.
Precision Styling
The trick is to twist the ends of small sections of hair with your fingers after applying the product. This creates that “pointed” look. If you just smear the product over your head and push it up, you will end up with a clump rather than a clean, spiked finish. Take the extra thirty seconds to work on the individual spikes near the front hairline.
Pro Tip
Do not use a blow dryer on a high setting for this style. You want the product to do the work of keeping the shape, and the excessive heat from a dryer can sometimes make spiky hair look dry and frayed. Let the product dry naturally for a few minutes while you finish getting ready.
9. The Long-Hair Quiff

If you have a bit of length to your hair, you can create a sweeping, dramatic quiff that almost touches the crown of your head. This style requires a bit of dedication. You will need to grow your hair out to at least five or six inches on top. It looks fantastic and offers a lot of variety for different styling options, but it requires more attention in the mornings.
Managing the Weight
With more length comes more weight, and more weight makes it harder to maintain height. You will need a strong-hold spray or a very high-quality clay to anchor the style. If you notice your hair falling forward after an hour, it means your product isn’t strong enough to support the weight of your hair length.
Styling Strategy
- Use a blow dryer with a round brush to get maximum lift from the root.
- Apply a generous amount of strong-hold styling product while the hair is still warm.
- Finish with a light dusting of hairspray.
10. The Disconnected Quiff
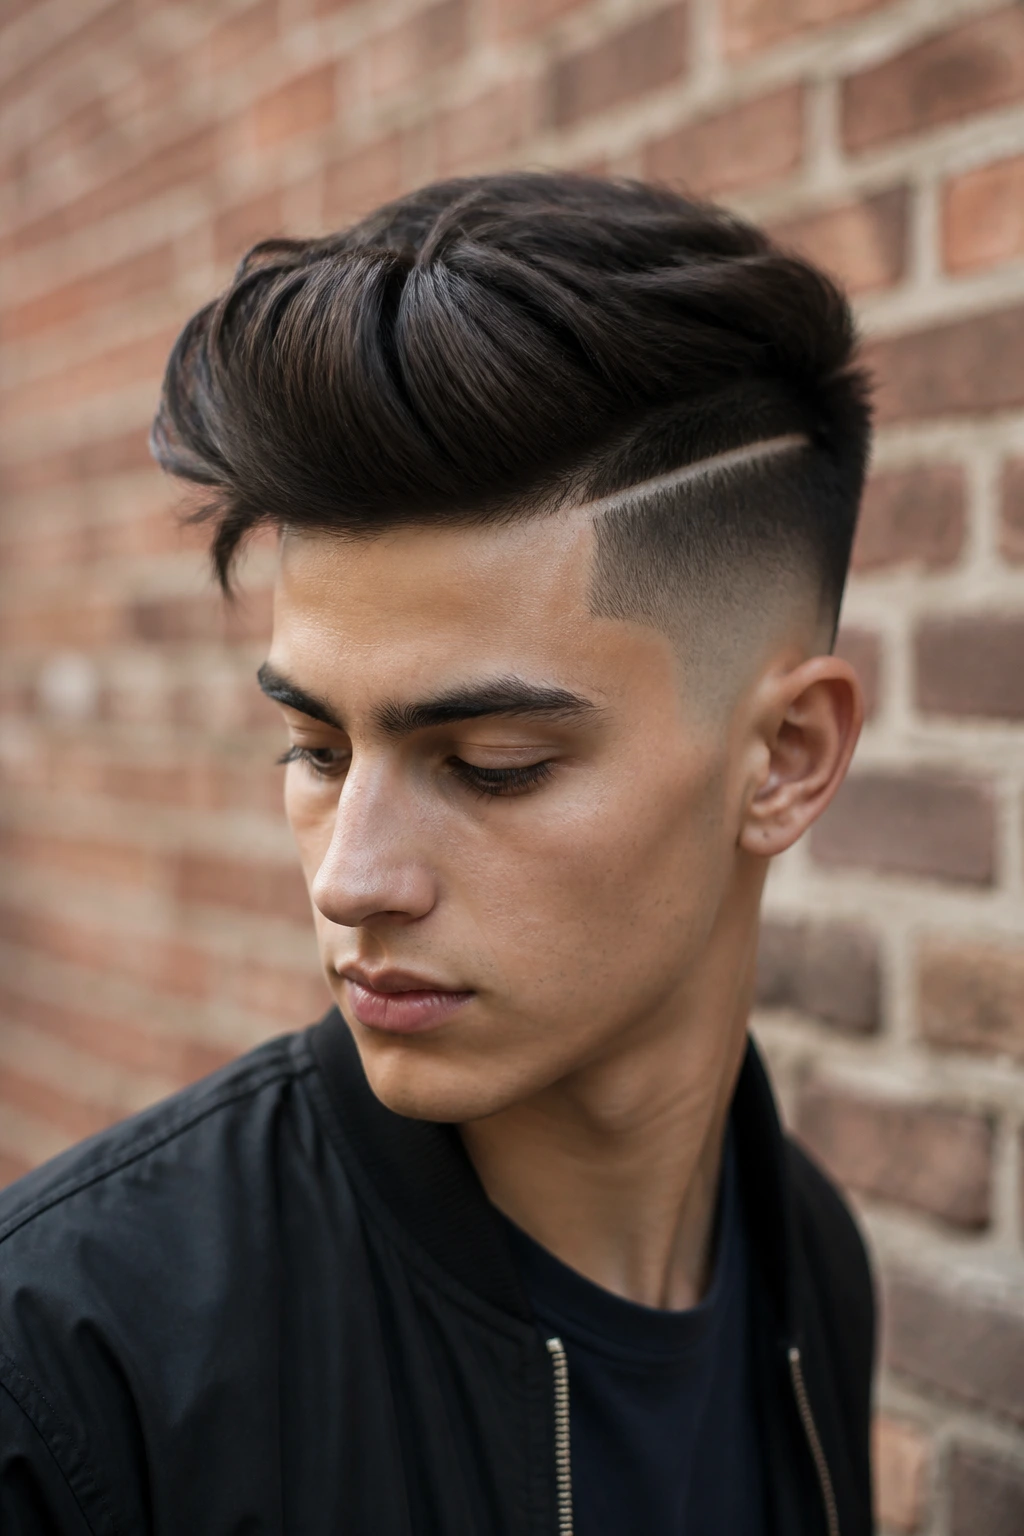
A disconnected quiff occurs when there is no blending between the short sides and the long top. It creates a literal “shelf” of hair. It is a very stylized, fashion-forward look. It isn’t for everyone, but if you have a strong sense of personal style, this can be a signature look that feels uniquely yours.
Why It’s Unique
This style is a statement piece. It draws attention to the contrast between the hair on the sides and the hair on top. It is incredibly clean and sharp, provided you keep your sides trimmed tight. You don’t need a lot of product to maintain the shape once it is set, as the hair naturally wants to sit in that long, defined mass on top.
Maintaining the Line
The biggest risk with the disconnected quiff is the hair starting to look messy as it grows out. Because there is a hard line where the long hair meets the short hair, any stray hairs immediately look out of place. You need to keep the sides trimmed with a guard setting of 1 or 2 consistently to keep the look intentional.
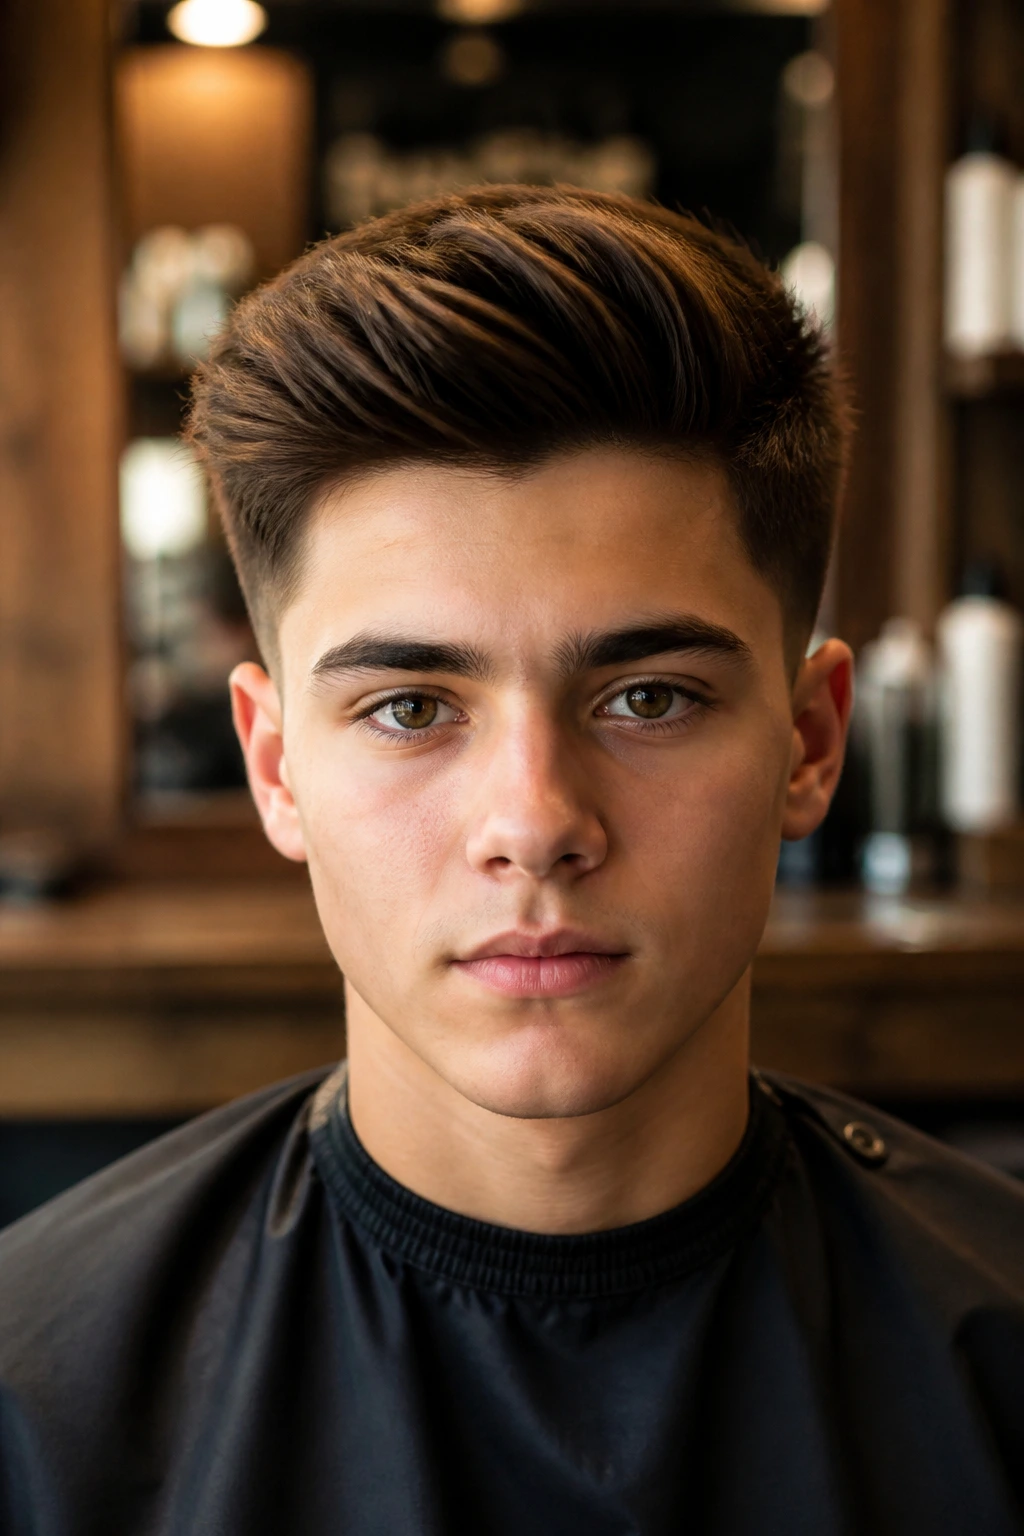
11. The Faded Quiff
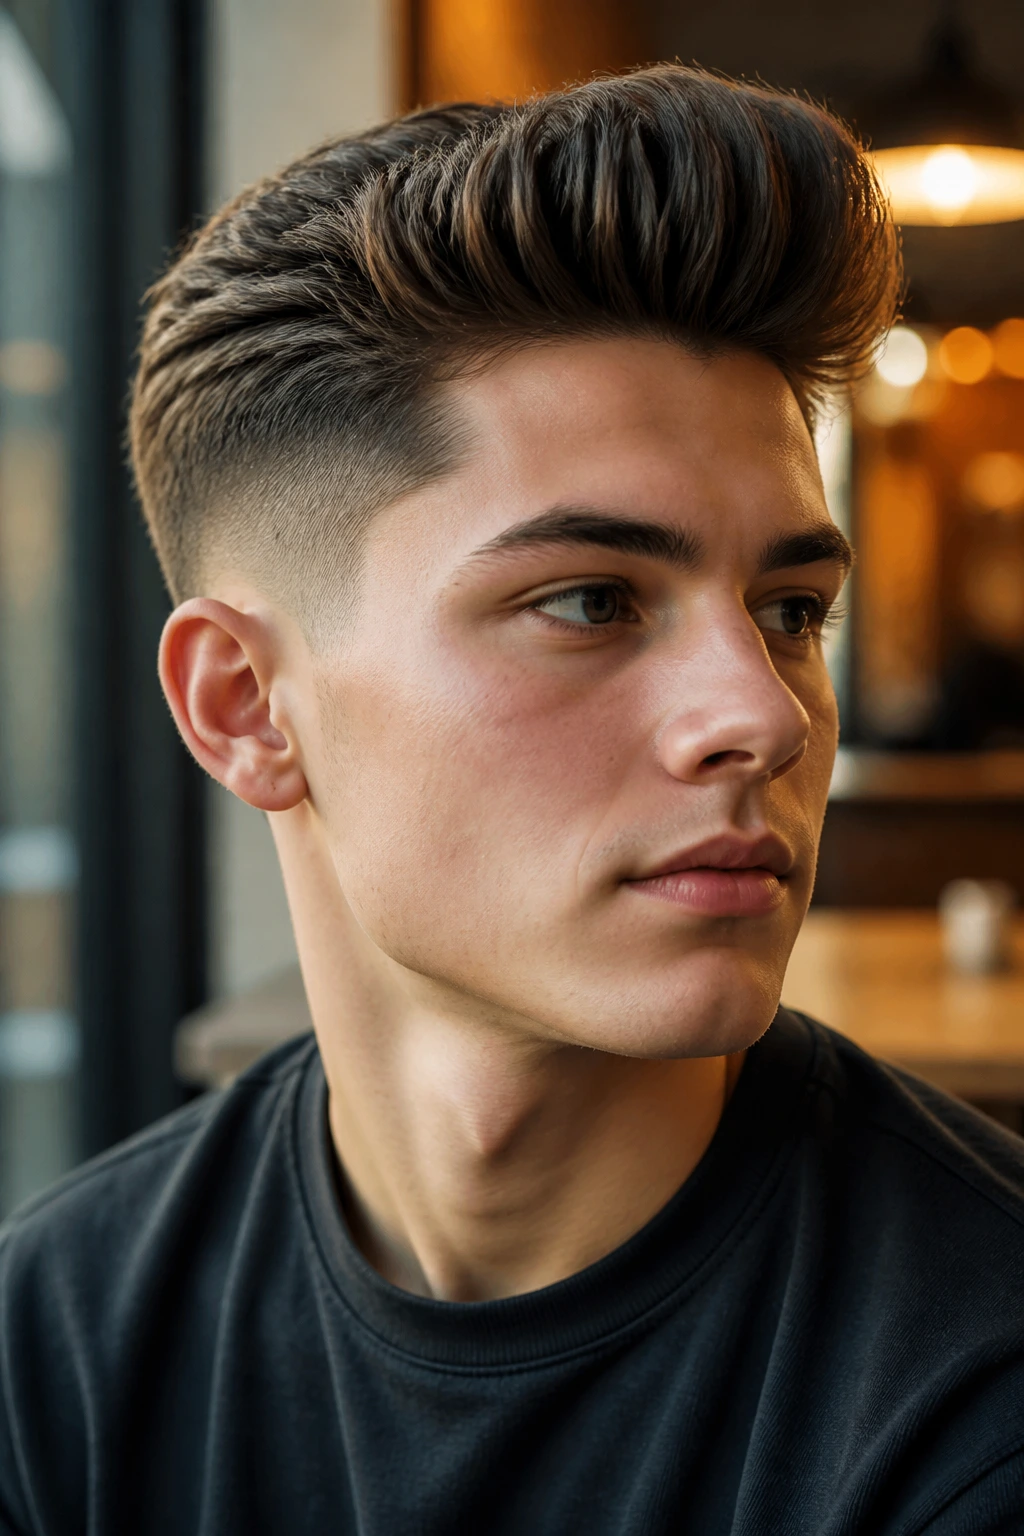
A taper or fade on the sides gives the quiff a much more professional and modern appearance. The fade can be a low, mid, or high fade depending on your preference. The higher the fade, the more dramatic the contrast. A low fade is a great middle-ground for a school setting, keeping things tidy but not overly aggressive.
Fading Benefits
A well-executed fade hides the natural thickness of the hair at the sides, making your head look more streamlined and balanced. It also makes your face appear slightly leaner. It is an investment in your barber’s time, but it lasts longer and requires less daily effort than any other style.
How to Request This
Ask your barber for a “taper fade” or a “skin fade” on the sides. Make sure to specify how high you want the fade to go. If you are worried about school dress codes, a low or mid fade is usually the safest bet. It maintains a clean, uniform look that rarely attracts negative attention.
12. The Brushed-Back Quiff
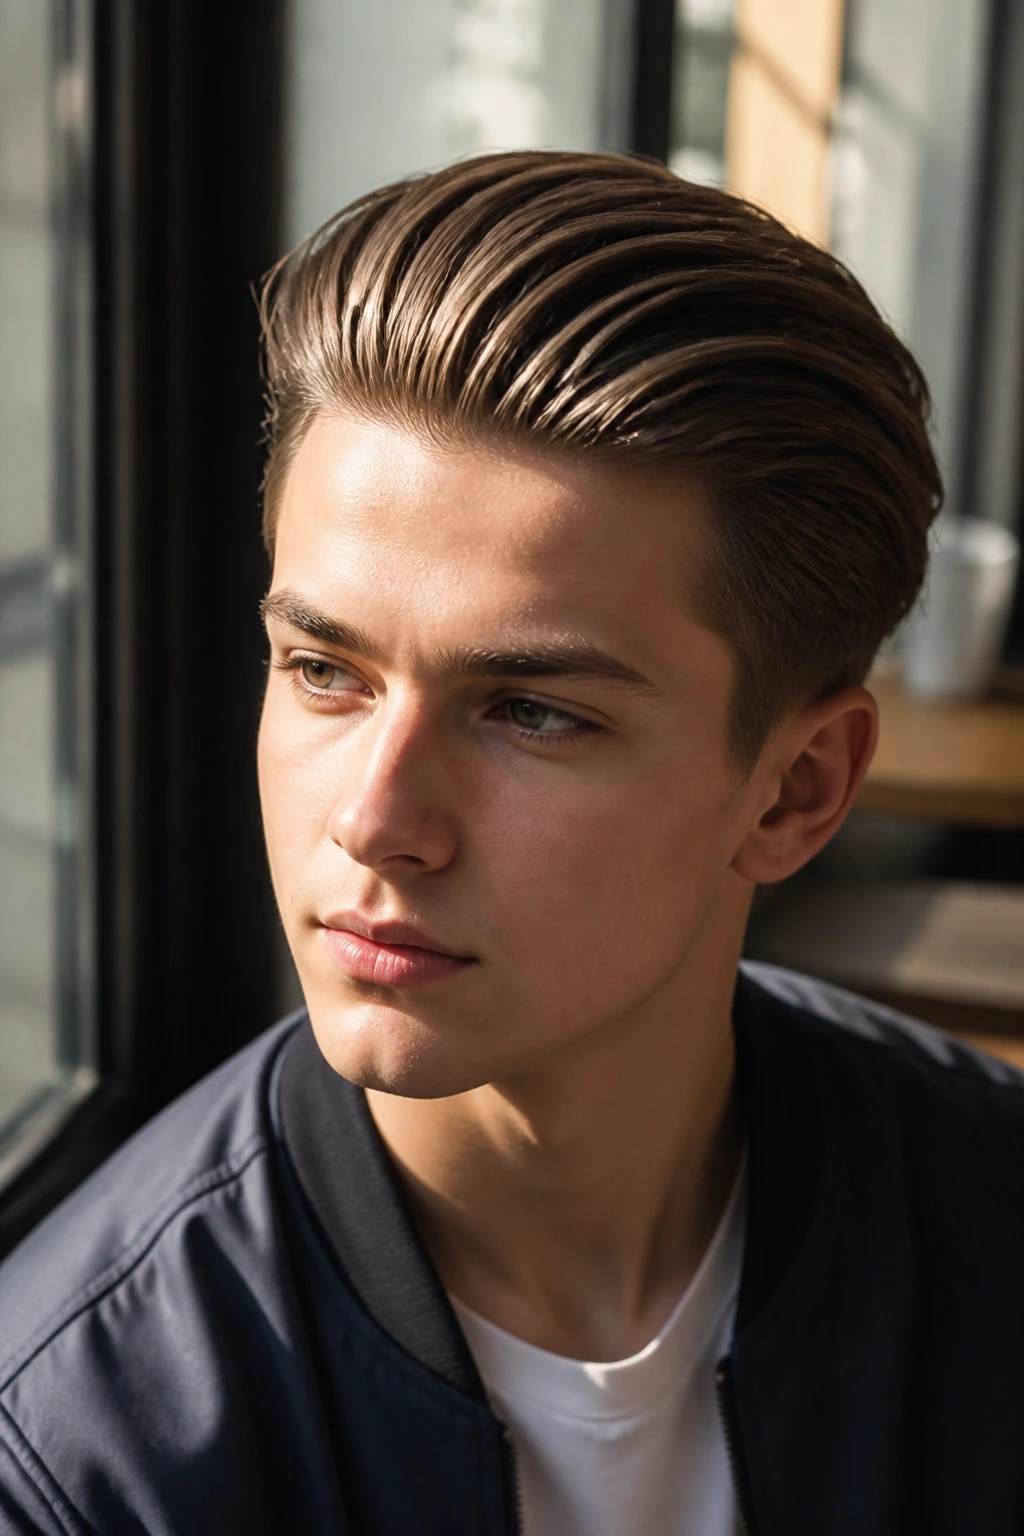
This is the classic “gentleman” version of the quiff. Instead of trying to create a wave or a spike, you simply brush all your hair straight back. It’s elegant and works perfectly for someone who wants to look like they are heading to an interview or a formal school function. It is smooth, polished, and very clean.
The Slick Finish
You will want a product that offers some shine to get that polished look. A pomade with a bit of oil or a glossy finish works well. A fine-tooth comb is mandatory here. If you use your fingers, you will get texture; if you use a comb, you get that smooth, uniform, professional finish.
Common Mistakes
Don’t use too much product. If you saturate your hair, it will look heavy and dark. Start with a pea-sized amount, spread it through your palms, and build up only if you feel you need more hold. You want your hair to look styled, not wet.
13. The Minimalist Quiff

Sometimes, the best hair is the kind that looks like you didn’t do anything at all. The minimalist quiff is subtle. It is only about an inch or two of lift at the front. It is perfect if you are not ready for a bold change but want to move away from flat, boring hair.
The “Just Enough” Approach
Use a very small amount of styling cream. You aren’t trying to sculpt the hair; you are just trying to give it a nudge in the right direction. It works on almost any hair length and any hair type. It is the perfect introduction to the world of quiffs if you have been nervous about styling your hair in the past.
Versatility
This style is extremely versatile. You can wear it to school, to a job, or to a night out with friends without feeling like your hair is the loudest part of your outfit. It is a subtle upgrade to a basic cut.
14. The Wet-Look Quiff
If you like the polished, structured look of the fifties, the wet-look quiff is your best bet. It is characterized by high shine and a firm, immovable hold. While it is less common in the halls today, it is a timeless look that never really goes out of style. It requires a specific type of pomade that stays malleable but shiny throughout the day.
Getting the Shine
Water-based pomades are generally the best choice for this. They provide that high-gloss finish without the grease of oil-based products. They also wash out much easier at the end of the day, which is essential if you don’t want to deal with buildup on your pillowcase.
Styling Tip
Work the product into the hair while it is slightly damp. This helps distribute the product more evenly and sets the shine. Once you have styled it the way you want, avoid running your hands through your hair during the day, as that will break the structure and dampen the shine.
15. The Voluminous Crown Quiff

Many people focus so much on the front of the quiff that they forget the back. A voluminous crown adds height to the entire top of the head, creating a much more dramatic silhouette. This is excellent for balancing out certain head shapes, as it adds height where it is needed most.
The Back-Combing Technique
To get this look, use a fine-tooth comb to gently “tease” or back-comb the hair at the crown. This adds layers of texture that push the hair upward. Just be gentle—you don’t want to break the hair or create tangles that you’ll have to fight later in the shower.
Maintenance
This style stays put quite well, but it can get tangled if you are wearing a hat or a hood during the day. If you live in a climate where you wear a lot of outerwear, keep a small comb in your pocket to reset the volume after taking off your gear.
16. The Fringed Quiff
This style keeps a bit of hair hanging down over the forehead before blending into a higher, swept-back quiff. It feels very modern and is common in many creative school environments. It’s a great way to soften the face if you have a high forehead or a strong brow line.
Balancing the Fringe
The trick here is ensuring the fringe isn’t too long or heavy. You want it to look intentional, not like you forgot to cut your hair. Keep the fringe light and wispy, and let the product in the quiff pull the hair away from the face toward the center.
Texture and Flow
This look relies heavily on flow. Use a matte texture paste to keep the hair looking light and airy. If you use a heavy product, the fringe will end up looking greasy and clumped against your skin, which can cause breakouts. Keep it light, keep it clean.
17. The Asymmetrical Quiff

An asymmetrical quiff involves styling the hair in a way that is intentionally unbalanced. You might have more volume on one side, or a sharper angle pointing toward one temple. It is a bold, artistic choice. It breaks the “symmetry is perfection” rule and adds a lot of character to your look.
Why It Works
Asymmetry is naturally eye-catching. It forces the viewer to look twice. It is perfect if you like to experiment with your personal style and want a haircut that reflects that. You can play with how extreme the asymmetry is each morning, making it one of the most flexible styles on this list.
Styling Needs
You will need a decent mirror and some patience. Because it isn’t a standard, balanced look, you cannot just brush it back and expect it to look right. You have to shape it by hand. Spend a few extra minutes in front of the mirror experimenting with angles until you find the shape that best fits your face.
18. The Graduated Quiff
This is a cut where the hair gets progressively longer as it approaches the front of the head. The hair at the crown is relatively short, while the hair at the forehead is at its maximum length. This creates a natural slope that makes building the quiff much easier.
Why It’s Easy
The haircut does most of the heavy lifting. Because the hair is already longest where you need the most height, you don’t have to work as hard to pull the hair back. It naturally wants to sit in a quiff-like shape, making your morning routine incredibly short.
Barber Guidance
Tell your barber you want a “graduated length” from the crown to the forehead. This is a very standard request, and any competent barber will know exactly how to execute this to make your daily styling faster and more effective.
19. The Parted Quiff

This is a sophisticated blend of a side part and a quiff. It uses the structure of a part to create a clean line, while the front section is still lifted into a quiff. It is very refined and looks great with collared shirts or uniforms.
The Parting Secret
Use the arch of your eyebrow to determine where the part should start. This is usually the most flattering position for any face shape. Once the part is set with a comb, work on the quiff as a separate section. It is essentially two hairstyles working together in harmony.
Best Occasions
This is the “dress-up” quiff. Use it for presentations, formal events, or any time you want to look slightly more mature. It is a powerful style that gives off a sense of confidence and attention to detail.
20. The “Tamed” Quiff
Finally, the tamed quiff is for those with extremely thick or unruly hair that typically refuses to listen. You are using product to force the hair into a structure that it would otherwise naturally fight. You need high-hold, heavy-duty product and a lot of heat to set this.
Controlling the Beast
Heat is your best friend here. A hot hairdryer will relax the cuticle of thick, coarse hair, allowing you to force it into a quiff shape. Once you have it where you want it, hit it with a “cool shot” from your hairdryer to lock the style in place. This two-step process is the secret to getting thick hair to behave.
The Final Lock
Finish with a strong-hold hairspray. Do not be shy with it. If you have hair that fights against the style, you need that extra layer of security to ensure you don’t end up with a flat, frizzy mess by the end of your second class.
Final Thoughts

Finding the right version of the quiff is a process of trial and error. You might think you want a sharp, pompadour-style quiff, only to realize that your hair texture works infinitely better with a textured, messy version. Do not get discouraged if your first few attempts do not look exactly like the photos you see in magazines. Hair is a dynamic material—it changes based on the weather, the product you use, and how well you take care of your scalp.
Invest in a quality hair dryer and a couple of different styling products. If you rely on the same gel or spray for years, you might never discover the volume or texture your hair is truly capable of. Once you find the combination that works for your specific hair type, your school morning routine will become the most consistent, low-stress part of your day. Keep it simple, keep it clean, and don’t be afraid to try a new angle.