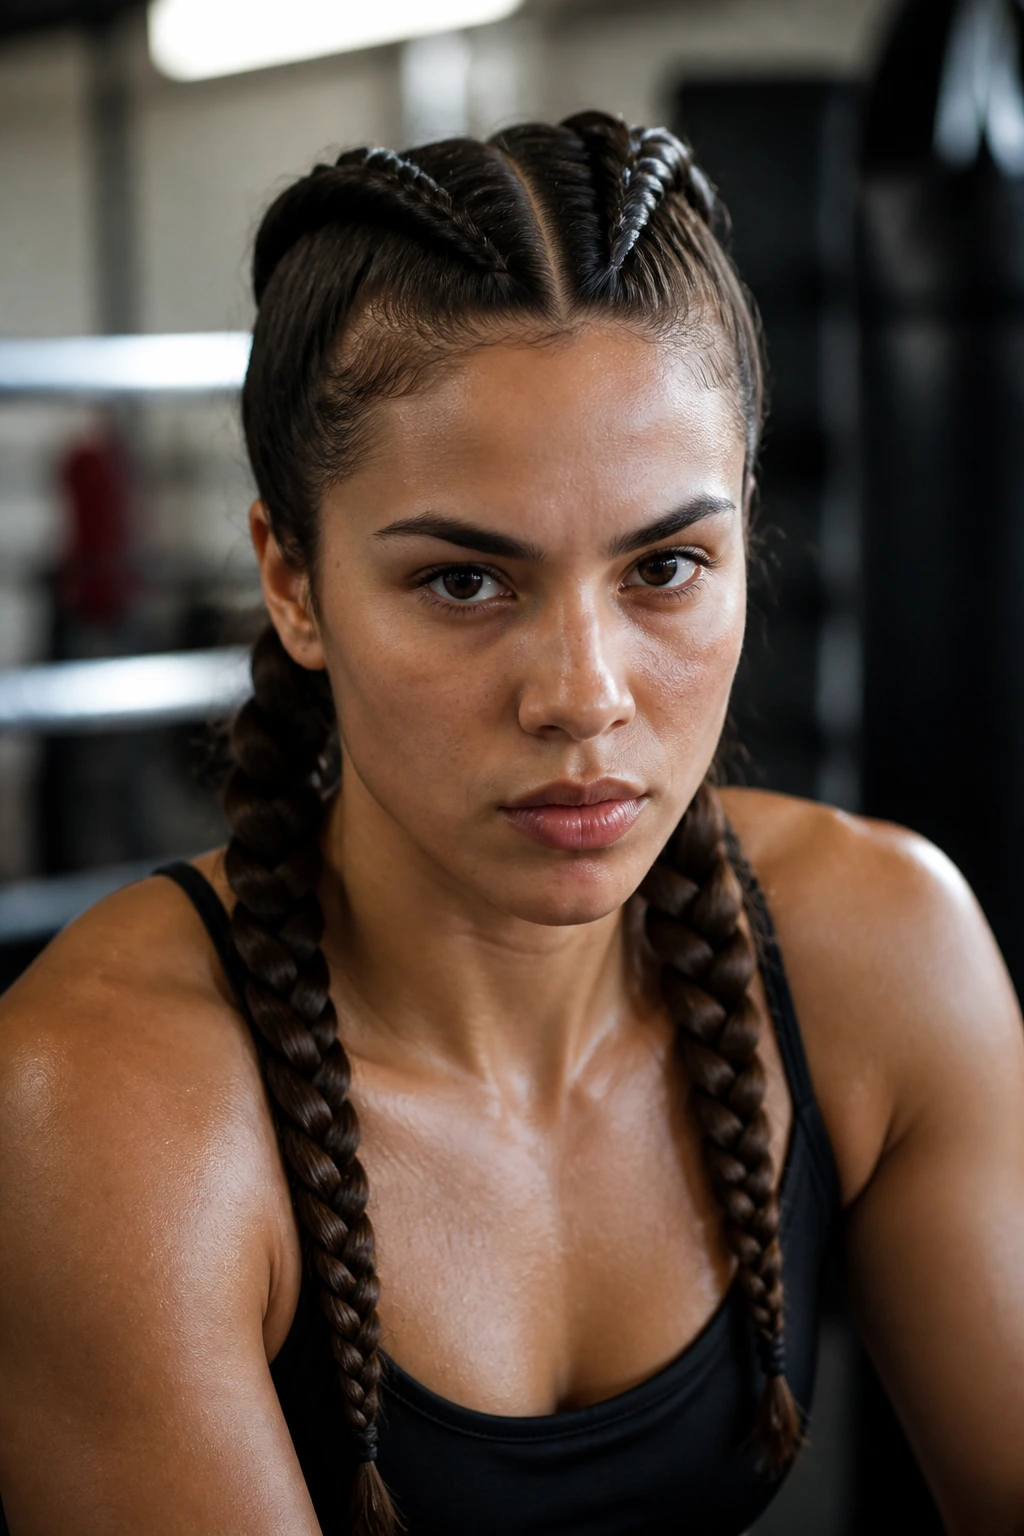
Hair ties and gym culture have a complicated relationship. You want your hair off your face, but you also need something that won’t snap under the tension of a high-intensity interval session or give you a stress headache halfway through a long-distance run. Big braids solve this by distributing weight evenly across the scalp, providing a secure hold that lasts long after the sweat starts dripping. While a standard three-strand braid is fine for a light walk, larger, more structural styles protect your strands from breakage and keep your hairline clear, which is a major win for anyone prone to breakouts from oil and sweat.
Whether you are hitting the heavy lifting platform or flow-state yoga, the secret is in the prep. You need a little bit of grip—clean hair is often too slippery to hold a tight braid—so utilizing a light dry shampoo or a salt spray at the roots is a move that pays dividends by the second set. The following styles are designed to stay put, look intentional, and minimize the mechanical damage that standard elastic ponytails cause during grueling sessions.
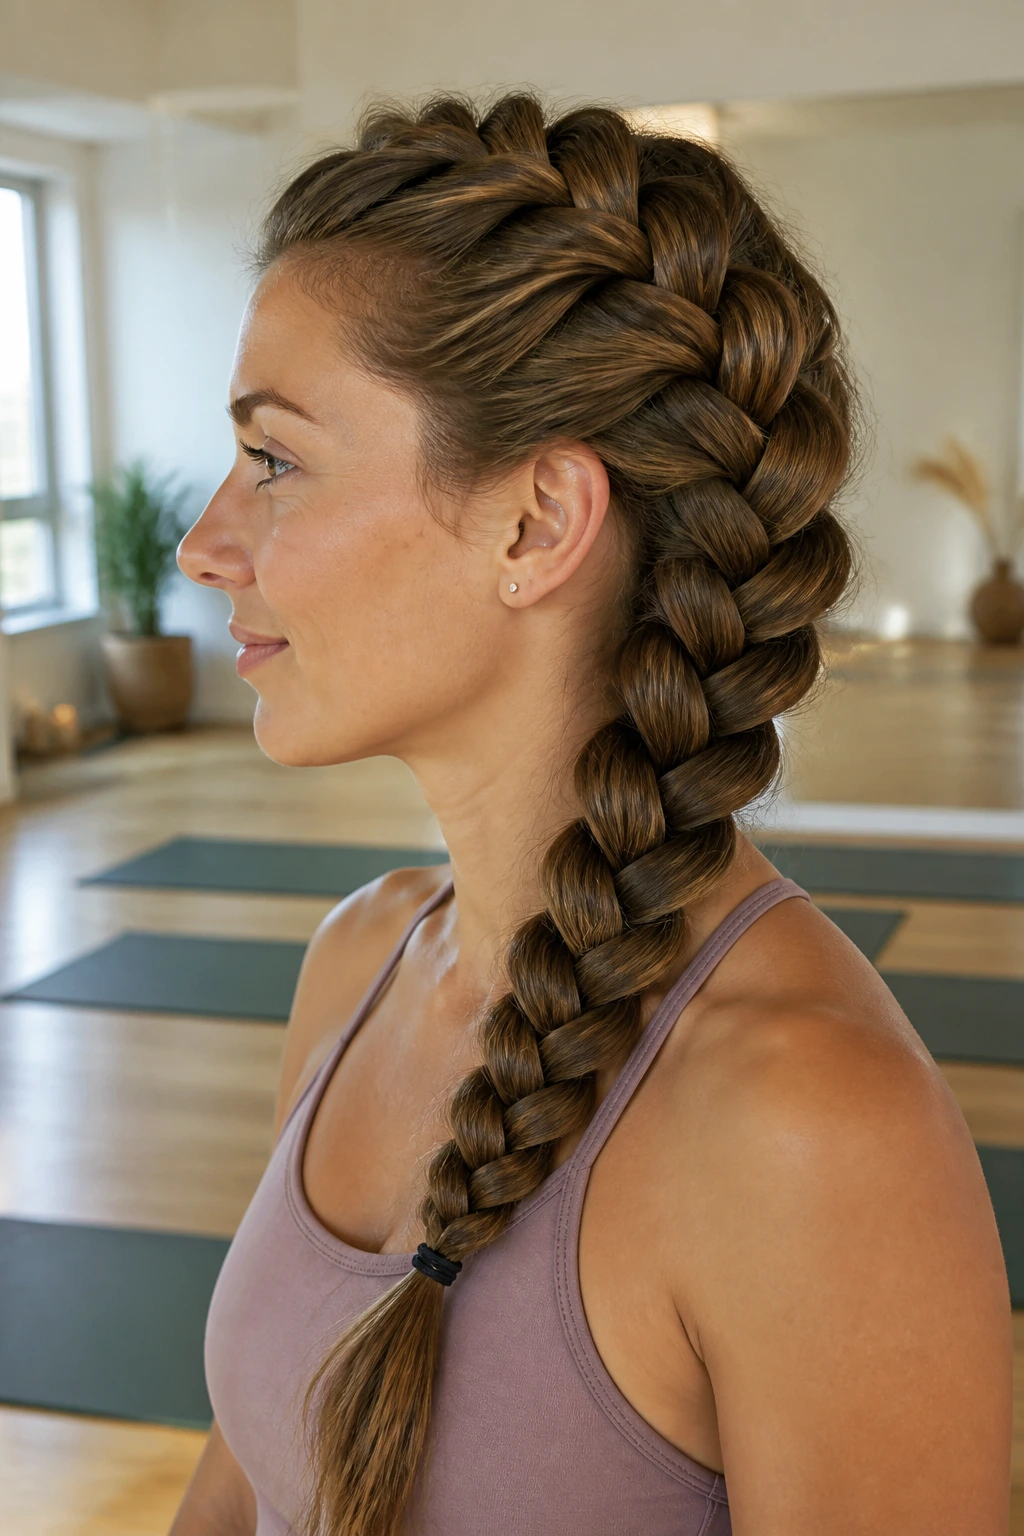
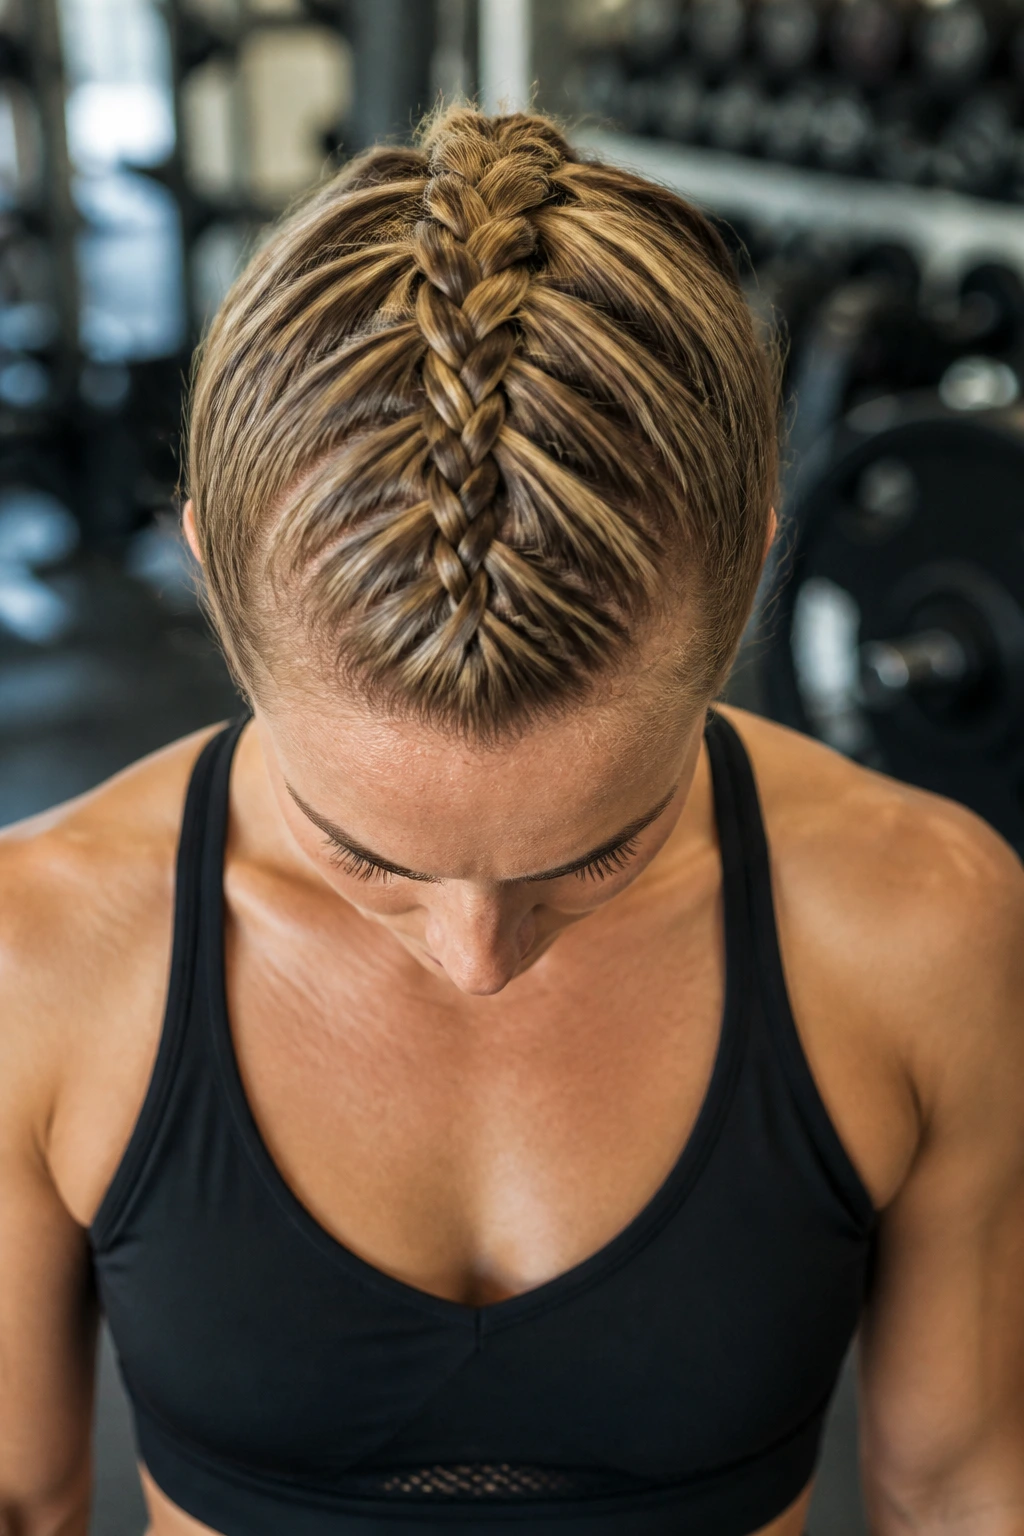
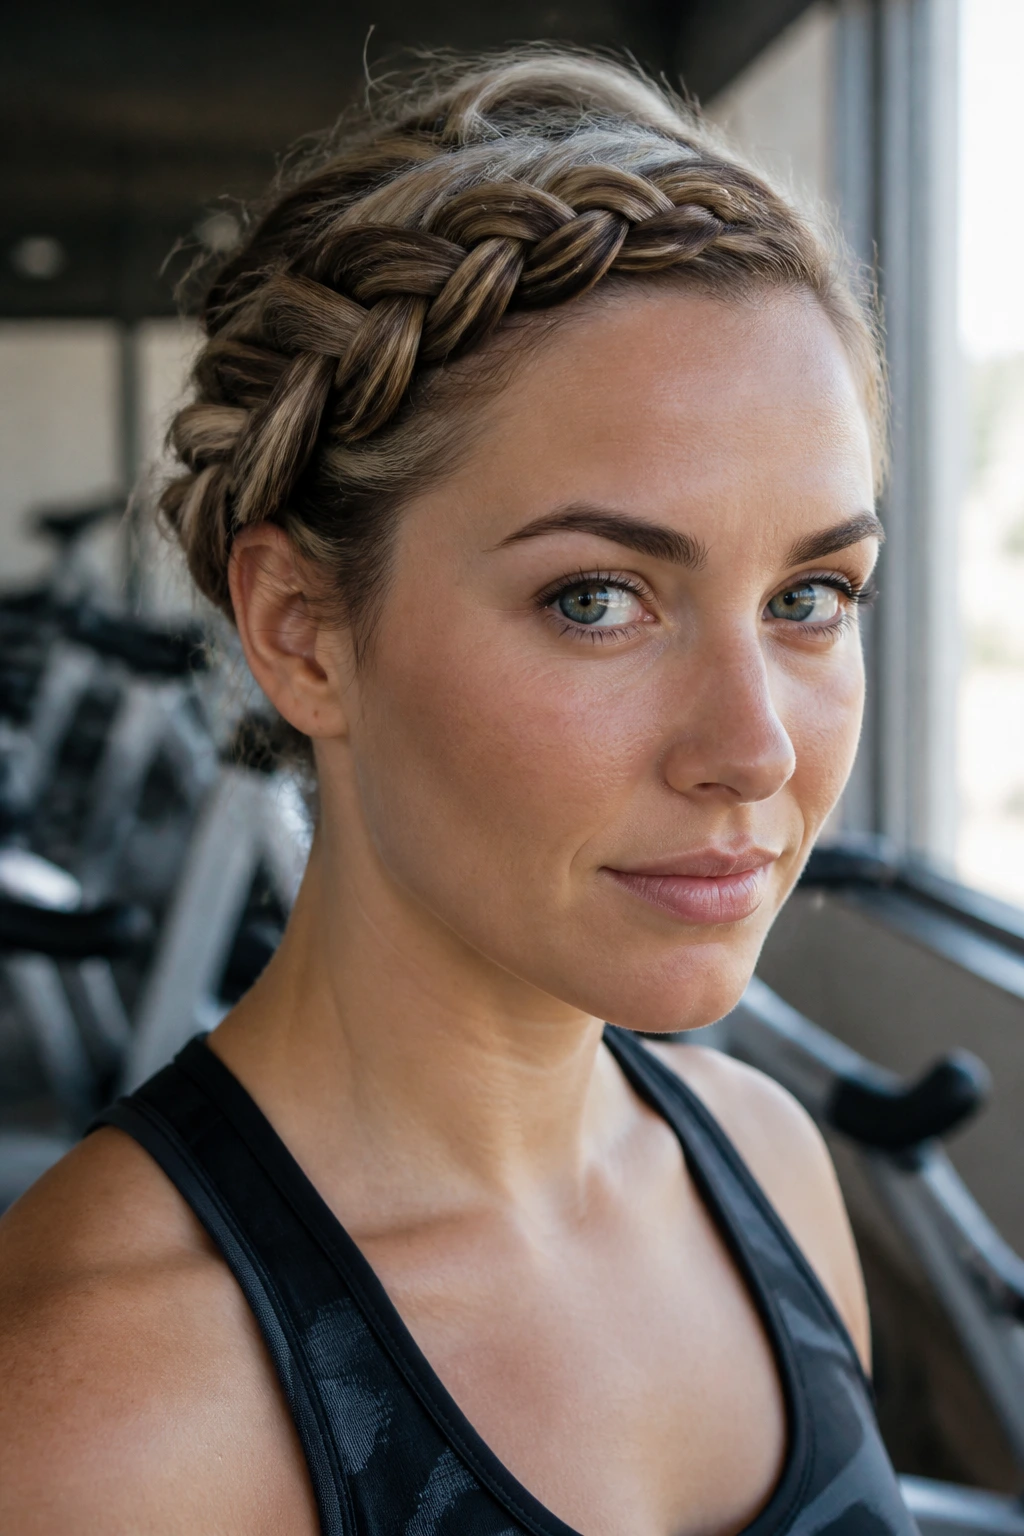
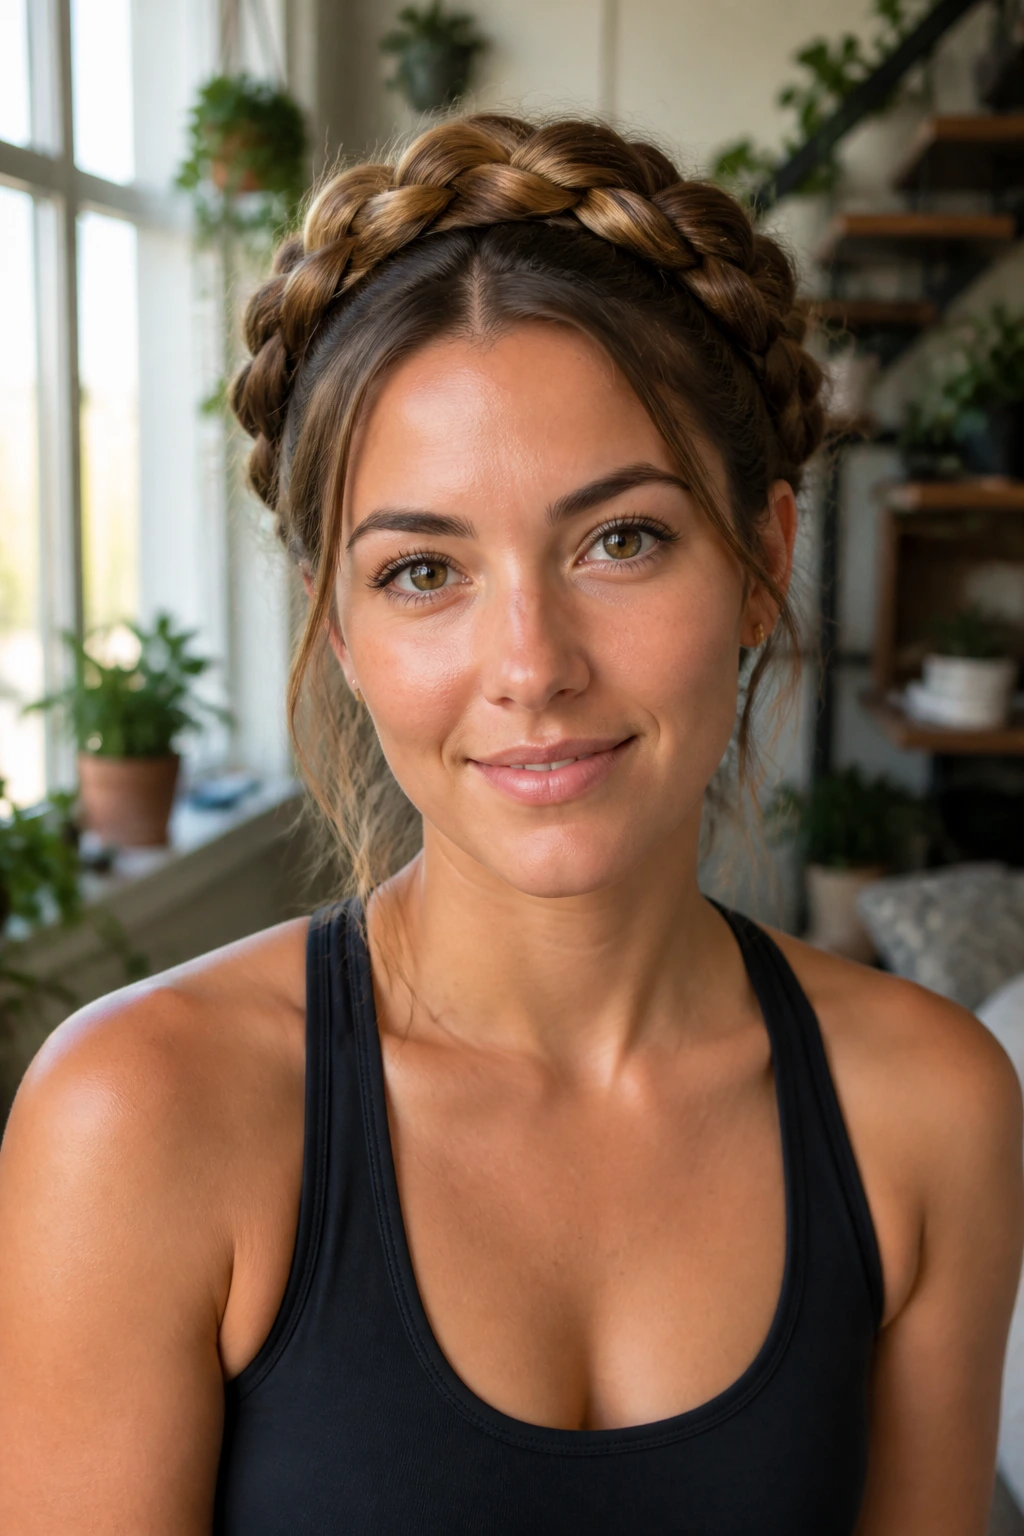
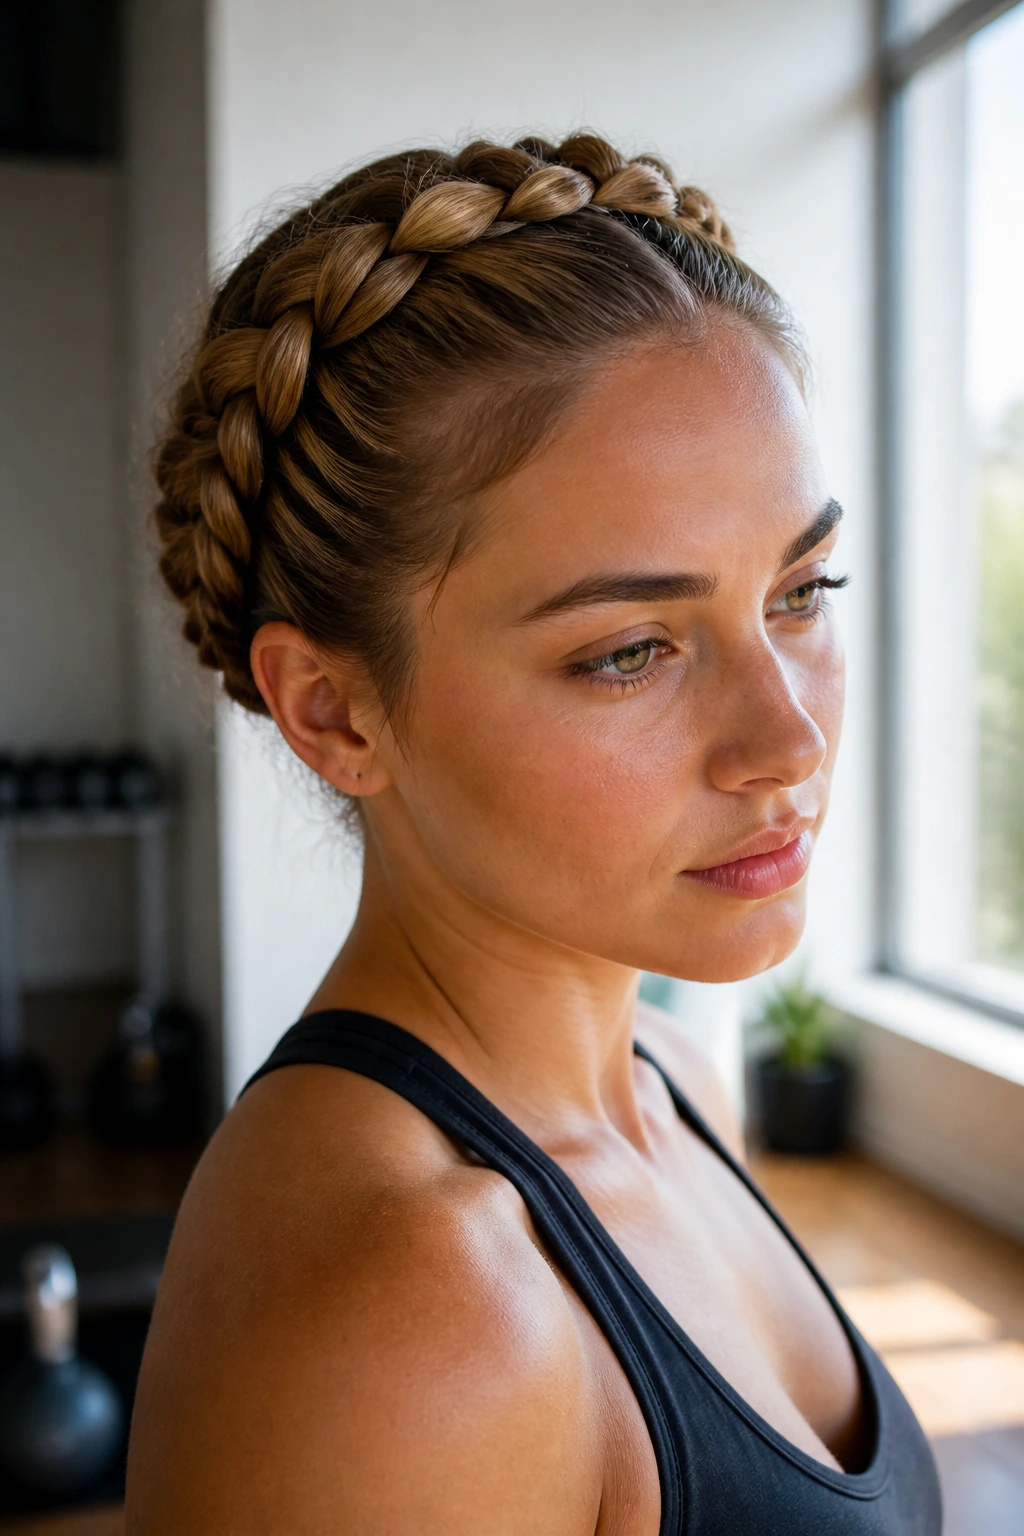
1. The Classic French Crown Braid
This style is the gold standard for high-impact movement. By pulling all your hair into a single, substantial braid that encircles the head, you effectively lock every strand into place. The weight of your hair is shared across the entire circumference of your scalp rather than pulling at a single point near the crown, which drastically reduces the likelihood of that dreaded “post-gym headache.”
Why It Works for Intense Cardio
When you are moving quickly, side-to-side or up-and-down, a ponytail acts like a pendulum, whipping around and tugging at your roots. A crown braid remains stationary. It essentially creates a protective barrier around your head, ensuring that not a single loose hair gets in your eyes when you are mid-sprint.
The Prep Strategy
- Use a texturizing powder at the roots before you begin braiding to add friction.
- Start your French plait at the temple, keeping the sections large to maintain that “big” braid aesthetic.
- Secure the very end with a snag-free silicone band, then tuck the tail underneath the beginning of the braid with a bobby pin for a seamless finish.
Pro tip: If you have shorter layers, apply a dab of lightweight styling wax to your fingertips before you start, which helps catch those flyaways before they have a chance to escape.
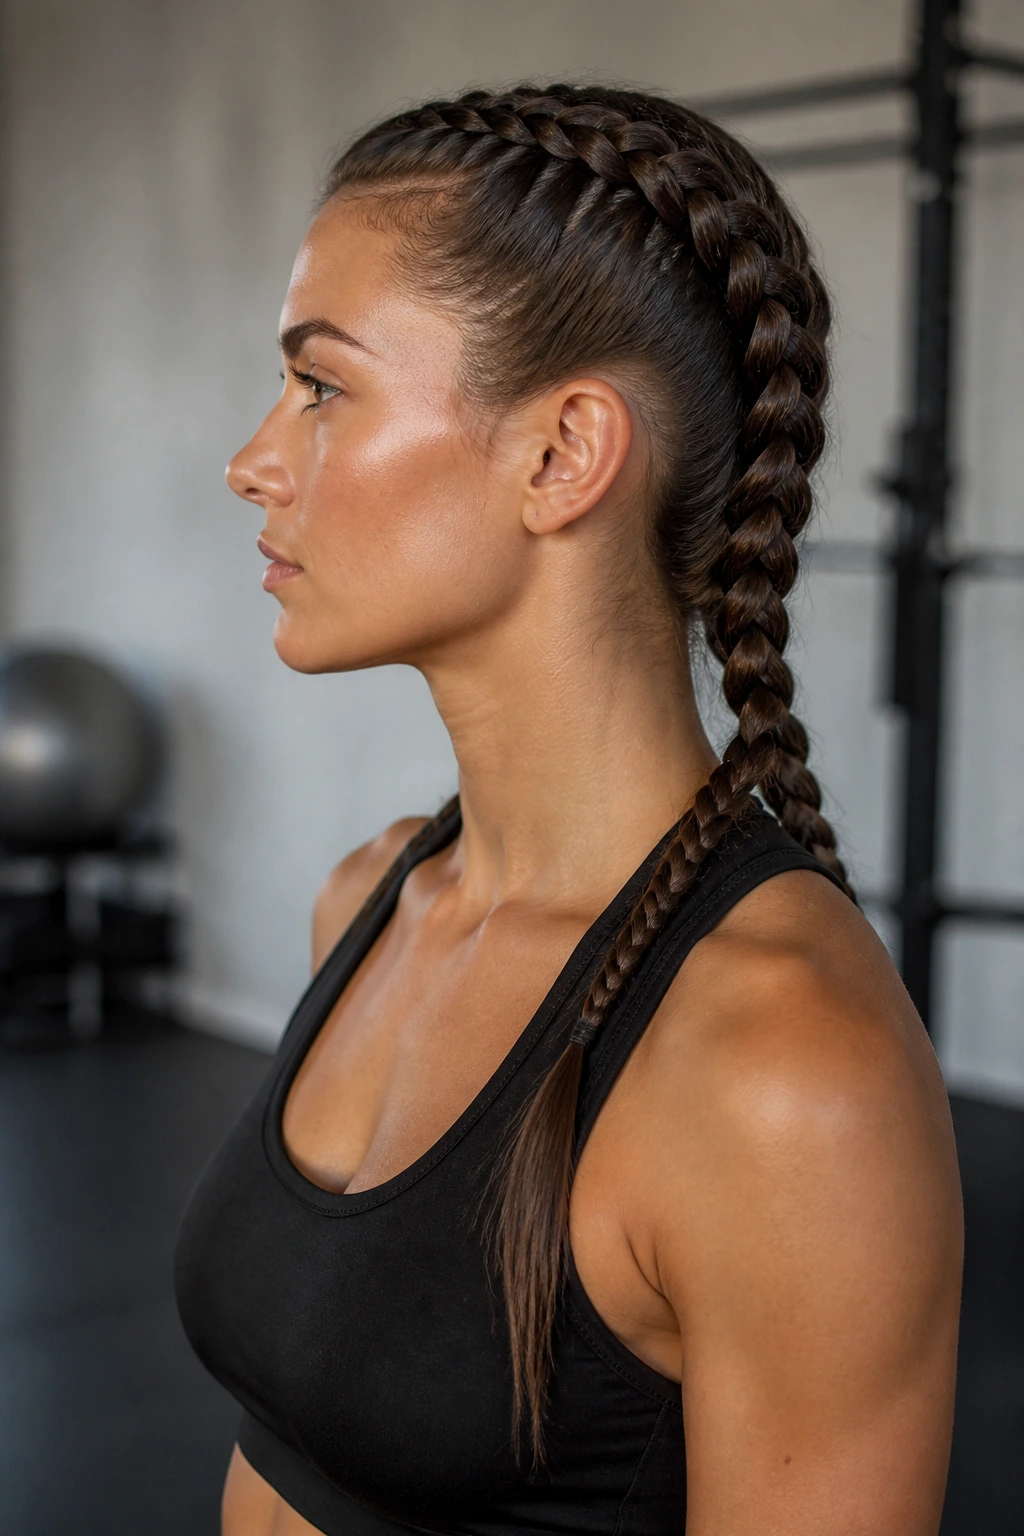
2. Dual Dutch Boxer Braids
There is a reason professional fighters have favored this style for decades. The Dutch technique, where you cross the strands under rather than over, creates a thick, raised braid that sits high on the scalp. This creates a sturdy foundation that can withstand hours of heavy bag work or floor exercises without loosening.
Why They Are So Secure
Because these braids are woven tight against the scalp, they act like a headband. They are particularly effective for people with thick, heavy hair who usually struggle to find a hair tie that can survive a full workout. By splitting the hair into two even sections, you reduce the sheer volume of hair per braid, making the styling process faster and the result more durable.
Styling for Maximum Hold
- Divide your hair into two clean, even sections using a rat-tail comb to ensure a straight part.
- Keep the tension constant; the tighter you pull each strand as you incorporate it into the plait, the better the final shape will hold.
- If you find your hair is too slippery, dampen your hands with a tiny bit of water and a pea-sized amount of smoothing cream to keep the sections contained.
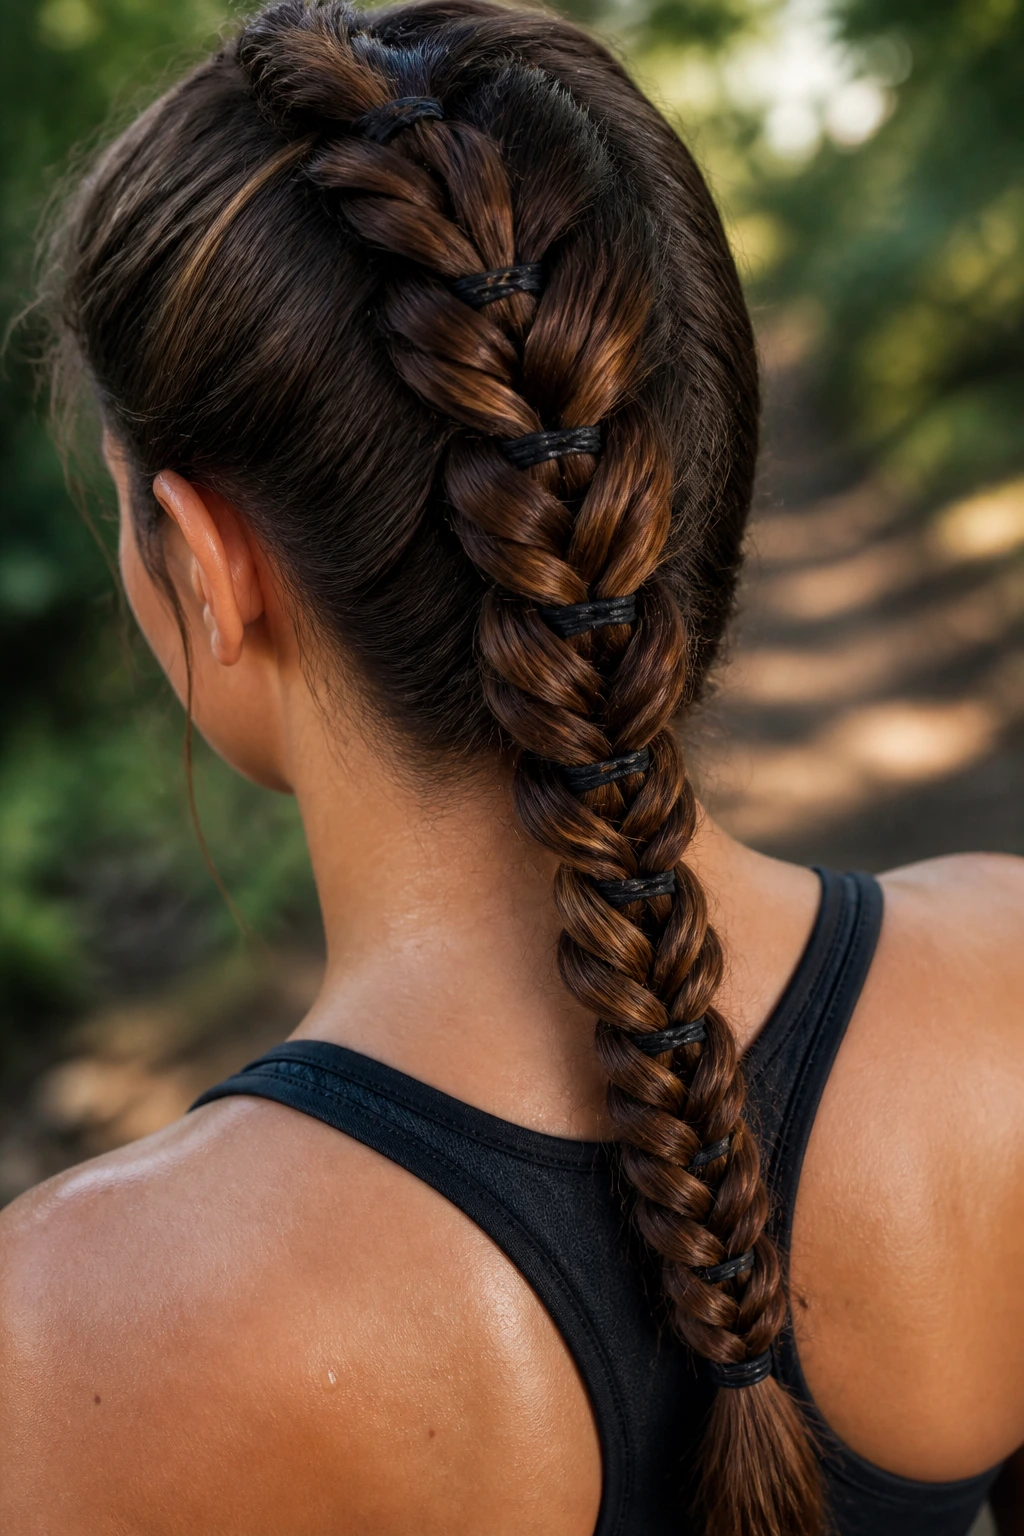
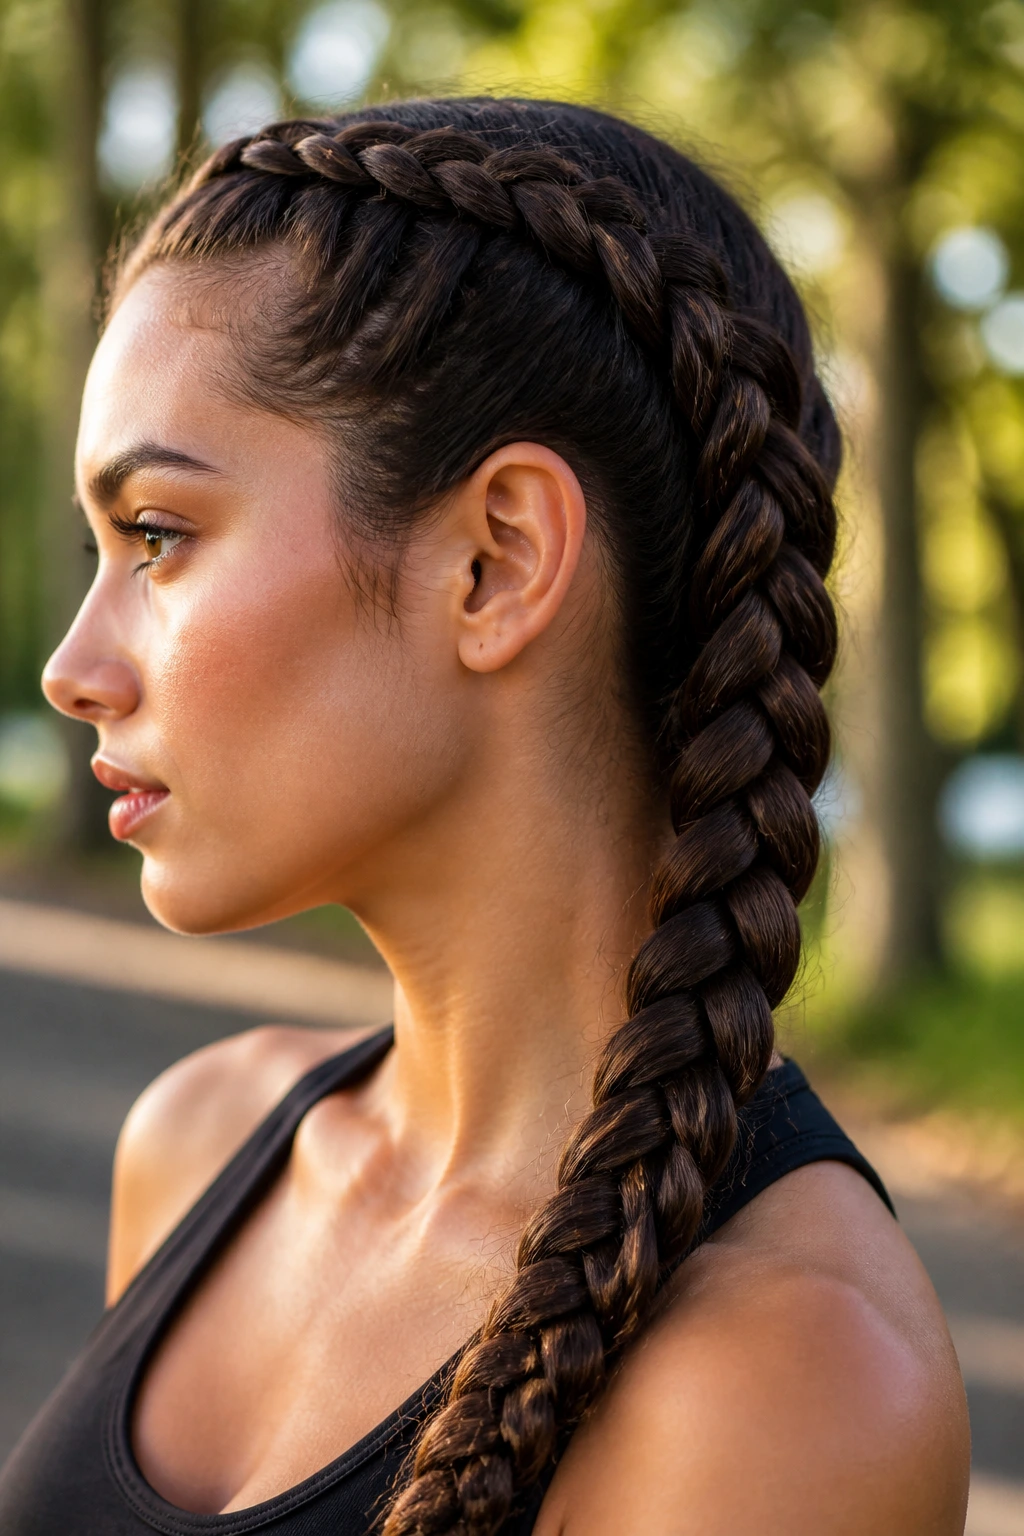
3. The Single Oversized Rope Braid
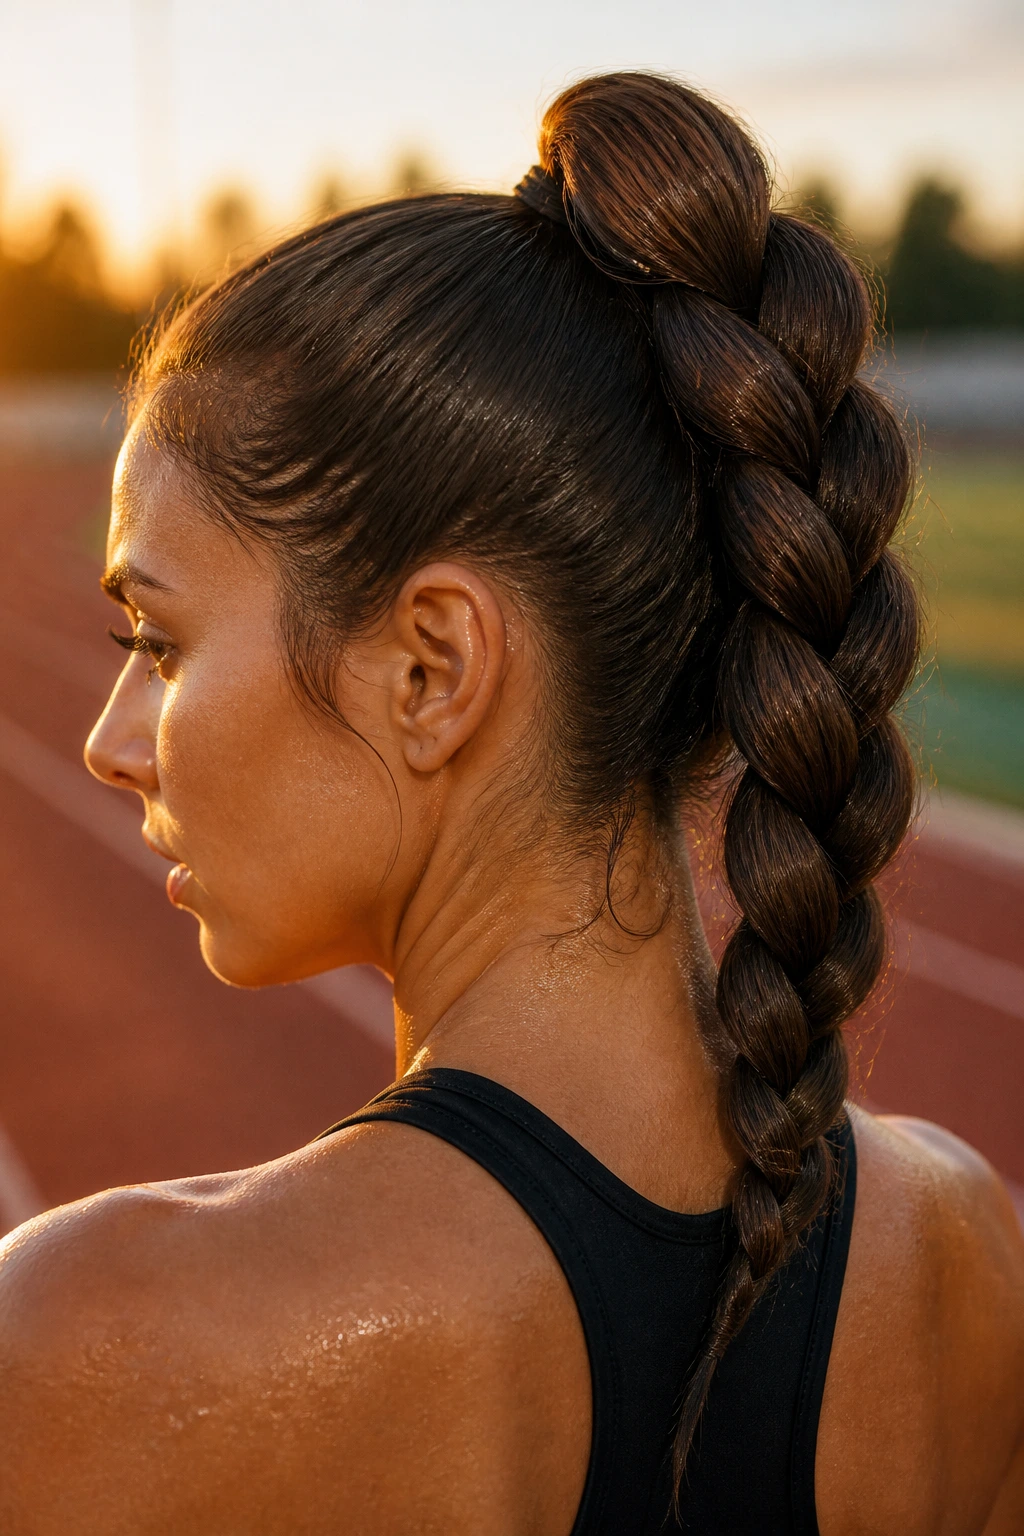
If you prefer a simpler, more streamlined look, the rope braid is your best friend. Unlike a traditional plait, this involves twisting two large sections of hair around each other. It is incredibly quick to execute, taking less than two minutes, and it holds surprisingly well if you start with a high, secure base.
The Technique That Changes Everything
Start by gathering your hair into a high ponytail and securing it with a sturdy elastic. Divide the ponytail into two massive chunks and twist each section firmly to the right. Once both are twisted, cross them over each other to the left. This “twist-and-counter-twist” method is what gives the rope its strength; it’s physically impossible for the braid to unravel as long as your end-tie is secure.
Best Workouts for This Style
- Weightlifting, where you don’t want a heavy braid dangling down your back.
- Barre classes, as the high, central placement allows you to lie back on the floor without feeling a lump against your skull.
4. The Pull-Through High Ponytail
This is a cheat code for those who want the volume of a big braid without actually having to braid. By using a series of small, clear elastics down the length of a ponytail, you can create a “faux-braid” that looks massive. It provides the security of a ponytail with the structural integrity of a braided style.
Why It Wins on Security
Standard braids can loosen over time, but the pull-through method locks each section with an individual elastic band. Even if one part stretches out, the rest of the style stays locked in place. It is perfect for long-haired athletes who want to ensure their hair stays away from their sweat-wicking gear during floor work.
How to Get the Most Volume
- After you pull each section through, take your fingers and gently pull at the edges of the hair between the elastics to “pancake” it.
- This creates a dramatic, wide effect that looks like a high-fashion runway look while you’re hitting a personal record on the leg press.
5. The Low Dutch Side-Sweep
If you are doing yoga, Pilates, or any exercise where you are frequently reclined on a mat, you want to avoid anything that creates a bump at the back of your head. A side-swept Dutch braid keeps the bulk of the hair to one side, allowing your head to rest flat against the floor.
Understanding the Geometry of Comfort
Your head needs to be stable during poses like Savasana or bridge poses. A large, chunky braid positioned to the side is out of the way, won’t dig into your neck, and stays perfectly intact. It’s elegant, functional, and keeps your hair from getting caught under your shoulders or back.
Tips for Success
- Begin the Dutch braid at the hairline, pulling strands from the crown towards the ear.
- Angle the braid downwards and towards the nape of the neck.
- Secure it with a larger, fabric-covered scrunchie at the ends to prevent breakage; avoid harsh rubber bands that can snap your hair while you are focused on your breathing.
6. The Half-Up Braided Top-Knot
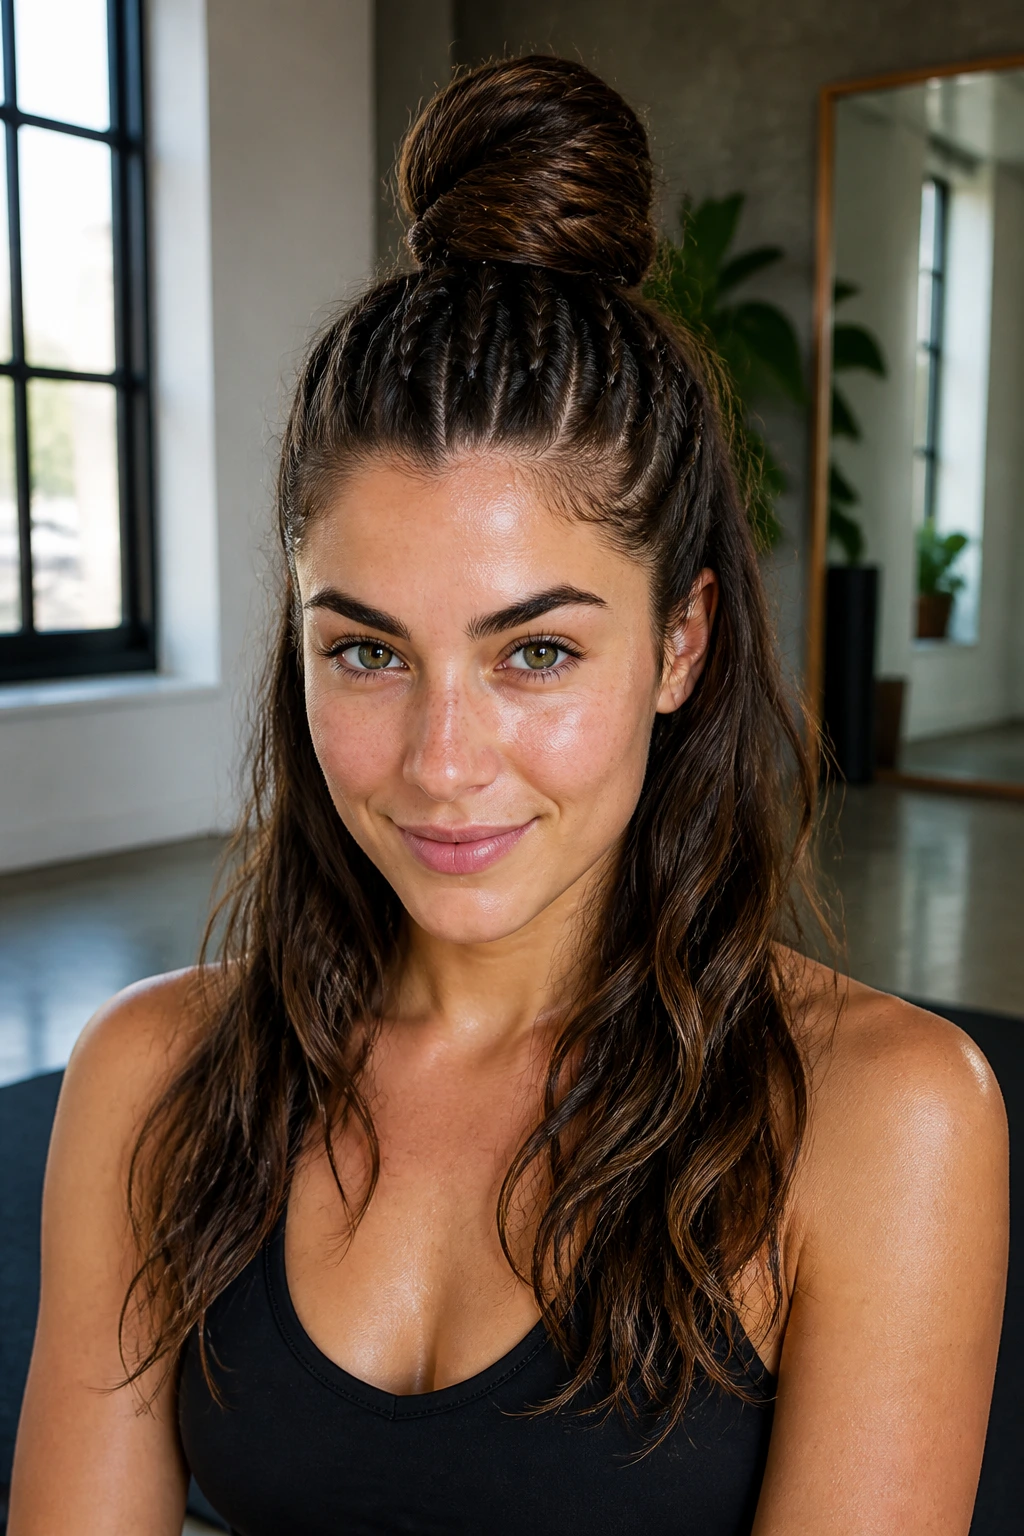
For those who cannot decide between a full braid and a messy bun, the half-up, half-down hybrid is a great middle ground. You braid the top section of your hair—incorporating both sides of your hairline—and then wind that braid into a large top-knot at the crown.
Benefits for High-Intensity Training
This style keeps the hair at your temples totally immobilized. The lower half of your hair is left free to breathe, which is a massive relief if you have very thick hair that traps heat. It is a stylish way to keep your peripheral vision clear while still feeling like you have a bit of movement.
Troubleshooting Your Knots
- Use two pins to secure the base of the bun once it is twisted.
- If your hair is on the finer side, use a bit of volumizing mousse before drying to give the braid more “meat” so the knot looks thicker and more substantial.
7. The Fishtail Braid with Elastic Bands
The fishtail is naturally tight because it uses such small, thin sections of hair, but it can be time-consuming. To make it “big” and “gym-ready,” use a technique where you combine two small, tight fishtails into one massive, central braid at the nape of the neck.
Why This Style Is Uniquely Durable
The cross-hatch pattern of a fishtail is the strongest of all braid structures. It doesn’t stretch or sag as the hours go by. By starting with two separate fishtails and joining them, you create a complex, interwoven look that is basically indestructible.
Ideal Use Case
- Long-duration outdoor activities like hiking or long-distance cycling.
- It survives wind, sweat, and movement better than almost any other style.
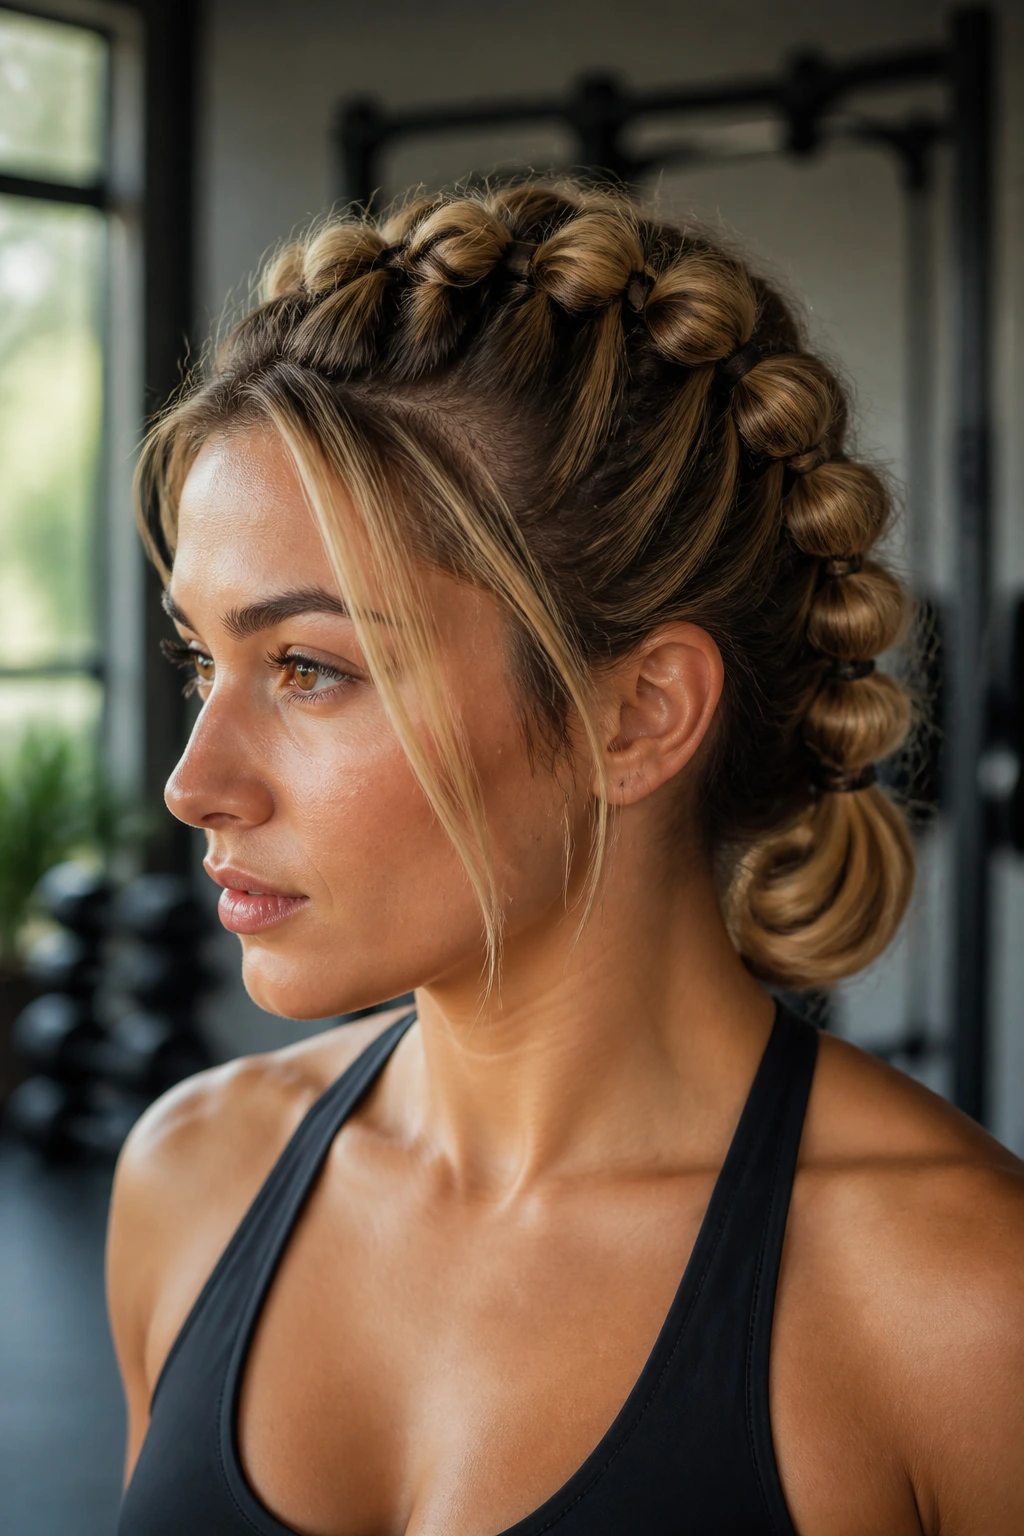
8. The Viking-Inspired Mohawk Braid
If you want to feel powerful, a large, thick braid running directly down the center of your head is the way to go. This is a single, large Dutch braid that incorporates almost all of your hair. It’s tight, it’s secure, and it has an aggressive, clean aesthetic that fits perfectly in a weight room setting.
Structuring the Mohawk
- Start with a center part and work downward, pulling in large sections of hair.
- Make sure to keep your hands close to the scalp as you braid; the farther your hands are from the head, the looser the braid will be, which invites fraying during intense movement.
- Once you reach the nape, continue as a regular three-strand braid and secure with a heavy-duty hair tie.
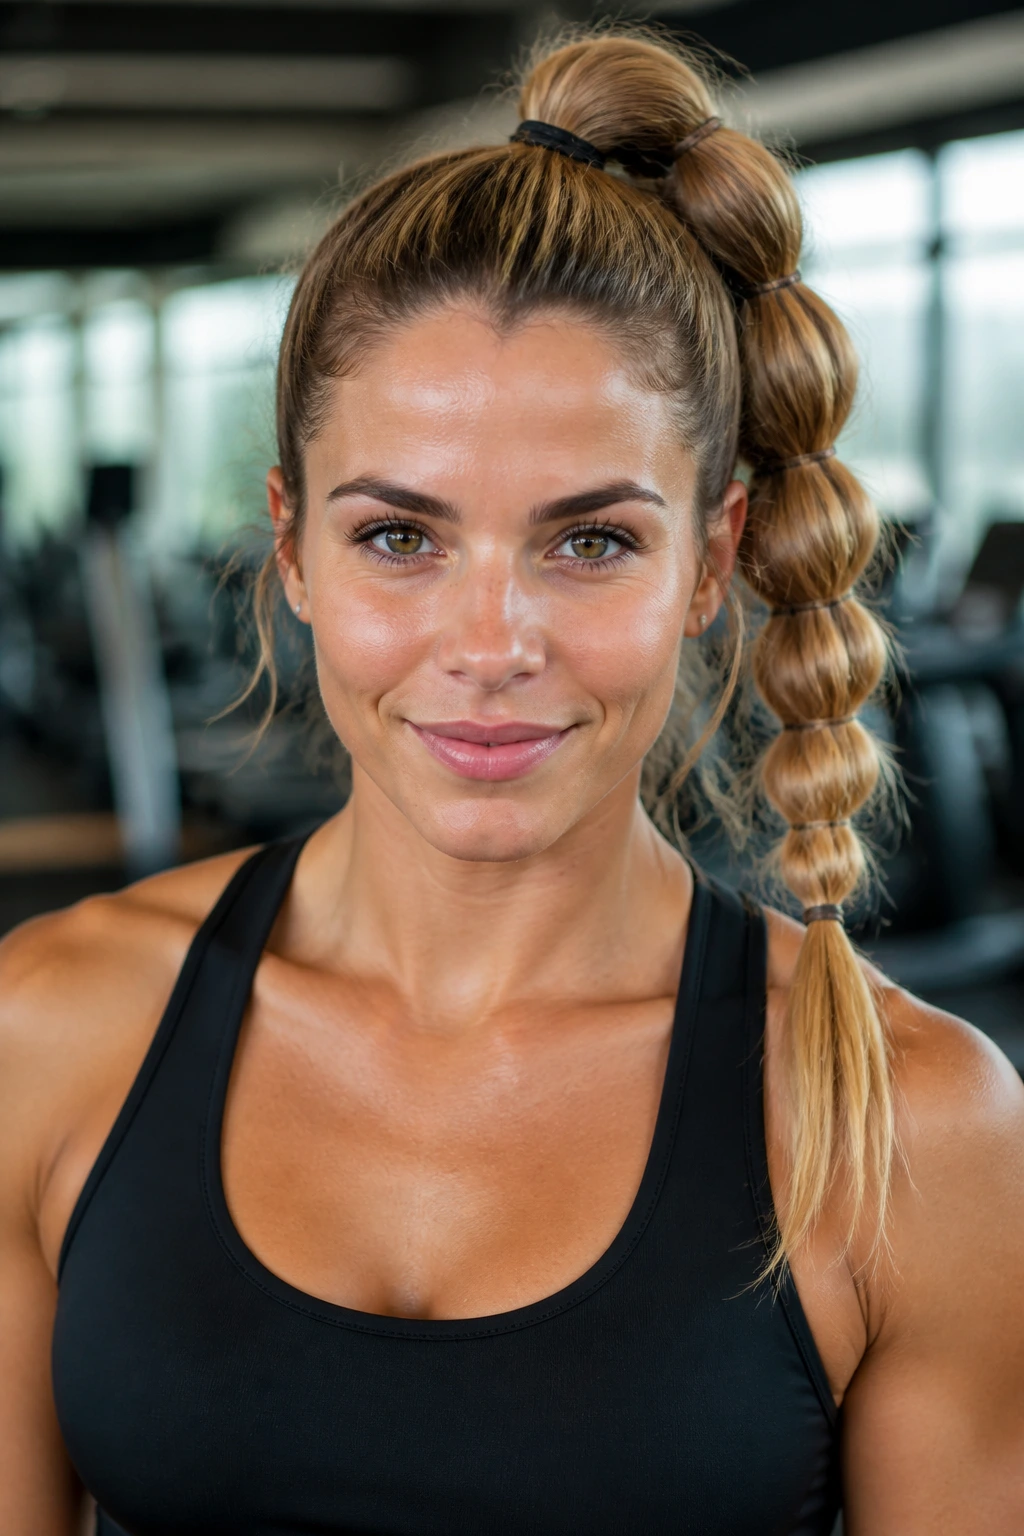
9. The Bubble Braid Ponytail

Forget braiding altogether if you are short on time. A bubble braid—made by placing elastics every two inches down a high ponytail and pulling the hair between them—gives the illusion of a massive, voluminous braid with a fraction of the effort.
Why It Works for Fast-Paced Workouts
- It is incredibly quick to adjust if it starts to feel loose.
- The “bubbles” provide a fun, bouncy aesthetic that doesn’t take itself too seriously.
- You can use brightly colored elastics to match your workout gear, which adds a bit of flair to your gym outfit.
10. The Waterfall Braid Into a Bun
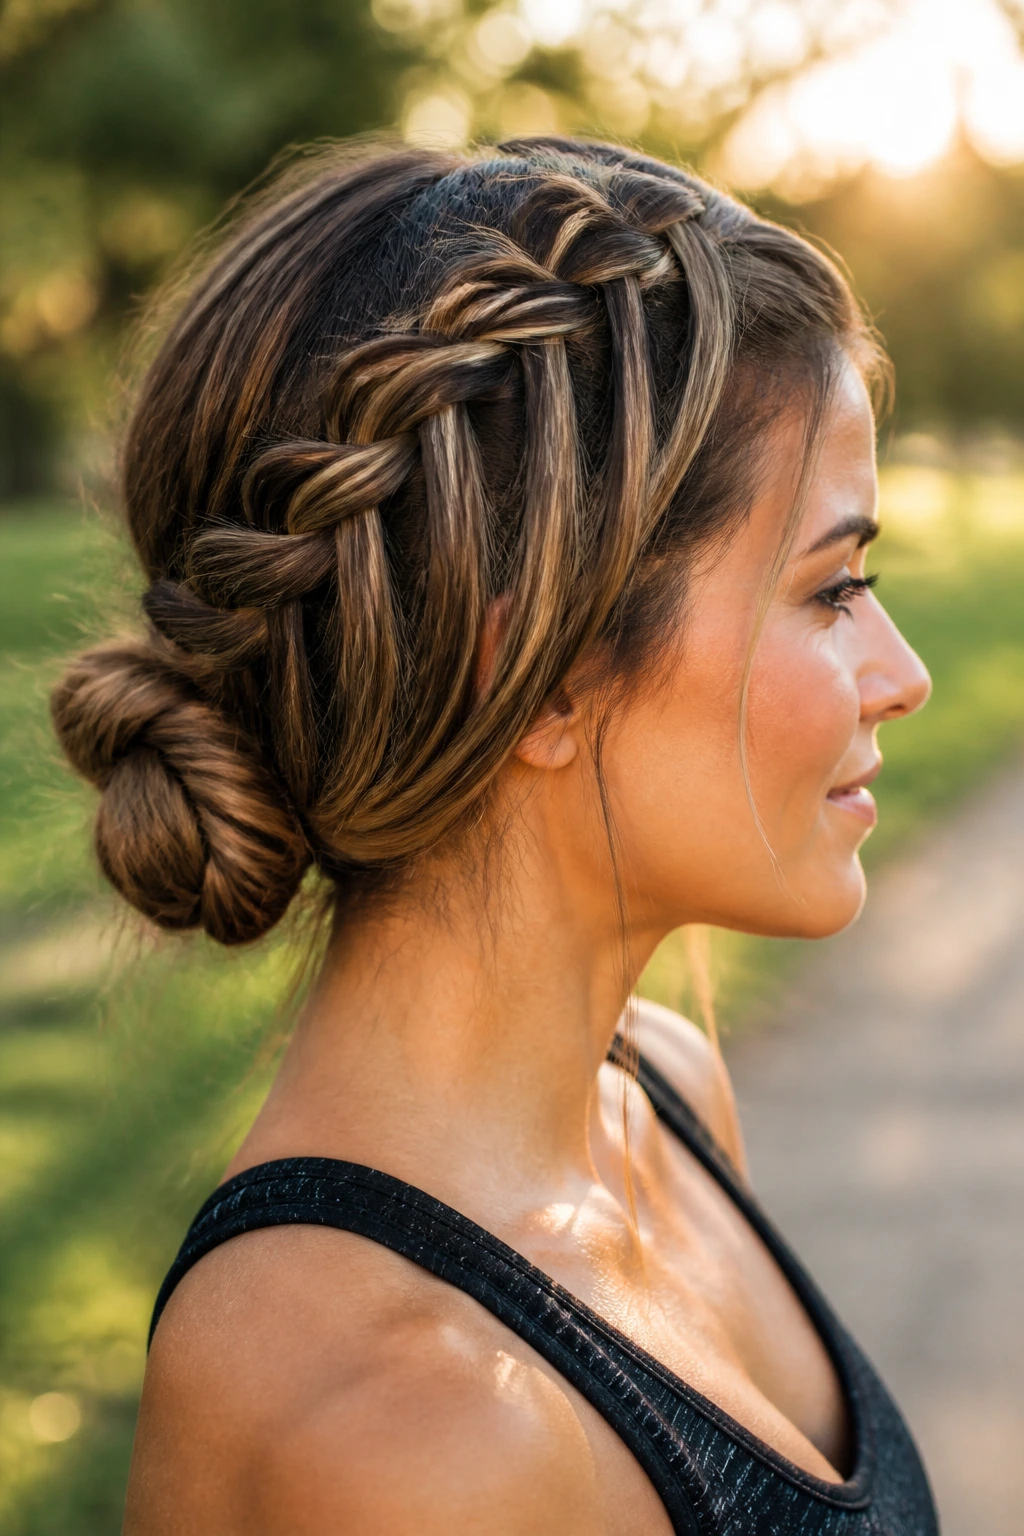
This style is specifically for those who find traditional braids too heavy or hot. By using a waterfall technique—where you drop sections of hair through the braid—you create a lightweight structure that keeps your hair pulled back while letting some of it remain loose.
Managing the Heat
If you are doing cardio in a warm environment, having all your hair glued to your scalp can be oppressive. The waterfall braid secures the front and sides of your hair, keeping it out of your eyes, while the dropped sections allow for more airflow around your neck.
Execution Essentials
- Always secure the final bun with a sturdy pin or a spiral hair coil.
- Use a light-hold hairspray to ensure the “waterfall” sections don’t pull out of the braid during lateral movements.
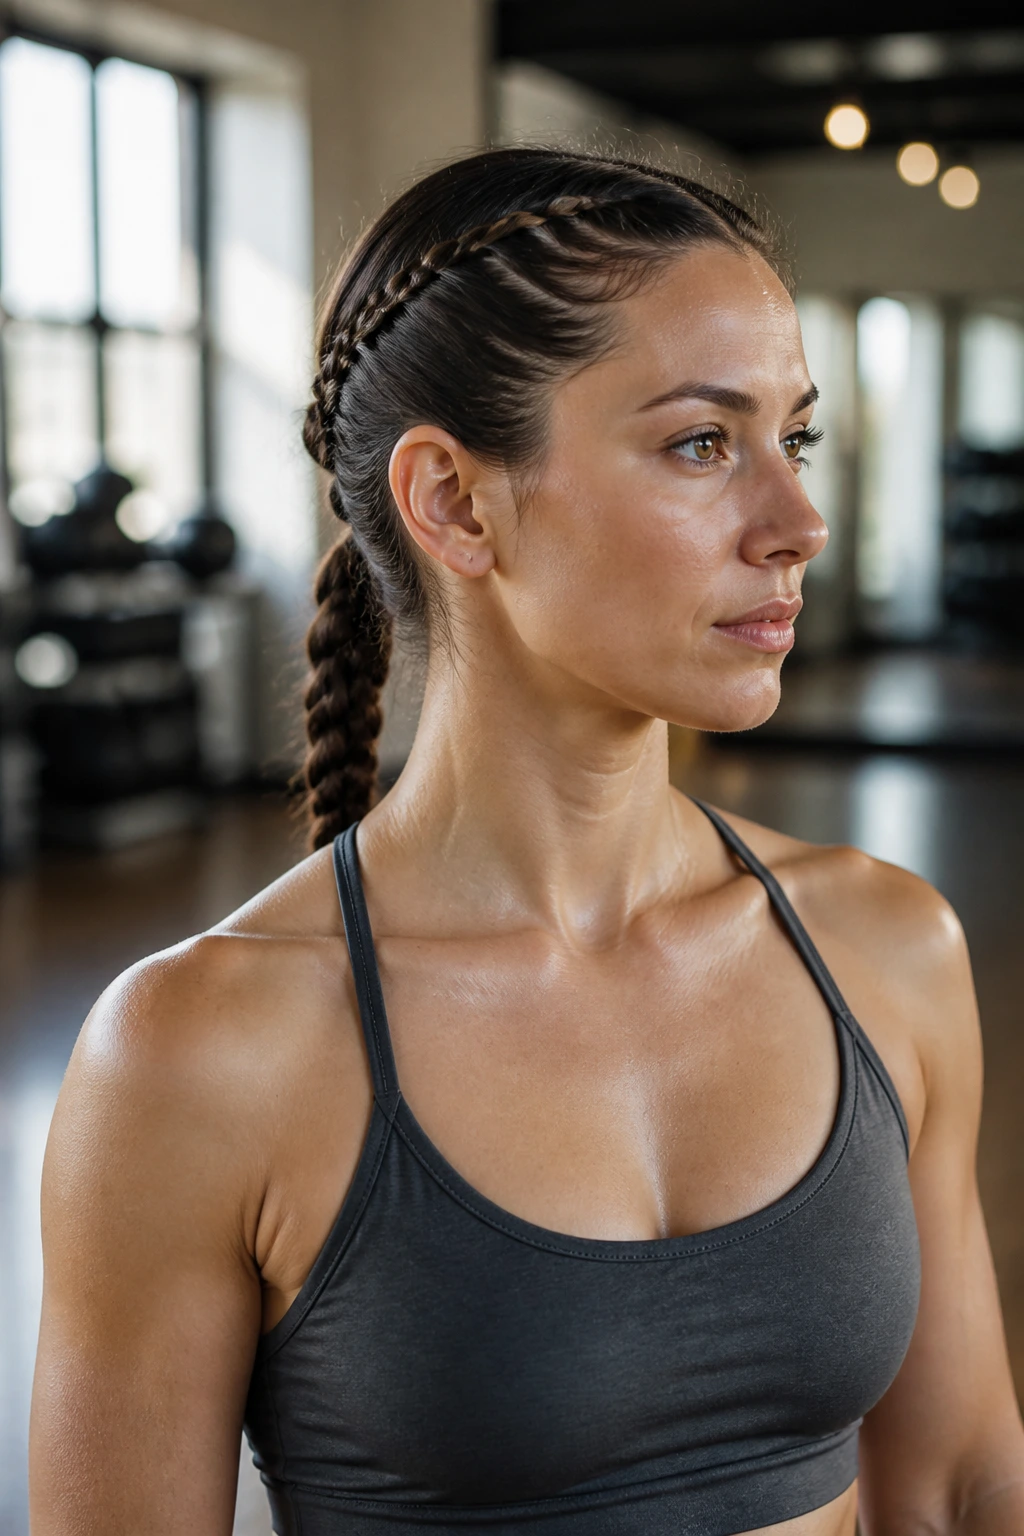
11. The Dutch Side-Part Plait
Sometimes you don’t need a massive, intricate braid to keep your hair under control. A simple, large Dutch braid starting from a deep side part and moving across the forehead functions perfectly as a technical headband.
Why It’s Perfect for Spin Classes
You spend a lot of time looking down at your handlebars in spin class. A side-part Dutch braid acts as an anchor for those shorter pieces of hair around your hairline, ensuring they stay tucked away even when you are dripping with perspiration. It is the ultimate “functional fringe” solution.
Stylist’s Advice
- Keep the tension loose at the start of the part and tighten it as you get closer to the temple.
- This creates a smooth curve that mimics the natural line of your hair.
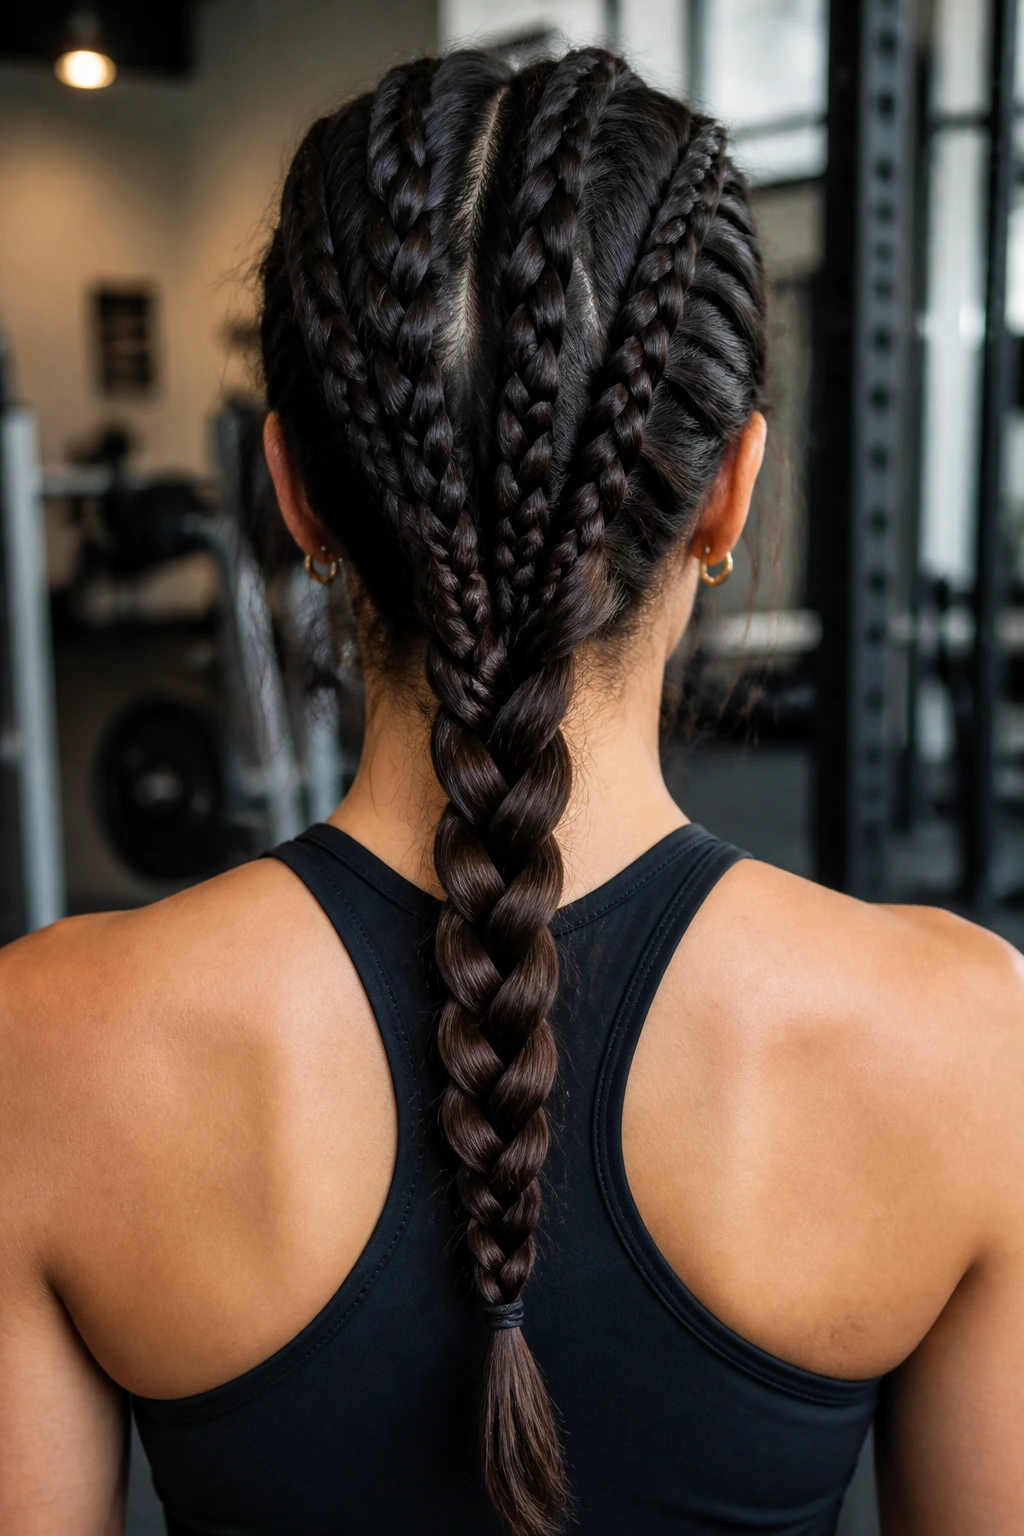
12. The Multi-Strand Interwoven Braid
For those who want something that looks like it took an hour but can be done in ten minutes, try braiding two sections separately and then weaving them together. This style is thick, robust, and offers double the security.
Understanding the Mechanics
By creating two separate, tight braids, you provide two distinct paths for the hair to stay anchored. When you combine them, you effectively create a reinforced cable. It is excellent for high-impact activities like jump rope or box jumps where you need absolute stability.
The Maintenance Factor
- Ensure you have a good detangling spray on hand for after the workout.
- Thick, multi-braid styles can lead to knots if you aren’t careful about how you undo them.
13. The Headband Braid with Texture

This is a classic “gym-meets-street” style. You braid a large section from ear to ear, creating a built-in headband. It’s a clean look that keeps your hairline clear and your sweat-wicking headbands from slipping.
Why This Beats a Synthetic Headband
Synthetic fabric headbands can lose their elasticity, sliding down into your eyes at the most inconvenient moment. A braid made from your own hair doesn’t slip. It stays where you put it, and it feels far more natural against your skin during a long session.
The Best Texture
- If you have curly hair, you’re in luck; this style works perfectly with the natural grip of your coils.
- If your hair is straight, use a generous amount of sea salt spray to give it the grit it needs to hold a horizontal braid.
14. The Triple-Threat Low Braid
By taking three smaller French braids and feeding them into one large, singular braid at the base of your neck, you gain maximum control over your hair’s volume. This style is incredibly secure and prevents that “heavy clump” feel at the end of your braid.
Why This Style Is Great for Recovery
After a long workout, you don’t want to deal with a tangled mess. This style keeps your hair sectioned off from the start, making it much easier to brush through once you get home and take it down. It’s a thoughtful, pre-planned approach for anyone with thick, prone-to-tangling hair.
The Triple-Section Advantage
- Start by dividing the hair into three equal sections at the top of the head.
- Braid each to the nape, then combine.
- Secure with a fabric-wrapped elastic to avoid damaging the hair where the three braids meet.
15. The Pull-Back Twist and Tuck
Similar to the rope braid, this style uses twisting instead of weaving. Twist two large sections from your temples back toward the center, then braid the resulting ponytail. It is a quick, sophisticated way to keep hair off the face that doesn’t require the precision of a French plait.
The Benefits of Twisting
Twisting creates a tight, rope-like structure that is less likely to pull and snag than a traditional braid. If you are prone to hair breakage, switching to twists for your gym days is a smart, low-tension alternative that still looks very sharp.
Improving the Result
- Apply a tiny bit of non-greasy hair oil to the lengths to ensure the twists look clean, not frizzy.
- Use a clear elastic to hold the twists together before you start the final braid.
16. The Inside-Out Dutch Pigtails
Pigtails are often dismissed as “casual,” but when executed as tight, inside-out Dutch braids, they are arguably the most secure hairstyle you can have for the gym. They are low-profile, balanced, and stay perfectly still during floor work.
Staying Balanced
Because the weight is distributed equally on either side, you never feel lopsided during movements. Whether you are doing deadlifts or running, these braids provide a symmetric weight distribution that is physically comforting and visually balanced.
Why They Last
- Because they are braided under, the “braid” itself is raised, which protects the hair from friction against the back of your gym shirt or hoodie.
- It’s a very protective style for those who want to keep their ends tucked and hidden.
17. The High-Volume Fishtail Bun
If you like the aesthetic of a messy bun but need it to survive a HIIT class, the fishtail bun is your answer. You fishtail-braid your entire ponytail and then wrap that braid around the base. It’s the ultimate “stay-put” bun.
The Security Check
- The braid structure ensures that every single hair is locked within a weave.
- The bun shape keeps the bulk of your hair off your back.
- It is perhaps the most “gym-proof” bun on the market today.
The Final Touch
- Use two u-shaped pins, not bobby pins, for a more secure hold without the harsh snapping.
- Slide them in horizontally to catch the base of the braid against your scalp.
18. The Crown Braid With a Twist
Take a standard French crown braid, but instead of braiding straight, add a diagonal twist starting from the back. It’s a slight variation that keeps the hair even more secure by increasing the tension across the scalp.
Why Diagonal Matters
Braiding at an angle helps to lift the hair from the root in a different way, which can actually make the braid appear bigger and more voluminous. It’s a simple trick that adds a bit of professional flair to your look without adding any extra time to your routine.
Pro Technique
- When you reach the side, pull a little bit of hair from the opposite side of the part to create a “bridge” over the center of your head.
- This creates a massive, singular braid that is almost impossible to disrupt.
19. The Knotted Pull-Through
For this, you use a series of small, tied knots rather than elastics. It creates a very distinct, chunky texture that looks like a heavy-duty rope. It is perfect for those who want to avoid plastic elastics entirely.
The Knotted Advantage
- Knots are naturally tighter than bands because they use the hair itself as the anchor.
- It is a very durable style that doesn’t lose its shape, even after an hour of heavy sweating.
- It looks sophisticated, almost like a piece of jewelry for your hair.
Handling Your Ends
- Once you reach the bottom, braid the remaining length normally or finish with one final knot to seal it.
- Keep the knots tight; the more space you have between knots, the more the style will move around.
20. The Half-Back Dutch Braid for Short Hair
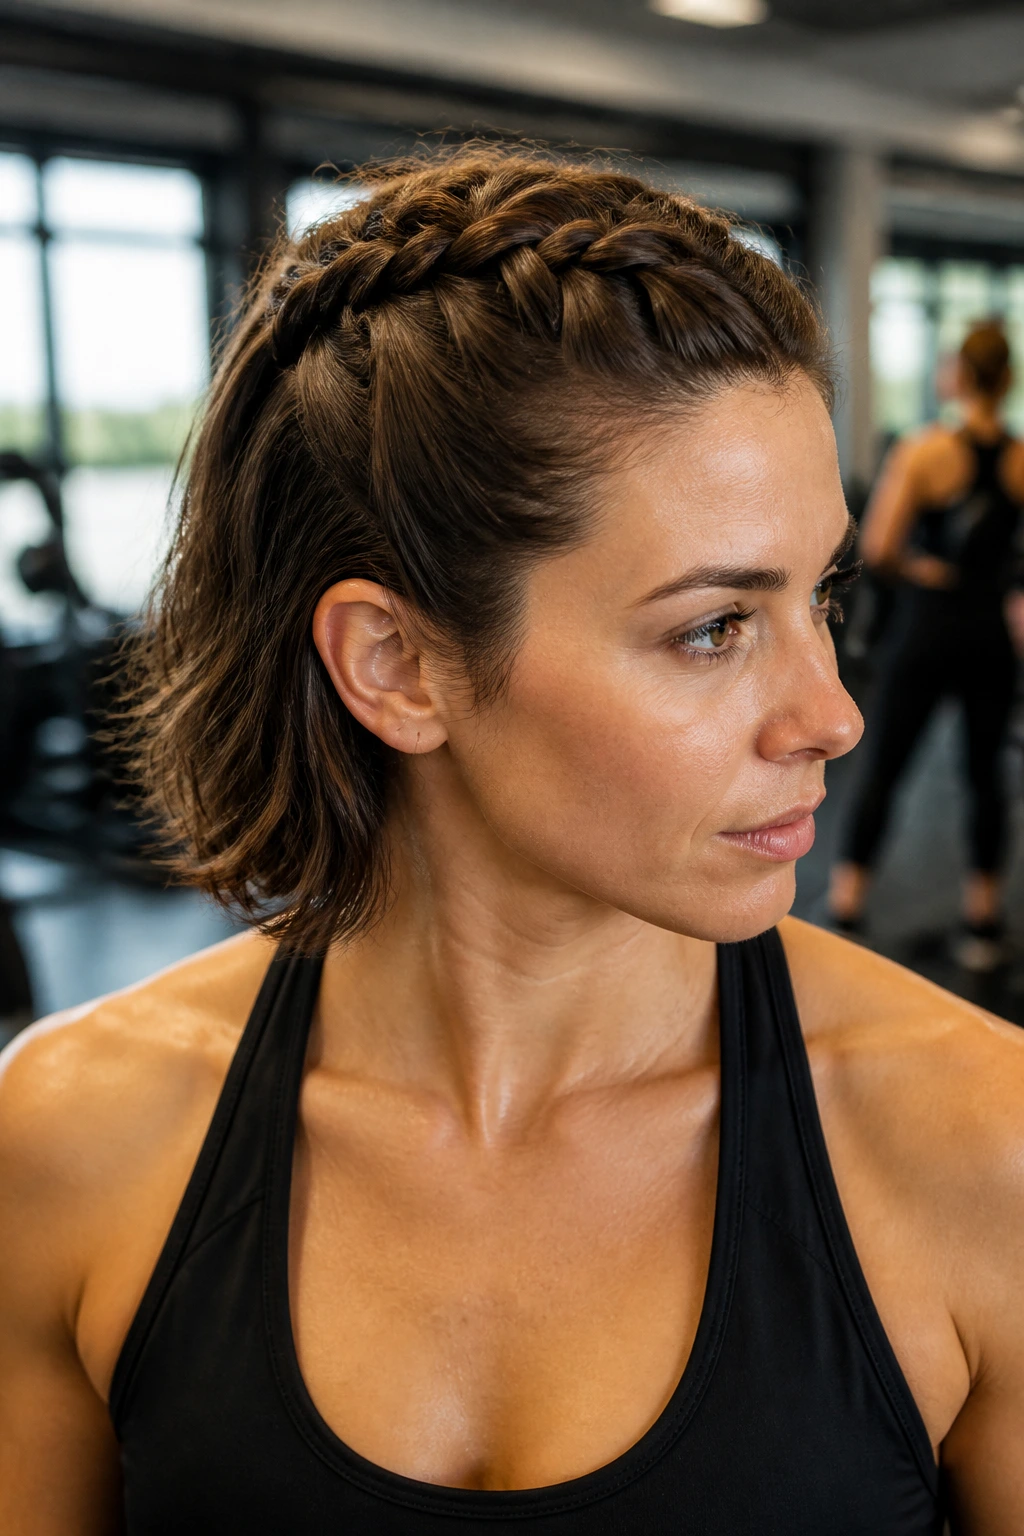
If your hair is shoulder-length or shorter, a full braid can be difficult to pull off. The half-back Dutch braid secures the front and top layers, keeping them out of your face, while leaving the back short enough that it doesn’t get in your way.
Why Less Is More
- For shorter hair, trying to incorporate every single strand into a braid often leads to loose, straggly ends that just get in your eyes during a workout.
- By braiding only the top section, you create a controlled “halo” that is incredibly stable.
The Best Way to Finish
- Use a small, decorative clip to hold the braid in place at the back.
- It’s a stylish touch that makes the half-up look feel like a deliberate design choice rather than an unfinished style.
Final Thoughts
Finding the right braid for your workout comes down to understanding your hair’s texture and the specific needs of your training. If you are doing floor work, skip the high knots and go for side-swept styles. If you are hitting high-intensity cardio, Dutch braids provide the most security and structural integrity. The most important thing is that you feel comfortable and secure, allowing you to focus entirely on your movement rather than your hair. With a bit of prep—a dash of dry shampoo or texturizing spray—any of these styles will keep you looking as focused and driven as you feel.