Braided hairstyles for Latina hair are not just about neatness or convenience. They are a cultural language, a way to manage thick, lustrous textures, and a form of artistic expression that has evolved over generations. Whether your hair is stick-straight, wavy, or carries the deep, coiled density often found in Afro-Latina textures, braids offer a versatile solution for protecting your strands while keeping them looking polished. Finding the right style means understanding how your specific hair density interacts with tension, moisture, and weight.
Many people with Latina hair types deal with high-density strands that crave hydration. When you braid, you are essentially sealing that moisture in, shielding your ends from environmental stressors like wind or friction against fabrics. The beauty of these styles is that they can transition from a casual day at the beach to an evening event with just a switch in accessories or a change in how you finish the edges. We are looking at a spectrum of styles that honor the thickness and versatility of Latina hair, focusing on longevity and visual impact.
1. The Classic Three-Strand Dutch Braid
The Dutch braid, often called an inverted French braid, is the foundational workhorse for thick hair. Because you weave the strands under rather than over, the braid sits on top of your head, creating a dimensional, elevated look that thrives on volume. For those with heavy, thick hair, the Dutch braid acts as a structural anchor, keeping hair firmly in place without the need for excessive amounts of hairspray.
Why It Works for Latina Hair
Thick, coarse, or even medium-texture hair has enough grip to hold these braids tight. If your hair tends to be on the slippery side, prep it with a lightweight texturizing spray or dry shampoo to give your fingers something to hold onto. The key to the Dutch braid is maintaining consistent tension as you move from the crown to the nape of the neck.
Styling for Maximum Volume
- Start by gathering a triangular section at the hairline.
- As you weave the strands under, pull them firmly to ensure a clean base.
- Once finished, gently pull at the loops of the braid to “pancake” it, making the style look fuller and wider.
- Pro tip: If you have layers, secure stray flyaways at the end with a dab of pomade rather than pulling them too tight, which can cause breakage.
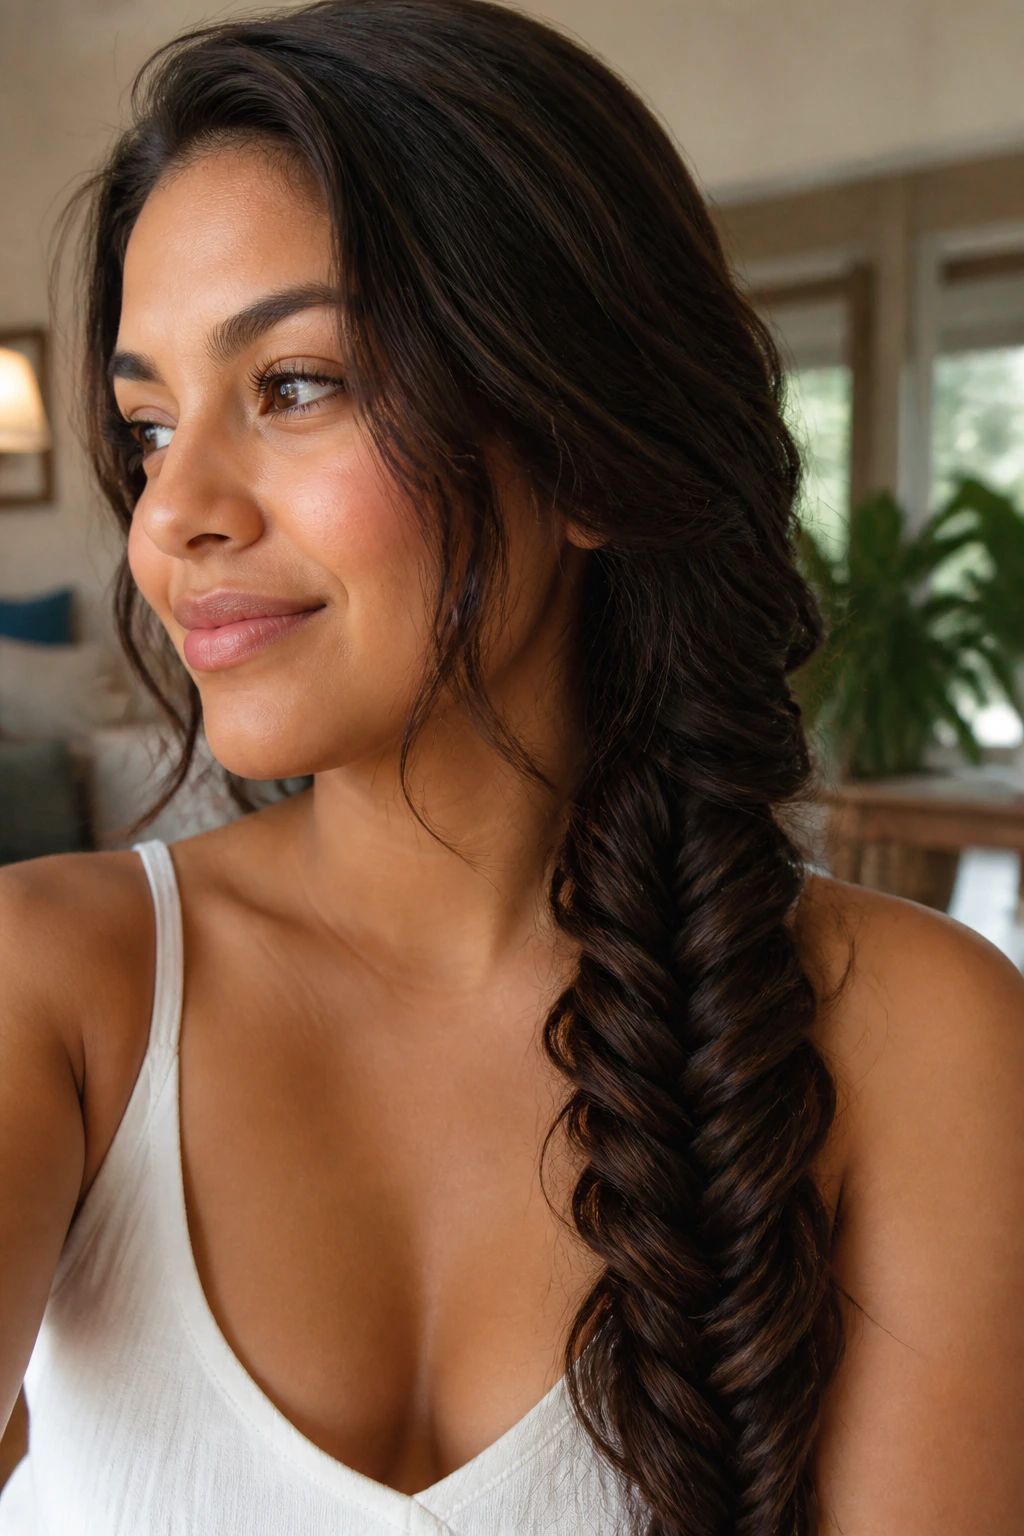
2. Intricate French Fishtail Updo
A fishtail braid might look like it belongs on a runway, but it is surprisingly achievable once you master the alternating technique of grabbing small outer sections. For Latina hair that has natural wave or curl, the fishtail is the perfect way to manage volume while creating a refined silhouette. It is tighter than a standard braid, which helps in controlling frizz throughout a long day.
The Mechanics of the Fishtail
Unlike a three-strand braid, you are working with only two main sections. By crossing small, thin outer pieces from one side to the other, you create that signature “herringbone” pattern. The thinner the sections you pull, the more intricate and polished the final result will appear. It is a slow process, but the visual payoff is immense.
Preparing Your Texture
- Use a leave-in conditioner to smooth the cuticle before you begin braiding.
- For hair that is freshly washed, use a bit of wax to prevent static and flyaways.
- A tight fishtail can be heavy, so consider pinning it into a bun at the nape of the neck to redistribute the weight.
3. Bohemian Side-Swept Waterfall Braid
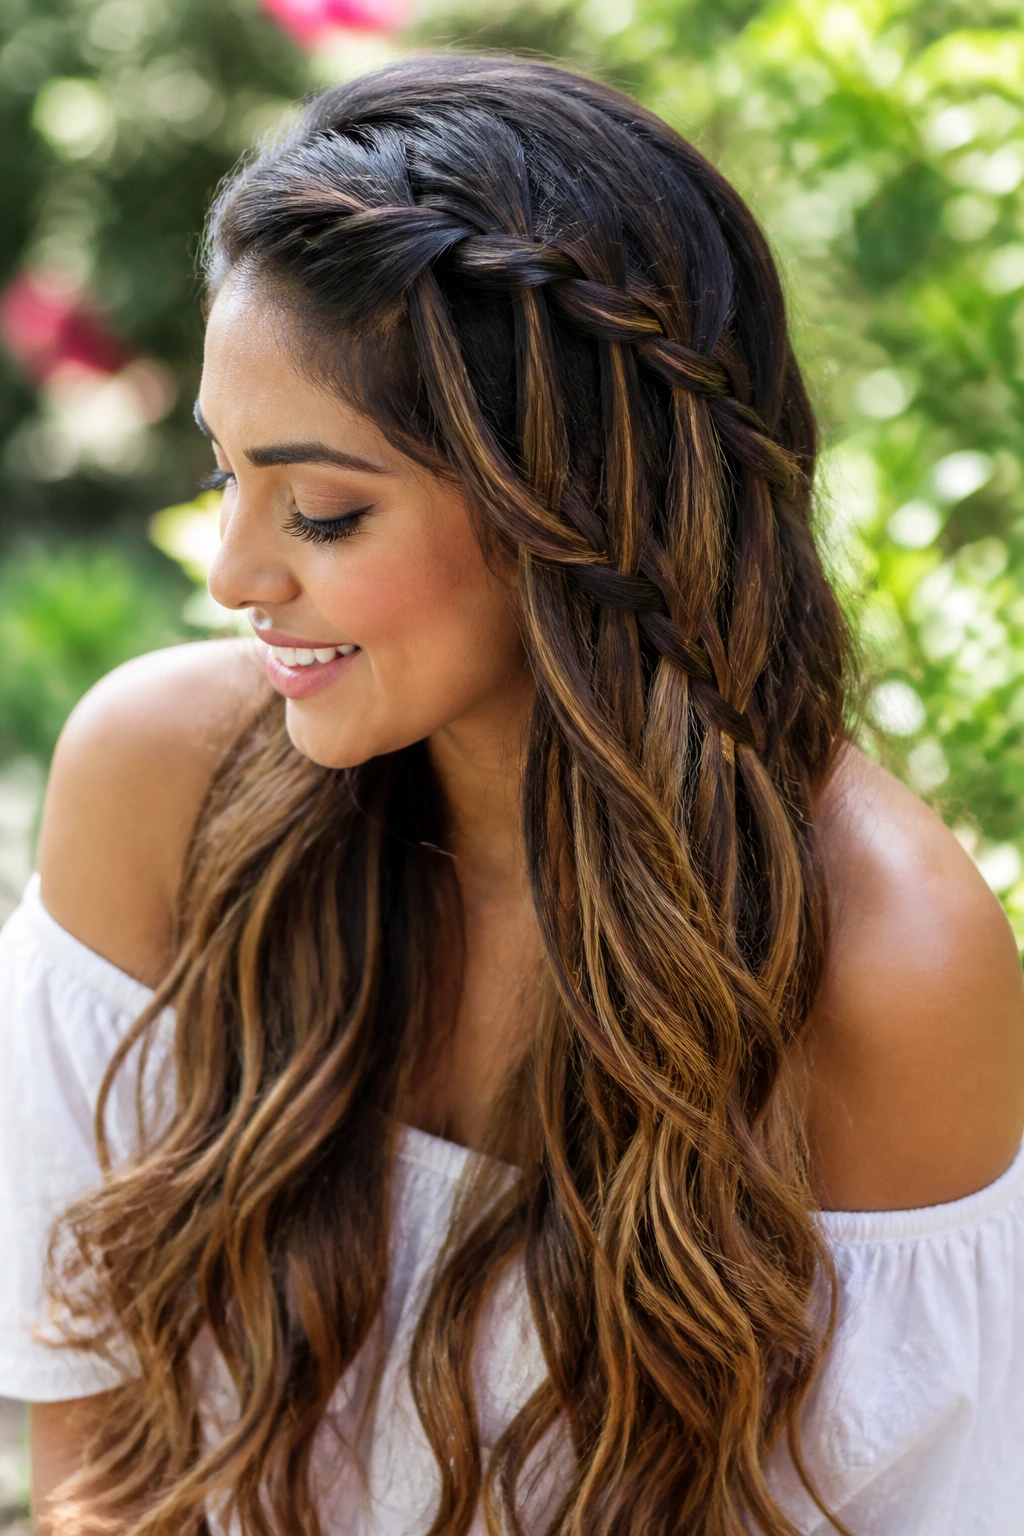
If you prefer to keep your length while adding a touch of elegance, the waterfall braid is your best friend. It allows for the majority of your hair to flow freely while the braid acts as a crown-like headband. This style works exceptionally well with natural waves, enhancing the organic feel of the texture without requiring heat styling tools.
Why It’s a Go-To for Soft Looks
The waterfall technique involves dropping one strand from your three-strand weave and picking up a new piece from the hair hanging below. It creates a cascading effect that looks incredibly intricate but is surprisingly fast once you get the rhythm. It’s perfect for those days when you want your hair down but need to keep your bangs or front layers out of your face.
Variations for Different Occasions
- Wear it tight and structured for an office-appropriate look.
- Pull the braid apart slightly after securing it to create a relaxed, “lived-in” bohemian vibe.
- Accentuate the “waterfall” strands by curling them slightly with a wand to match the rest of your hair.
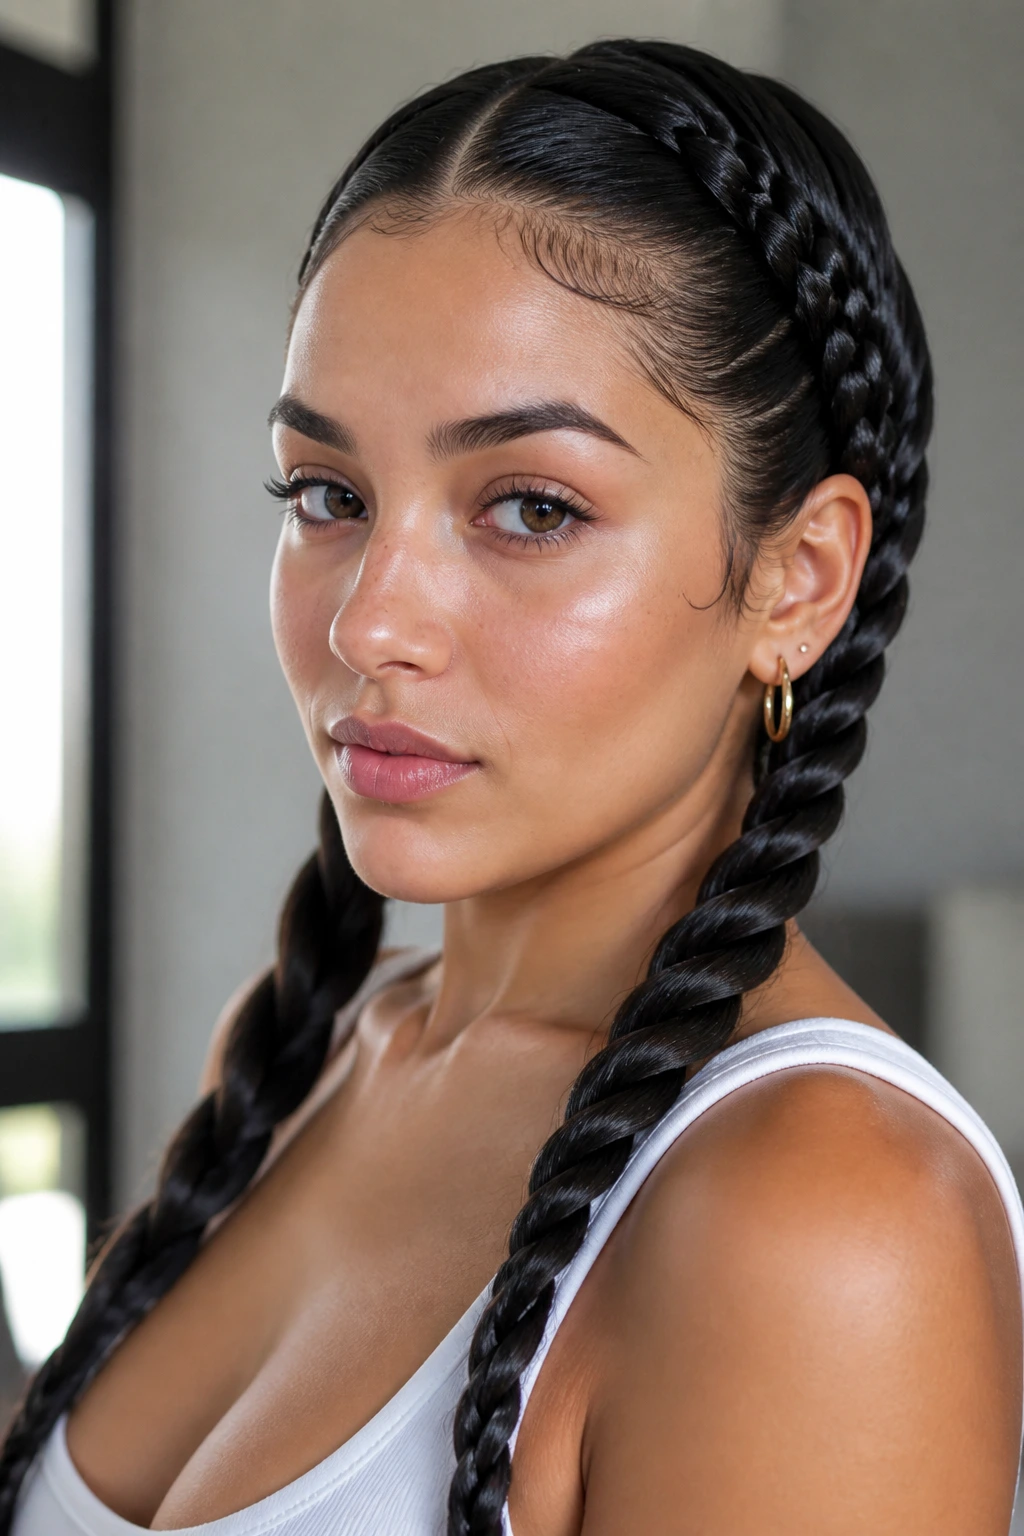
4. Double Dutch Pigtail Braids
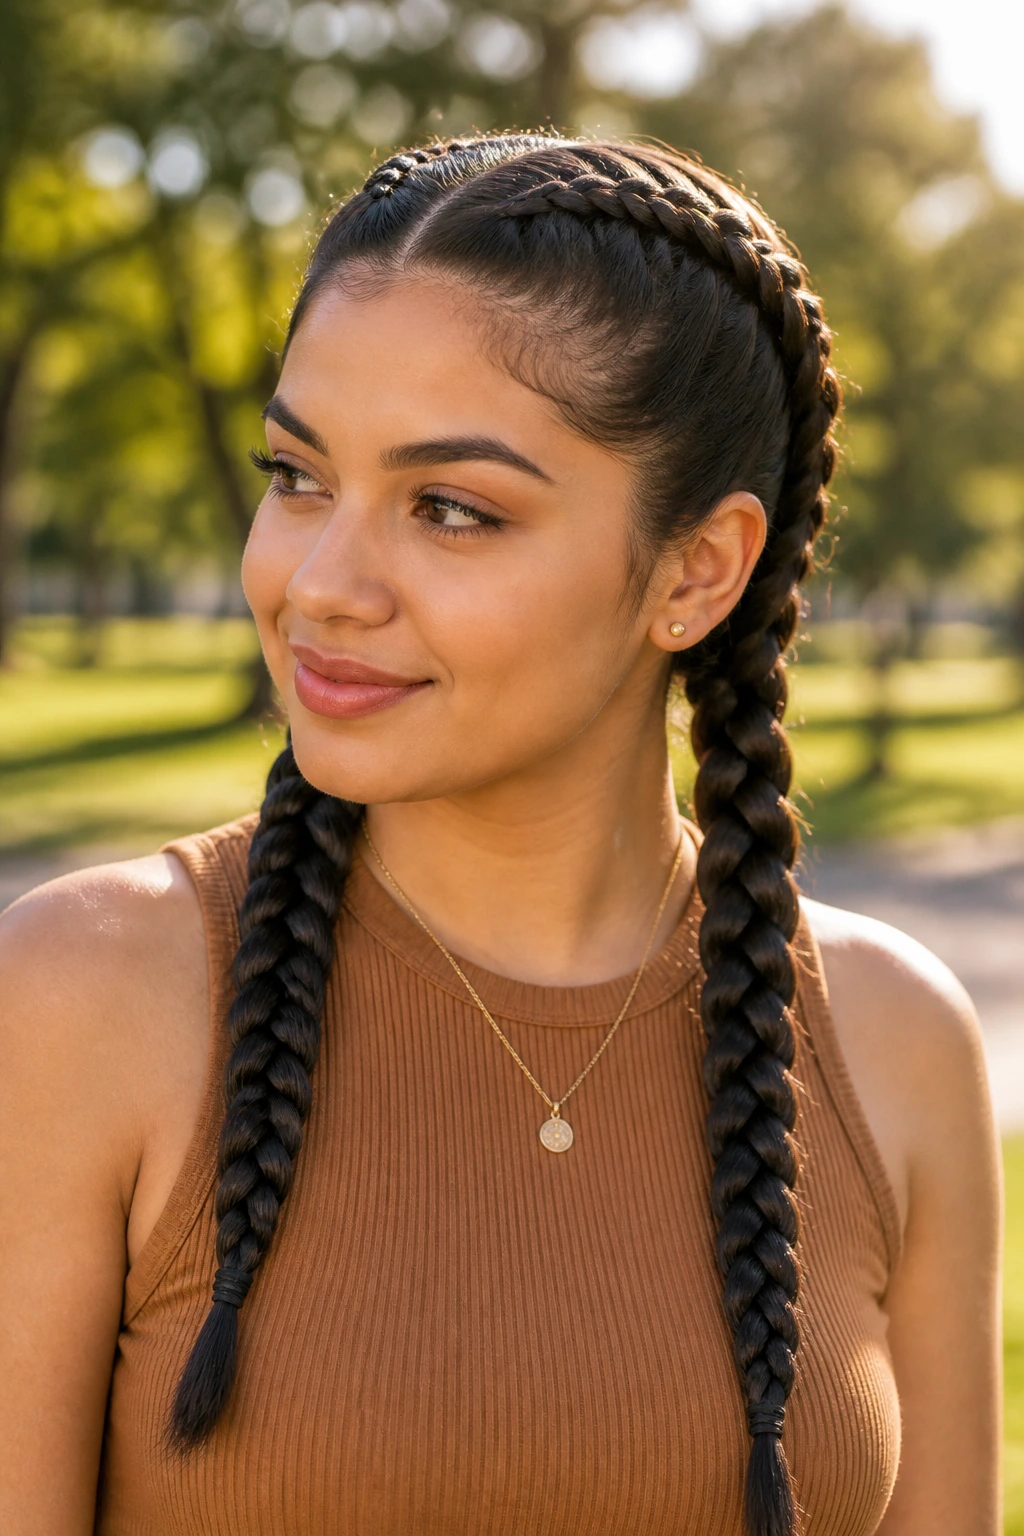
These braids are the ultimate high-performance style. By splitting the hair down the center and creating two distinct Dutch braids, you create a symmetrical look that holds up through exercise, humidity, and travel. It is a protective style that minimizes tangles, especially for those with long, thick hair that tends to knot easily overnight.
Ensuring Symmetry
- Use a rat-tail comb to ensure a perfectly straight part, as a jagged part will throw off the balance of the braids.
- Clip the half you aren’t working on out of the way to avoid pulling loose hairs into the braid you are currently building.
- Keep your hands low and close to the scalp while braiding to avoid “baggy” sections at the back of the neck.
Finishing the Ends
- Tie off the ends with clear elastic bands for a minimal look, or use decorative ribbons that match your outfit.
- If you have shorter layers, apply a small amount of edge control at the nape to keep the bottom section from unraveling.
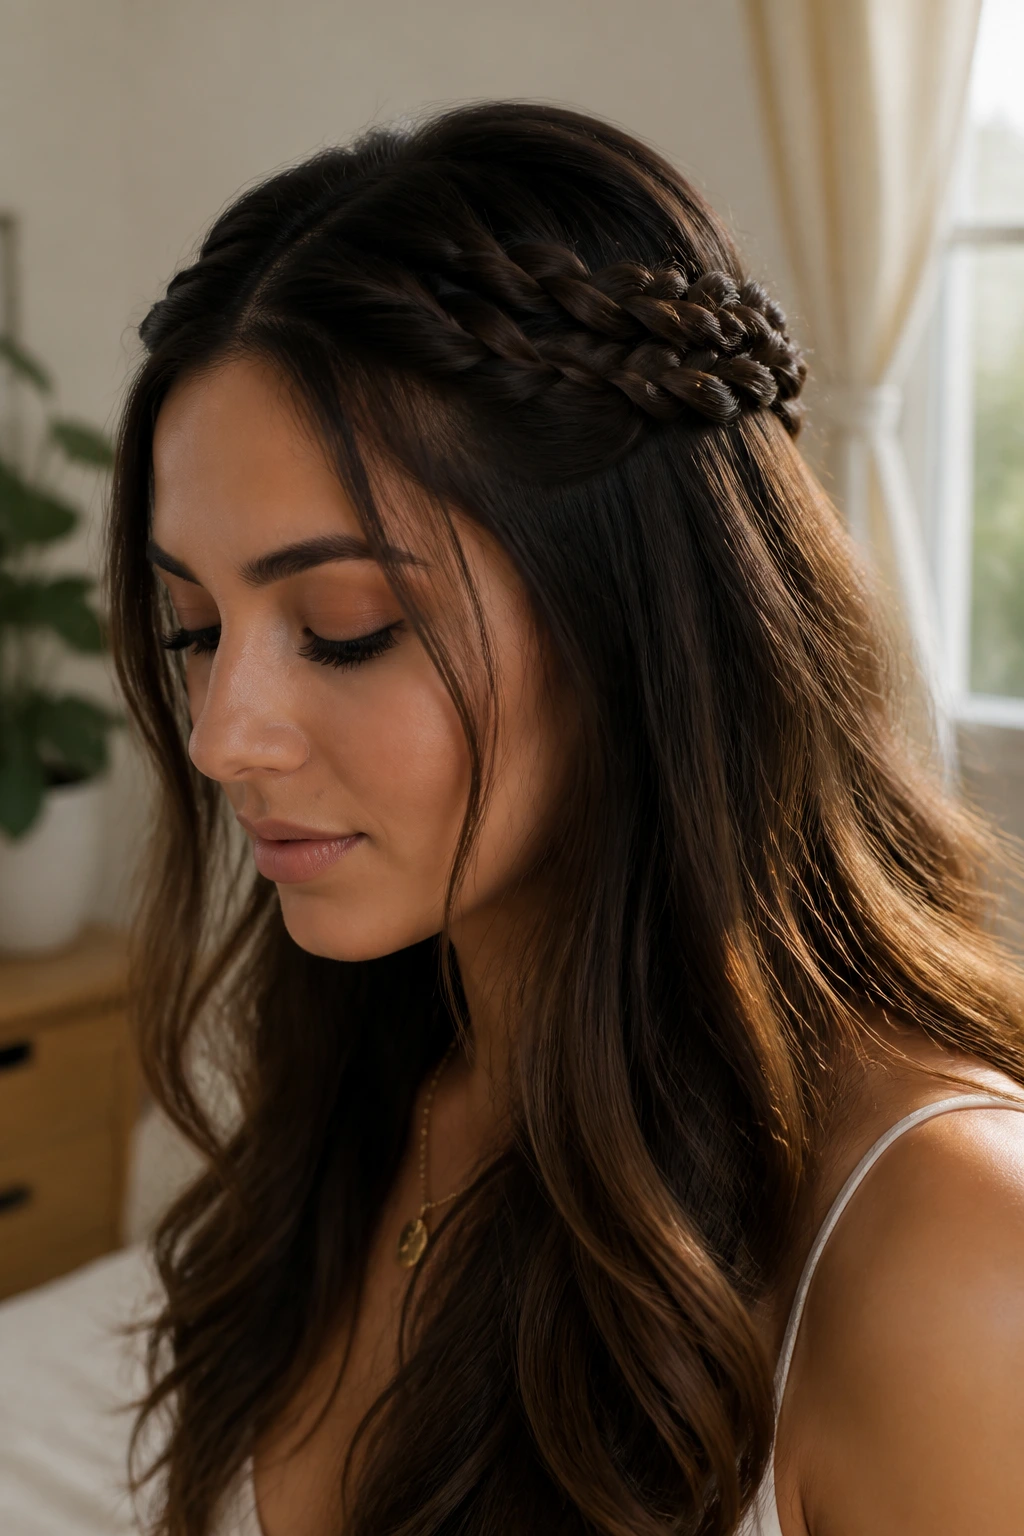
5. The Elegant Crown Braid
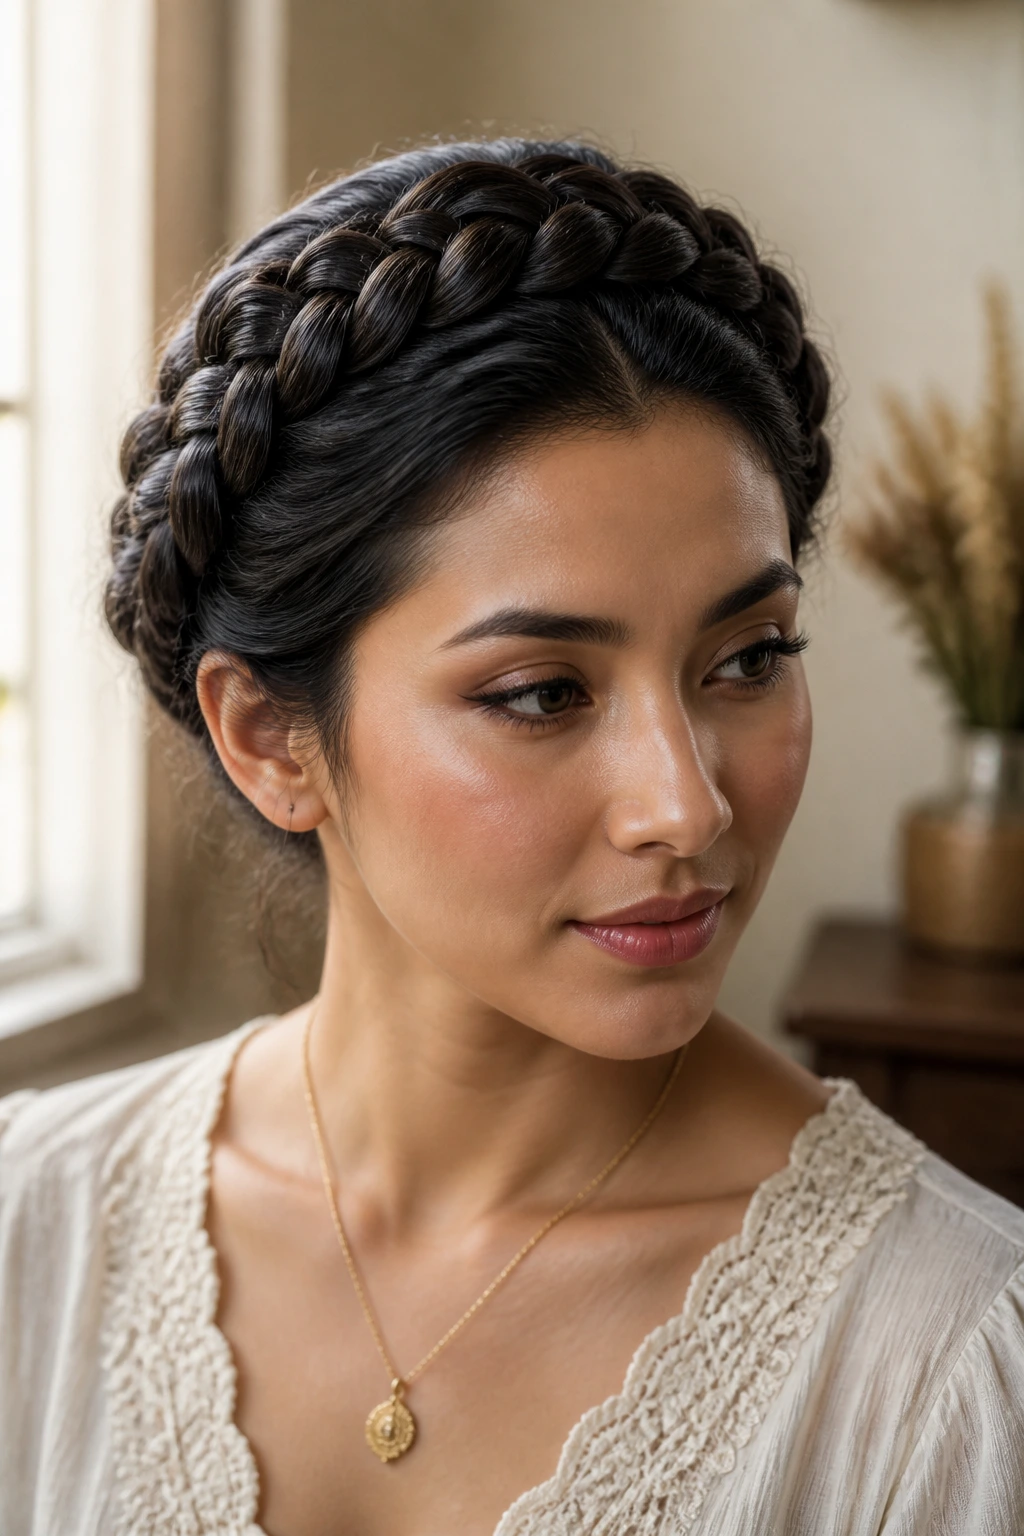
Channeling a classic, regal aesthetic, the crown braid wraps your hair around the circumference of your head like a halo. This style is exceptional for formal events or warmer months when you want your hair completely off your neck. It manages thick Latina hair by evenly distributing the weight around the scalp, preventing the pulling sensation often associated with heavy ponytails.
Constructing the Halo
- Start braiding from behind one ear, pulling in hair as you go, moving along the hairline.
- Keep the tension uniform; if you braid the front too tightly, it will be uncomfortable by the end of the day.
- Once you reach the starting point, tuck the tail of the braid under the beginning of the braid and pin it securely with bobby pins that match your hair color.
Handling Thick Ends
- If your hair is very thick, you may need to divide your hair into two separate braids and pin them together at the top of your head rather than one continuous braid.
- Use a few hidden hairpins to secure the mid-sections of the braid to your scalp to prevent the “crown” from slipping.
6. Rope Twist Braids
Also known as a two-strand twist, the rope braid is a sleek, modern alternative to traditional plaiting. It is perfect for hair that has a lot of natural oils or is slightly damp, as the twisting motion smooths the cuticle as you work. The final look is polished, sophisticated, and surprisingly resilient, holding its shape far longer than a loose three-strand braid.
Mastering the Twist
The trick is to twist the two individual strands in one direction while crossing them over each other in the opposite direction. If you just twist them together, the braid will unravel within minutes. The opposing tension is what keeps the rope braid tight and uniform from root to tip.
Enhancing the Shine
- This style excels on sleek, dark hair.
- Apply a light-reflecting serum or a drop of argan oil to your palms before you start.
- Work the product through each strand as you twist to ensure every inch of the hair is coated and frizz-free.
7. Bubble Braid Ponytail
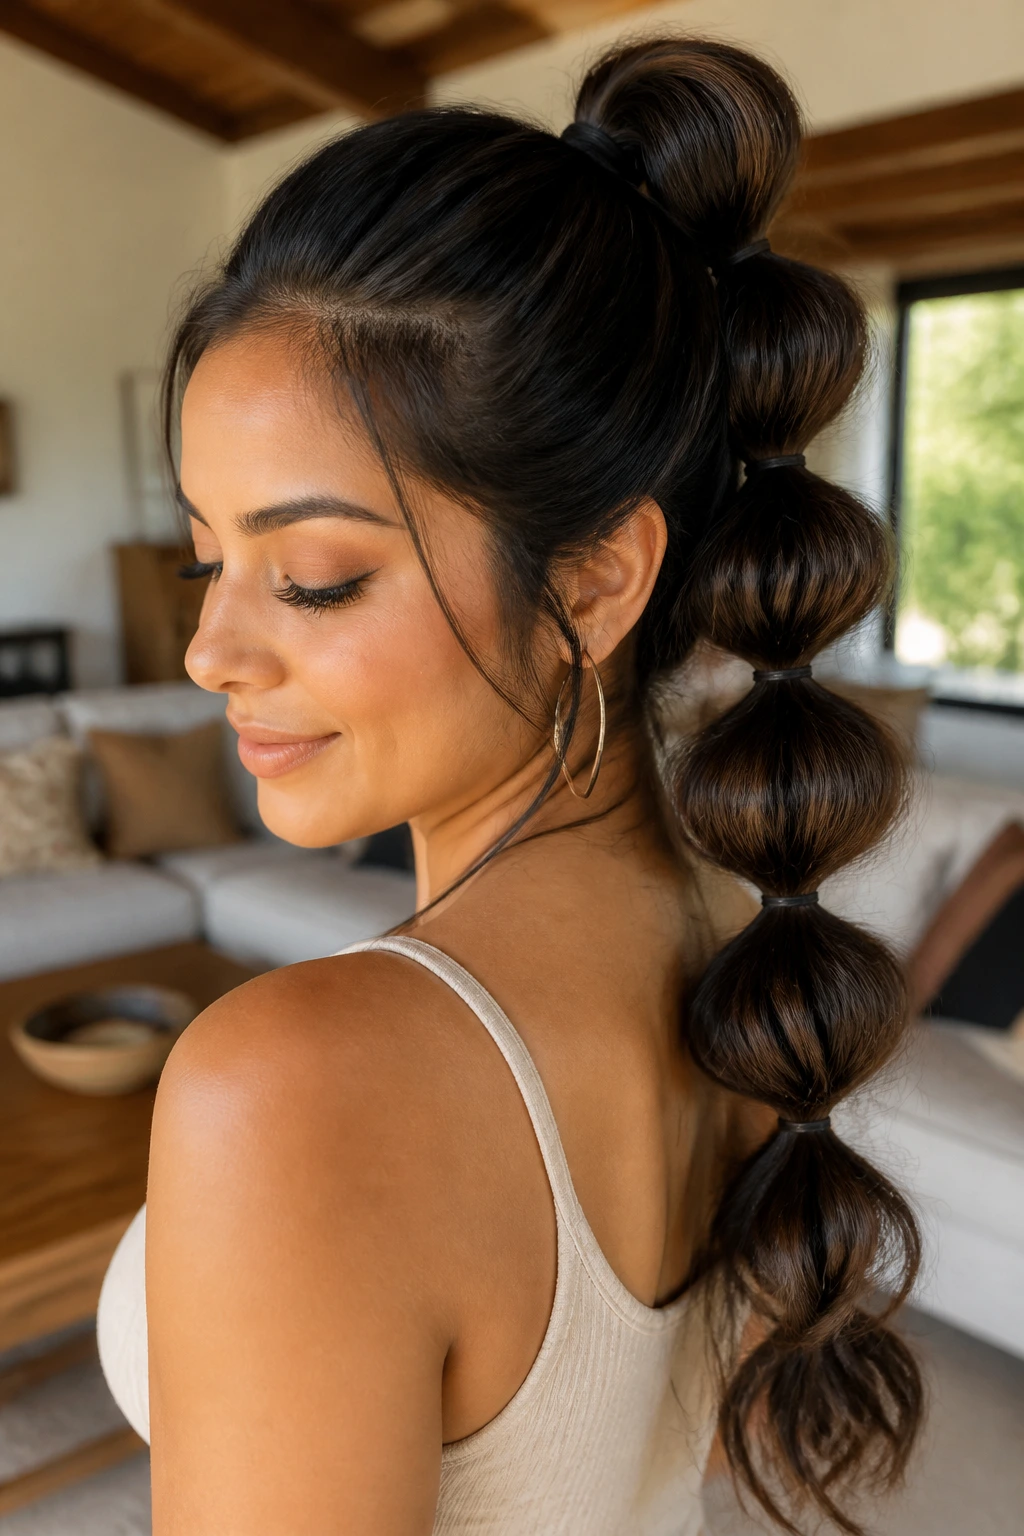
Technically a “faux” braid, the bubble braid is a fantastic choice for those who love the look of thick, voluminous hair but lack the patience for traditional braiding. It is essentially a series of ponytails secured with elastics and teased out to create “bubbles.” It is a playful, modern style that works beautifully on long, layered hair.
Creating the Volume
- The secret to the bubble braid is in the teasing.
- After securing each section with an elastic, pull at the edges of the hair between the bands to expand the volume.
- If your hair is on the finer side, use a dry texture spray to add “grip” and thickness before you start.
Customizing the Look
- Use color-coordinated elastics to make the style pop.
- For a more mature look, wrap a thin piece of hair around each elastic to hide it, creating a seamless, elevated finish.
- This style is incredibly easy to touch up throughout the day if a section starts to look a bit flat.
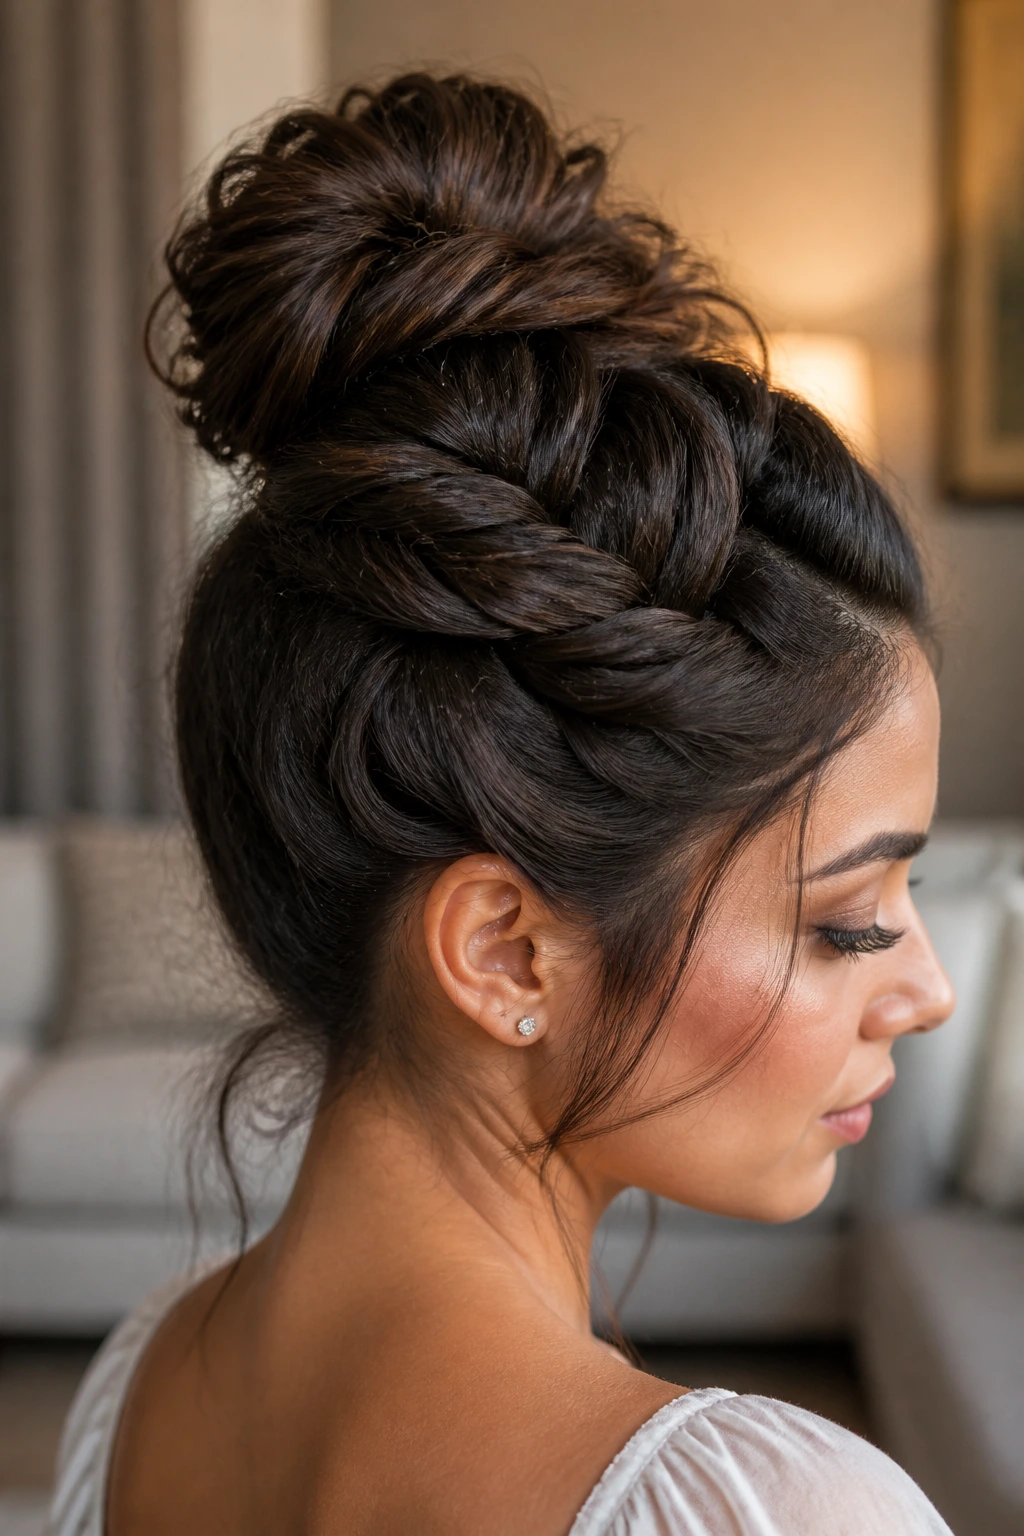
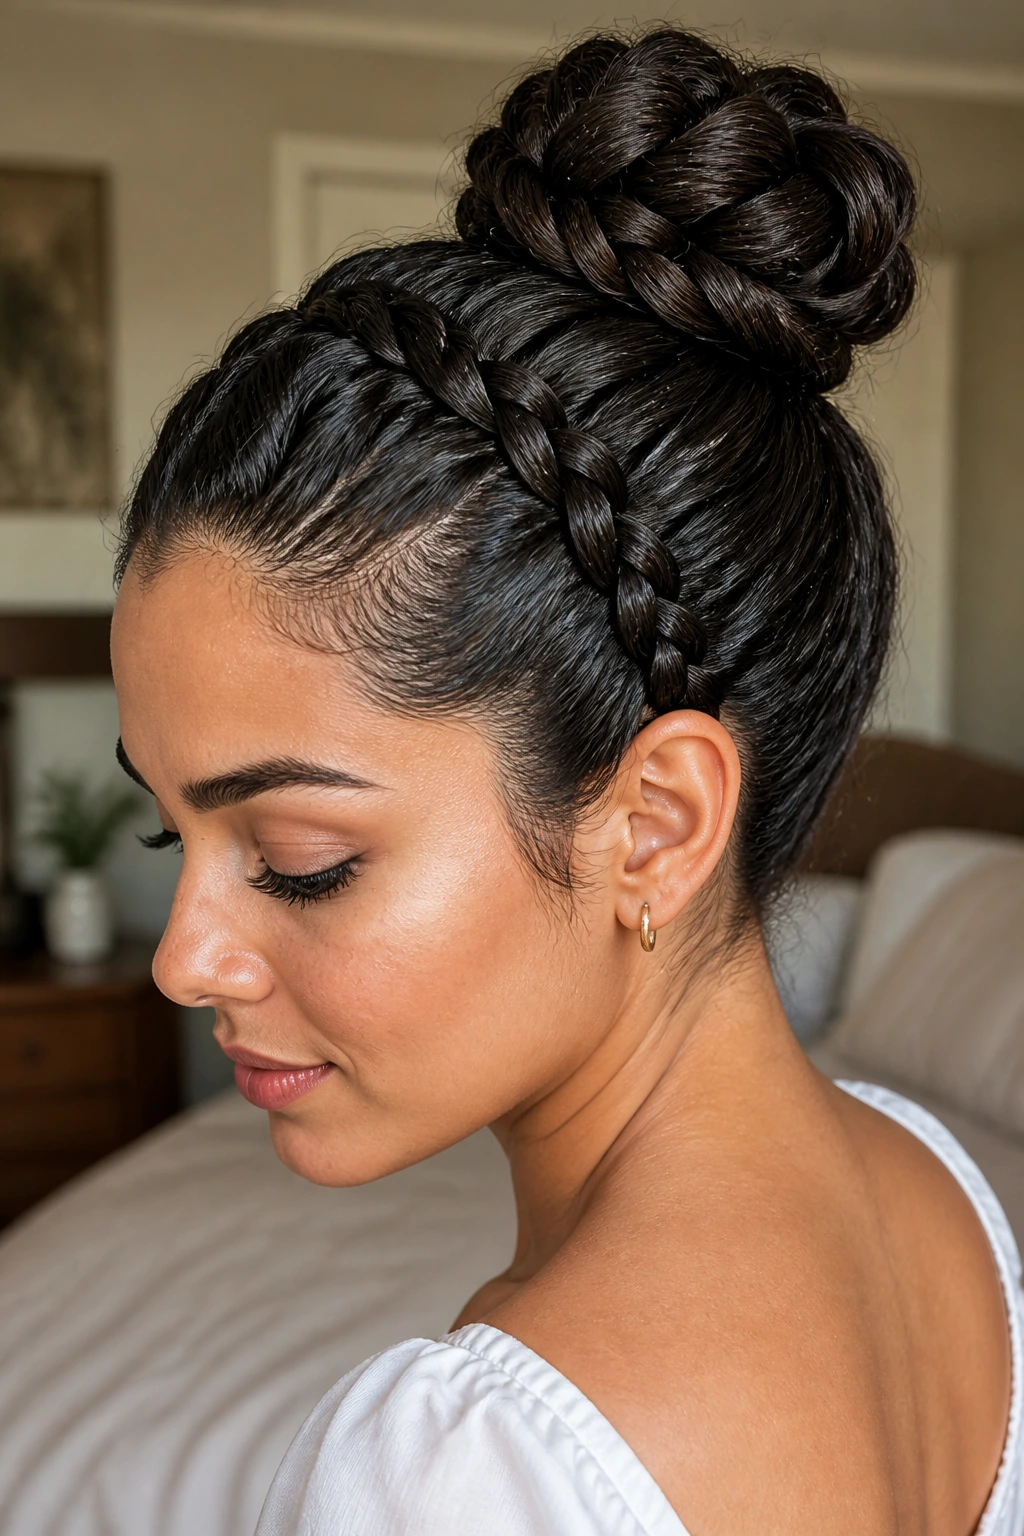
8. High-Top Braided Topknot
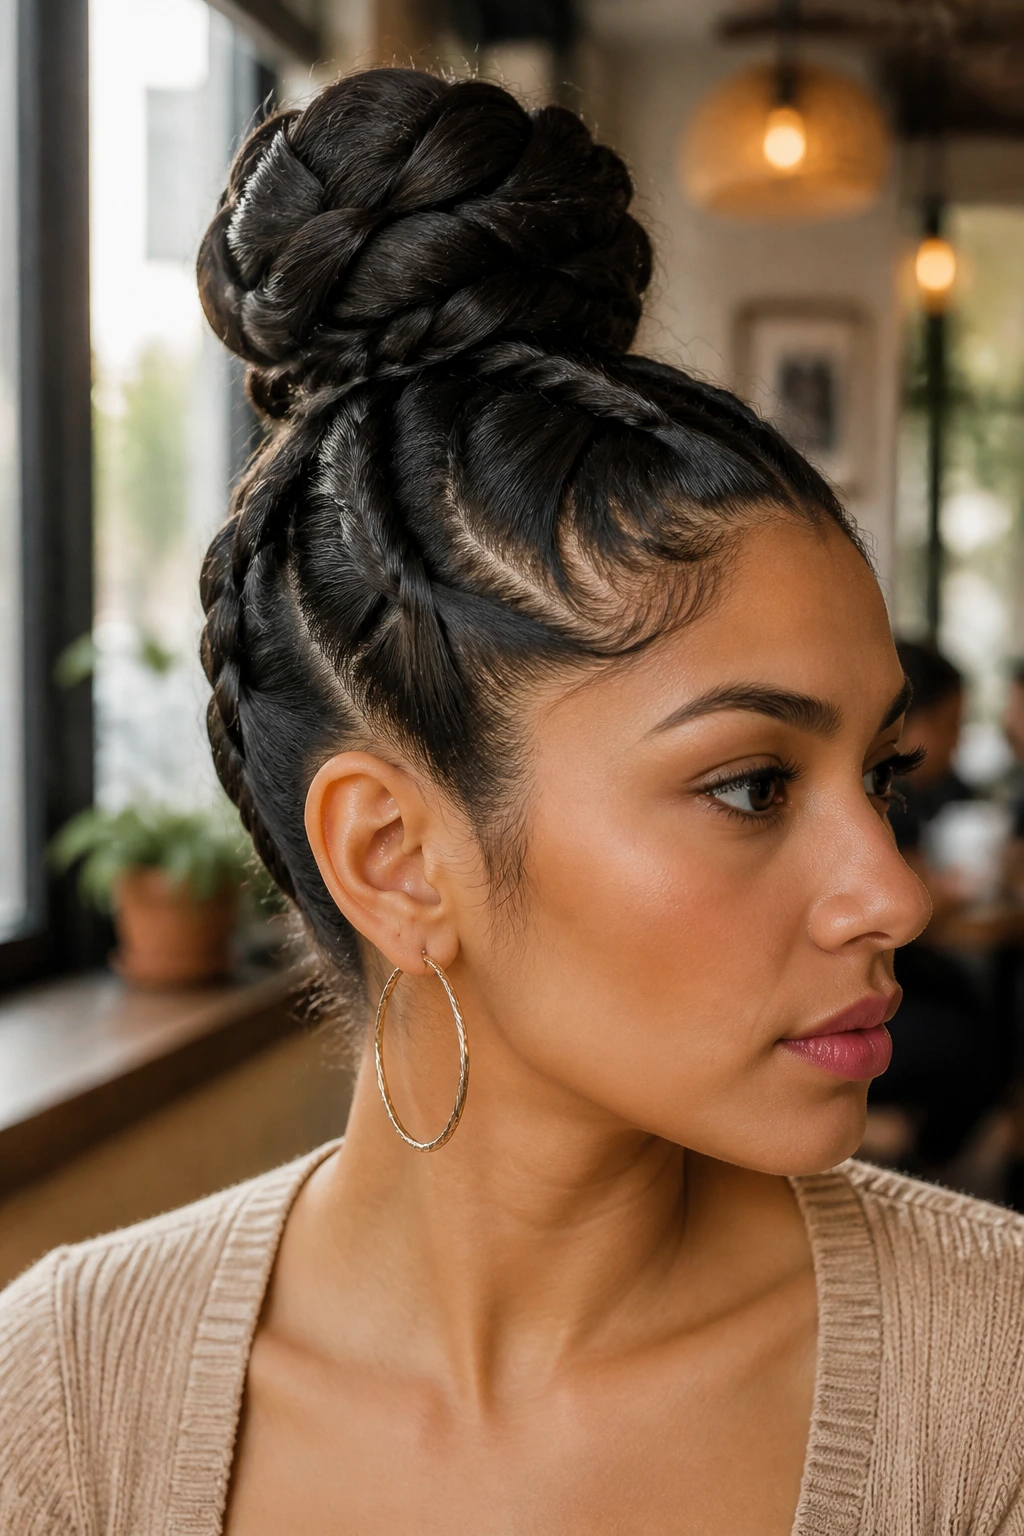
For a look that exudes confidence and keeps the face completely clear, the high-top braided bun is a powerhouse. You begin by creating an inverted Dutch braid starting from the nape of the neck, moving upward toward the crown. Once you reach the top, you gather the remaining length into a high bun.
The Inversion Technique
- Flip your head upside down to begin the braid at the nape.
- This is where you have the most control over the tightness of the braid.
- Once you reach the crown, gather the rest of your hair and use a heavy-duty elastic to secure the base of your bun.
Achieving the Perfect Bun
- Wrap your hair into a donut-style bun or keep it messy for a more casual appeal.
- If your hair is exceptionally thick, use a large claw clip or a set of strong U-shaped hairpins to hold the bun in place, as traditional elastics might snap under the weight.
9. Pull-Through Braid
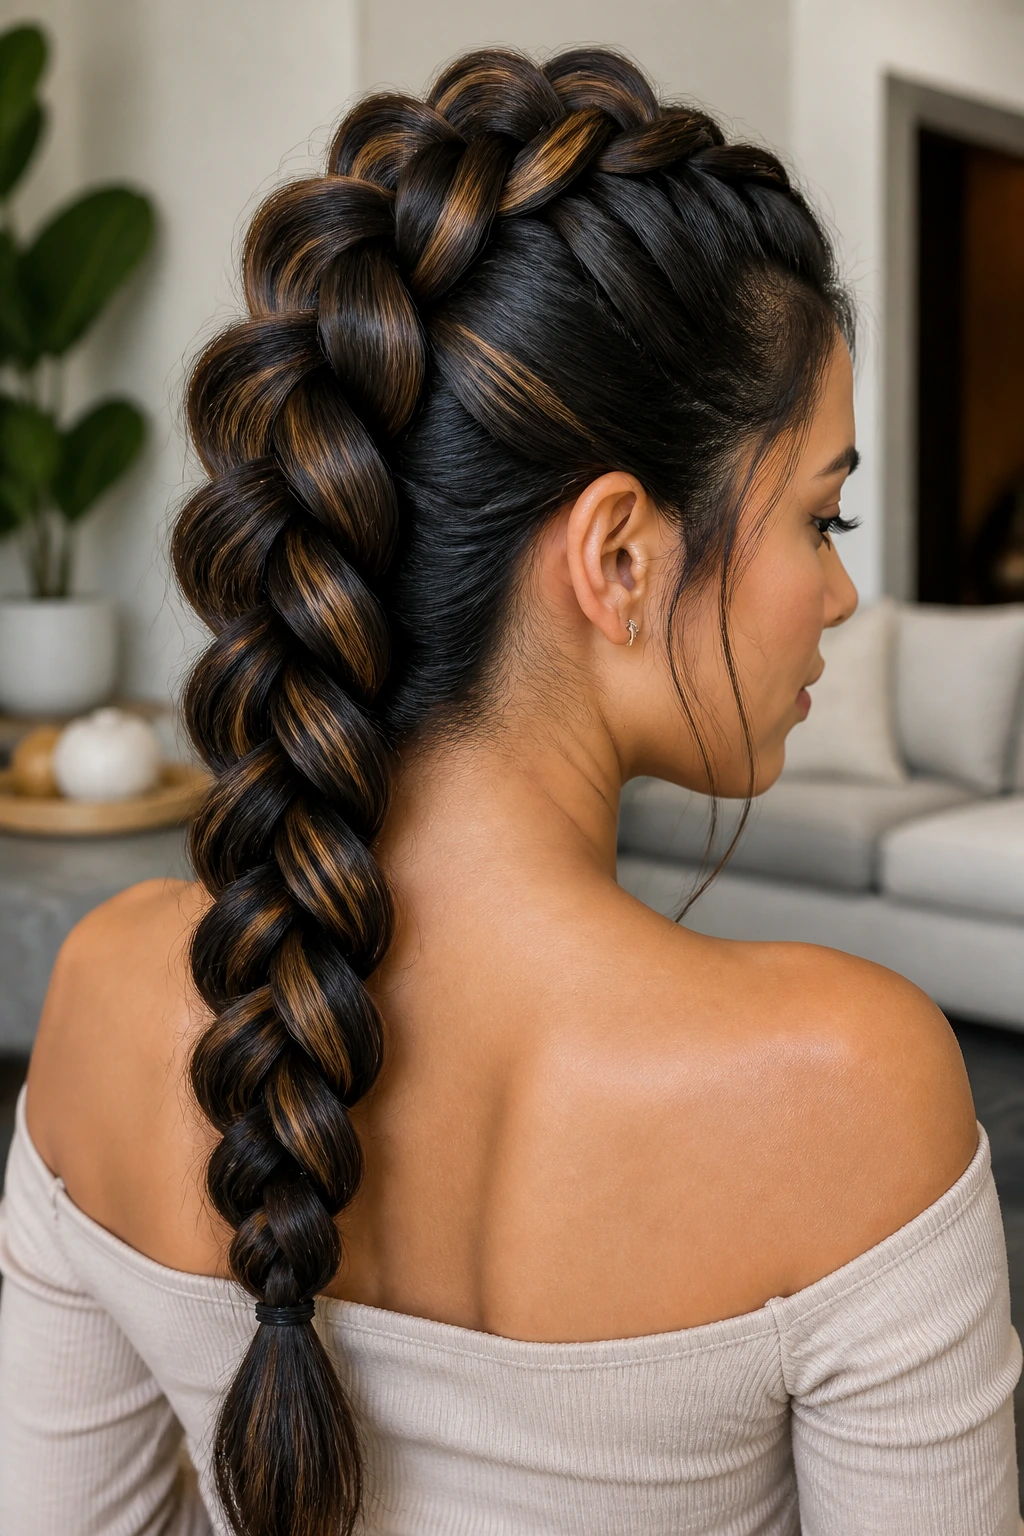
The pull-through braid creates the appearance of an incredibly thick, voluminous plait without the need for traditional braiding skills. By using a series of small, stacked ponytails and pulling the hair through the centers, you create a wide, textured braid that looks like a high-end salon creation.
Why It’s Unique
- It creates a much wider braid than a standard three-strand weave.
- It is perfect for showing off highlights or dimension in your color.
- It stays put throughout the day because it is anchored by multiple elastic points.
Managing the Tension
- Start with high-quality, snag-free elastics.
- Do not make your initial ponytails too tight, as you will need to pull the hair through them later.
- Pull gently on the edges of each “section” as you work your way down to ensure the braid looks wide and consistent.
10. Accent Braid for Loose Waves

Sometimes, a full head of braids is too much commitment for a day. An accent braid—a single, small braid woven through loose waves—adds a subtle, textured detail that feels effortless. This is a great way to transition a wash-and-go style into something that feels intentional and styled.
Placing the Braid
- Choose a section near the temple to frame your face.
- A tight three-strand braid works best here to create a sharp contrast against the softness of your loose hair.
- You can pin the braid back behind your ear or let it hang naturally alongside your waves.
Finishing the Look
- Leave the ends of the small braid slightly wispy for a natural look.
- If your hair is very wavy, give the rest of your hair a quick mist of salt spray to enhance the texture and make the braid feel like a natural part of the overall style.
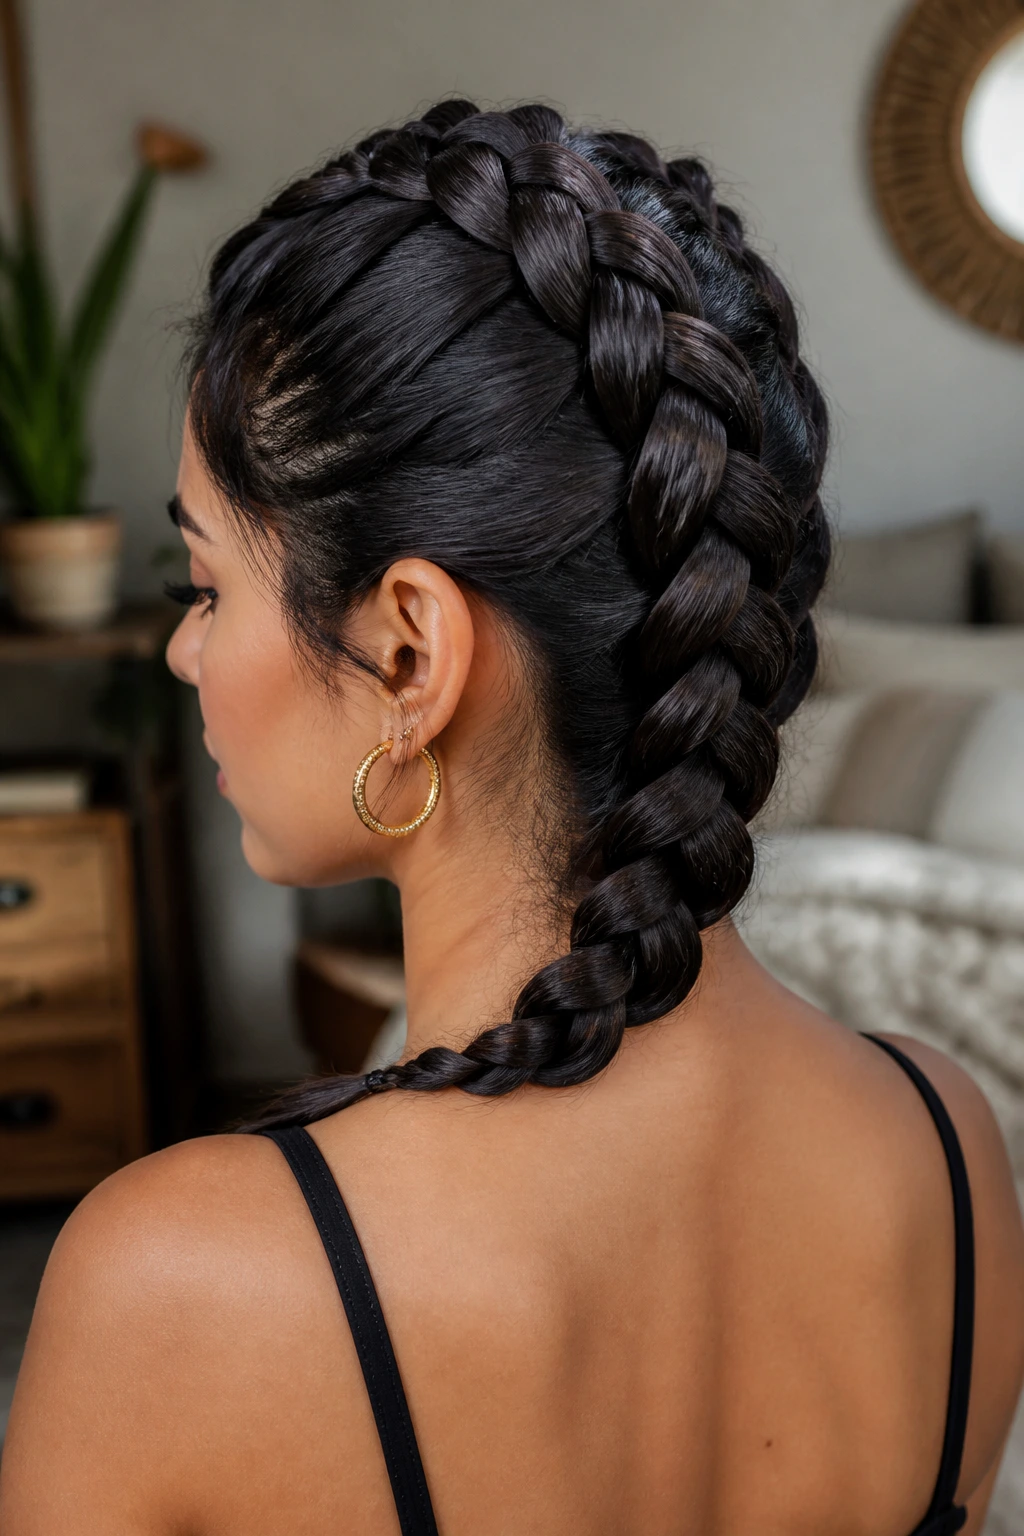
11. Side-Swept Viking Braid
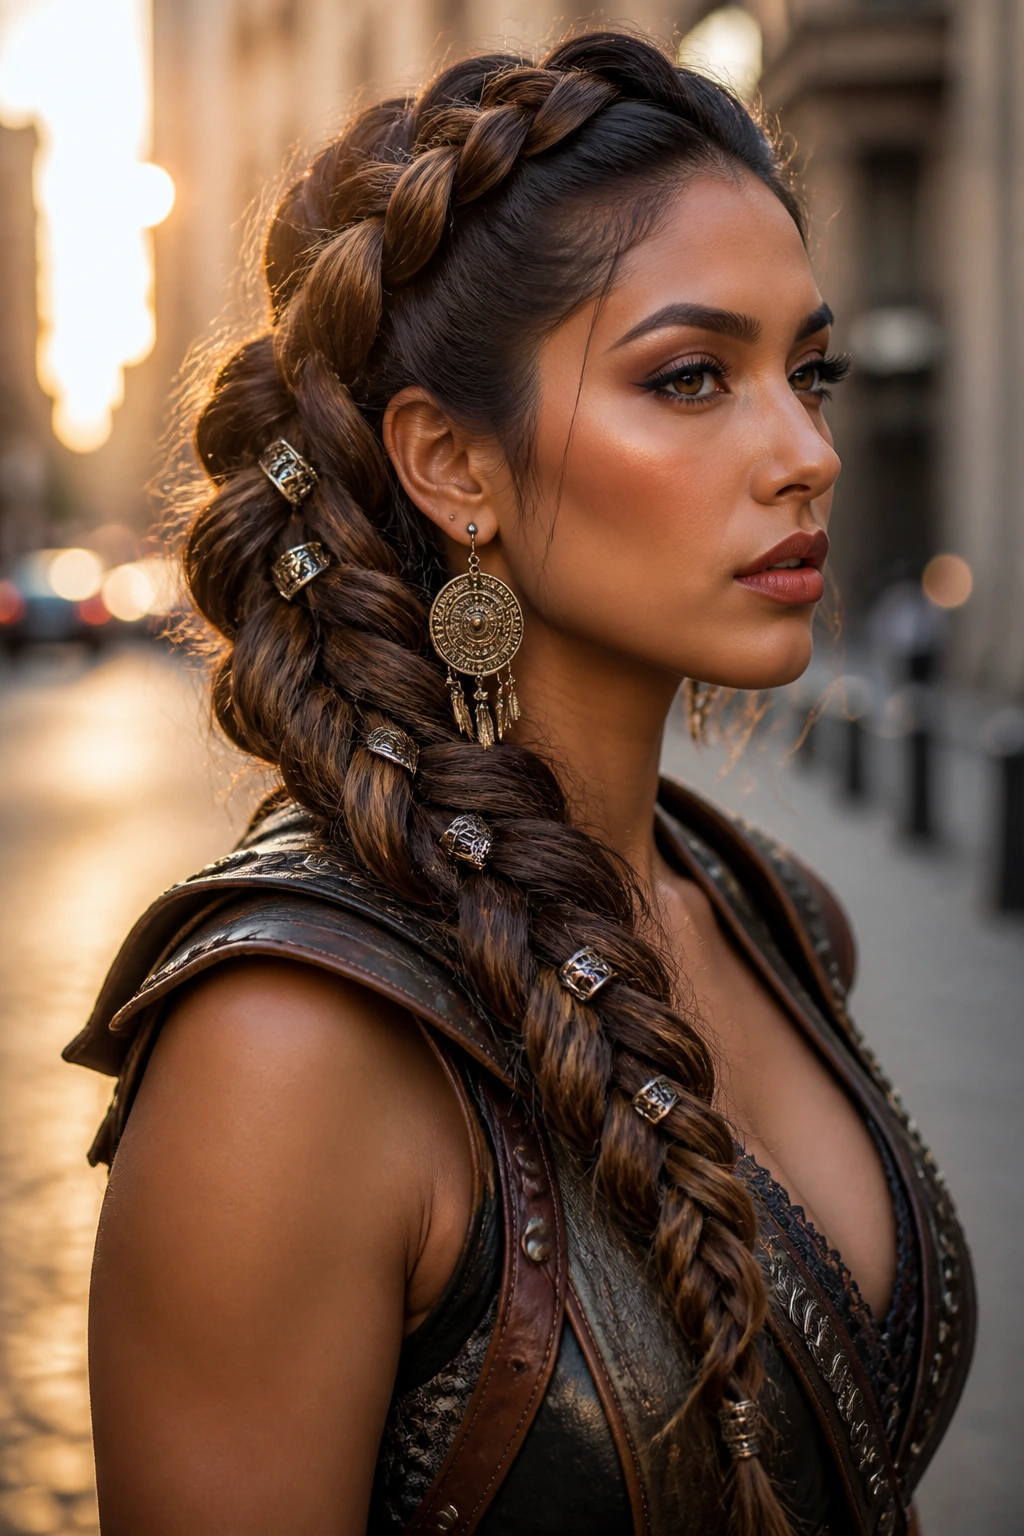
Borrowing inspiration from historic braided styles, the Viking braid is characterized by its rough, textured, and powerful aesthetic. These braids are usually kept slightly loose, allowing for volume and a sense of movement. They are perfect for long, thick hair that has been curled with a large-barrel iron.
The “Rough” Aesthetic
- Don’t worry about perfect, sleek lines with this style.
- The beauty is in the slight dishevelment; pull at the braid loops aggressively after you secure the ends.
- This style looks particularly good with metallic hair accessories, like gold rings or clips, woven directly into the braid.
Styling for Length
- If you don’t have enough length, adding clip-in extensions is a common trick.
- The braid hides the wefts perfectly, and the extra hair gives you the volume needed for those thick, heavy Viking-style plaiting techniques.
12. Milkmaid Braids with Soft Edges
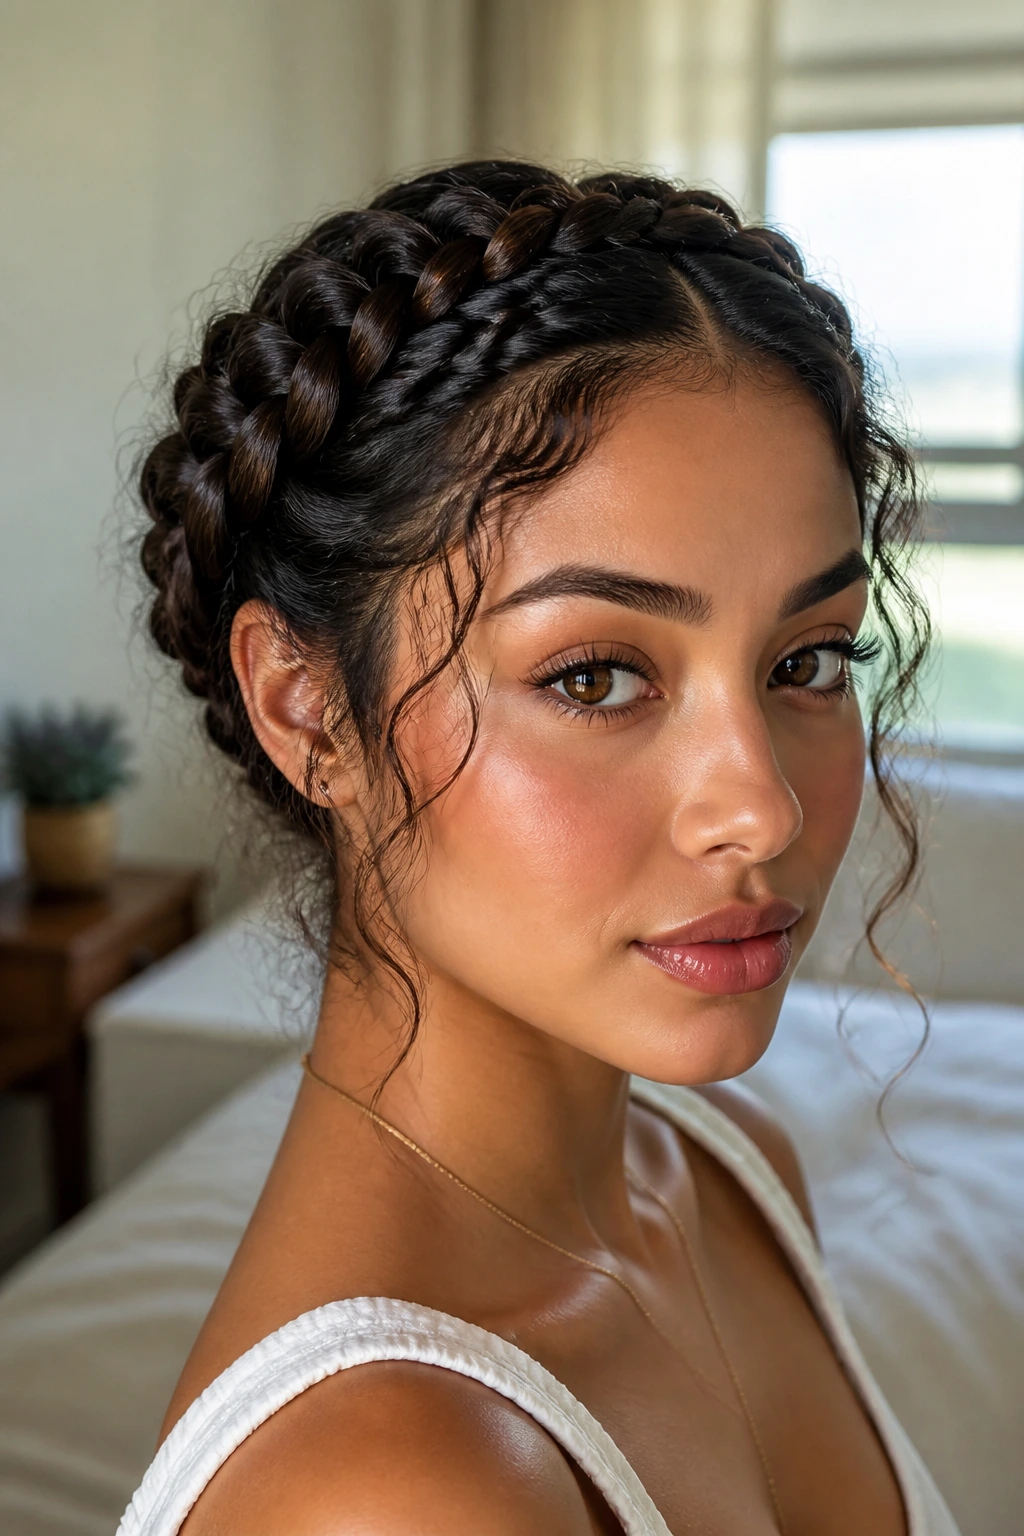
Milkmaid braids involve two pigtails braided and then wrapped over the top of the head, secured with pins. It is a classic look that feels vintage and feminine. For Latina hair types, the density of the hair usually means you won’t need “padding” to make the braids look thick—your natural volume is enough to create a beautiful, full crown.
Softening the Face
- Don’t pull all your hair back; leave a few face-framing pieces around the temples.
- These soft, wispy tendrils prevent the look from appearing too severe or “costumey.”
- A curling wand can give those front pieces a gentle bend to match the soft aesthetic of the braided crown.
Long-Term Hold
- Because this style sits on top of your head, gravity isn’t fighting against you as much as it is with low ponytails.
- However, keep a few spare bobby pins in your purse just in case a section starts to loosen throughout the day, especially if you have heavy hair.
13. Braided Headband with a Sleek Bun
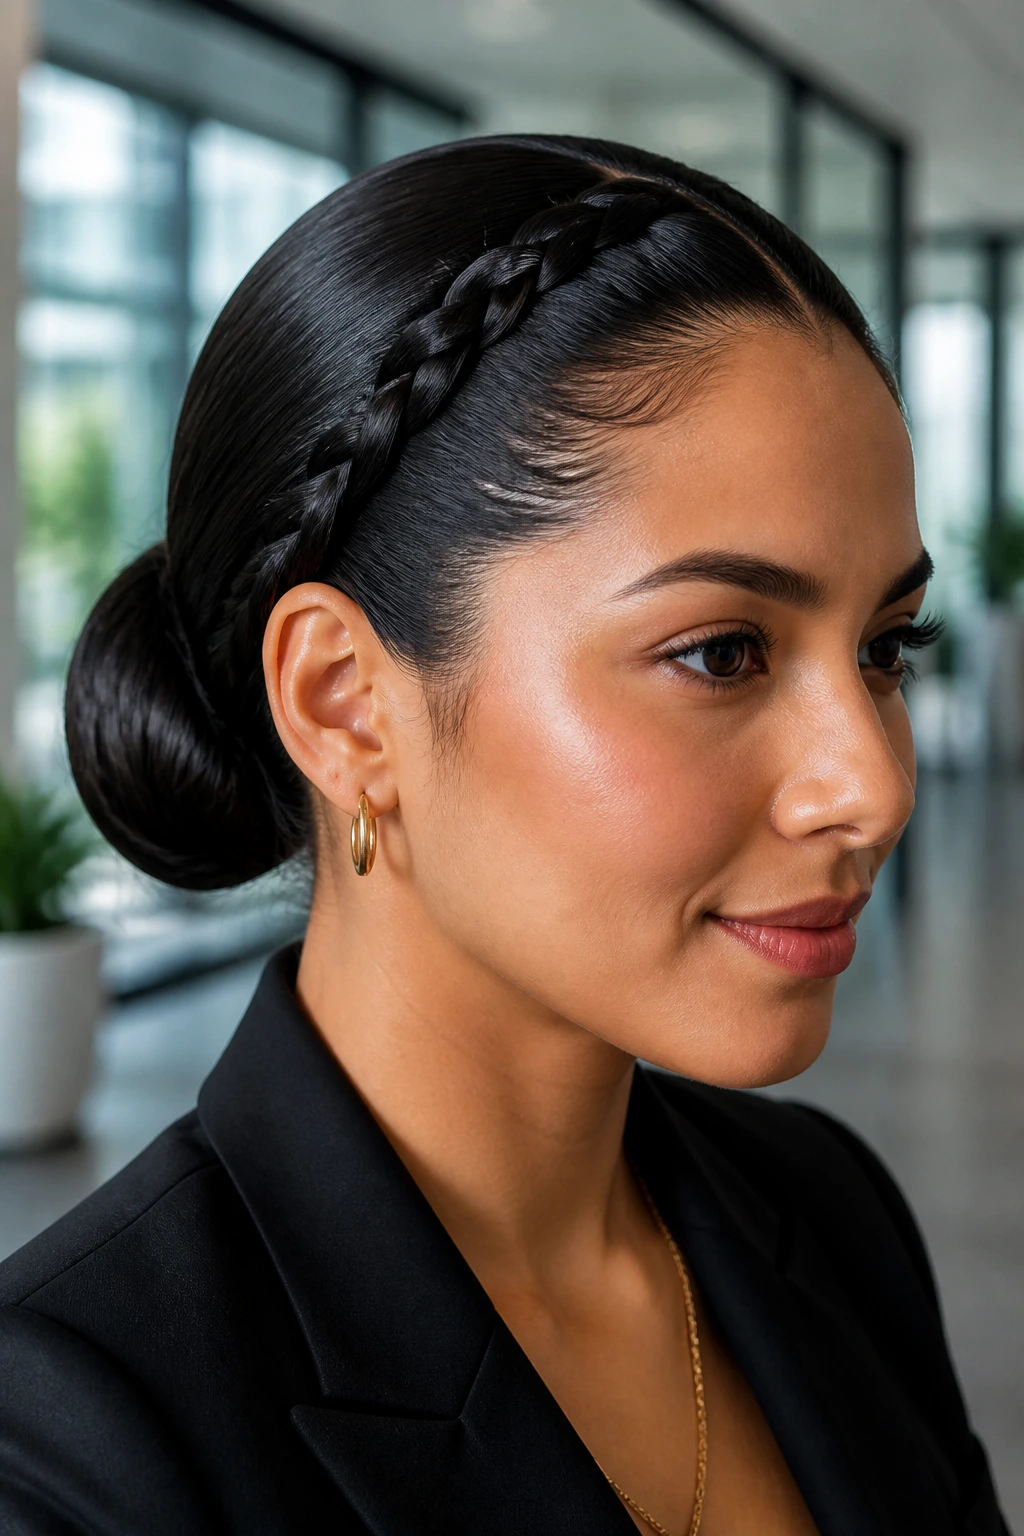
When the weather gets humid or you are heading into a busy workday, the braided headband keeps your hair secure while the sleek bun keeps your neck cool. This style creates a clean line from your forehead to your nape, making it one of the most professional options for those with long, thick hair.
Achieving the Sleekness
- Apply a light-hold gel to your hairline before you begin the braid.
- This ensures that the hair pulled into the braid stays flat against your scalp, preventing those annoying bumps or “bubbles” that can happen when the hair isn’t smooth.
Balancing the Bun
- Use a donut-style hair accessory to help manage the volume of your bun.
- Secure the end of your braided headband underneath the bun to hide the pins and the hair tie, creating a cohesive, finished look.
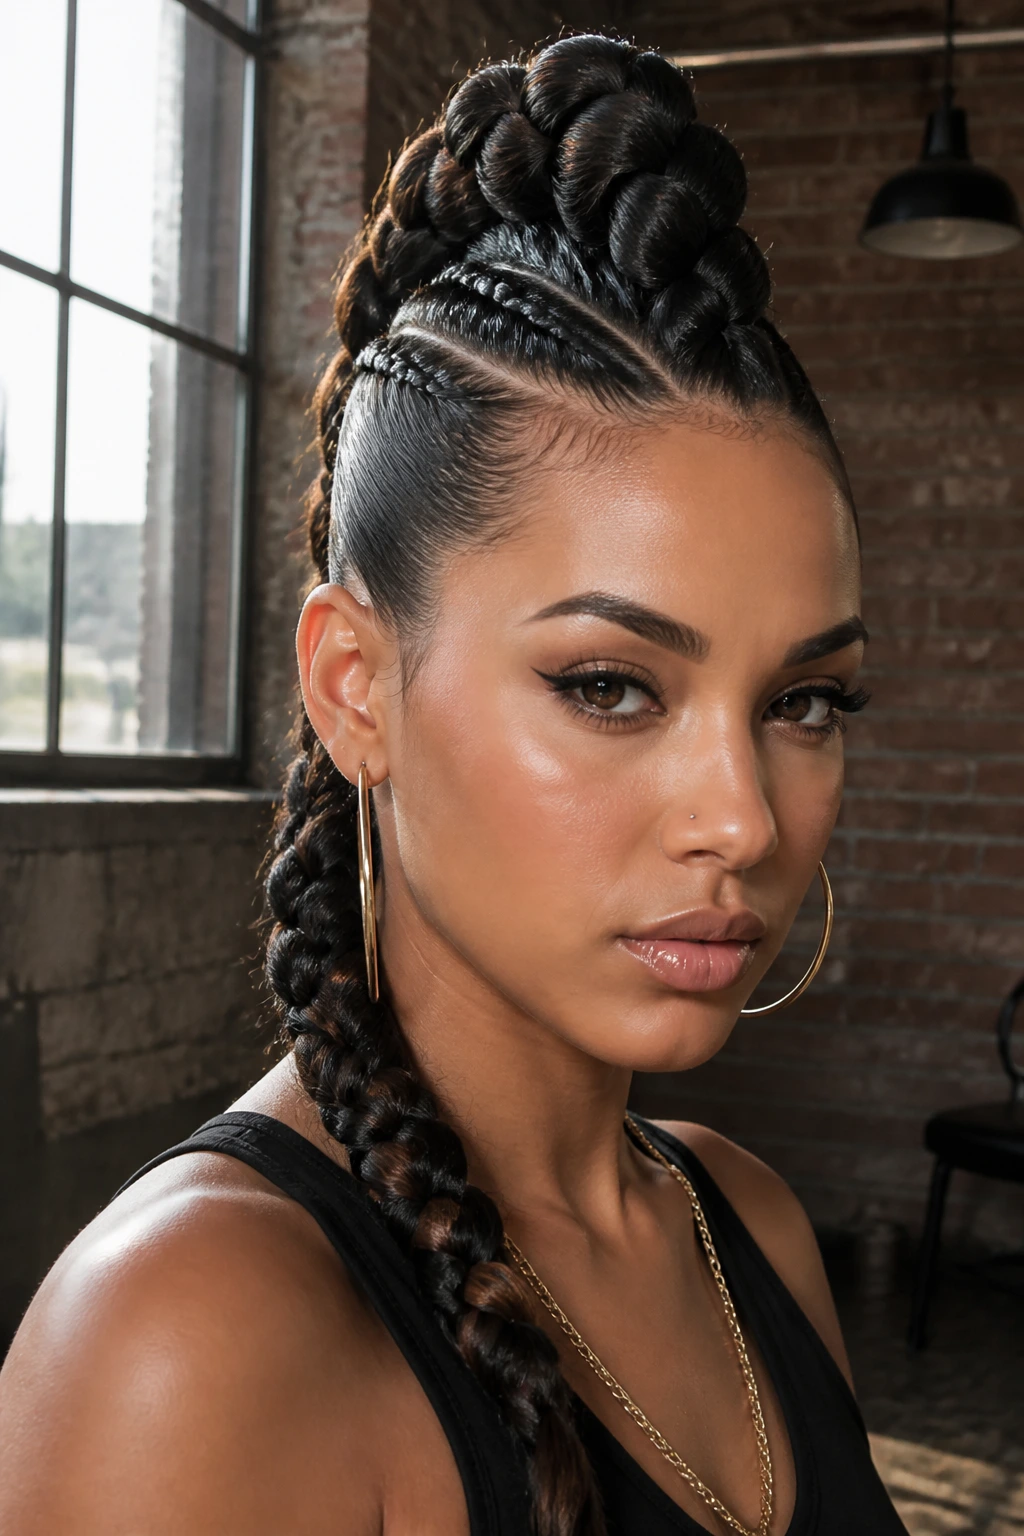
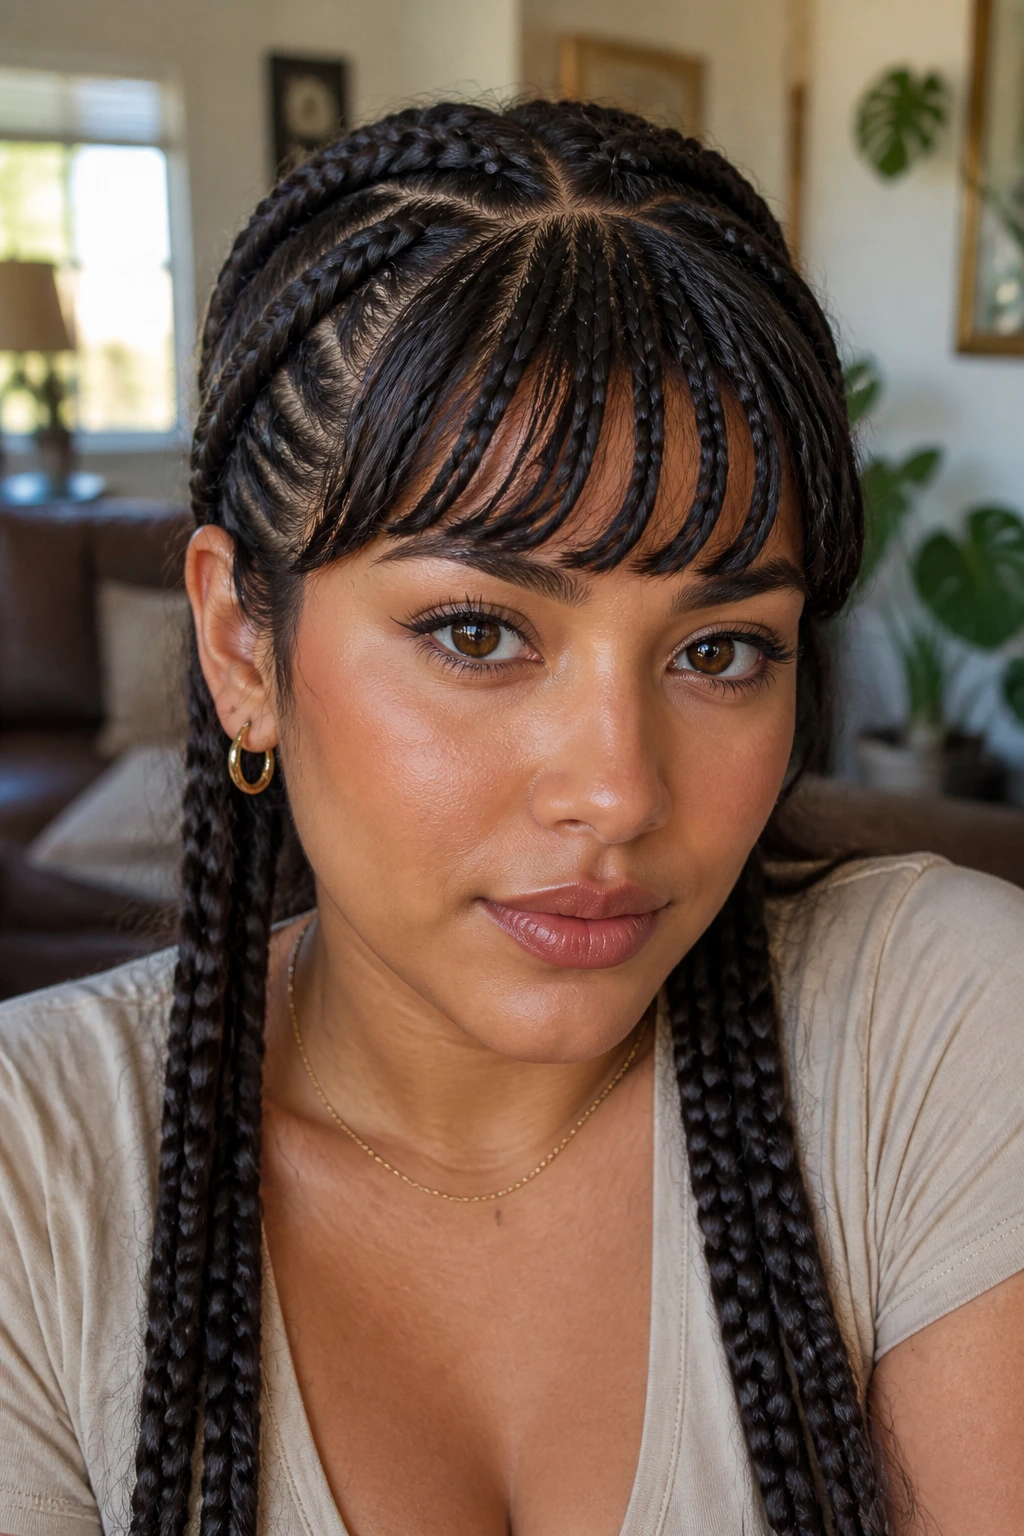
14. Criss-Cross Cornrow Style
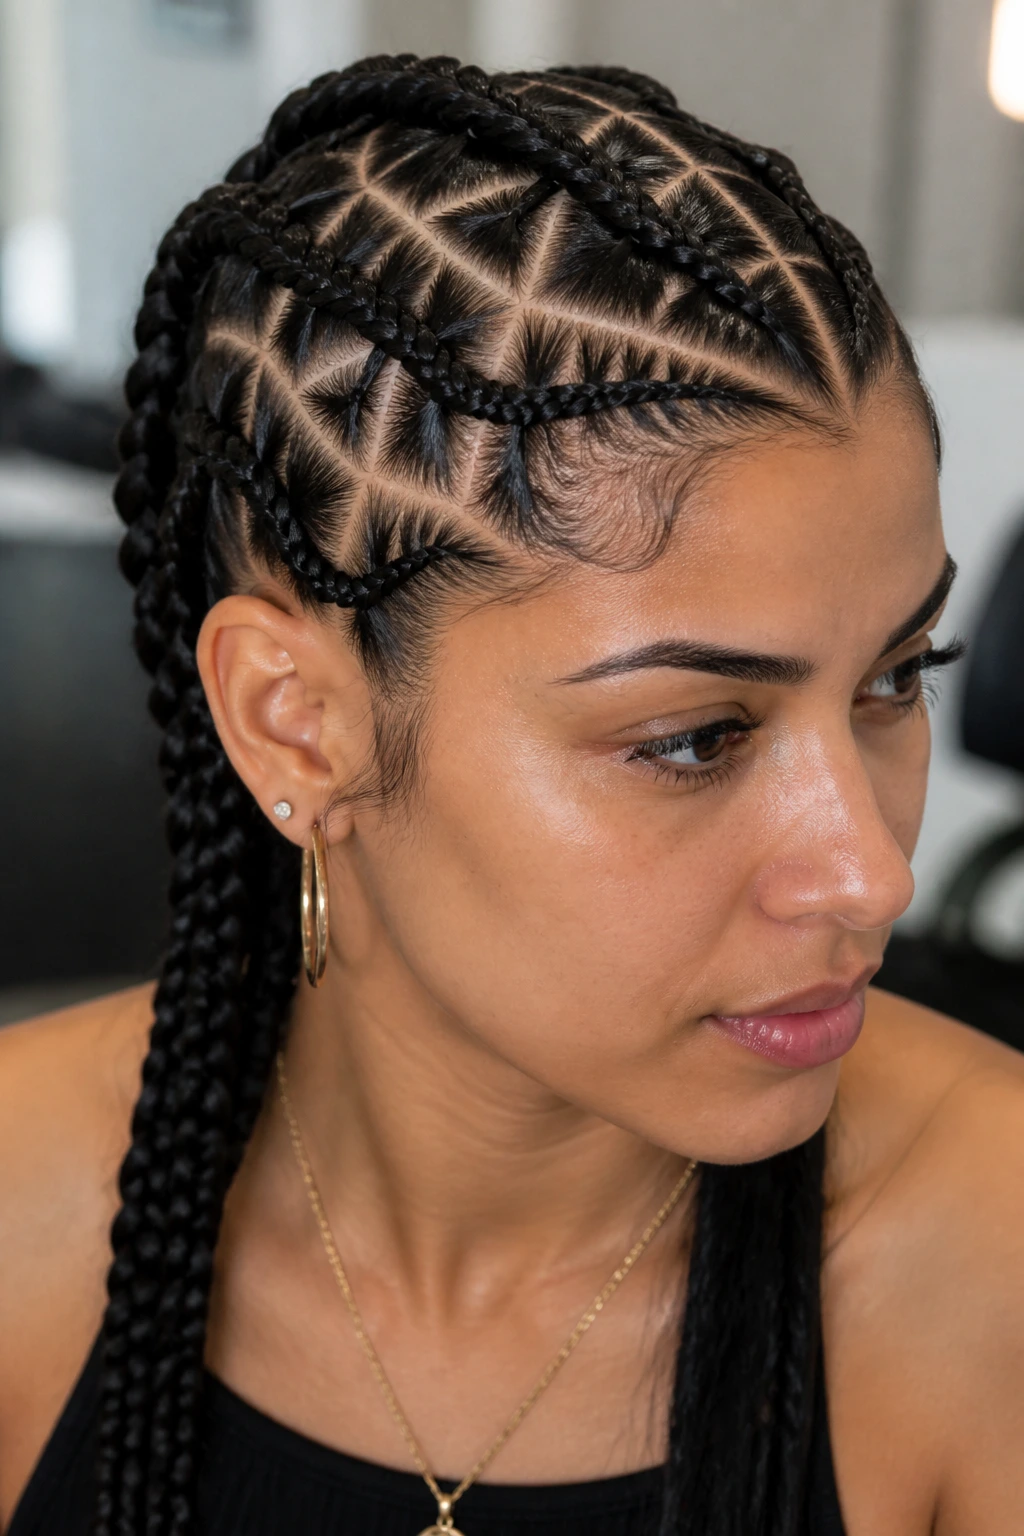
For those with thicker or coarser hair textures, cornrows provide a structured foundation that protects the strands from breakage while allowing for intricate patterns. A criss-cross pattern adds a layer of artistry to the standard straight-back style, making the hair look sculptural and deliberate.
Precision is Key
- This style is best done on slightly damp, detangled hair.
- Use a fine-tooth comb to part the hair with total precision; the patterns are the star of this show, so the parts must be sharp.
- Apply a generous amount of edge control to ensure the roots remain tight and smooth, which also helps the style last for multiple days.
Protecting the Ends
- You can either leave the ends of the braids loose or tuck them into a small bun at the base of the neck.
- If you leave them loose, consider dipping the ends in hot water to seal them and prevent fraying over time.
15. The Fishtail Side-Braid
The side fishtail is the ultimate “romantic” braid. By pulling all your hair to one side and weaving a loose fishtail, you create a look that is soft, voluminous, and elegant. It is the perfect choice for those who have a lot of hair and want to show off the length without it feeling like a burden on the back of their neck.
Managing the Weight
- If your hair is very thick, a side fishtail can become quite heavy as you reach the ends.
- Use a strong, textured hair tie at the base to ensure it stays pinned toward your shoulder rather than sliding down your back.
The “Pancaking” Effect
- Don’t be afraid to pull the fishtail wide.
- Once you reach the end, tug at each individual “V” shape in the weave.
- This creates a soft, almost cloud-like texture that makes the braid look twice as thick as it really is.
16. Half-Up Braided Crown
If you cannot decide between having your hair up or down, the half-up braided crown provides the perfect middle ground. You create two small braids from the front sections of your hair and join them at the back, leaving the rest of your hair to flow freely. This manages the hair around your face while keeping the dramatic length visible.
Framing the Face
- Start your braids right at the part to ensure you have enough coverage over the ears.
- You can opt for a Dutch braid here for more dimension or a simple three-strand braid for a more minimalist look.
Adding Waves
- Once the crown is pinned at the back, use a large-barrel curling iron to add some soft movement to the loose hair.
- The contrast between the intricate, tight crown and the loose, flowing lengths is a classic look that works for almost any event.
17. The Twisted Mohawk Braid
This style is bold, architectural, and incredibly cool. It involves taking the center section of your hair and weaving a series of braids that lead into a high-volume center, mimicking the look of a faux-hawk. It is a fantastic way to utilize the natural thickness of Latina hair, as volume is naturally built into the shape of the braid.
Working with Density
- Because this style relies on hair being pushed toward the center, you will need to section the sides of your hair and pull them tightly toward the middle.
- Use plenty of pomade or styling cream on the sides to keep them sleek and smooth against the scalp.
Styling the “Hawk”
- You can tease the hair inside the braids or use small clear bands to section the “mohawk” part, making it stand up taller and wider.
- This is a high-fashion look that pairs best with minimal jewelry, as the hair itself is the main accessory.
18. Braided Ponytail with Hidden Elastic
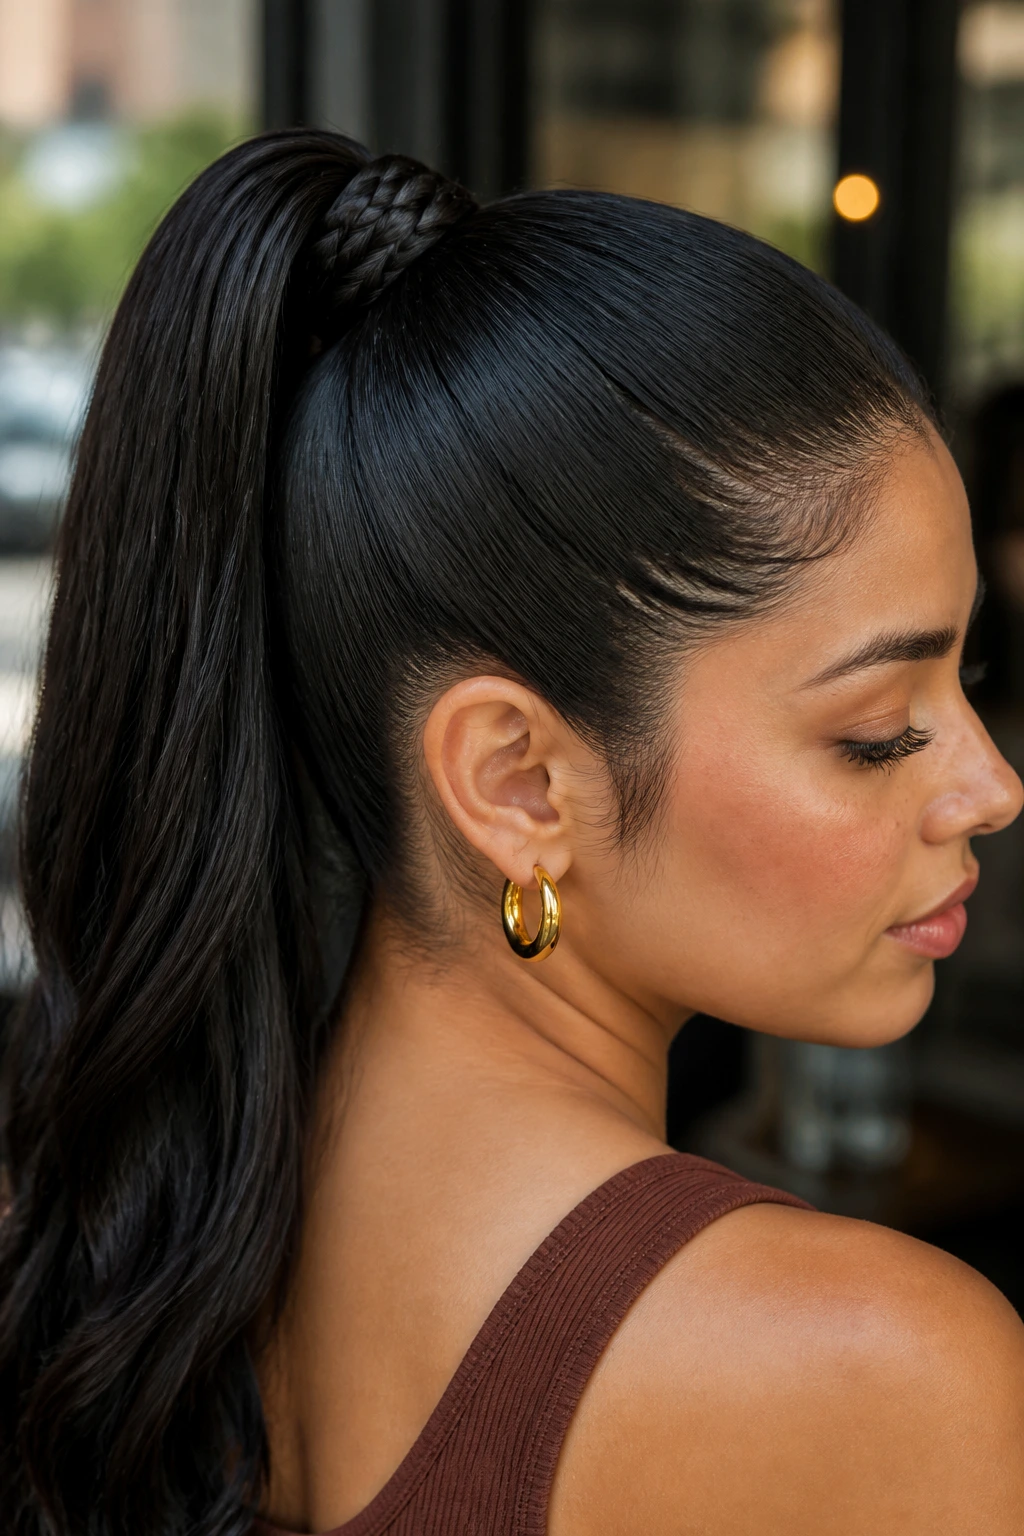
Take a standard high ponytail to the next level by braiding one section of the tail. It is a small detail that elevates the look from a basic gym style to a sophisticated, thought-out hairdo. The contrast between the smooth, sleek ponytail and the intricate texture of the braid is visually arresting.
Creating the Detail
- Wrap a small piece of hair around your main ponytail elastic first to hide it.
- Take a single strand from the ponytail and braid it all the way to the end, securing it with a tiny clear elastic.
- Leave the rest of the ponytail loose, letting the braid act as a solitary, decorative element.
Customization Options
- Add metallic charms or small beads to the braid for a bit of extra personality.
- If you have very long hair, you can wrap the braid around the base of the ponytail rather than letting it hang loose, creating a decorative “choker” effect for your hair.
19. Reverse Braid Bun
The reverse braid bun is sophisticated and unexpected. By starting the braid at the nape of the neck and working your way up to the crown, you draw the eye toward the face, highlighting your features. It is a great way to manage hair that is thick and unruly by pinning it into a controlled, polished shape at the top.
The Upward Journey
- You will need to tilt your head forward and ensure you are working from the bottom up.
- This style requires a bit of practice to ensure the braid is straight and clean, but the result is a professional, put-together aesthetic.
Finishing the Shape
- When you reach the top, gather all the hair into a bun.
- Use pins to secure the bun so that it covers the end of the braid, creating a seamless transition.
- This is a great choice for long hair that needs to be completely tucked away for the day.
20. Layered Braids for Fringes
If you have bangs or shorter face-framing layers, you might find that standard braids leave them sticking out. The layered braid approach involves incorporating those shorter pieces into the braid progressively, using a bit of styling paste to keep them tucked away.
Managing Flyaways
- Apply a light-hold cream to the bangs before starting the braid.
- As you weave, pull the shorter pieces into the main braid slowly, rather than trying to force them all in at once.
- Using a small comb can help guide those shorter strands into the weave so they don’t pop out as you move.
The Finished Look
- The result is a clean, continuous line that makes your bangs look like a purposeful part of the style.
- Once finished, a light mist of hairspray will ensure those shorter pieces don’t drift away as the day goes on.
21. Triple-Braid Low Bun
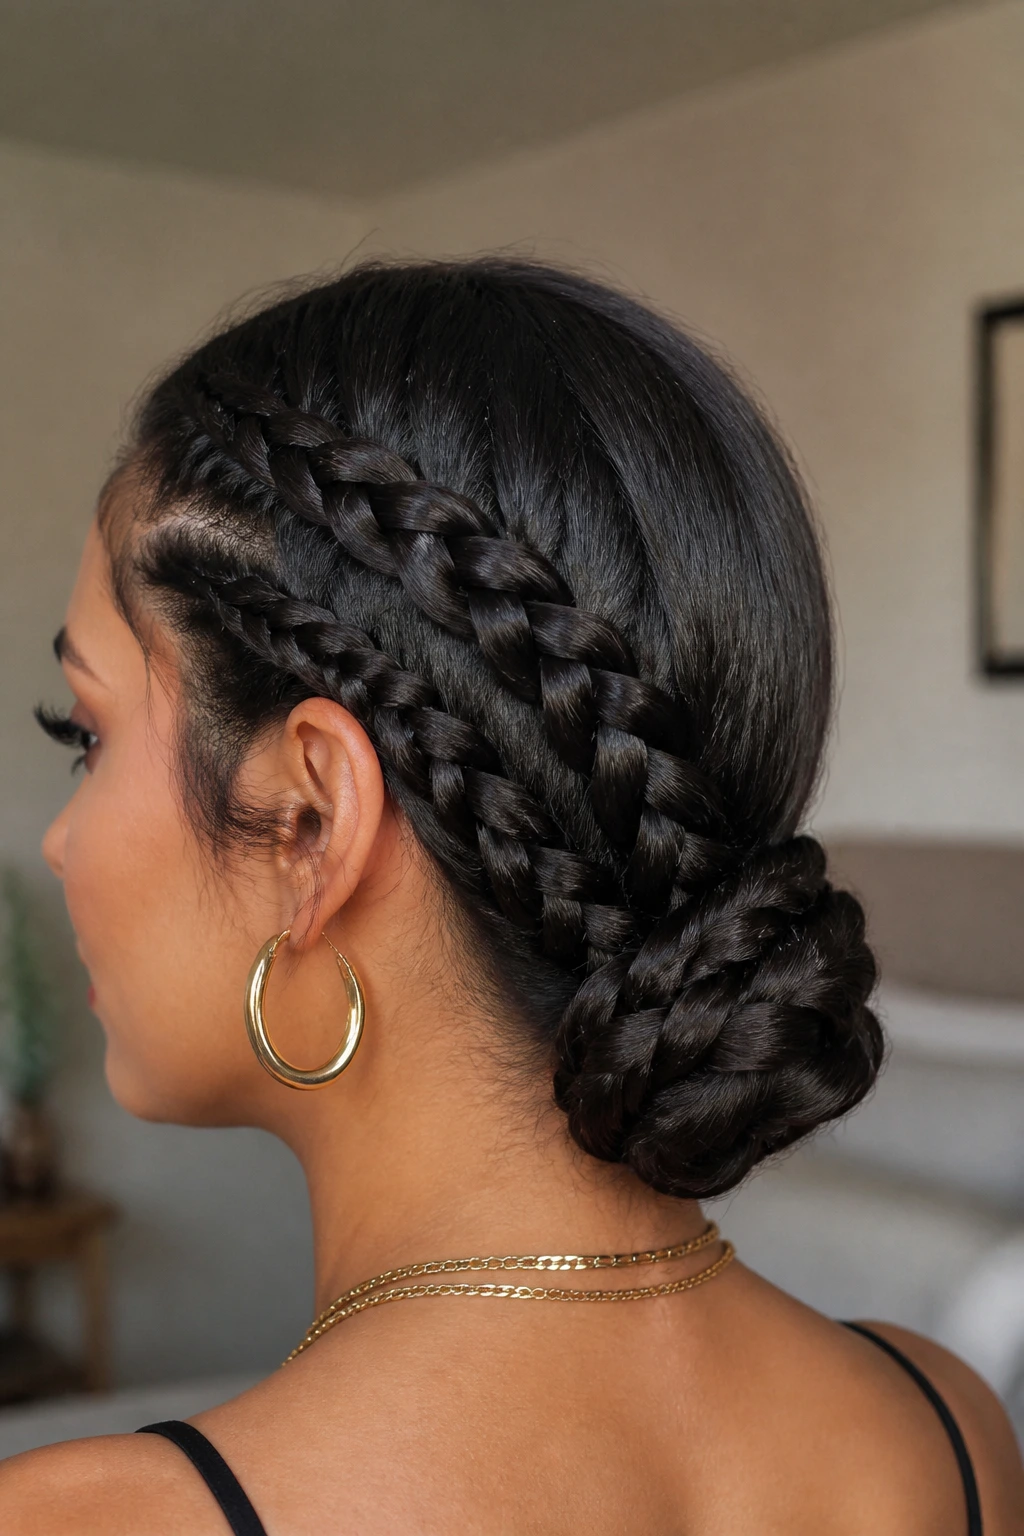
For a low-maintenance yet highly stylish option, try the triple-braid low bun. You divide your hair into three equal sections, braid each one individually, and then twist them together into a single, low bun at the nape. This creates a multi-dimensional texture that looks far more complicated than it actually is.
Building the Texture
- Make sure each of the three braids is identical in size to keep the bun balanced.
- You can twist them tightly for a clean look or pull them apart slightly before pinning for a messy, boho-chic vibe.
Securing the Style
- Because you have three braids forming one bun, you will need a few extra pins to hold the shape.
- Place the pins in the folds of the braids, rather than directly on the surface, to keep them hidden from view.
- This style is wonderful for thick hair, as the three separate braids distribute the bulk of the hair evenly, making the bun feel secure and light.
Final Thoughts
Embracing your hair’s natural texture is the first step toward mastering these looks. Latina hair is often characterized by its strength, depth, and ability to hold style, but it also demands care when it comes to tension and hydration. The key is never to overwork the roots; focus on keeping your braids smooth and consistent, and remember that “perfect” is often less interesting than “lived-in.”
Whether you choose a simple Dutch braid for a casual afternoon or an intricate fishtail updo for a formal gathering, the secret lies in the prep work. Moisture-rich products, the right elastics, and a little patience will turn any of these styles into a signature look. Your hair is an asset—treat these braids as the framework that allows that beauty to shine while keeping your strands protected and healthy for the long term.