Frizz is not an enemy to be defeated with a gallon of silicone serum; it is simply a texture that craves structure. When your hair feels like a cloud that refuses to settle, the best approach is to stop trying to force it flat and start building it into something more intentional. Tight braids are the ultimate solution for this. By securing the hair firmly at the root and weaving it into compact patterns, you lock the strands in place, effectively creating a style that looks polished from the moment you finish until the day you take it down.
Working with high-porosity or naturally curly hair that tends to expand in humidity requires a specific touch. The secret lies in the prep. You need a bit of grip to keep those flyaways from escaping the weave, which usually means using a leave-in conditioner followed by a light styling gel or cream. If your hair is prone to snapping, focusing on moisture before you even pick up a tail comb is non-negotiable. Once the foundation is set, you can explore the architecture of a tight braid, turning that uncontrollable volume into a sleek, durable masterpiece.
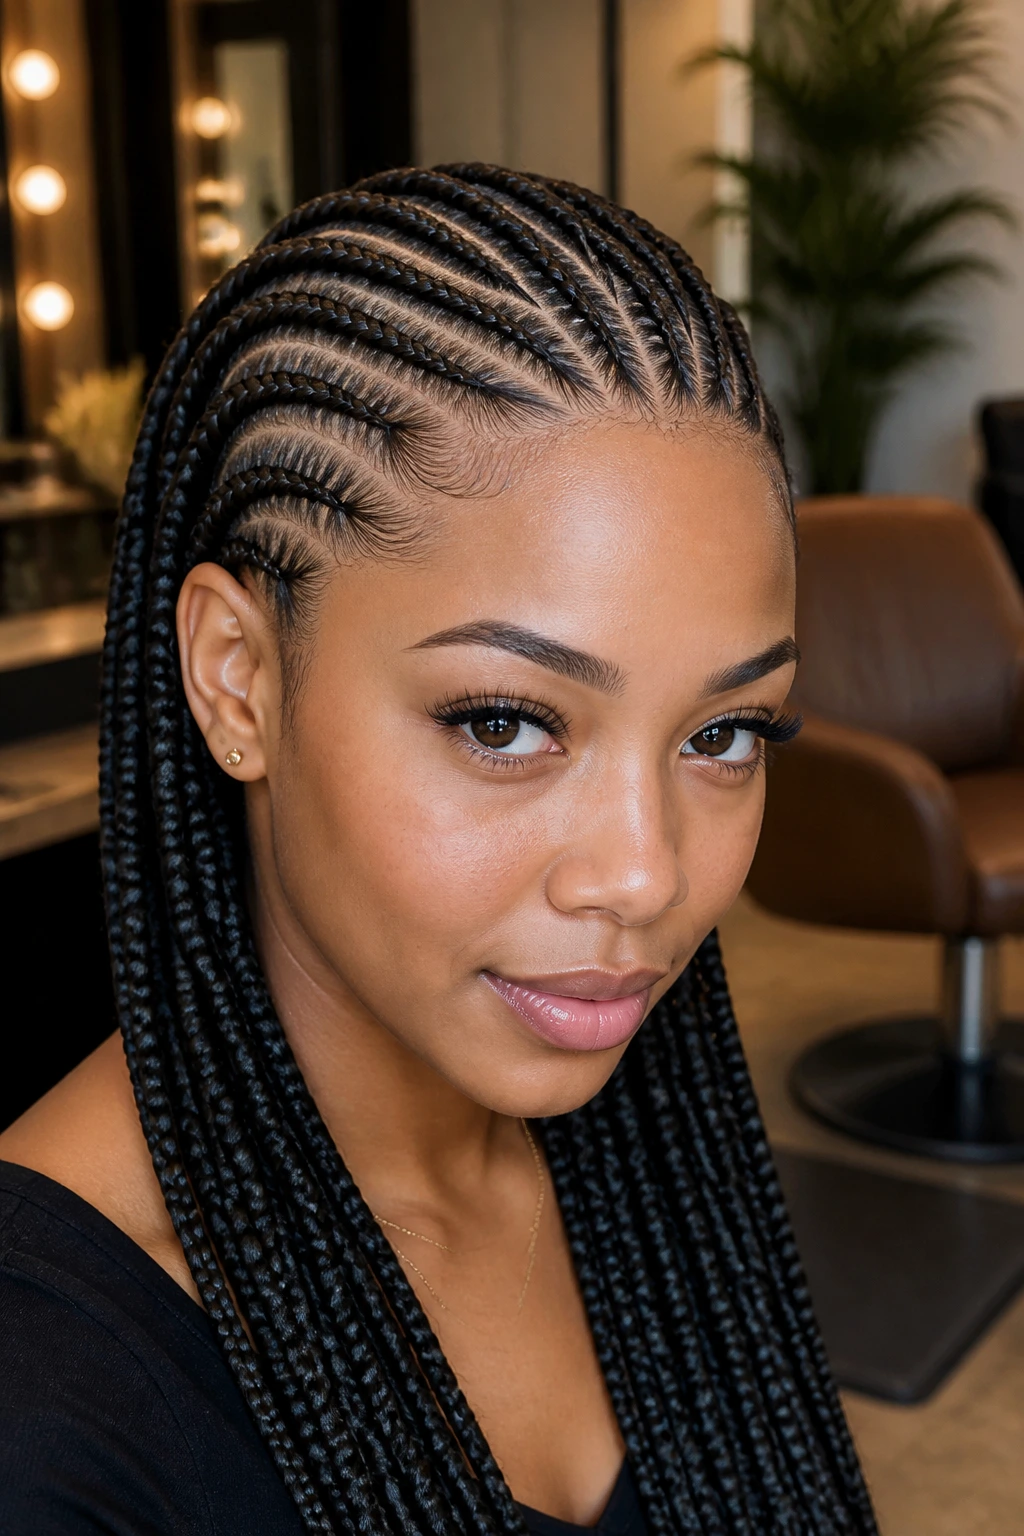
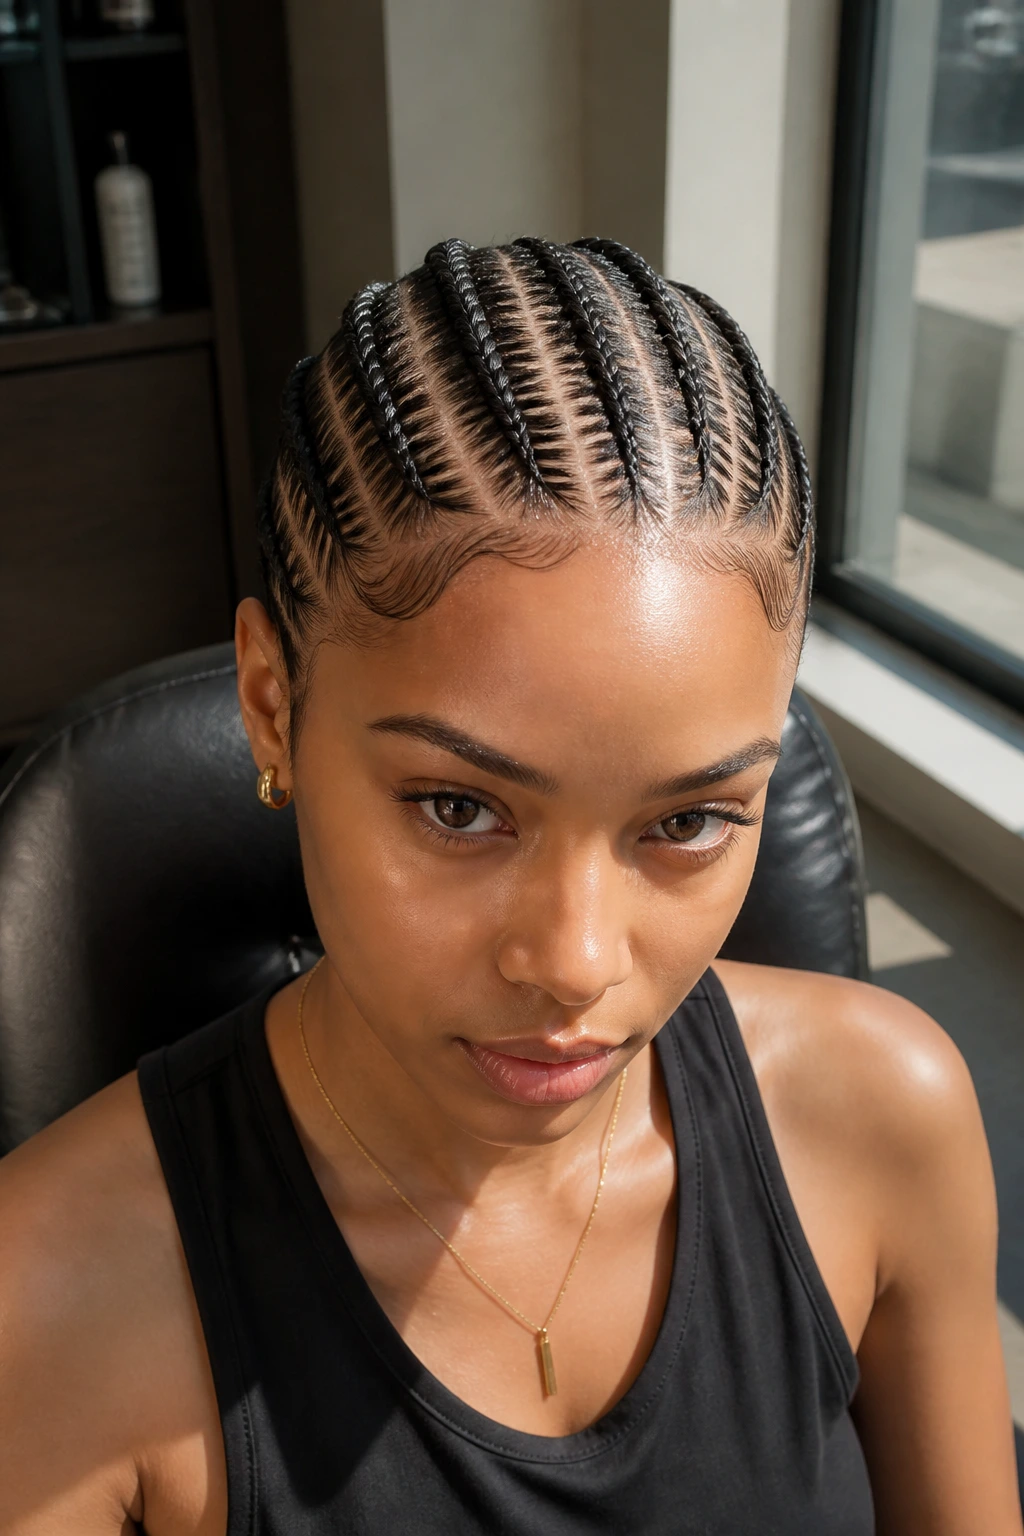
1. Traditional Three-Strand Cornrows
This is the baseline for anyone struggling with excessive frizz. By pulling the hair tight to the scalp, you force the cuticle down and prevent the hair from catching on fabrics or rubbing against pillows. I have found that starting with damp hair makes the process much cleaner, as the moisture acts as a temporary adhesive for those pesky shorter layers.
Why It Works for Texture
When you braid close to the scalp, you aren’t just styling—you are managing the hair’s physical trajectory. Each segment is locked in, leaving no room for the hair to swell outward. This style is incredibly low-maintenance and can last for weeks if you keep your edges protected at night.
Pro Technique for Longevity
Always use a rat-tail comb to ensure each part is perfectly straight. Crooked parts lead to uneven tension, and uneven tension is exactly where the frizz starts to creep back in by day two. Use a small amount of pomade on your fingertips to smooth the hair as you feed it into the braid.
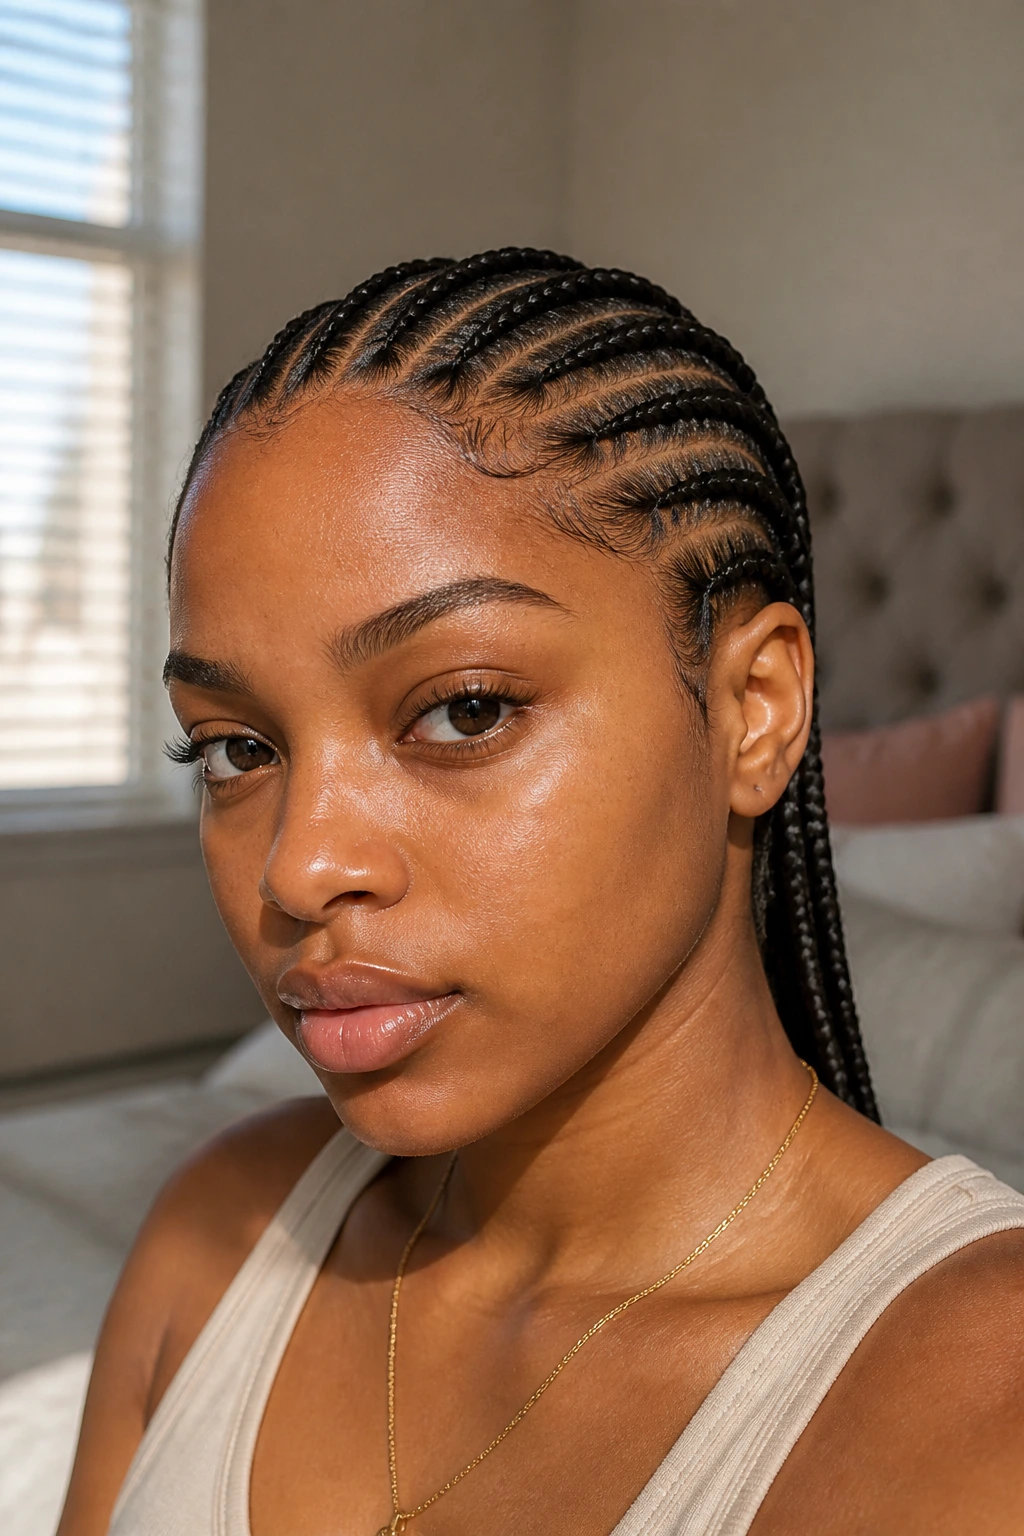
2. High-Tension Feed-In Braids
Feed-in braids are a game changer because they start small at the hairline and grow in volume as you add synthetic or human hair. This method eliminates the heavy knot at the front, which often pulls on the scalp and creates a halo of frizz around the forehead. It looks like the hair is growing directly out of your scalp with perfect definition.
The Secret to the Sleek Look
The trick to a feed-in look is the “feed” itself. You must add the extension hair in tiny, incremental pieces rather than large chunks. If you add too much hair at once, the braid becomes bulky and the natural hair underneath will eventually push through, creating a fuzzy, uneven texture that ruins the aesthetic.
How to Maintain Definition
- Keep your scalp hydrated with a light oil, but avoid heavy creams near the roots.
- Sleep with a silk or satin scarf to keep the friction away from your hairline.
- Use a foam mousse every morning to “re-set” any stray hairs that have migrated out of the braid.
3. Double Dutch Braids with Added Texture Cream

Dutch braids, or “inverted” braids, sit on top of the head like a crown. Because they are raised, they look more substantial than standard French braids. For frizzy hair, you must be generous with the product. I prefer a shea butter-based cream because it provides the weight necessary to keep the frizz from escaping the weave.
Handling the Flyaways
When you reach the back of your head, the tension usually slackens. If you feel the braid loosening, stop and re-tighten. You want the tension to remain consistent from the nape of your neck all the way to the ends. If your ends are frayed, a tiny dab of oil applied to the tail will keep them sealed.
Styling Tip for a Polished Finish
If you have bangs or shorter face-framing layers, do not try to force them into the braid if they are too short. It creates unnecessary pulling and will eventually lead to breakage. Instead, leave them out and define them with a twist, or secure them with a small, clear elastic before you start the main braid.
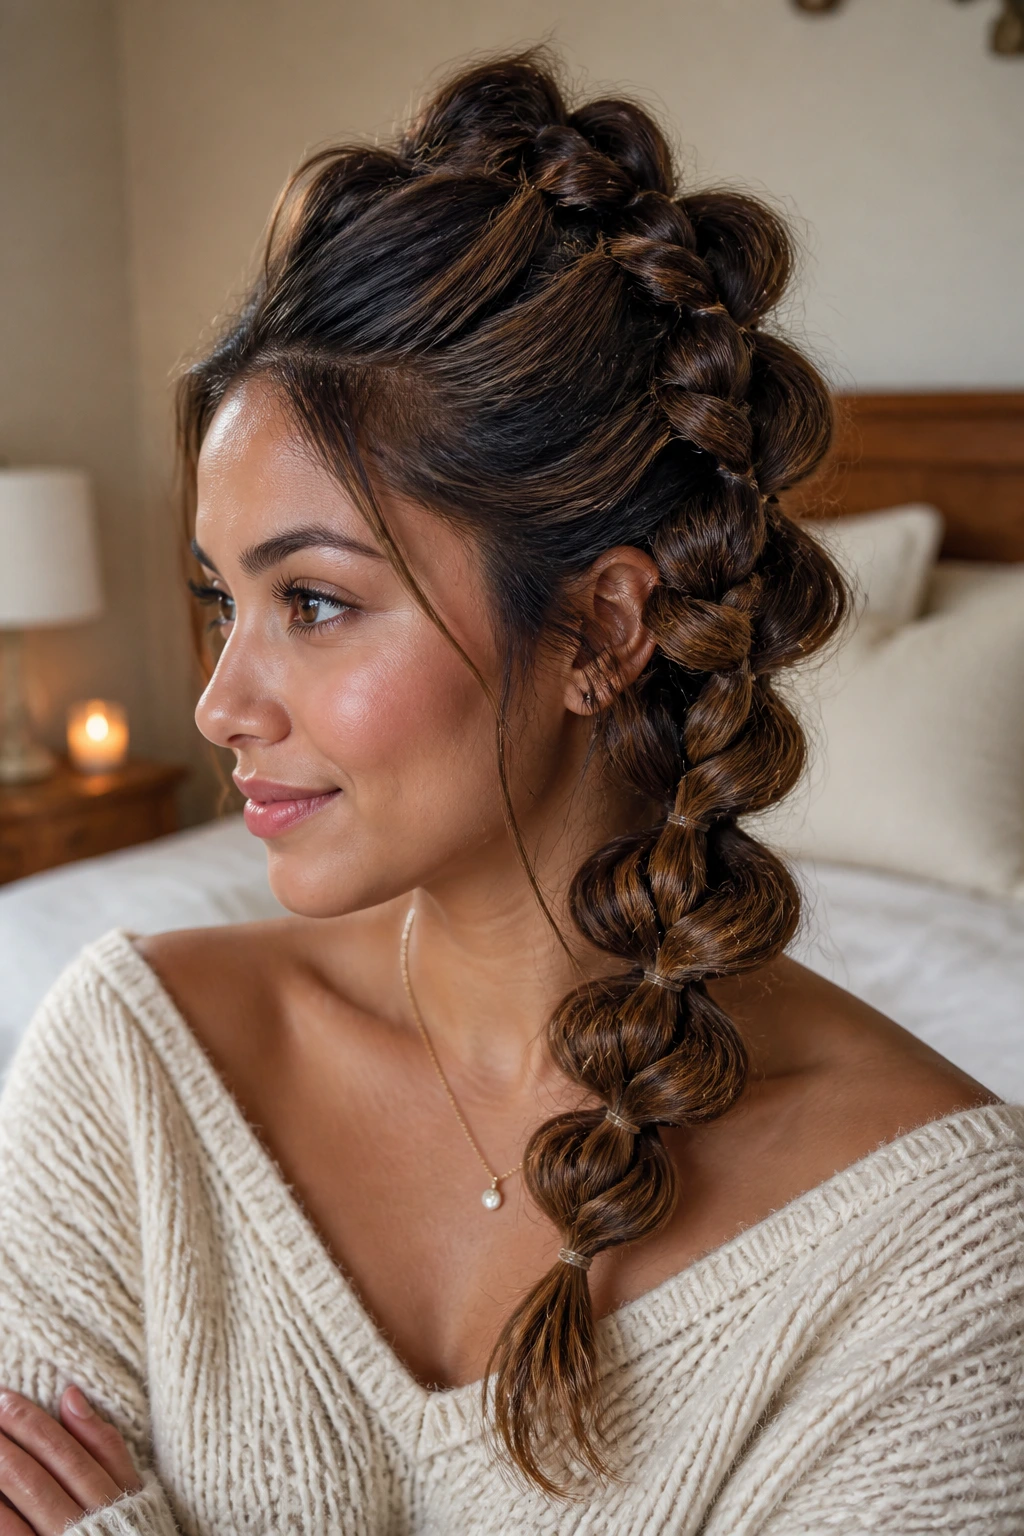
4. Tight Fishtail Plait
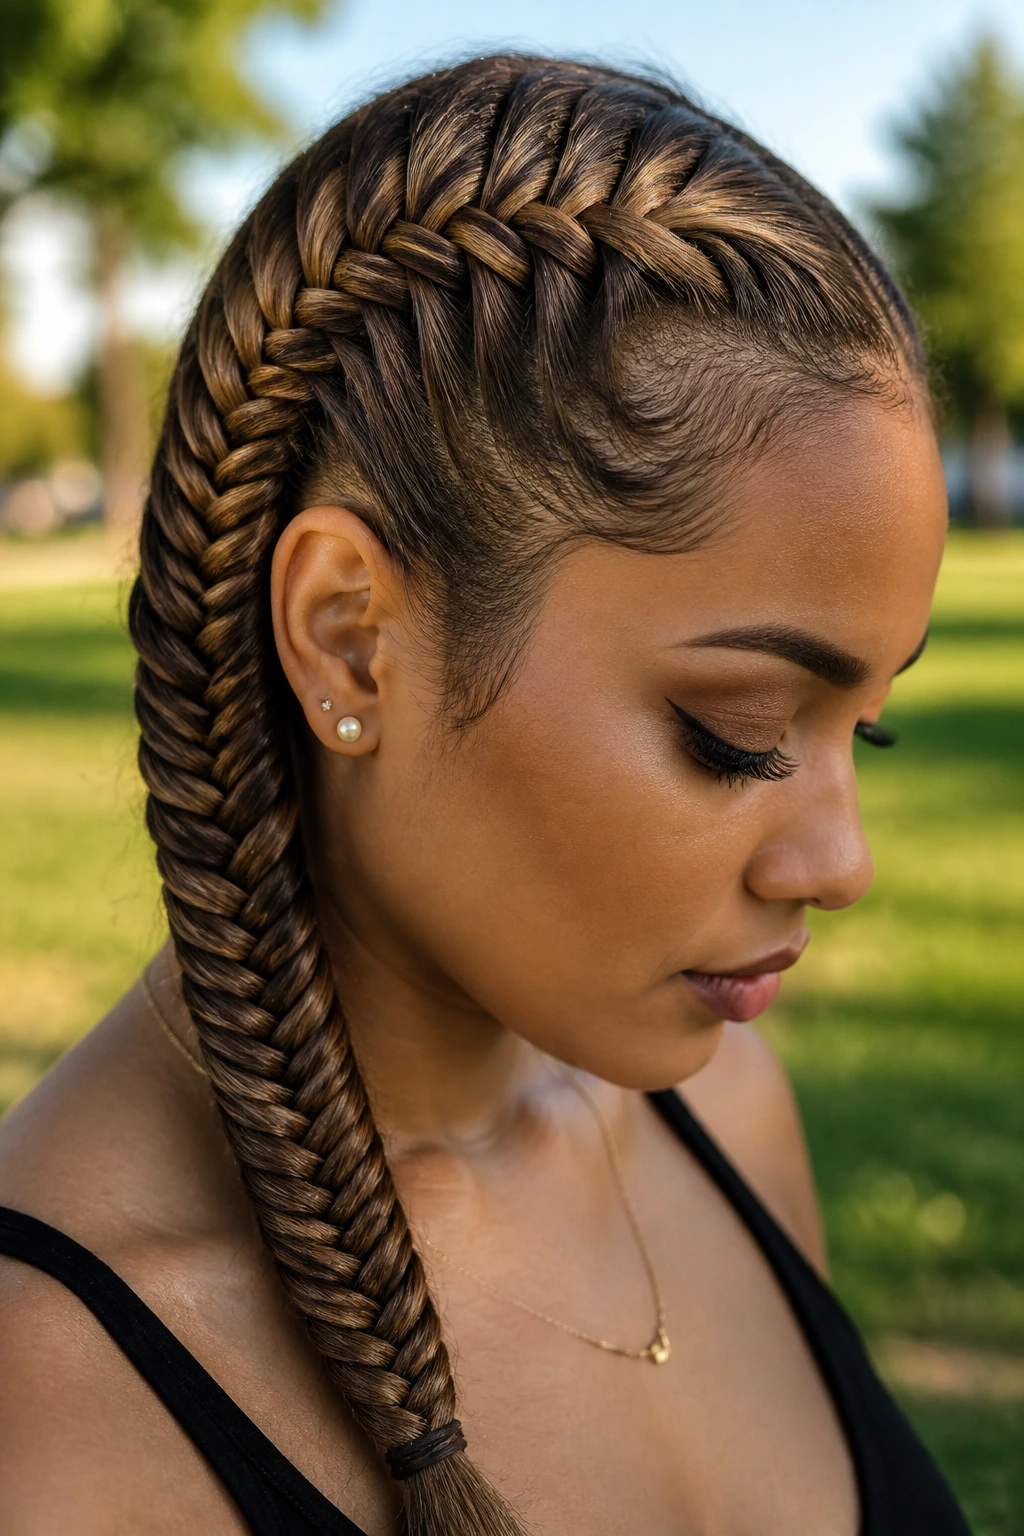
Fishtails are notoriously difficult for frizzy hair because the tiny, delicate weaves can look messy if a single strand pops out. The trick is to perform the braid very tightly. Every time you cross a strand over, pull it taut. It creates a compact, woven effect that looks almost like a rope of silk.
Achieving the “Rope” Aesthetic
The tightness is what gives the fishtail its signature look. If you leave it loose, the frizz will make the braid look like a fuzzy caterpillar. By keeping the tension high, you force the hair to lay flat against itself, creating a sleek, shimmering finish that actually highlights the health of the hair.
The Best Hair Type for This Look
This style excels on hair that has been blown out or straightened slightly. If your hair is freshly washed and very curly, the fishtail will require an immense amount of product to keep it smooth. Use a strong-hold styling wax specifically designed for braiding to keep every single strand in its designated lane.
5. Crown Braids with Reinforced Pins
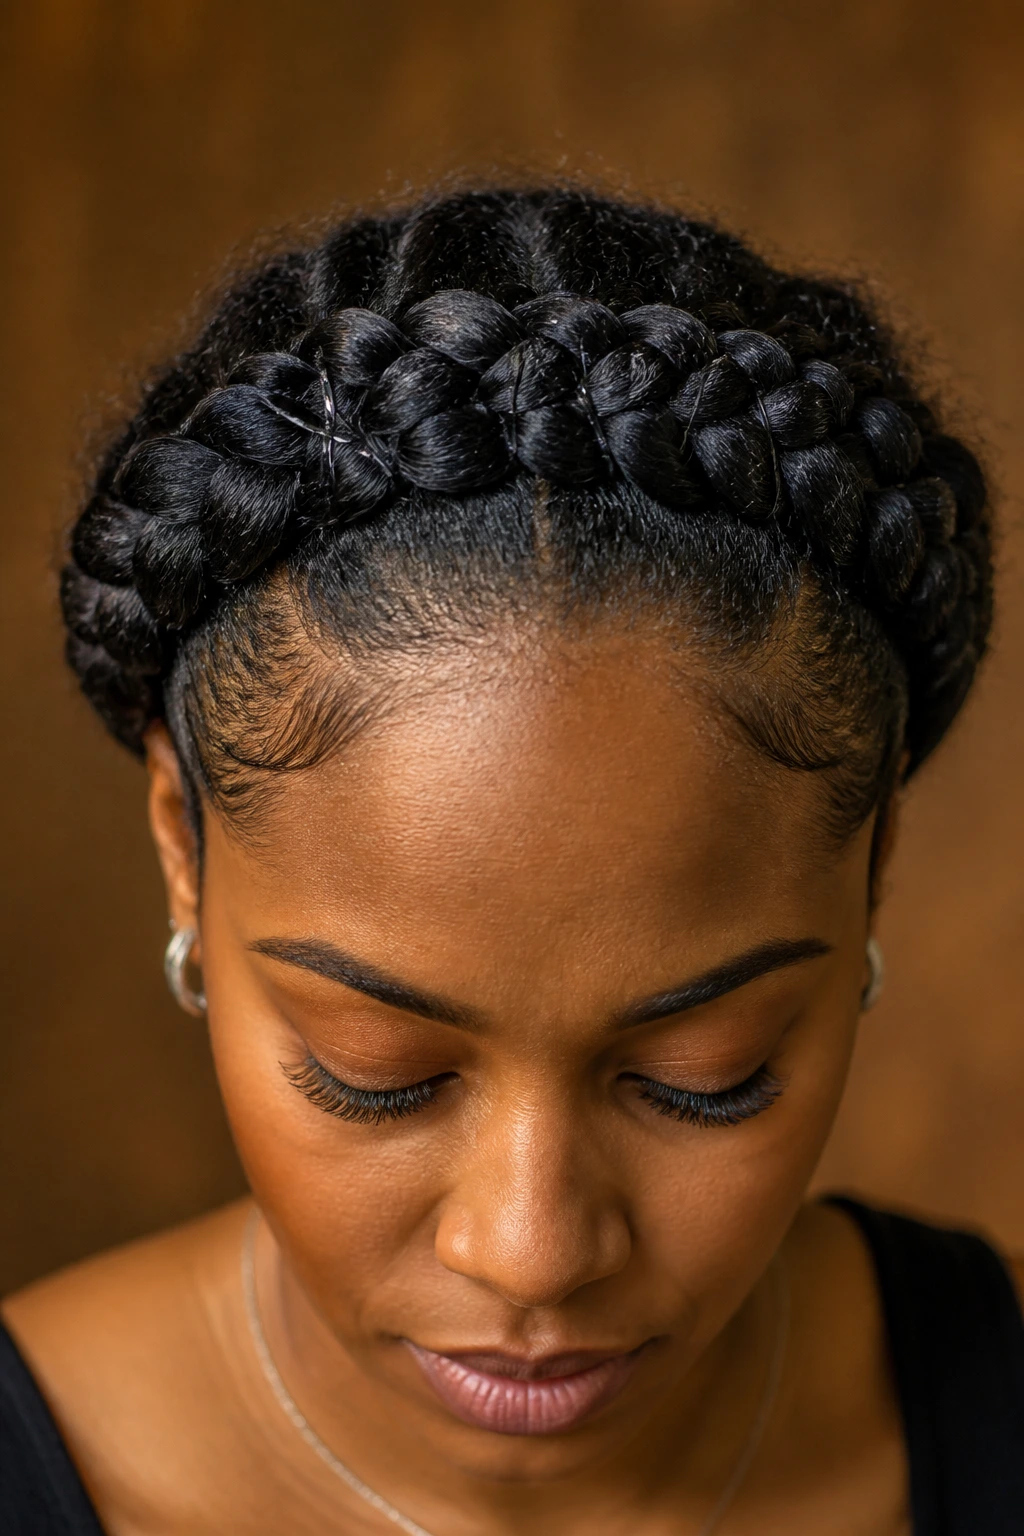
A crown braid is essentially a Dutch braid that travels in a circle around the head. It is the ultimate style for keeping hair away from the face, which is where most of us experience the most “halo” frizz. Because this style involves wrapping the braid around the skull, it requires significant pinning.
Managing the Tension
Because you are working in a circle, the hair is being pulled from multiple angles. This naturally reduces the opportunity for frizz to develop, as the hair is constantly under tension. When pinning the braid, use U-shaped hairpins rather than bobby pins. They hold more weight and are less likely to snag on your hair and cause breakage.
Why It’s a Protective Powerhouse
This is one of the best styles for hair growth. Since your ends are tucked away under the braid, they are protected from environmental damage. You can leave a crown braid in for two or three days easily, provided you cover it at night. When you take it out, you’ll have gorgeous, heat-free waves.
6. Micro-Braids with Beaded Ends
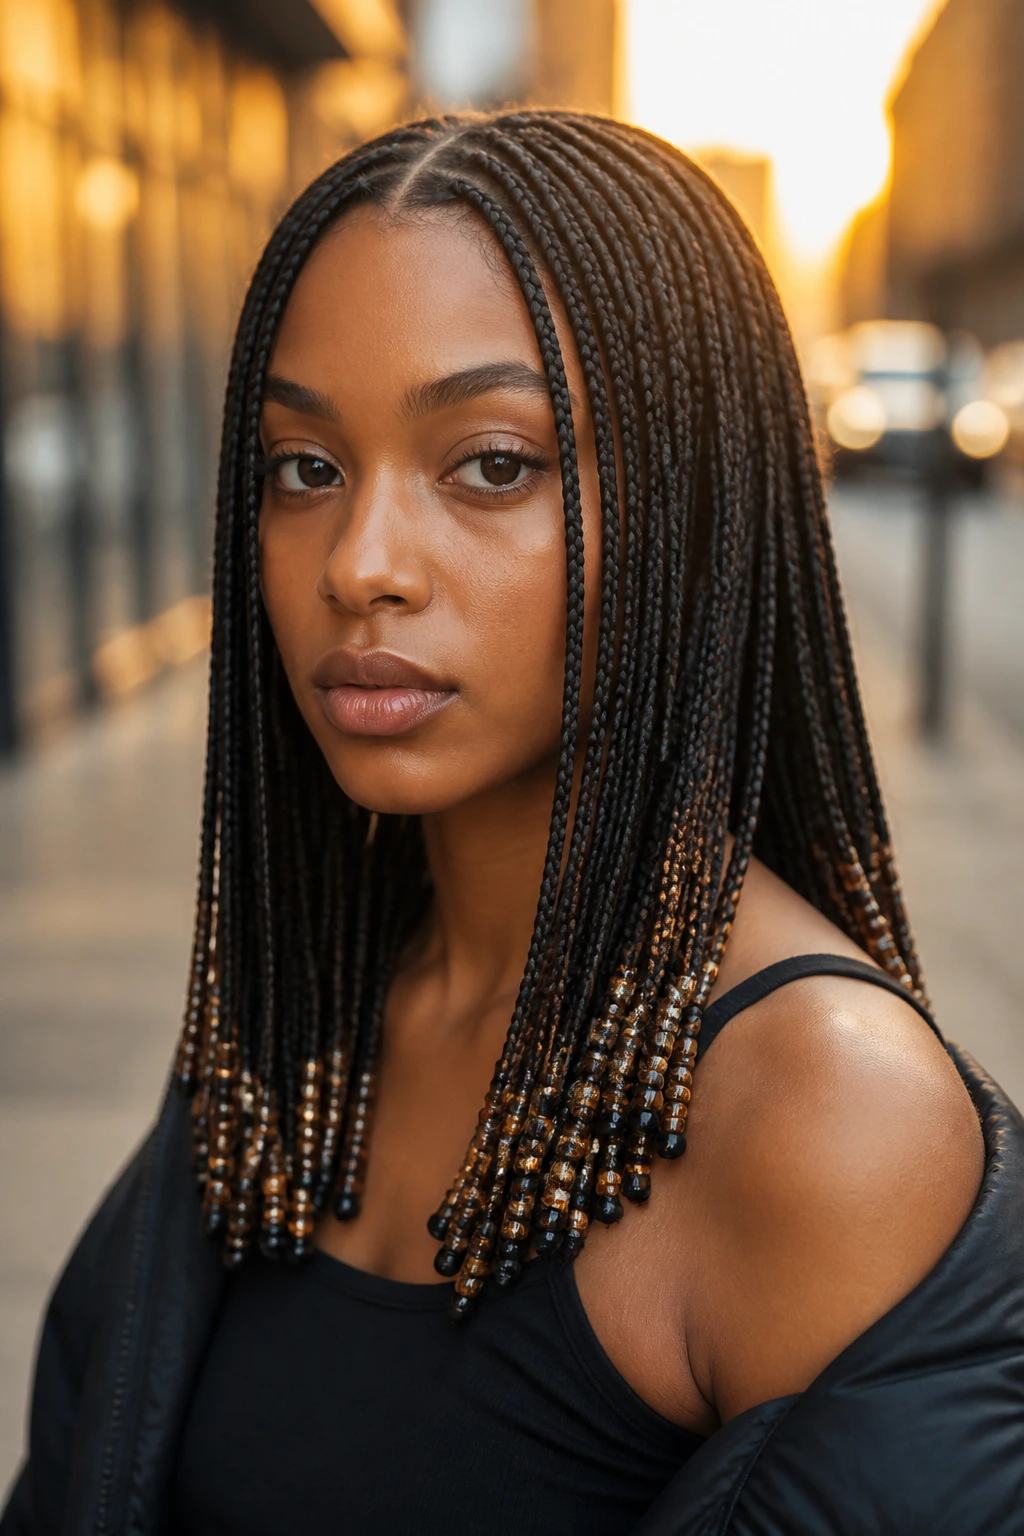
If you have a lot of time and a desire for a style that lasts, micro-braids are the answer. These tiny braids distribute the weight of your hair evenly and keep every strand contained. Adding beads to the ends is more than just a style choice; the weight of the beads helps keep the braids straight and prevents them from curling up at the bottom.
Preparing Your Hair
Micro-braids are a commitment. You must ensure your hair is thoroughly detangled before starting. Any knot left in the hair will become a permanent, frizzy lump inside the braid, which is impossible to fix once the style is completed. Take your time during the prep phase—it is the most important part of the process.
Maintenance Considerations
Because the braids are so small, you can’t really “wash” them like a normal head of hair. Use a scalp-cleansing spray or a mixture of water and apple cider vinegar to keep your scalp clean without agitating the roots. This prevents the buildup that leads to the dreaded “fuzzy” root look.
7. Chunky Pull-Through Braid
The pull-through isn’t technically a braid—it’s a series of loops held together by elastics. For frizzy hair, it is a miracle. It creates the illusion of a massive, voluminous braid without requiring the complex hand-weaving that usually drags on frizzy strands and creates friction.
Why It Minimizes Friction
Standard braiding involves weaving hair over and under, which creates friction and causes hair to lift. Pull-through braids involve using small clear elastics to “stack” sections of hair. This keeps the hair in a static state, drastically reducing the amount of frizz that develops during the styling process.
The Secret to Fullness
To make this look professional, you have to “pancake” the loops. Once you have finished the braid, gently pull the edges of each loop outward. Do this carefully. If you pull too hard, you will create loops of frizz. If you pull just right, you get a braid that looks twice as thick as your natural hair.
8. Snake Braids
Snake braids involve braiding a section of hair and then holding one strand while pushing the rest of the braid upward. It creates a wavy, zig-zag pattern that looks incredibly chic and keeps the hair very tight against the scalp. Because it uses a base braid to anchor the design, the hair stays put.
Sculpting the Pattern
You can create a single snake braid or several running parallel to each other. The tighter you weave the initial braid, the more defined the “snake” pattern will be. This style is perfect for those who want a dramatic look without needing extensions, as it relies on the natural movement of your own hair.
Keeping the Edges Sleek
Use a firm-hold edge control gel to lay your hairline before you begin. The contrast between the intricate, tight snake pattern on the head and the perfectly smoothed edges creates a high-fashion look that is very effective at hiding frizz.
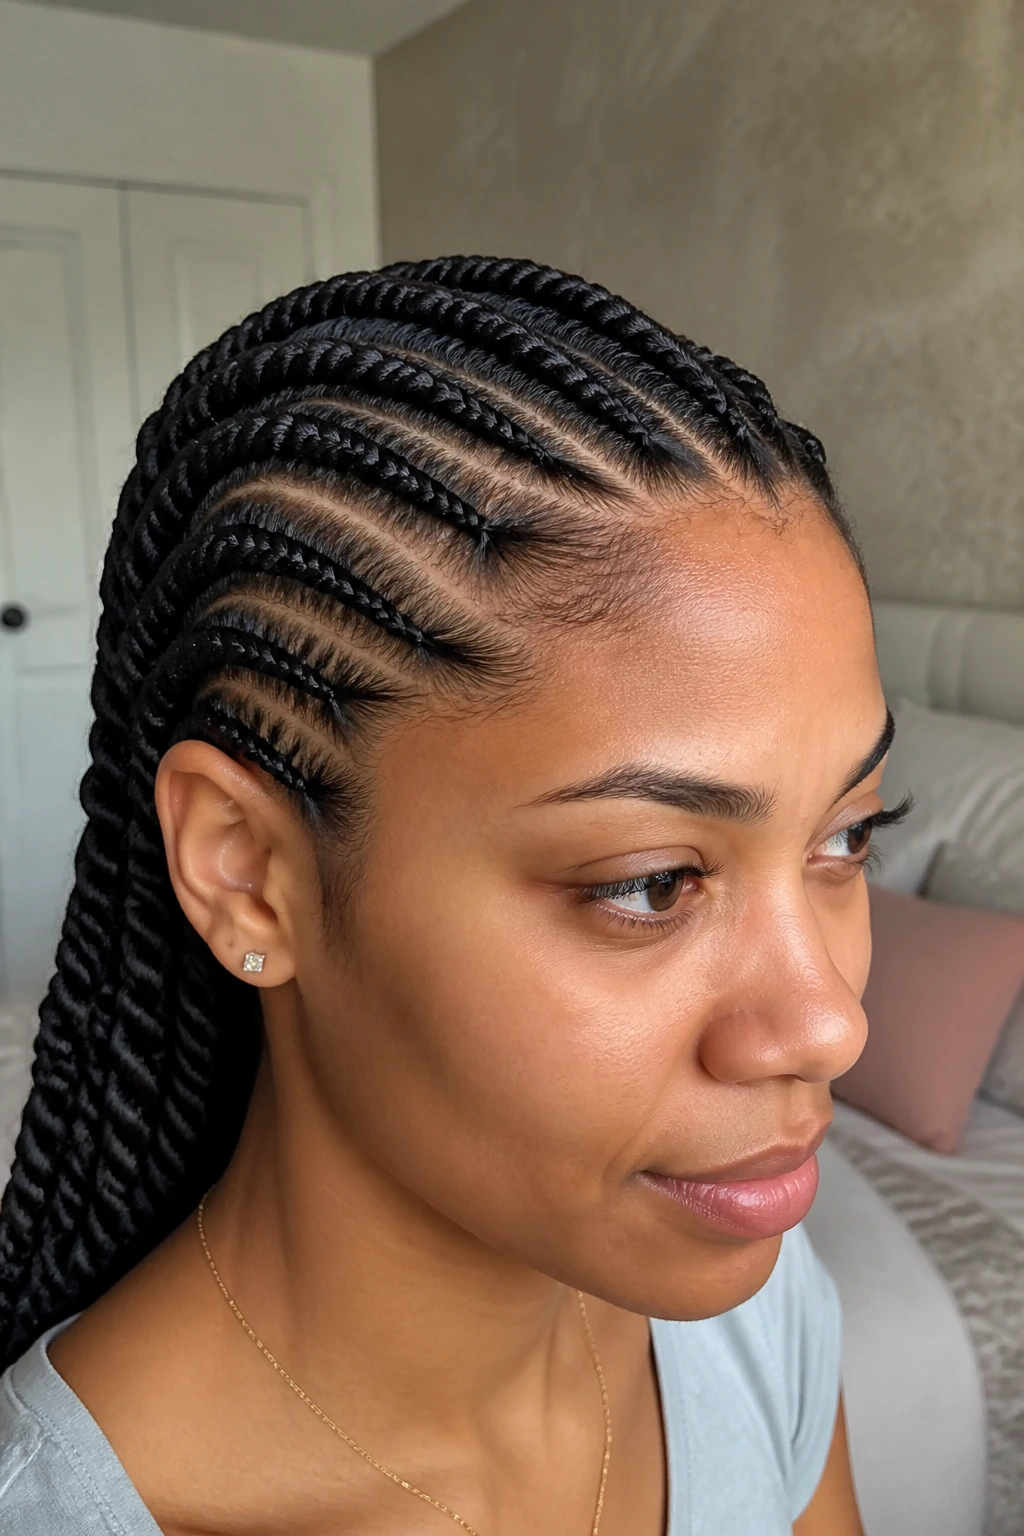
9. Rope Twists
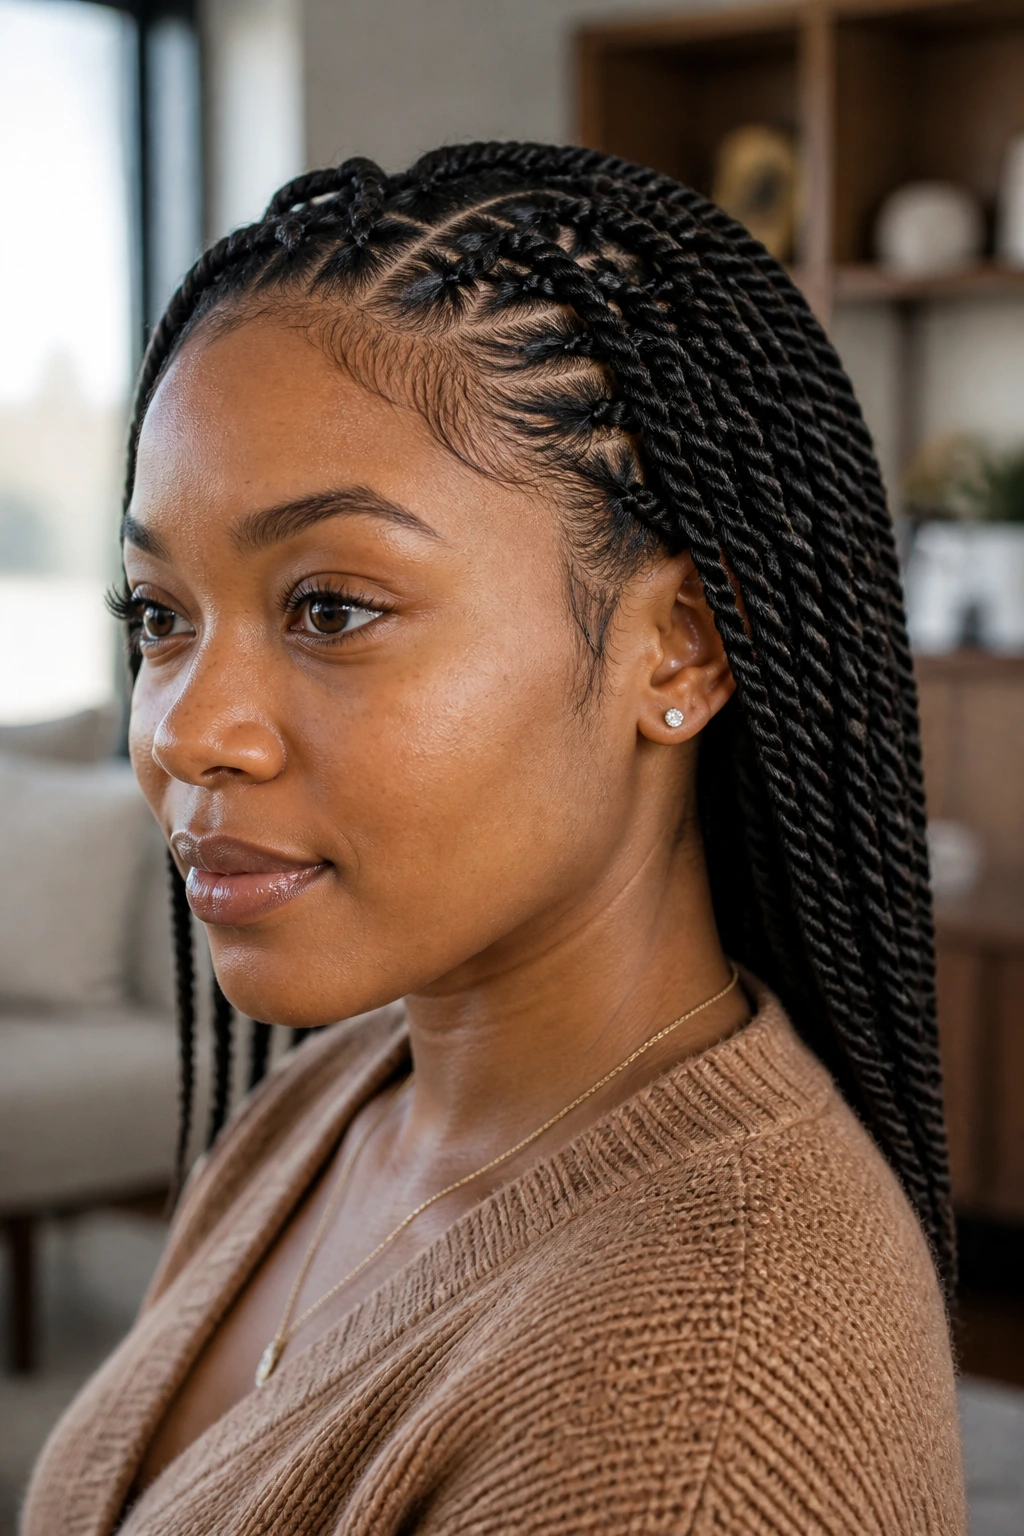
Sometimes called “two-strand twists,” these are easier to execute than complex braids but offer the same anti-frizz benefits. By twisting two sections of hair around each other in the same direction, you create a tight, rope-like structure that resists expanding even in high humidity.
The Importance of Direction
You must twist both strands individually in the same direction before you wrap them around each other. This counter-tension is what keeps the twist from unraveling. If you don’t twist the strands tightly enough, the hair will naturally try to spring back, resulting in a fuzzy, untidy look.
Styling for Maximum Hold
A medium-hold gel is your best friend here. Apply it from root to tip. As you twist, smooth the hair down firmly. If you see a stray hair popping out, don’t ignore it—stop and tuck it back into the twist immediately. Once a twist is set, it is very hard to fix without redoing the whole thing.
10. Mohawk Braids

A faux-hawk is achieved by braiding the sides of the head toward the center, creating a high, tight ridge of hair. By cornrowing the sides tightly, you remove the hair that usually creates the most frizz—the hair around the ears and neck—and focus all the volume in the center.
Creating the Illusion
You can braid the center into a single, thick French braid or several smaller ones. The key to the Mohawk is the tension on the sides. You want the side braids to be so tight that they pull the skin slightly. This “stretched” look is what keeps the hair looking sleek and professional rather than messy.
Occasion-Ready Styling
This is a bold, edgy style that works as well for a formal event as it does for the gym. Because the hair is braided so close to the skull, it is extremely durable. You can wrap it in a silk scarf at night, and it will look almost exactly the same the next morning.
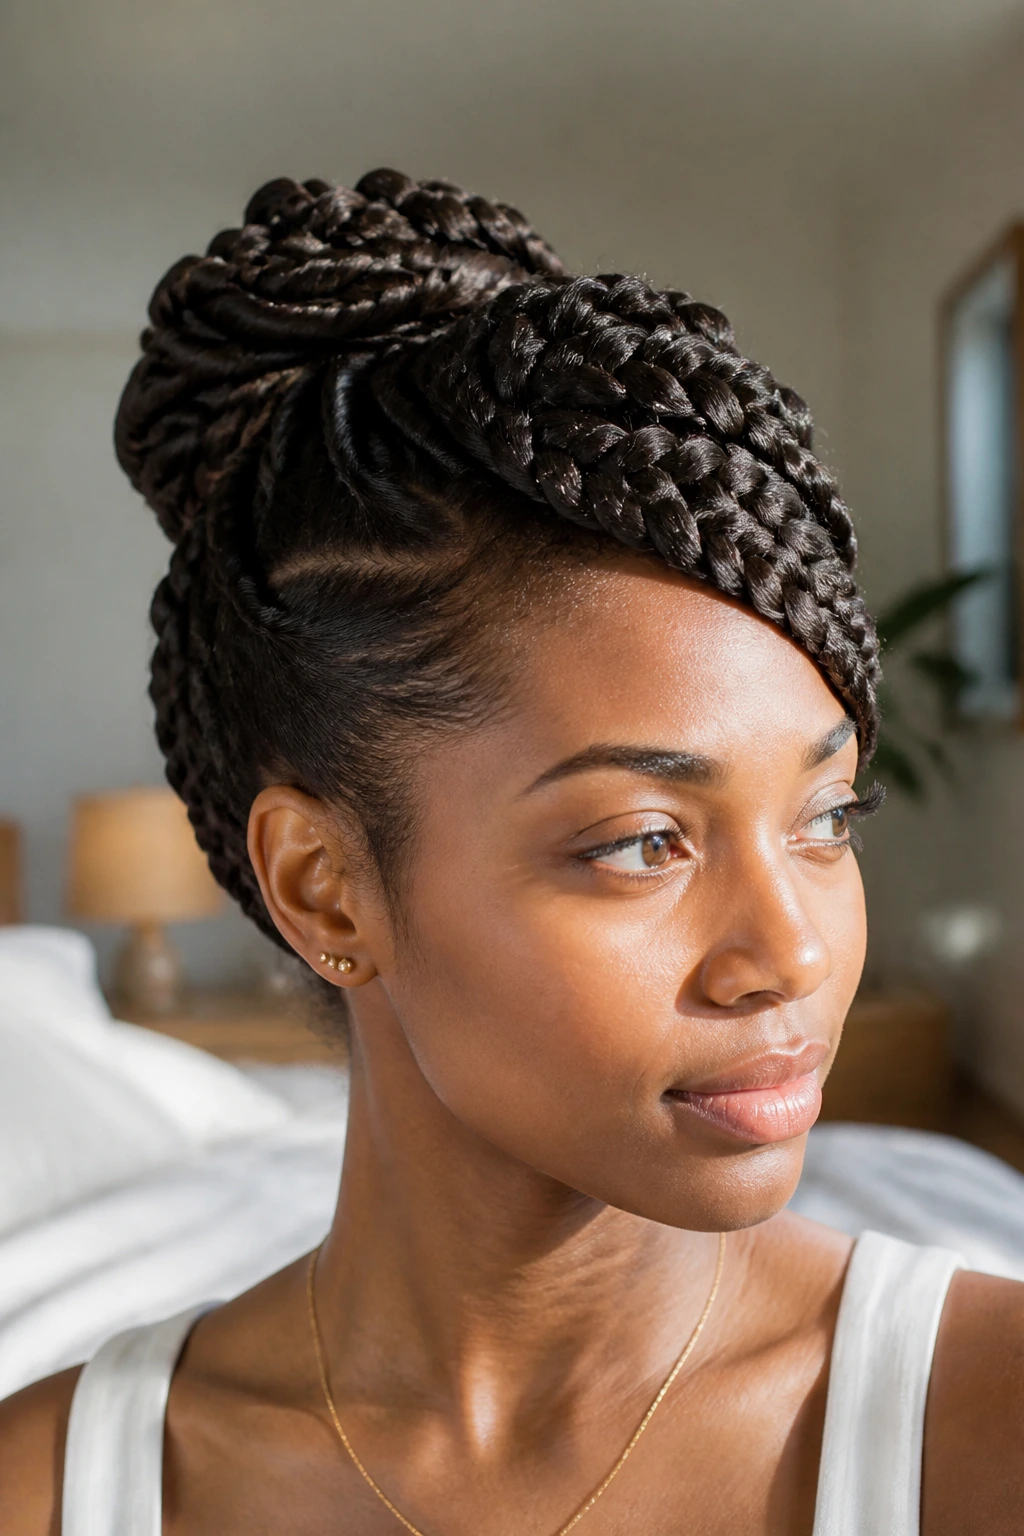
11. Goddess Braids
Goddess braids are essentially large, thick cornrows. They are faster to install than micro-braids and offer a more dramatic, regal appearance. For frizzy hair, they are ideal because you use a lot of product to slick the hair back before braiding, creating a glass-like finish.
Why Thickness Matters
Thick braids cover more surface area with less manipulation. Every time you manipulate your hair, you create potential for frizz. By opting for larger braids, you reduce the number of movements you make with your hands, keeping the hair smooth and undisturbed throughout the duration of the style.
Adding Hair for Sleekness
Even if you don’t need the length, adding a small amount of extension hair to the braid can help seal the frizz. The synthetic hair acts as a protective layer, shielding your natural strands from friction. It is a common professional trick for achieving that “perfect” look.
12. Lace-Front Braids

This style focuses on the hairline. By creating small, intricate braids that follow the curve of the forehead, you create a natural-looking “headband” of hair. This style is designed specifically to handle the most problematic, frizz-prone areas of the head.
The Art of the Part
The parting needs to be surgical. Any stray hair that crosses into the braid’s section will create a bump. Take your time with the parting—use a magnifying mirror if you have to. Once the part is clean, the braiding process becomes much more straightforward.
Maintenance Tips
- Use a light-hold spray instead of a heavy gel if you are prone to flaking.
- Avoid tight elastics that cause tension headaches.
- If you notice frizz developing, use a small mascara wand dipped in hairspray to brush the flyaways down.
13. Box Braids with Sealed Ends
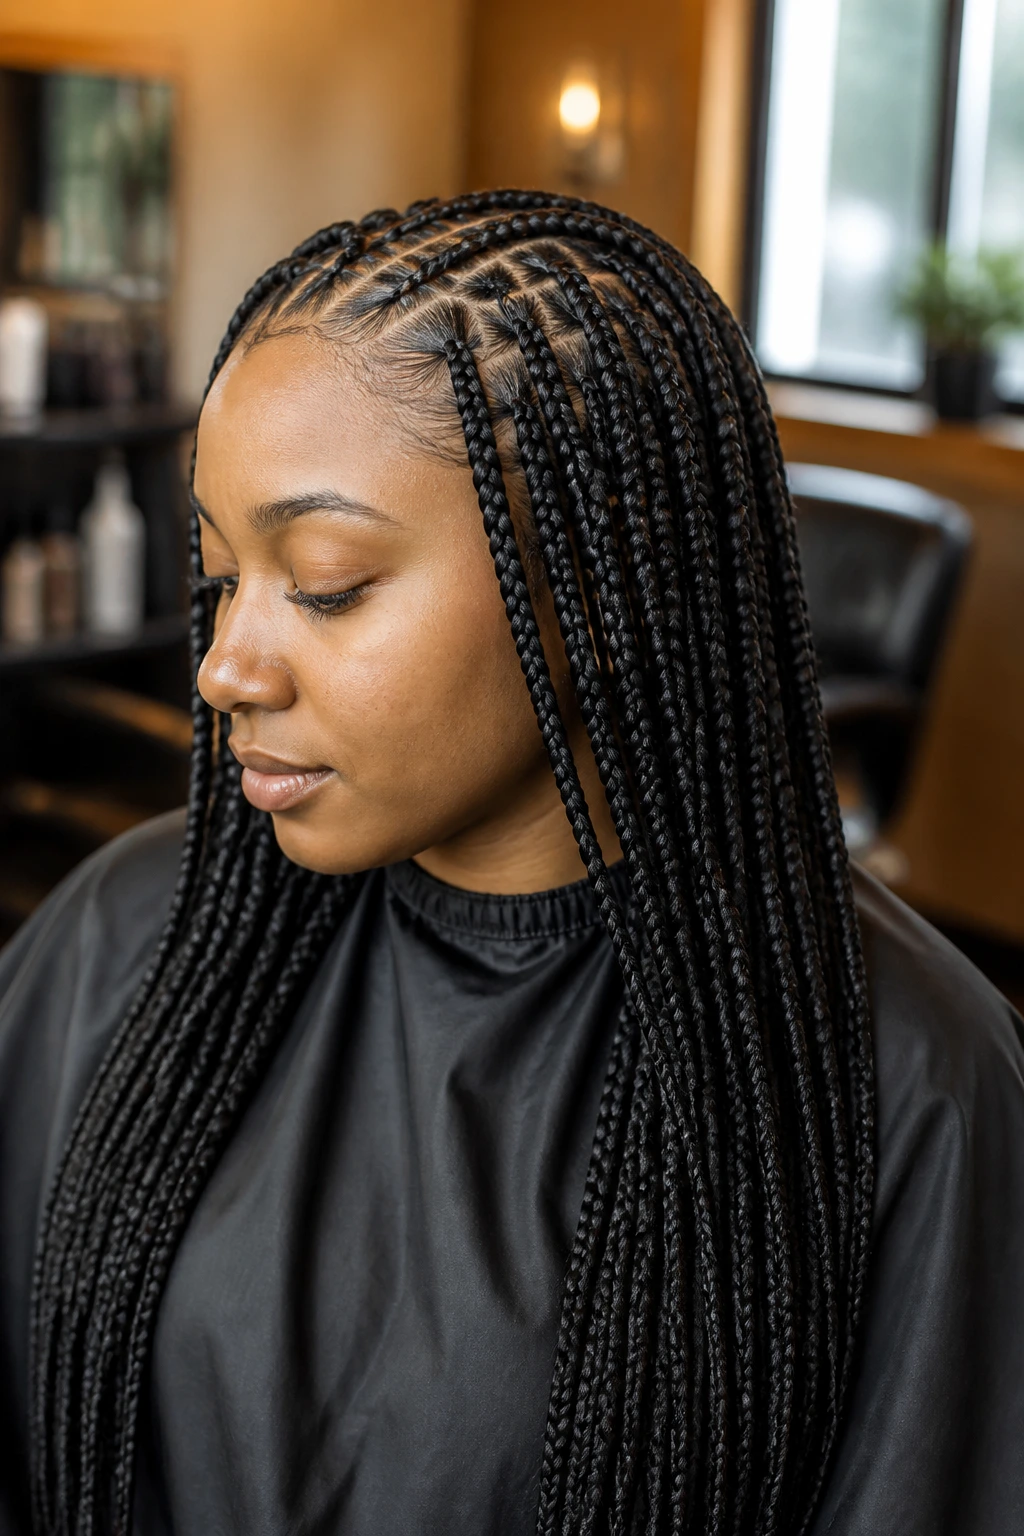
Box braids are the classic protective style for a reason. By dividing the hair into precise squares, you ensure that every strand of hair is contained. The tightness of the braid, especially when finished with a hot water seal, prevents frizz from ever having a chance to form.
The Sealing Technique
The hot water seal is what gives box braids their polished, professional look. Once you finish braiding, dip the ends into boiling water for exactly ten seconds. Be extremely careful. This shrinks the synthetic hair, tightening the ends and preventing them from unraveling or turning into a frizzy mess.
How to Prevent Root Frizz
The biggest mistake people make with box braids is leaving the roots too loose. When you braid, make sure you are gripping the hair firmly at the root. If you feel the braid sagging, you haven’t started tight enough. A tight root is the secret to a braid that lasts for weeks without getting fuzzy.
14. Criss-Cross Cornrows
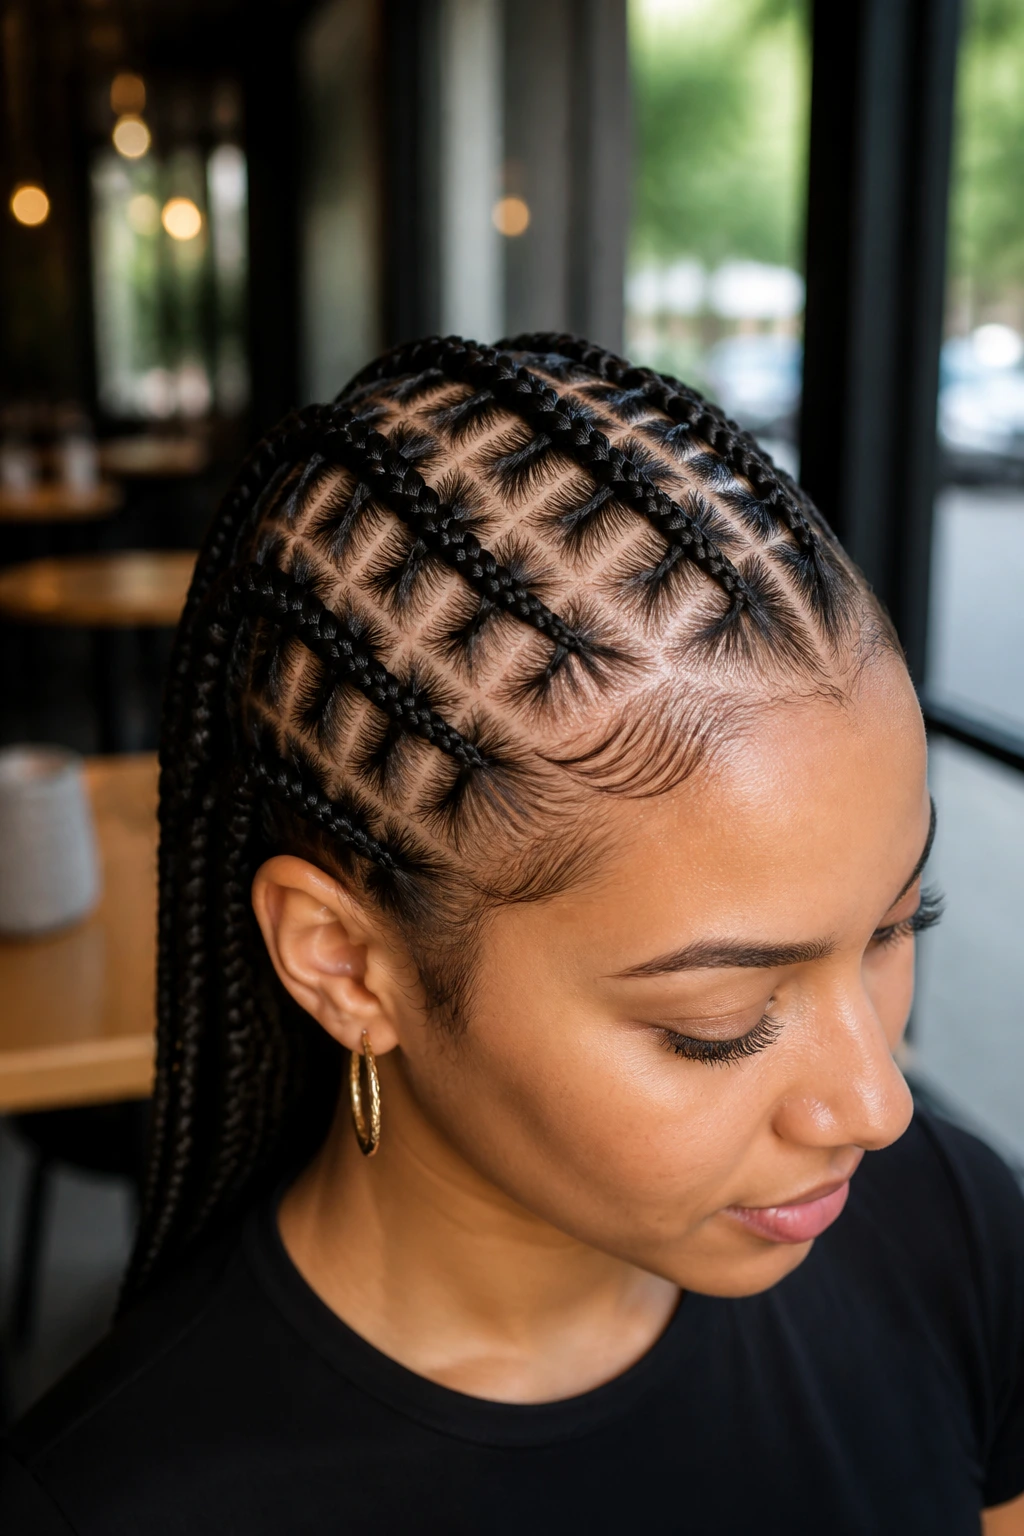
These braids add a geometric element to your hair. By braiding hair in diagonal patterns that cross over one another, you create a complex, tight structure that is visually stunning. The overlapping of the braids keeps the hair compressed, making it very difficult for frizz to expand outward.
Navigating the Angles
When braiding diagonally, keep your tension even. It is tempting to pull harder in the center than at the edges, but this will result in a braid that pulls unevenly and causes breakage. Think of your scalp as a grid and stick to the lines.
Styling for Impact
This style is best worn with minimal accessories. The braid pattern itself is the star. Use a bit of clear shine spray to make the pattern pop. The glossier the hair, the better the geometric lines will show up.
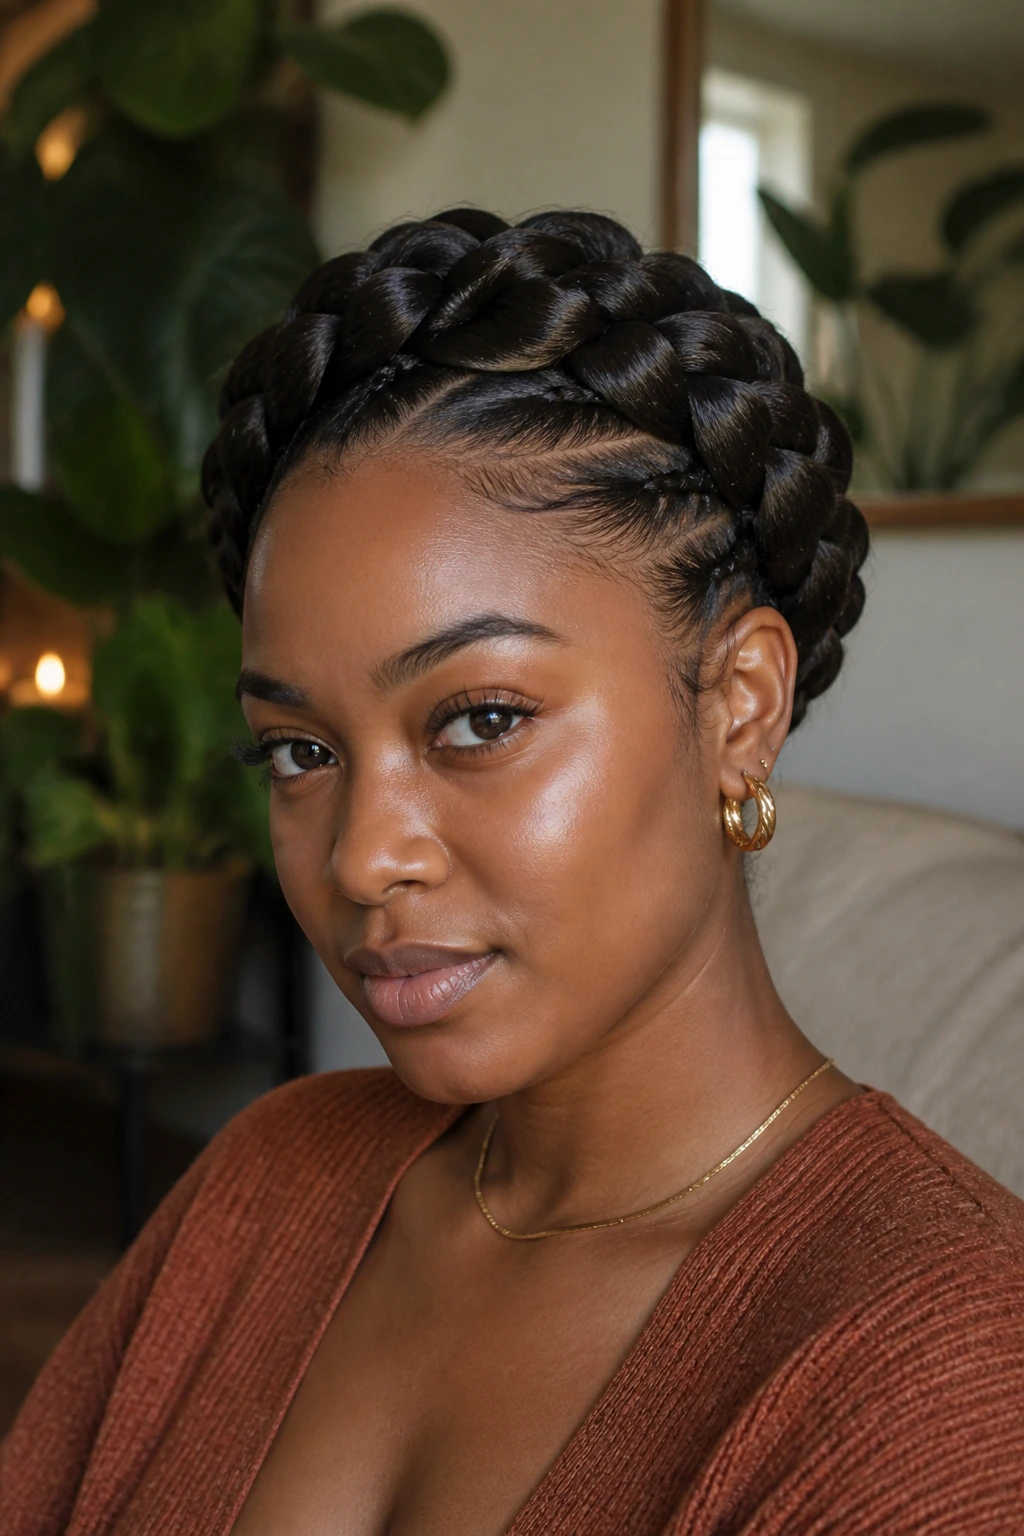
15. The “Halo” Braid

A halo braid is a singular, thick braid that wraps around the entire head. It is essentially a crown braid but uses only one, very thick plait. It is elegant, timeless, and perfect for keeping frizzy hair under control during humid days.
Achieving the Perfect Wrap
The trick to a halo braid is ensuring the braid is long enough to meet its beginning. If your hair isn’t long enough, you can add extension hair into the braid as you go. By integrating the hair smoothly, you create a seamless circle of braid that keeps every single strand contained.
How to Style It
- Tuck the tail of the braid under the start and pin it securely with several U-pins.
- If you have layers that stick out, use a small amount of pomade to smooth them into the braid.
- Do not use hairspray, as it can make the braid look crunchy. Stick to lightweight oils for shine.
16. Fulani-Inspired Braids
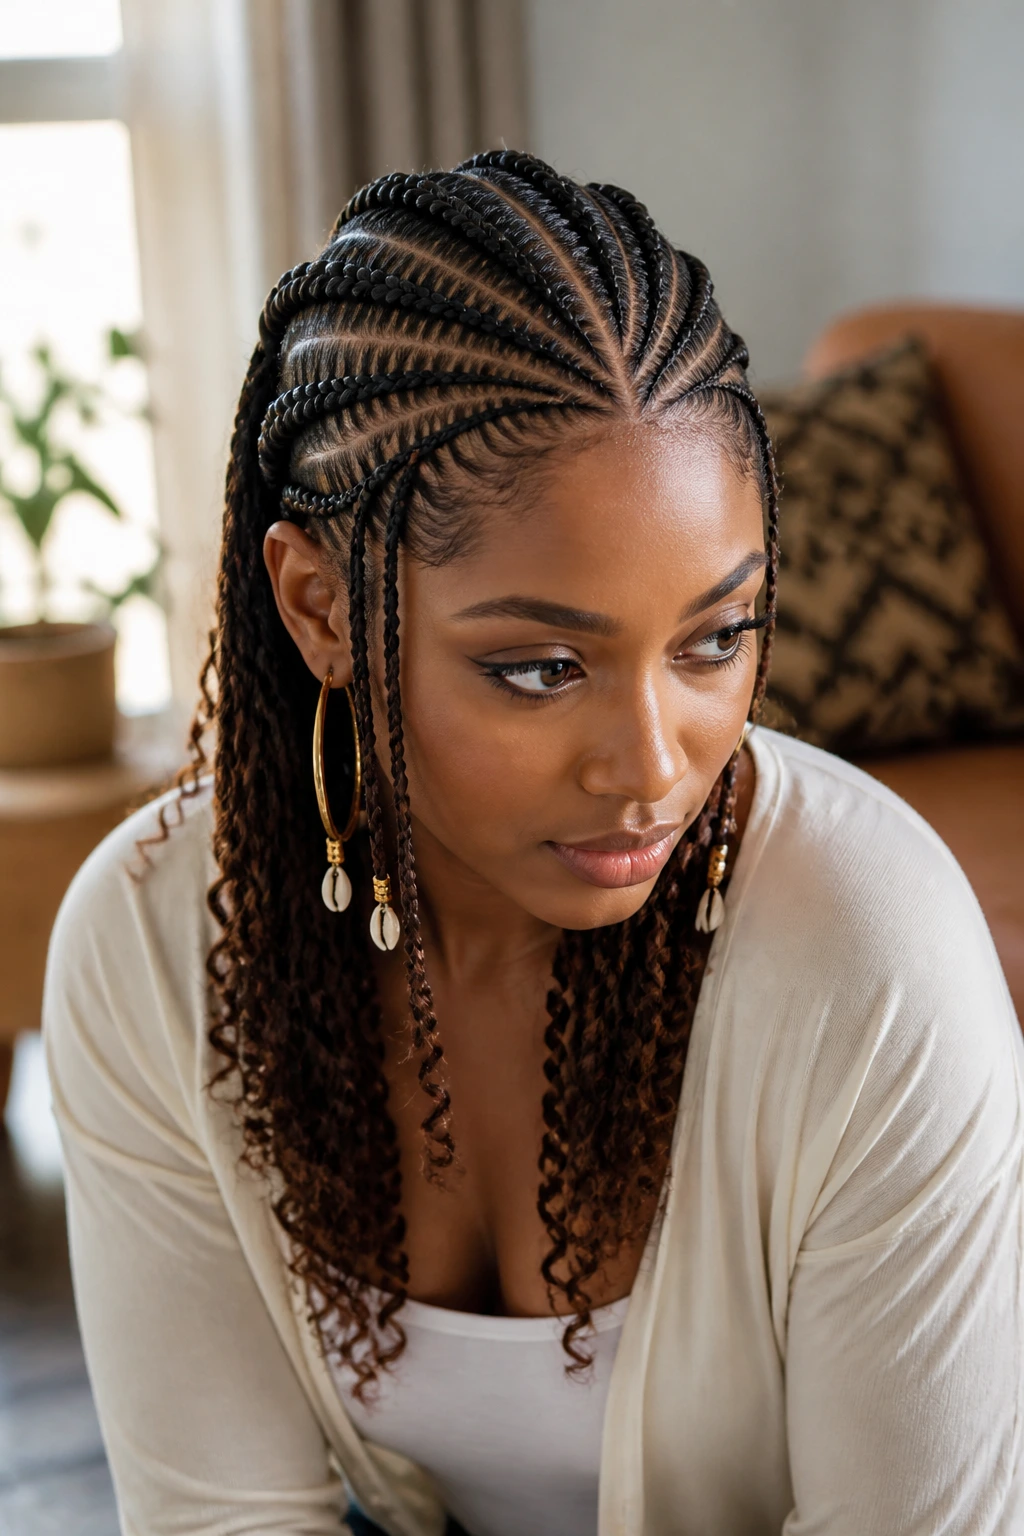
These braids combine cornrows with loose strands. Typically, they feature a cornrow down the center, cornrows on the sides, and a few strands left out to be styled as braids or curls. This style is great for frizz management because the bulk of the hair is securely cornrowed.
Managing the Loose Strands
Since you have some hair left loose, you need to manage the frizz on those specific pieces. I recommend using a curling custard or a high-hold gel on those sections. Twist them tightly to match the sleek look of the cornrows. The contrast between the tight cornrows and the defined, twisted ends is what makes this style so iconic.
Why It Works for Diverse Textures
Fulani styles are incredibly forgiving. If you have different textures of hair—like tighter curls at the nape and looser curls at the crown—the cornrow structure pulls everything into a cohesive, uniform look.
17. Yarn Braids
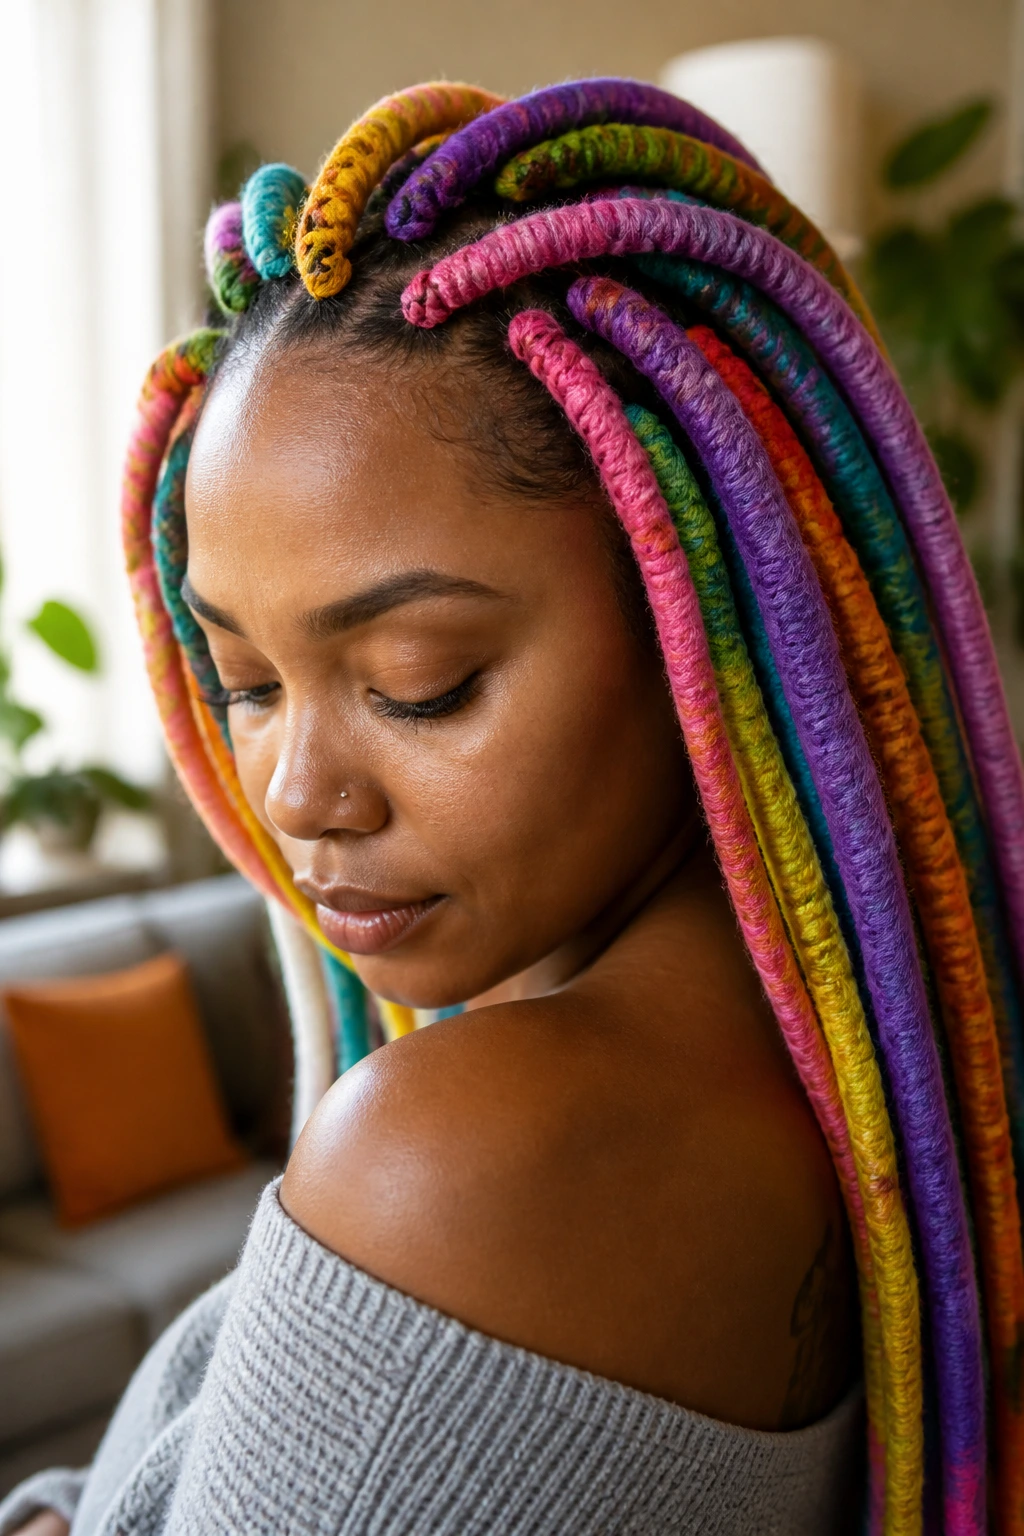
Yarn braids are a unique, stylish way to contain frizzy hair. By wrapping your natural hair in acrylic yarn, you create a protective barrier that is completely immune to moisture. The yarn absorbs the tension, meaning your hair stays perfectly smooth underneath.
Choosing the Right Yarn
Look for 100% acrylic yarn. It is lightweight, comes in every color imaginable, and is very inexpensive. Avoid wool or cotton, as they can be heavy and take forever to dry if they get wet. Acrylic is the industry standard for a reason.
How to Manage the Weight
Yarn can be heavy. To prevent strain, keep the sections small. The smaller the section, the less yarn you need, and the lighter the final style will be. This is a great protective style to wear during long, humid summer months.
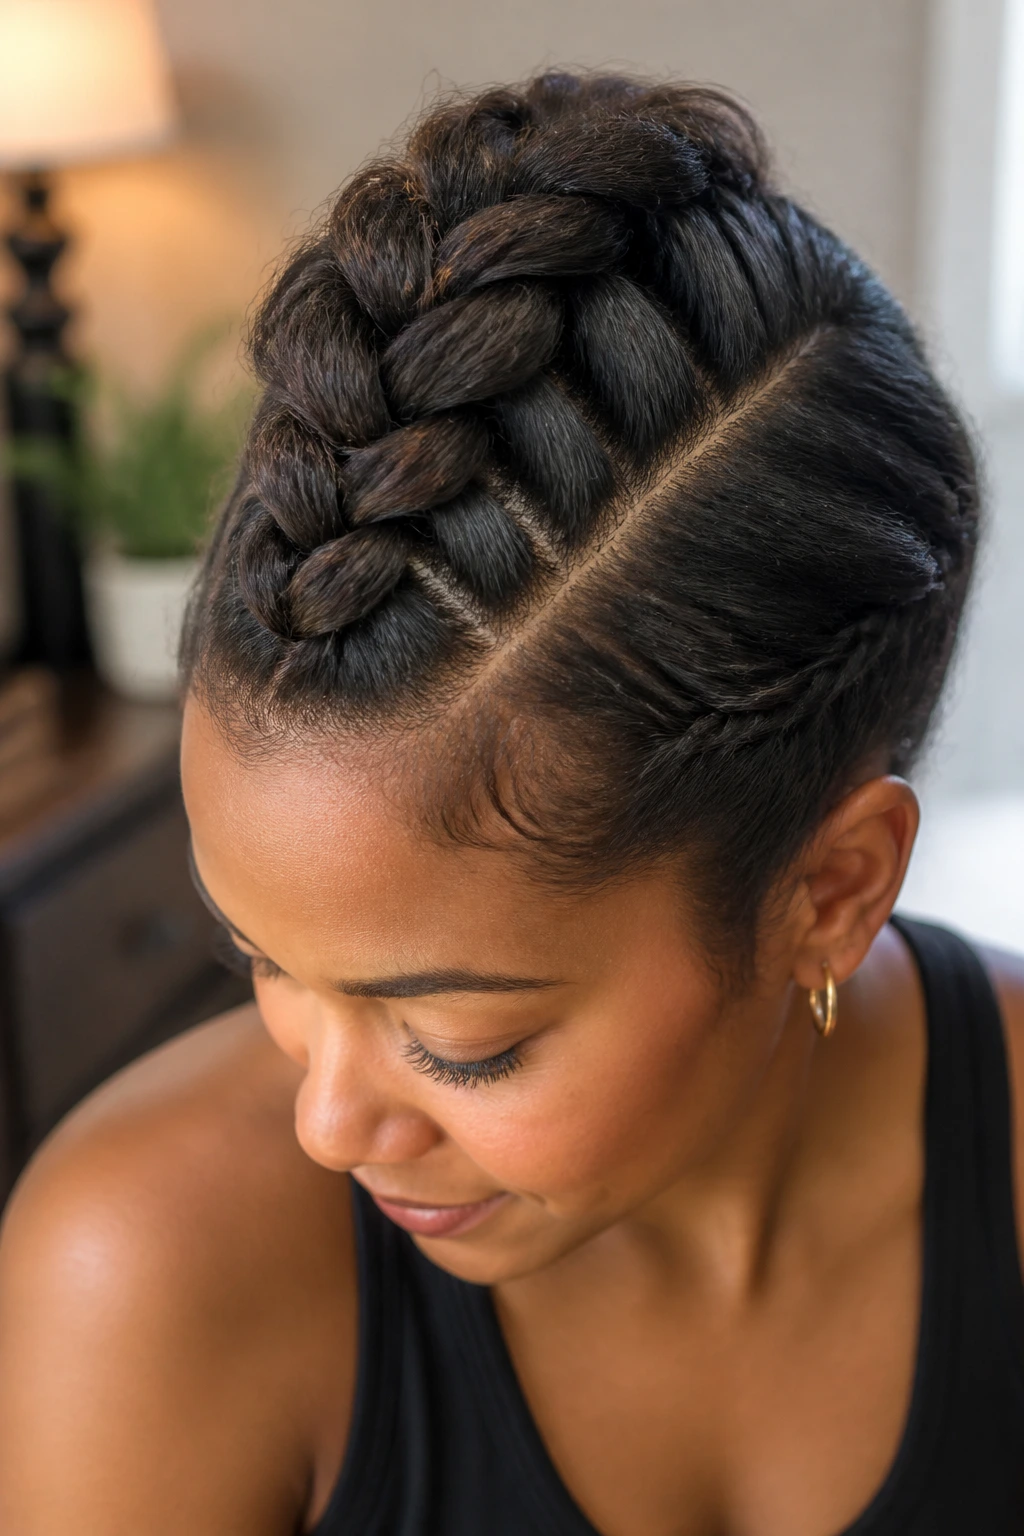
18. Braided Updo with Side Sweeps
An updo takes your hair completely off your shoulders, which is a major victory against frizz. By braiding your hair toward the center of your head and securing it into a bun, you are essentially sealing the cuticle by keeping the hair in a fixed position.
The Secret of the Bun
Don’t just twist your hair into a bun. Braid the ends first, then wrap the braid around the base. This provides a more secure hold and ensures that your ends—which are usually the frizziest part of the hair—are tucked away where they cannot be damaged.
Using Accessories
A decorative hair fork or a set of silk scrunchies can make an updo feel intentional rather than like a “lazy” style. Choose accessories that are smooth, like metal or coated plastic, to avoid snagging your hair.
19. Two-Strand Flat Twists
If you struggle with the complexity of three-strand braids, flat twists are your best friend. They sit flat against the scalp, just like a cornrow, but they are much easier to execute. For frizzy hair, they offer the same level of control and sleekness.
Why Flat Twists Are Superior for Beginners
Flat twists don’t require the same level of dexterity as braiding. You are essentially just rolling two sections of hair over each other while picking up hair from the scalp. They are much less likely to snag, which means less breakage and a smoother finish.
Tips for Definition
Always twist toward your scalp. If you twist away, the braid will lift, and frizz will have a chance to bloom. Keep your movements slow and deliberate. The more control you have over each twist, the more defined the final pattern will be.
20. The “Tuck-In” Braid
This is a specific technique for those with very frizzy hair who want to wear a simple French braid. As you braid, you tuck the outer strands toward the center underneath rather than over. This creates a “puffy” braid that looks substantial, but by tucking the ends, you keep the frizz contained.
How to Execute the Tuck
It is a simple shift in direction. When you cross a strand over, instead of letting it sit on top, you press it into the braid. This is sometimes called a “pancake braid” variation, but by doing it tightly, you ensure the hair stays locked in place.
The Importance of the Final Seal
Once the braid is finished, run your hands down the length with a tiny bit of lightweight oil. This smooths down any hairs that lifted during the process. You will be left with a braid that looks soft and voluminous, but feels firm and secure.
Final Thoughts
The journey to managing frizzy hair is rarely about finding one perfect product, but rather about mastering the art of tension and structure. When you choose to braid, you are opting for a style that respects your hair’s natural volume while providing the discipline it needs to look sleek. Whether you favor the intricate precision of micro-braids or the architectural beauty of a crown braid, the key is always preparation and consistency.
Start with a clean, moisturized foundation and work with products that give you actual grip. If you find a style that works for you, do not be afraid to stick with it for a few days to let the braids settle. Your hair has a memory, and the more often you guide it into a specific, structured shape, the more it will eventually start to cooperate on its own. Remember to protect those braids at night—a silk bonnet is not just a luxury; it is the final, non-negotiable step in keeping your look fresh, tight, and completely free of unwanted frizz.