



Morning chaos is a universal equalizer. The alarm screeches, the coffee pot struggles, and your hair looks like an unapproved science experiment. When time is short, most of us default to a quick ponytail or a hurried messy bun. But there is a better way to look put-together in less than ten minutes.
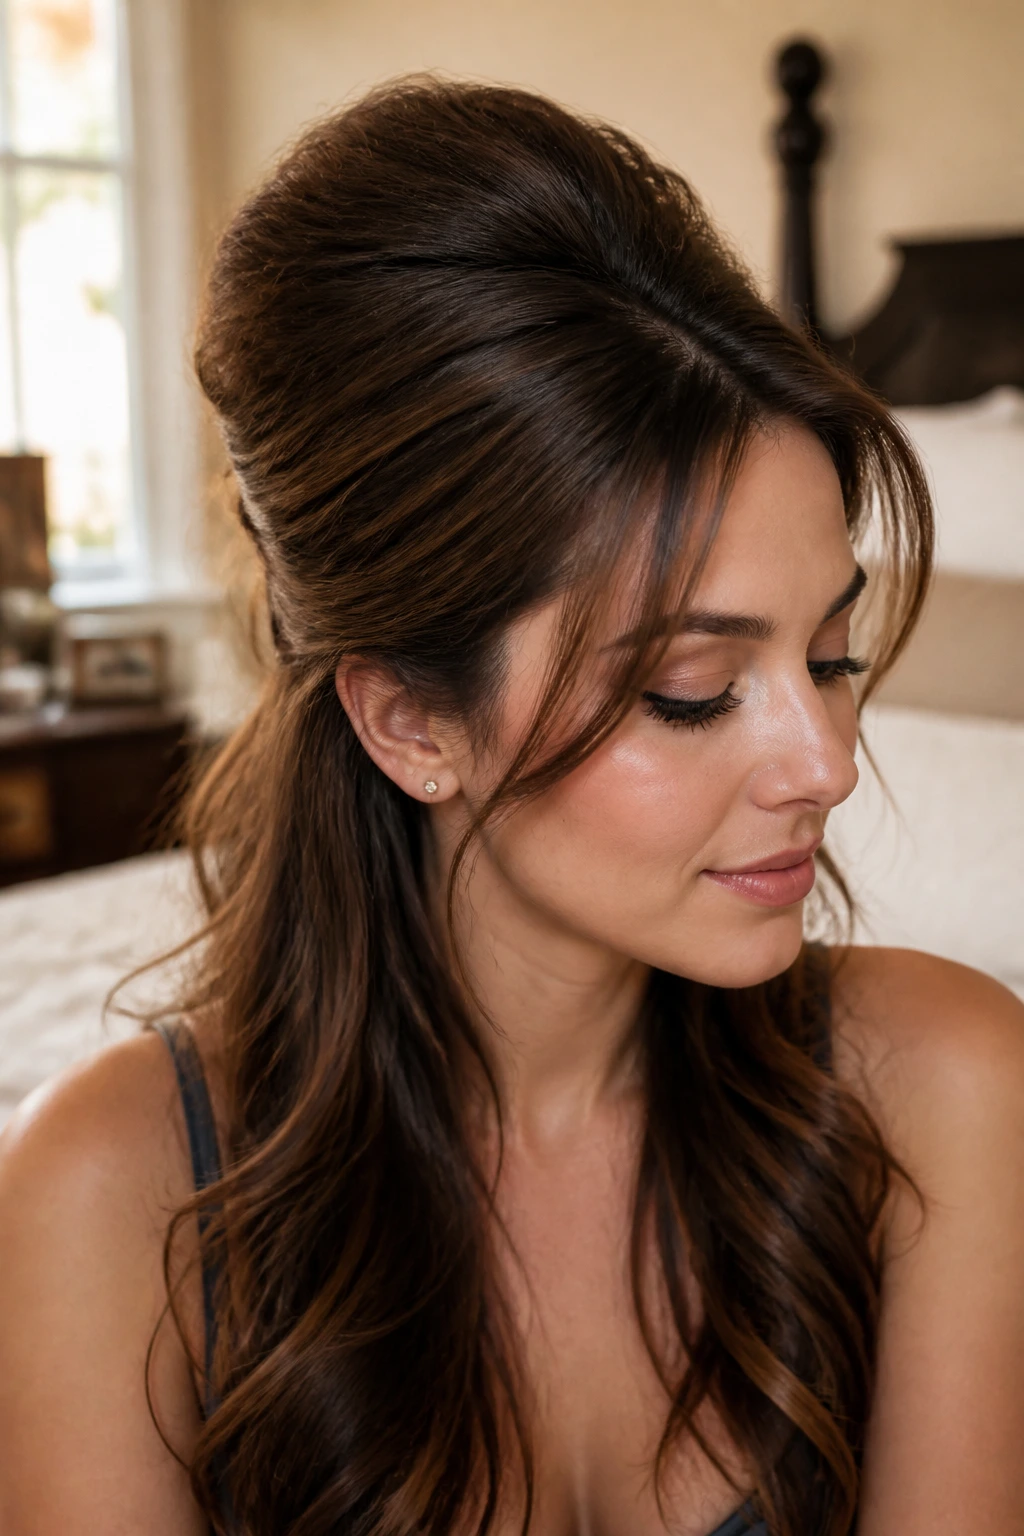
Historically, the classic bouffant was a high-maintenance structural marvel involving heavy cans of aerosol spray and hours under a salon hood. Today, we can adapt these retro silhouettes into practical, fast styles that hold up during a long workday. Integrating beehive hairstyles for busy mornings into your routine gives you instant volume and a polished, vintage charm without requiring an hour in front of the mirror.
To make these styles work, you need to understand the physics of backcombing. It is not about tangling your hair into an impenetrable nest; it is about creating a dense cushion of hair at the roots to support the smoother top layers. With a few bobby pins, a decent comb, and some dry shampoo, you can build height that stays secure from your morning commute until your evening wind-down. Let’s look at the most reliable ways to get that classic volume without the stress.
1. The Half-Up Mini Beehive
This style is the perfect gateway to retro volume because it only requires you to style the top half of your hair. It keeps the hair out of your face while letting the rest drape naturally over your shoulders. It is particularly forgiving on second-day hair, which already has some natural oil and grip to hold the height.
The Secret to Root Support
Instead of teasing the very top layer of your hair, lift a one-inch section just below the crown. Backcomb this lower section firmly to create a sturdy shelf, then drape the smooth top layer over it. This trick hides the frizzy, teased texture completely under a sleek exterior.
Essential Tools for the Setup
- A classic plastic rat-tail comb for clean sectioning
- Dry shampoo or texturizing spray to add instant friction
- Two standard bobby pins to lock the style in place
- A lightweight bristle brush to smooth the outer canopy
Pro tip: Slide your bobby pins in diagonally, crossing them over each other in an “X” shape to prevent the weight of the bouffant from pulling them loose by lunchtime.
2. The Messy Tousled Beehive Ponytail
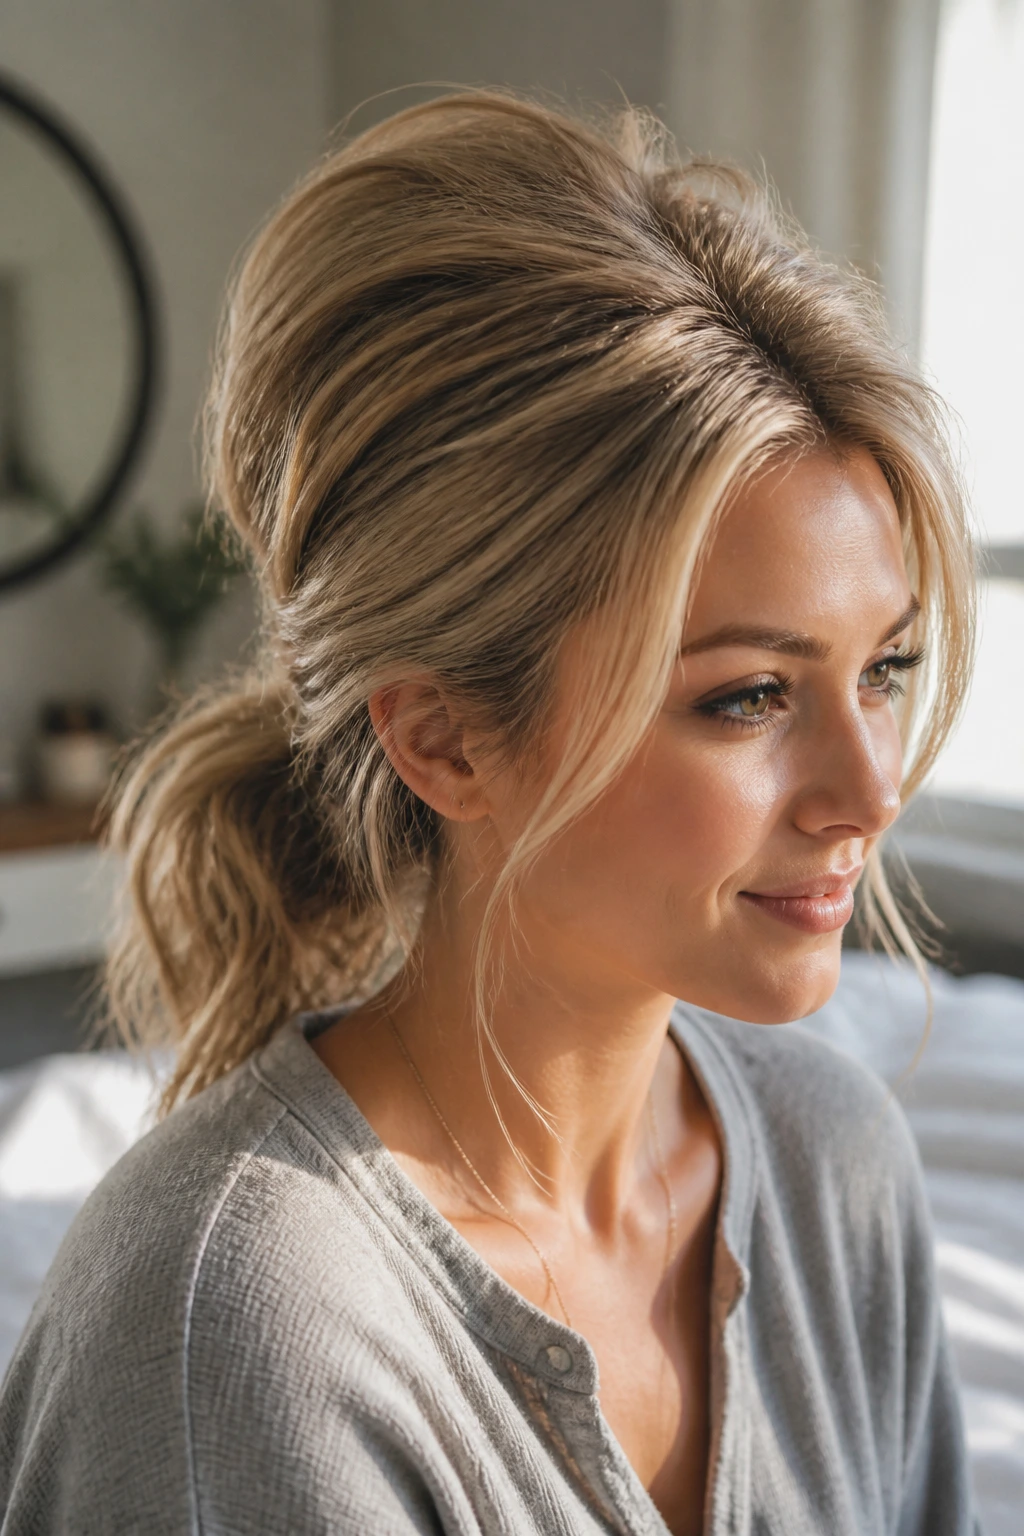
You do not need perfectly smooth hair to pull off a stunning retro crown. In fact, a bit of natural curl or bedhead texture makes this modern take on the ponytail look incredibly chic and modern. It is the ultimate solution for those mornings when you simply do not have time to use a flat iron or curling wand.
The magic of this look lies in the contrast between a volumized, teased crown and a relaxed, swishy ponytail at the nape of your neck. By keeping the tail messy, you take the stuffiness out of the vintage shape. It feels lived-in and comfortable.
To style this, section off the crown of your hair and give it three firm backcombing strokes at the roots. Secure the rest of your hair into a mid-height ponytail, then pin the teased crown section directly over the hair elastic. Gently tug a few loose strands around your ears to soften the overall frame.
3. The Sleek Low-Bun Beehive
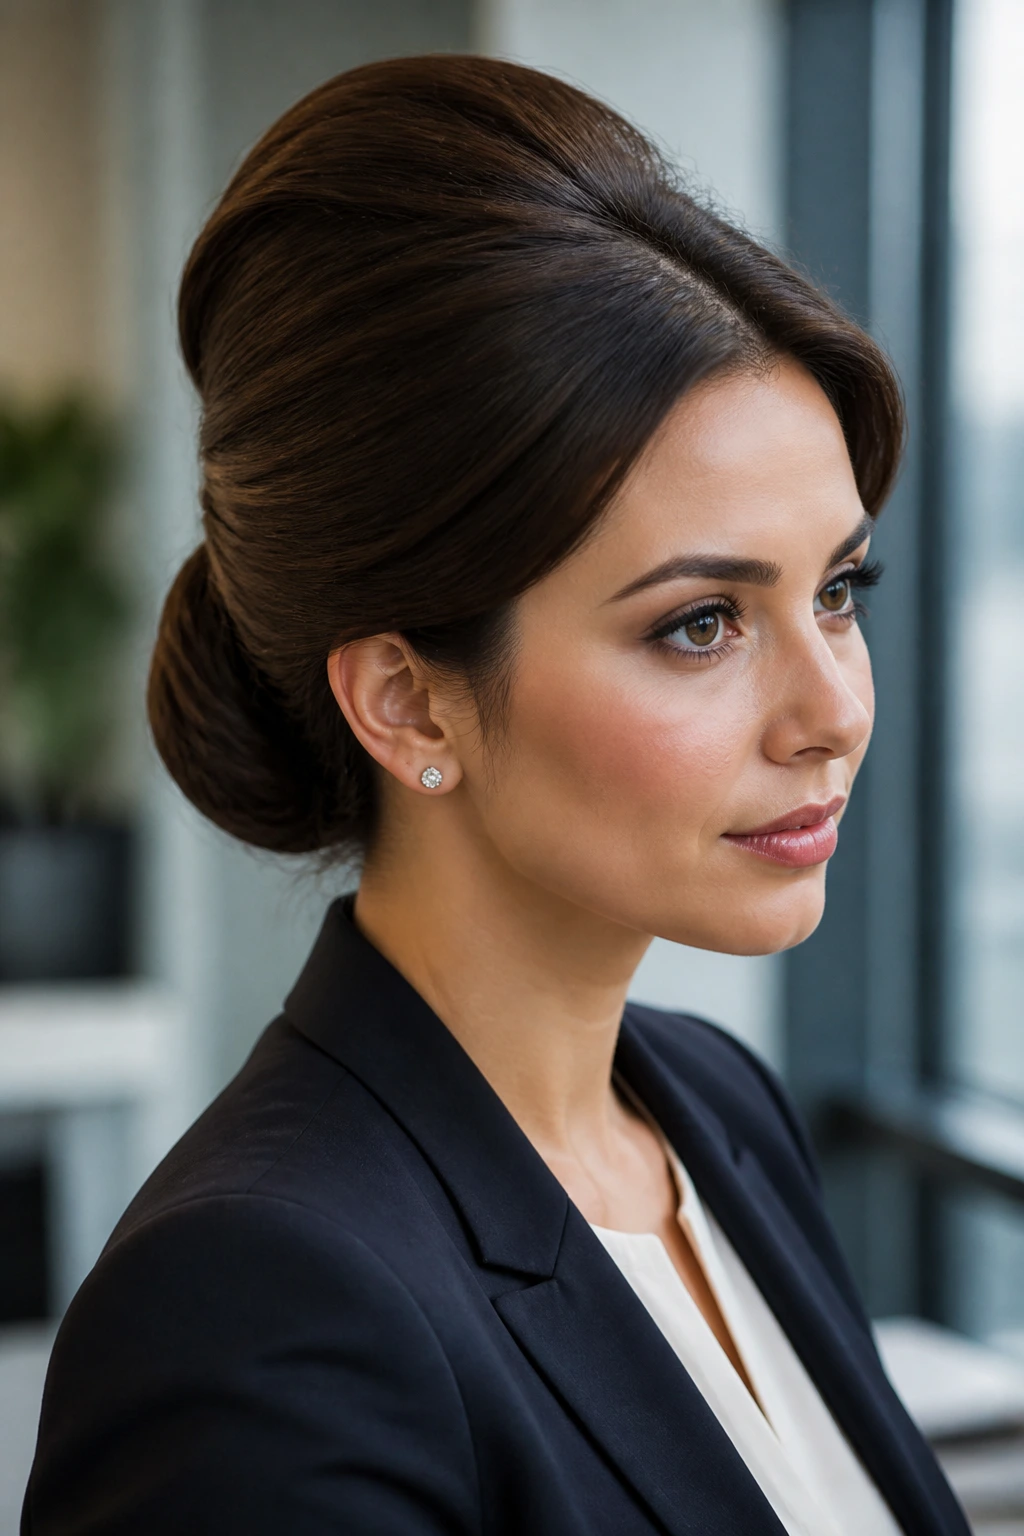
Does your workplace demand a highly polished, conservative look? This low-bun variation offers all the height of a traditional bouffant but keeps the length of your hair neatly contained. It is an excellent choice for rainy days when humidity threatens to turn loose hair into a frizzy mess.
How to Achieve a Mirror-Like Shine
The key to keeping this style looking professional rather than messy is using a small amount of hair pomade or smoothing serum on the top layer. This tames any flyaways and creates a clean, glossy shell over your teased cushion.
Step-by-Step Security
- Separate your hair into a top crown section and a bottom ponytail section.
- Backcomb the crown section thoroughly, focusing on the roots at the back of your head.
- Gather the bottom section into a low pony, twist it into a neat coil, and pin it to your nape.
- Smooth the teased crown backward, wrapping the ends around the low bun and pinning them underneath.
4. The Bobby-Pin-Backed Bouffant
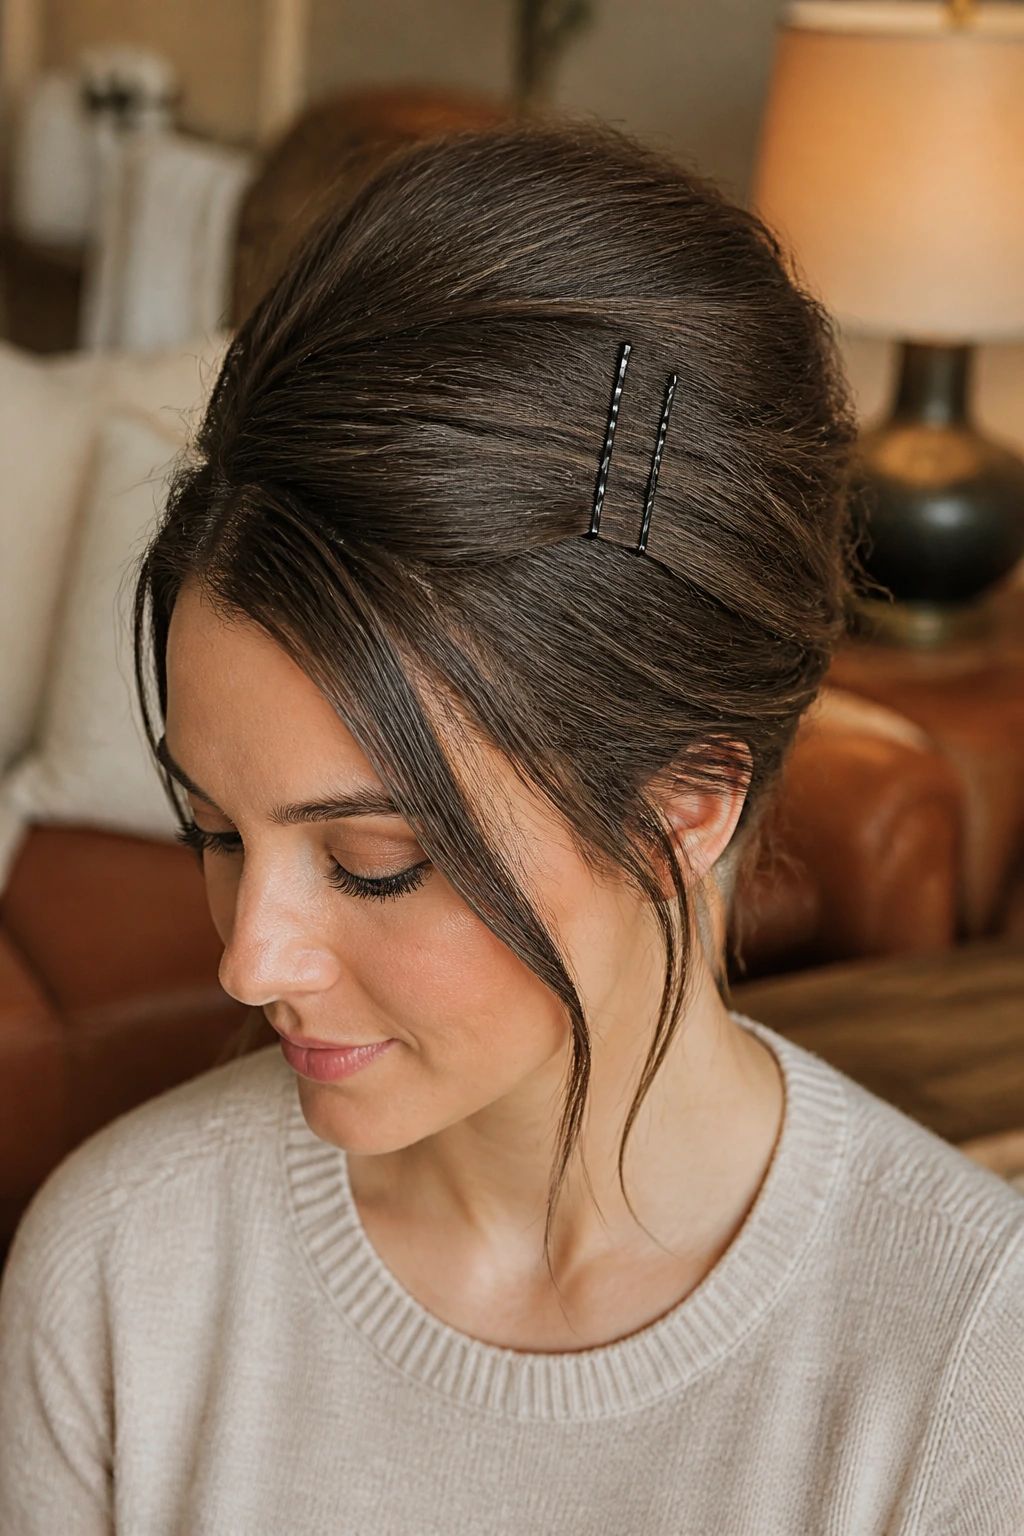
Imagine you are running fifteen minutes late, your coffee is spilling, and you have an important meeting in half an hour. You need a style that requires zero advanced styling skills but still looks deliberate. This simple pinning technique is your best ally.
By using bobby pins as structural anchors rather than hidden tools, you can create a secure, elevated shape in under two minutes. You are essentially lifting the front and crown sections of your hair and locking them down at the back of your head.
- Gather a horse-shoe-shaped section of hair from your temples back to your crown.
- Lift the section straight up and spray the roots with a bit of dry shampoo.
- Push the hair forward slightly to create a gentle hump of volume.
- Insert three bobby pins horizontally across the back of the section to freeze the height.
- Leave the rest of your hair completely natural, whether it is straight, wavy, or curly.
5. The Headband-Wrapped Retro Crown
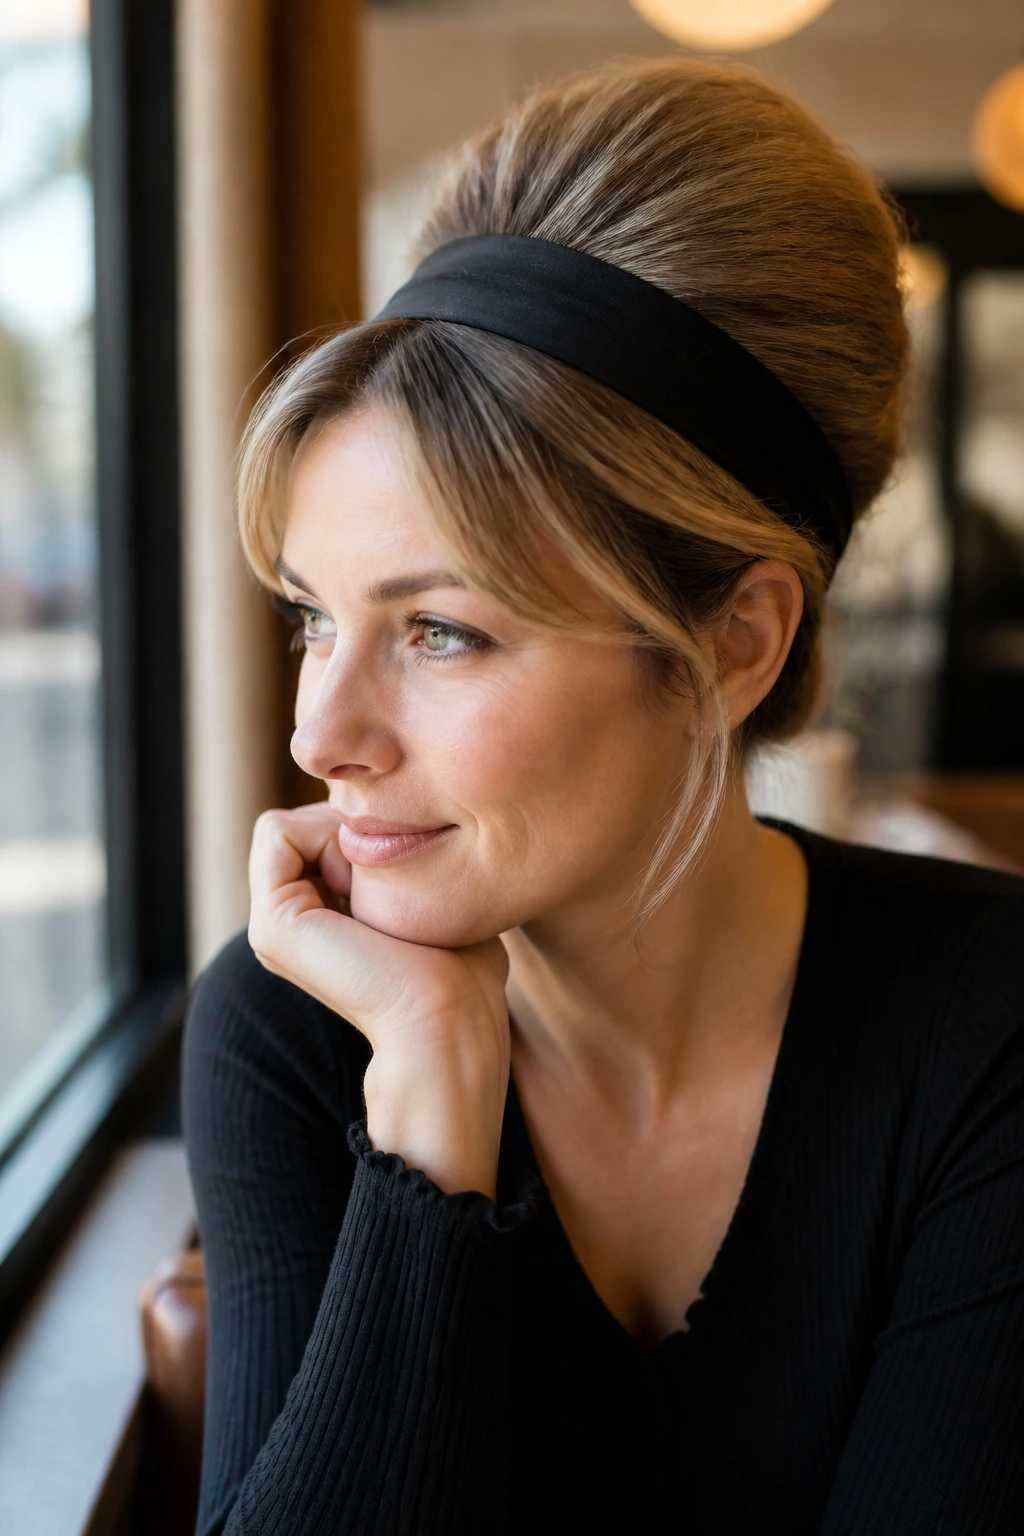
This is a classic cheat code for instant style. A thick, structured headband does two things at once: it physically pushes your hair back to create natural height, and it hides any messy, unwashed roots at your hairline. It is a brilliant option for third-day hair that needs a bit of camouflage.
To start, place a wide fabric or plastic headband about two inches back from your forehead. Use a fine-toothed comb to gently backcomb the hair directly behind the headband, working in small, horizontal sections. The physical barrier of the headband acts as a ramp, forcing the teased hair behind it to stand up taller and stay put.
Once you have achieved your desired height, smooth the surface of the hair behind the band with a soft bristle brush. You can leave the back of your hair down, or gather it into a low, relaxed ponytail for a clean profile. It is a simple, beautiful look that takes less than three minutes to complete.
6. The Braided-Rim Beehive
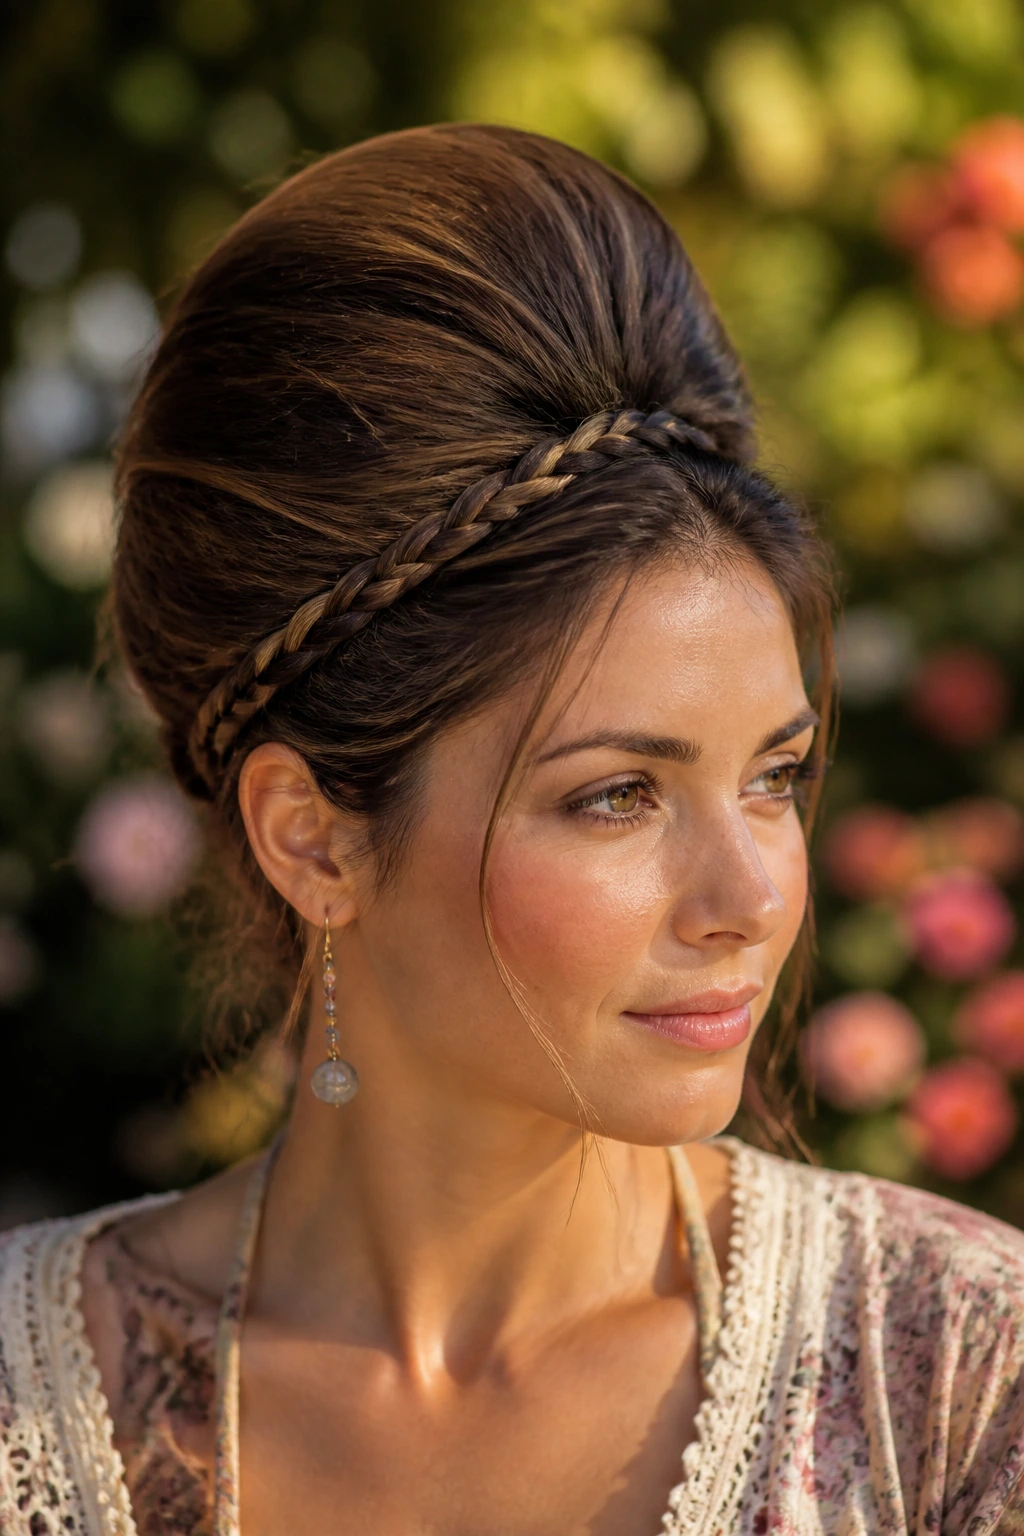
For those who love a bohemian twist on vintage shapes, wrapping the base of your bouffant with a simple braid adds a lovely tactile element. This style looks intricate and time-consuming, but it actually relies on a very simple trick that anyone can master in a few tries.
Unlike a standard crown braid, this version keeps the braid low and tight around the base of your teased crown. The braid acts as a decorative border, drawing attention to the height above it while keeping the sides of your hair looking exceptionally neat.
This style works beautifully on long hair. You tease the crown as usual, pin it down at the back, and then take a small section of hair from behind one ear. Braid this small section to the ends, drape it across the back of your head directly over your bobby pins, and secure it behind the opposite ear.
7. The Double-Decker Topknot Beehive
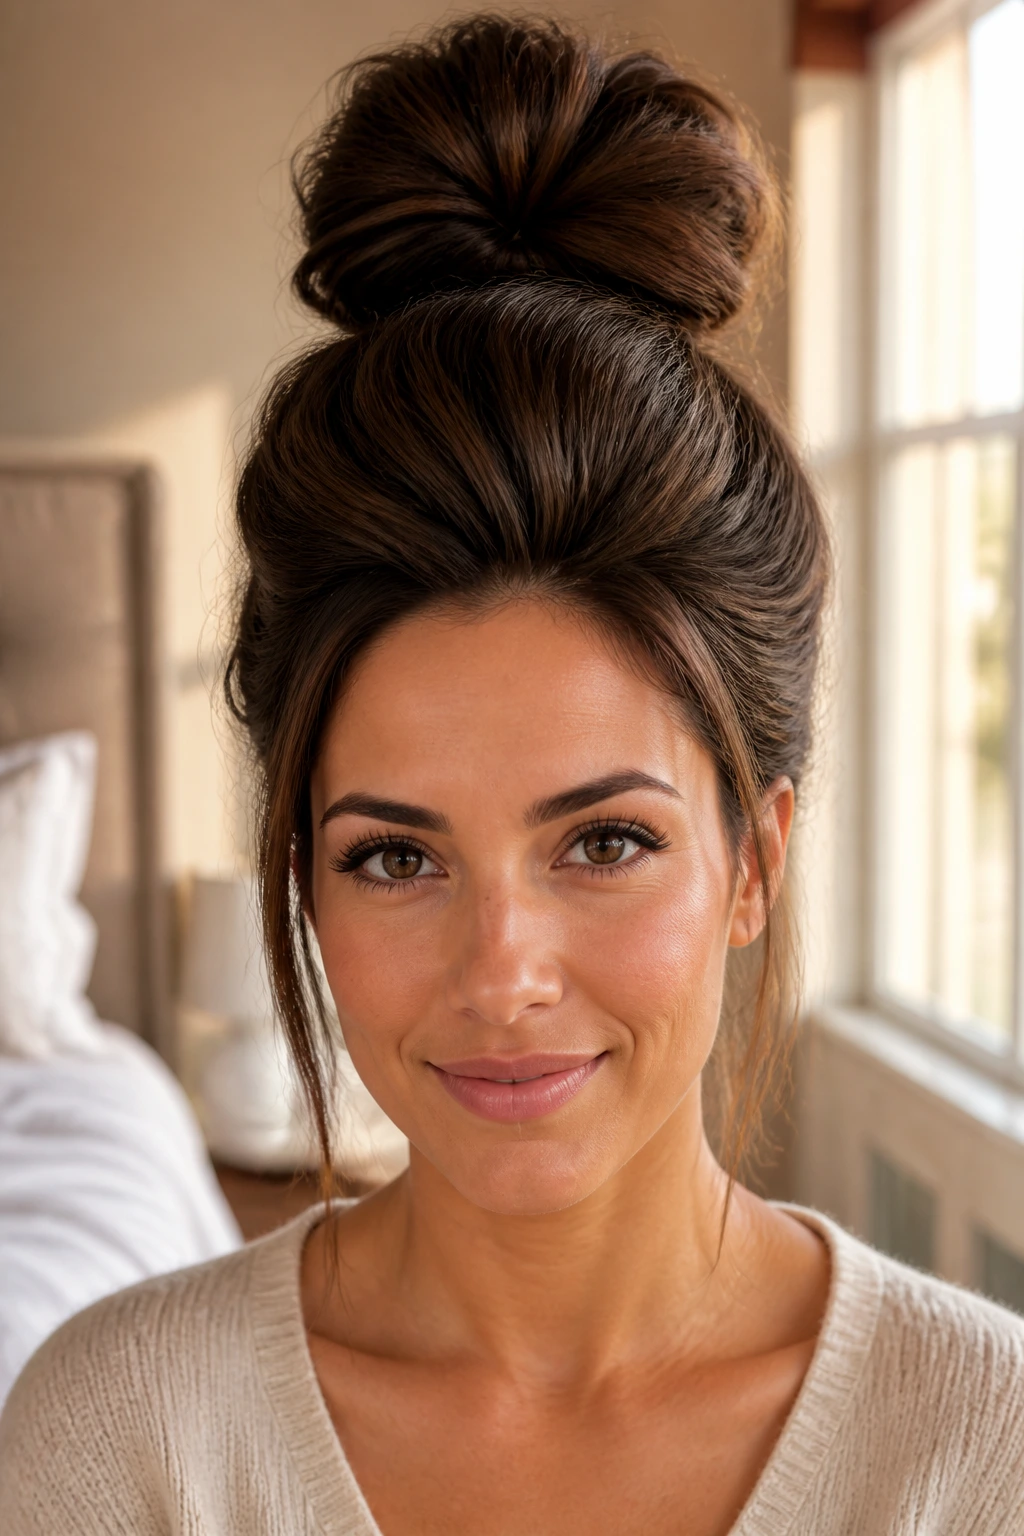
This style is for the warmest days of the year, or those long, busy afternoons when you want your hair completely up and away from your neck. It combines the height of a retro bouffant with the casual ease of a high topknot bun.
Building the Dual Structure
Instead of creating one uniform shape, this style breaks your hair into two distinct zones of volume. The front and crown provide the classic backward sweep, while the bun itself sits directly on top of the head, adding a second tier of height.
Why This Style Works So Well
- It lifts your facial features by drawing the visual focus upward.
- It keeps the ends of your hair tucked away, protecting them from friction and wind.
- It requires no precise parting, making it incredibly fast to assemble.
- It actually holds better on unwashed hair with plenty of natural grip.
Pro tip: If your topknot feels top-heavy, slide a large hairpin vertically down through the center of the bun until it hits your scalp, then flip the pin inward to lock the bun against your head.
8. The Classic Brigitte Bardot Half-Up
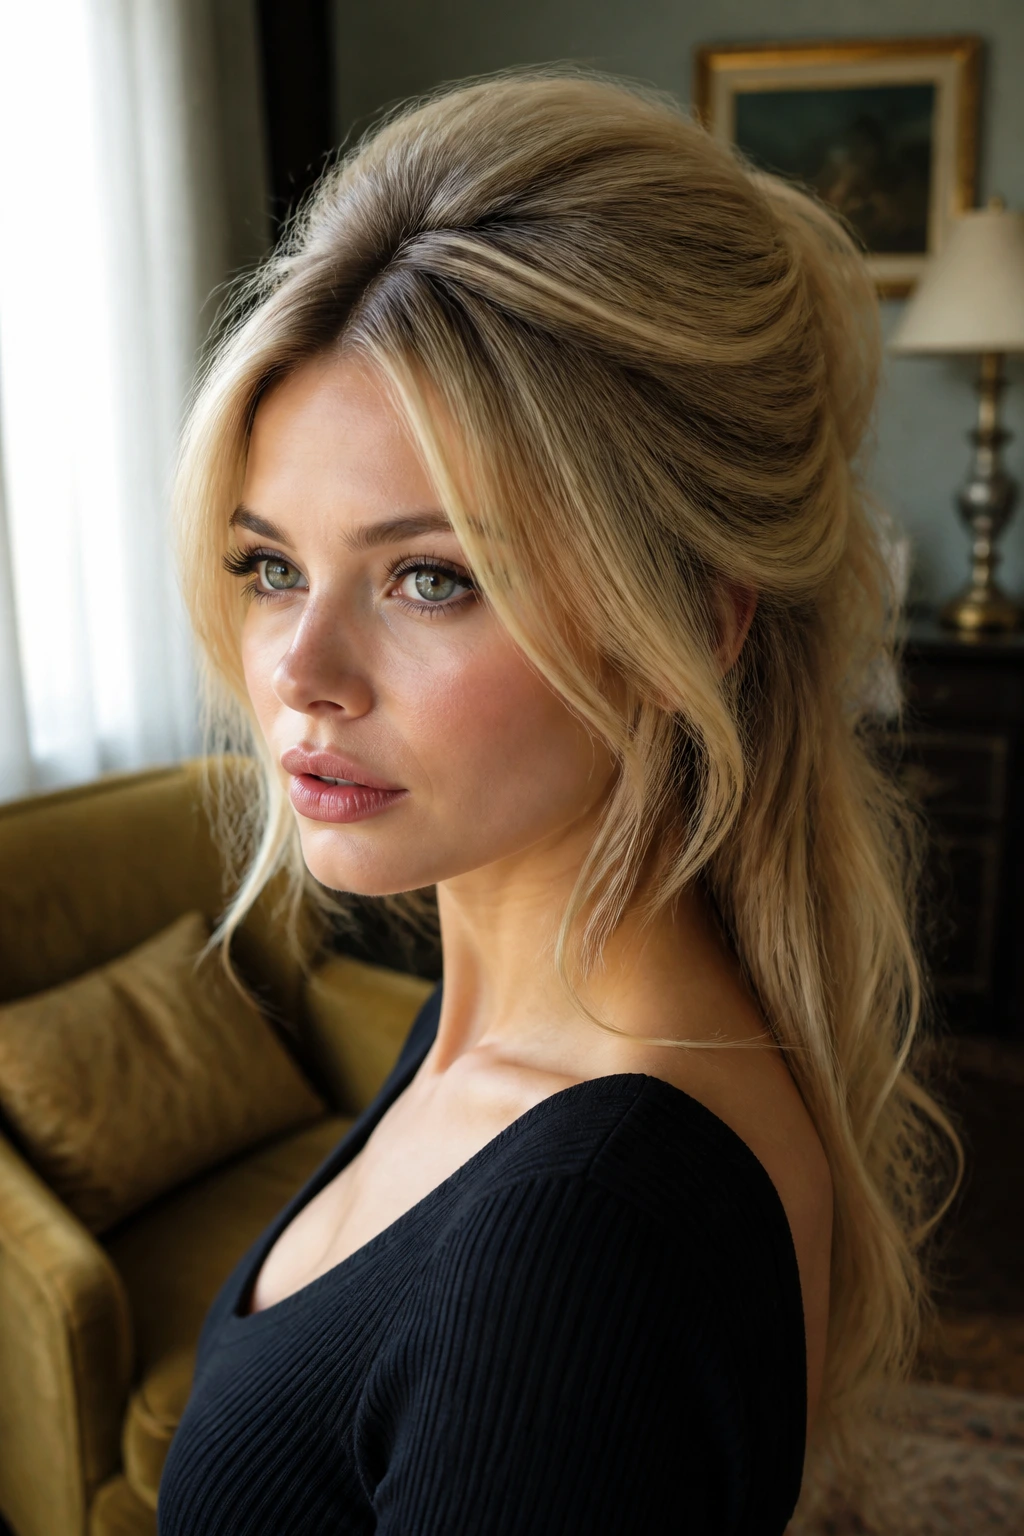
No discussion of retro volume is complete without mentioning the iconic French style of the mid-century. This look is defined by soft, touchable volume at the crown, a middle part at the front, and face-framing pieces that soften the overall shape. It is incredibly romantic and effortless.
The secret to this look is leaving the very front sections of your hair out of the tease entirely. Create a short center part, letting those front pieces drape naturally around your cheekbones. Behind those pieces, tease the crown vigorously to create a round, soft dome of volume.
Gather the sides of your hair loosely, bringing them together at the back of your head just below the bouffant. Instead of pulling them tight, keep them relaxed and pin them with a small barrette or a pretty ribbon. The contrast between the sleek parted front and the high, soft crown is timelessly beautiful.
9. The Side-Swept Bouffant Pony
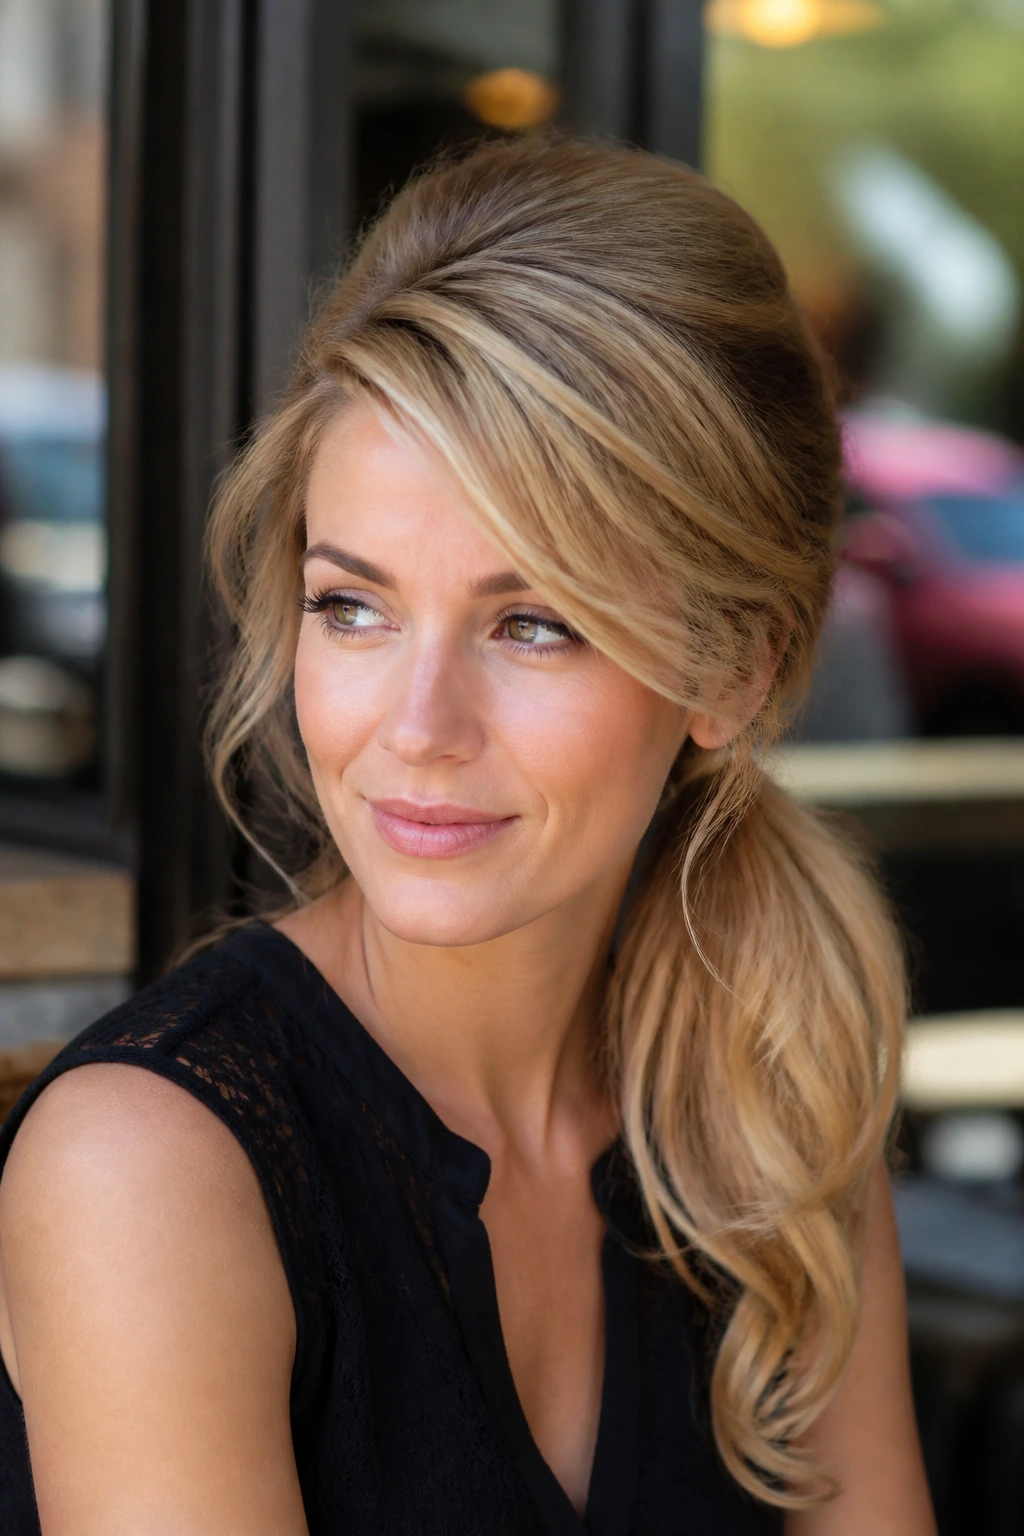
If you have a deep side part that you love, you do not have to abandon it to wear a beehive. This variation uses your natural part to create a dramatic, sweeping silhouette that looks sophisticated and highly structured.
To build this style, start by parting your hair deeply on your preferred side. Take the larger section of hair and sweep it smoothly across your forehead, pinning it temporarily out of the way. Tease the crown directly behind this front sweep to build your height.
Bring all of your hair—including the side-swept front section—back into a low, side-positioned ponytail on the opposite side of your part. This creates a beautiful diagonal line across your head, linking the sweep of your bangs to the volume of your crown and the drape of your pony.
10. The Scarf-Tied High Beehive
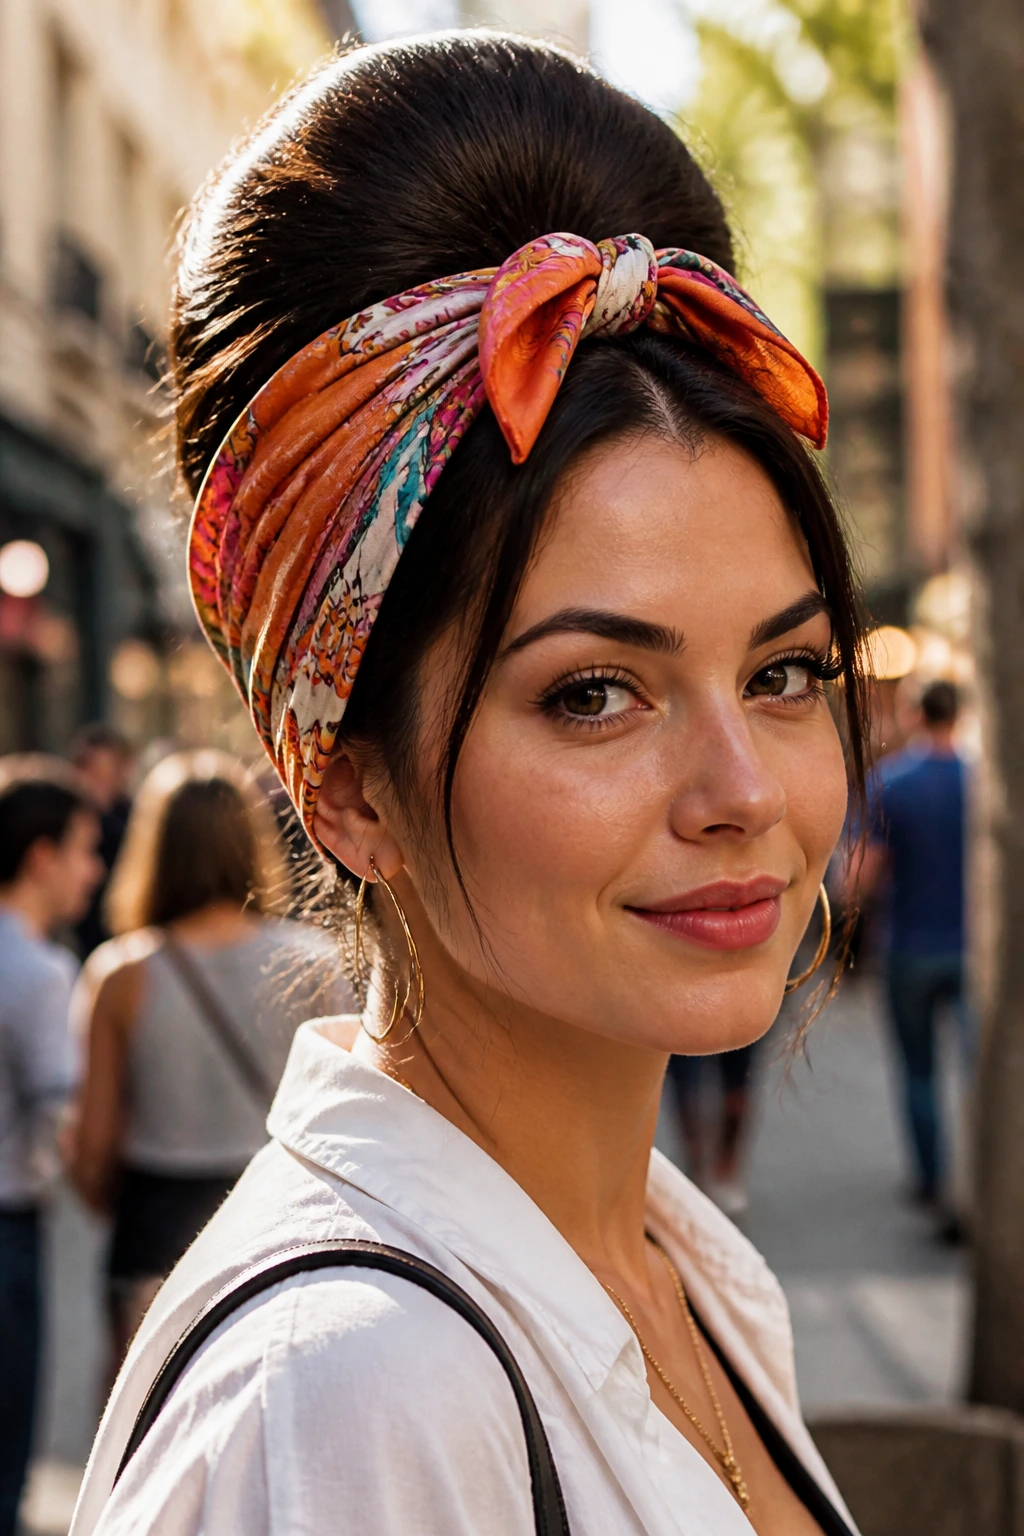
When your hair simply refuses to cooperate, a colorful silk or cotton scarf is your best friend. This style uses a folded scarf to wrap the entire lower half of your hair, leaving only the voluminous crown peeking out of the top. It is a fantastic option for protecting your hair from wind and dust.
First, gather the top section of your hair and tease it to your desired height, securing it at the back with a few pins. Take the rest of your hair and twist it up into a high, compact bun or roll.
Fold a square scarf into a long band, wrap it around the back of your neck, and bring the ends up to the front of your head, tying them into a neat knot just in front of your teased crown. The scarf holds the lower sections securely in place while framing the volume of your beehive perfectly.
11. The French Twist Beehive Hybrid
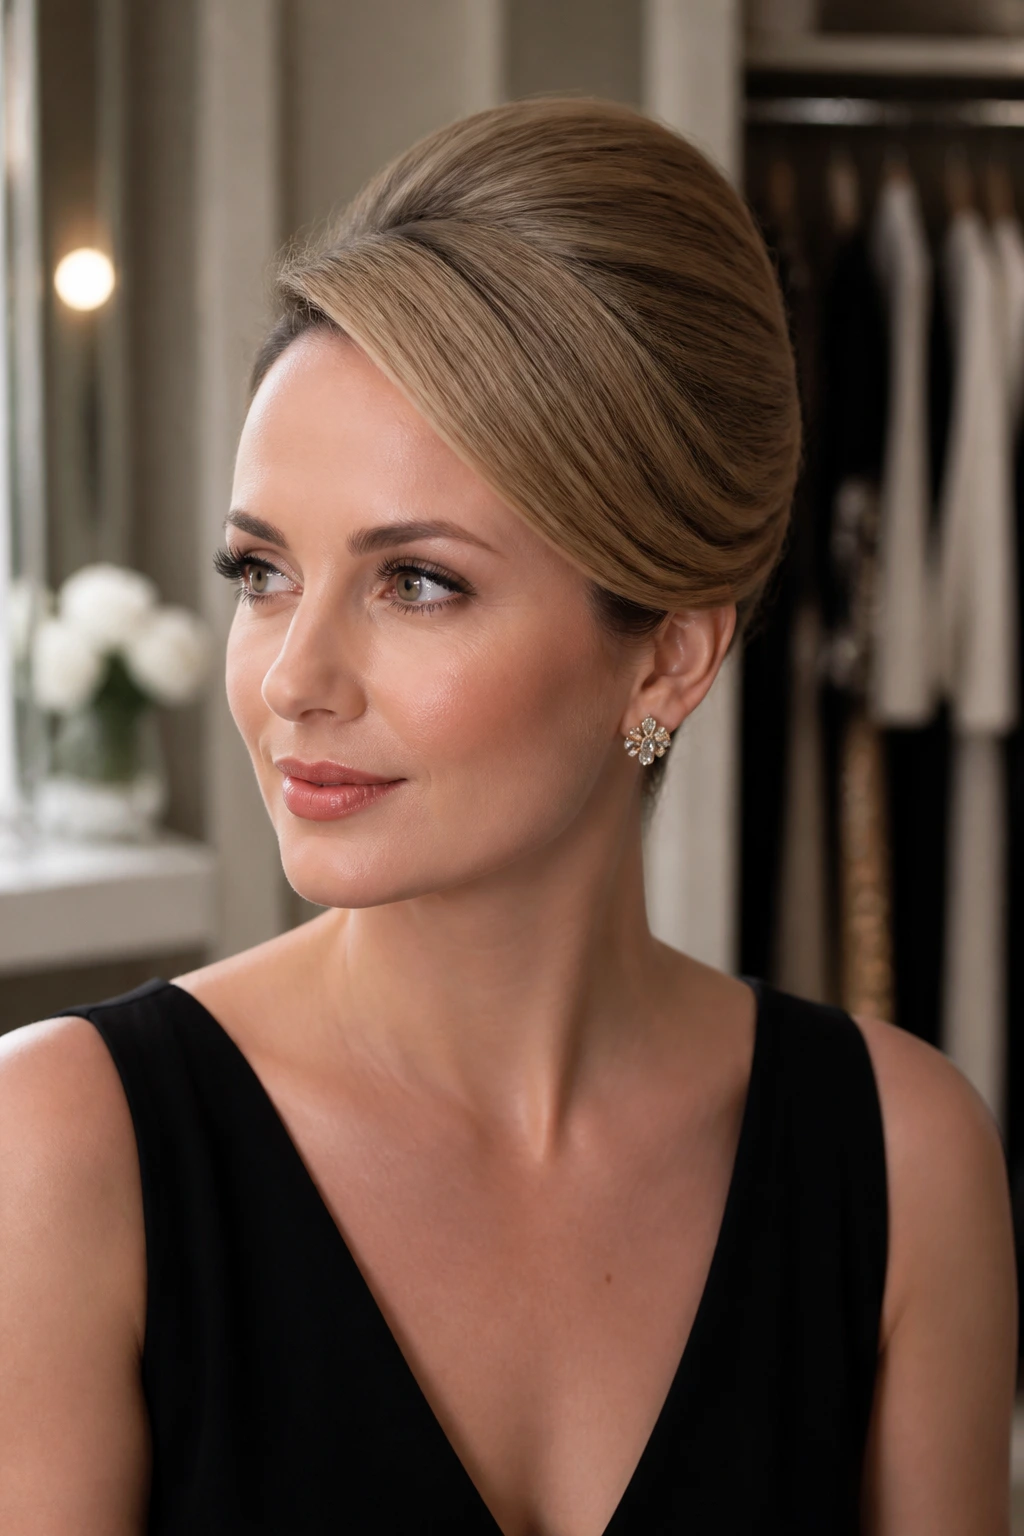
This style combines two of the most popular retro shapes into a single, cohesive look that is surprisingly easy to do on yourself. It is perfect for medium to long hair that has a bit of natural wave or texture to hold the twist in place.
The Art of the Roll
Instead of pinning your hair straight back, you are going to sweep all of your hair to one side, secure it with a vertical row of bobby pins, and then roll the hair back over those pins to create a clean, elegant seam. This roll naturally pushes the hair at the crown upward, creating beautiful, integrated height.
Step-by-Step Construction
- Apply a light mist of texturizing spray from roots to ends.
- Tease the crown section gently to establish your base volume.
- Sweep all of your hair to the left side of your head and pin it vertically down the center.
- Gather the hair, roll it back to the right over the pins, and tuck the ends into the seam.
- Use long hairpins to secure the roll along the seam from top to bottom.
12. The Curled-Tendril Pixie Beehive
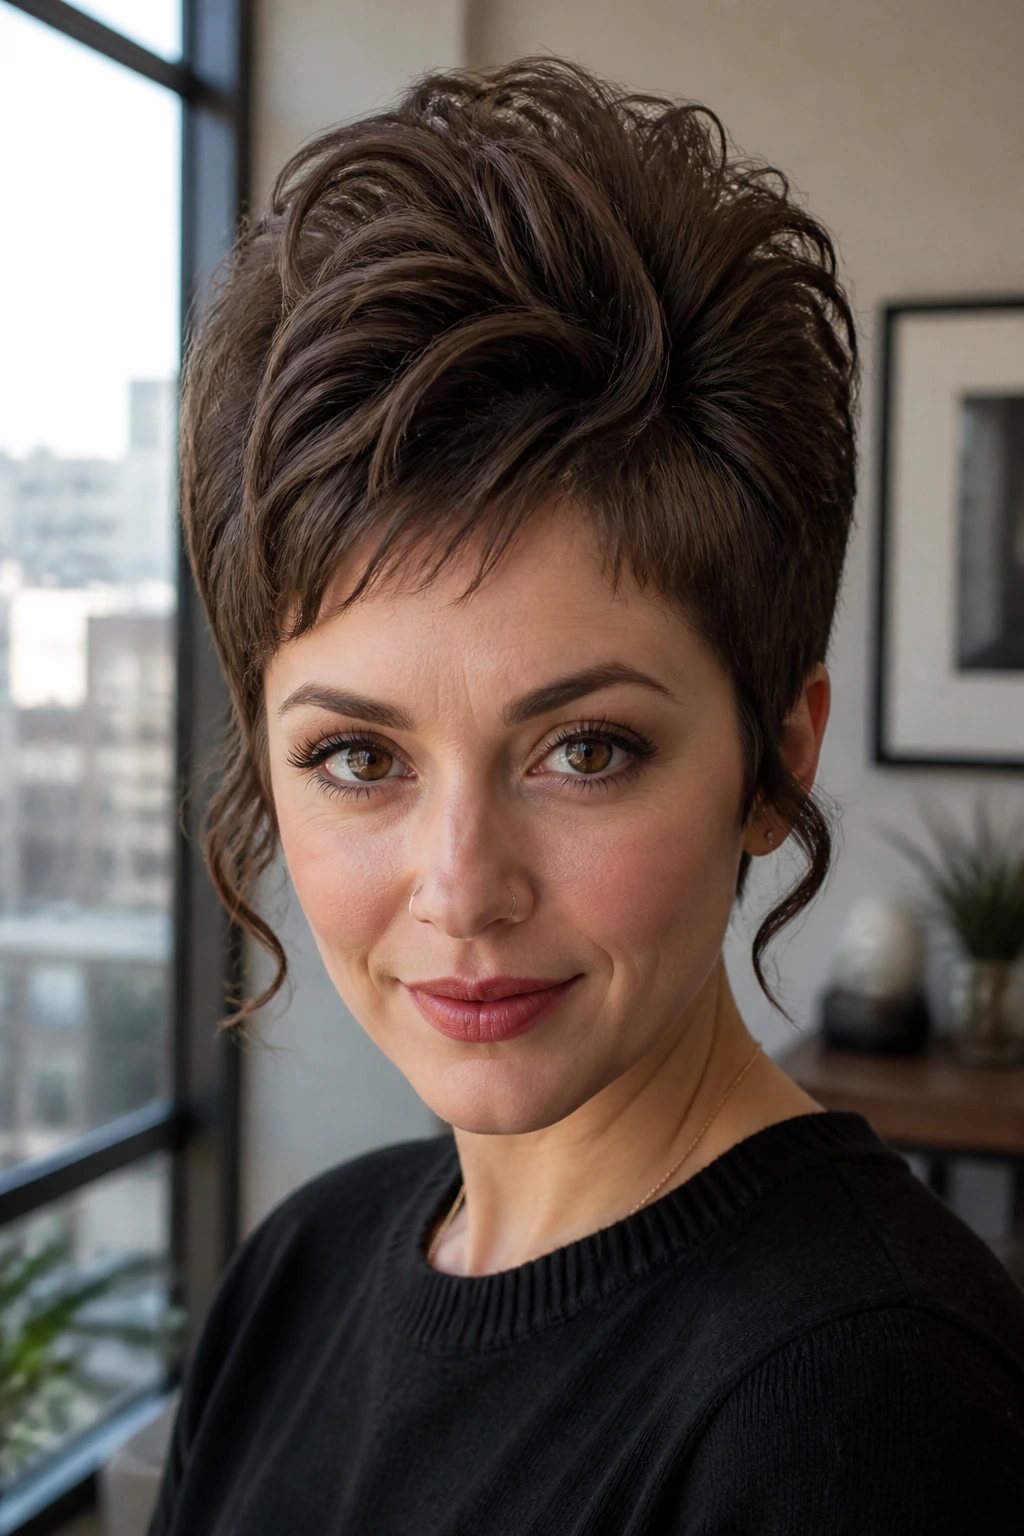
Who says you need long hair to enjoy retro volume? A short pixie cut can be styled into a stunning, high-volume look that emphasizes your eyes and cheekbones. It is a fast, fun way to change up your daily look if you have shorter layers.
To style a pixie beehive, focus all of your efforts on the crown and top layers of your hair. Use a small round brush or a slim curling iron to lift the roots upward and backward. Apply a small dab of styling wax or clay to your fingertips to piece out the ends, keeping the sides and back flat and sleek.
For a soft, feminine touch, pull a few tiny tendrils forward in front of your ears and let them curl naturally. The key is the dramatic contrast between the short, flat sides of your haircut and the high, textured volume on top.
13. The Triple-Pinned Voluminous Shag
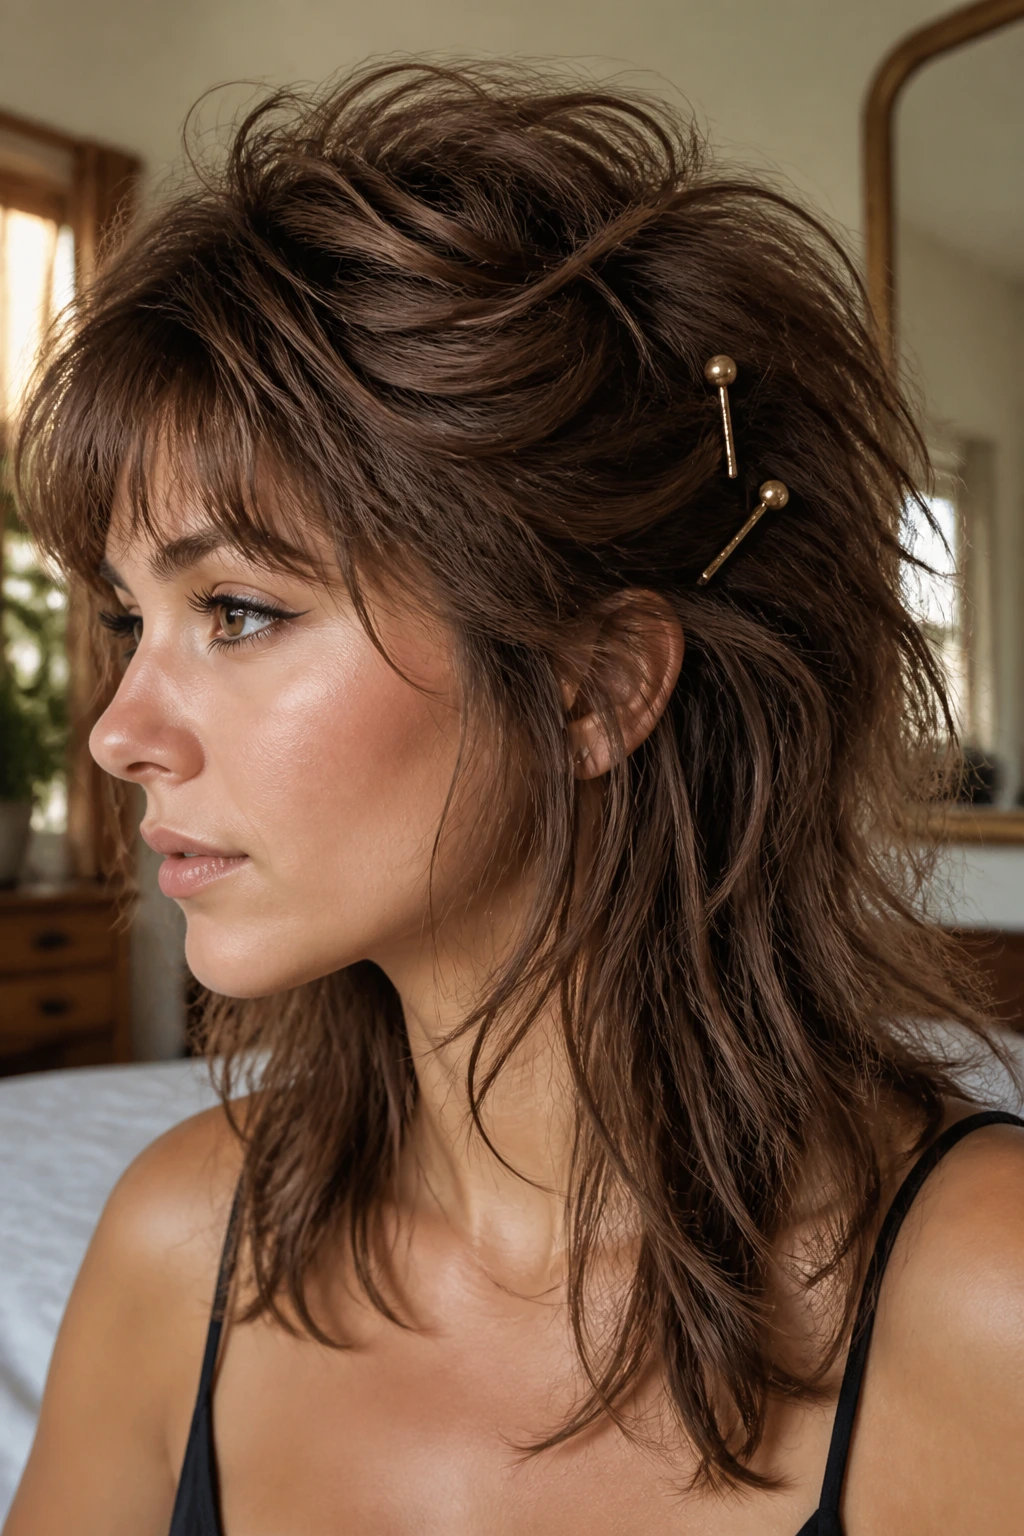
Modern shaggy haircuts with lots of choppy layers are practically built for retro volume. The shorter layers at the top of your head make it incredibly easy to get massive height with minimal teasing, as there is less weight dragging the hair down.
To style this, take the short top layers of your shag and mist them with dry shampoo. Give them a quick scrunch with your hands to activate their natural texture. Lift the crown section and secure it with three distinct pins placed in a triangular pattern at the back of your head.
Let the longer, thinner bottom layers of your haircut hang completely loose and messy around your shoulders. This creates a wonderful, rock-and-roll silhouette that feels effortless and cool, perfect for a fast-paced morning when you want to look styled but not stiff.
14. The Claw-Clip Beehive Quickie
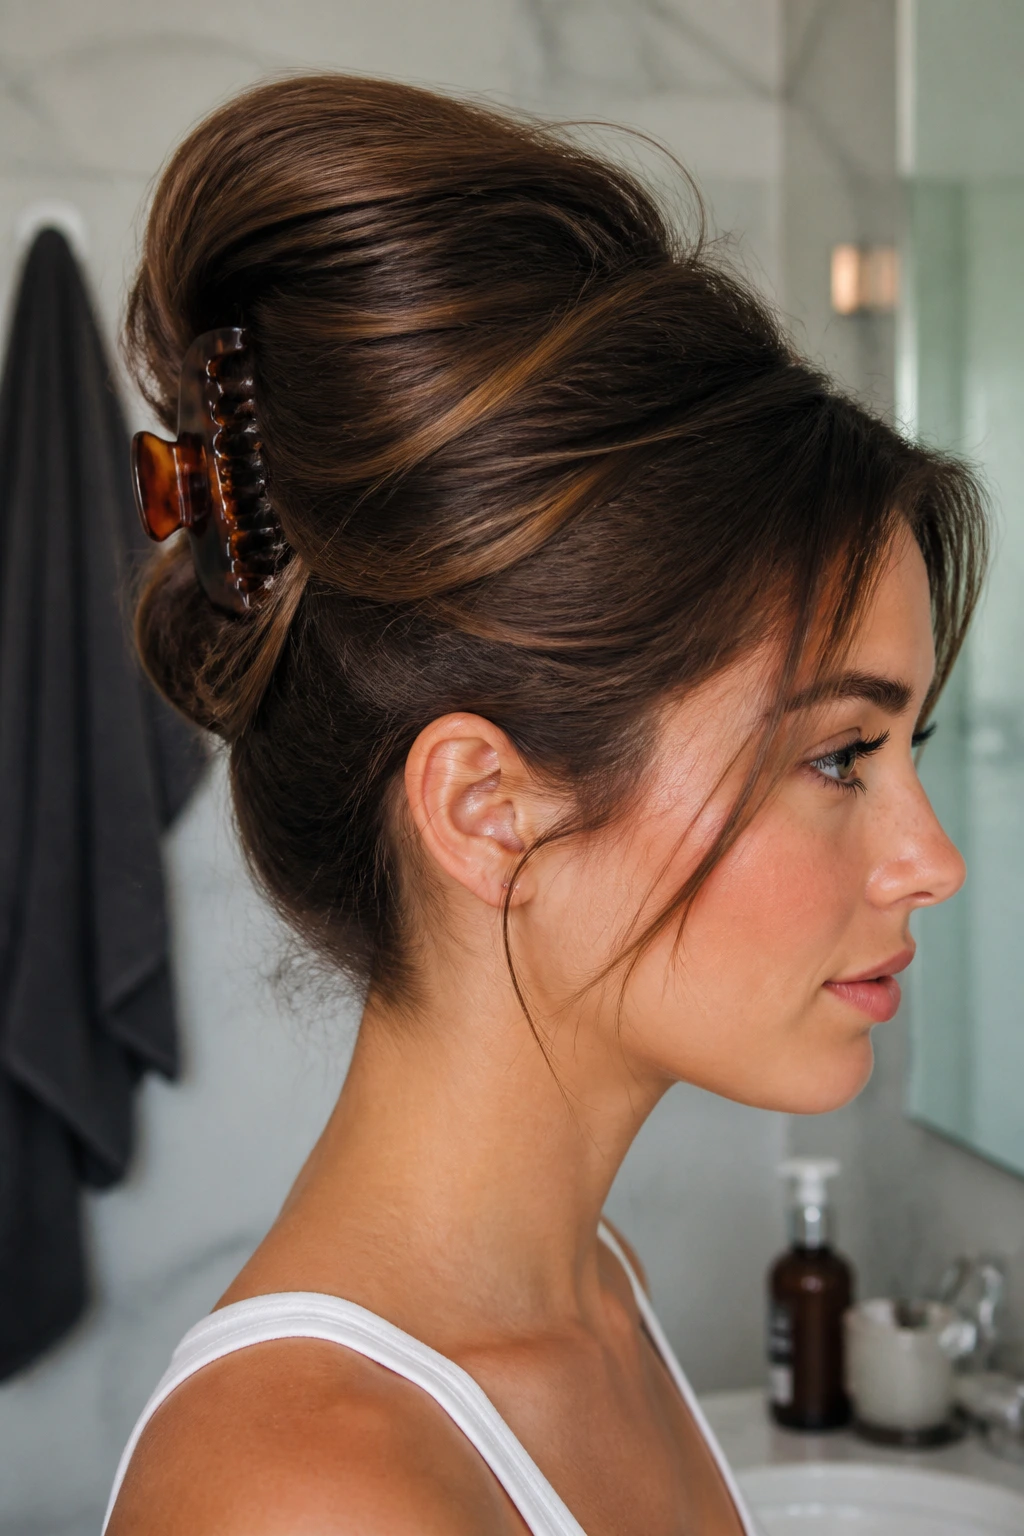
The humble claw clip is a staple of busy mornings everywhere. By modifying how you twist your hair into the clip, you can create a beautiful, high-volume shape that looks much more intentional than a standard casual twist.
Instead of pulling all of your hair flat against your scalp before clipping, lift the crown section up first and push it forward to create a gentle puff. Hold that puff in place with one hand while you twist the rest of your hair upward with the other.
Claw the twisted hair to the back of your head, positioning the clip directly underneath your voluminous crown. The clip acts as a shelf, physically supporting the weight of your beehive and keeping it from sinking throughout the day.
15. The Deep Side-Parted Smooth Bouffant
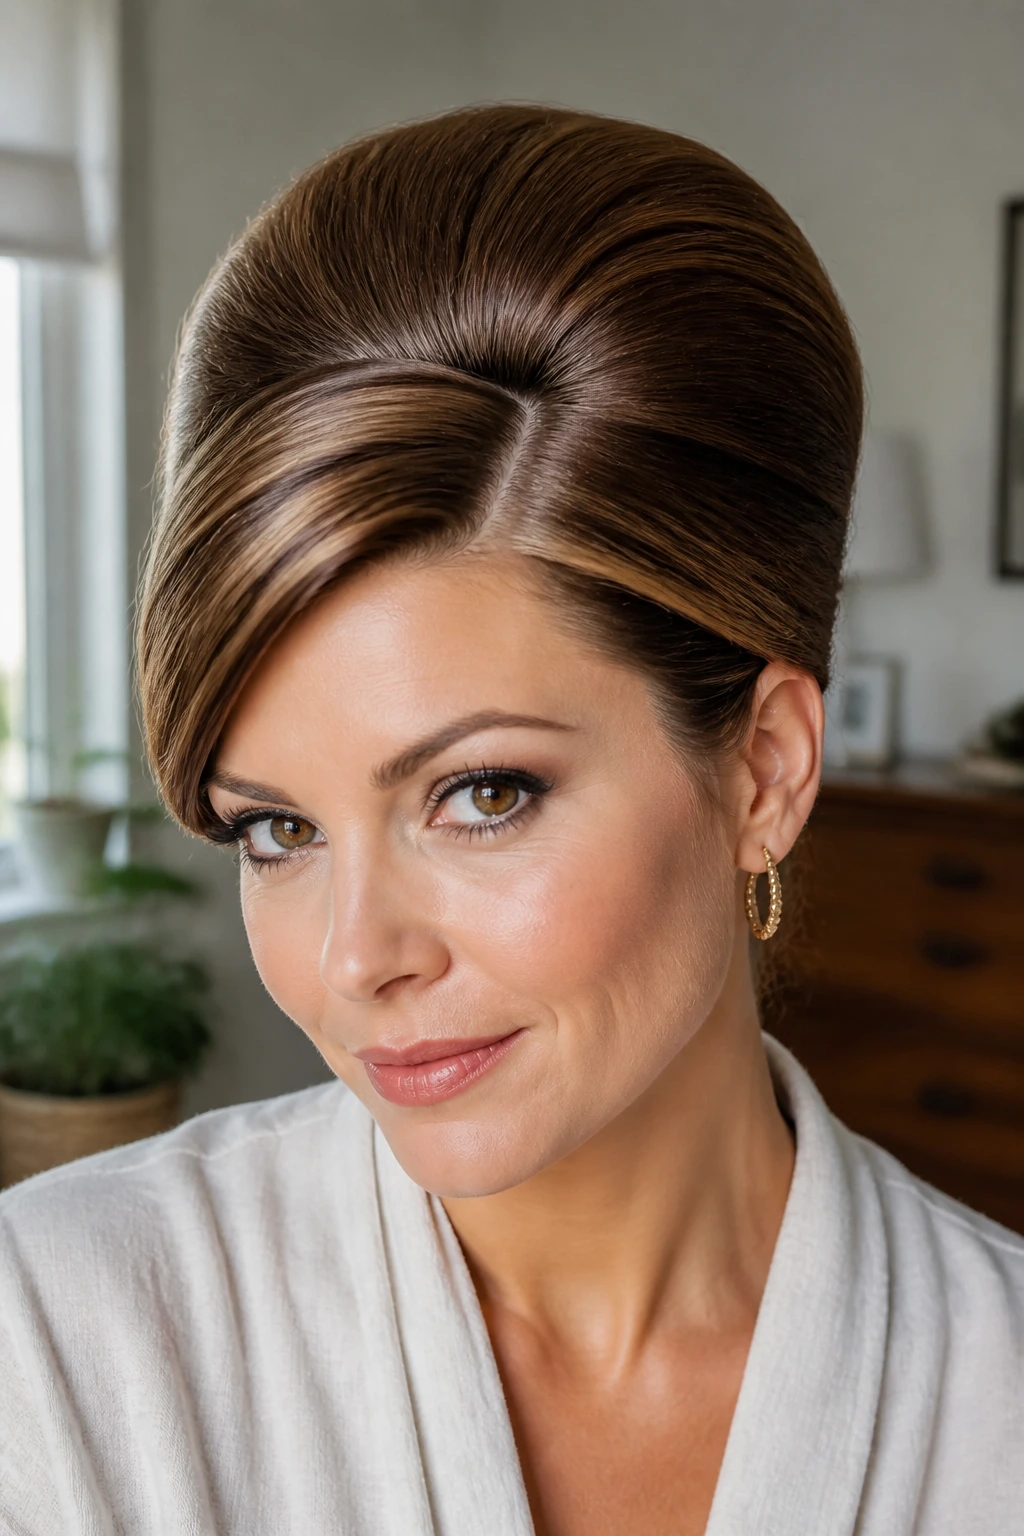
For a look that screams classic mid-century elegance, a deep side part paired with a smooth, sculpted bouffant is hard to beat. It is a style that works beautifully on straight, blow-dried hair and looks exceptionally polished with a sharp blazer or a simple knit top.
Begin by creating an immaculate side part using the tip of your comb. Section off the front side-swept portion of your hair and clip it out of the way. Tease the crown directly behind the part, building a round, smooth dome of height.
Release the front section, smooth it diagonally across your forehead, and tuck it behind your ear, securing it with a hidden bobby pin. This clean, diagonal line draws attention to your eyes while the height behind it provides a beautiful, classic frame.
16. The Twisted-Crown Crown-Braided Beehive
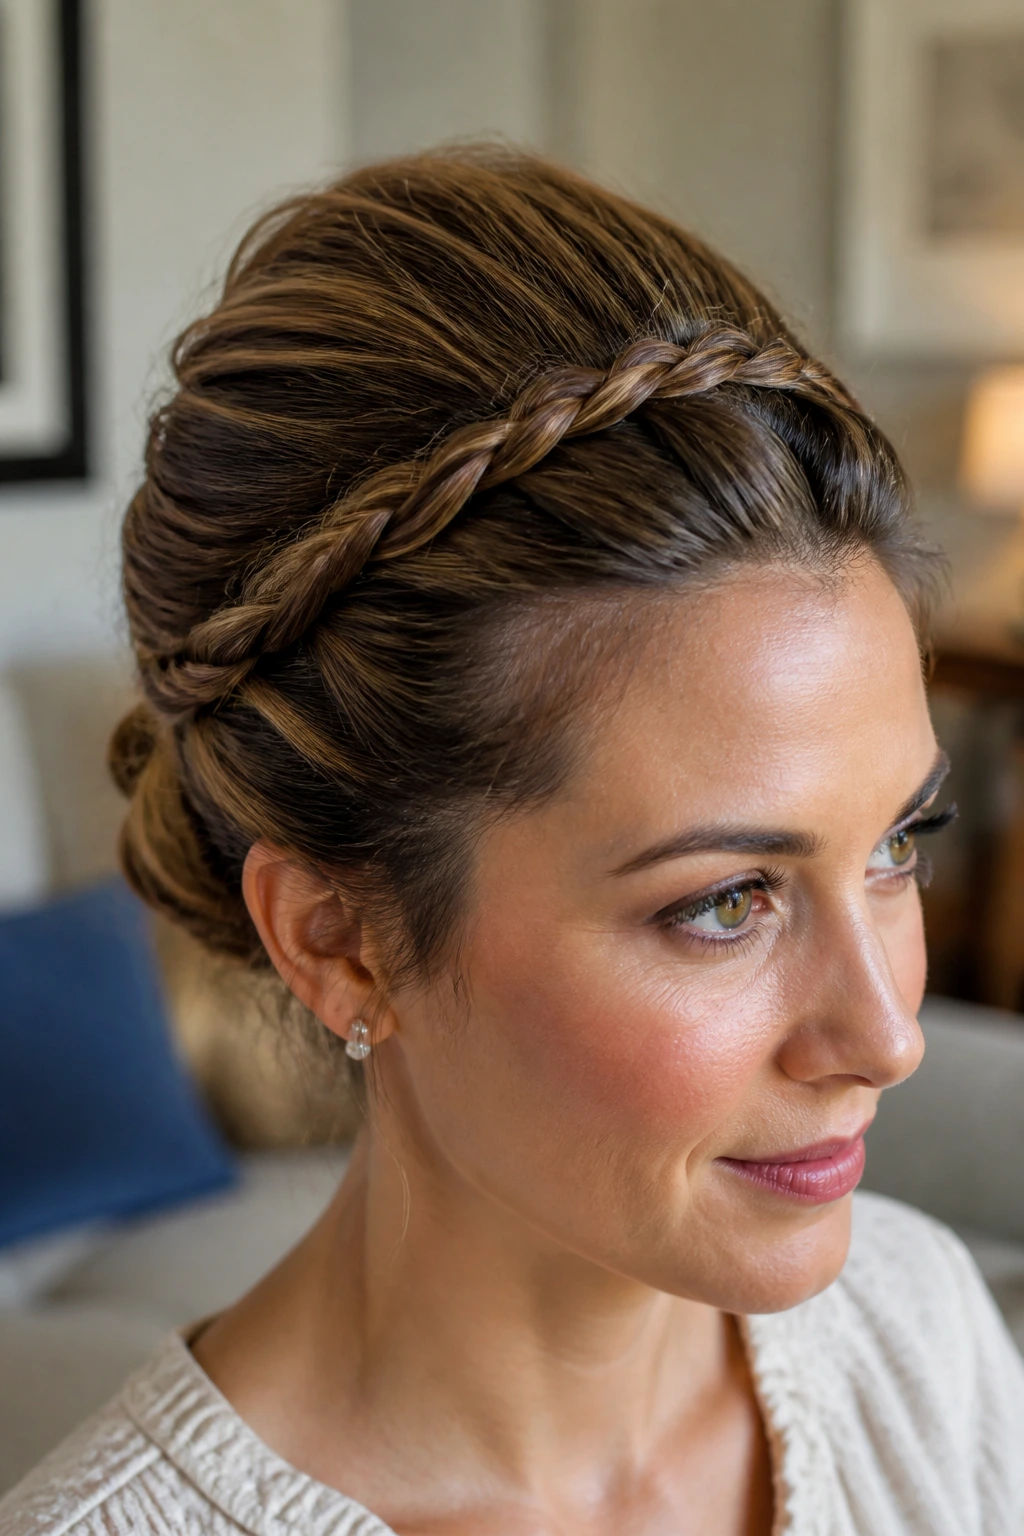
If you want the look of a braided rim but struggle with actual braiding, this twisted variation is a lifesaver. It uses simple two-strand twists instead of three-strand braids, which are much faster to execute when you are short on time.
The Mechanics of the Twist
By taking two small sections of hair from your temples and twisting them around each other, you create a beautiful, rope-like detail that frames your beehive. As you pull the twists back, they naturally help to anchor and lift the voluminous crown.
Why Twists Are Faster Than Braids
- They require less finger coordination, making them easy to do without looking in a mirror.
- They do not tangle as easily when working with textured or unbrushed hair.
- They create a thicker, more three-dimensional detail that stands out beautifully.
- They can be easily secured with a single bobby pin at the back of your head.
Pro tip: Gently pull apart the loops of your twists before pinning them down to make them look twice as thick and full.
17. The Five-Minute Sock-Donut Beehive
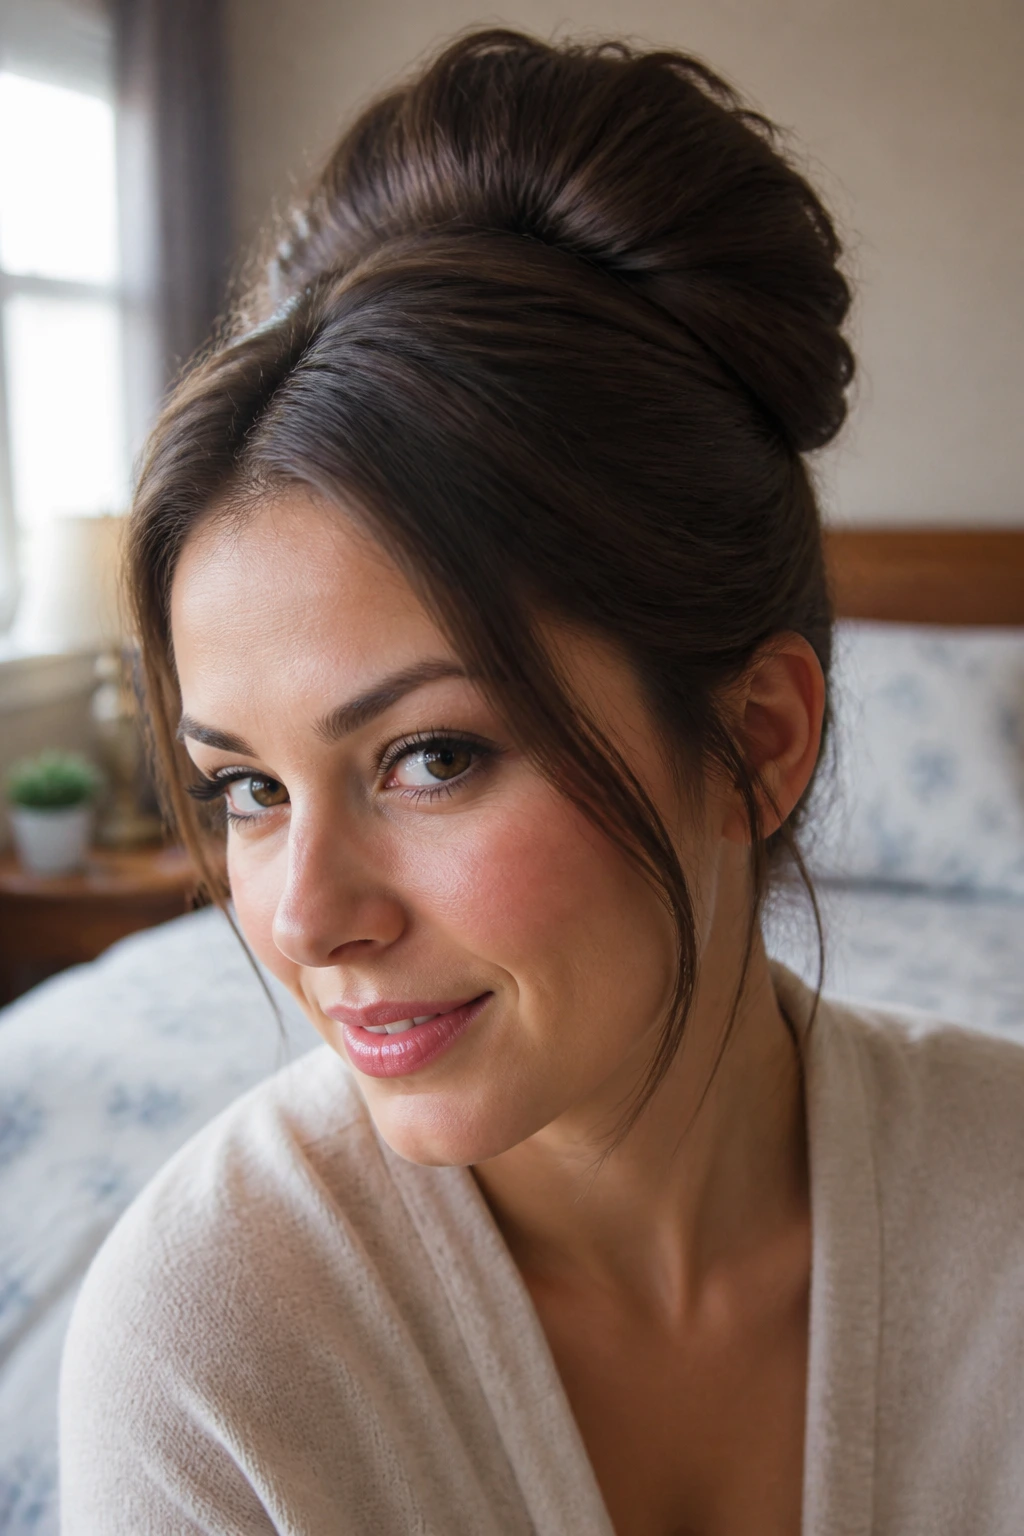
If your hair is very fine or thin, you might find that backcombing alone does not give you the lasting height you want. This is where using a hidden hair donut—or a clean sock with the toe cut off and rolled up—can work wonders.
Instead of putting the donut at the very top of your head for a ballet bun, you are going to pin it flat against the back of your crown to act as a structural foam insert. It provides instant, lightweight volume that will never deflate, no matter how long your day is.
Simply drape the smooth front and crown sections of your hair directly over the pinned donut, smoothing them down to completely hide the foam underneath. Pin the hair secure just below the donut, and let the rest of your hair hang down naturally. It is an instant, flawless shape every single time.
18. The Textured Lob Beehive
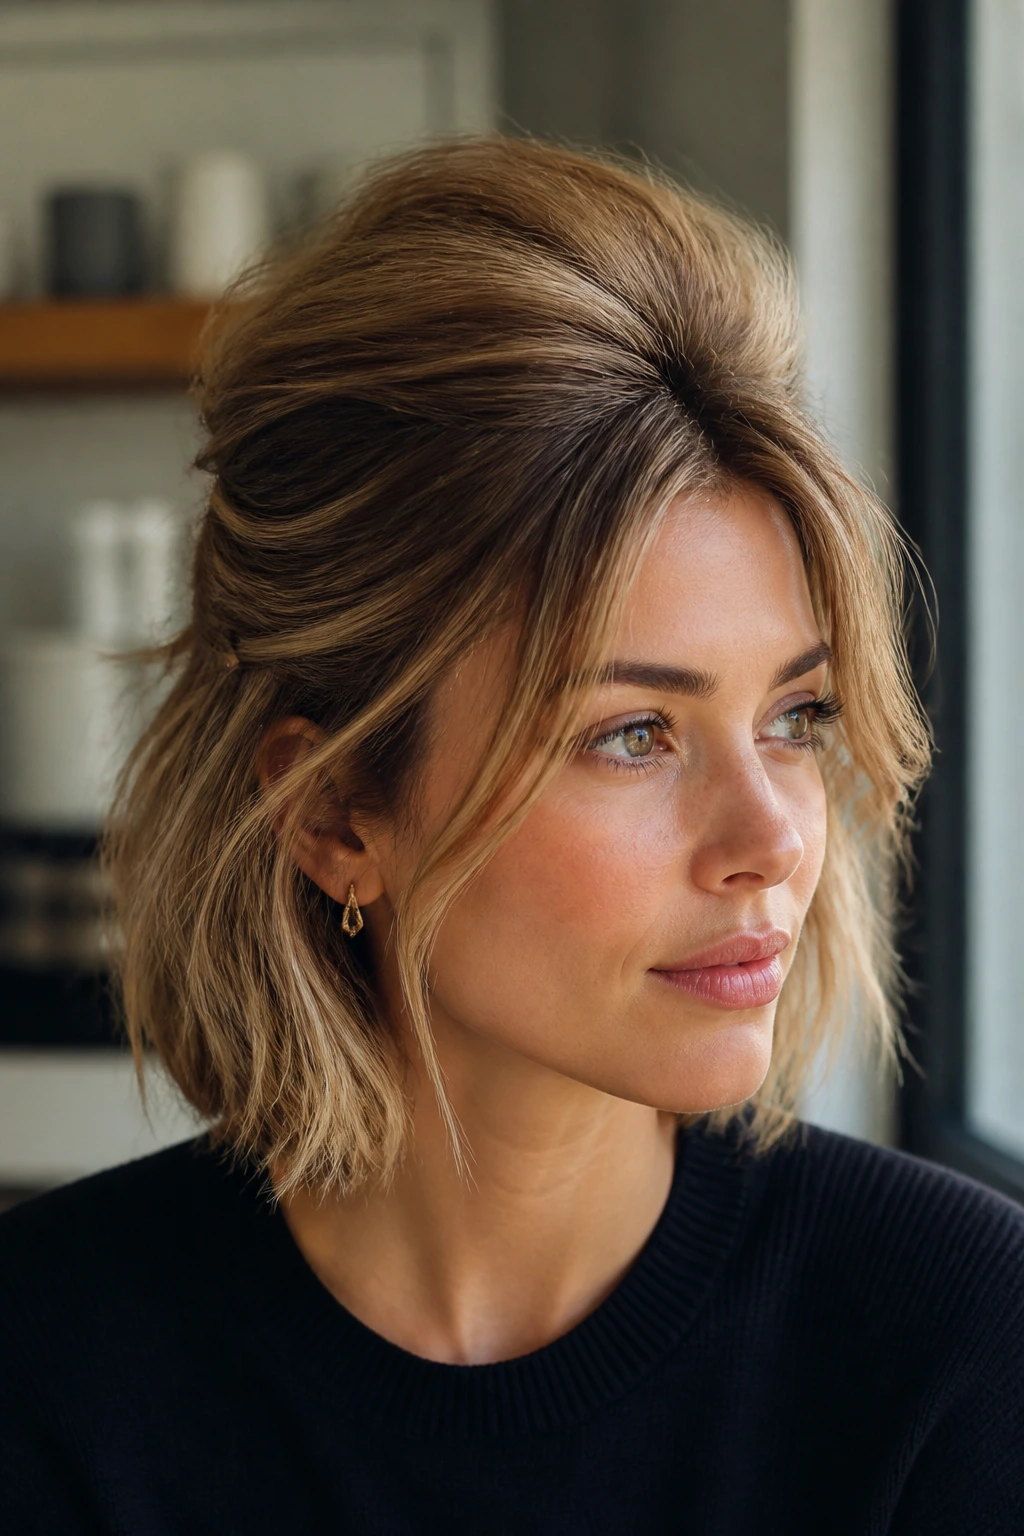
The long bob, or “lob,” is one of the most popular haircuts for a reason—it is incredibly versatile. It is also the perfect length for a quick retro volume update, as it has enough length to pin back but is short enough to hold height easily.
To style a lob beehive, focus on creating a messy, textured base. Spray your hair with a sea salt spray or texturizing mist and run your fingers through it. Tease the crown section gently, then pin the sides back behind your ears, leaving the textured ends of your lob to swing freely.
This style looks best when it is not too perfect. A few loose flyaways and a slightly uneven texture give it a modern, casual feel that pairs perfectly with a simple t-shirt and jeans on a weekend morning.
19. The Space-Bun Dual Beehive
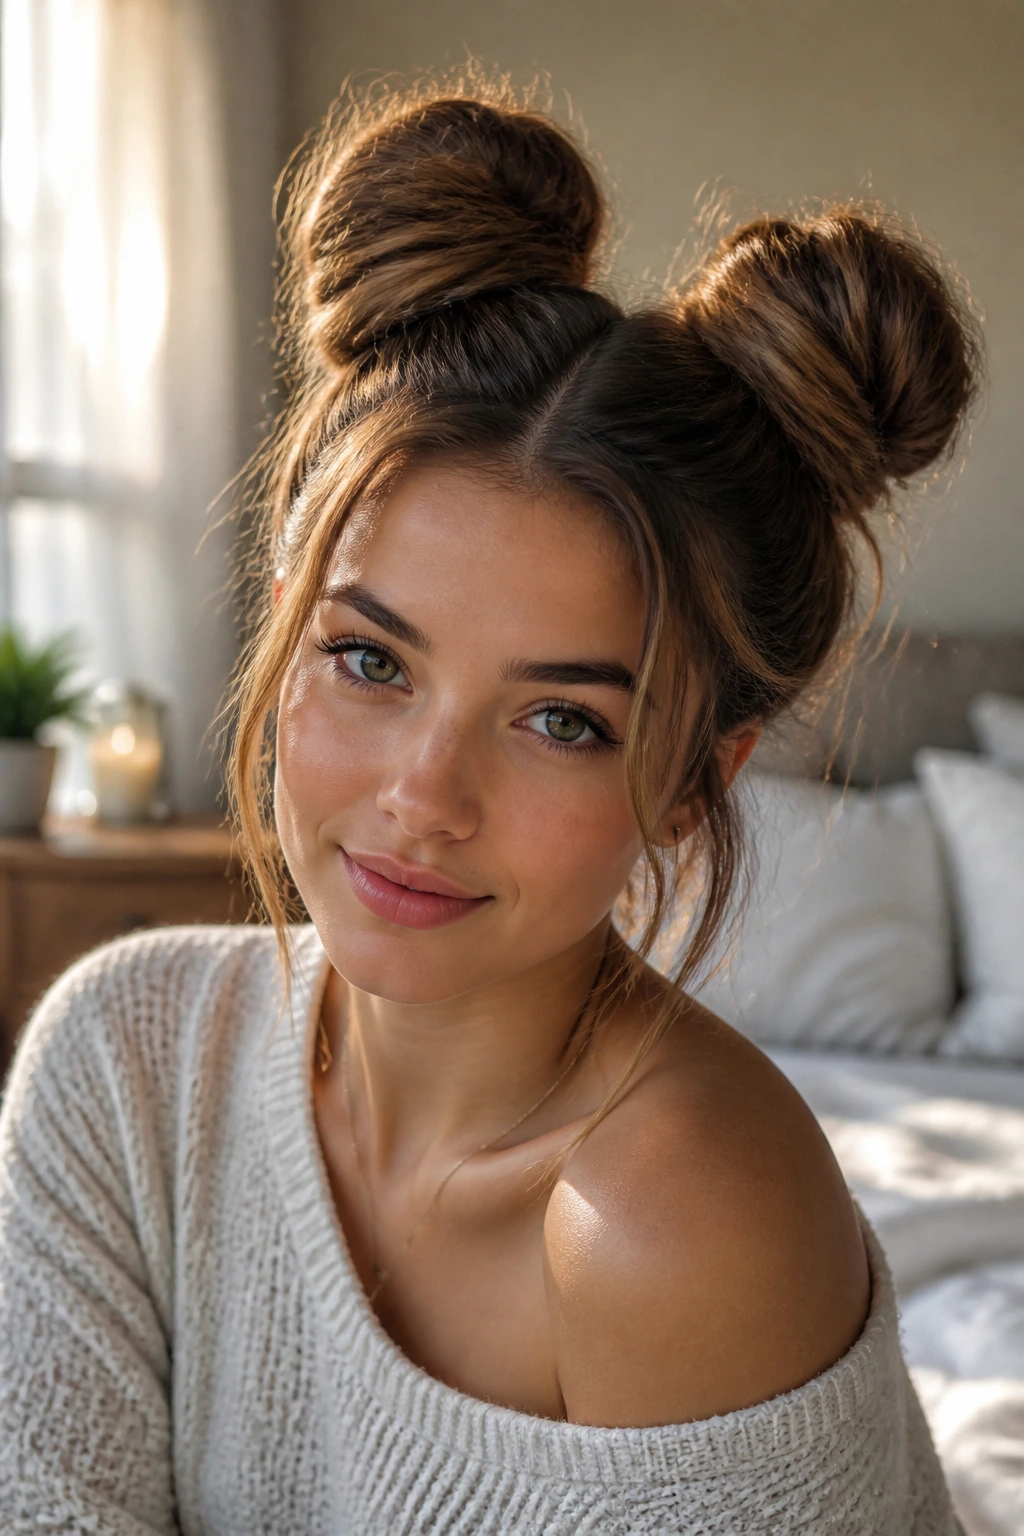
For a playful, youthful take on retro volume, why not try doubling your height? This style features two smaller, voluminous crowns that lead into two high space buns on either side of your head.
Start by parting your hair down the center from your forehead to the nape of your neck. Work on one side at a time, teasing the crown section of that half to build vertical height. Gather the hair into a high ponytail on the side of your head, keeping that volume at the crown intact.
Twist the ponytail into a loose, messy bun and secure it with a hair tie or pins. Repeat the process on the other side. The result is a fun, balanced style that offers all the lift of a classic bouffant with a whimsical twist.
20. The Faux-Hawk Teased Ridge
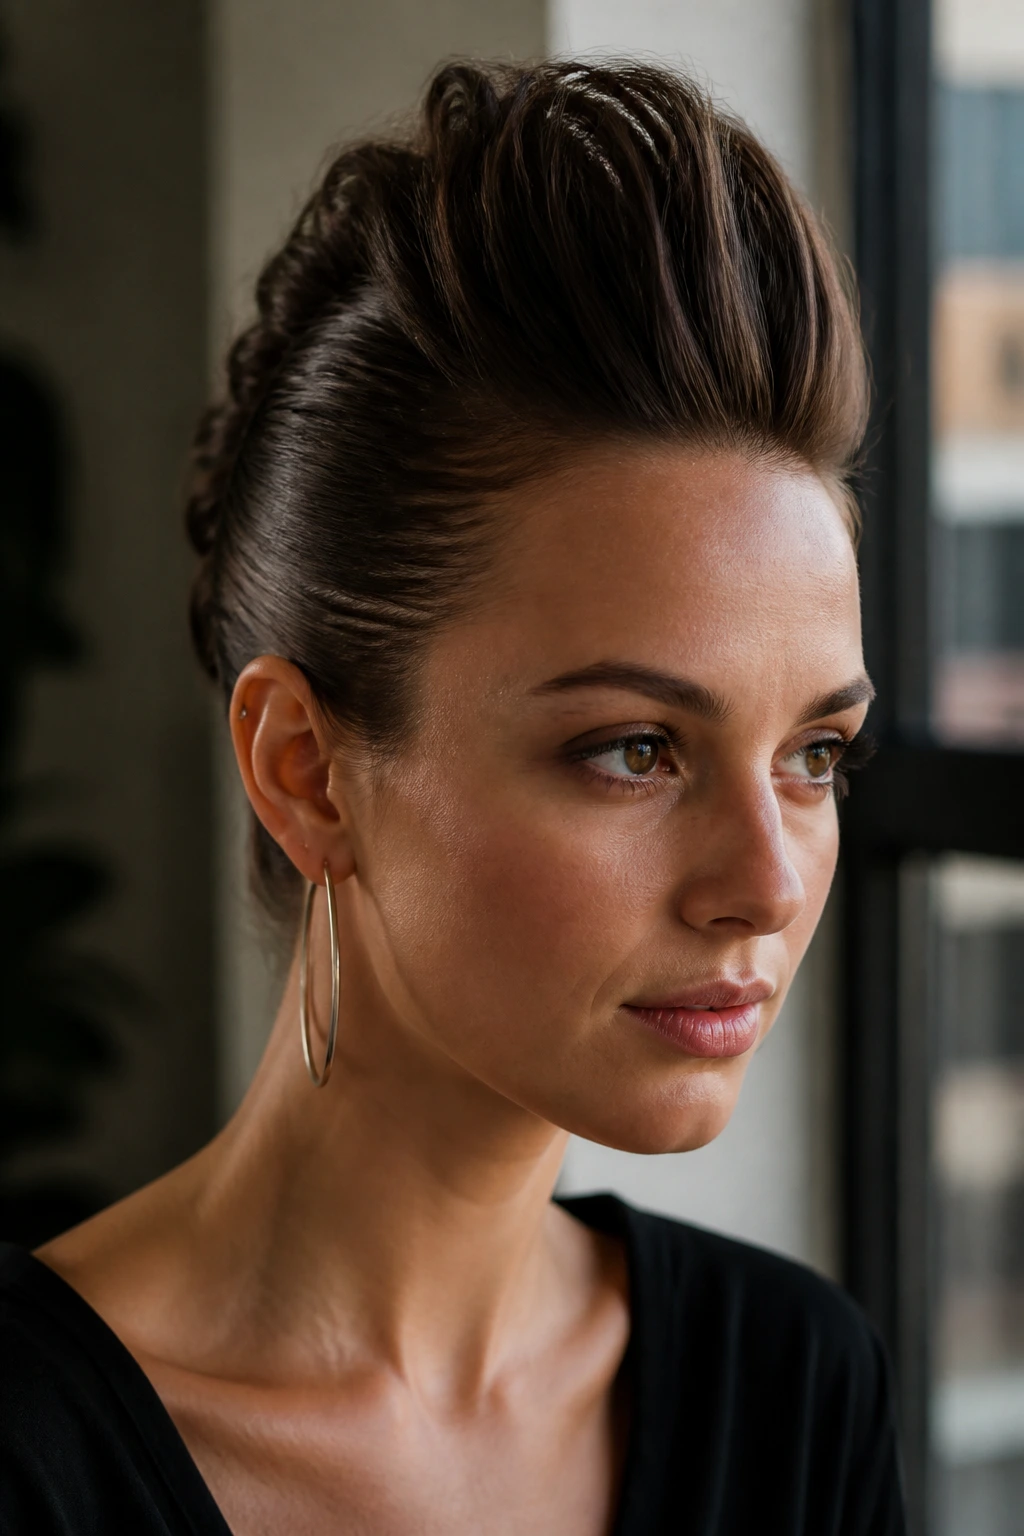
If your personal style leans a bit more edgy or modern, this faux-hawk inspired variation is a fantastic way to wear retro volume. It concentrates all of the height along the center line of your head, creating a sharp, striking silhouette.
Tease your hair in a narrow strip from your front hairline all the way back to your crown. Use a firm-hold styling gel or pomade to slick the sides of your hair completely flat against your head, pinning them tightly at the back.
Smooth the teased center ridge backward, keeping the sides tight and clean. This creates a dramatic, high-contrast shape that looks incredibly styling and bold while keeping your hair completely out of your face during a busy day.
21. The Silk-Wrapped Beehive Turban
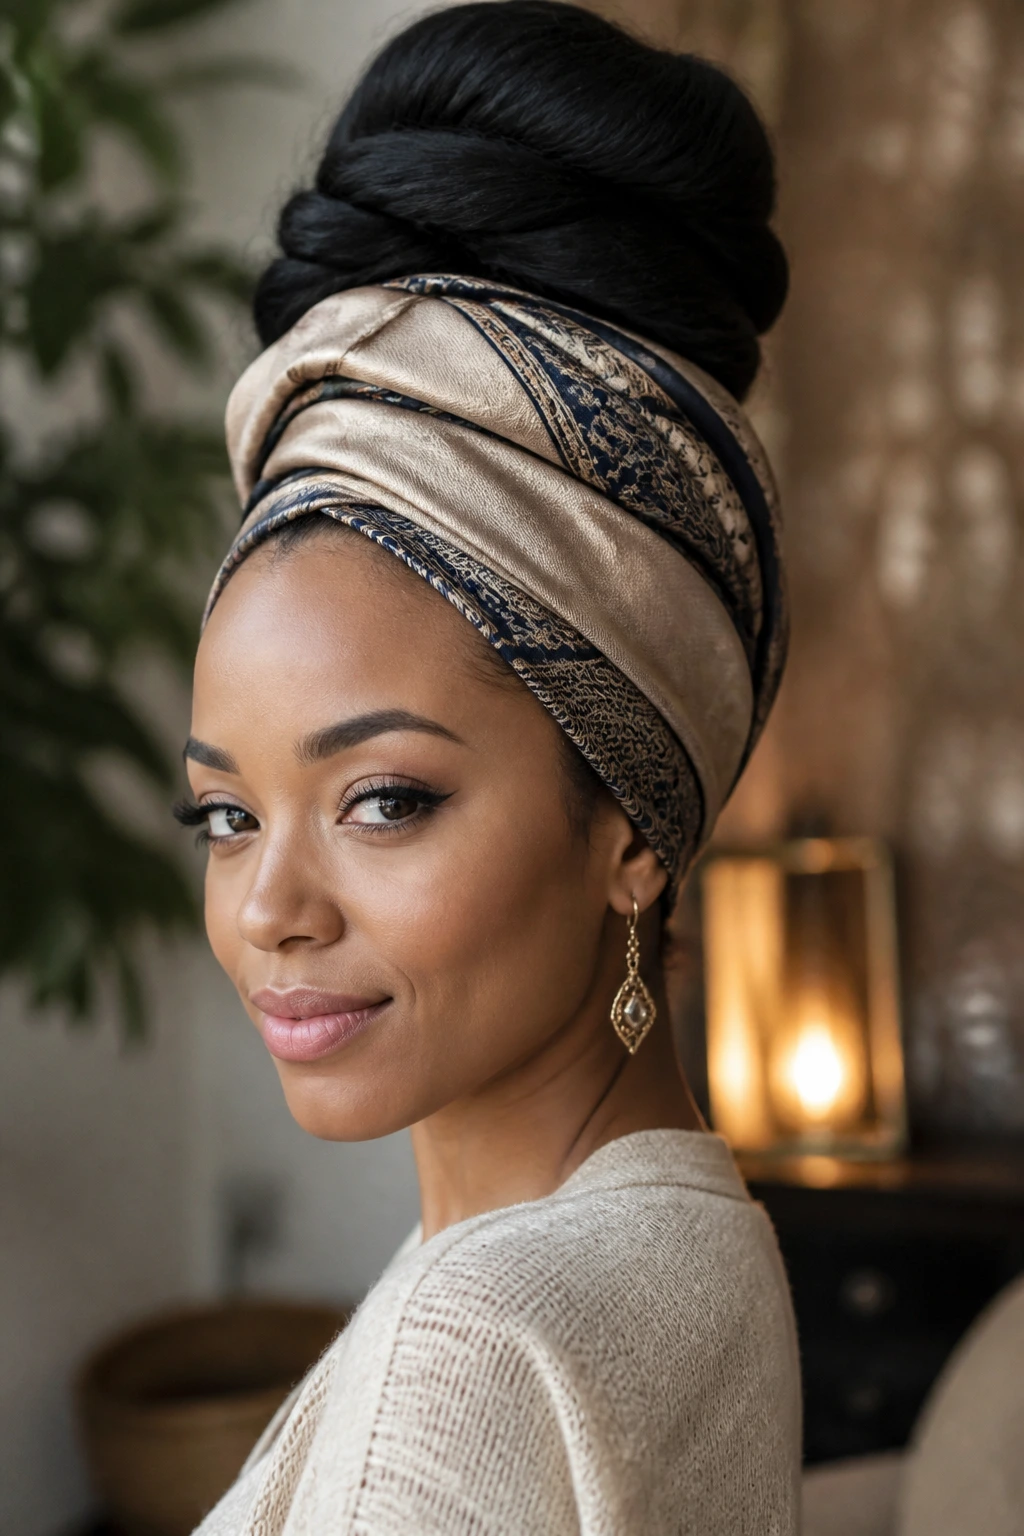
On those mornings when your hair is completely uncooperative or you are overdue for a wash, wrapping your head in a silk turban is the ultimate styling solution. It allows you to keep all of your hair tucked away while still enjoying the beautiful, high-profile shape of a classic beehive.
First, gather your hair at the crown and secure it into a high, messy bun to act as your structural base. Place a pre-styled turban or a long silk scarf over your head, wrapping it snugly around the base of the bun.
Adjust the fabric so that the high shape of the bun is clearly defined underneath the wrap. The fabric smooths over any bumps or messy spots, creating a clean, elegant, and highly sophisticated silhouette that looks like you spent hours styling it.
Wrapping Up
Mastering retro volume is all about understanding your hair’s natural texture and working with it, not against it. You do not need a shelf full of expensive products or hours of free time to enjoy these beautiful, high-volume styles. With a simple comb, a handful of sturdy bobby pins, and a bit of practice, you can easily elevate your morning routine and step out the door feeling polished, confident, and ready to take on the day. Experiment with these different variations to find the ones that work best for your hair length and texture, and enjoy the ease of classic, timeless style on even your busiest mornings.
