



The alarm blares, the shower steam begins to clear, and you have exactly twelve minutes to make your coils, curls, or locks look presentable before walking out the door. We have all been there. Finding reliable Black hairstyles for busy mornings isn’t just about looking neat; it is about preserving the life of your hair without sacrificing precious sleep.
Textured hair requires strategic handling. You cannot simply run a plastic brush through dry Type 4 coils and hope for the best—unless your goal is an impromptu halo of frizz and broken ends. The reality of caring for natural hair is that it demands moisture, patience, and structural respect.
On mornings when time is short, the goal is simplicity. You need styles that work with your hair’s existing state, whether it is a three-day-old wash-and-go, a stretched blowout, or old braids that need a quick refresh. These styling strategies focus on working with your texture rather than fighting it, ensuring you look put-together in ten minutes or less.
Nighttime Prep That Saves Your Morning
Morning success is almost always decided the night before. If you sleep directly on a cotton pillowcase without securing your curls, you are setting yourself up for a frustrating, dry, tangled morning. A simple nighttime routine preserves moisture and keeps your hair stretched, reducing your morning styling time to under five minutes.
Hydration is the first step. Spraying a light mist of water mixed with a liquid leave-in conditioner onto your ends before bed keeps the hair pliable. Once the hair is damp but not wet, sealing that moisture with a few drops of jojoba or avocado oil prevents water loss overnight.
Protecting the physical structure of your curls is just as crucial. Gathering your hair into a loose high ponytail at the very top of your head—often called a pineapple—prevents your curls from getting crushed while you sleep. Wrapping the perimeter of your head with a silk or satin scarf keeps your edges flat, meaning you won’t need to apply heavy gels or heat to slick them down when the sun comes up.
1. The High Puff with Sleek Edges
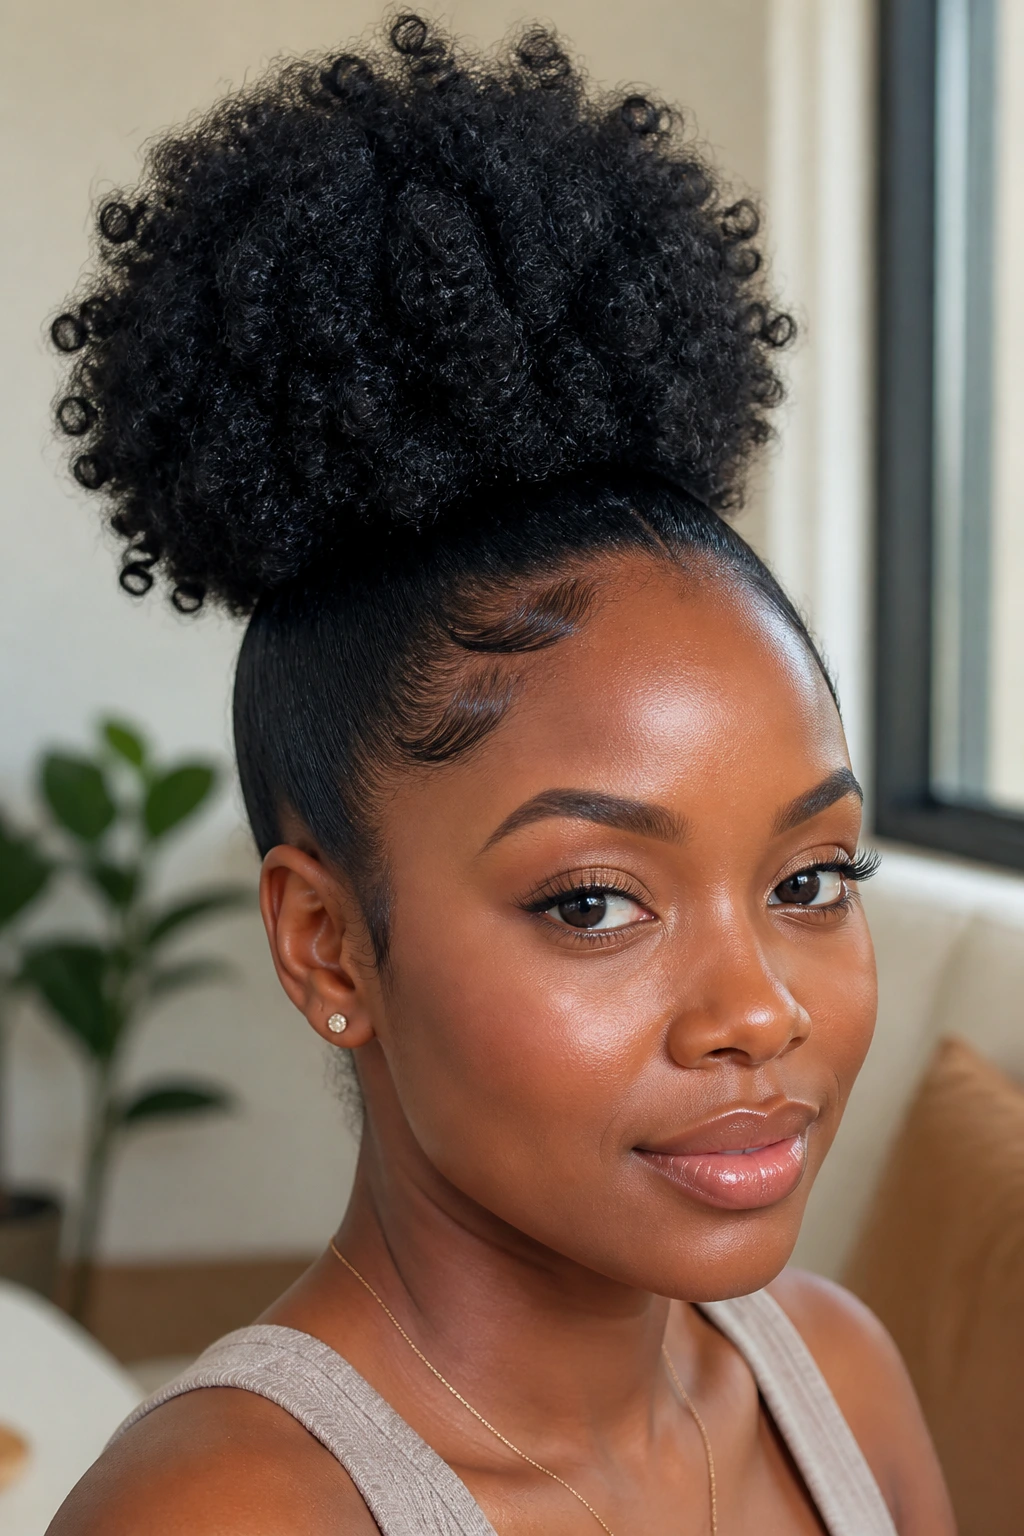
This classic style is the ultimate fallback for natural hair of almost any length. It works exceptionally well on older wash-and-go hair or twist-outs that have lost their individual definition but still retain beautiful volume. The key to making a puff look intentional rather than accidental lies in the contrast between sleek sides and a voluminous crown.
Why This Style Works So Well
By gathering the bulk of your hair at the top of your head, you protect your ends from rubbing against your clothing throughout the day. It also creates an instant lifting effect for your facial features.
Quick Styling Steps
- Mist your edges with water or a hydrating rosewater spray to soften the hair.
- Apply a small amount of flaxseed gel or your favorite edge control to your perimeter.
- Use a soft boar-bristle brush to smooth the hair upward toward the crown.
- Loop a long elastic band, shoestring, or satin headband around your neck, pull it upward, and tie it gently to secure the puff.
- Use your fingers to fluff the ends, adding volume where needed.
Pro tip: Never pull the elastic band too tight, as this can cause tension headaches and gradually thin your hairline over time.
2. The Half-Up, Half-Down Top Knot
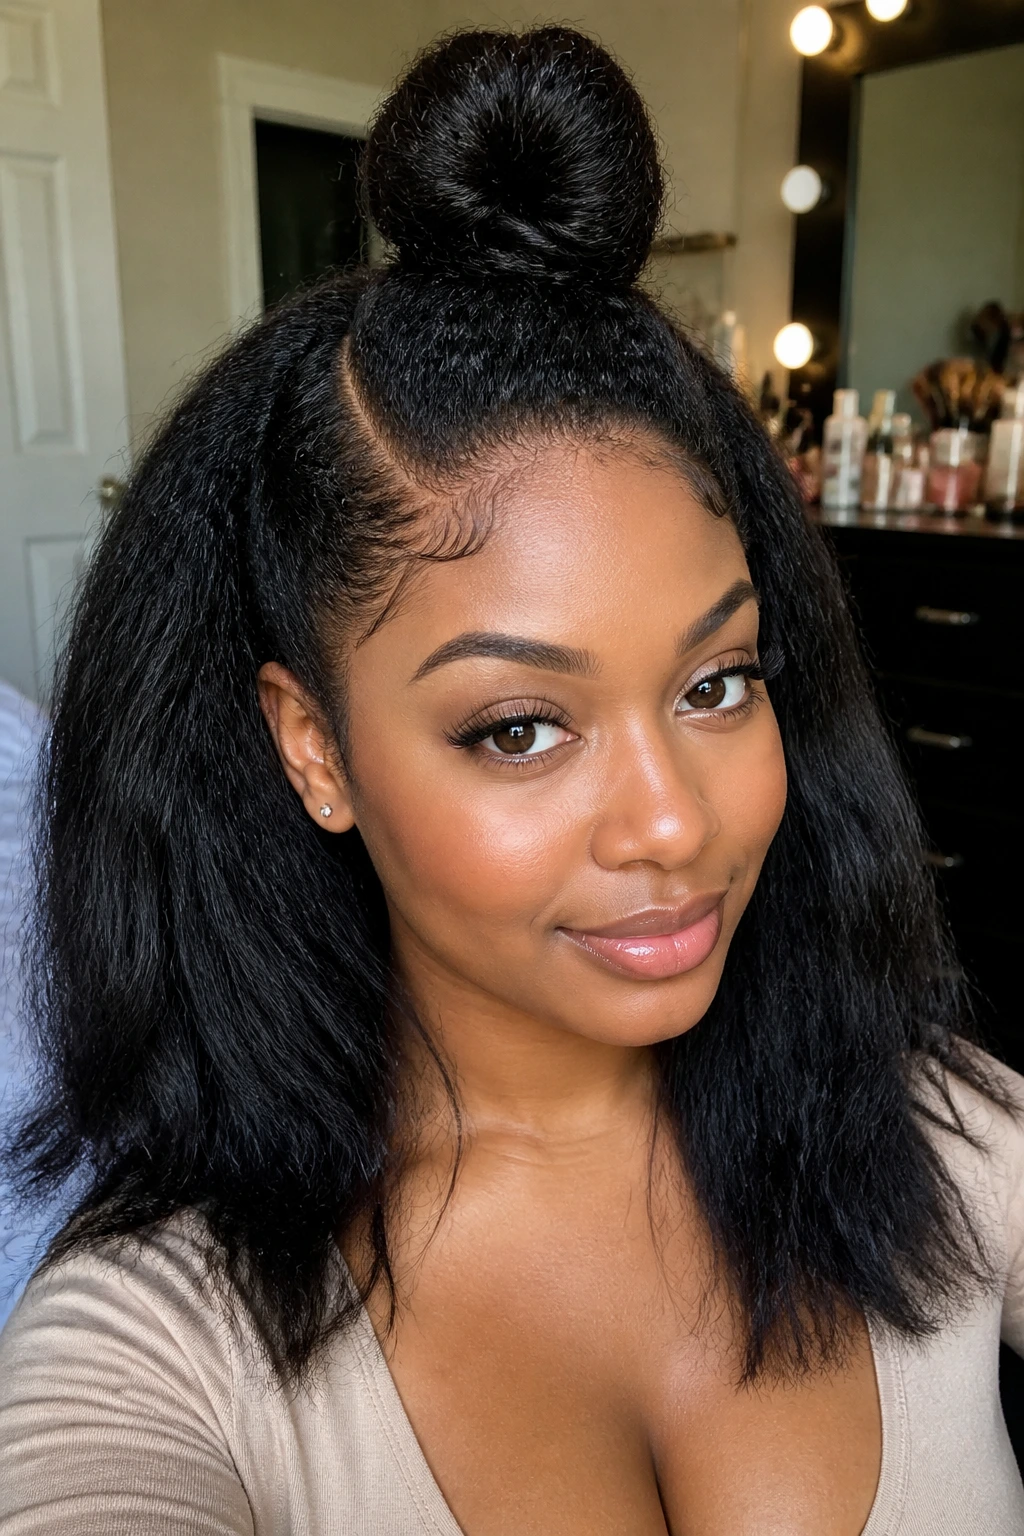
When you want to show off your length but need your hair out of your face, this hybrid style is a lifesaver. It works beautifully on stretched curls, blown-out hair, or even older box braids. By dividing the hair into two distinct sections, you handle texture issues in the front while letting the back cascade freely.
You do not need freshly washed hair to make this look clean. In fact, slightly dirty hair often has the perfect amount of grip to hold the top knot in place without slipping. Simply section off the hair from the top of your ears upward, smoothing this top section into a high ponytail.
Once secured with a hair tie, wrap the ponytail around its base to form a neat bun, securing it with a couple of U-shaped bobby pins. Leave the back section untouched, or mist it with a light curl refresher spray to revive the coil pattern. It is structured, practical, and takes less than four minutes to execute.
3. Double Flat Twists
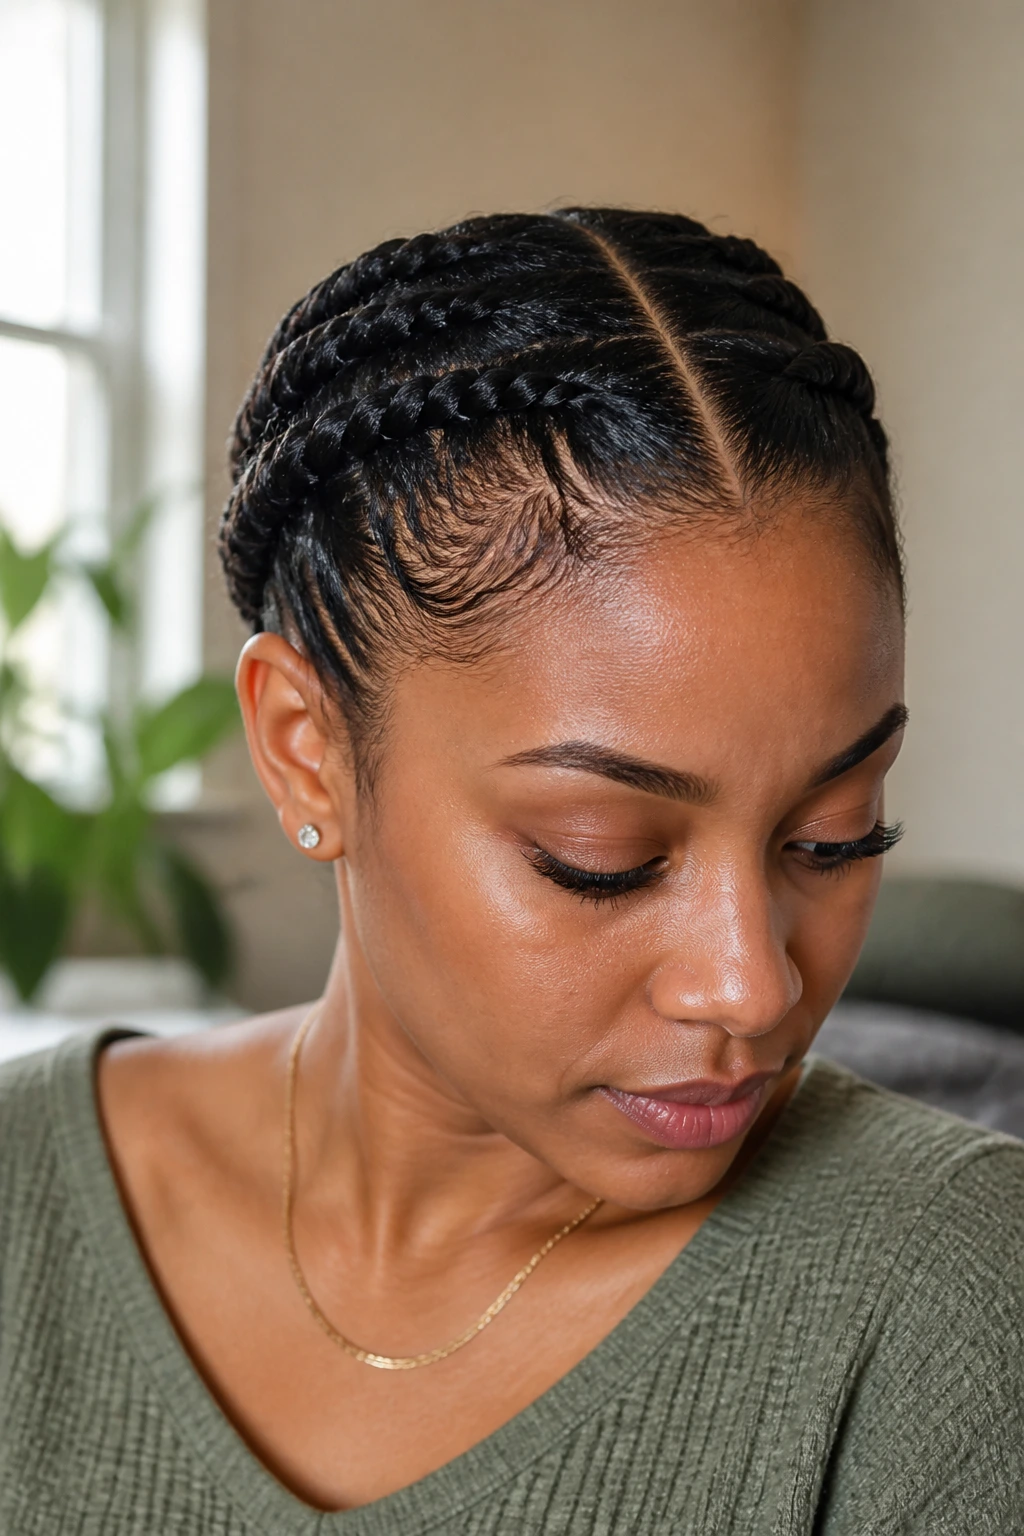
If you are dealing with a humid forecast, loose hair is going to frizz. Flat twists keep your hair secure, neat, and protected from the elements. This style is particularly excellent for medium-to-long hair and can easily transition from a day at the office to an evening workout.
How to Get the Look
To make this look polished, start by parting your hair down the center from your forehead to the nape of your neck. Working on one side at a time, take a small section of hair at the hairline and split it into two. Begin twisting them over each other, incorporating more hair from the scalp as you move backward along your head—similar to a French braid but much faster to execute. Once you reach the nape, twist the remaining length to the ends and secure with a small elastic. Repeat on the other side.
Flat Twist Quick Facts
- Ideal Hair Type: Works well on Type 3 and Type 4 hair.
- Time Required: Roughly 5 to 7 minutes once you master the twisting motion.
- Longevity: Can easily last 2 to 3 days with a silk scarf at night.
- Low Manipulation: Keeps hands out of your hair, reducing physical breakage.
Pro tip: If your ends feel dry, apply a generous amount of shea butter to the tips of the twists before securing them.
4. The Low Sleek Chignon
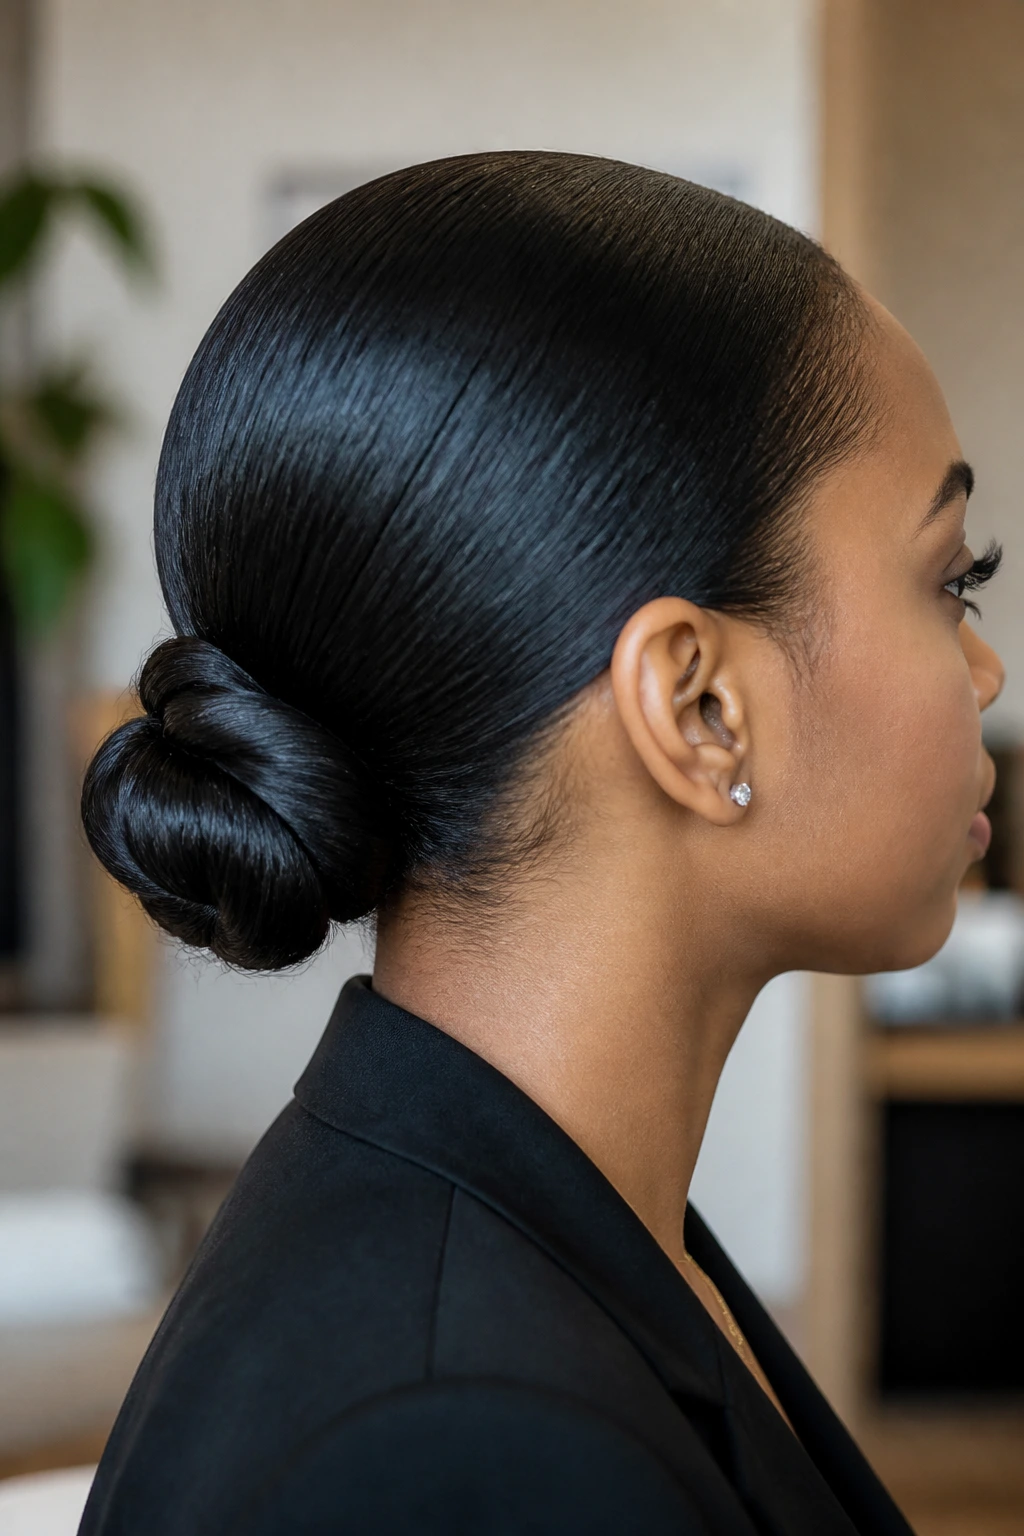
For an executive meeting or a formal presentation, a low chignon provides an instant level of sophistication. This style is particularly forgiving on dry or slightly frizzy hair because the bulk of the hair is tucked away, hiding any uneven texture or split ends.
A paddle brush is your best friend here. Start by parting your hair either down the middle or deep on one side, depending on your face shape. Dampen your roots with a water bottle, apply a firm-hold styling cream, and brush your hair downward and backward toward the nape of your neck.
Gather the hair into a low ponytail. Once secured, twist the length of the ponytail into a tight rope, coil it around the hair tie to form a flat bun, and tuck the ends underneath. Use bobby pins to lock the chignon in place. The result is a smooth, sophisticated profile that looks like it took an hour but only took five minutes.
5. Banded Ponytail (Bubble Pony)
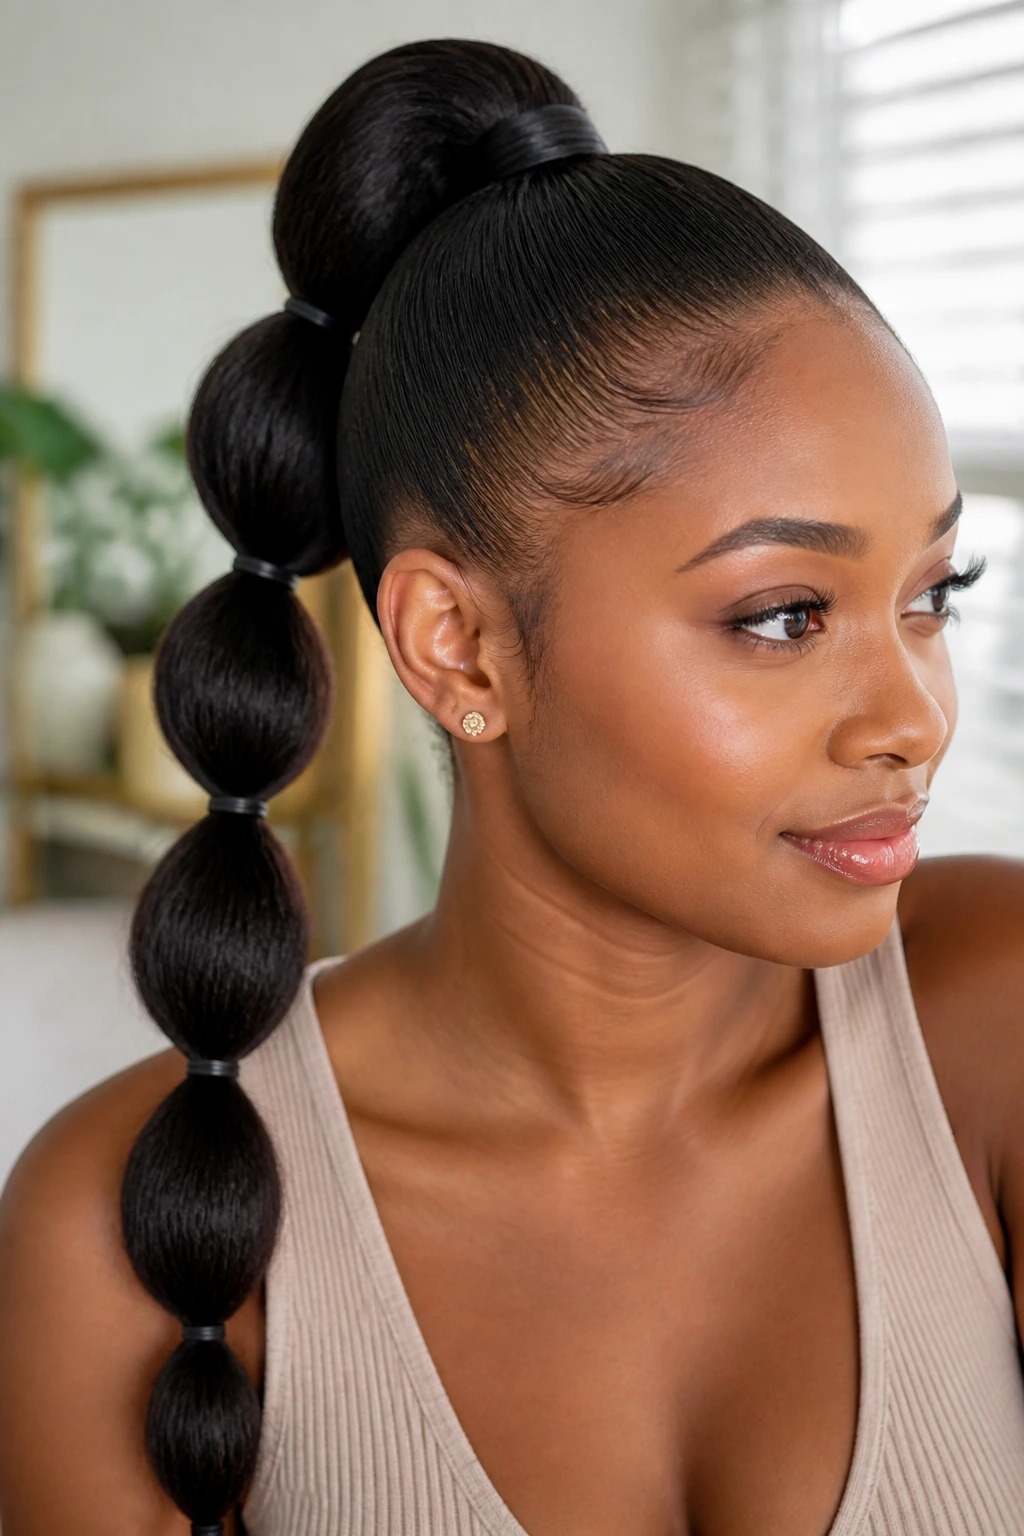
This playful style is an excellent way to showcase your hair’s length while keeping it completely contained and tangle-free. It is a fantastic option for blown-out or stretched natural hair, as the banding process keeps the hair from shrinking during the day.
Start by gathering your hair into a high or medium-height ponytail, smoothing the base with a little styling cream. Once the main ponytail is secured, take smaller elastic bands—preferably satin-covered or seamless bands to prevent snagging—and place them at equal intervals down the length of your ponytail.
After placing each band, gently pull at the sides of the hair between the elastics to create a rounded, bubble-like effect. Depending on your length, you might have two, three, or five bubbles. It is a modern, structured look that requires absolutely no heat or complex braiding skills.
6. Claw Clip Updo on Blown-Out Hair
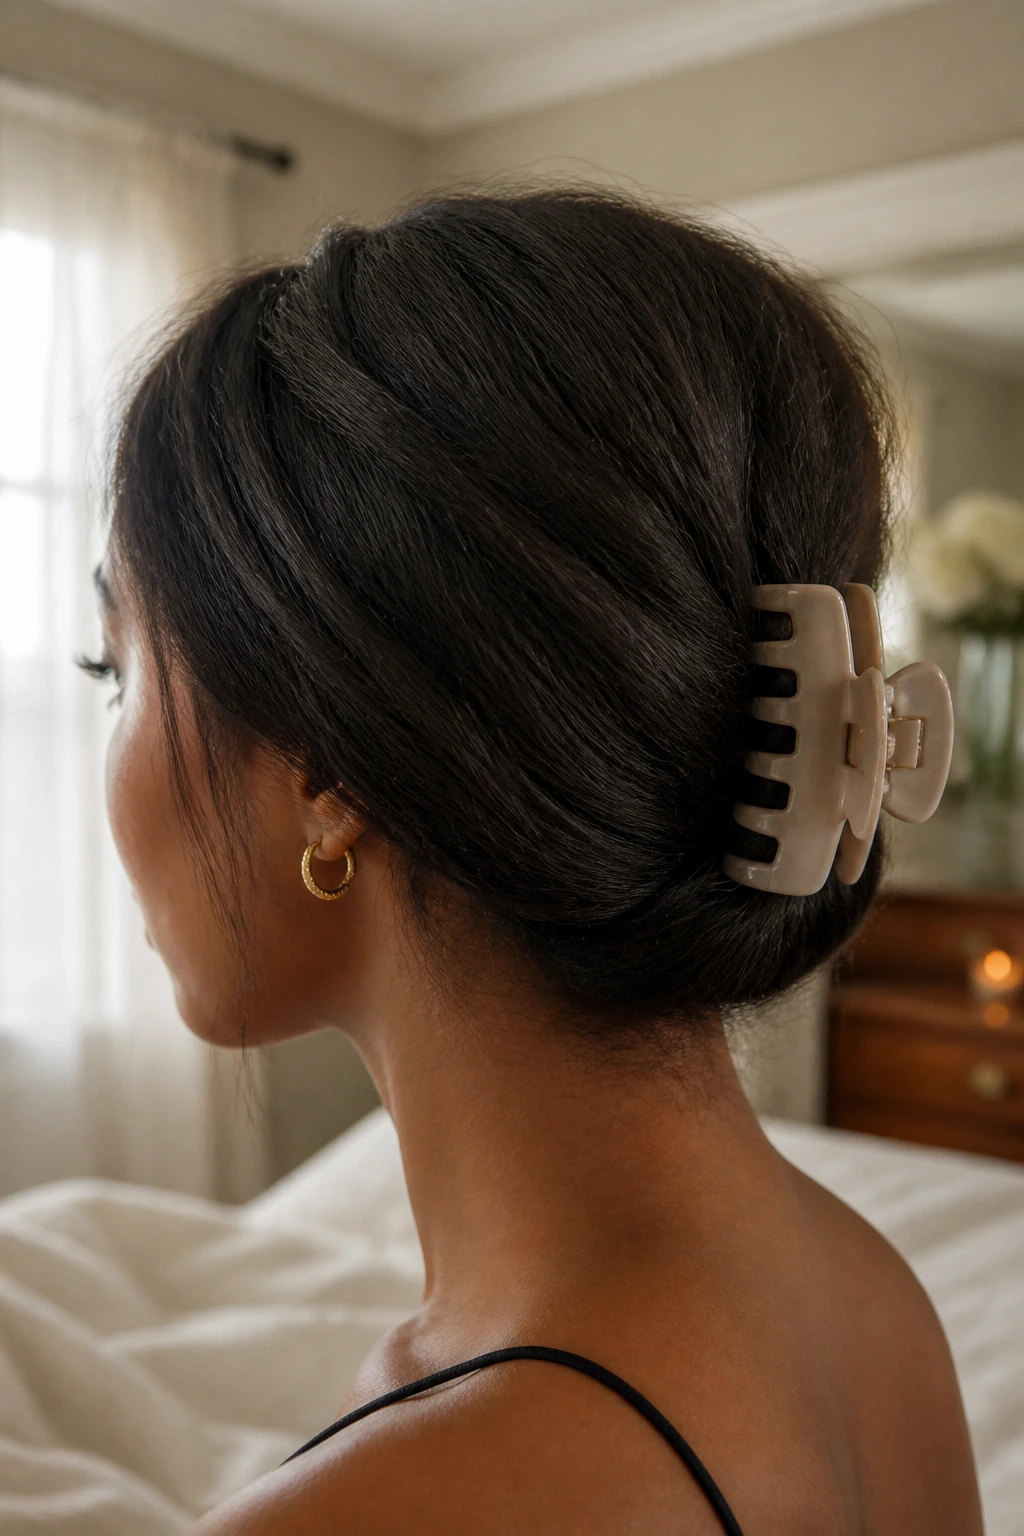
Claw clips are no longer just for the shower. They have become an indispensable styling accessory for textured hair, offering a quick way to pin up thick hair without the tension of traditional hair elastics.
What Makes It Different
Unlike elastic bands, which can pinch and cut into the hair shaft, a claw clip distributes weight evenly across your scalp. This means less pull on your roots and a much lower chance of mechanical breakage.
Who It Is Best For
This look is perfect for those with stretched or blown-out hair who want an effortless, undone look that still feels deliberate.
How to Style It
Simply gather your hair at the nape of your neck as if making a low ponytail. Twist the length of the hair upward against the back of your head. Hold the twist in place and clamp a large, wide-tooth claw clip over the middle of the twist, letting your textured ends cascade over the top of the clip like a waterfall.
7. The Pineapple with a Satin Scarf
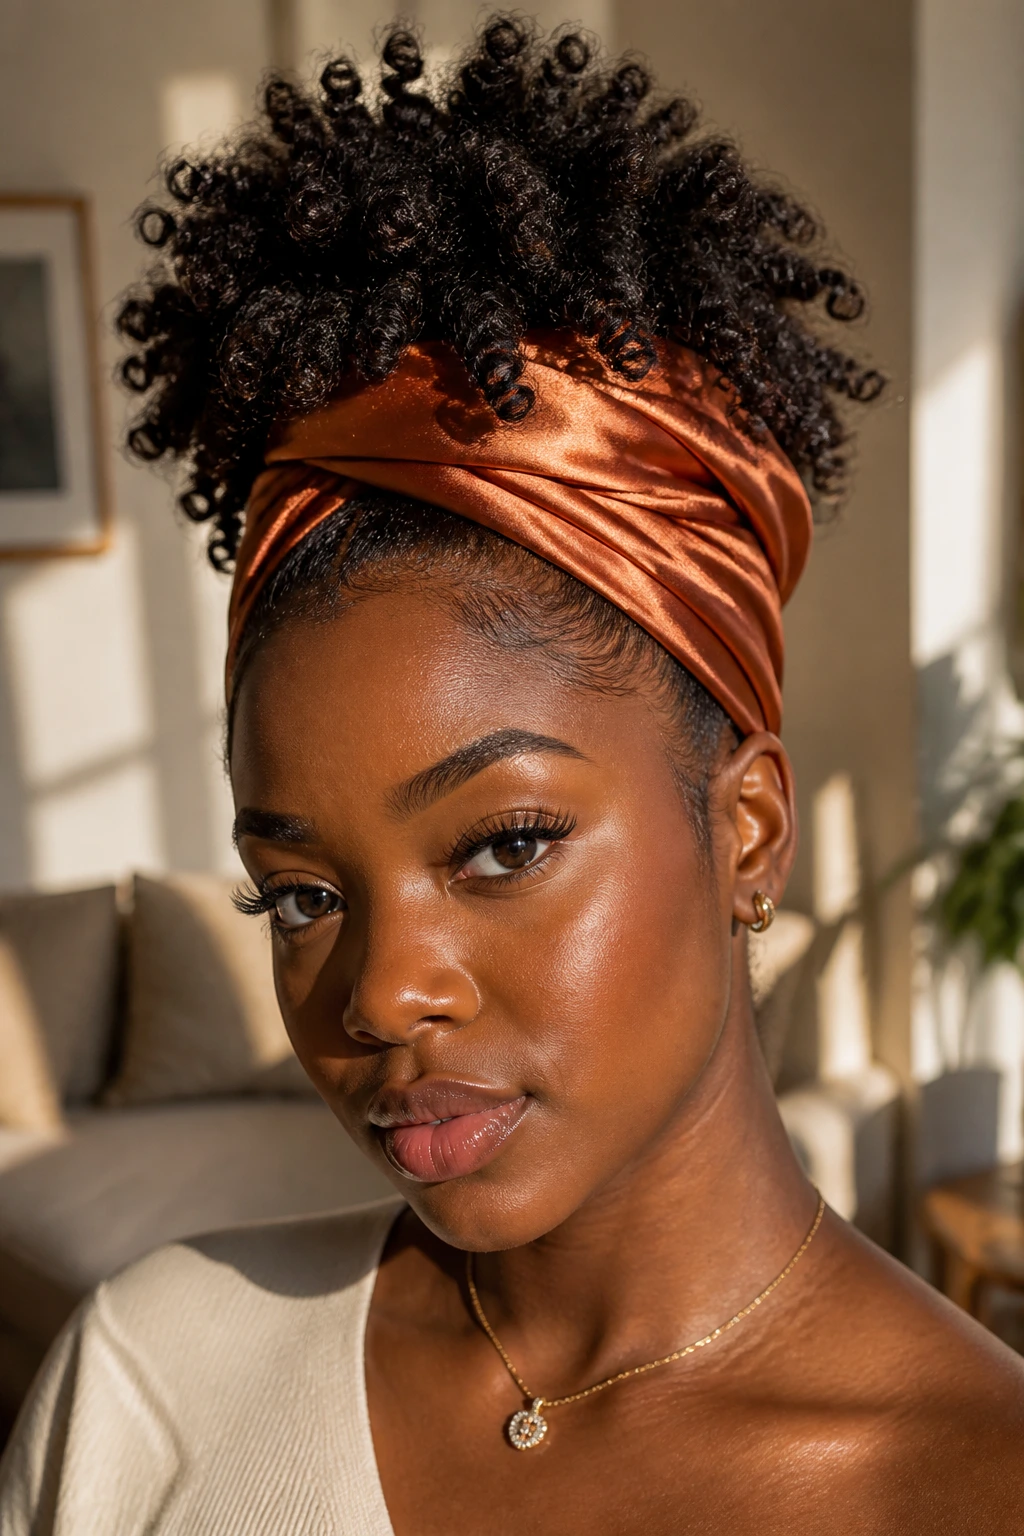
The pineapple is not just for bedtime. With the addition of a beautifully patterned silk or satin scarf, it becomes a vibrant, stylish daytime look that protects your hair while keeping you cool.
Why This Style Works
It hides old roots and dry crown areas by covering them with a decorative fabric, leaving only your defined curls visible at the top.
Quick Styling Steps
- Gather your hair into a loose ponytail at the very front of your crown using a soft scrunchie.
- Fold a square satin scarf into a triangle, then fold it again into a wide band.
- Place the center of the band at the back of your head, pull the ends forward, and tie them into a neat knot or bow at your hairline.
- Tuck any loose corners of the scarf into the band.
- Fluff your curls forward so they spill over the front of the scarf band.
Pro tip: Choose a scarf with colors that complement your outfit to make the hairstyle look like a coordinated fashion choice.
8. Side-Parted Low Puff
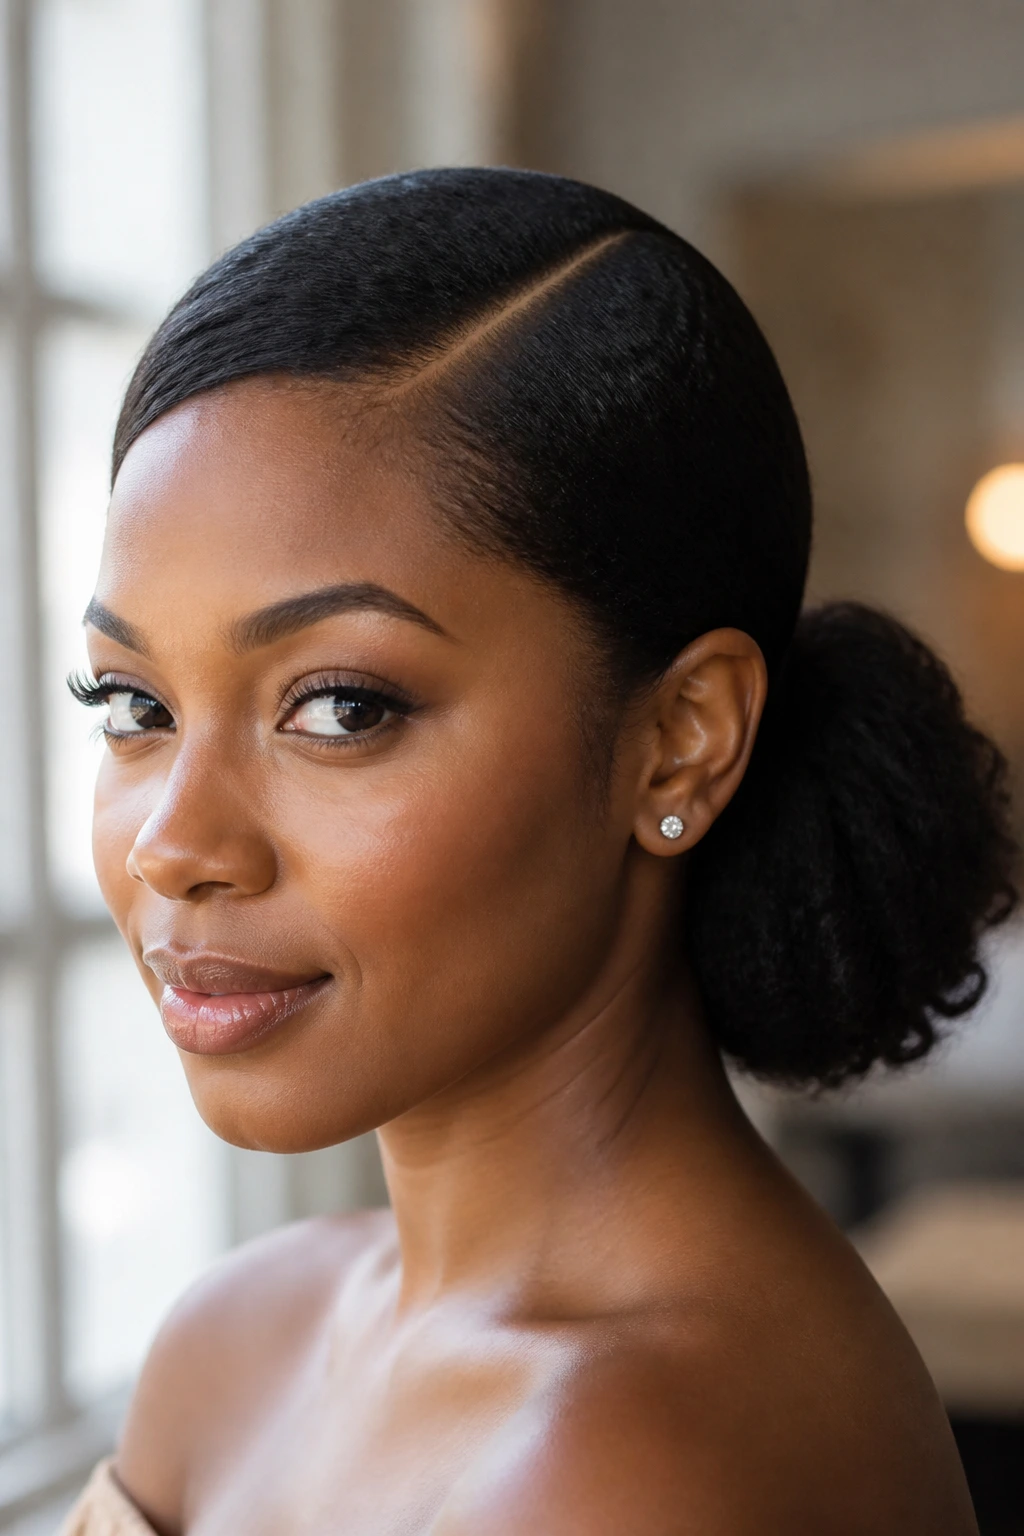
If the high puff feels too casual, shifting the placement to the nape of your neck and adding a clean side part changes the entire dynamic. It is a soft, romantic look that frames the face beautifully.
Start by creating a deep side part using the tail of a metal parting comb. Dampen the roots on either side of the part and apply a moisturizing leave-in cream. Brush the hair down smoothly behind your ears, keeping the part crisp and clear.
Gather your hair at the nape of your neck and secure it with a soft hair tie. Because this is a low puff, you can allow your natural texture to flare out fully behind your head, creating a beautiful contrast between the flat, parted front and the fluffy, textured back.
9. Flat Twist Halo Crown
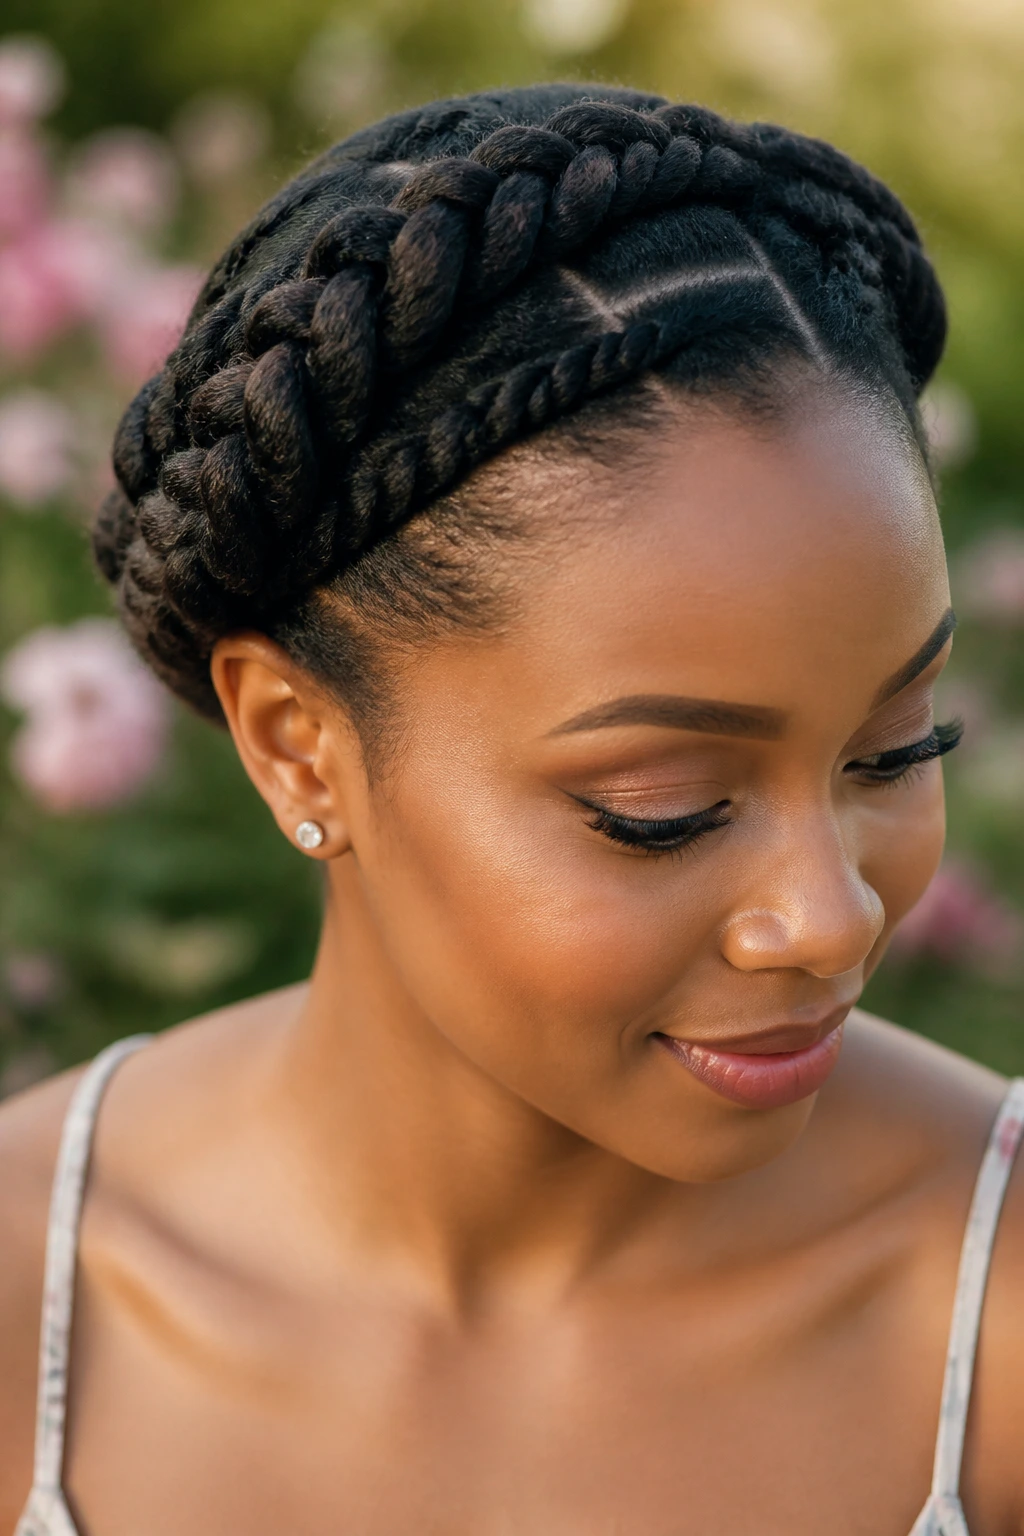
This elegant style looks incredibly intricate but is actually just two large twists pinned together. It keeps your hair completely off your neck, making it an excellent option for warm weather or active days.
How to Get the Look
Start with a middle part that goes all the way down to the nape of your neck, dividing your hair into two equal sections. Beginning at the back of your head on one side, flat twist the hair upward toward your forehead, following your hairline. Once you reach the top of your forehead, continue twisting the hair down the other side to the nape. Repeat the process with the second section of hair, twisting in the opposite direction.
Once you have two long twists hanging down, wrap them around the perimeter of your head, tucking the loose ends under the opposite twist. Secure the entire circle with bobby pins.
Halo Crown Quick Facts
- Difficulty: Intermediate (requires basic flat twisting ability).
- Time: Under 8 minutes once you get the rhythm.
- Sensation: Lightweight, secure, and zero pull on your edges.
10. Two Quick Space Bun Puffs
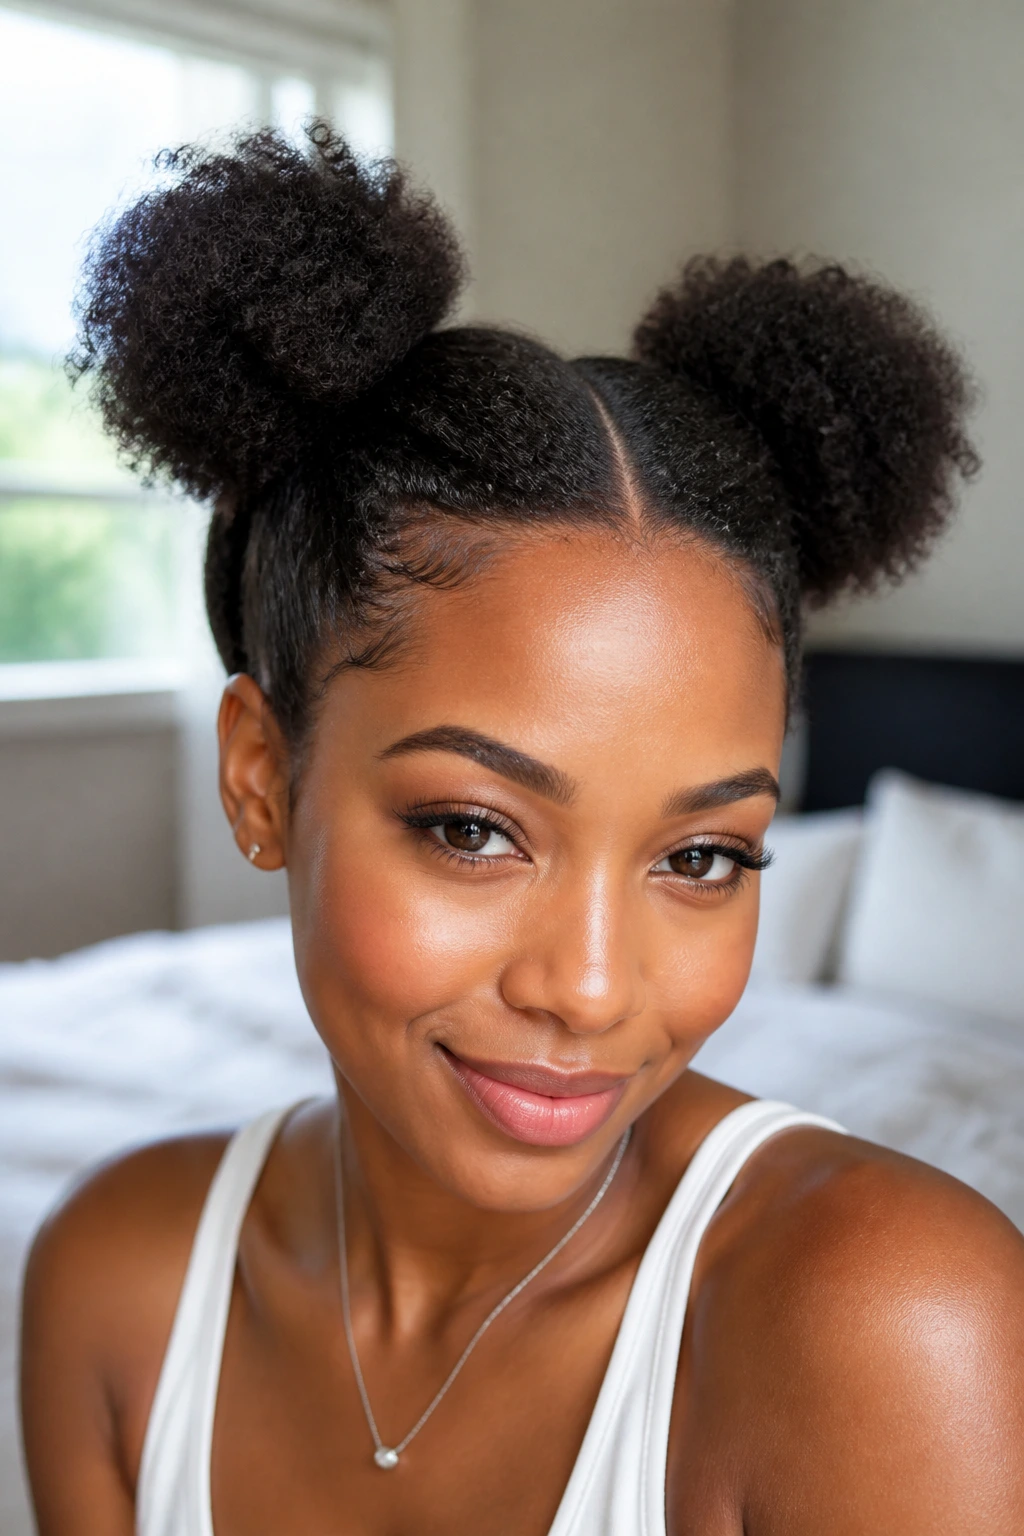
When you want something fun and youthful, space buns are an incredibly fast option. They work perfectly on short-to-medium natural hair that might not fit into a single high ponytail.
Gather your tools. You will need a comb for parting, two hair ties, and a moisturizing styling cream. Part your hair down the center of your head, dividing it into two equal halves.
       [Left Bun]     [Right Bun]
           O               O
                         /
             ___________/
             |  Center   |
             |   Part    |
Brush the left side upward into a high ponytail on the side of your head and secure it. Repeat on the right side. You can leave the ends free as two fluffy puffs, or wrap them loosely around the bases to create two soft, textured buns. This style is incredibly forgiving of asymmetrical curl patterns and uneven lengths.
11. French Roll with Flexi-Rods Definition
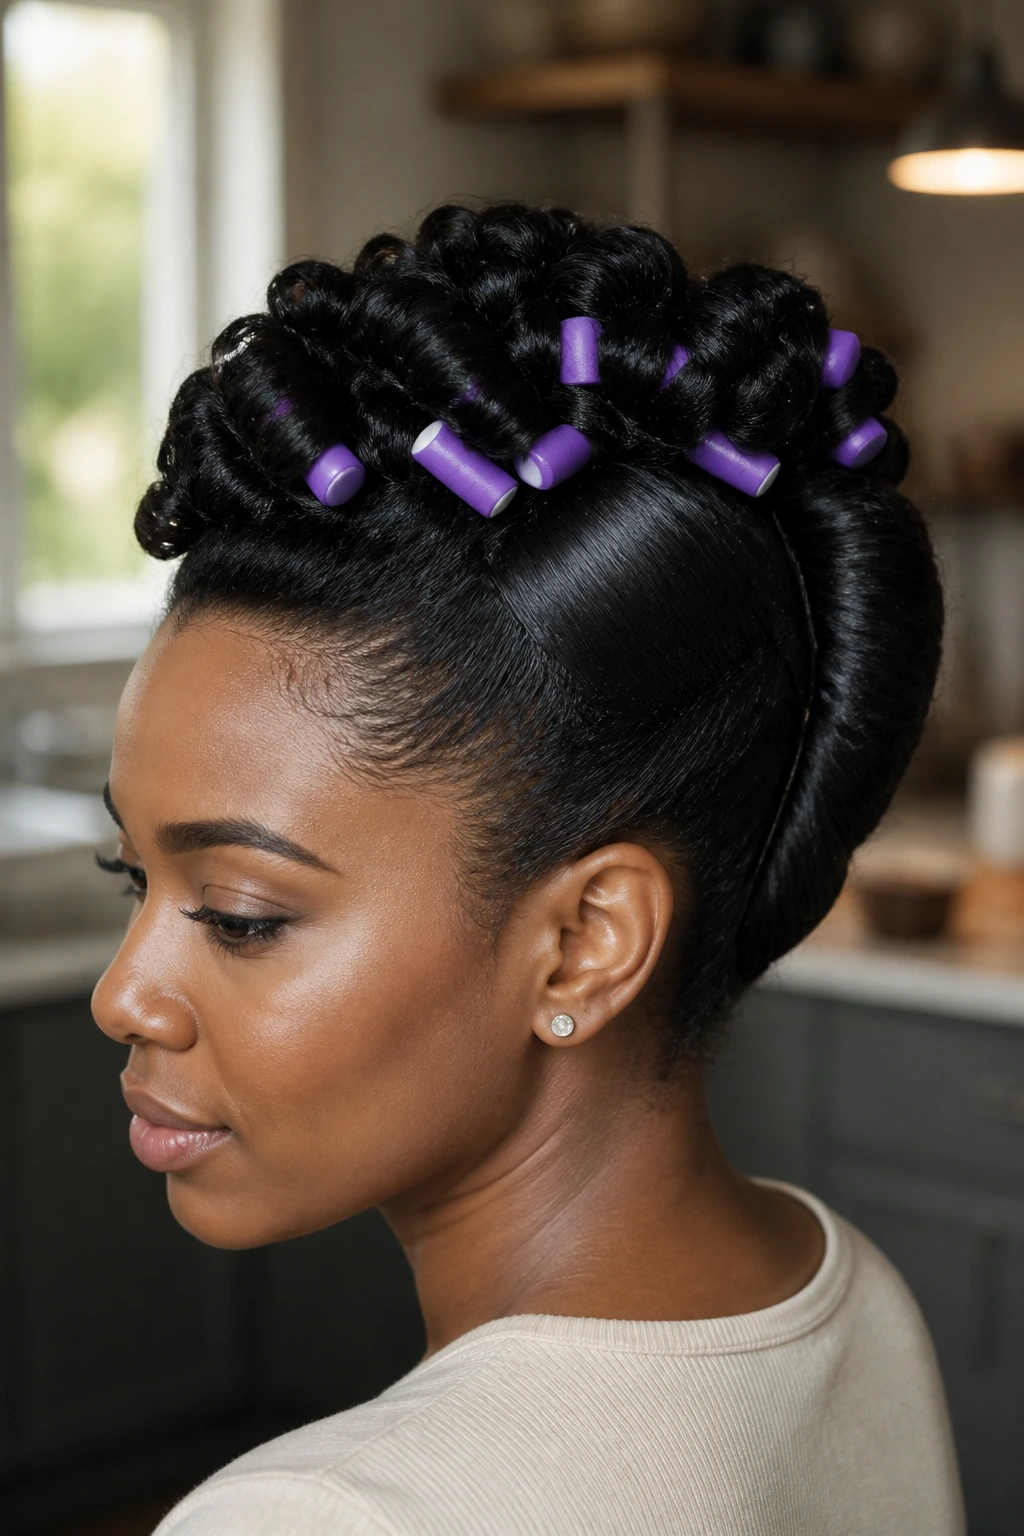
The French roll is a classic silhouette that never goes out of style. If you have older flexi-rod curls or a rod set that has started to drop, this style allows you to preserve that beautiful ringlet definition at the top while keeping the back neat and tidy.
Start by brushing the hair on the sides and back of your head upward toward the center-top. Use long, sturdy bobby pins to secure the hair in place as you go, creating a flat vertical seam along the back of your head.
Once the back is pinned flat, take the remaining curly hair at the top of your head and let it tumble forward over your forehead. This creates a beautiful, curly faux-fringe that showcases your texture while keeping the sides of your head completely sleek. It is a vintage-inspired look that takes minutes to assemble but looks incredibly intentional.
12. Scarf-Wrapped Low Bun
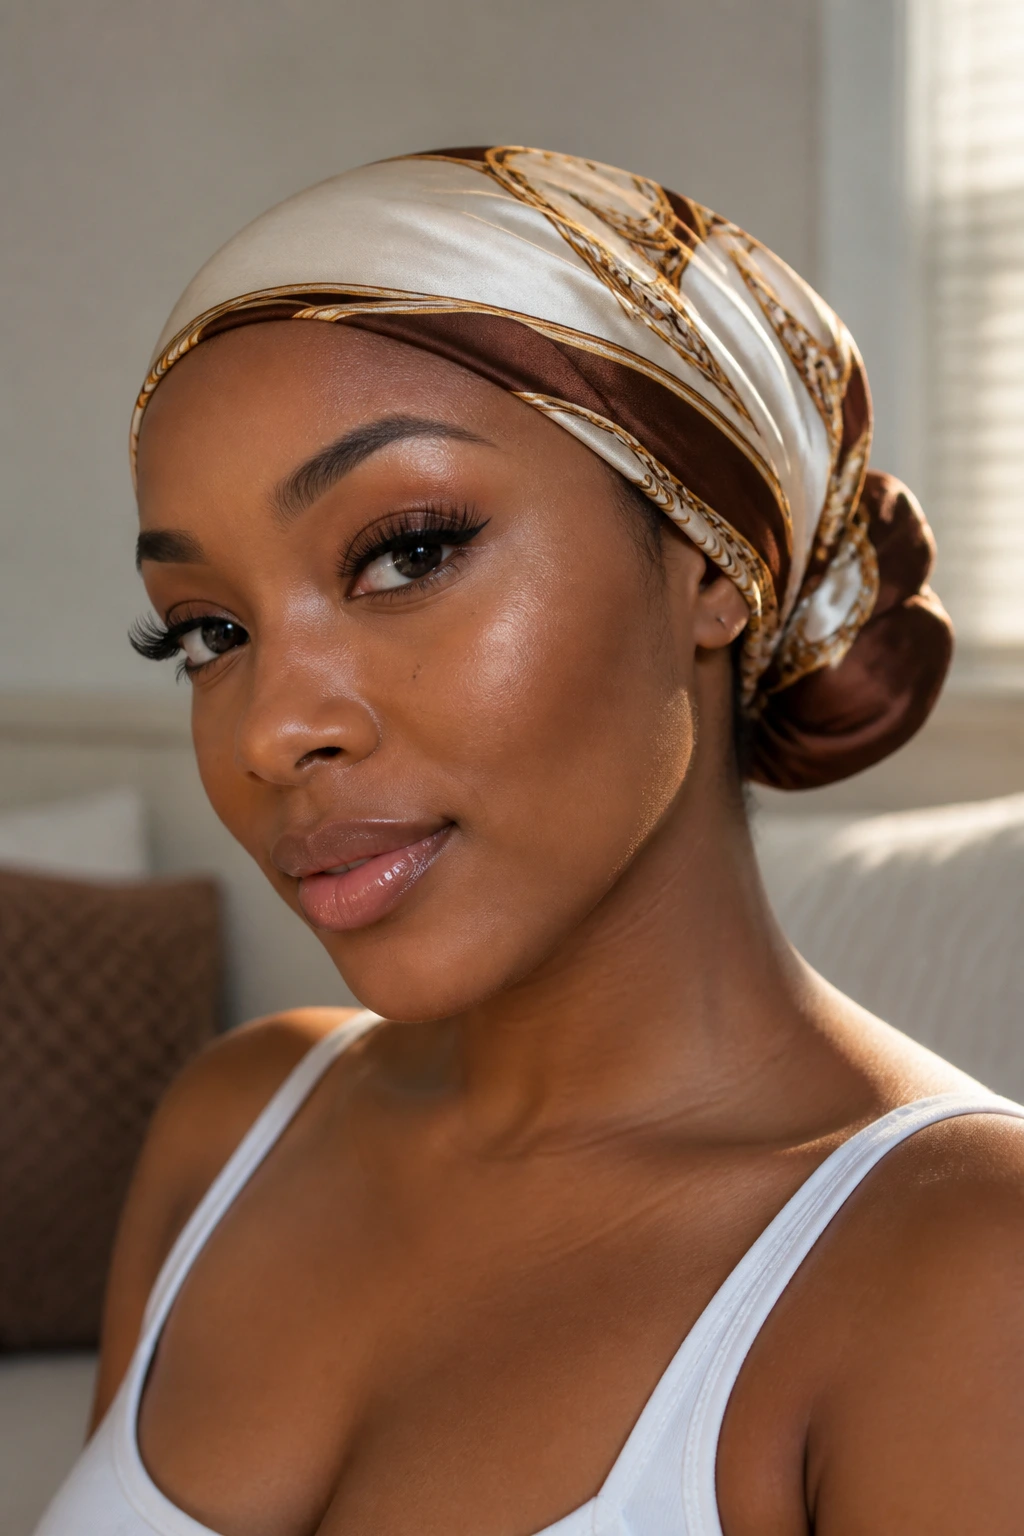
When your hair is incredibly dry and you do not have the time or energy to do a full moisturizing routine, hiding it within a beautiful silk wrap is a smart, stylish choice.
What Makes It Different
Unlike styles that expose your hair to dry air, this wrap completely seals your hair inside silk or satin, keeping moisture locked in all day.
Who It Is Best For
Perfect for anyone experiencing a dry hair day, or those on day six of a wash-and-go who want to skip wash day for one more morning.
How to Style It
Gather your hair into a low bun at the nape of your neck. Take a long, rectangular silk scarf and fold it in half lengthwise. Place the center of the scarf over your forehead, wrapping the ends around to the back of your head, covering your hair completely. Tie the scarf ends into a knot directly over your low bun, then wrap the remaining fabric around the bun itself, tucking the loose ends underneath. Your hair is protected, moisturized, and completely out of sight.
13. The Asymmetrical Side Braid
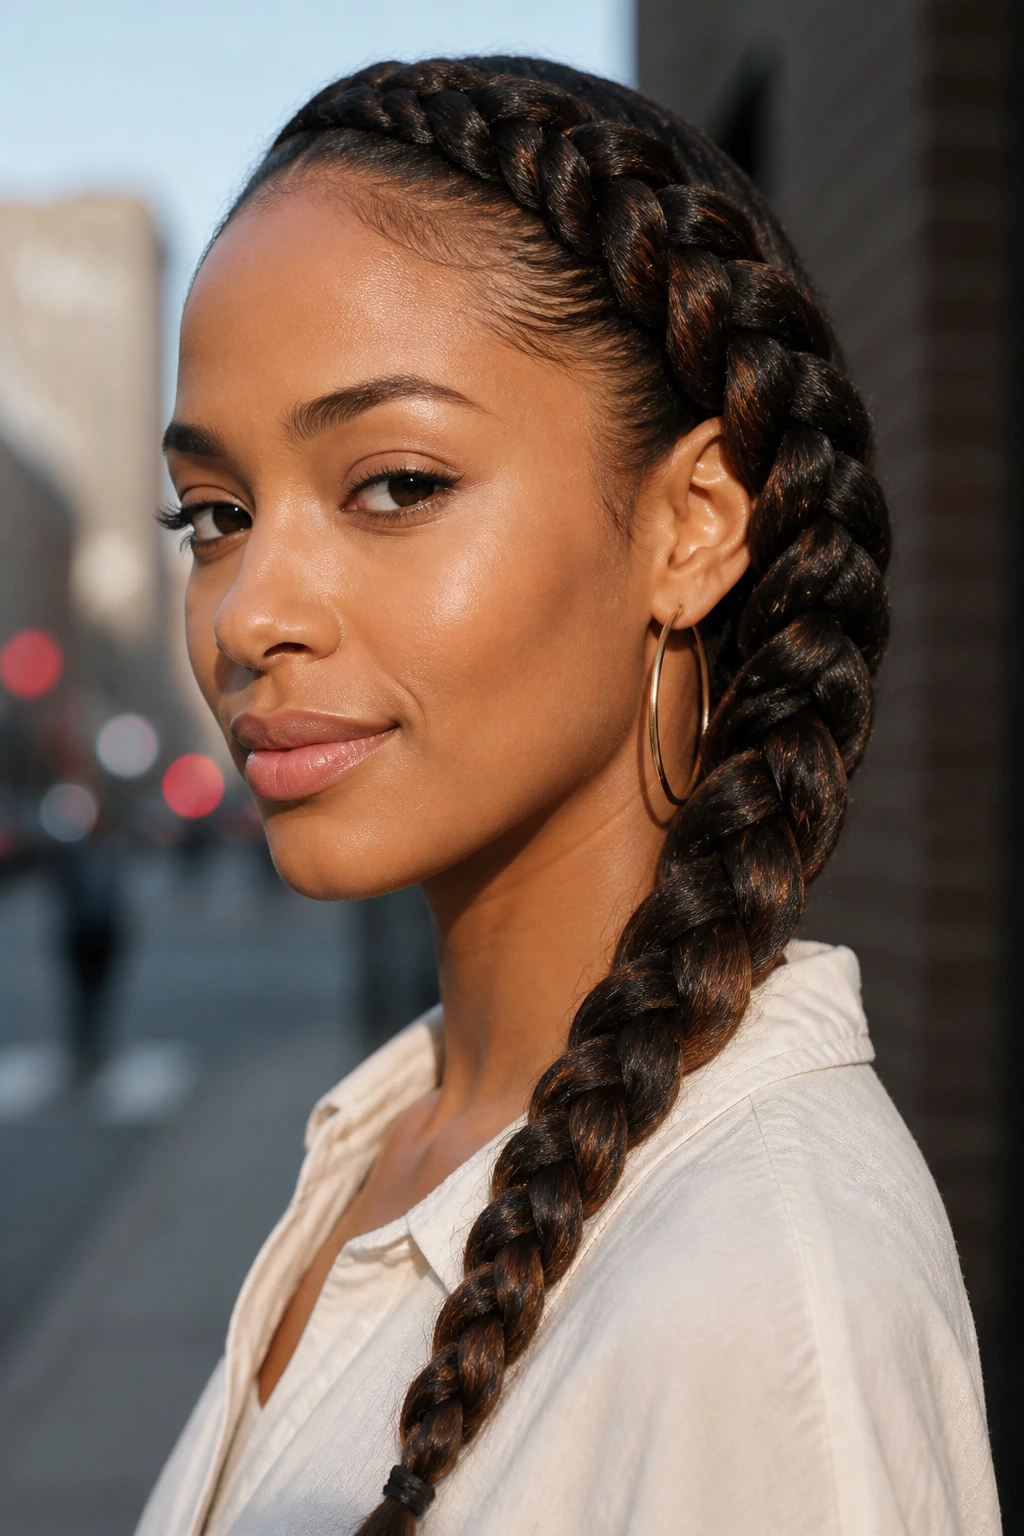
A single, thick side braid is soft, casual, and takes less than two minutes to complete. It works beautifully on stretched natural hair, blown-out hair, or pressed hair that has started to revert due to humidity.
Why This Style Works
It gathers your hair to one side, showcasing your length and volume in a controlled, elegant way that doesn’t require constant adjustment throughout the day.
Quick Styling Steps
- Sweep all of your hair over to your preferred shoulder.
- Smooth the opposite side of your head with a brush and a small touch of water-based pomade to keep it flat.
- Divide the swept hair into three sections near your ear.
- Braid the hair loosely downward, letting the braid rest over your shoulder.
- Secure the end with a small elastic, leaving about an inch of curly hair free at the very tip.
Pro tip: Gently pull at the outer loops of the braid to pancake it, making the braid look much thicker and more voluminous than it actually is.
14. Finger-Coiled Front Tendrils with a Puff
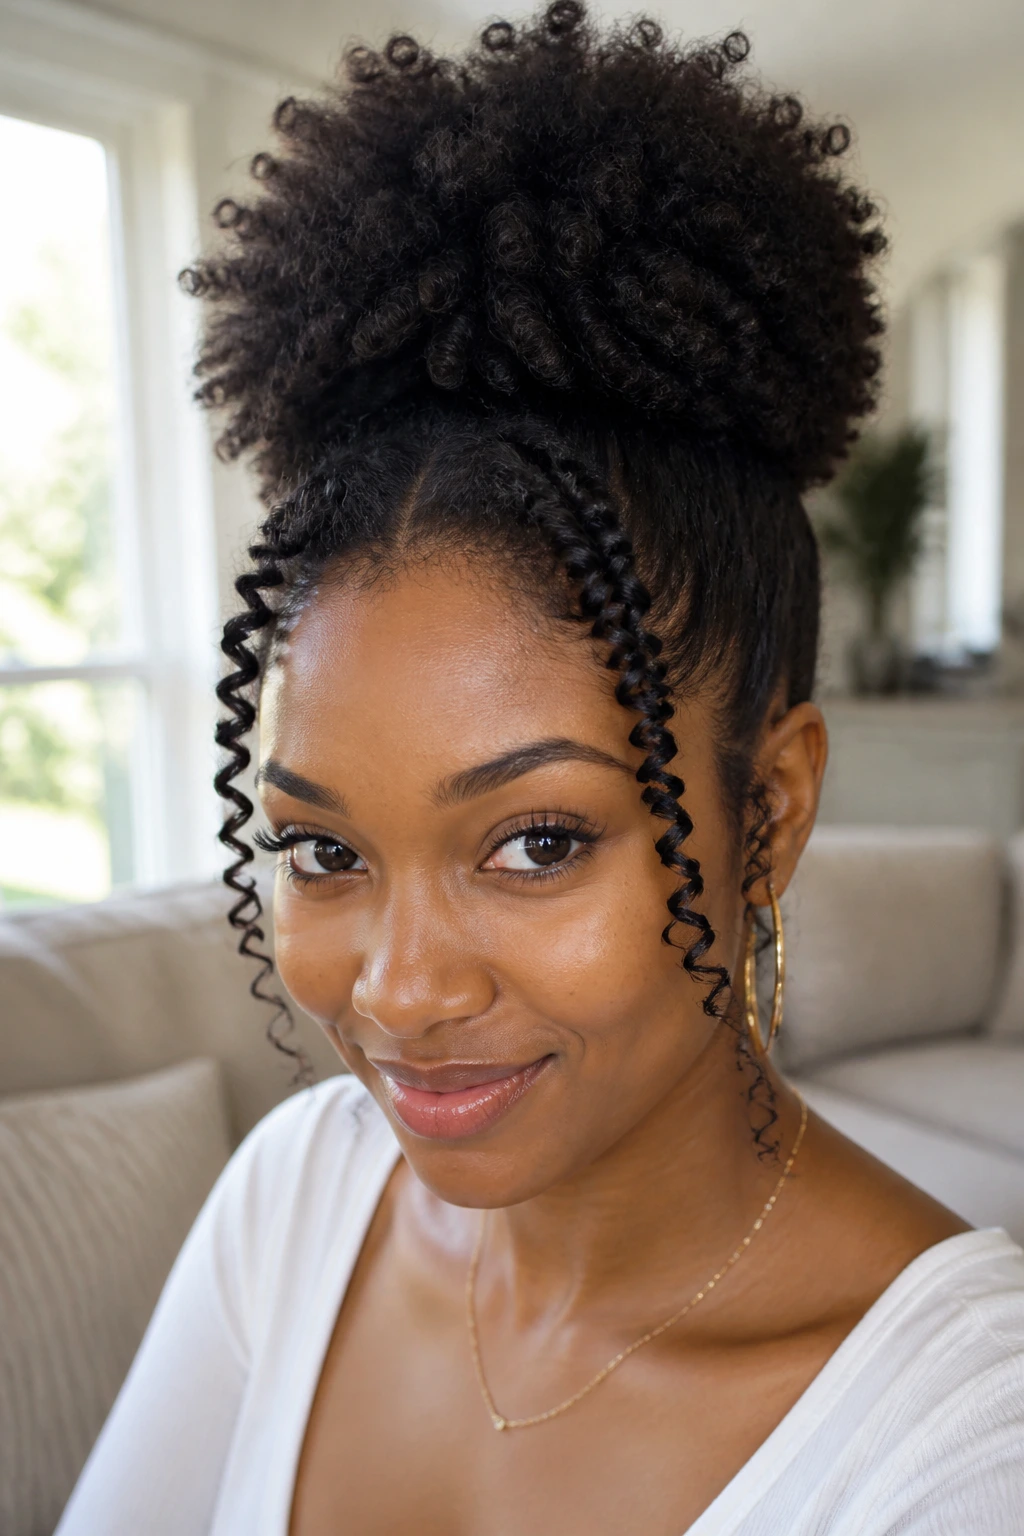
Sometimes, all you need to make a simple puff look fresh is a little bit of framing around your face. By leaving out two small sections of hair in the front, you soften the look and add an effortless, romantic vibe.
Before pulling your hair into a high puff, separate two thin sections of hair at your front hairline, right near your temples. Pull the rest of your hair back into your standard high puff as usual.
Now, take those two front sections, apply a small dab of defining gel or styling cream, and spin them around your index finger from root to tip. Release the coil gently. This creates two bouncy, defined ringlets that frame your face, turning a basic morning puff into something special.
15. The Faux Hawk with Side Clips
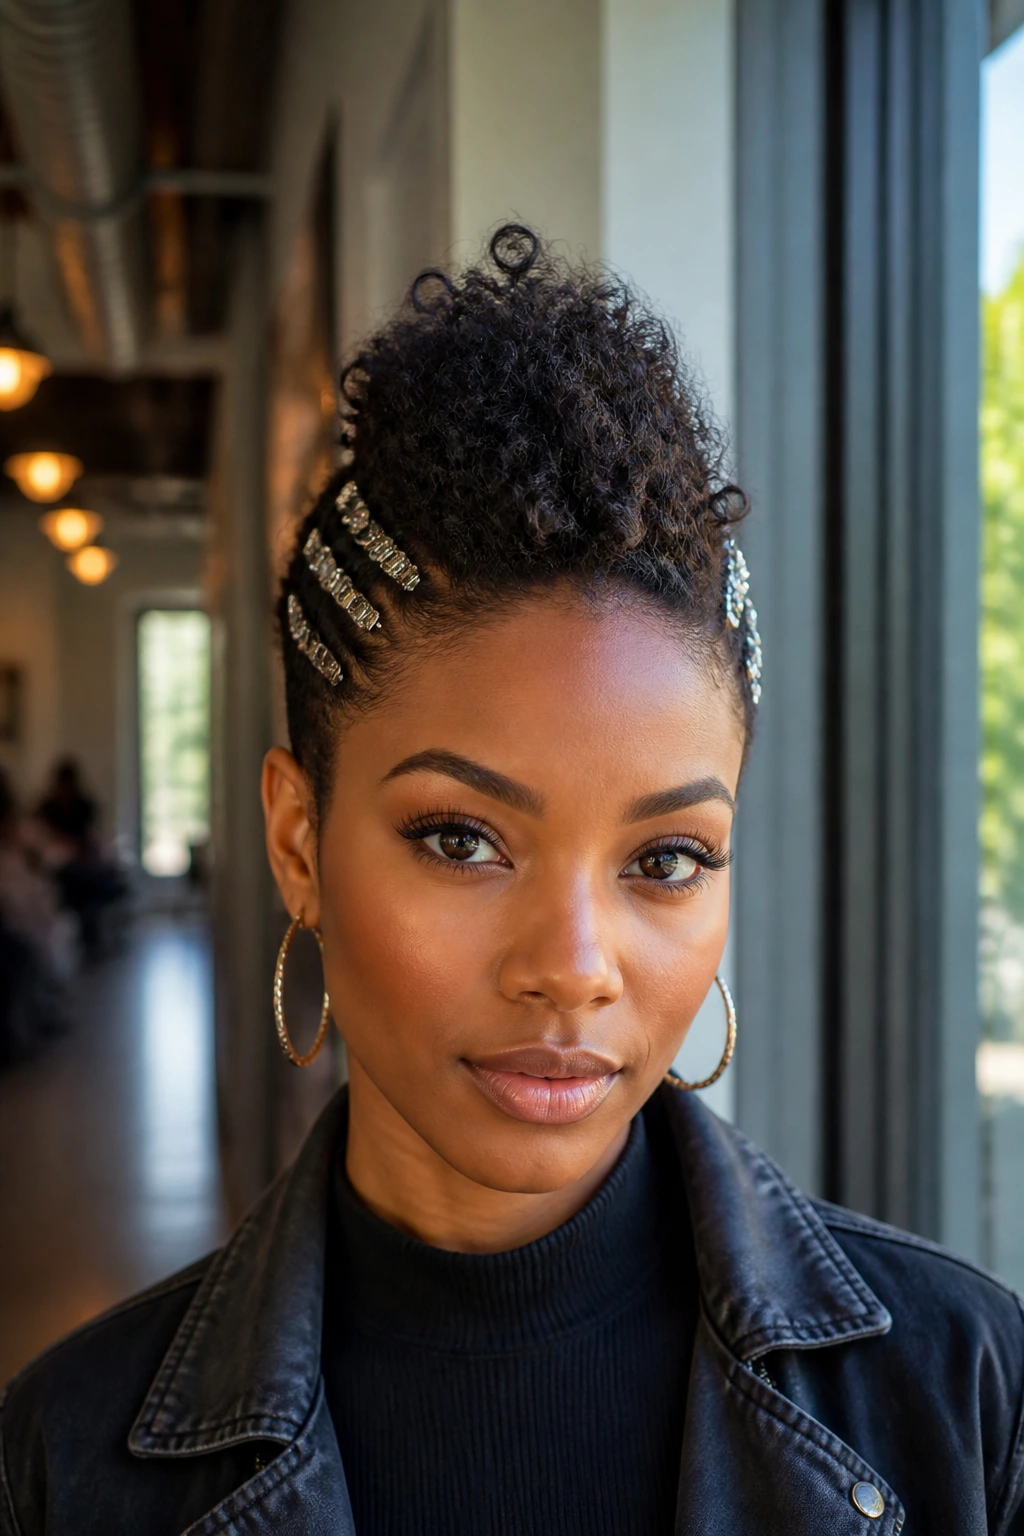
If you love the edgy look of a mohawk but don’t want to shave the sides of your head, this styled faux hawk is the perfect solution. It is highly dramatic, beautiful, and incredibly fast to style on Type 4 hair.
How to Get the Look
Start by applying a moisturizing cream to your hair. Using a soft brush, slick the hair on the left side of your head straight up toward the center of your scalp. Secure this side in place using three or four decorative slide pins or bobby pins placed vertically in a row. Repeat the exact same process on the right side of your head, brushing the hair upward and pinning it securely.
This leaves a wide, voluminous strip of textured hair running down the center of your head from your forehead to your neck. Use your fingers to fluff and shape the center strip.
Faux Hawk Quick Facts
- Best Hair Type: Highly textured, dense Type 4 hair that easily stands upright.
- Accessories Needed: Decorative gold, silver, or tortoiseshell bobby pins.
- Vibe: Modern, bold, and highly fashionable.
16. The Triple Sleek Ponytail
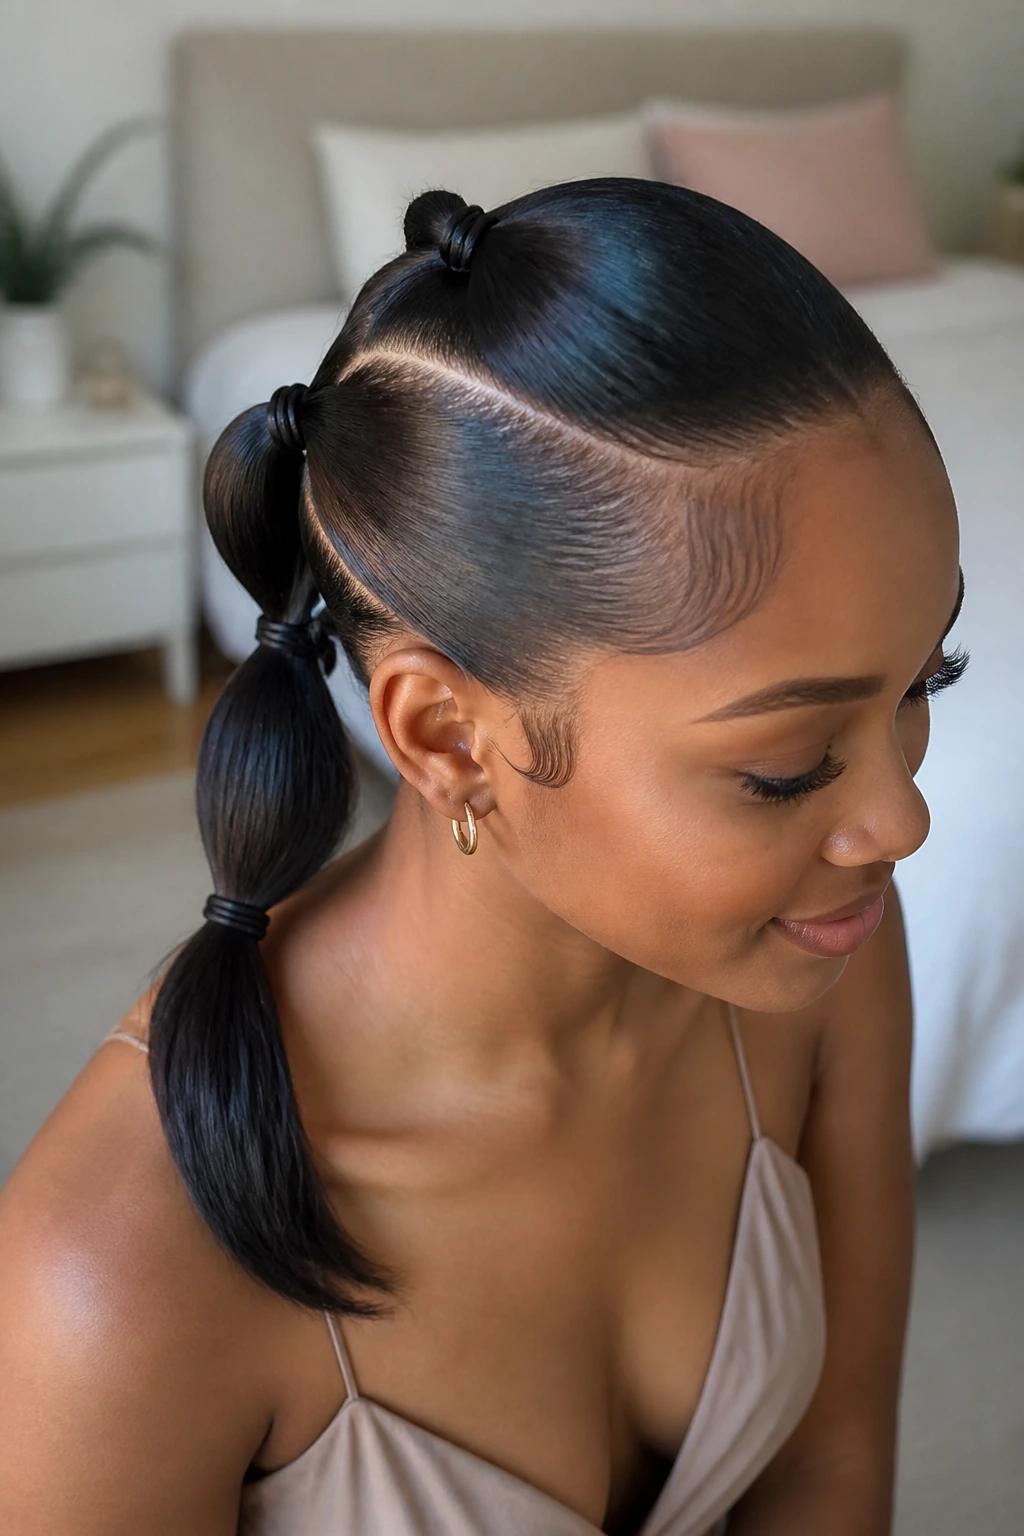
This style is a great way to handle thick, heavy hair that refuses to fit into a single, neat ponytail. By dividing the hair into three smaller sections, you reduce tension on your scalp and make it much easier to achieve a flat, sleek finish.
Divide your hair horizontally into three equal sections: one at the crown, one in the middle of your head, and one at the nape of your neck.
       [Top Section]    ->  Ponytail 1
             |
      [Middle Section]  ->  Ponytail 2 (incorporates tail 1)
             |
      [Bottom Section]  ->  Ponytail 3 (incorporates tail 2)
Secure the top section into a neat ponytail. Next, gather the middle section, join it with the tail of the first ponytail, and secure them together. Finally, gather the bottom section at your nape, join it with the combined tail of the upper ponytails, and secure the final ponytail. The result is a beautiful, cascading tiered ponytail that stays flat to your head and feels incredibly secure.
17. Twisted Low Crown Halo
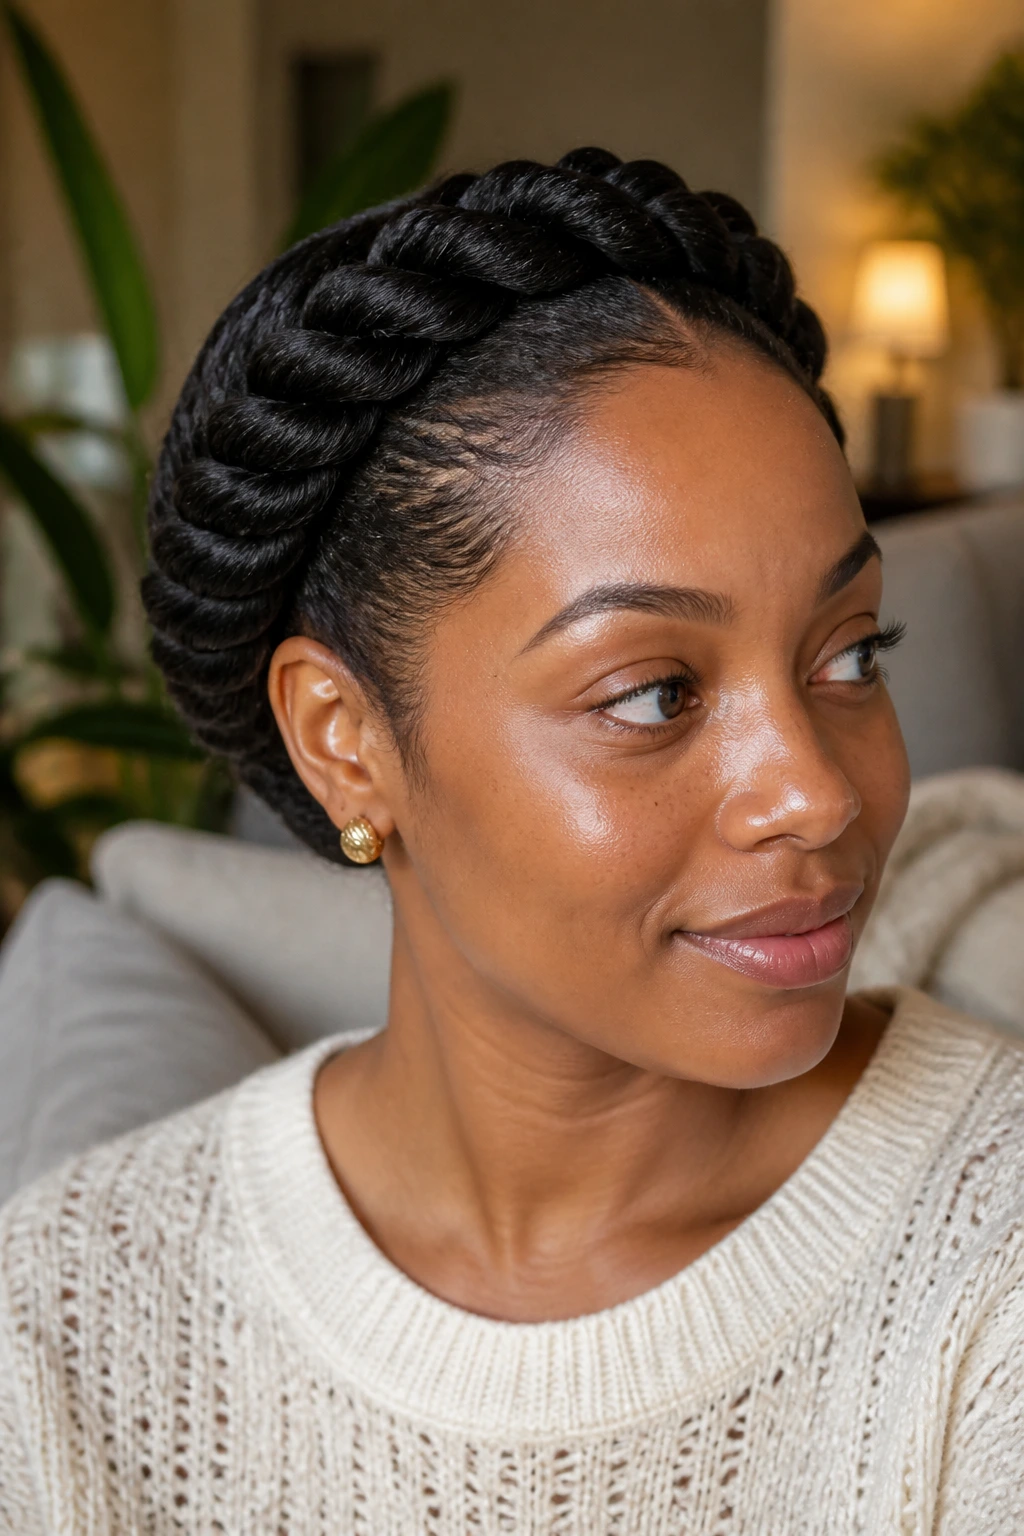
For those who find flat twisting difficult, this twisted crown offers a much simpler alternative. It relies on basic two-strand twists that sit loosely around the head, making it highly accessible for beginners.
Start by parting your hair down the middle. Take a small section of hair at the front hairline on the left side and split it in two. Begin a simple two-strand twist, adding a small amount of loose hair to each strand as you twist backward toward your ear. Once you reach behind your ear, finish the length as a standard two-strand twist and secure the end.
Repeat this process on the right side of your head. Take the two completed twists, cross them over each other at the back of your neck, and pin them flat against your head using bobby pins, tucking the ends away neatly. It is soft, secure, and protects your ends completely.
18. Slicked-Back Wet Look Curl Definition
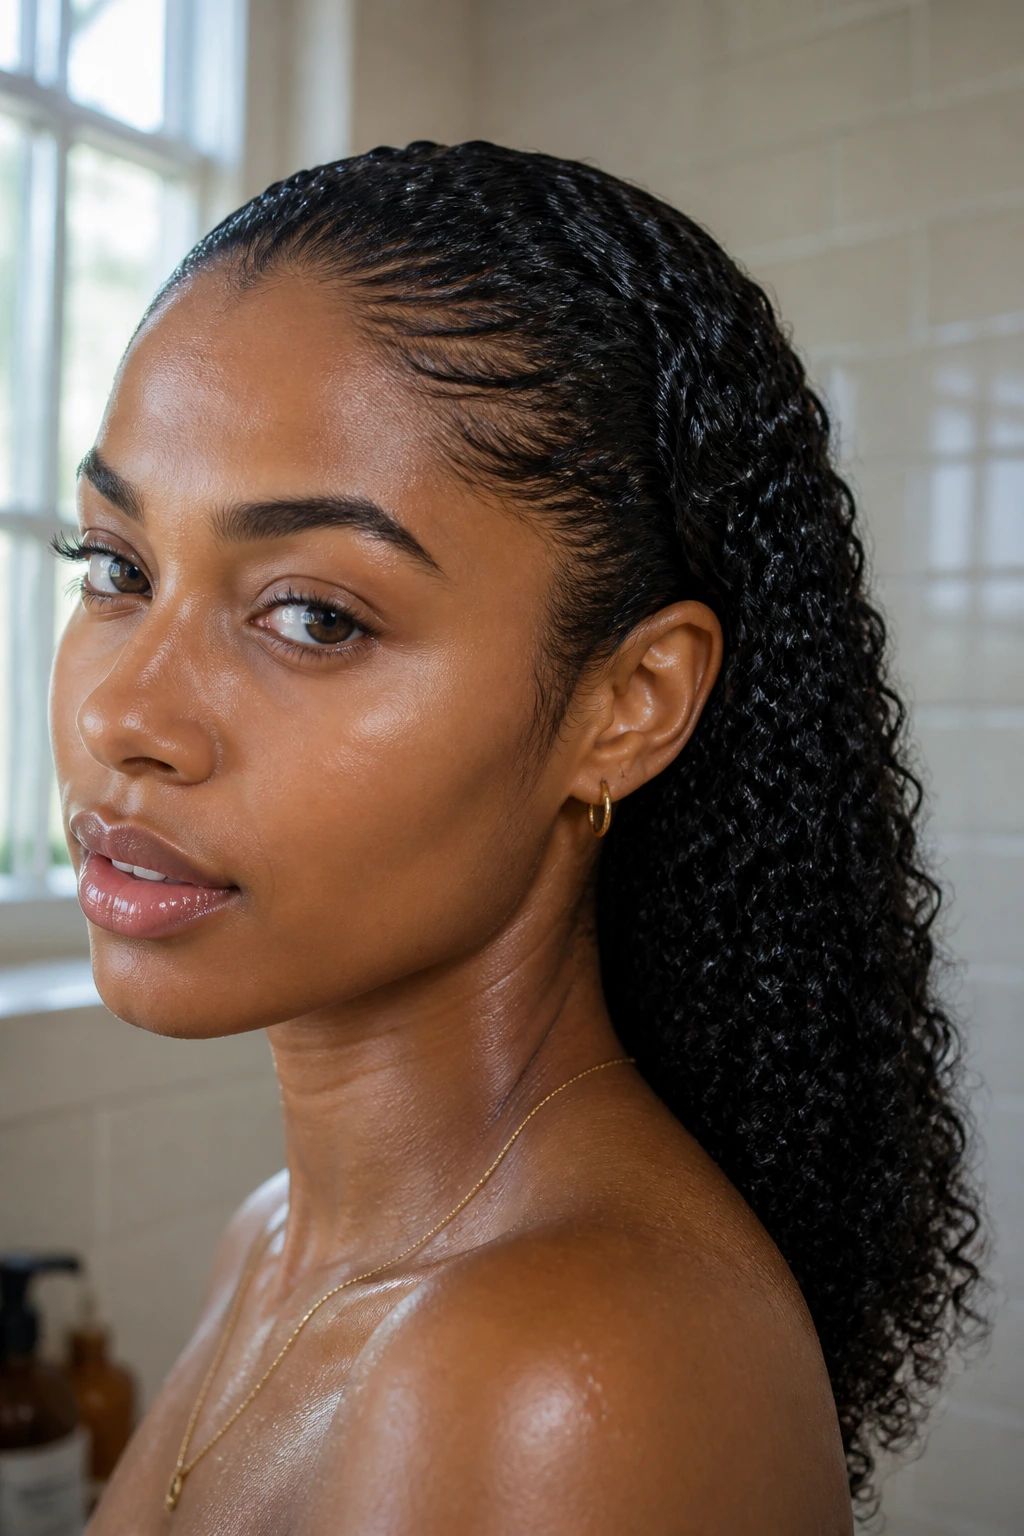
When you want a clean, minimalist look that highlights your natural curl pattern without the frizz, the wet-look slick back is incredibly effective. It is best done on hair that is already damp from the shower.
What Makes It Different
Unlike dry styling, which can cause frizz when manipulated, styling damp hair with heavy moisturizers locks the curl pattern in its clumping, defined state.
Who It Is Best For
This works wonderfully on Type 3 and Type 4 hair of medium-to-long length.
How to Style It
Mist your hair thoroughly with a spray bottle until it is damp but not soaking wet. Apply a generous amount of leave-in conditioner from roots to ends, followed by a flexible-hold curling gel. Use your fingers or a wide-tooth comb to gently comb all of your hair straight back away from your face. Do not scrunch or disturb the hair once it is combed back; let it air dry. The gel will set the curls in place, giving you a sleek, defined look that lasts all day.
19. The Bantu Knot Half-Up Crown
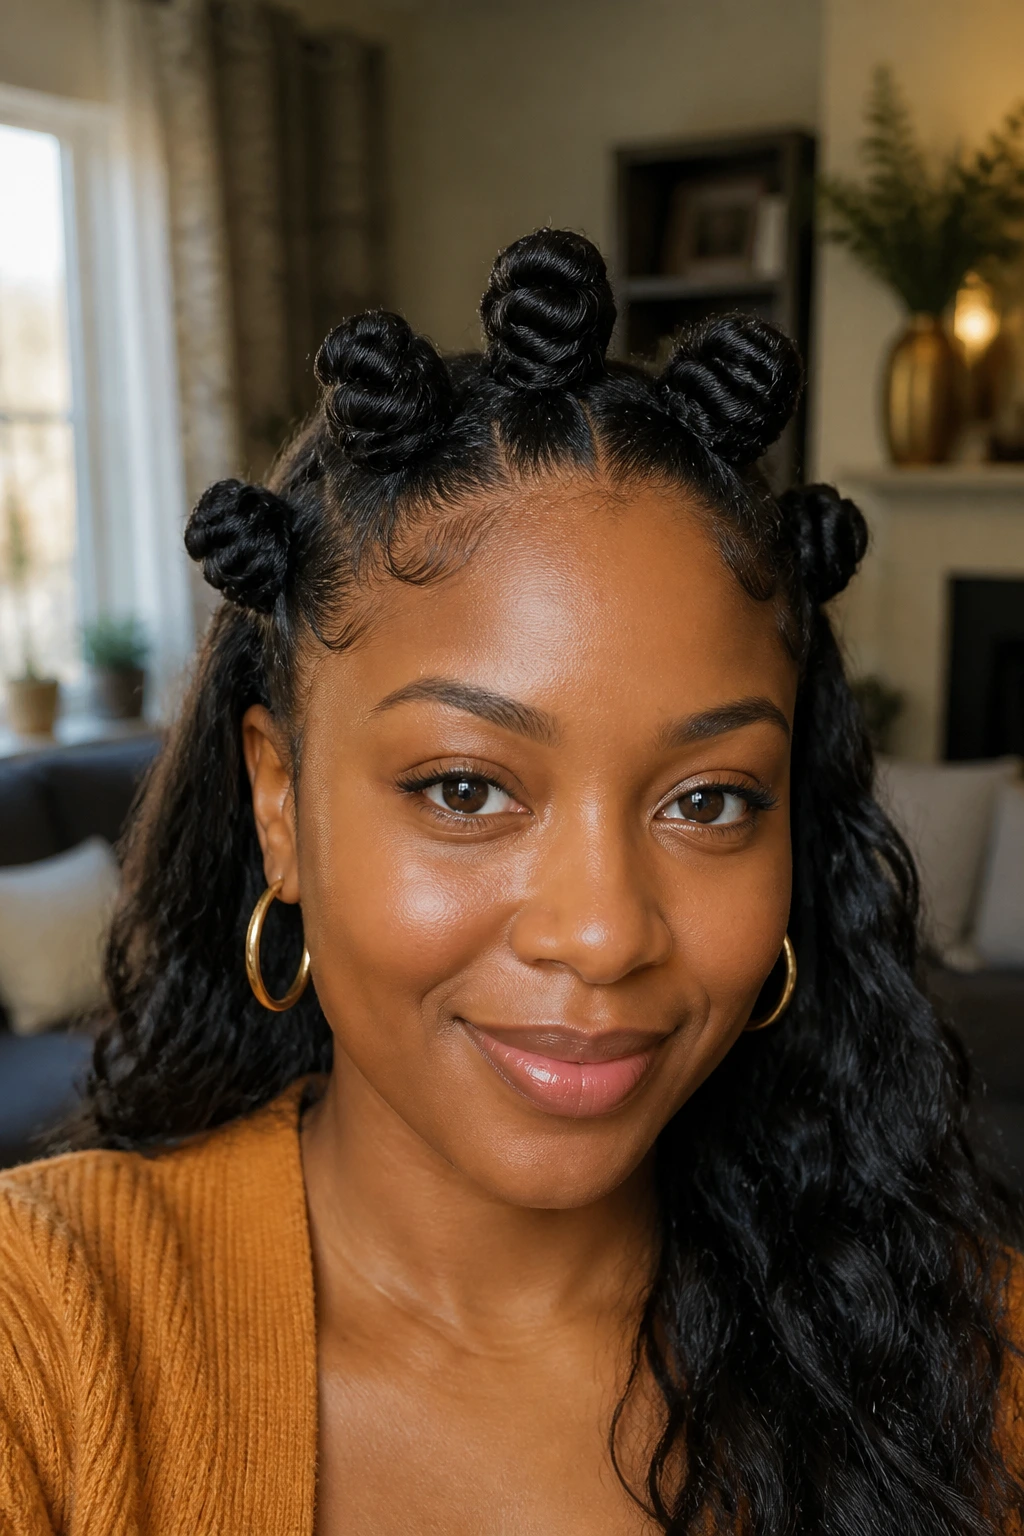
Bantu knots are a beautiful, traditional styling choice that also double as a heat-free curling method. For a quick morning look, creating just a few knots along your front hairline gives you a structured, regal crown while letting the back of your hair hang free.
Why This Style Works
It allows you to enjoy the volume of your loose hair while keeping the front section tightly controlled and styled away from your eyes.
Quick Styling Steps
- Section off the front third of your hair from ear to ear.
- Divide this front section into three or four smaller, square-shaped parts.
- Apply a touch of styling paste or butter to the first section, twist it tightly in one direction until it begins to coil on itself, and wrap it around its base to form a small knot.
- Secure the knot by tucking the end under the base, or use a small hairpin.
- Repeat for the remaining front sections.
- Leave the back of your hair loose, fluffing it with a pick for maximum volume.
Pro tip: To take this style down the next day, simply unwind the knots for beautifully defined, heat-free curls in the front.
20. Folded Goddess Braid Bun
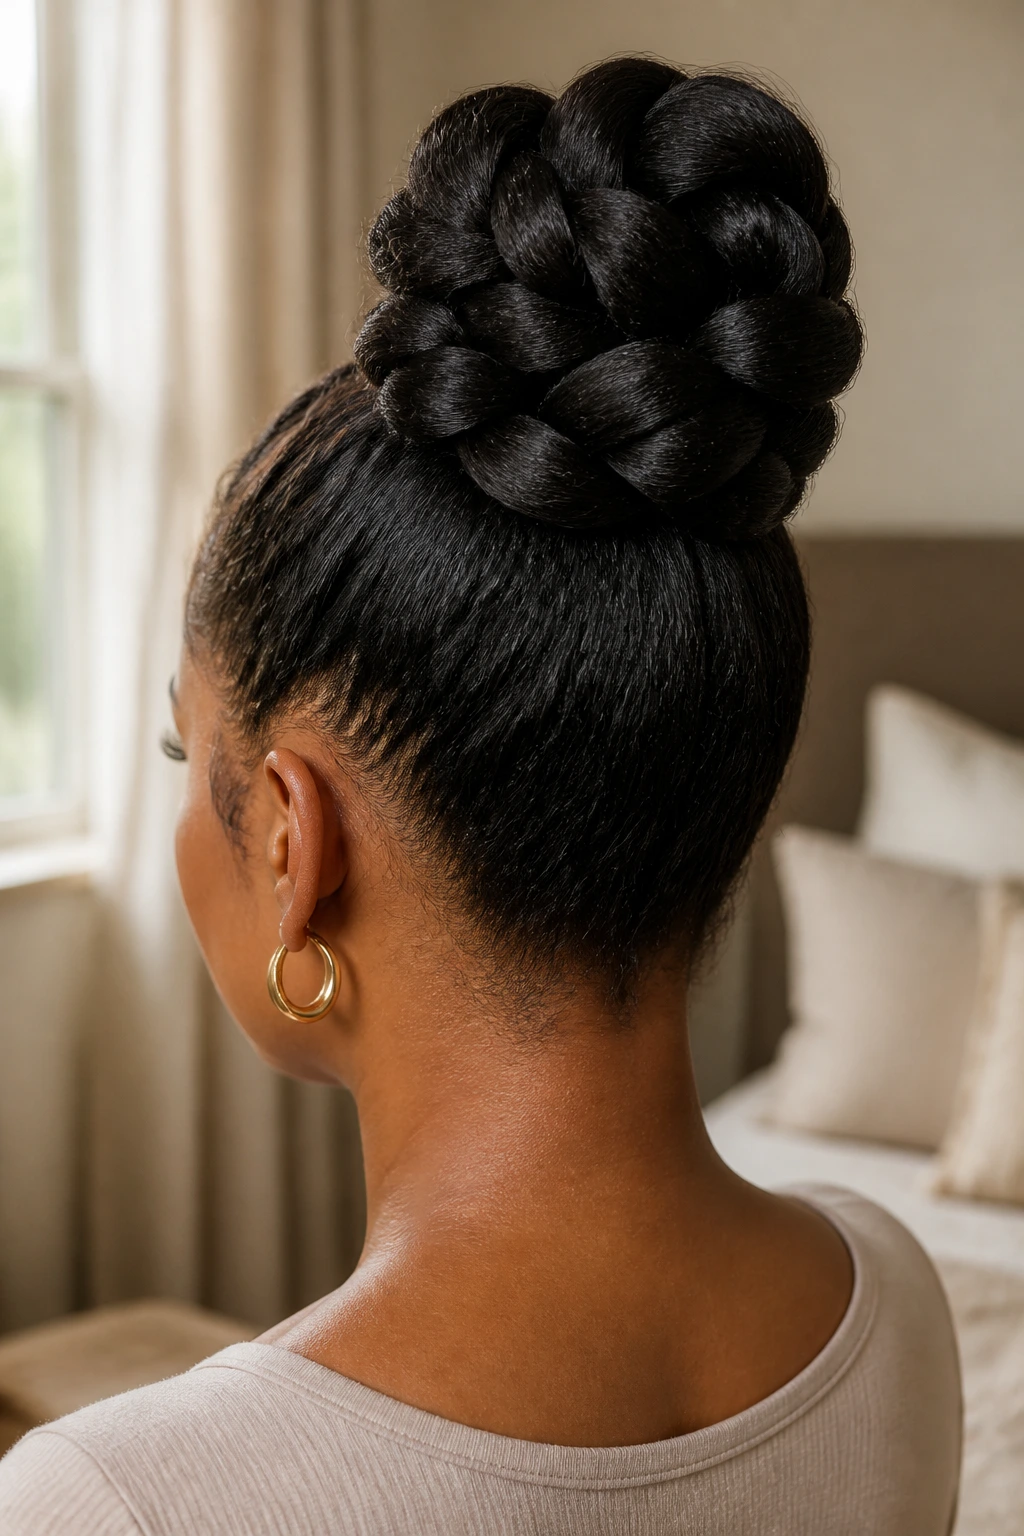
This style is perfect for those who want the look of a massive, intricate bun without the hours of styling time. It works exceptionally well on thick, long natural hair or hair that has been stretched with heatless methods.
Apply a light moisturizing cream to your entire head. Smooth your hair upward and backward into a high ponytail, securing it tightly at the crown of your head.
Once the ponytail is secured, braid the length of the hair into one large, loose three-strand braid. Take the end of the braid, fold it under itself toward the base of the ponytail, and secure it with a large hair elastic. This creates a beautifully structured, architectural folded loop that looks incredibly elegant and takes less than three minutes to assemble.
21. The Textured Messy Pineapple Roll
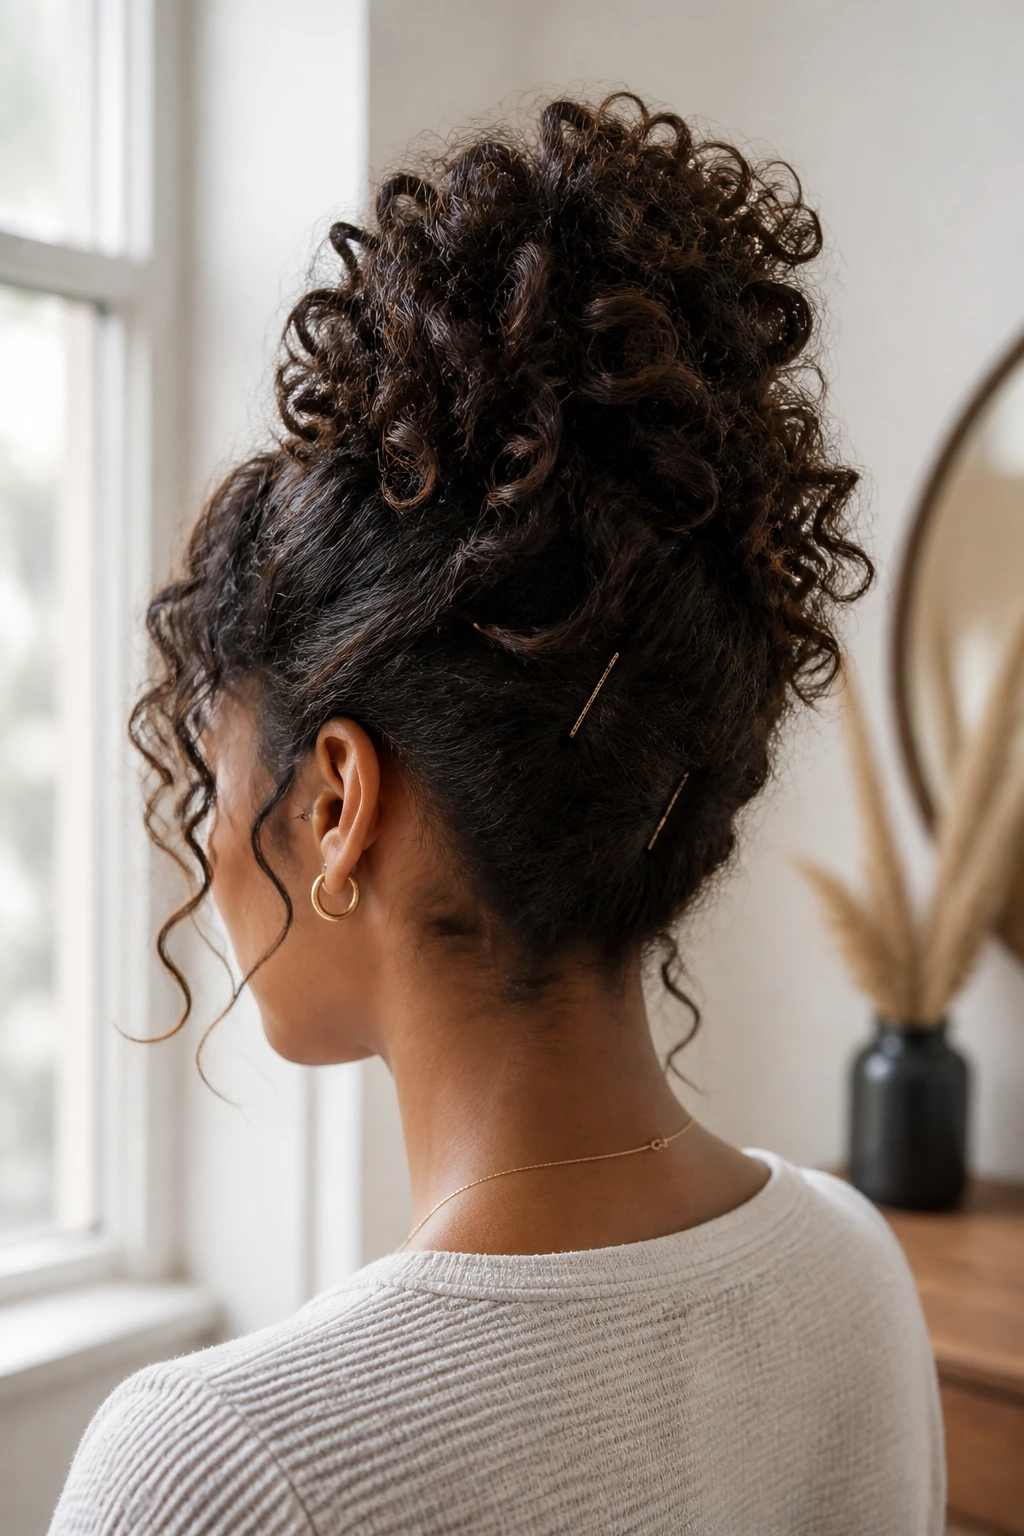
For days when you want a relaxed, bohemian look, this variation of the pineapple offers a softer silhouette. It relies on pinning the ends of your curls down slightly to create a rounded, faux-hawk-like shape rather than a single fountain of hair.
How to Get the Look
Gather your hair into a loose pineapple at the top of your head using a soft satin scrunchie. Instead of letting the ends of your hair spill forward freely, take individual curls or sections of hair from the puff and pin them loosely to your scalp around the base of the scrunchie.
This creates a soft, rounded mound of curls that looks like a carefully constructed updo. Let a few loose tendrils fall around your ears to enhance the soft, messy aesthetic.
Textured Roll Quick Facts
- Ideal Hair Type: Medium-to-long curls and coils with lots of volume.
- Time: Roughly 4 minutes.
- Vibe: Relaxed, artistic, and effortless.
The Minimalist Styling Kit for Textured Hair
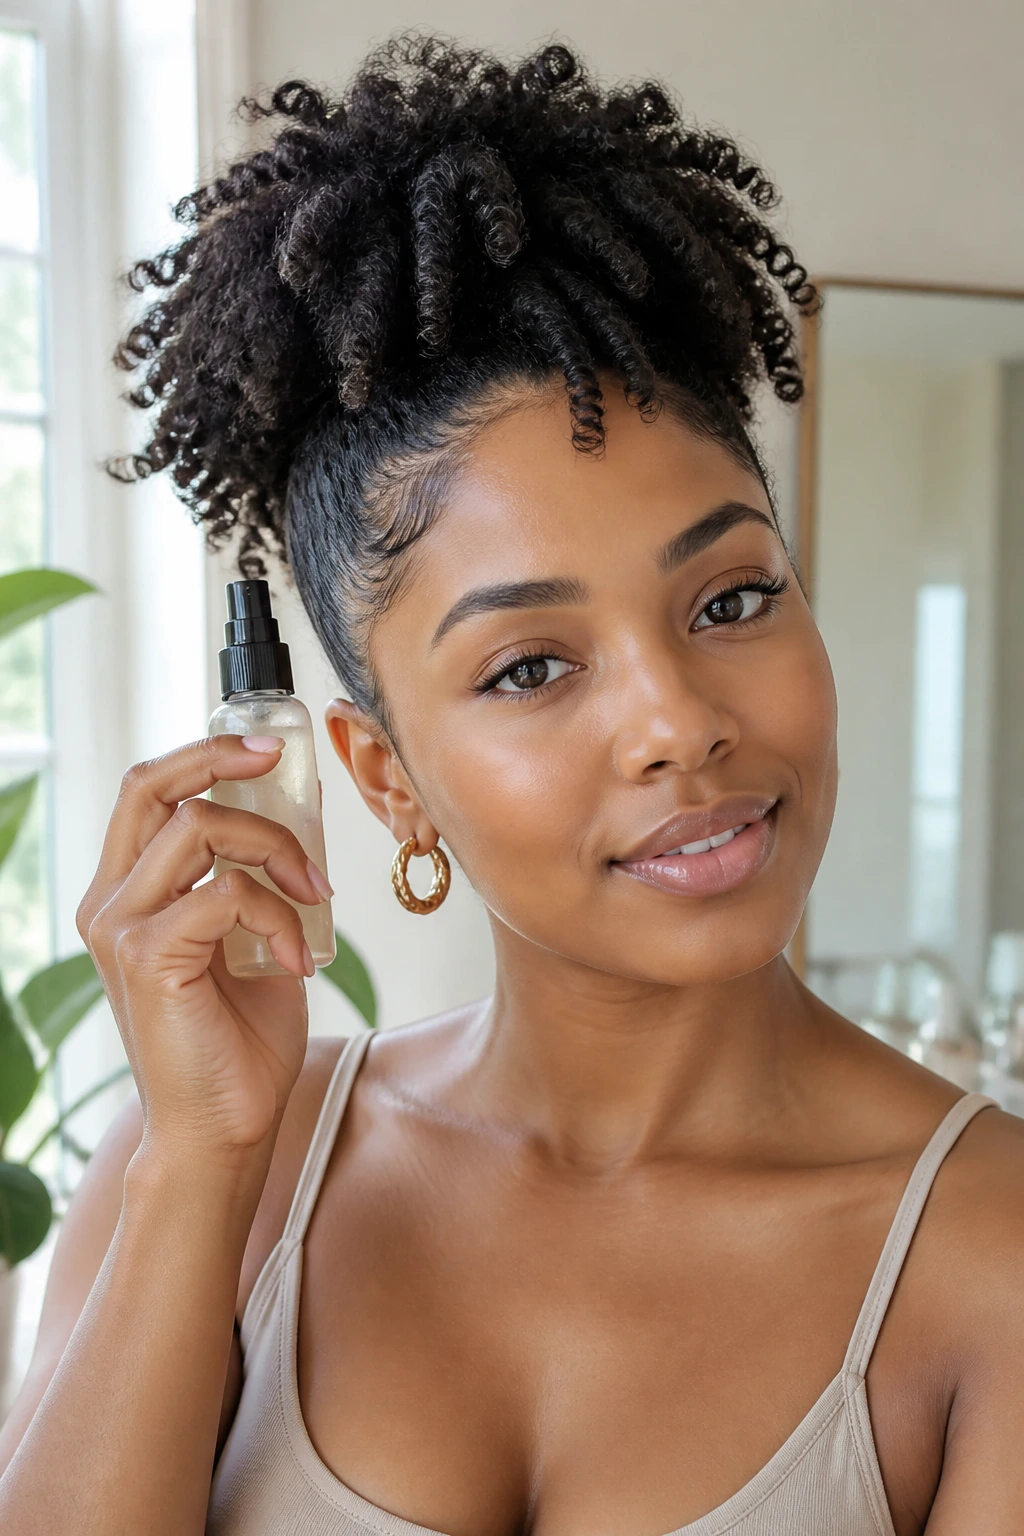
To make morning styling as fast and painless as possible, keeping your tools organized is incredibly helpful. You do not need a cabinet overflowing with products; a few high-quality, versatile items are all it takes to handle textured hair quickly.
+------------------+------------------+-------------------+
|      MOISTURE    |     STYLING      |     ACCESSORIES   |
+------------------+------------------+-------------------+
|  Continuous Mist |  Flaxseed Gel    |  Satin Scrunchies |
|  Spray Bottle    |  or Edge Control |  & Bobby Pins     |
|                  |                  |                   |
|  Leave-In        |  Moisturizing    |  Silk or Satin    |
|  Conditioner     |  Hair Butter     |  Head Scarf       |
+------------------+------------------+-------------------+
A continuous-mist spray bottle is an absolute game-changer for natural hair. Unlike traditional spray bottles that shoot a heavy stream of water, continuous-mist bottles release a fine, even cloud of moisture that dampens the hair without soaking it. This allows you to quickly reactivate products already in your hair from previous days.
Having a selection of seamless, metal-free hair ties and satin scrunchies prevents unnecessary breakage. Traditional elastics with metal clasps can catch on individual hair strands, leading to splits and tears. Keeping a pack of long, U-shaped bobby pins on hand is also essential; they hold thick hair in place much better than standard flat bobby pins, which tend to slip out of dense coils.
Wrapping Up
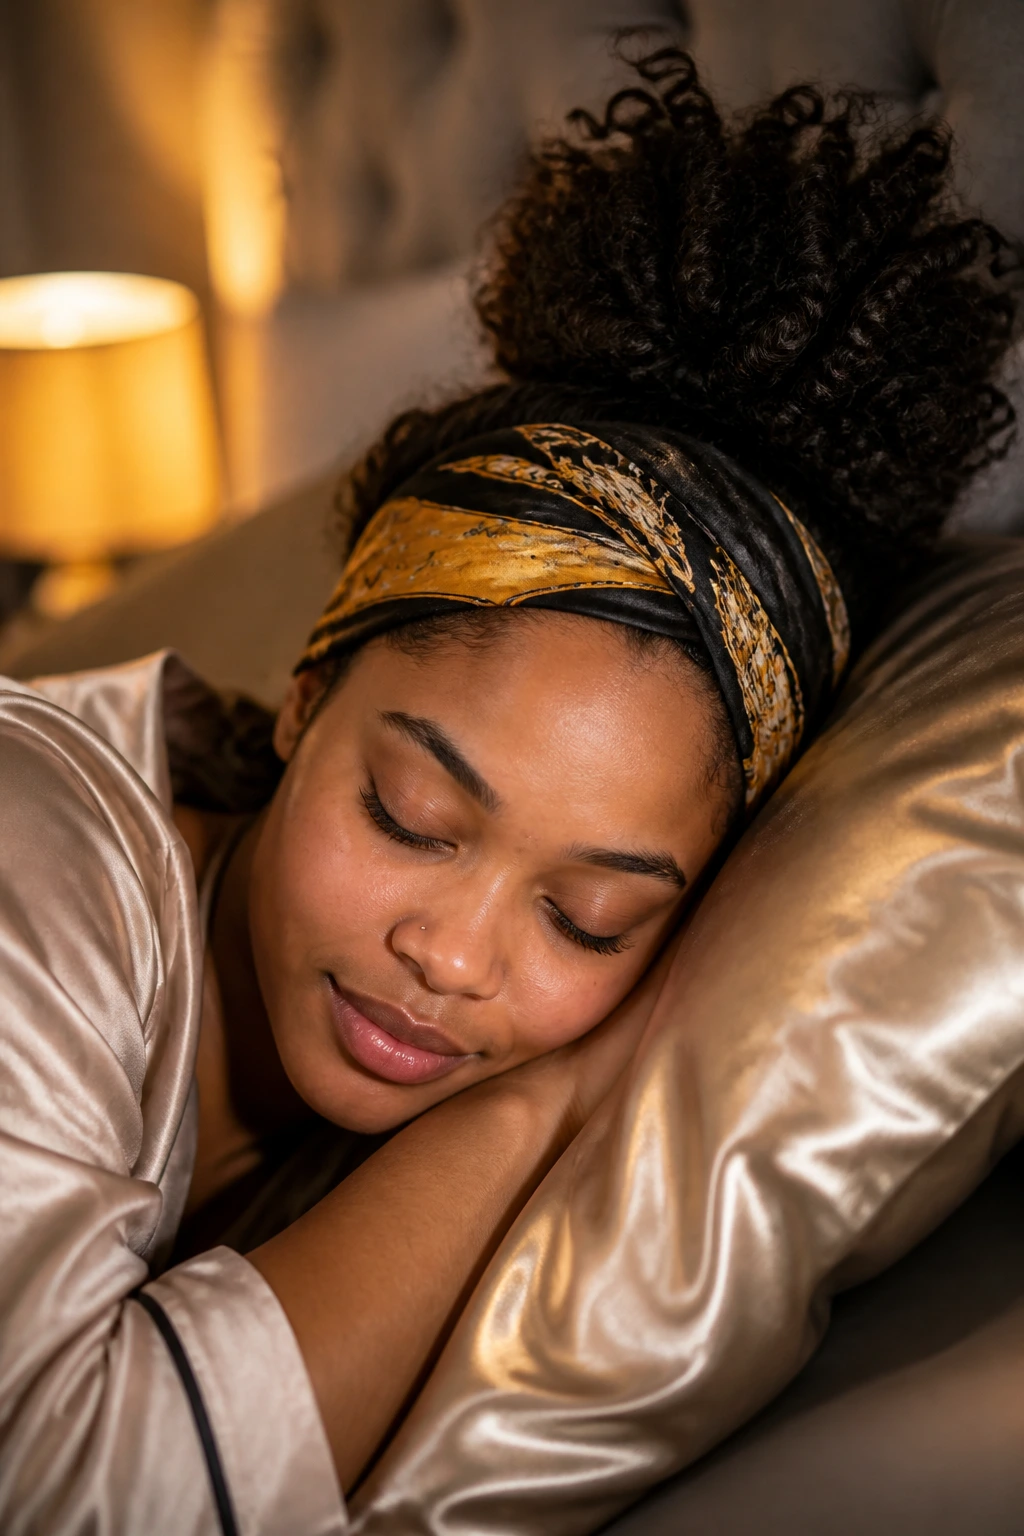
Managing textured hair on a tight schedule does not require heat, chemical straighteners, or complex styling techniques. The secret to fast mornings is learning to work with the natural state of your hair, using its volume, texture, and density to your advantage.
By prioritizing nighttime protection and keeping a few simple updo strategies in your styling rotation, you can walk out the door every single morning feeling confident, neat, and put-together. Keep your tools simple, treat your edges with care, and let your natural texture shine.
