



Waking up on a humid morning to find your fringe has transformed into a chaotic cloud of fuzz is a shared frustration. No matter how much time you spend with a round brush and a blow dryer, ambient moisture has a way of resetting your hair to its natural, unruly state. When the dew point climbs, hydrogen bonds in your hair break and reform around water molecules in the air, causing the hair shaft to swell and twist. For anyone with textured, wavy, or coily hair, this physical reality makes maintaining a sleek, straight bang feel like an uphill battle.
Instead of fighting your hair’s natural tendency to absorb moisture, you can work with its texture by physical containment. Braiding the fringe area locks the hair cuticles into a tight, structured pattern, preventing the individual fibers from splaying outward into a halo of frizz. This approach does more than just keep your hair out of your eyes; it turns what could be a frustrating hair day into an intentional, highly styled look. Braids hold their shape because the overlapping strands support one another, distributing tension and moisture evenly.
Working with frizzy hair requires a different set of rules than styling smooth, straight strands. You cannot simply pull and weave without preparation; dry, textured hair will snag, snap, or look dull. A light application of a water-soluble pomade or a few drops of moisturizing jojoba oil can give your fingers the grip they need while sealing the cuticle before you start braiding. It is about creating tension without pain and securing the ends so the style lasts from morning until you lay your head on a silk pillowcase at night.
The following braiding techniques offer a practical way to manage your fringe, regardless of whether you are dealing with loose waves or tight coils. Each style treats texture as an asset, using the natural volume of frizzy hair to create braids that look full, thick, and secure.
1. The Classic Dutch Side Braid with Textured Edges
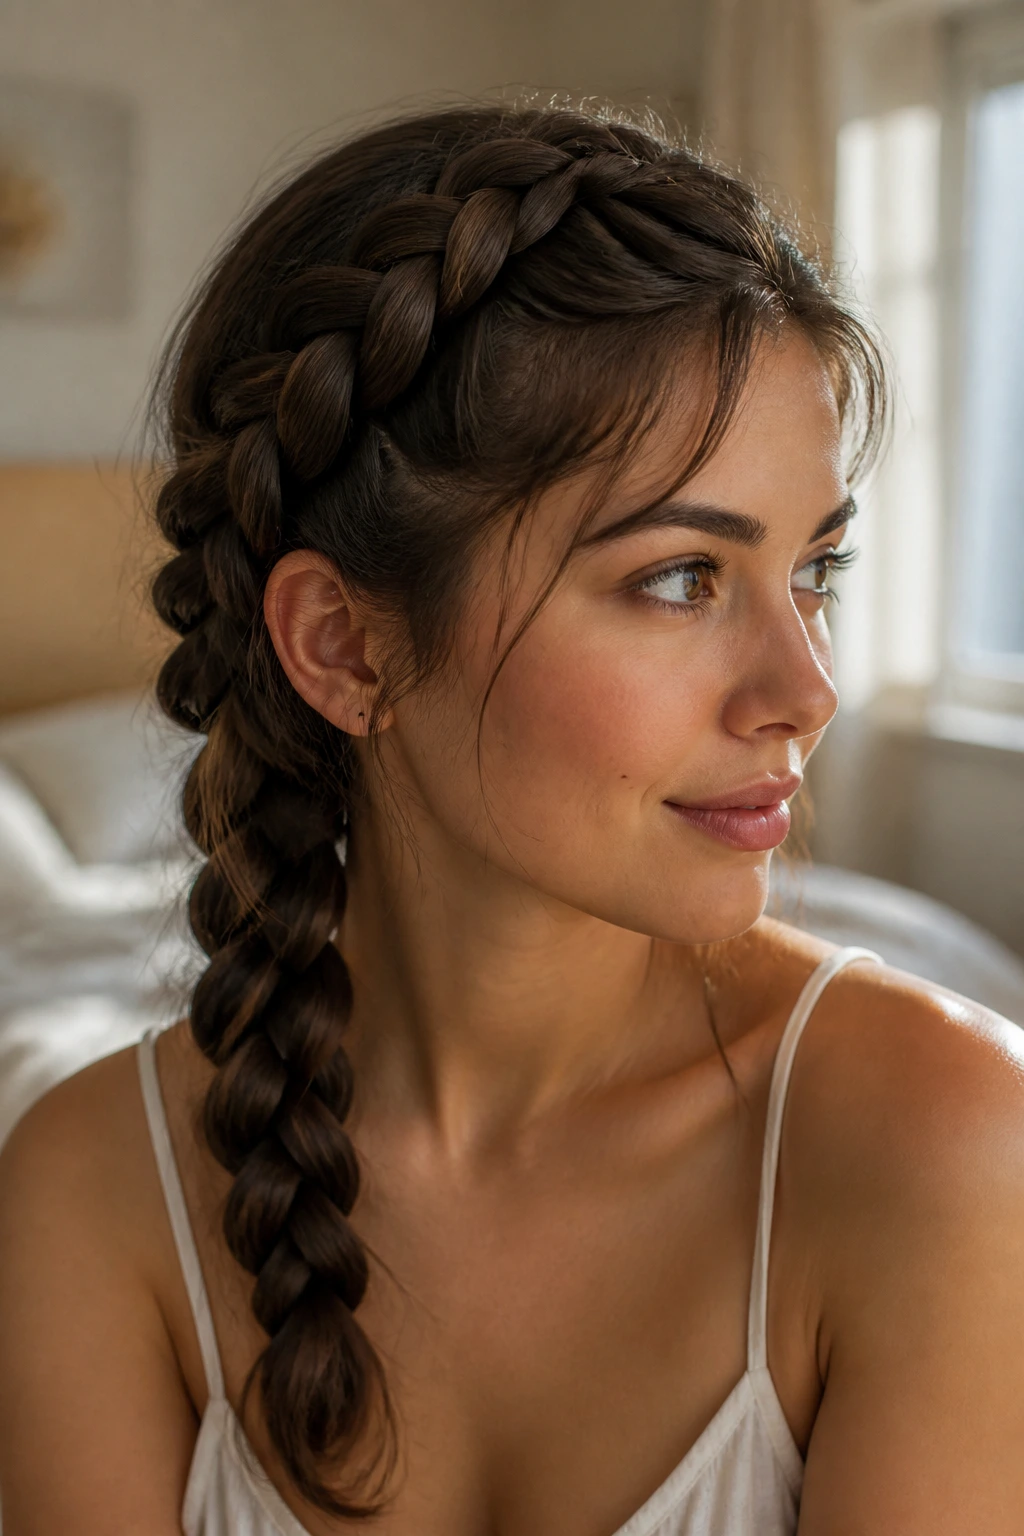
This style is a reliable option for mornings when your hair refuses to cooperate. By weaving the hair under rather than over, the Dutch technique lifts the braid away from the scalp, creating a three-dimensional band that keeps your face clear of stray hairs. The natural volume of frizzy hair actually helps this braid, giving it a thick, substantial appearance that would require hours of backcombing on finer hair types.
Why the Dutch Braid Works on Frizz
Because you weave the strands underneath the center section, the outer fibers of the braid are anchored tightly against the scalp. This positioning prevents humidity from lifting the roots of your bangs. The bulk of the frizz is tucked neatly into the center of the braid, hiding dry ends and uneven textures inside the structure.
Practical Steps for Success
- Partition your bangs from the crown down to the top of your ear, keeping the rest of your hair pinned back.
- Apply a pea-sized amount of shea butter or a moisturizing cream to your fingertips to provide grip.
- Begin braiding at your part, pulling in small sections of hair from both the hairline and the crown side.
- Secure the tail behind your ear with a sturdy bobby pin pushed upward against the direction of the braid.
Pro tip: Do not pull the braid too tight during weaving; instead, secure it first and then gently pinch the outer loops afterward to create a fuller, more relaxed shape.
2. The Crown French Braid Tucking into Loose Curls
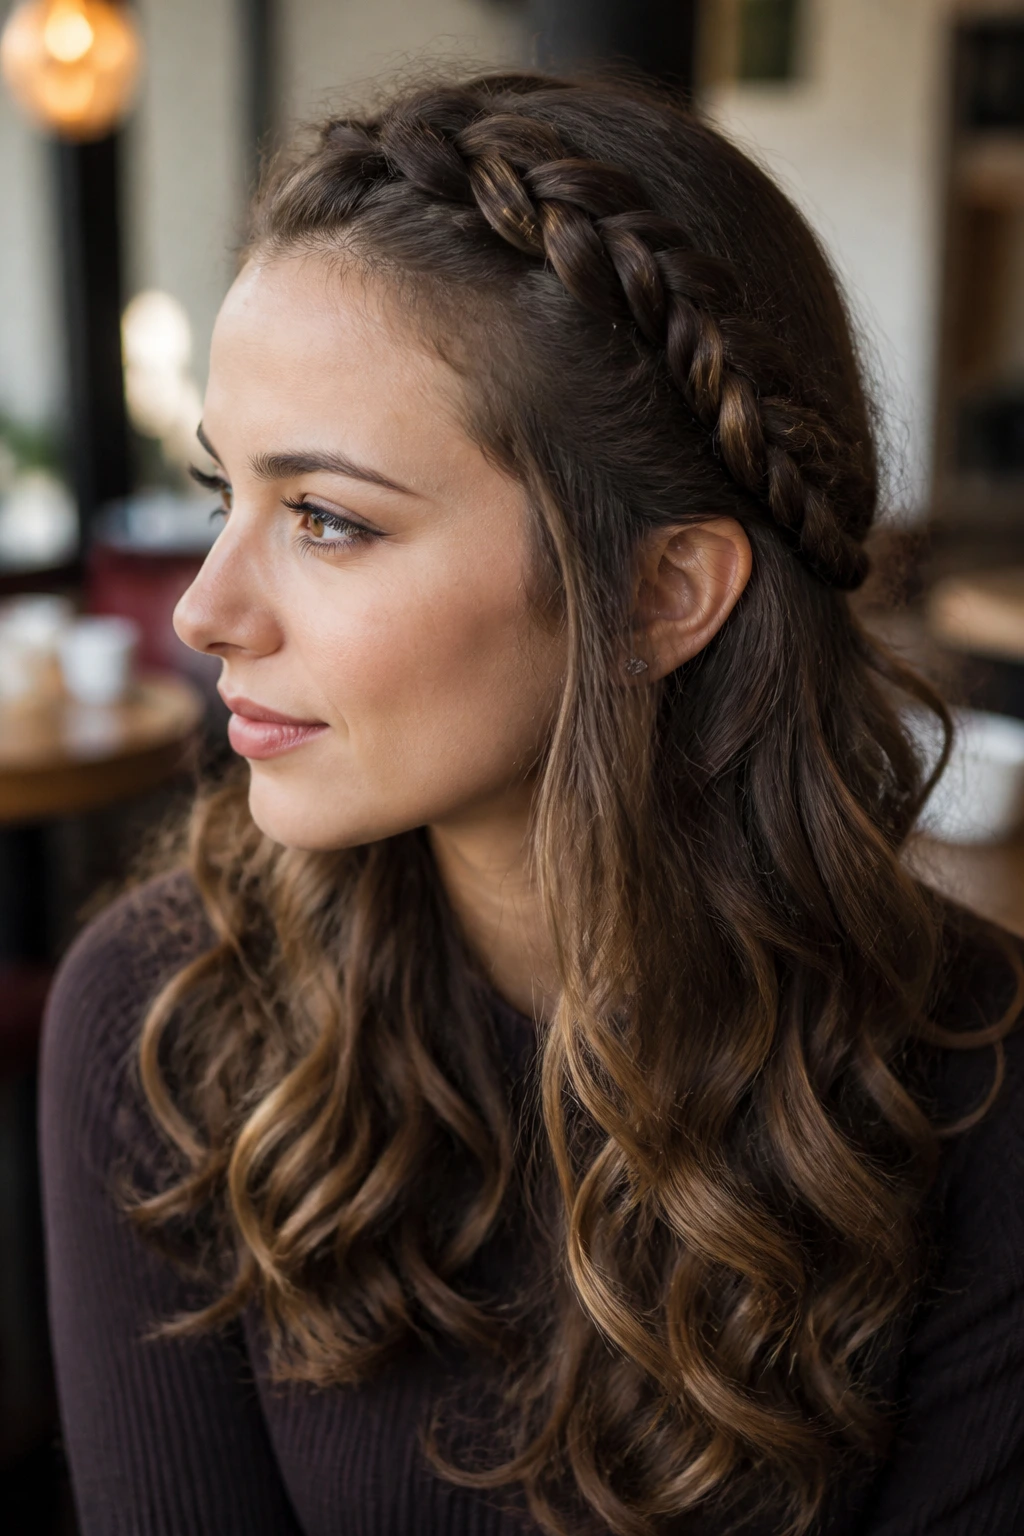
When you want to showcase your natural curl pattern while keeping your forehead clear, this half-up crown style is an ideal choice. It runs along your hairline, gathering up your bangs and the front sections of your hair, then tucks behind the ear to let the rest of your curls cascade freely. It offers a striking contrast between the neat, structured braid and the wild, voluminous texture of your remaining hair.
Instead of fighting the halo of frizz that often forms at the crown, this style uses that volume to create a seamless transition. You start at one temple and work across the hairline, pulling in strands of your fringe with light, even tension. The key is to avoid using fine-toothed combs, which disrupt the natural curl groupings and invite more frizz; instead, use your fingers to section the hair.
To make this style last all day, use a light-hold styling gel or a moisturizing styling cream on the bang section before you begin. Once the braid reaches past your ear, secure it with a small, clear elastic band, then tuck the tail under your loose curls, pinning it flat to your scalp. The weight of your natural hair will cover the pin, leaving you with a clean, polished frame for your face.
3. Micro-Three-Strand Accents Floating over Wild Waves
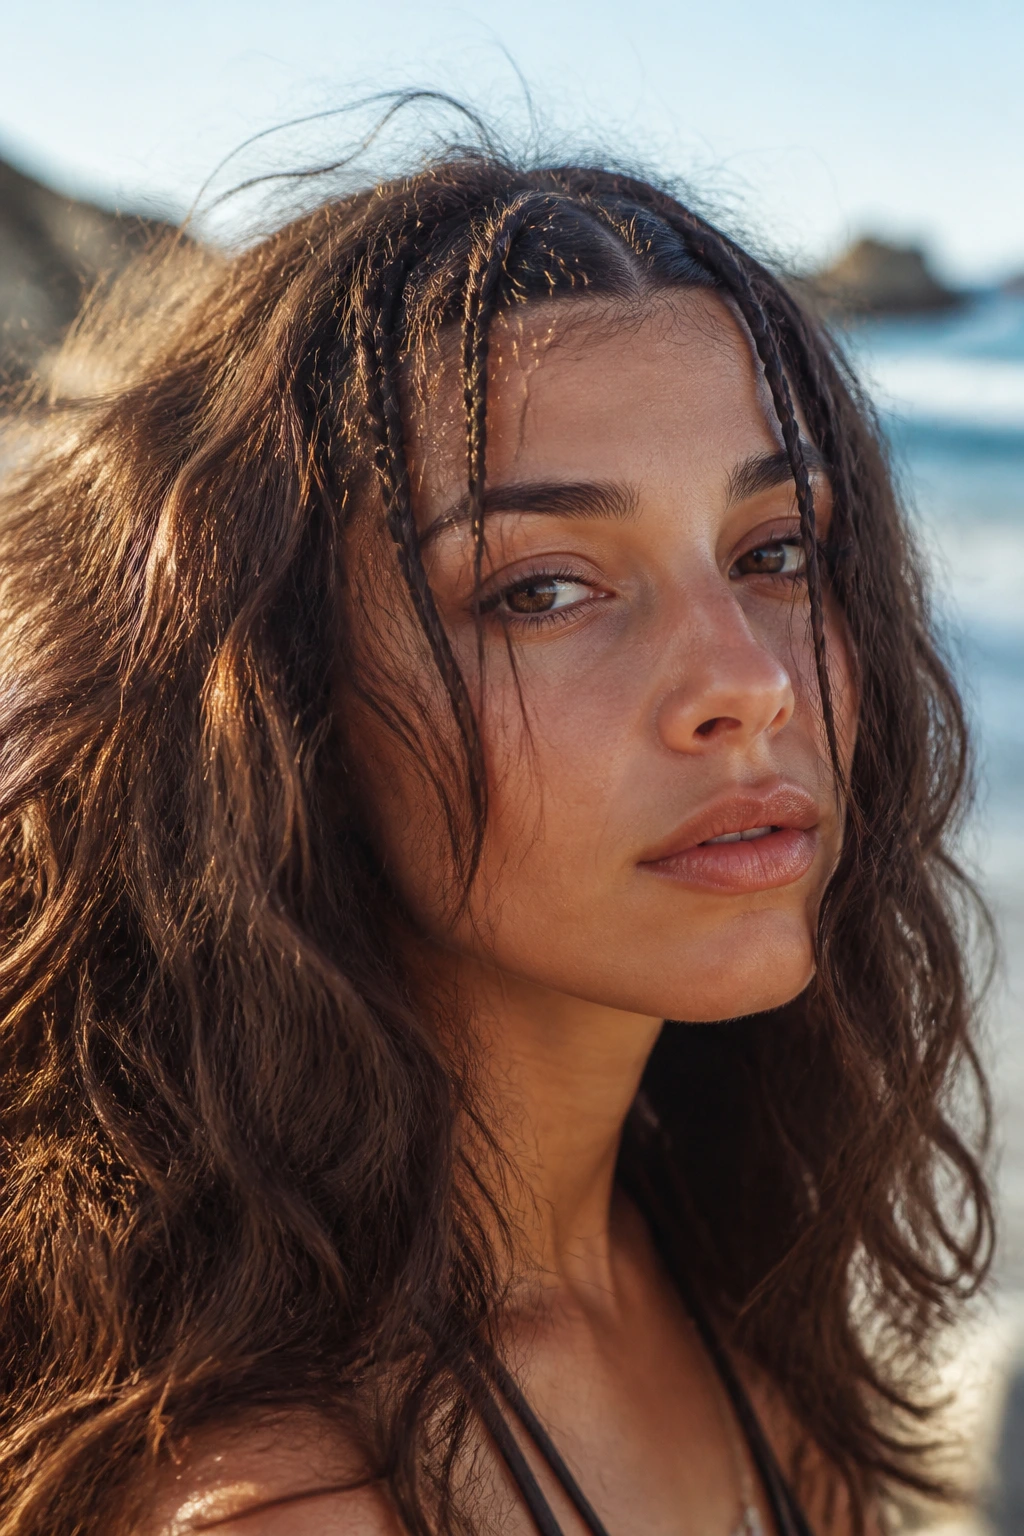
Is your hair having a day of massive, unpredictable volume? Instead of trying to hide it, you can add a few thin, delicate braids right through your fringe to create a deliberate, bohemian look. This style does not require you to braid your entire bang section; instead, you select small, random pieces to weave, letting the rest of your natural texture puff and swell around them.
Why Choose Micro-Accents?
Micro-braids act as anchor points that visually break up a large mass of frizzy hair. They draw the eye to the face while allowing your natural waves to do whatever they want. It is a low-effort styling choice that looks incredibly detailed and intentional.
Styling Details
- Select three to four random half-inch sections of hair along your hairline.
- Lightly mist each section with a moisturizing leave-in conditioner spray to soften the strands.
- Braid each piece tightly from root to tip, using a classic three-strand technique.
- Avoid using plastic elastics on the ends; instead, backcomb the last half-inch of the braid with your fingers to let your natural texture hold the braid closed.
Best Hair Types
- Type 2C Waves: Gives definition to lazy waves that tend to lose their shape.
- Type 3A Curls: Adds a structured contrast to bouncy, high-volume ringlets.
- Type 4A Coils: Creates a beautiful pattern play against a tight, cloud-like texture.
4. The Halo Fishtail Band Across the Forehead
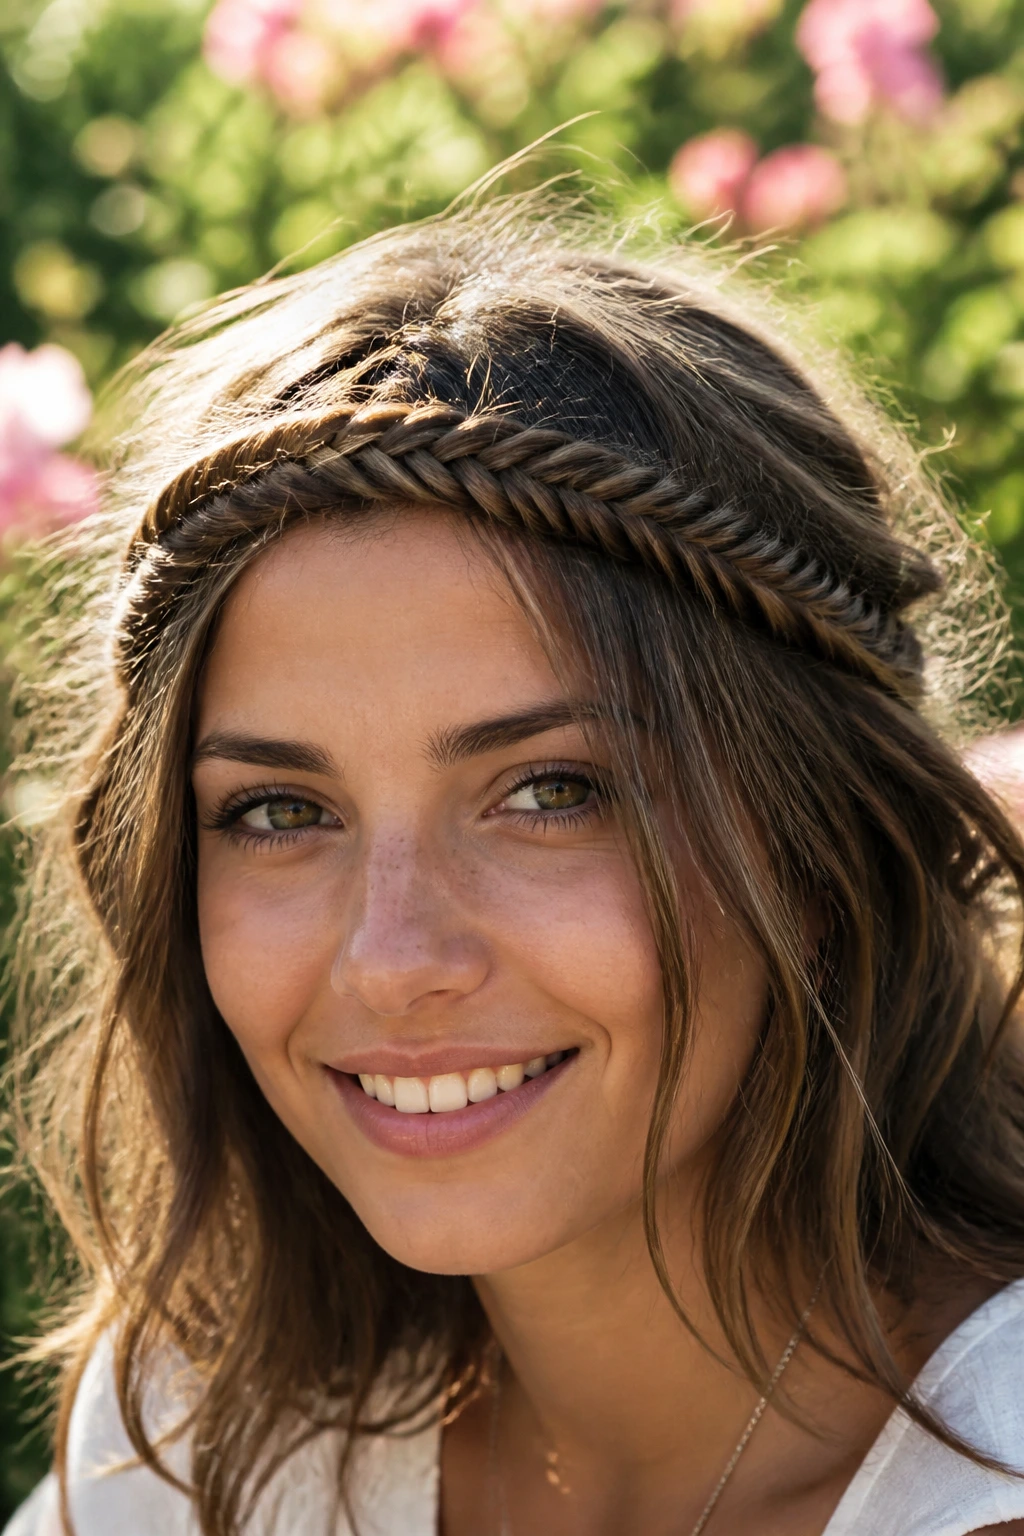
The fishtail braid has a reputation for being difficult, but it is actually one of the most forgiving styles for frizzy hair. A traditional fishtail uses only two strands, crossing tiny sections from the outside of one strand over to the inside of the other. When done on textured hair, the natural grip of the strands prevents the braid from slipping, making the weaving process surprisingly stable.
You start this look by parting your hair deeply to one side, using the crown of your head as the starting point. Grab a section of hair from the heavier side of the part, dividing it into two equal halves. As you cross the small outer sections over, let the frizzy texture work in your favor; those tiny, flyaway fibers help lock the weave together, meaning your fishtail will actually look better and stay tighter as the day goes on.
If your hair is particularly dry, you might find that the small sections try to escape your fingers. Keep a small tin of hair balm or coconut oil nearby to smooth your fingertips as you work. Once you reach the opposite temple, secure the braid with a small band and hide the end beneath your loose side hair, pinning it securely with two crisscrossed bobby pins.
5. Double Dutch Pigtail Bangs Ending in Soft Ringlets
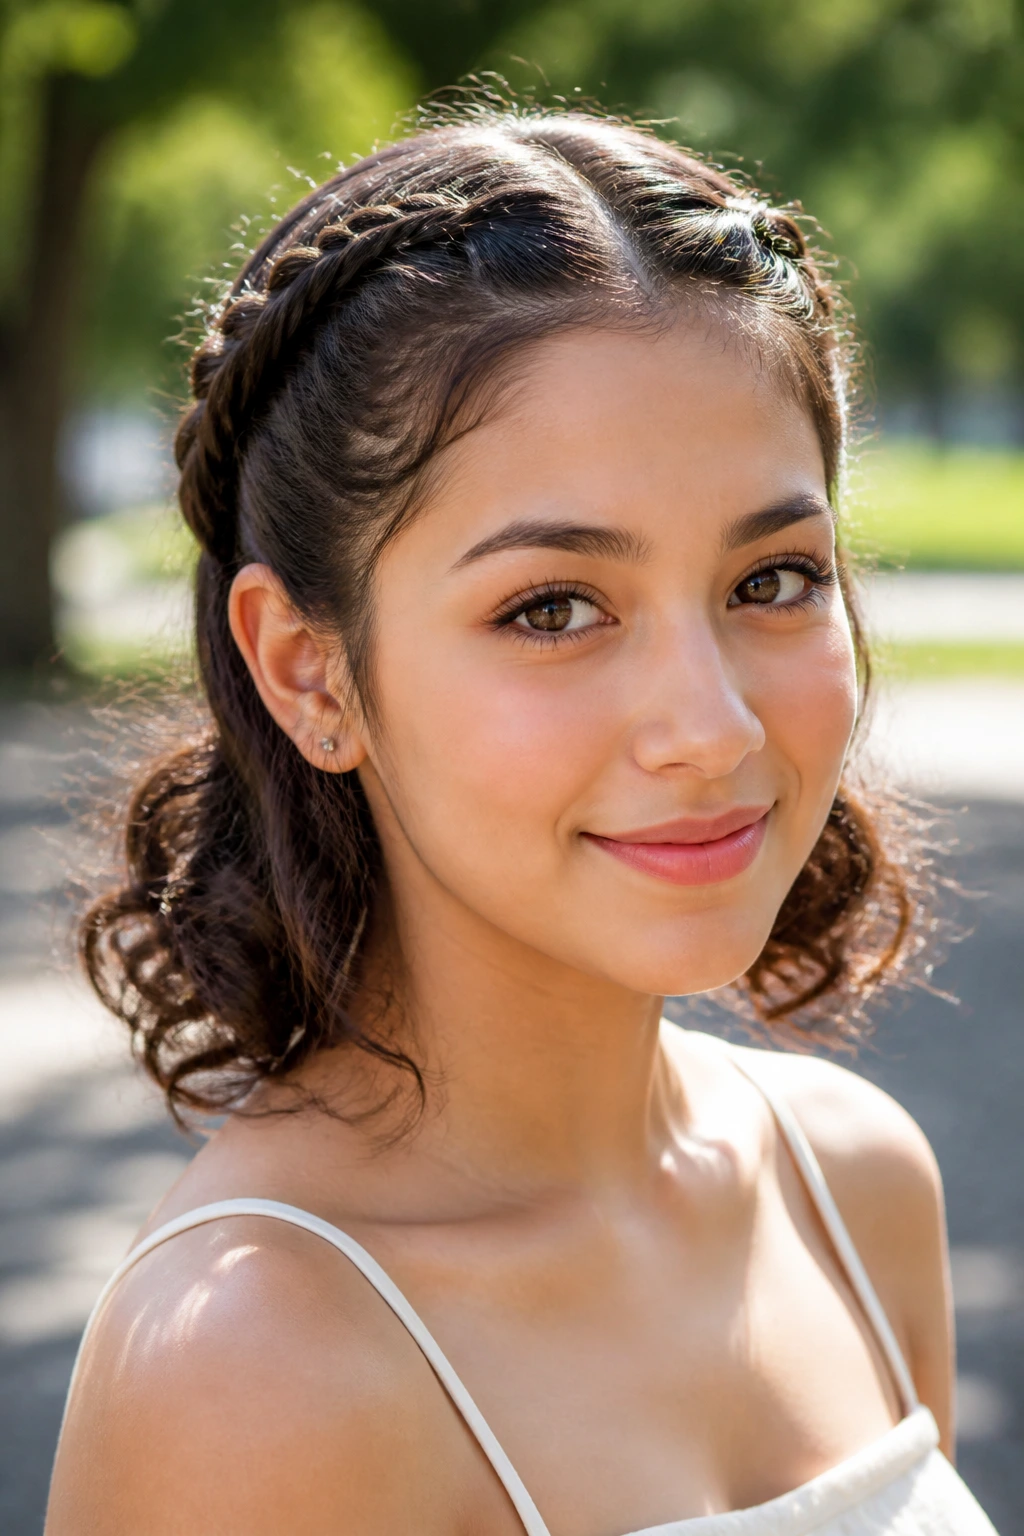
This classic youthful style is highly effective at managing intense frizz and keeping your hair completely off your face during hot, humid days. By parting your hair down the center, you create two symmetrical Dutch braids that start right at your hairline, capturing every single short hair in your bangs. The braids run back over your head, ending at the nape of your neck where they release into two fluffy, voluminous ponytails.
Using this approach means you do not have to worry about short, stubborn hairs popping out of your braids by midday. The Dutch technique locks those shorter fringe hairs flat to the scalp, while the transition to loose ringlets at the neck celebrates your natural texture where it is easiest to manage. It is a perfect style for outdoor activities, workouts, or long days when you do not want to think about your hair once.
To get clean parts on frizzy hair, use the tail of a metal parting comb, but do not drag it forcefully along your scalp. Work slowly, applying a small amount of edge-control gel along the parted line to keep the surrounding hairs from crossing over into the wrong section. This gives you sharp, clean lines that contrast beautifully with the textured braids.
6. The Waterfall Braided Border Framing the Brow
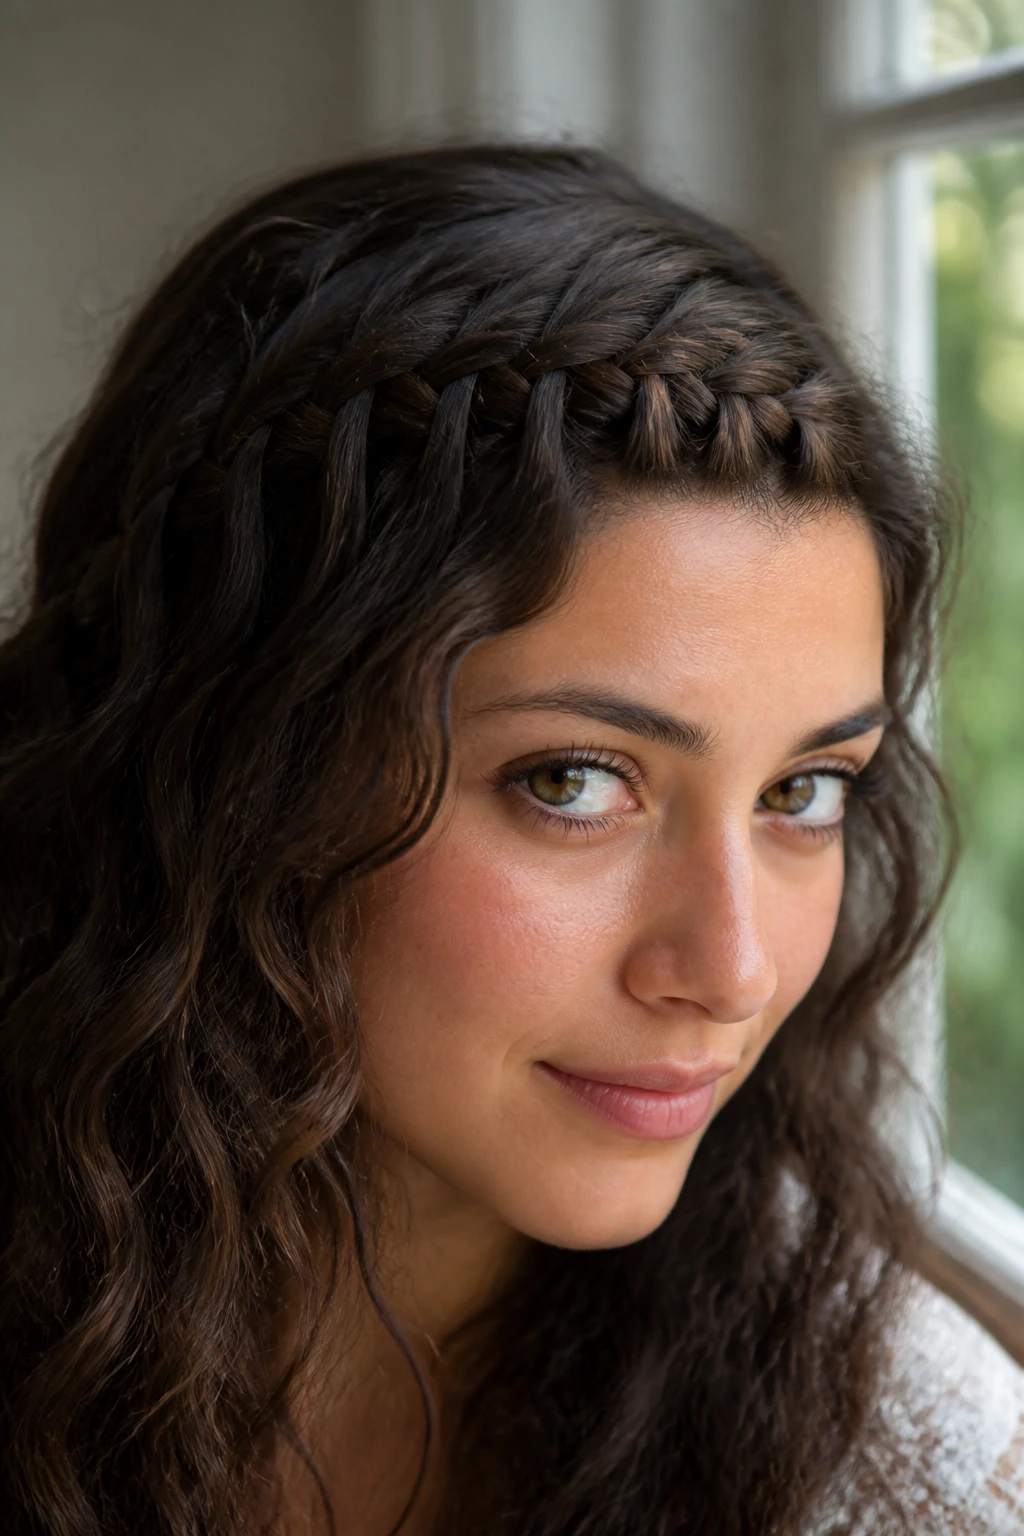
Unlike braids that tuck hair away, the waterfall braid lets strands cascade down through the weave, creating a floating effect. This style is excellent for wavy or frizzy hair because it shows off your natural texture while keeping the hair immediately around your forehead contained. It runs horizontally across your brow line, acting like a delicate, woven headband.
Comparing the Waterfall to the French Braid
A French braid pulls new hair into every step of the weave, locking all the strands into a single, thick cord. The waterfall braid, however, drops the bottom strand after each stitch and picks up a new section of hair directly behind it. This creates a loose, flowing border that allows your natural texture to breathe while still keeping the hair out of your eyes.
Who It’s Best For
This technique works exceptionally well for anyone with medium-length bangs that are in that awkward, growing-out phase. It catches those mid-length strands easily, holding them in place without requiring heavy styling products or stiff hairsprays.
Specific Recommendation
If you have very fine, frizzy hair, apply a light volumizing mousse to the bang area before braiding. This will give the floating strands enough body to drape beautifully without looking stringy or limp against your face.
7. Twisted Rope Bang Crown Wrapped with Silk Thread
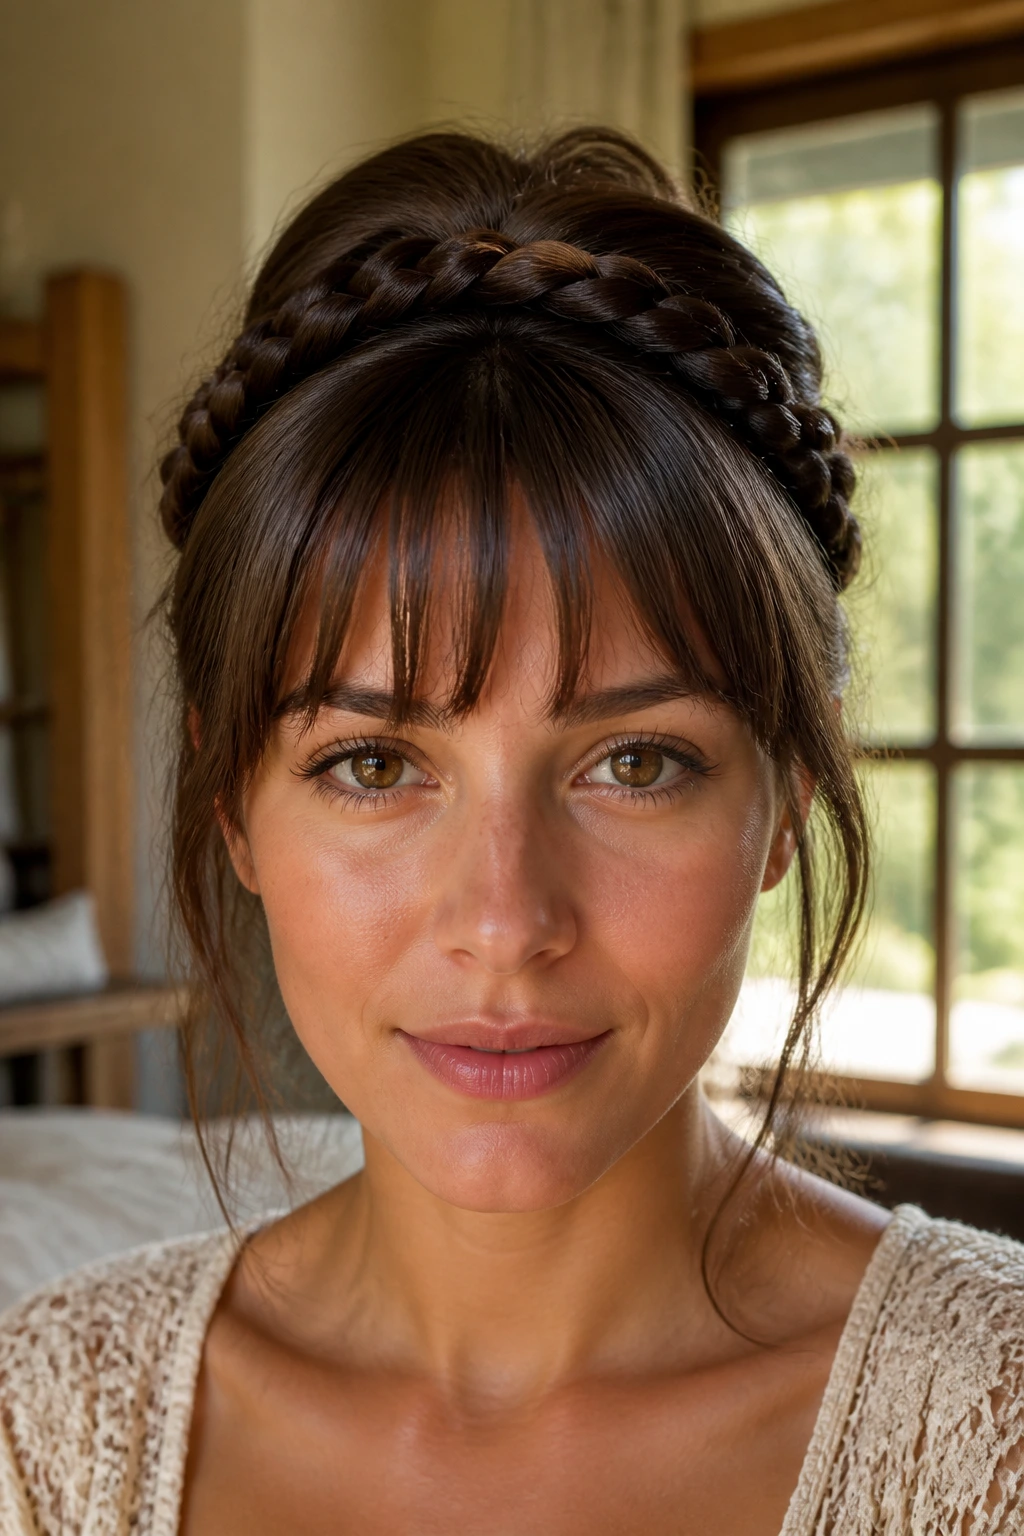
For a style that feels a bit more structured and architectural, a two-strand rope twist is an excellent alternative to standard braids. Instead of weaving three strands, you take two sections of hair, twist them individually in one direction, and then wrap them around each other in the opposite direction. This opposing twist creates a tight, rope-like structure that is incredibly resistant to frizz.
The Power of Opposing Tension
The magic of the rope twist lies in the physics of the counter-twist. If you twist each strand to the right, you must wrap them together to the left. This tension keeps the hair locked in place, preventing the damp air from invading the twist and causing the individual hairs to swell and escape.
Step-by-Step Styling
- Partition your bangs into a thick section running from temple to temple.
- Divide this section into two equal halves.
- Twist the left strand tightly to the right (clockwise) three times.
- Twist the right strand tightly to the right (clockwise) three times.
- Cross the right strand over the left strand (counter-clockwise).
- Repeat this process, adding a tiny bit of hair from your hairline to each strand before you twist and cross.
- Tie a thin, colorful silk thread around the end of the twist to secure it and add a subtle, decorative accent.
Pro tip: If your hair is highly textured or coily, you can skip the hair-tie entirely; the natural texture at the ends of your hair will often lock the twist in place if you simply roll the ends between your fingers with a touch of pomade.
8. The Flat Five-Strand Statement Braid Over the Temple
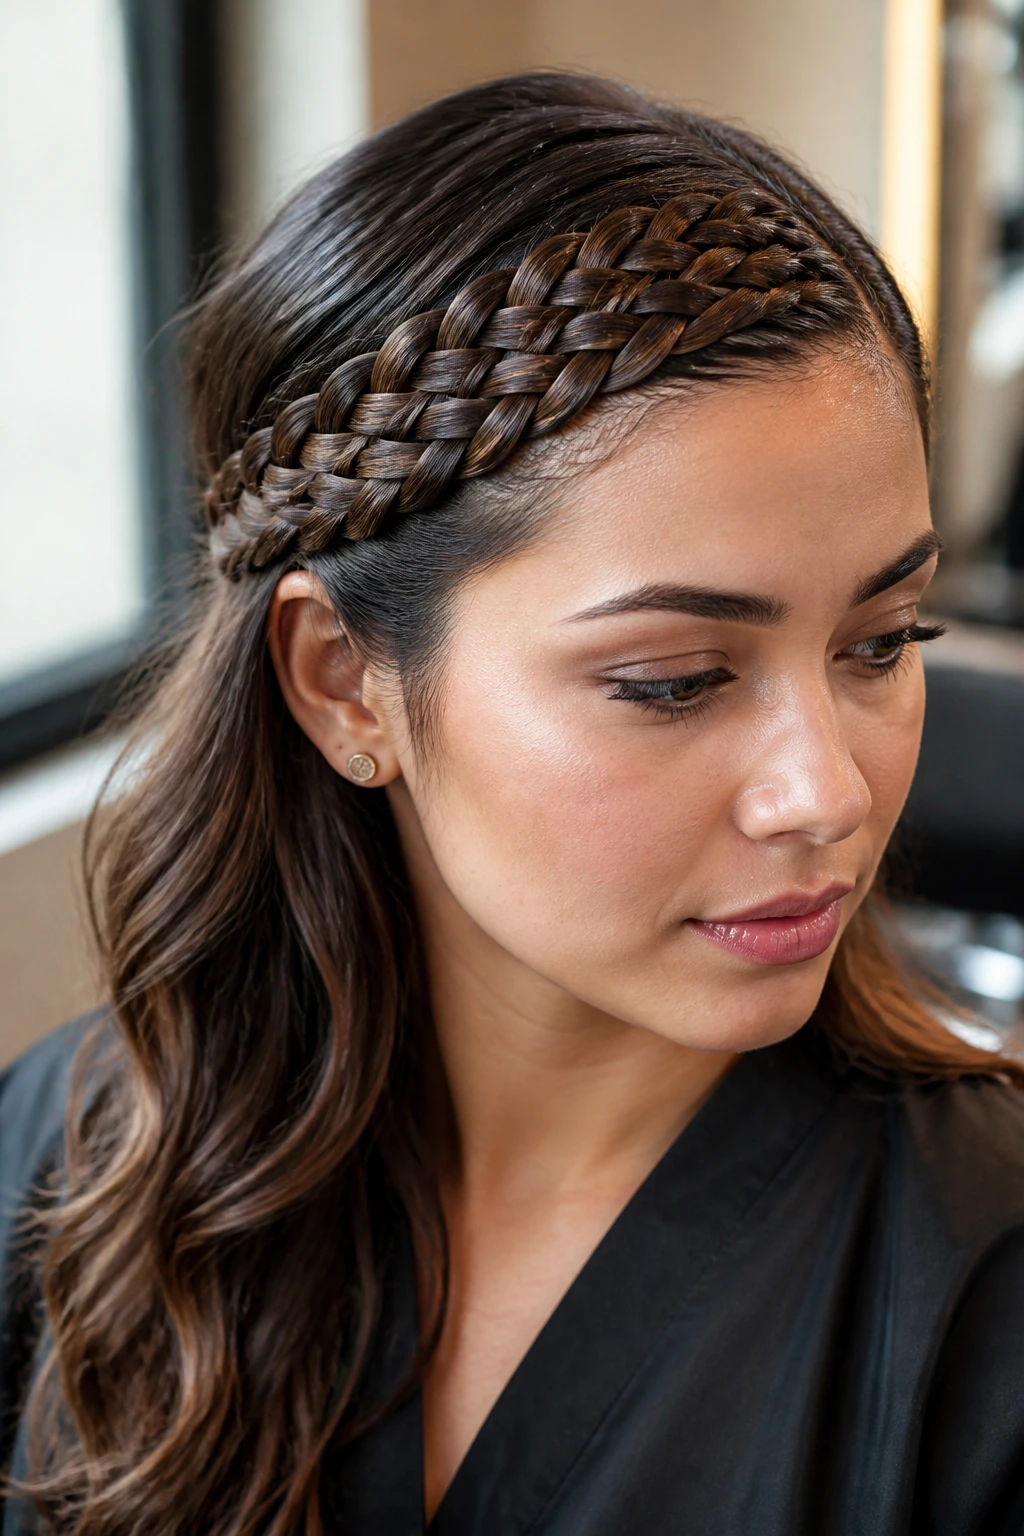
If you want a braid that looks wide, flat, and intricate, the five-strand braid is the ultimate statement style. It functions similarly to a woven basket, with the strands weaving over and under each other across a wider surface area than a standard three-strand braid. This wide shape is perfect for covering a large portion of the forehead, making it a brilliant way to hide a stubborn, frizzy fringe.
While it looks complicated, the pattern is actually a simple repeat: the outermost strand always goes over one, under one, to reach the center. Because you are working with five strands, you have more control over the distribution of hair, which helps keep the braid sitting flat against your head. This flatness prevents the braid from puffing up, even in high humidity.
To prepare your hair for this style, ensure your bangs are slightly damp. Apply a generous amount of leave-in cream to help the five separate strands stay distinct while you weave them. If your hair is too dry, the strands will blend back together, making it difficult to maintain the clean, woven pattern that makes this style so visually striking.
9. Diagonal Cornrow Bangs Feeding into a Sleek Bun
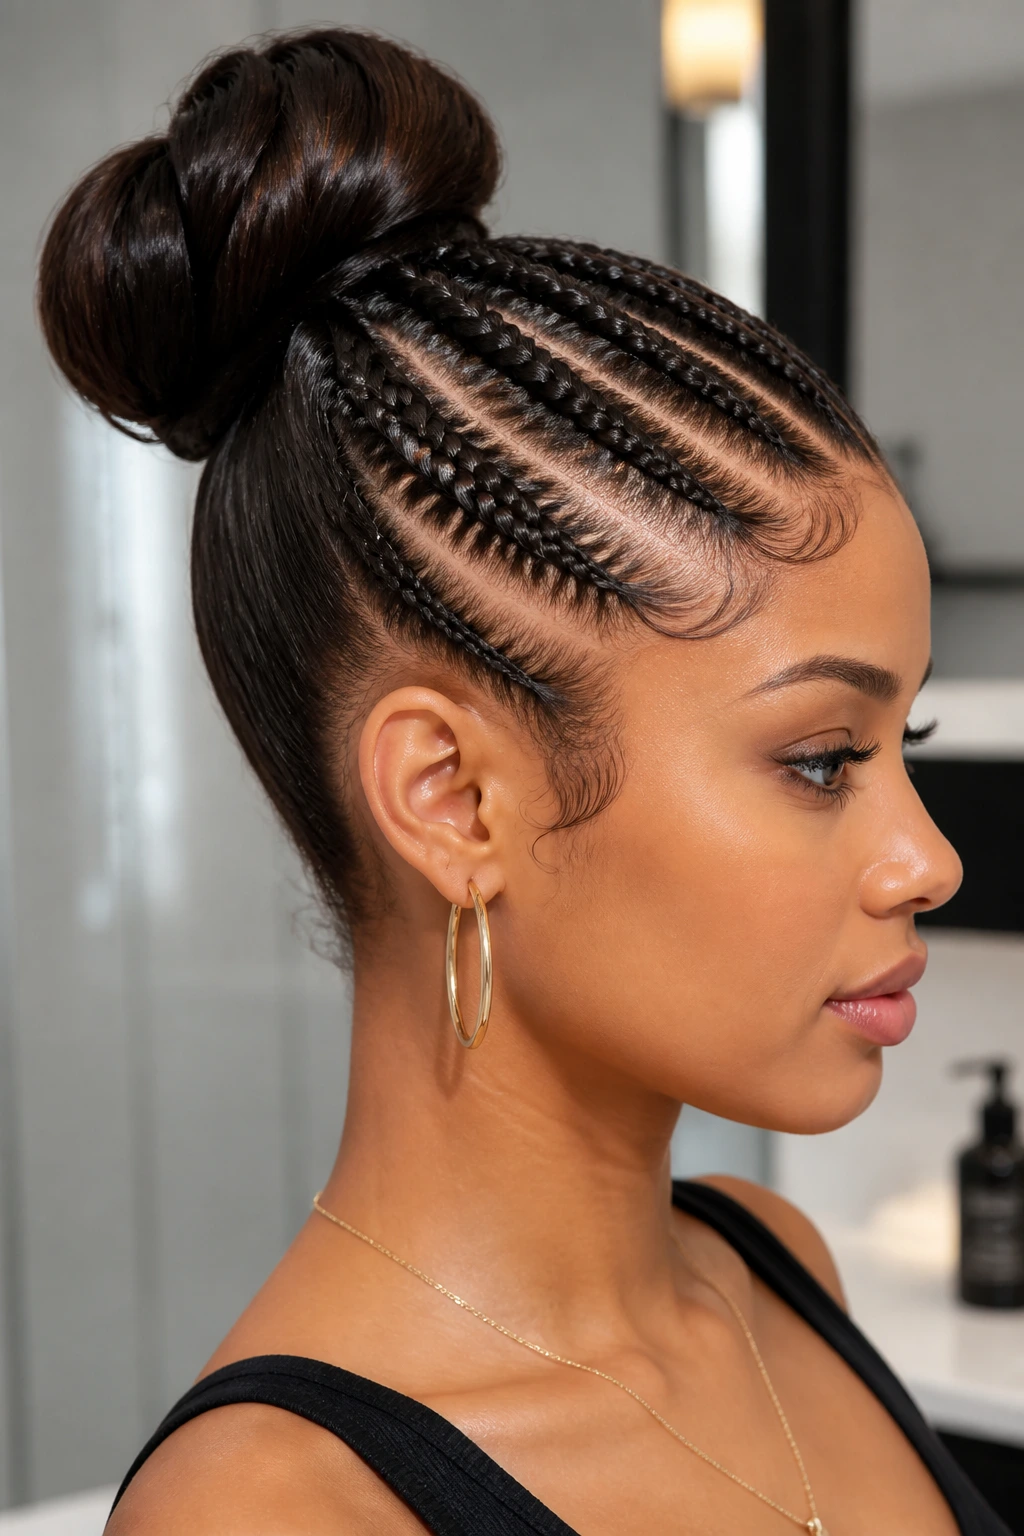
For an ultra-clean, high-contrast look, diagonal cornrows offer unmatched control over frizzy hair. This style involves braiding three or four tight cornrows across your fringe area, running diagonally from one temple up toward a high bun or ponytail. It is a sleek, athletic, and sophisticated look that completely tames even the most humid-sensitive hair.
Why This Style Solves the Frizz Problem
By braiding the hair flat to the scalp (cornrowing), you eliminate any space for the hair to swell or expand. The tension is distributed evenly along the scalp, keeping the roots flat and smooth. The remaining hair is gathered into a high bun, which can be styled as a fluffy, textured puff or a sleek topknot.
What to Watch For
Be mindful of the tension along your hairline. Frizzy hair can sometimes be fragile, especially around the temples. Avoid pulling too tightly, which can lead to tension headaches or damage to your delicate baby hairs.
How to Get the Most From It
Use a specialized braiding gel containing castor oil or honey to section and braid your hair. This provides a clean, high-shine finish and keeps the braids looking crisp for several days. Cover your hair with a satin bonnet at night to keep the cornrows from fuzzing up while you sleep.
10. Symmetrical Face-Framing Baby Braids with Fluffy Ends
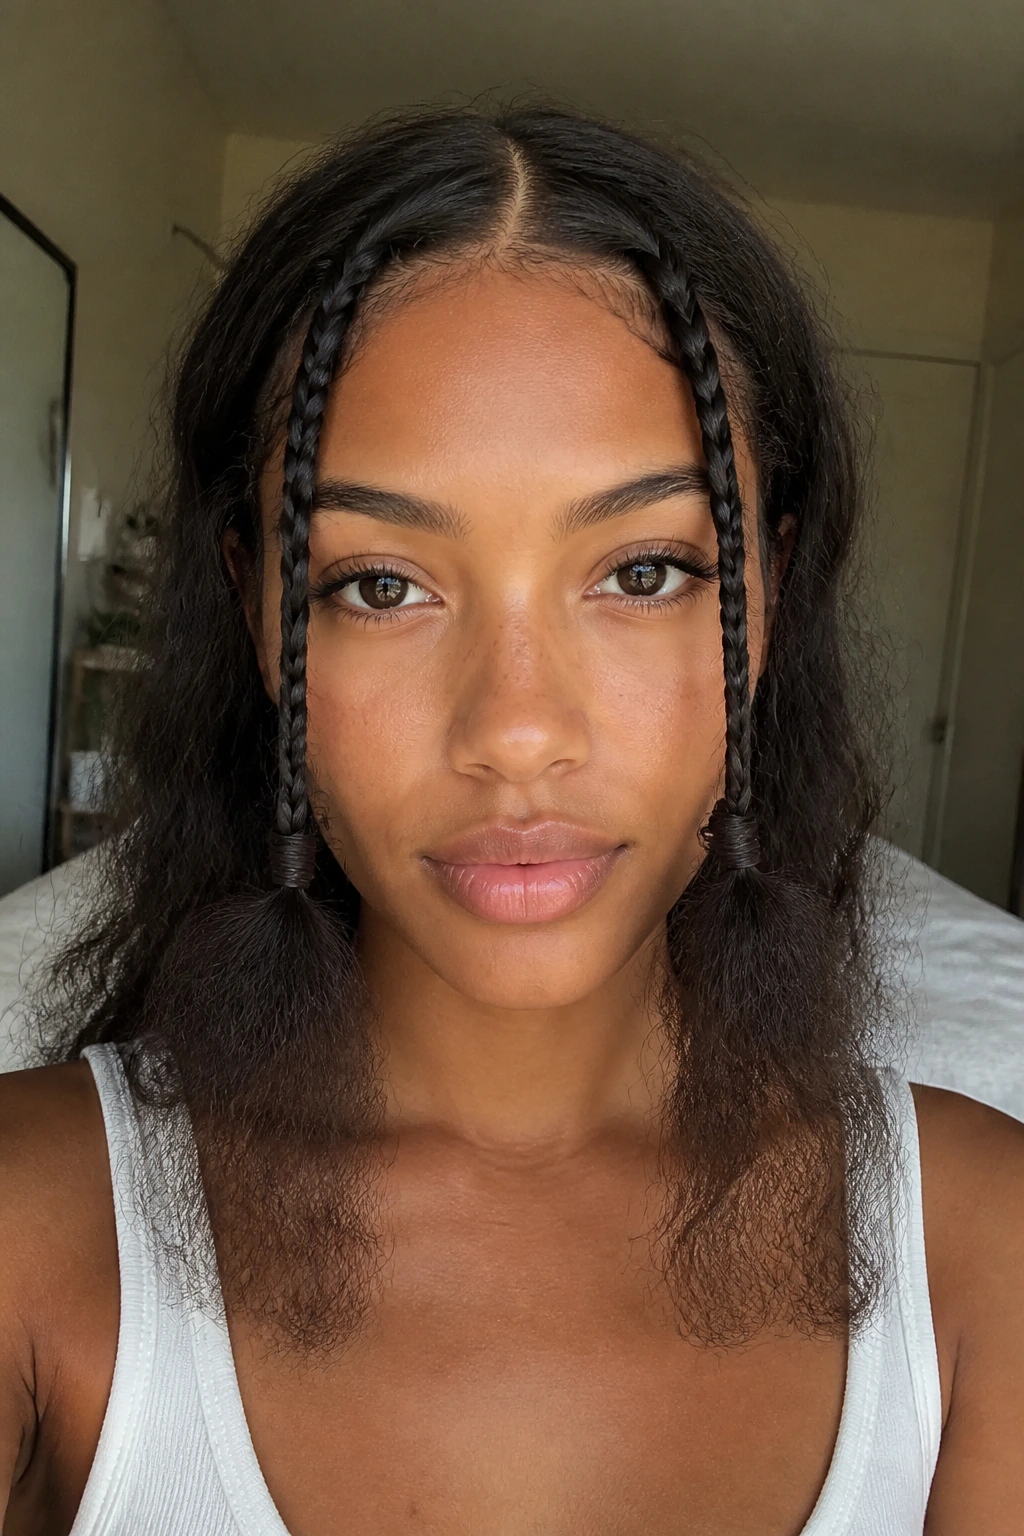
If you prefer a quick, low-effort style that embraces the natural fluffiness of your hair, symmetrical baby braids are a wonderful option. Popularized by bohemian fashion, this style involves parting your hair down the center and braiding just two thin strands at the very front of your face. The rest of your hair is left completely natural, creating a soft, framing effect.
What makes this style so appealing is its simplicity. You do not need perfect parts or complicated weaving techniques. You simply take a small, half-inch section of hair on either side of your center part and braid them all the way down, leaving the ends unbraided and fluffy. It is a relaxed, effortless look that takes less than five minutes to create.
To keep these braids looking neat, use a tiny drop of lightweight oil—such as sweet almond oil or argan oil—on the braids after you finish weaving. Run your oiled fingers down the length of each braid to smooth any flyaways without weighting the hair down. This subtle contrast between the sleek, thin braids and your big, natural hair is highly flattering.
11. The Upside-Down Lace Braid Sweeping Upward
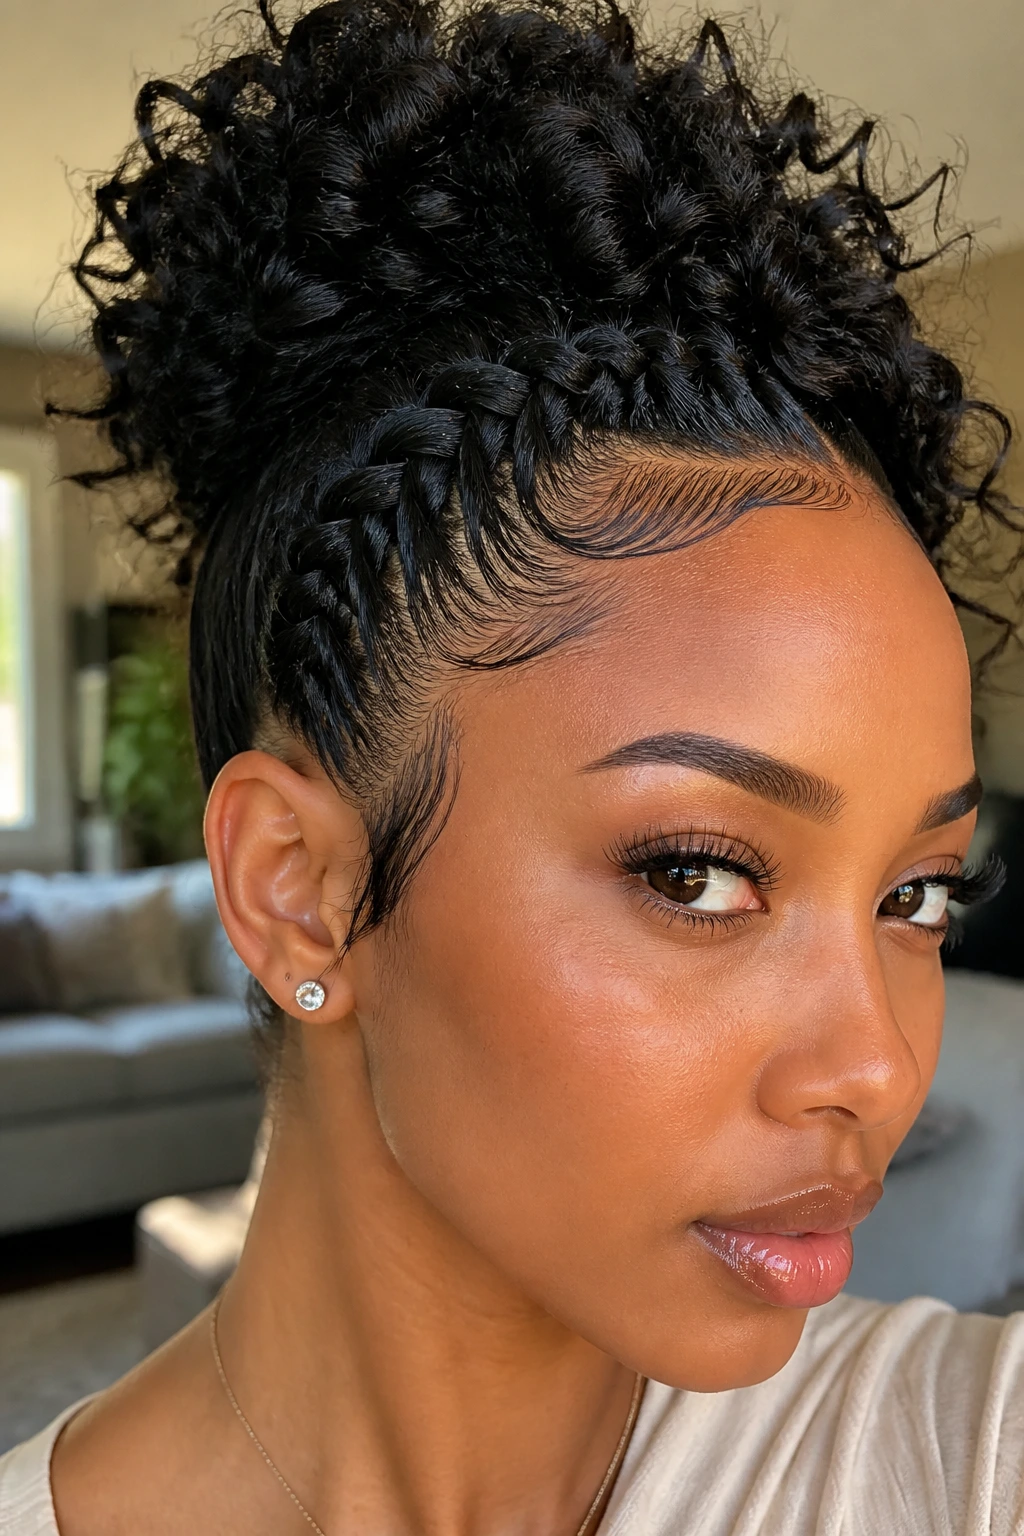
For an unexpected twist on traditional styling, the upside-down lace braid starts at the ear and sweeps upward across the forehead, acting like an asymmetrical tiara. A lace braid is a variation of the French braid where you only add new hair from one side—in this case, from the crown of your head, leaving the hairline clean and untouched.
This one-sided addition creates a beautiful, defined edge along your hairline, while the bulk of the braid sits slightly further back on your head. This positioning is fantastic for creating height and volume at the front of your style, making it a great option for those with rounder face shapes who want to elongate their features.
Because you are only pulling hair from one side, the braid feels light and comfortable on your scalp. It is an excellent way to transition your bangs out of your face while maintaining a soft, romantic feel. Secure the end with a small bobby pin hidden beneath your crown hair, allowing the rest of your texture to cascade naturally behind it.
12. The Four-Strand Ribbon-Woven Lace Braid

Adding a physical accessory directly into your braid is a clever way to distract from frizzy textures while adding structure. By weaving a thin silk ribbon or colorful thread as one of the strands in a four-strand braid, you create a beautiful pattern that holds your hair in place while providing a striking visual contrast.
The Mechanics of the Four-Strand Ribbon Braid
In this style, the ribbon acts as the third strand. You weave the three hair strands over and under the ribbon, which remains relatively straight in the center of the braid. This structural core helps keep the hair flat and prevents the braid from bending or twisting out of shape, even when your hair begins to absorb moisture from the air.
Step-by-Step Guide
- Secure a thin silk ribbon to a bobby pin, and anchor the pin deep near your hair part, hiding it under a layer of hair.
- Divide your bangs into three equal hair strands, using the ribbon as the fourth strand.
- Weave the outer left hair strand under the ribbon, then over the adjacent hair strand.
- Weave the outer right hair strand over the ribbon, then under the adjacent hair strand.
- Repeat this over-under pattern, incorporating small pieces of your fringe as you move along the hairline.
- Tie the remaining ribbon around the end of the braid to create a clean, finished knot.
Pro tip: Choose a ribbon made of silk or satin rather than polyester; these smooth materials slide easily through frizzy hair without snagging or causing static electricity.
13. Bubble Braid Bang Illusion with Tiny Elastics
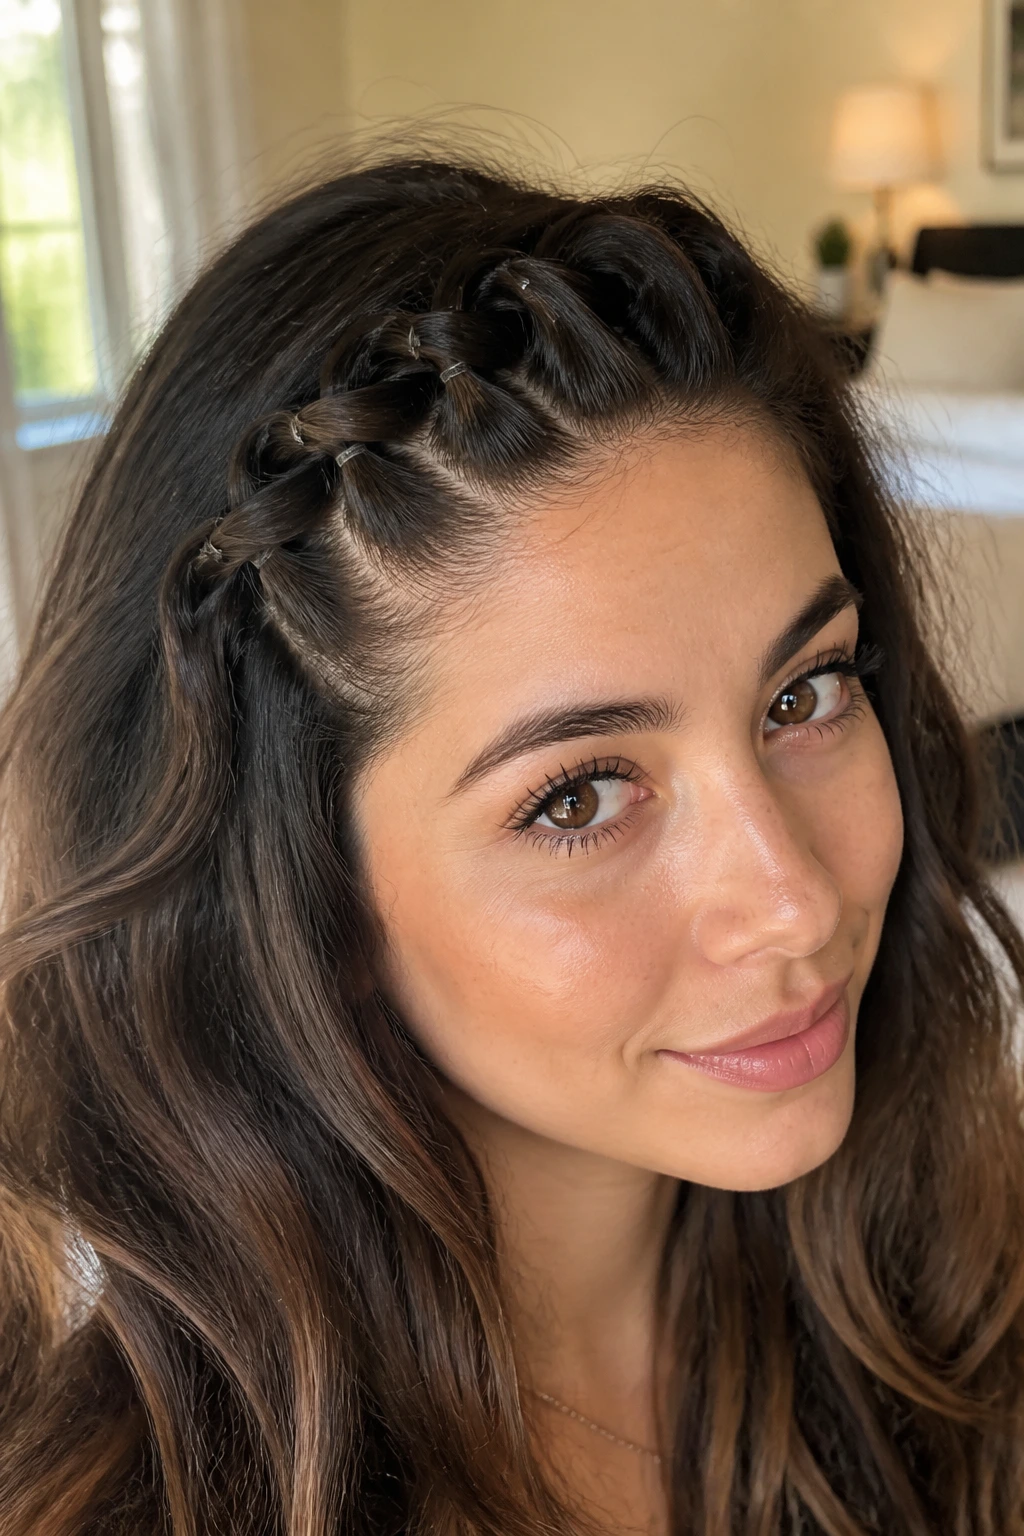
If you struggle with traditional braiding techniques or find that your fingers get tangled in your curls, the bubble braid is a brilliant alternative. It is not actually a braid at all; instead, it uses a series of small elastic bands to create a chain of rounded, bubble-like sections down your hairline. It is incredibly easy to do and offers a playful, graphic look.
Why It’s Perfect for Beginners
Because you are using elastics to secure each section, there is no risk of the style unraveling while you work. You have complete control over each “bubble,” allowing you to adjust the volume and tightness of each section individually. It is a fantastic option for anyone who finds French or Dutch braiding frustrating.
How to Style It
- Part your hair to the side, and section off a two-inch band along your hairline.
- Gather the first inch of hair near your part and secure it with a tiny, clear elastic band to create a small ponytail.
- Gather the next inch of hair, combine it with the tail of the first ponytail, and secure them together with a second elastic band about an inch further down.
- Gently pinch and pull the hair between the two elastics to puff it out into a rounded “bubble” shape.
- Repeat this process down your hairline until you reach your ear, then pin the tail flat to your head.
Best Hair Types
- Type 3B Curls: The natural spring of these curls helps create incredibly round, bouncy bubbles.
- Type 4B Coils: Provides a beautiful, sculpted texture that holds its puffed shape perfectly without needing hairspray.
14. The Loose Bohemian Feed-In Braid for Natural Texture
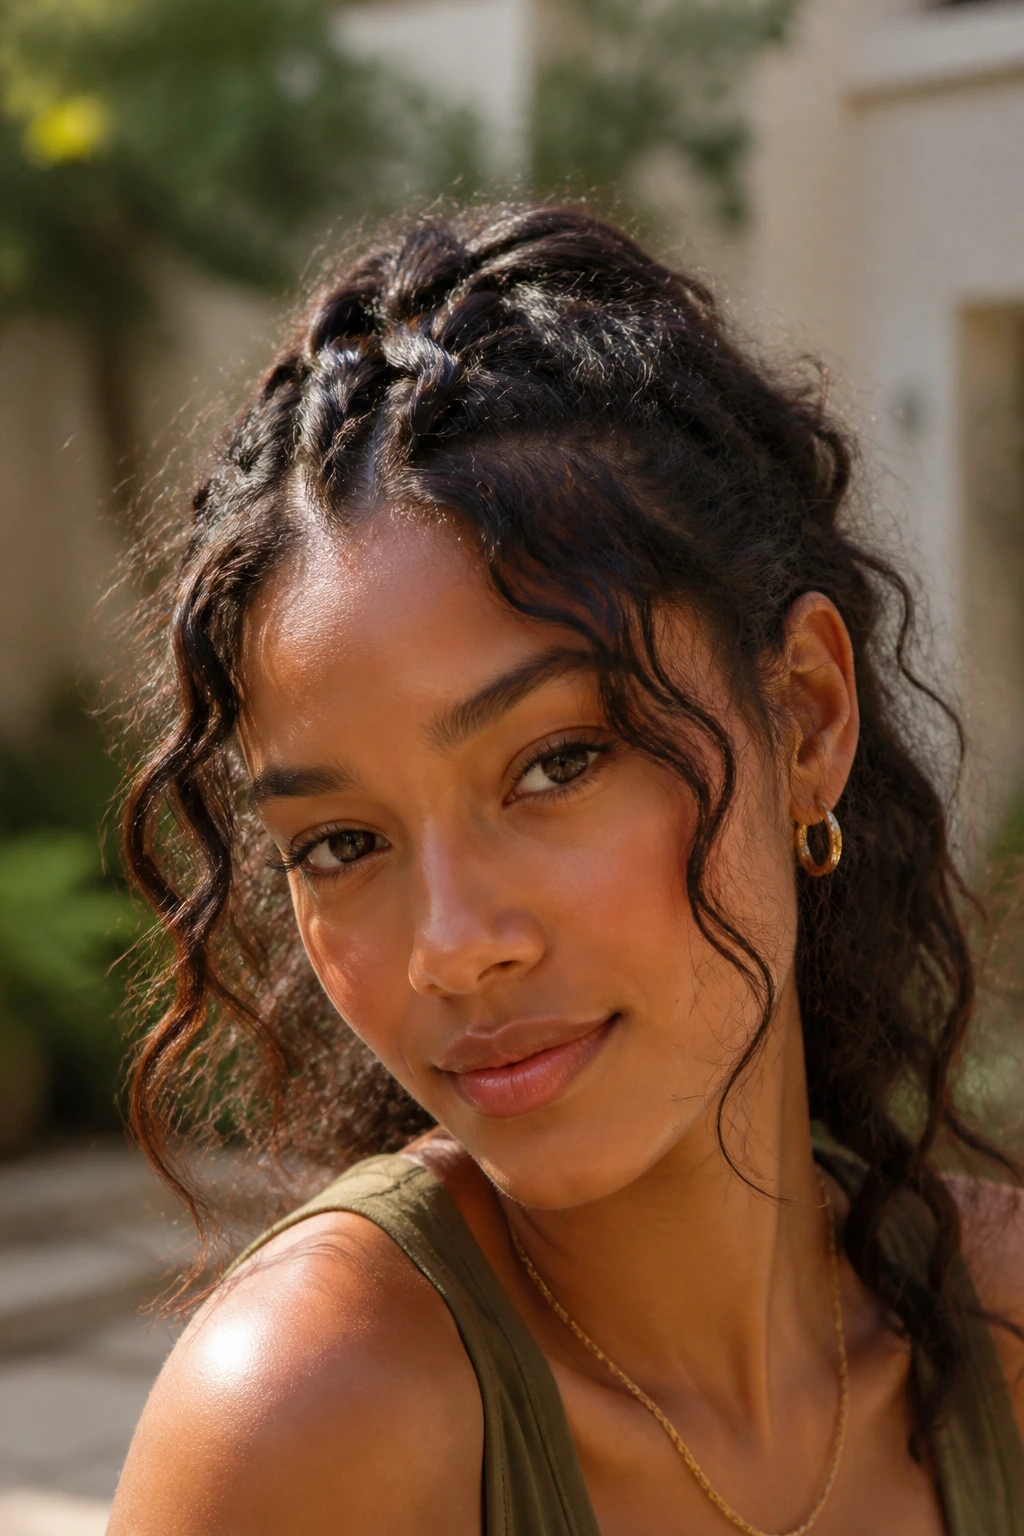
For a softer, more relaxed aesthetic, the bohemian feed-in braid allows small pieces of your natural texture to escape the weave intentionally. Rather than aiming for a sleek, slicked-back look, this style embraces flyaways and soft tendrils, turning what might normally be considered “frizz” into a romantic, ethereal frame for your face.
This technique involves starting with a very small three-strand braid at your part and gradually feeding in larger sections of hair as you move down your hairline. By keeping the tension relatively loose, you allow your hair’s natural curl pattern to show through the braid itself. The result is a thick, textured braid that looks soft and touchable.
To keep this style looking deliberate rather than messy, use a high-quality hair oil to define the pieces that escape the braid. Apply a drop of oil to your fingertips and gently twirl the loose tendrils around your finger to encourage them to form neat curls. This creates a beautiful contrast between the structured braid and the soft, defined curls around your face.
15. Goddess Braided Bangs Layered Over a Curly Afro
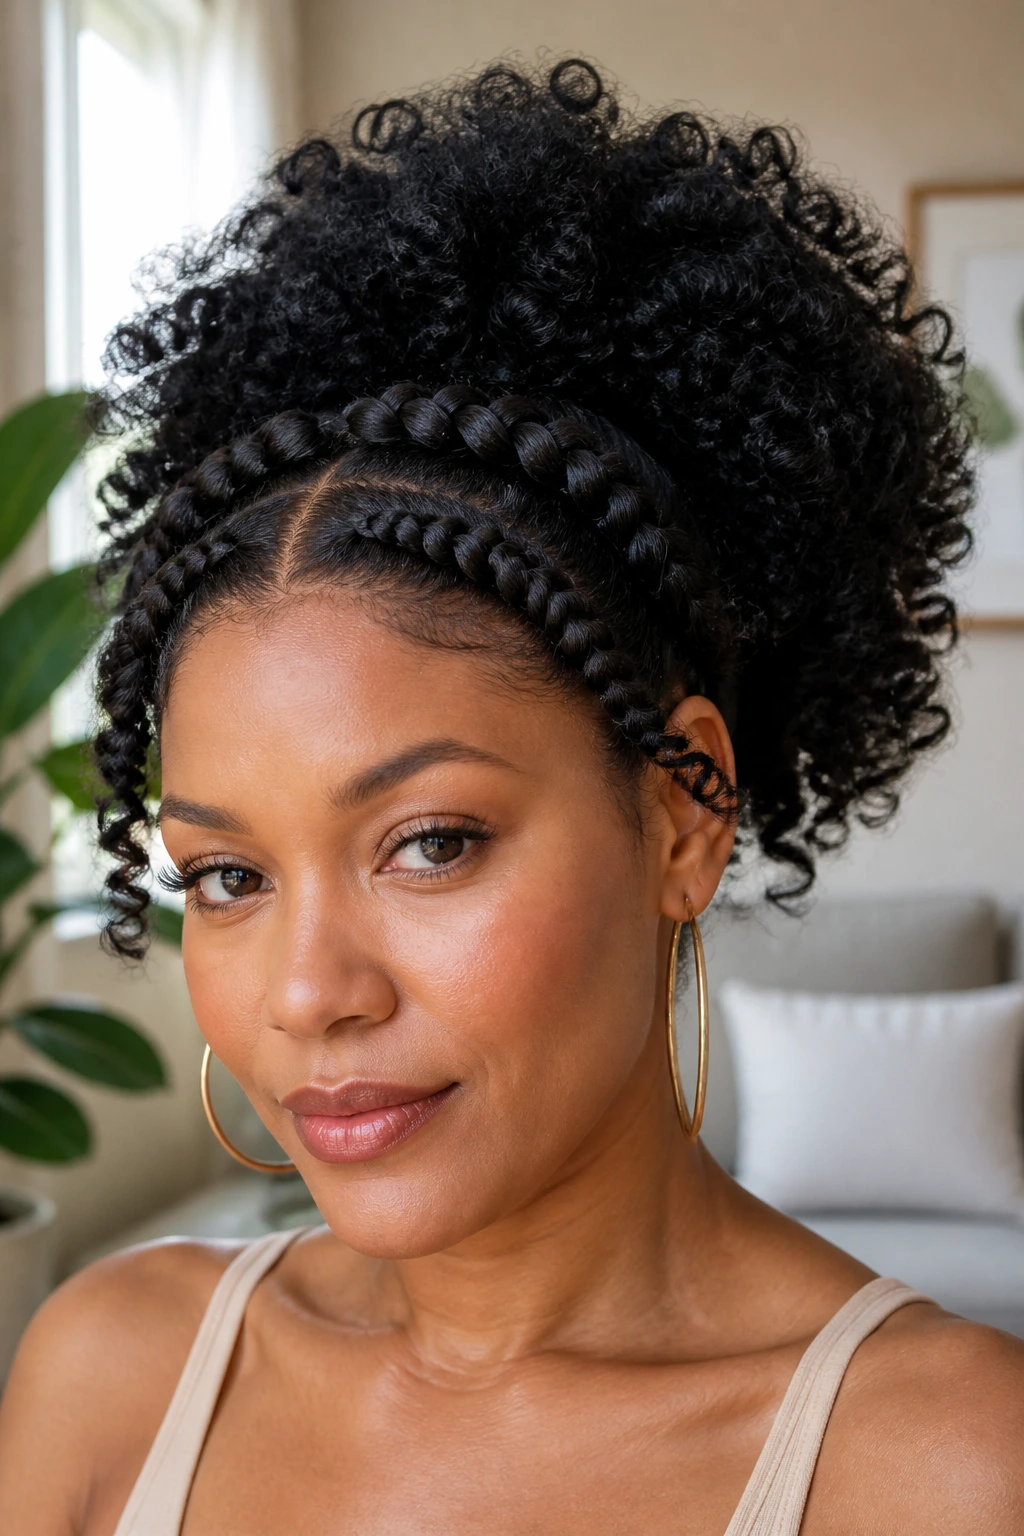
This style is designed to celebrate the incredible volume of a natural afro while keeping the hair out of your eyes. It involves braiding two or three thick, raised braids directly across your forehead, acting like a crown, while the rest of your hair is left to expand into a beautiful, high-volume afro behind them.
The Contrast of Structure and Volume
The goddess braid is essentially a larger, more prominent version of the Dutch braid. By placing these thick, defined braids right at the front of your hairline, you create a stunning frame that highlights your facial features. The contrast between the neat, tight braids and the soft, expansive cloud of your afro is incredibly striking.
Practical Tips
- Use a rich, water-based leave-in conditioner to thoroughly hydrate your hair before styling; this will give your braids a healthy, low-sheen finish.
- Keep the braids close to your hairline to ensure they sit flat and do not get lost in the volume of your afro.
- Secure the ends of the braids with small, black elastics, and tuck them neatly behind your ears, pinning them flat to your scalp.
16. The Half-Crown Milkmaid Braid Pinched for Volume
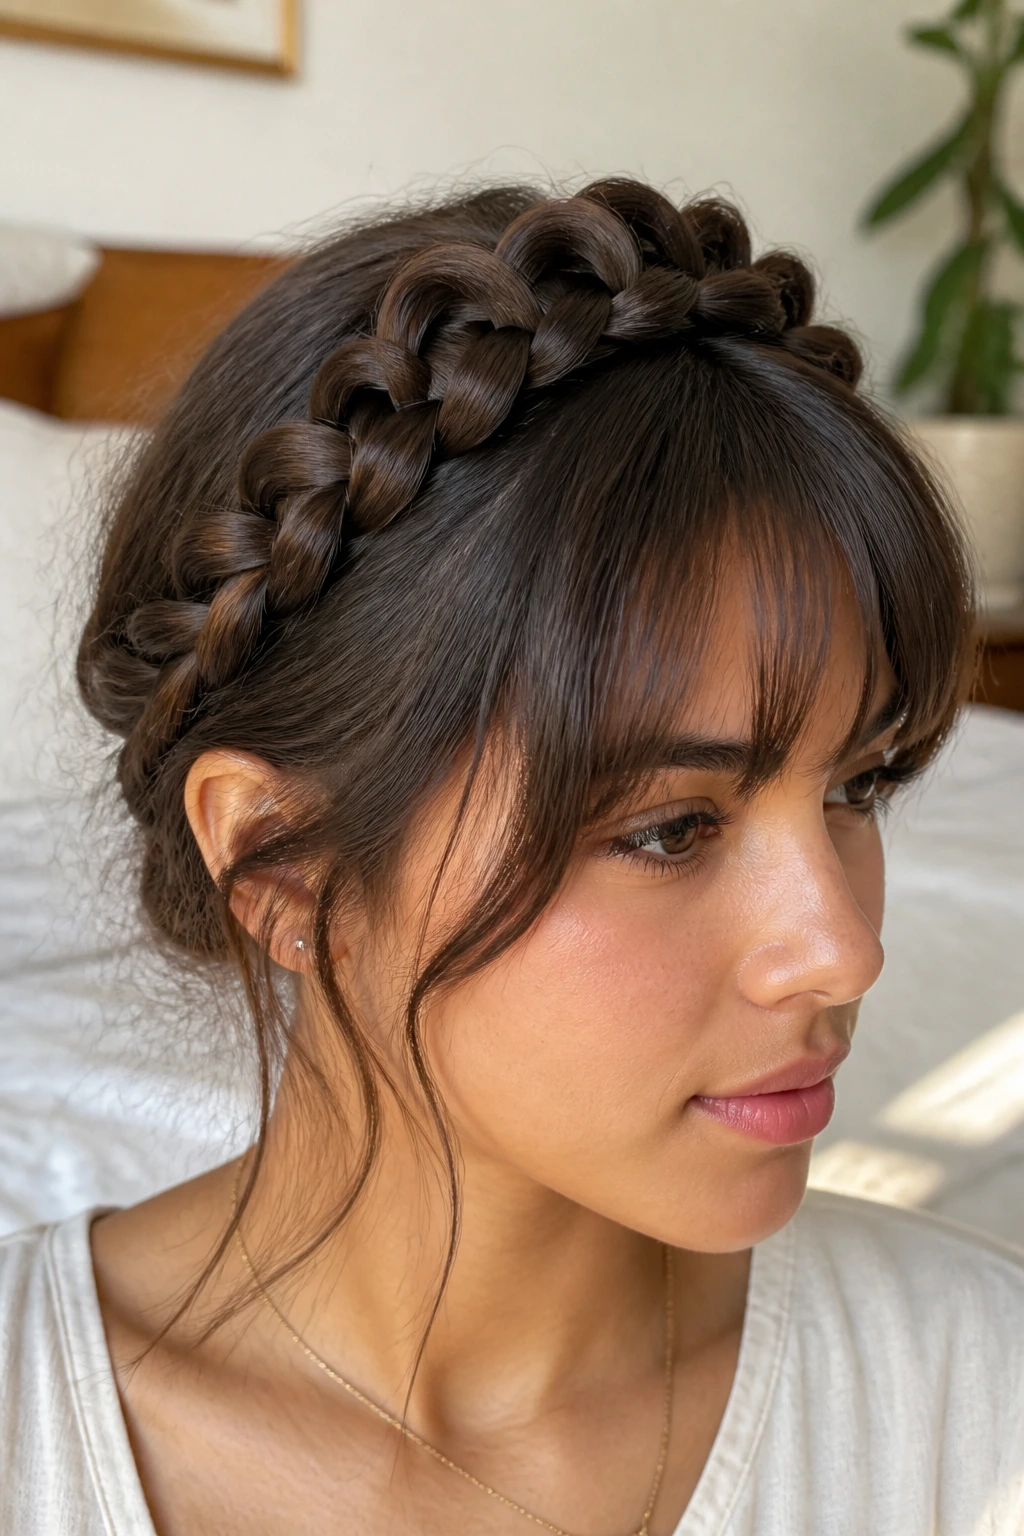
If you have longer bangs that are difficult to pin back, a half-crown milkmaid braid is a timeless and elegant solution. This style involves creating a single, thick braid that runs from one ear, up over the top of your head, and down to the opposite ear, mimicking the look of a traditional milkmaid crown but using only the front section of your hair.
To make this style work on frizzy hair, you must embrace the pinch-and-pull method. Once you have completed the braid and secured it with a small band, go back along the length of the braid and gently pinch the outer edges of each loop, pulling them slightly outward. This “pancaking” technique widens the braid, making it look incredibly thick and voluminous.
Because frizzy hair has natural grip, the pinched loops will stay put without slipping or sliding out of the braid. This makes the style incredibly stable and long-lasting, even on windy days or during active events. It is a beautiful, classic look that works just as well for a casual weekend as it does for a formal occasion.
17. Zig-Zag Parted Braids Crisscrossing the Hairline
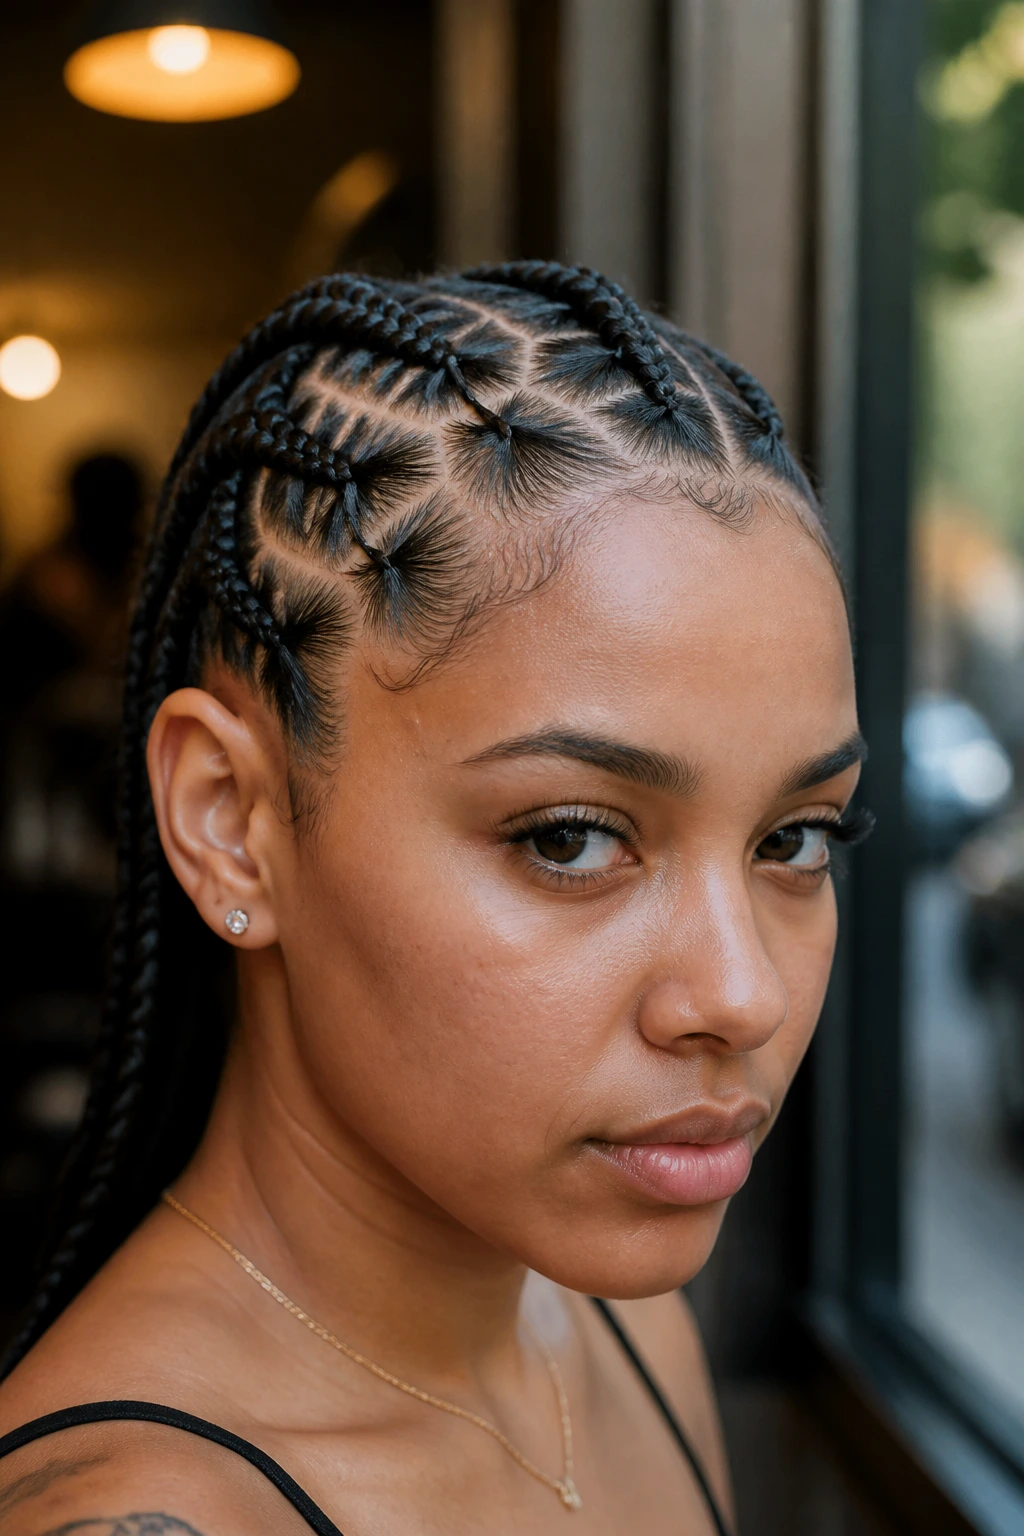
For those who love a graphic, modern look, playing with your parting is a fantastic way to elevate a simple braid. By creating a sharp zig-zag part across your hairline, you can divide your fringe into interlocking sections, braiding each one individually to create a stunning, geometric pattern across your forehead.
The Geometry of Zig-Zag Parts
Using a sharp, metallic tail comb, you draw a series of clean, diagonal lines across your scalp, moving in a zig-zag pattern from temple to temple. This divides your bangs into a series of triangular sections. Braiding each triangle flat to the scalp creates a beautiful crisscross effect that is both secure and highly visual.
Step-by-Step Styling
- Use a tail comb to carefully section your bangs into three or four alternating triangles.
- Apply a firm-hold edge-control gel along the parted lines to keep the sections clean and distinct.
- Braid each triangular section flat to the scalp, moving from the point of the triangle toward the base.
- Secure each braid with a tiny, clear elastic band.
- Let the tails of the braids blend into the rest of your natural hair, or gather them up into a high ponytail.
Pro tip: Take your time with the parting; the success of this style relies entirely on the sharpness of the lines. If your hair is highly textured, blow-drying the roots on a low-heat setting before parting can help you get cleaner lines.
18. Sleek Gel-Slicked Side Cornrows with Laid Baby Hairs
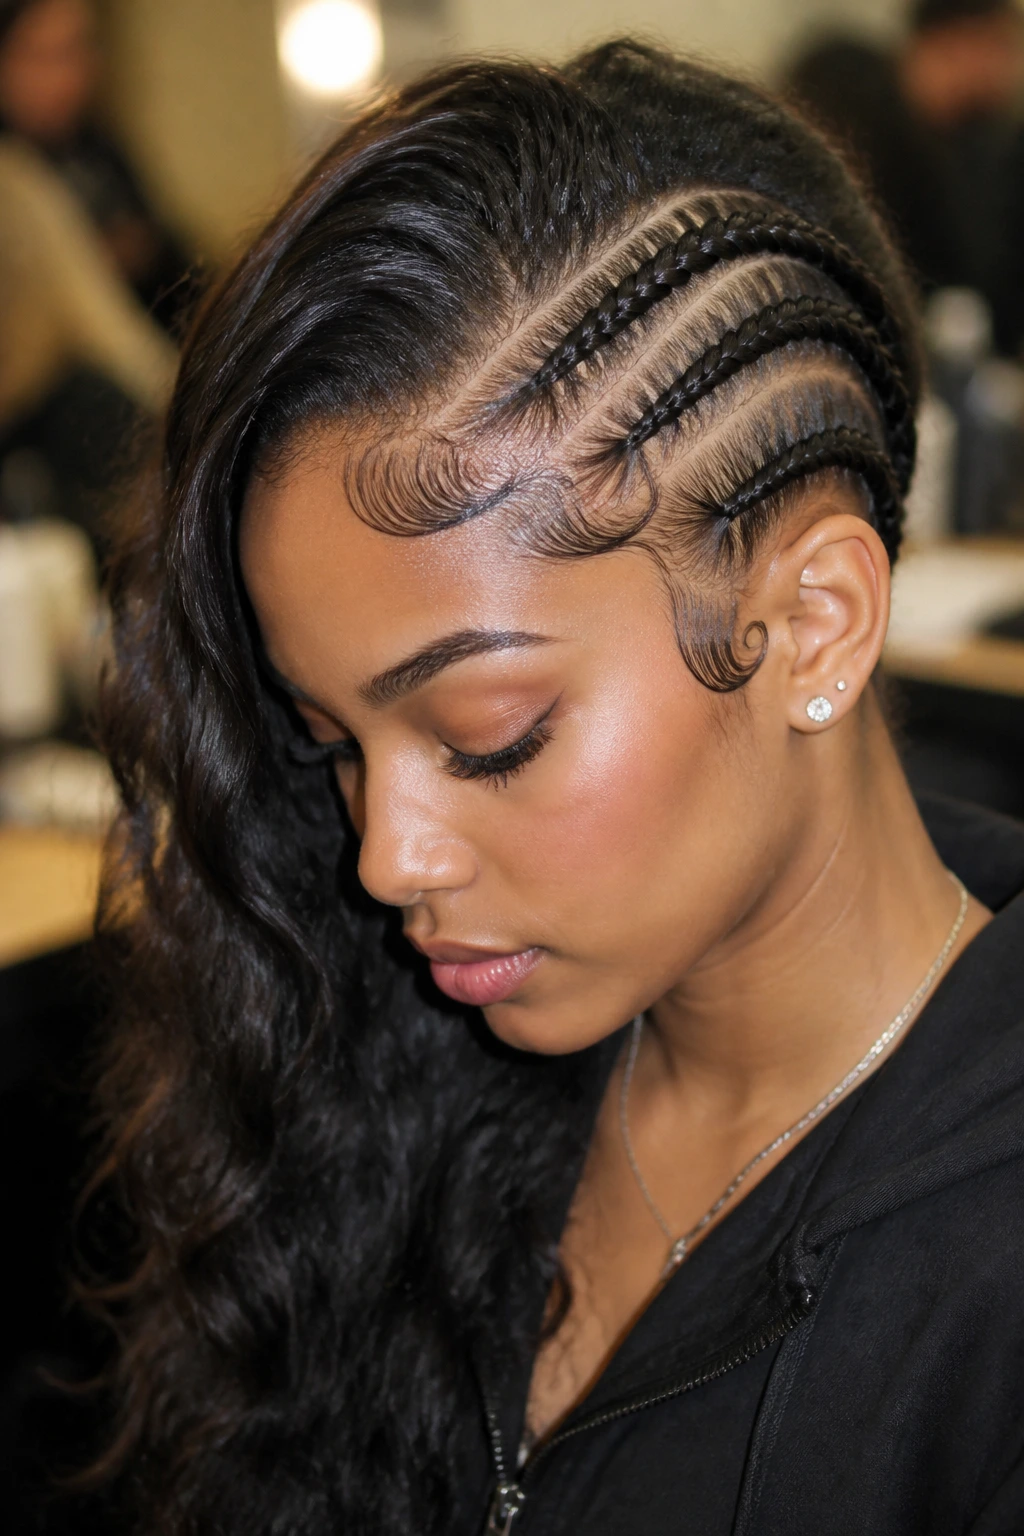
This style offers a high-fashion, polished look that is incredibly effective at managing intense frizz around the temples. It involves parting your hair to the side and braiding two or three tight, sleek cornrows along the shallower side of the part, while the rest of your hair is swept over to the opposite side in a dramatic, voluminous wave.
The key to this look is the use of a high-shine, firm-hold styling gel. By applying the gel directly to your roots before braiding, you can slick down any flyaways and short baby hairs, creating a glossy, mirror-like finish along the side of your head. Once the cornrows are secure, you can use a small brush to style your remaining baby hairs into soft, decorative swirls along your hairline.
This style is fantastic for evening events or formal occasions where you want a clean, sophisticated look that still showcases your natural texture. The contrast between the sleek, gel-slicked cornrows and the big, voluminous curls on the opposite side of your head is both modern and highly flattering.
19. The Wrapped Thread Braid with Colorful Accents
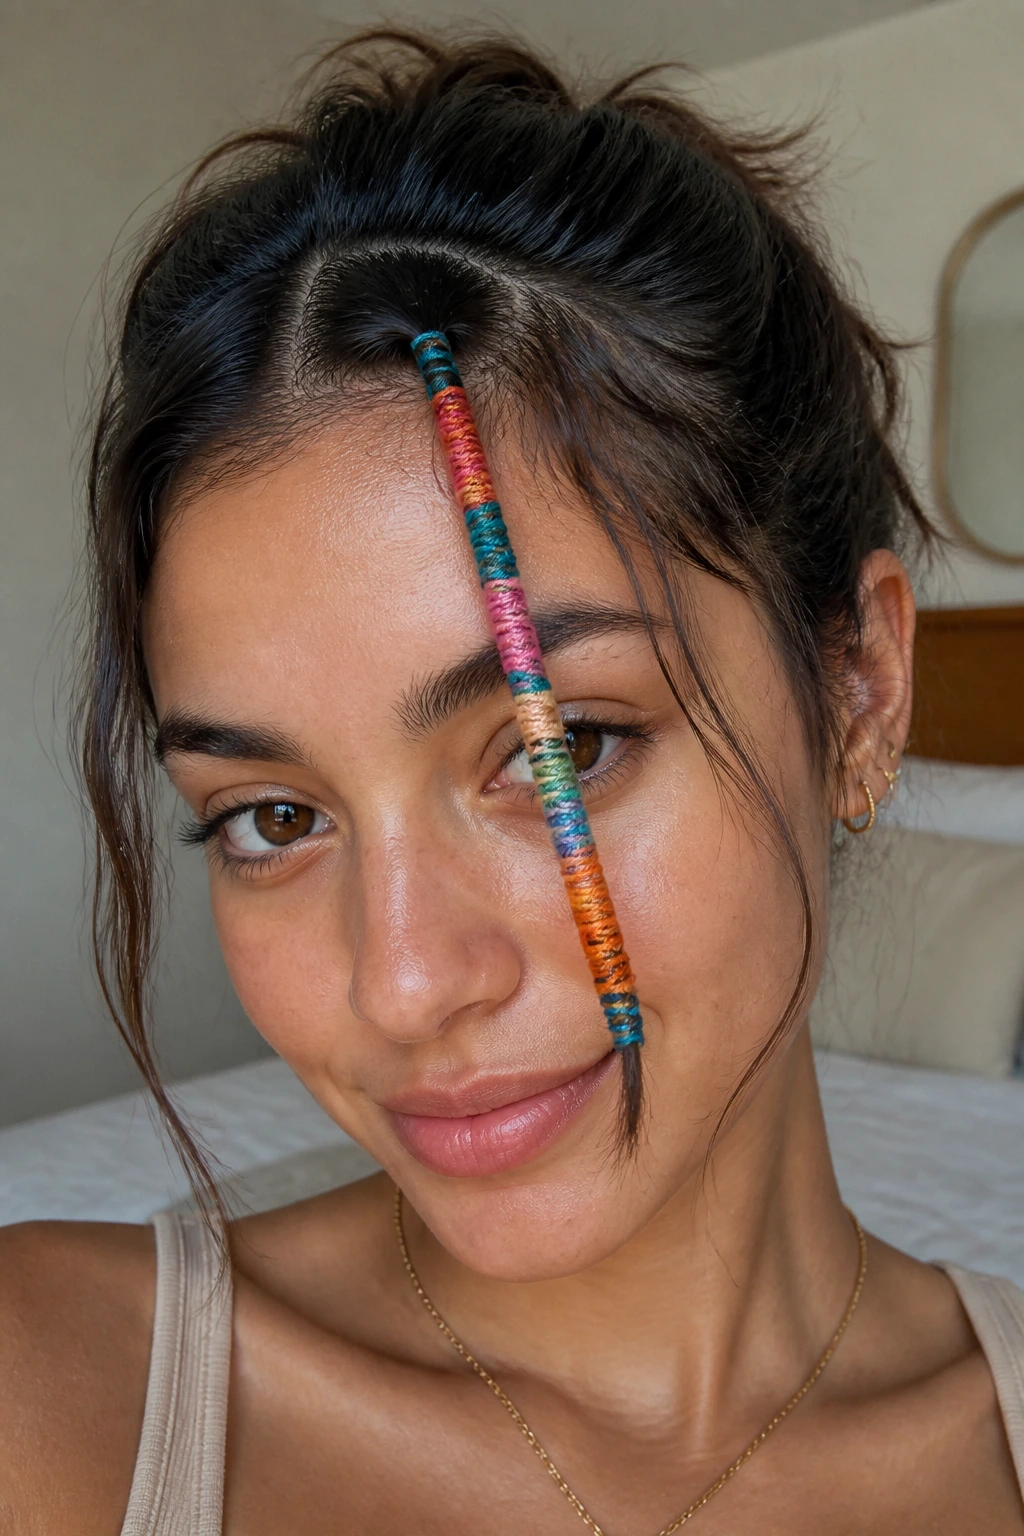
If you want a style that feels creative and personal, wrapping your braid with colorful embroidery thread is a beautiful option. This technique involves creating a simple three-strand braid through your bangs and then tightly wrapping colorful threads around the length of the braid, creating a structured, cylindrical wrap that is completely impervious to frizz.
The Protective Power of Thread Wrapping
By wrapping the thread tightly around the braid, you create a physical barrier that completely seals the hair inside. This prevents any moisture from reaching the hair shaft, meaning your braid will stay perfectly sleek and defined, no matter how humid the air is. It is an incredibly durable style that can last for several days.
How to Style It
- Create a simple three-strand braid through a small section of your bangs.
- Tie three or four strands of colorful embroidery thread to the base of the braid.
- Hold the braid flat, and begin wrapping the threads tightly around the hair, moving from the root toward the tip.
- You can alternate colors, crisscross the threads, or create solid bands of color along the braid.
- Tie the threads securely at the end of the braid, leaving a small tassel of thread at the tip.
Best Occasions
- Outdoor Festivals: Keeps your hair secure and out of your face while adding a playful, colorful element.
- Beach Days: Protects your bangs from salt water and sand, keeping them neat and tidy.
- Gym Workouts: A highly durable style that won’t move, sweat, or unravel.
20. The Multi-Texture Fishtail-Rope Hybrid Braid
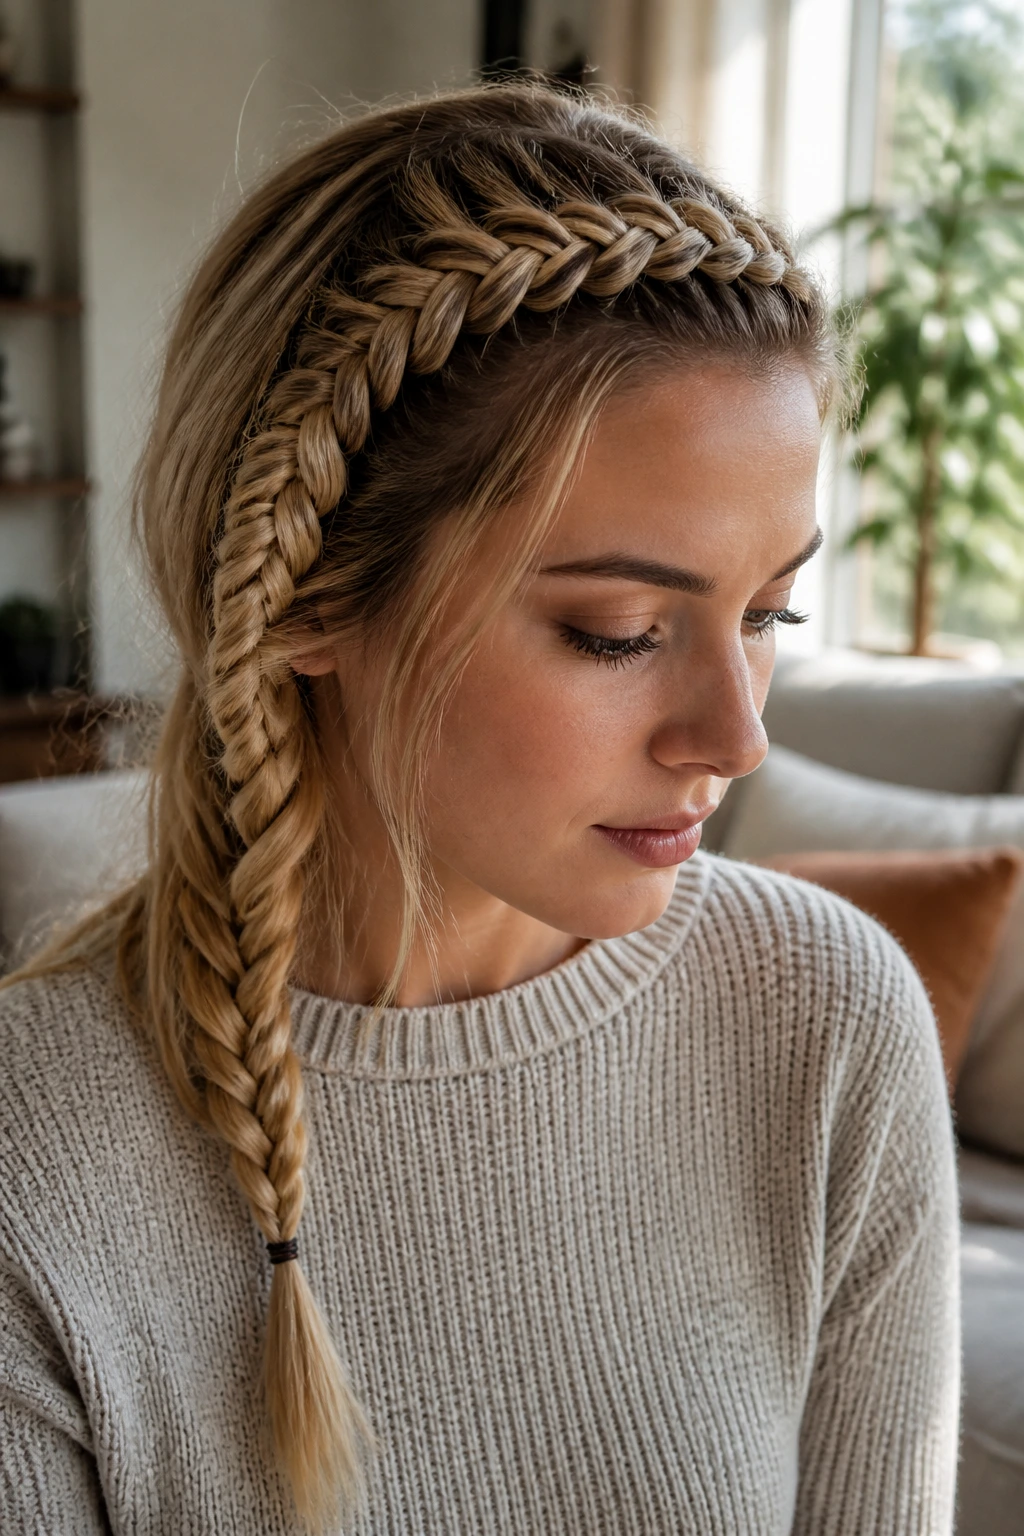
For those who love intricate, detailed styles, combining different braiding techniques into a single braid is a fantastic way to showcase your creativity. This hybrid style involves starting with a tight fishtail braid at your part, transitioning into a two-strand rope twist midway down, and ending with a classic three-strand weave at the tip.
This mix of textures is highly forgiving on frizzy hair because the changing patterns naturally disguise any unevenness or loose fibers. The fishtail section keeps the hair flat and secure at the roots, the rope twist adds volume and structure through the mid-lengths, and the three-strand weave provides a secure, reliable finish at the ends.
To keep this style looking cohesive, focus on maintaining consistent tension as you transition between the different techniques. Use a small amount of moisturizing hair butter on your fingers during the transition points to keep the strands distinct and prevent them from tangling together as you switch your finger positioning.
21. The Loose French Twist Braid for Soft Coils
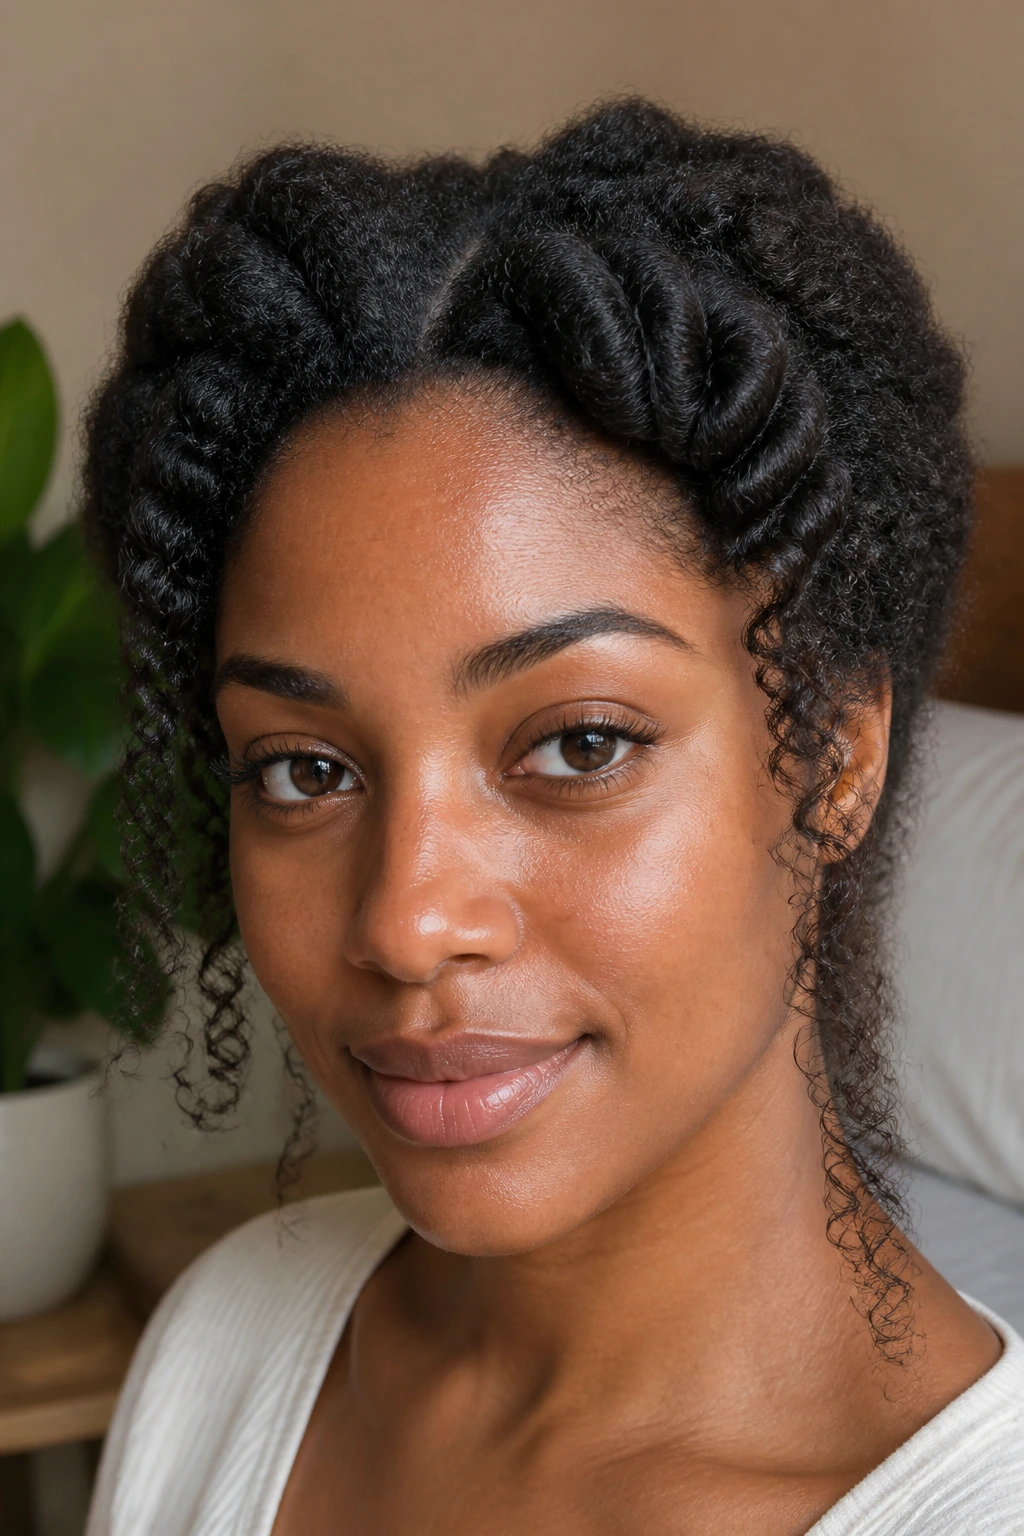
If you have very tight coils (Type 4C) and want a soft, romantic style that doesn’t put too much tension on your scalp, a loose French twist is a beautiful option. This style involves taking two sections of hair along your hairline and gently twisting them around each other, pulling in small pieces of your bangs as you go, to create a soft, rolled frame for your face.
Unlike a traditional braid, which can sometimes squeeze coily hair too tightly, the French twist allows your coils to retain their natural spring and volume. The twist sits softly against your scalp, creating a gentle, elegant wave across your forehead that looks incredibly soft and romantic.
To secure this style without squashing your coils, use long, U-shaped hairpin grips rather than standard tight bobby pins. These pins slide gently into the twist, holding it in place by anchoring it to the surrounding hair without flattening your natural texture. It is a beautiful, protective style that respects the delicate nature of coily hair.
Prep and Maintenance for Frizz-Free Braids
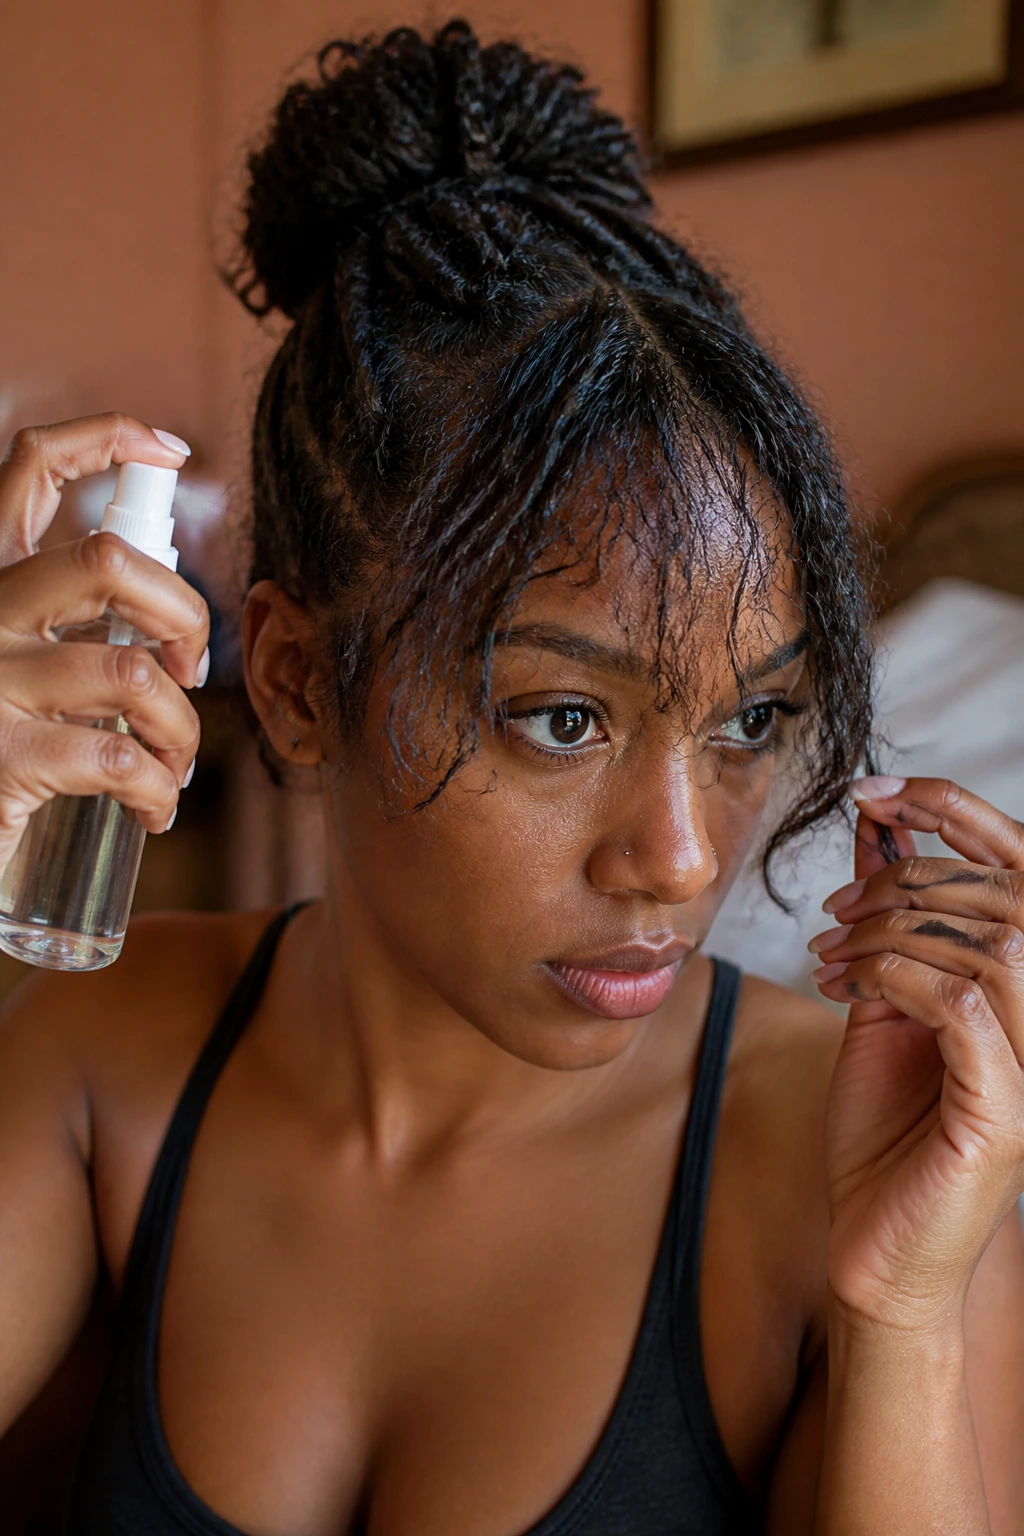
To get the best results from any of these styles, preparing your hair before you begin braiding is essential. Frizzy hair is often dry and searching for moisture; if you braid it while it is completely dry, you will likely experience snagging and breakage. Conversely, braiding hair while it is soaking wet can cause it to stretch and weaken, leading to damage once it dries and shrinks.
Start by misting your fringe with a lightweight, water-based leave-in conditioner to hydrate the hair shaft. Follow this with a small amount of oil or butter—such as jojoba oil, argan oil, or shea butter—to lock that moisture in. This process, often referred to as “sealing the cuticle,” smooths the outer layer of your hair, giving your braids a healthy, low-sheen finish and making the strands much easier to slide past one another as you weave.
At night, protecting your braids is key to making them last. Sleeping on a standard cotton pillowcase can create friction, which roughs up the hair cuticle and invites frizz to return overnight. Instead, wrap your hair in a silk or satin scarf, or sleep on a satin pillowcase. This smooth surface allows your braids to slide gently without snagging, keeping your style looking clean, crisp, and beautiful for several days.
