



Walking down the crowded hallway of a high school, you can immediately tell who is prepping for homecoming weekend. The air smells slightly more like strawberry-scented heat protectant than usual, and locker mirrors are getting a serious workout. Finding the perfect look is tough, but finding hairstyles that work beautifully for both the big dance and regular classes is the real challenge. You want something that feels special enough for a formal dress but casual enough that you won’t look absurd sitting in your AP history class at eight in the morning.
The magic lies in versatility. A style that holds up through a grueling pre-calc quiz can easily transition to the dance floor with a simple change of accessories or a little extra volume. You do not need a professional stylist or a massive budget to pull this off. In fact, most of these looks rely on basic braiding techniques, strategic Bobby pins, and products you probably already have sitting on your bathroom counter.
When you are planning hoco hair for school days, durability is just as important as aesthetics. High school days are long. You have gym class, heavy backpack straps pulling at your shoulders, and the unpredictable school climate that switches from freezing to humid in a matter of minutes. The styles below are designed to survive the chaos of a school day while keeping you looking put-together and elegant.
Let’s get practical. Here are twenty-five versatile, beautiful options that bridge the gap between daytime study sessions and nighttime celebrations.
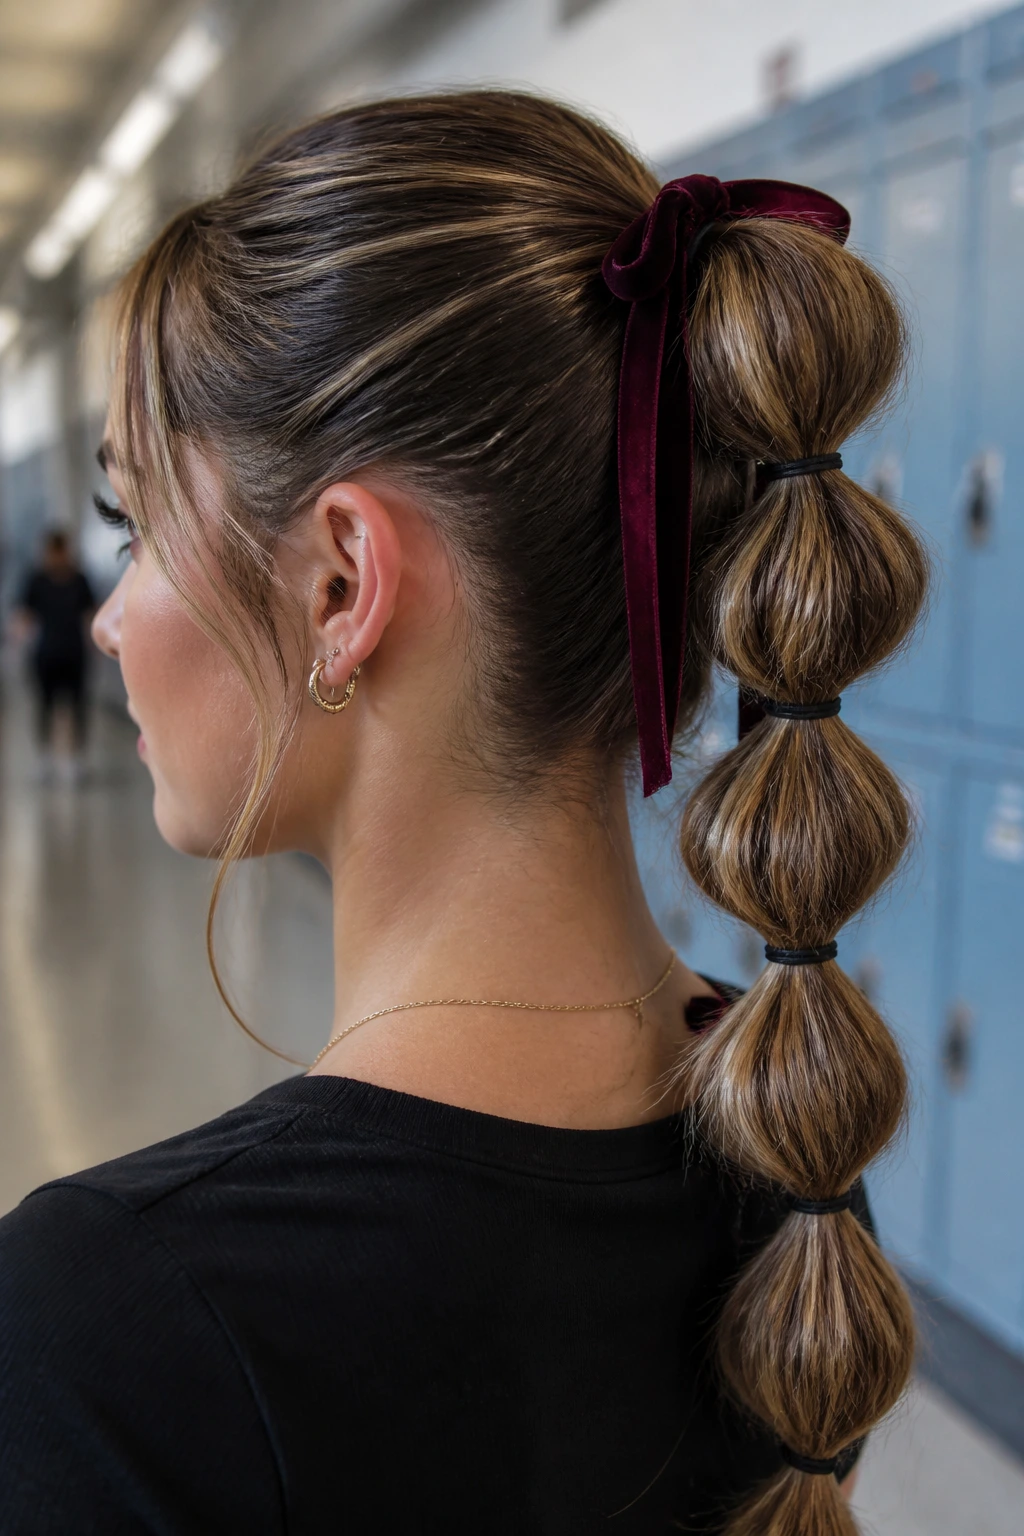
1. Bubble Ponytail with Velvet Ribbon
This look takes a basic, boring ponytail and turns it into something sculptural and eye-catching. It is incredibly easy to do, even if you struggle with traditional braiding, because it only requires basic hair elastics. The velvet ribbon adds a touch of classic elegance that fits right into a formal setting.
How to Create Clean Bubbles
To get this style right, start by pulling your hair into a high, secure ponytail at the crown of your head. Use a clear elastic to secure it. Next, wrap a small section of hair around the elastic to hide it, tucking the end into a bobby pin.
Step-by-Step Bubble Placement
- Secure another clear elastic about two inches down the ponytail shaft.
- Gently pull at the edges of the hair between the two bands to create a rounded, bubble-like shape.
- Repeat this process down the length of your ponytail, spacing the bands evenly.
- Tie a thin velvet ribbon around the very first elastic band, leaving the ends hanging loose.
Pro tip: Use a light texturizing spray on each section before pulling it out to give the bubbles more grip and volume that won’t deflate by lunchtime.
2. Half-Up Dutch Crown Braid
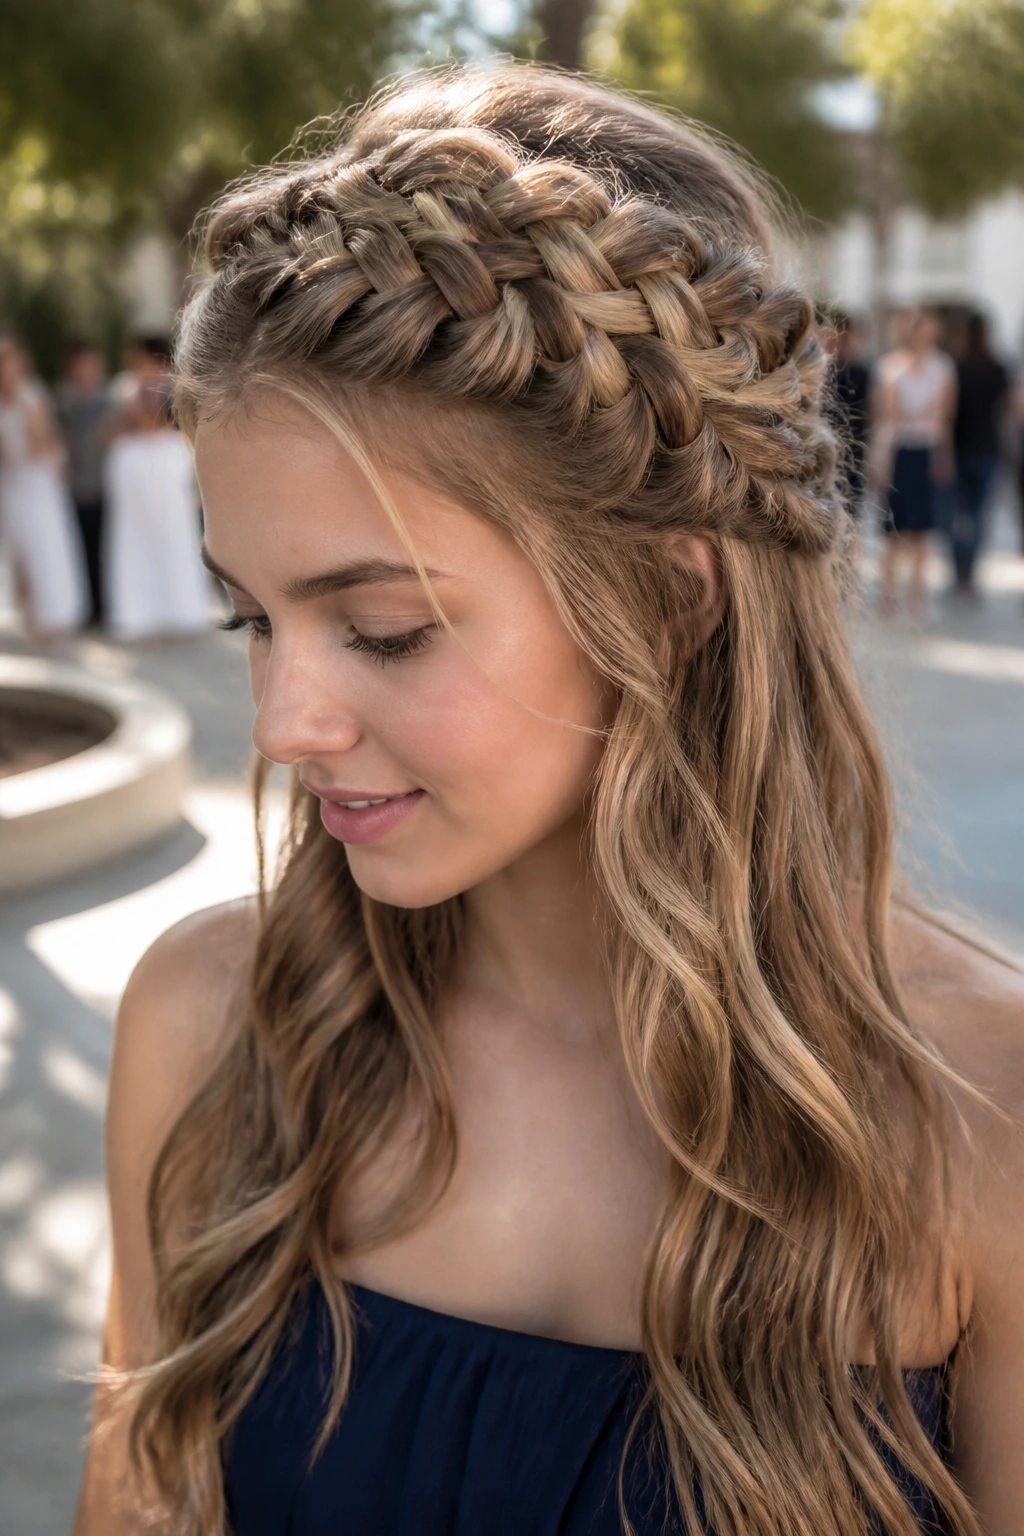
There is something undeniably romantic about a crown braid, but a full updos can sometimes feel too stuffy for a regular Tuesday. By keeping the lower half of your hair down in loose waves, you balance out the formality of the braid.
Unlike a French braid where you cross sections over each other, a Dutch braid requires you to cross the strands under the middle section. This makes the braid pop up off your head, creating a three-dimensional look that catches the light beautifully in photos. You can braid just the front sections of your hair, wrapping them around the back of your head like a tiara.
For a school day, leave the texture slightly messy and lived-in. When hoco night arrives, you can use a curling wand to add polished waves to the loose hair at the back. It is a seamless transition that takes less than ten minutes to refresh.
3. Textured Messy Bun with Face-Framing Tendrils
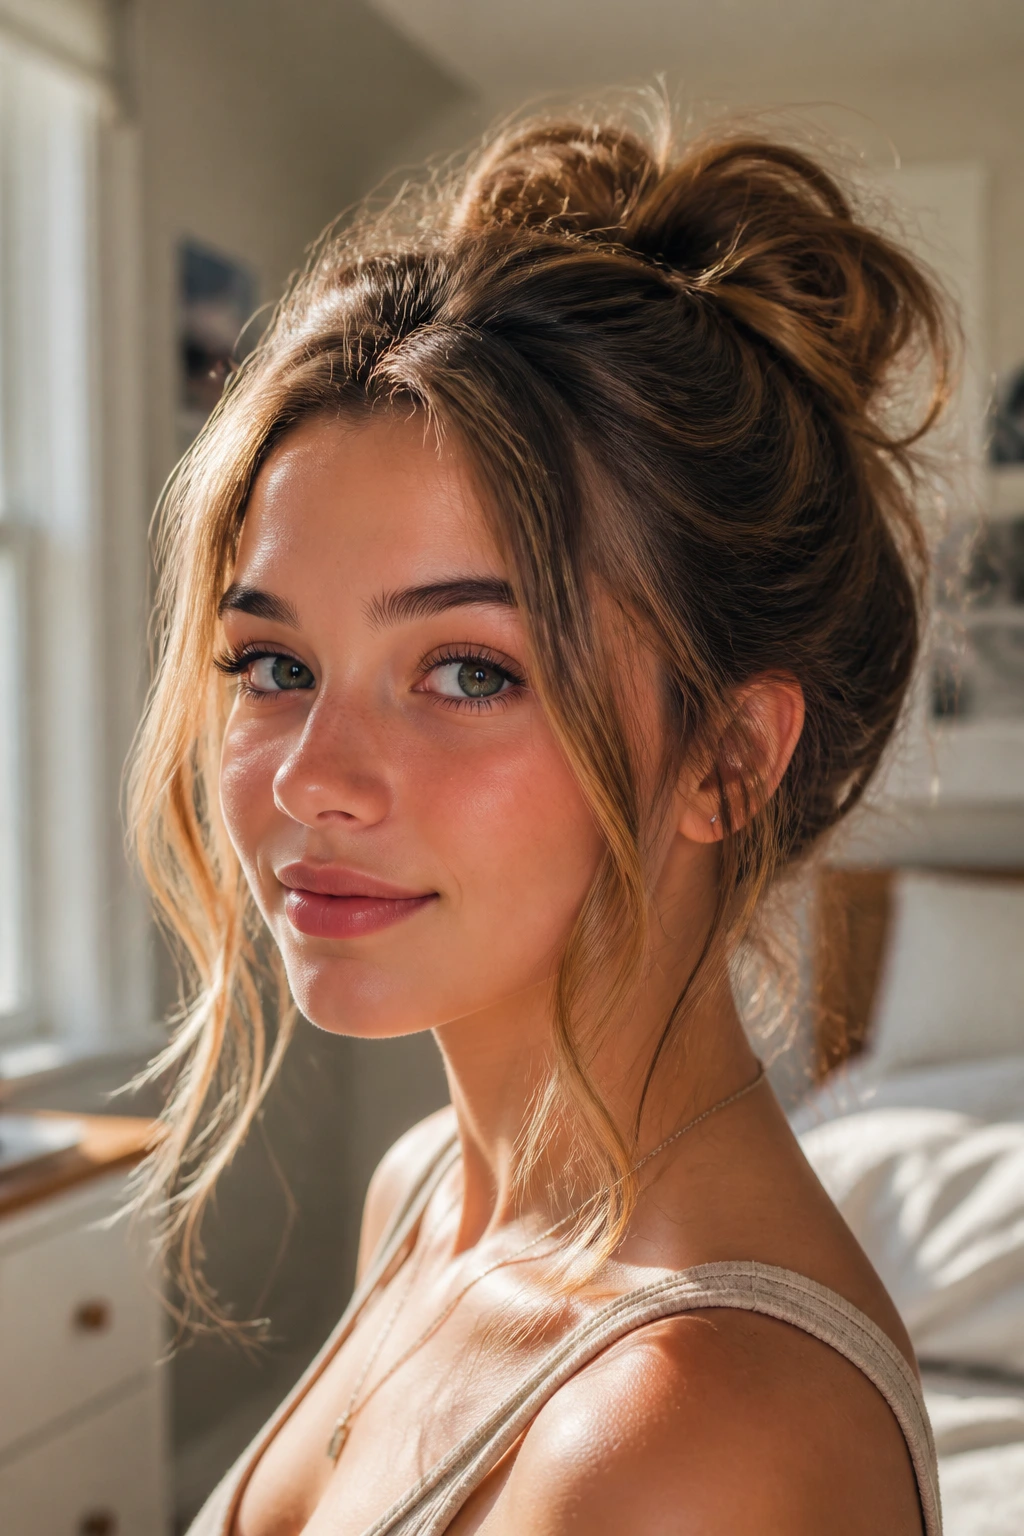
Why does this work? It works because it embraces imperfection. A stiff, perfectly shellacked bun can make you look like you are heading to a ballet recital, but a textured messy bun looks effortless, modern, and chic.
How to Style It
Start with second-day hair if possible, as it has more natural grip than freshly washed strands. Flip your head upside down and gather your hair at the crown. Instead of pulling your hair all the way through the elastic on the last wrap, leave it in a loop. Take the loose ends, wrap them loosely around the base, and secure them with a few U-shaped hairpins.
Once the bun is secure, use your fingertips to gently tug at the roots to create volume. Pull a few thin pieces of hair down around your ears and temple. If you have straight hair, give these tendrils a quick bend with a flat iron to create a soft, face-framing frame.
4. Sleek High Pony with Wrapped Base
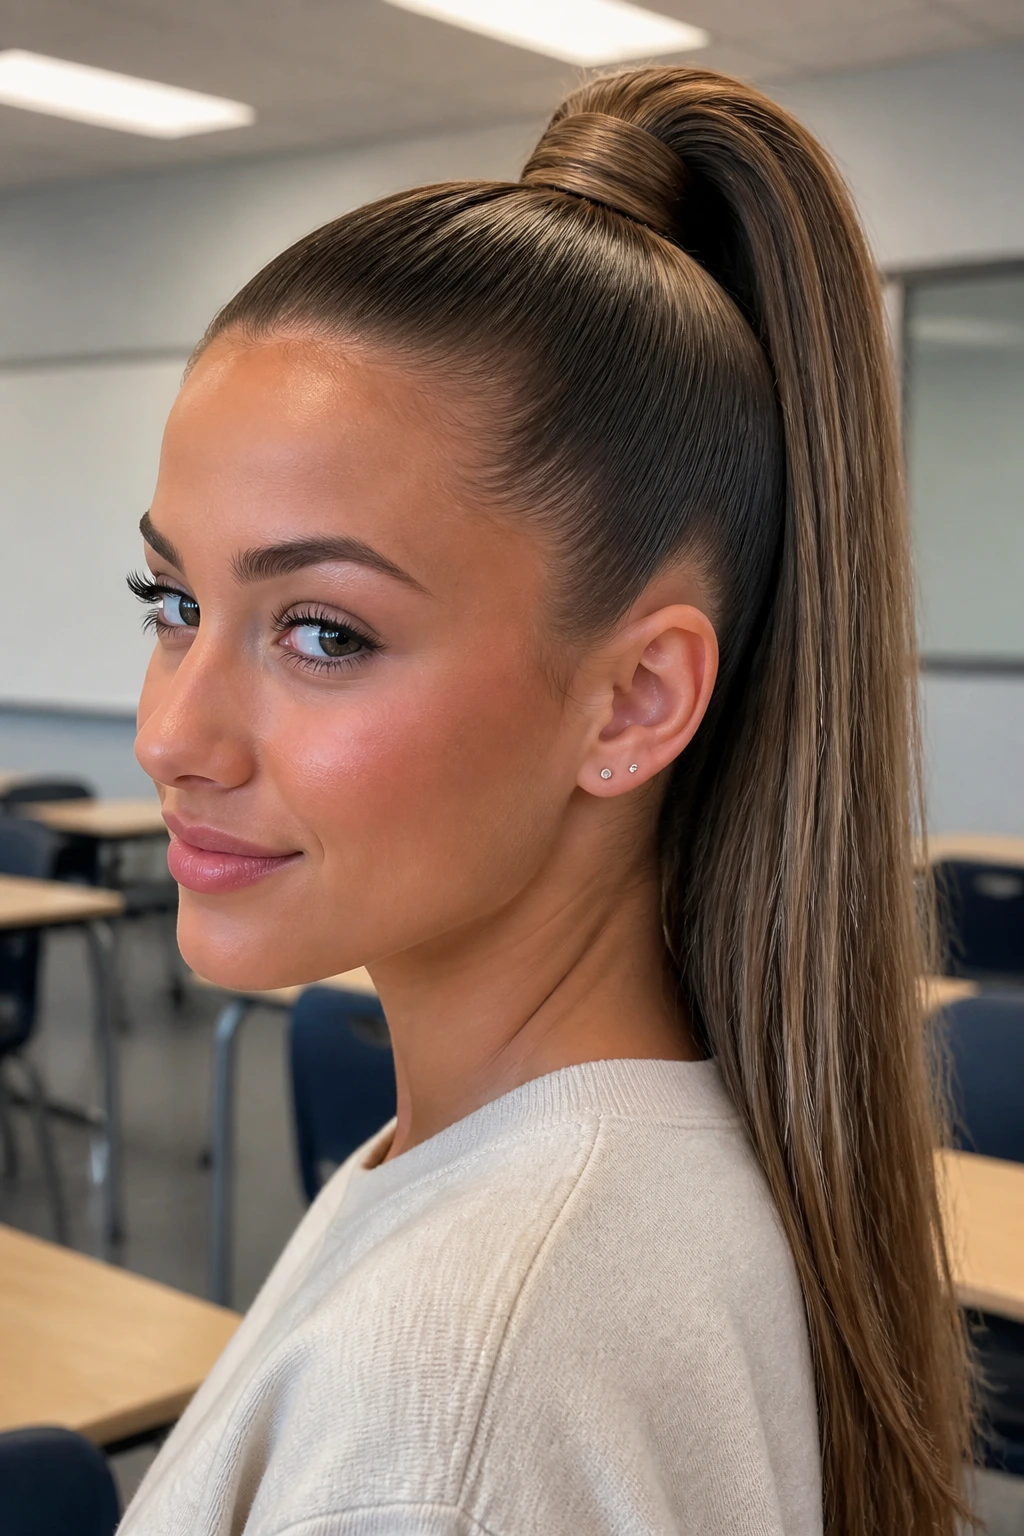
The high ponytail is a classic for a reason. It acts like an instant facelift, drawing your features upward and keeping your hair completely out of your face. It is clean, modern, and incredibly durable.
You might think a ponytail is too simple for homecoming, but when it is done with precision, it looks incredibly sophisticated. The key is getting the sides completely smooth. A boar bristle brush is your best friend here, as it flattens bumps and coaxes flyaways into place without tearing your hair.
The Construction Steps
- Apply a small dab of styling cream or lightweight gel to your damp roots.
- Brush your hair upward, following the line of your cheekbones for the most flattering placement.
- Secure with a thick, high-quality hair tie that won’t slip down during the day.
- Take a half-inch section of hair from the underside of the pony, wrap it around the elastic until it is completely hidden, and pin it underneath.
This style looks great with straight, sleek hair or with a bouncy curl at the very end of the ponytail. It is a clean slate that lets your outfit do the talking.
5. Double French Braid Space Buns
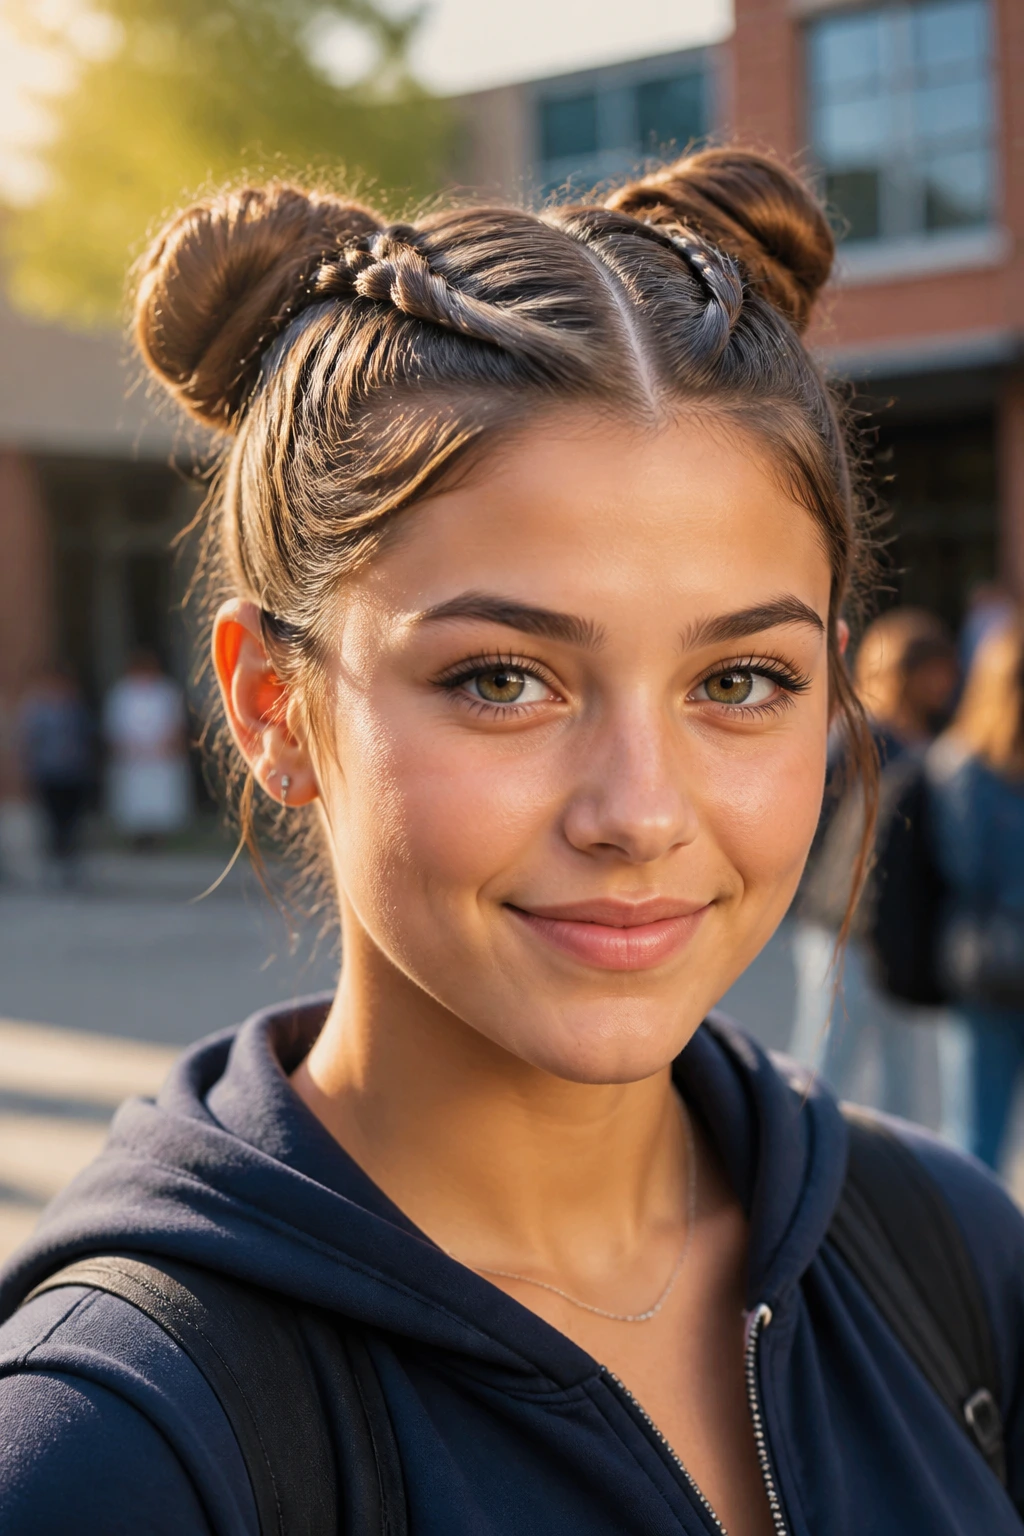
This style is playful, energetic, and holds like absolute iron. If you have a busy school day followed immediately by photos and the dance, this is a fantastic option because it simply does not budge.
Start by parting your hair straight down the middle from your forehead to the nape of your neck. Clip one side out of the way. On the active side, begin a French braid at the nape of your neck, working your way upward toward the crown. Once you reach the top of your head, secure the hair into a high ponytail. Repeat this on the other side.
With the two high ponytails in place, twist the loose hair around the bases to create two neat, compact buns. Secure them with bobby pins. The braided detail on the back of your head adds an unexpected element of detail that looks amazing when you walk away or turn around.
6. Twisted Halo Half-Up Style
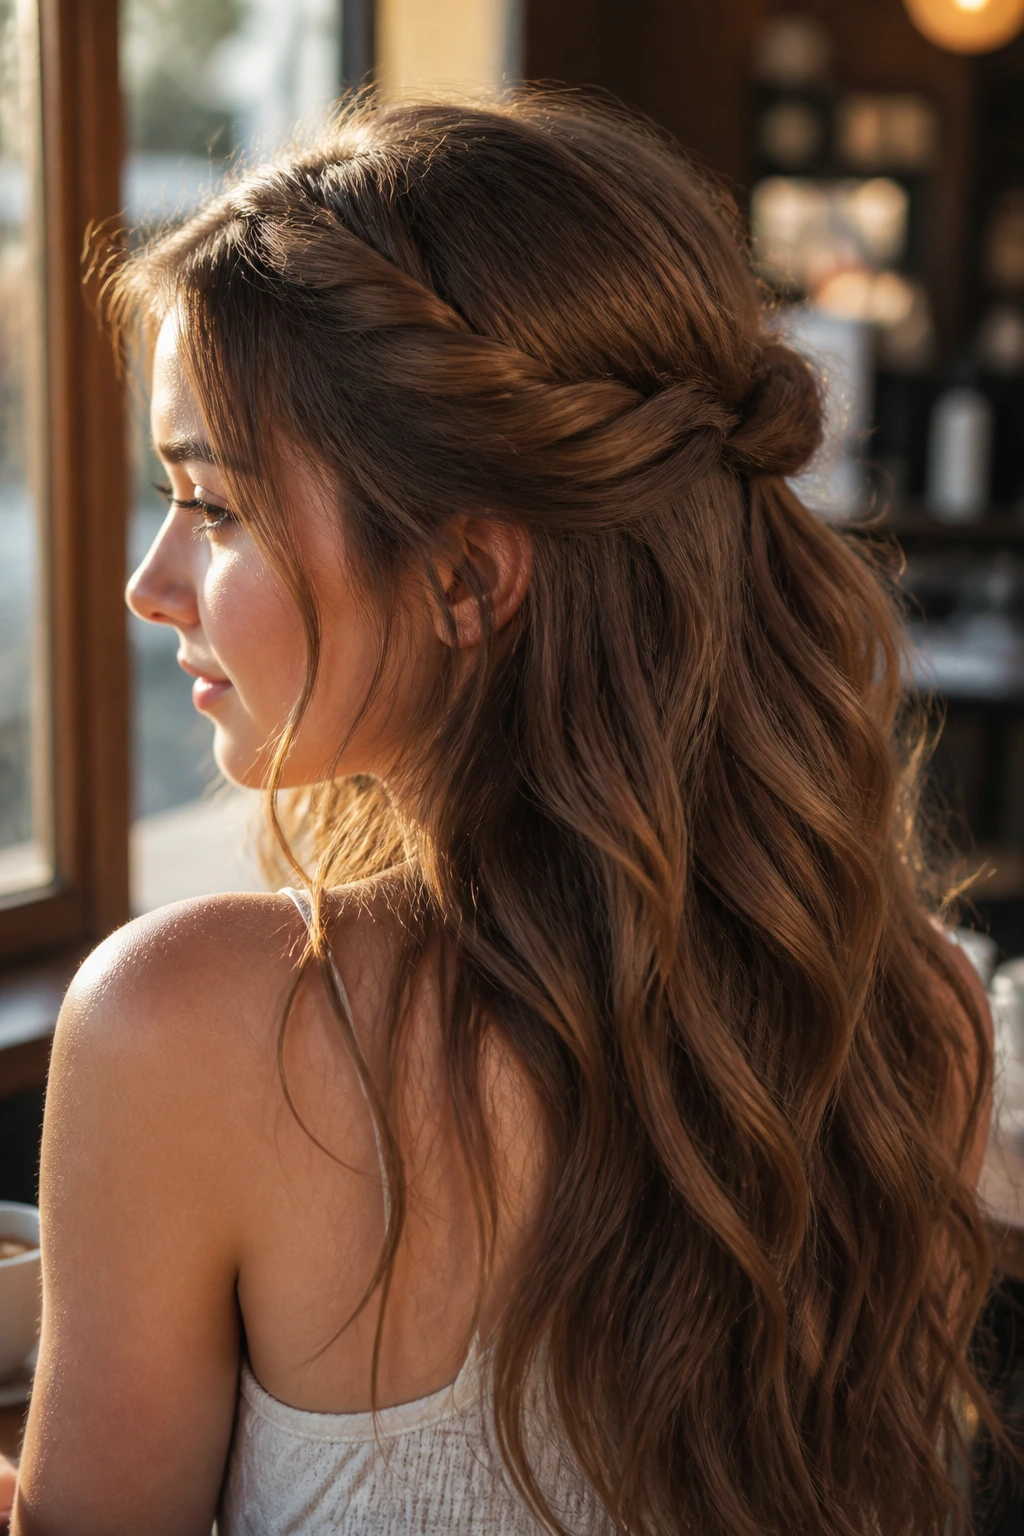
Unlike intricate braids that require tight finger coordination, this twisted style relies on simple rolls that anyone can master in front of a mirror. It is soft, feminine, and incredibly quick to put together on a rushed morning.
This style is best for medium-to-long hair of any texture. It creates a beautiful frame around the back of your head, acting like a natural crown.
Who It Is Best For
This look works wonderfully on natural curls, waves, or straight hair. If you want a style that looks like it took an hour but actually took three minutes, this is your winner.
The Twisted Technique
To create the halo, take a two-inch section of hair from above your left ear. Divide it into two parts and twist them around each other, adding a little more hair from your hairline as you work backward. Secure the twist temporarily at the back of your head. Repeat the process on the right side. Once both twists meet in the middle, secure them together with a small, clear elastic, and tuck the ends underneath.
7. Soft Waves with Jeweled Bobby Pins
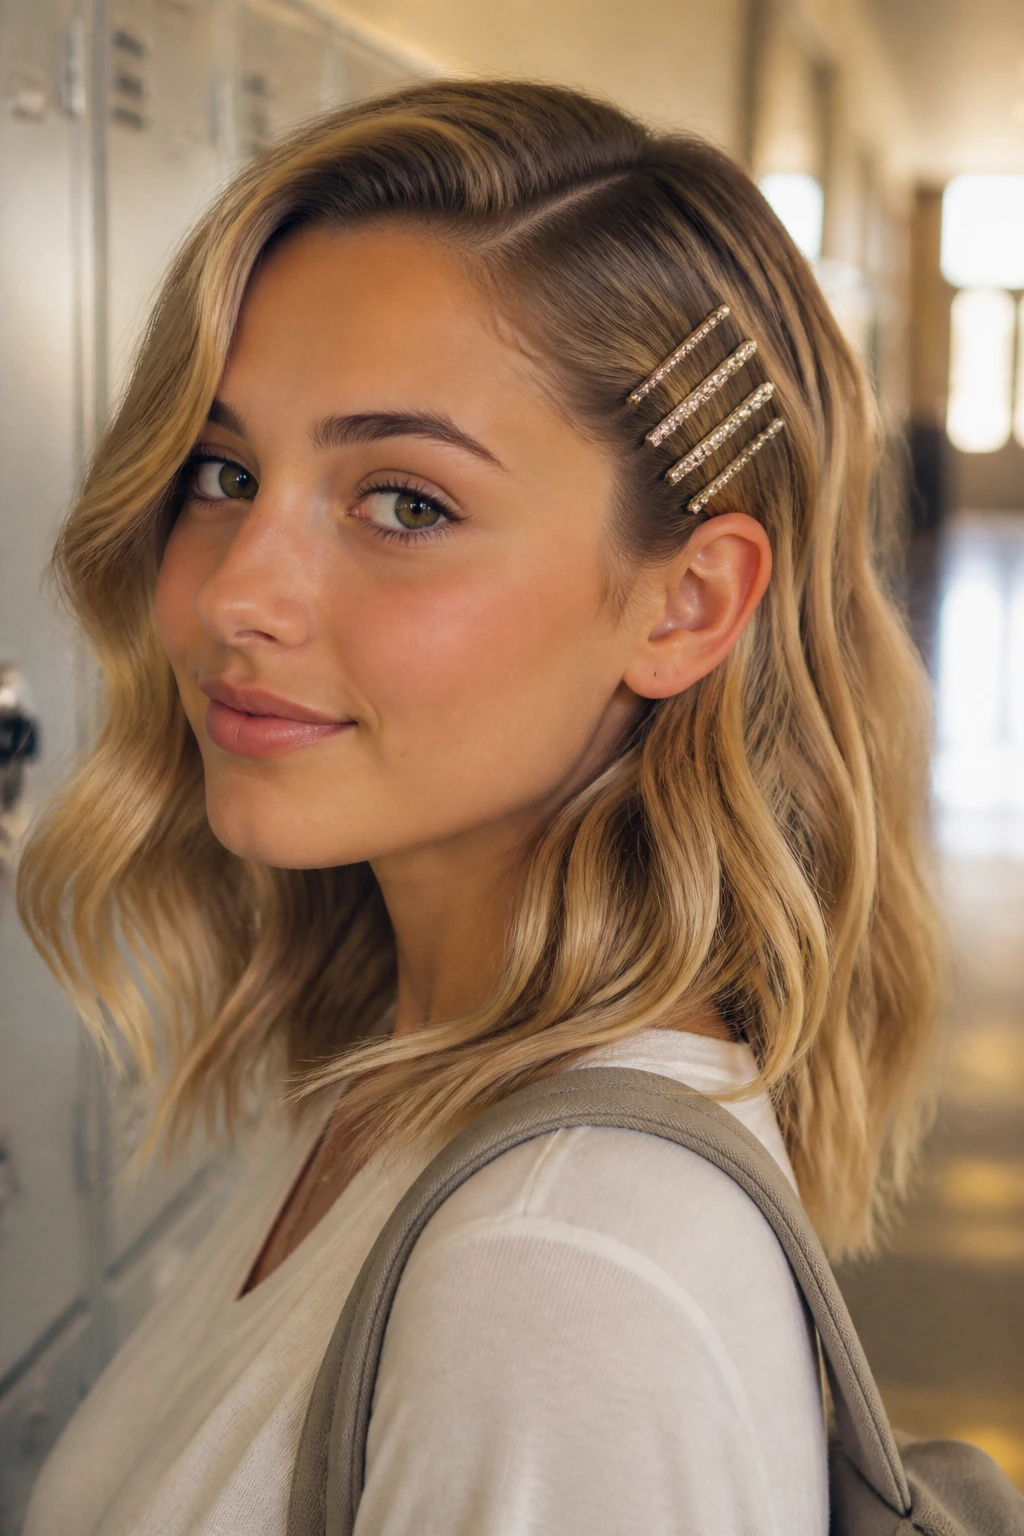
If you prefer to wear your hair completely down, you can still make it feel special by using strategic accessories. This look combines the effortless vibe of beachy waves with the sparkling detail of decorative hair jewelry.
Getting the Wave Right
To get waves that last all day, use a one-inch curling wand. Wrap flat sections of hair around the barrel, leaving the last inch of the ends straight. This prevents the curls from looking too bouncy or old-fashioned. Once your whole head is curled, let the hair cool completely before running a wide-tooth comb through it.
Accessorizing Your Look
- Choose a side to feature; a deep side part works best for this style.
- On the shallower side, brush the hair sleekly behind your ear.
- Slide three or four jeweled bobby pins into the hair, placing them parallel to each other.
- Space them about half an inch apart for a clean, intentional look.
Pro tip: Spray the back of the jeweled pins with a little dry shampoo before sliding them in. This gives them extra traction so they won’t slip down your hair during your afternoon classes.
8. Pull-Through Side Braid
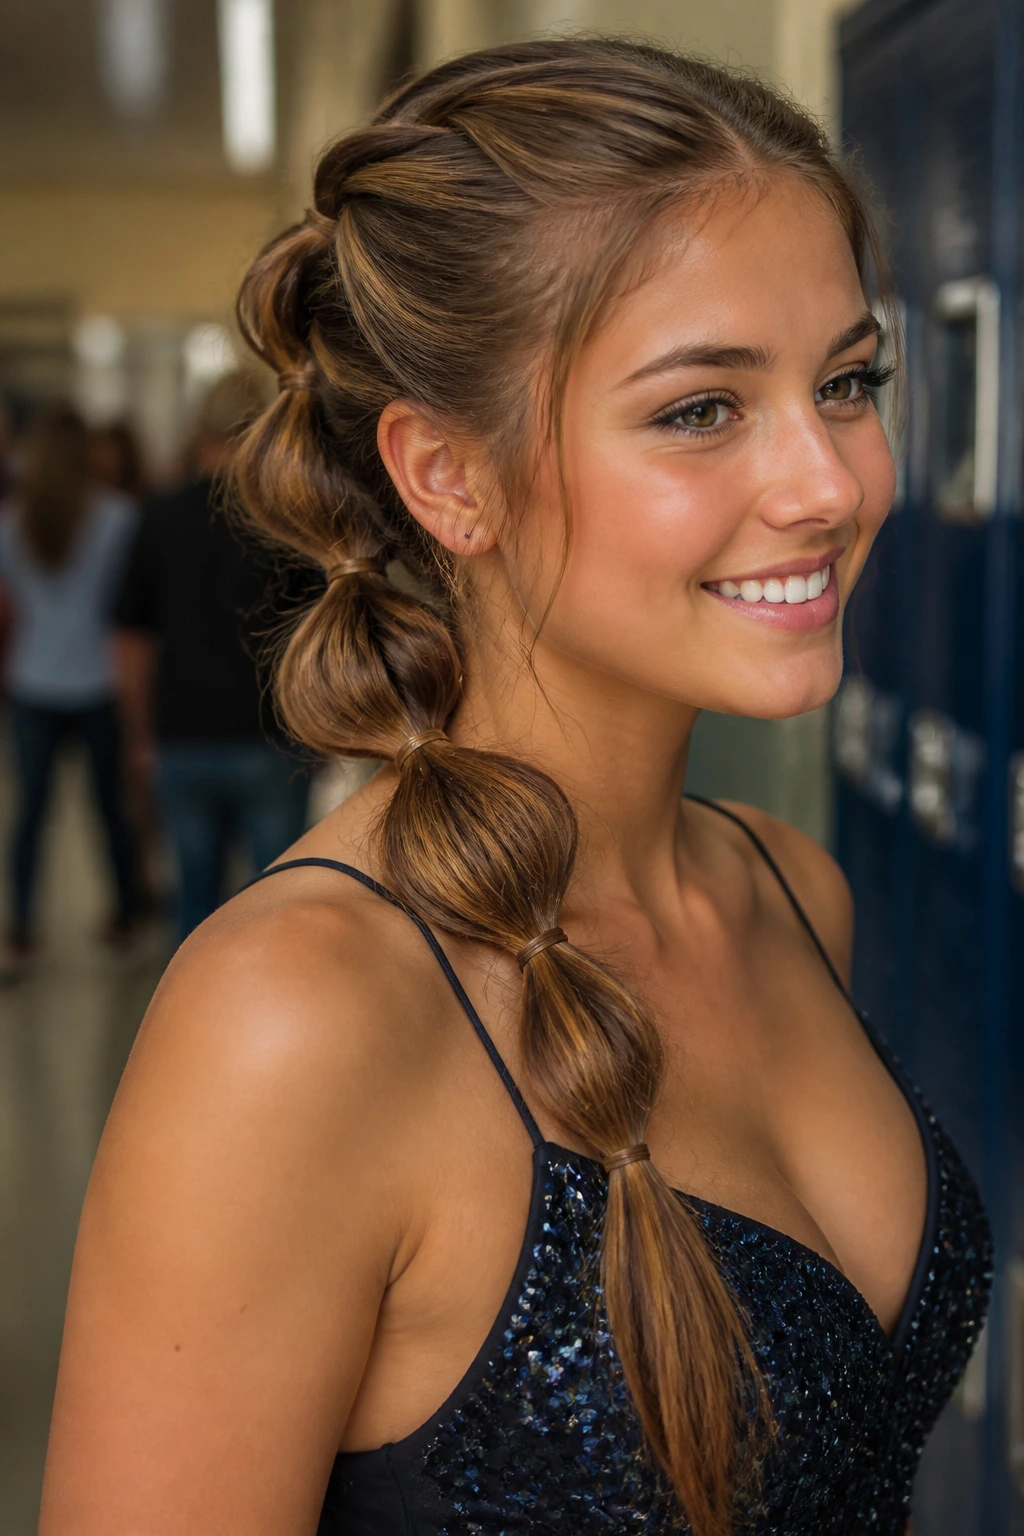
This style looks like a complex, chunky braid, but it is actually a series of interconnected ponytails. It is thick, voluminous, and perfect for anyone who feels like their standard braids always look thin or flat.
First, gather all your hair to one side and secure a small ponytail near the top of your ear. Just below that, create a second ponytail using the hair directly underneath. Split the first ponytail in half, wrap the two halves around the second ponytail, and secure them together with a third elastic.
Keep repeating this pattern down the side of your neck. Once you reach the end, gently pull at the outer edges of each loop to pancaking the braid. This creates massive volume and a beautiful, thick texture that holds its shape beautifully without unraveling.
9. Low Sleek Chignon with Claw Clip Accent
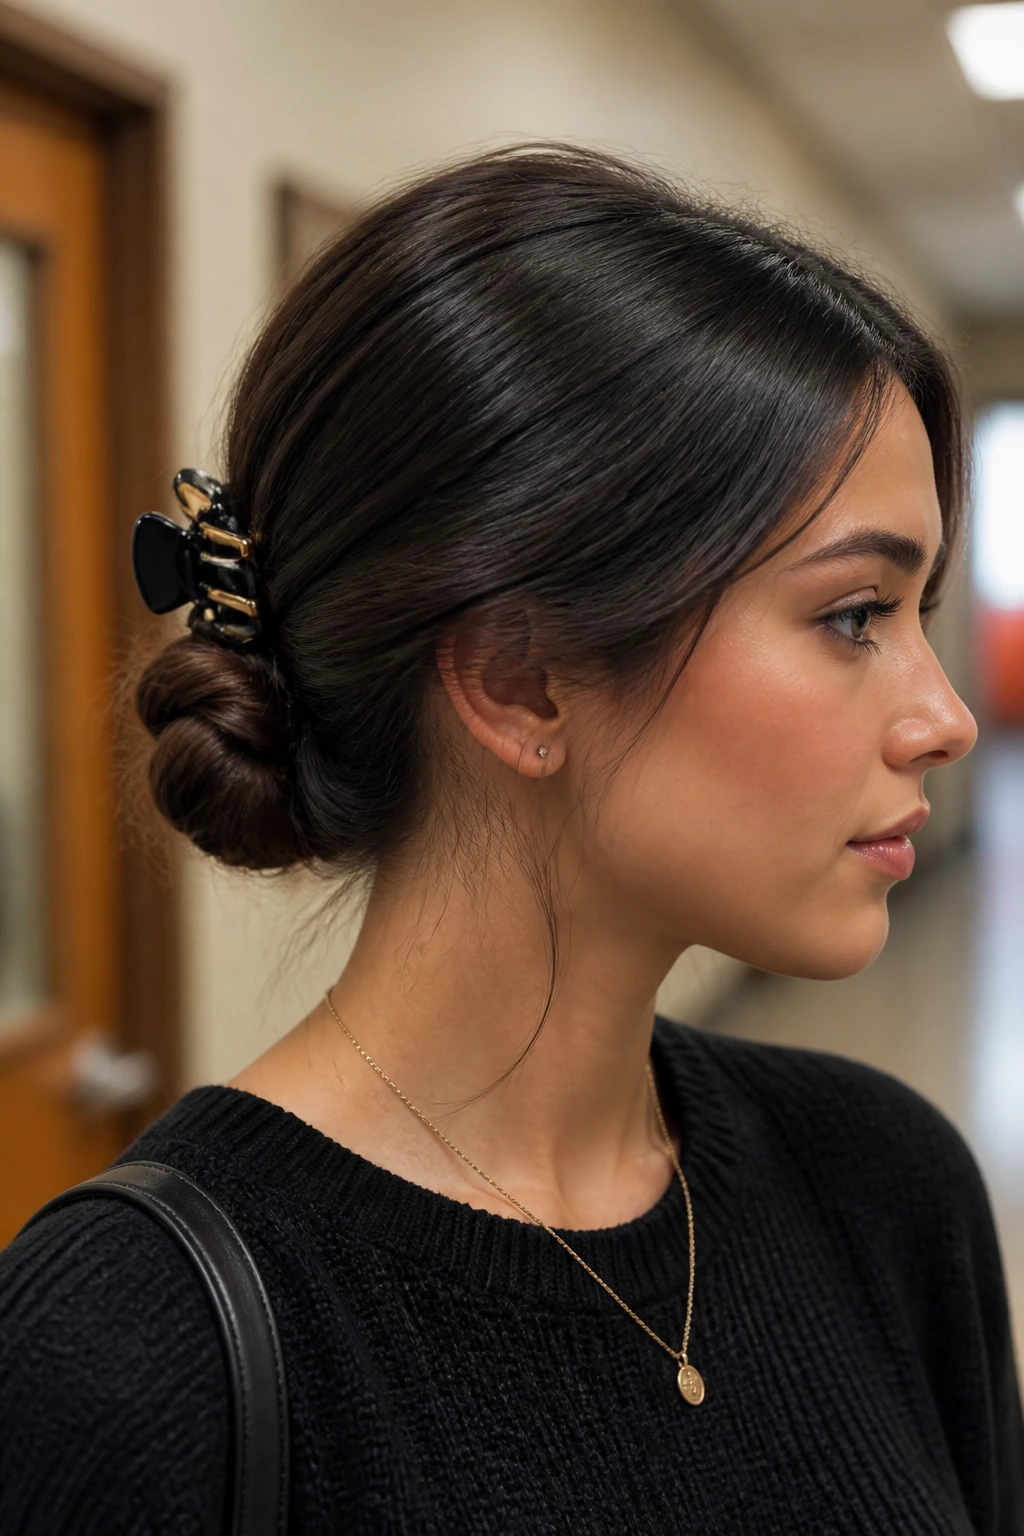
Why does this work? It bridges the gap between the casual, everyday utility of a claw clip and the timeless elegance of a low chignon. It is sophisticated without trying too hard.
How to Style It
Start by parting your hair down the center and brushing it back into a low, smooth ponytail at the nape of your neck. Twist the ponytail tightly until it begins to coil around itself, forming a neat, flat bun. Secure the bun with several hairpins around the perimeter.
Instead of leaving the style plain, take a small, highly polished or pearl-encrusted claw clip and attach it directly over the top of the bun. The clip acts as a functional piece of jewelry, adding a modern, trendy touch to an otherwise traditional style. It is comfortable to wear all day and stays secure through hours of movement.
10. Fishtail Accent Ponytail
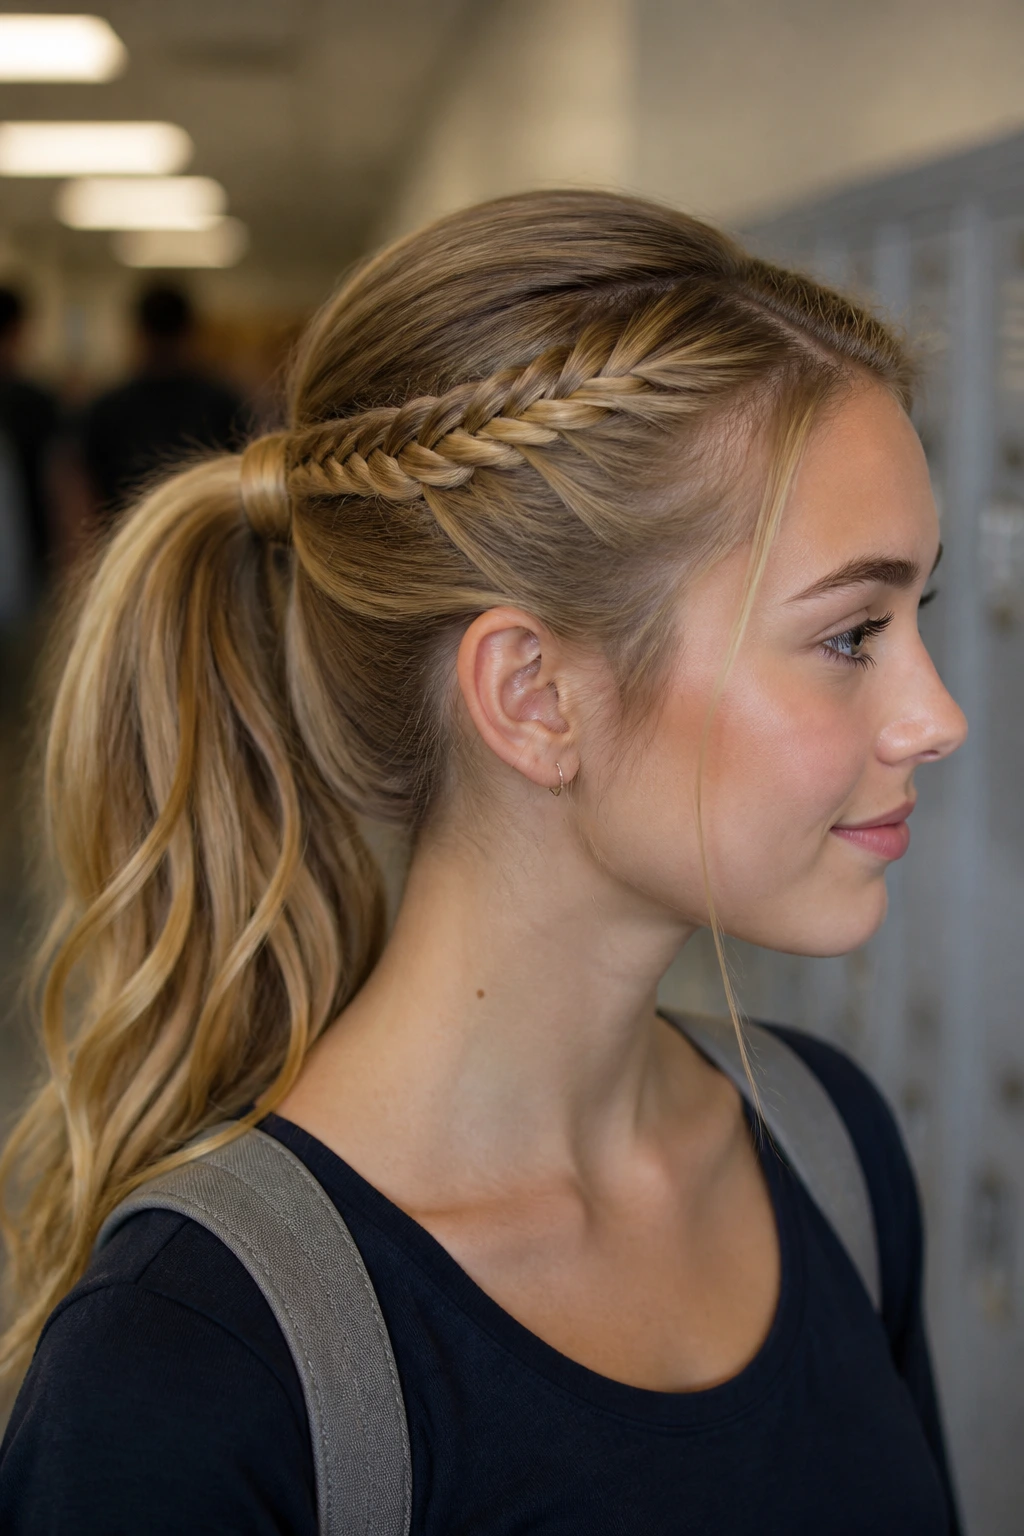
A classic ponytail gets a stylish upgrade with the addition of a delicate fishtail braid running down the side. This style offers a great balance of neatness and texture.
Preparing the Braid
Start by separating a two-inch section of hair near your temple. Divide this section into two equal parts. Take a tiny strand of hair from the outer edge of the left section and cross it over to the right section. Then, take a tiny strand from the outer edge of the right section and cross it over to the left.
Step-by-Step Assembly
- Continue this crossing pattern until you reach the end of the section, then secure it with a clear elastic.
- Pull the rest of your hair, including the finished braid, back into a mid-height ponytail.
- Position the ponytail so the fishtail braid sits visibly along the top or side of the style.
- Secure the entire look with a strong hair tie.
This combination of a sleek ponytail and an intricate braid provides a fantastic contrast of textures that looks highly styled but remains very easy to wear.
11. Triple Twisted Half-Up Pony
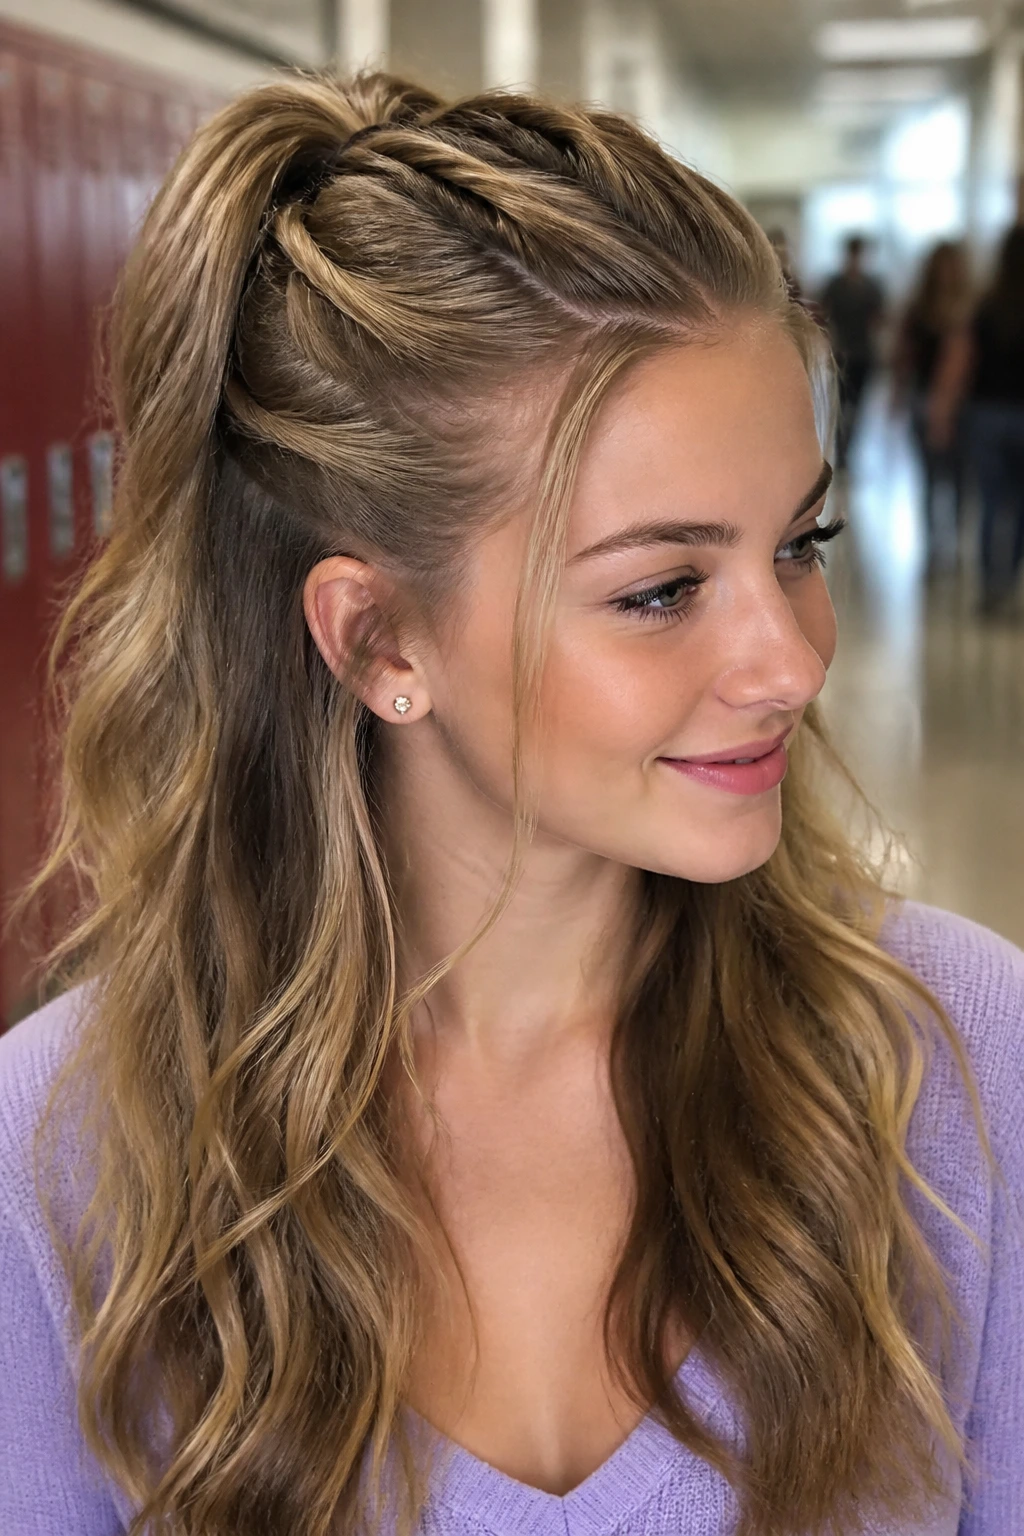
This style is clean, geometric, and keeps the hair firmly away from your face while allowing your lengths to flow freely behind you. It uses a series of simple twists to create a beautiful pattern at the back of the head.
To create this look, section off the top third of your hair, from the temples back, and tie it into a neat half-up ponytail. Next, take a small section of hair from just below your left temple, twist it tightly toward the back, and pull it over the central elastic, securing it underneath with a bobby pin. Repeat this step with a section from the right side, crossing it over the first twist.
The result is a layered, woven effect that hides the hair elastic completely. It looks incredibly polished for school and has a modern, minimalist vibe that pairs beautifully with sleek, contemporary dresses.
12. Smooth Lob with Deep Side Part and Pearl Clips
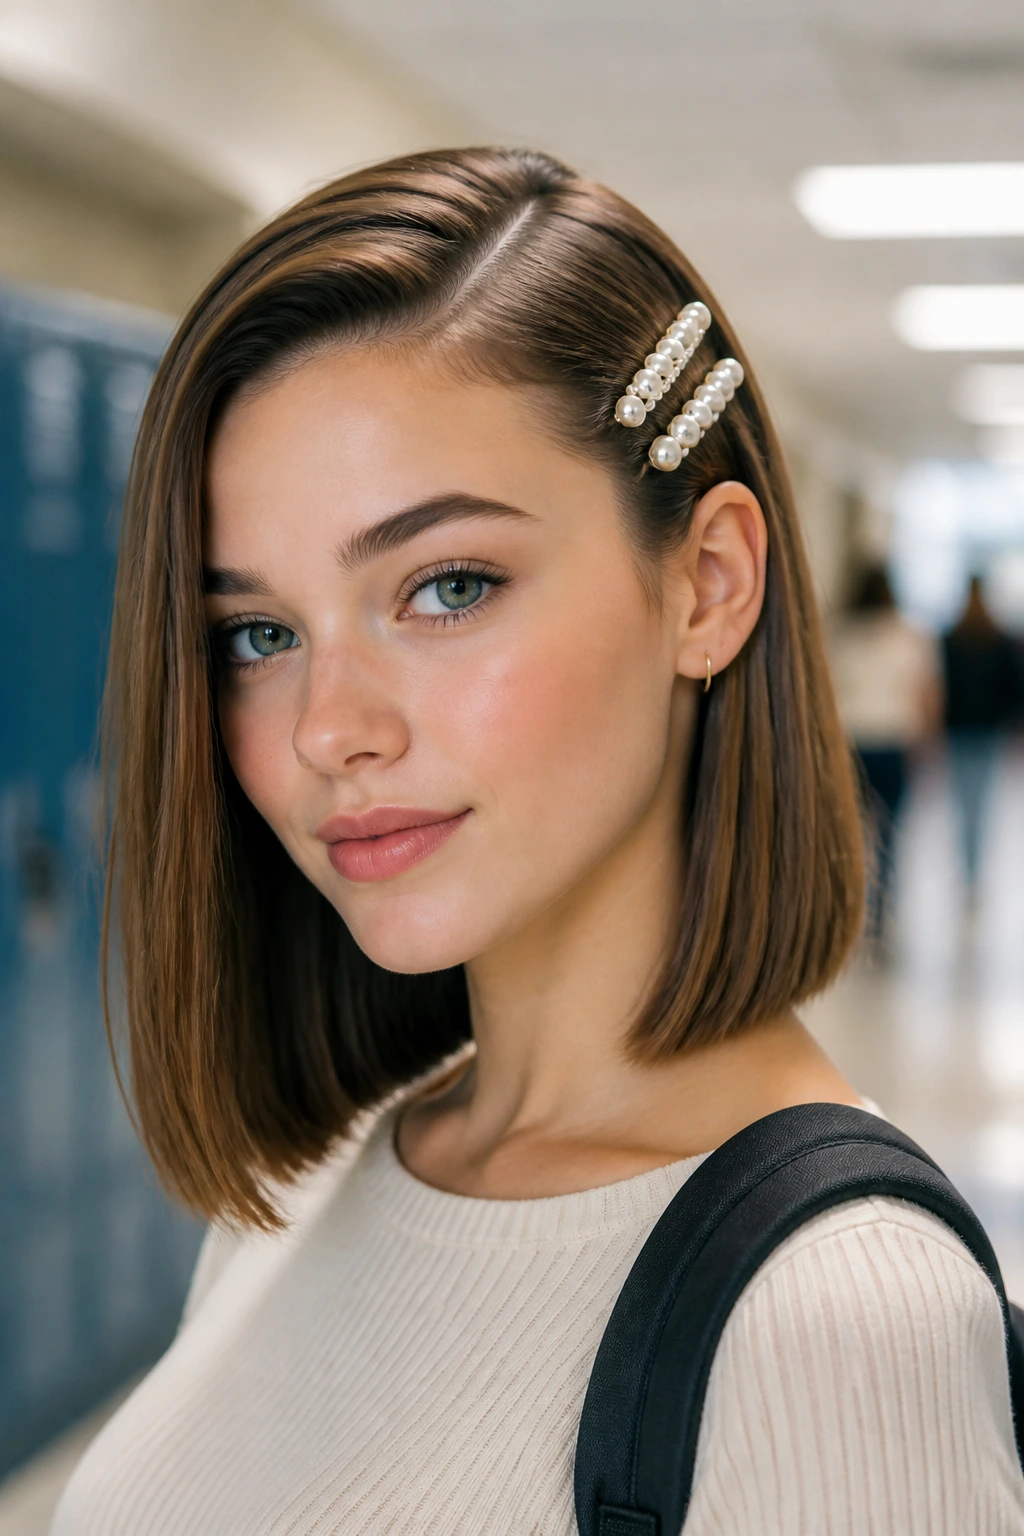
Unlike long hairstyles that offer endless braiding options, shorter cuts rely on precision parting and bold accessories to make an impact. This style is chic, sophisticated, and takes under ten minutes to perfect.
This look works best on bobs, lobs, or collarbone-length cuts. It focuses on clean lines and high shine, making it look incredibly elegant.
Who It Is Best For
This is the ultimate choice for anyone with shorter hair who wants to look dressed up without dealing with the hassle of extensions or complex updos.
Styling the Lob
Start by applying a smoothing serum to damp hair and blow-drying it straight with a round brush, curving the ends slightly inward toward your chin. Create a deep, sharp side part using a rat-tail comb. Smooth down any flyaways with a tiny amount of pomade. On the side with less hair, tuck the length behind your ear and secure it with two or three pearl-embellished slide clips placed flat against your head.
13. Retro Voluminous Half-Up Bounce
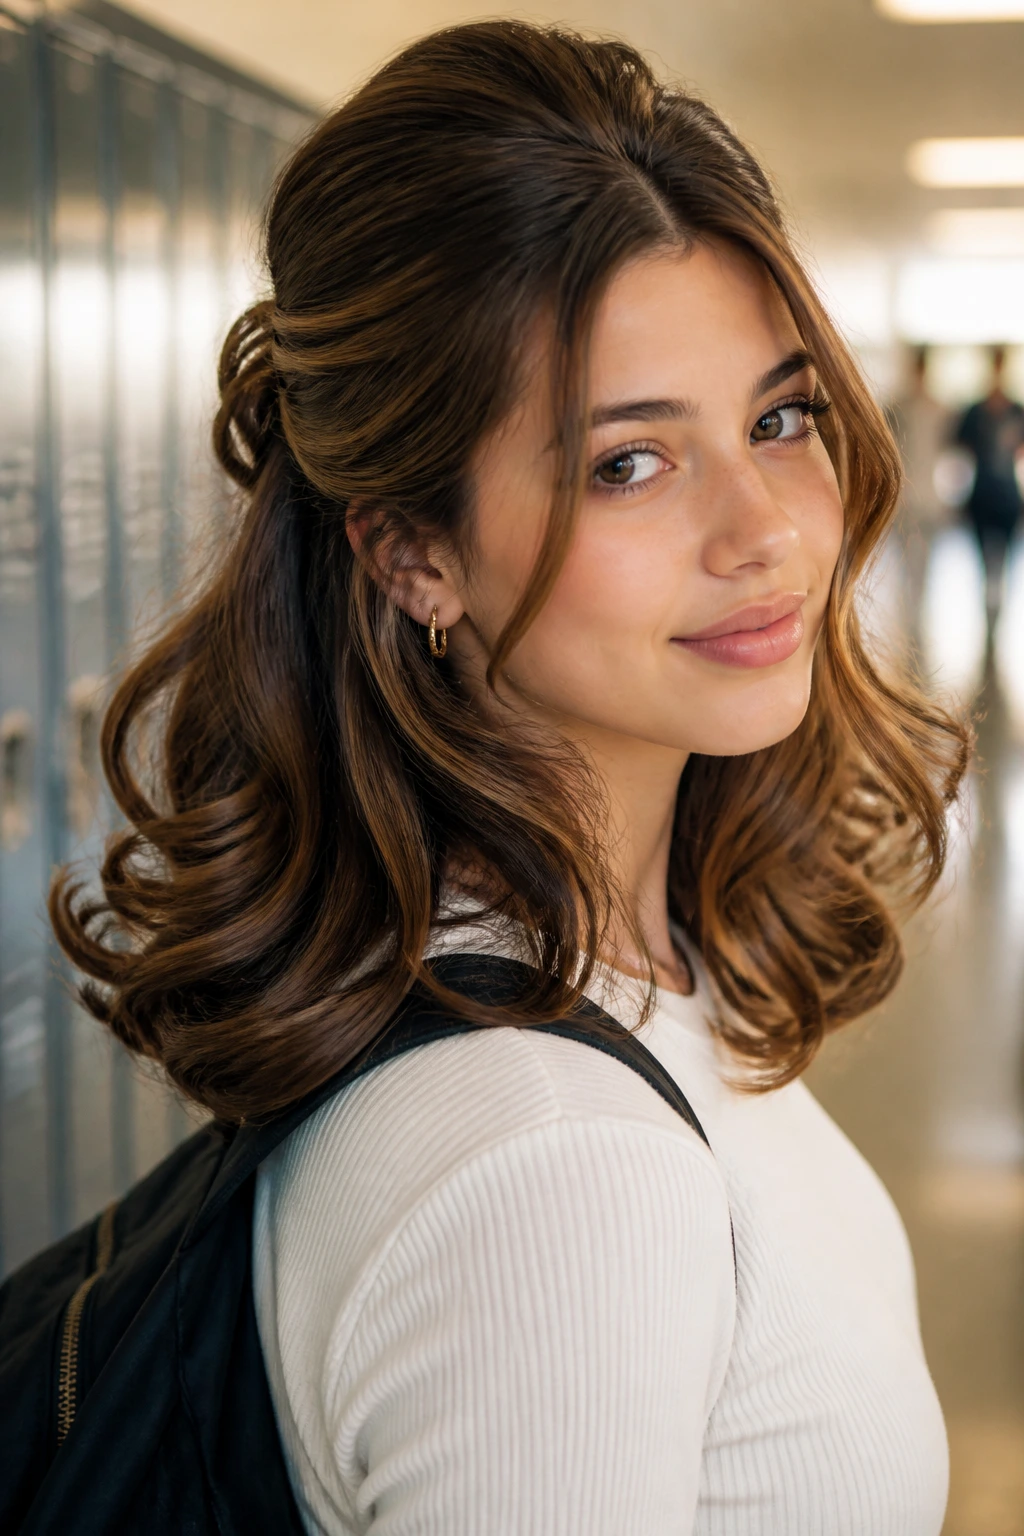
If you love vintage aesthetics, this style brings a touch of sixties glamour into the modern school day. It is all about height, volume, and bouncy ends.
Creating the Crown Volume
To achieve the necessary lift at the crown, section off the top portion of your hair and spray the roots with a volumizing hairspray. Use a teasing brush to gently backcomb the underside of this section, creating a sturdy cushion of volume. Smooth the top layer of hair over the teased section to hide the texture.
Securing and Bouncing the Ends
- Gather the smoothed top section and secure it at the back of your head with a barrette.
- Use a large-barrel curling iron (about 1.5 inches) to curl the ends of your loose hair outward.
- Let the curls cool, then brush them out gently to create a soft, flipped-out edge.
- Set the style with a flexible-hold hairspray.
Pro tip: When backcombing, work in small, horizontal sections and press the hair downward toward the scalp in single, smooth strokes rather than sawing up and down, which can cause damage and tangles.
14. Scarf-Woven Low Braid
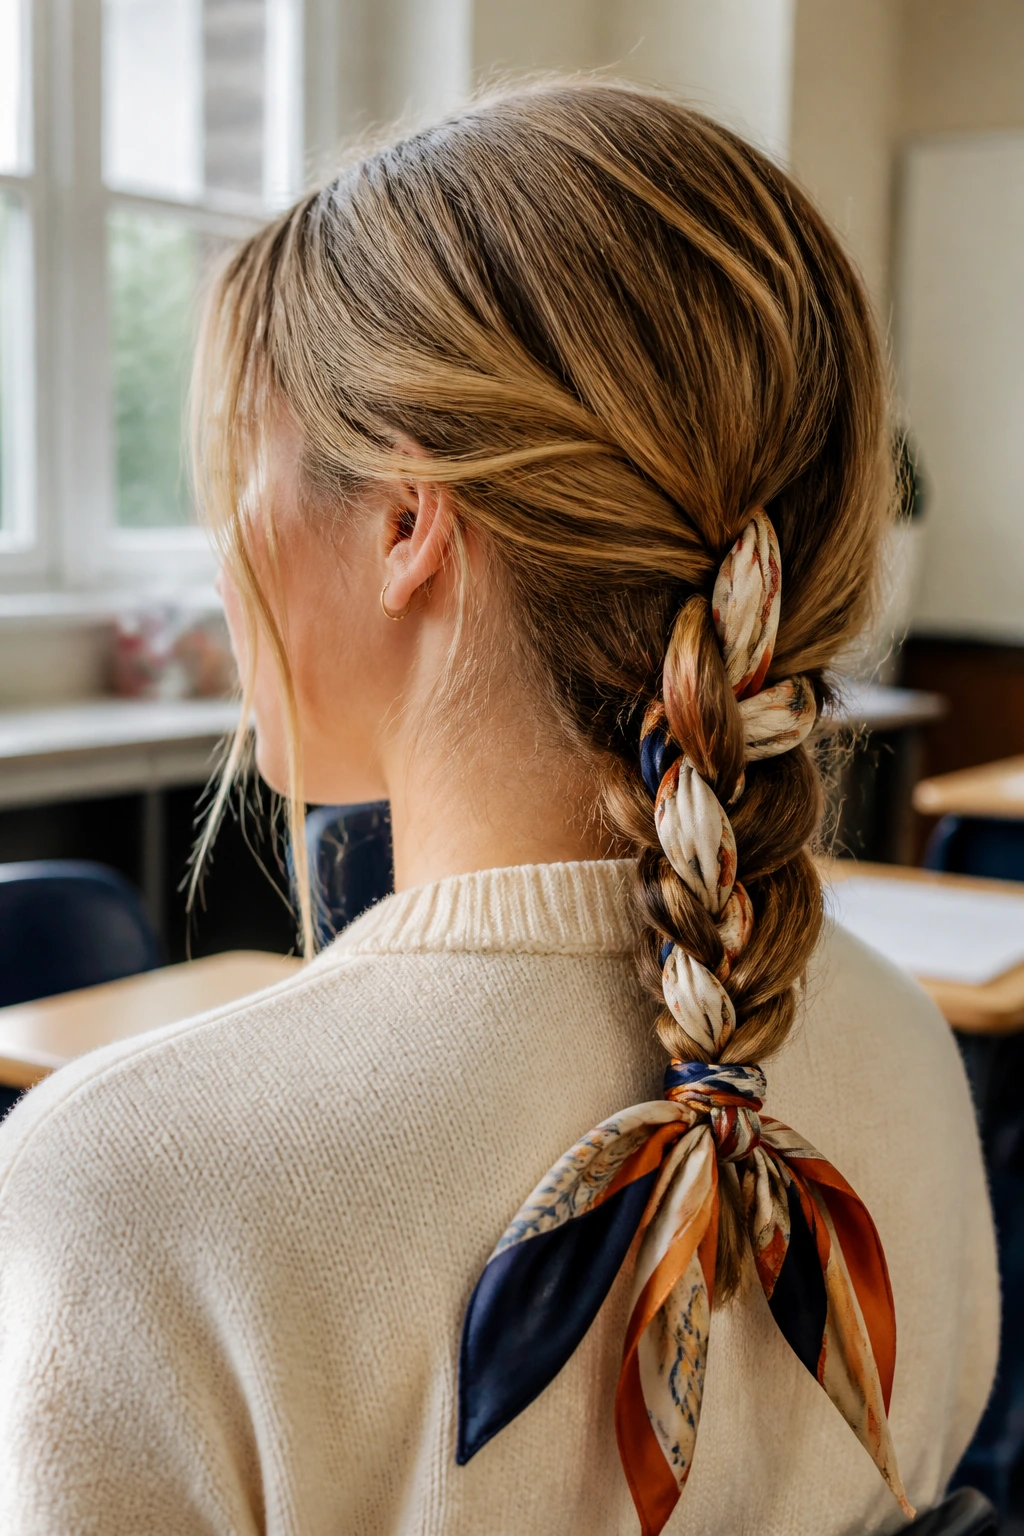
A simple three-strand braid can sometimes feel a bit ordinary. By weaving a colorful silk scarf directly into the braid, you add instant color, texture, and visual interest to a classic style.
Start by folding a long, thin silk scarf in half. Gather your hair at the nape of your neck and divide it into three sections as if you were making a normal braid. Loop the folded end of the scarf around the middle section of hair, allowing the two loose ends of the scarf to merge with the left and right sections of your hair.
Braid your hair normally, treating the scarf strands as part of the hair sections. When you reach the end, tie the remaining scarf ends into a small, neat bow to secure the braid. This style keeps your hair contained and protected throughout the school day while looking effortlessly stylish.
15. Textured Shag with Micro Accent Braids
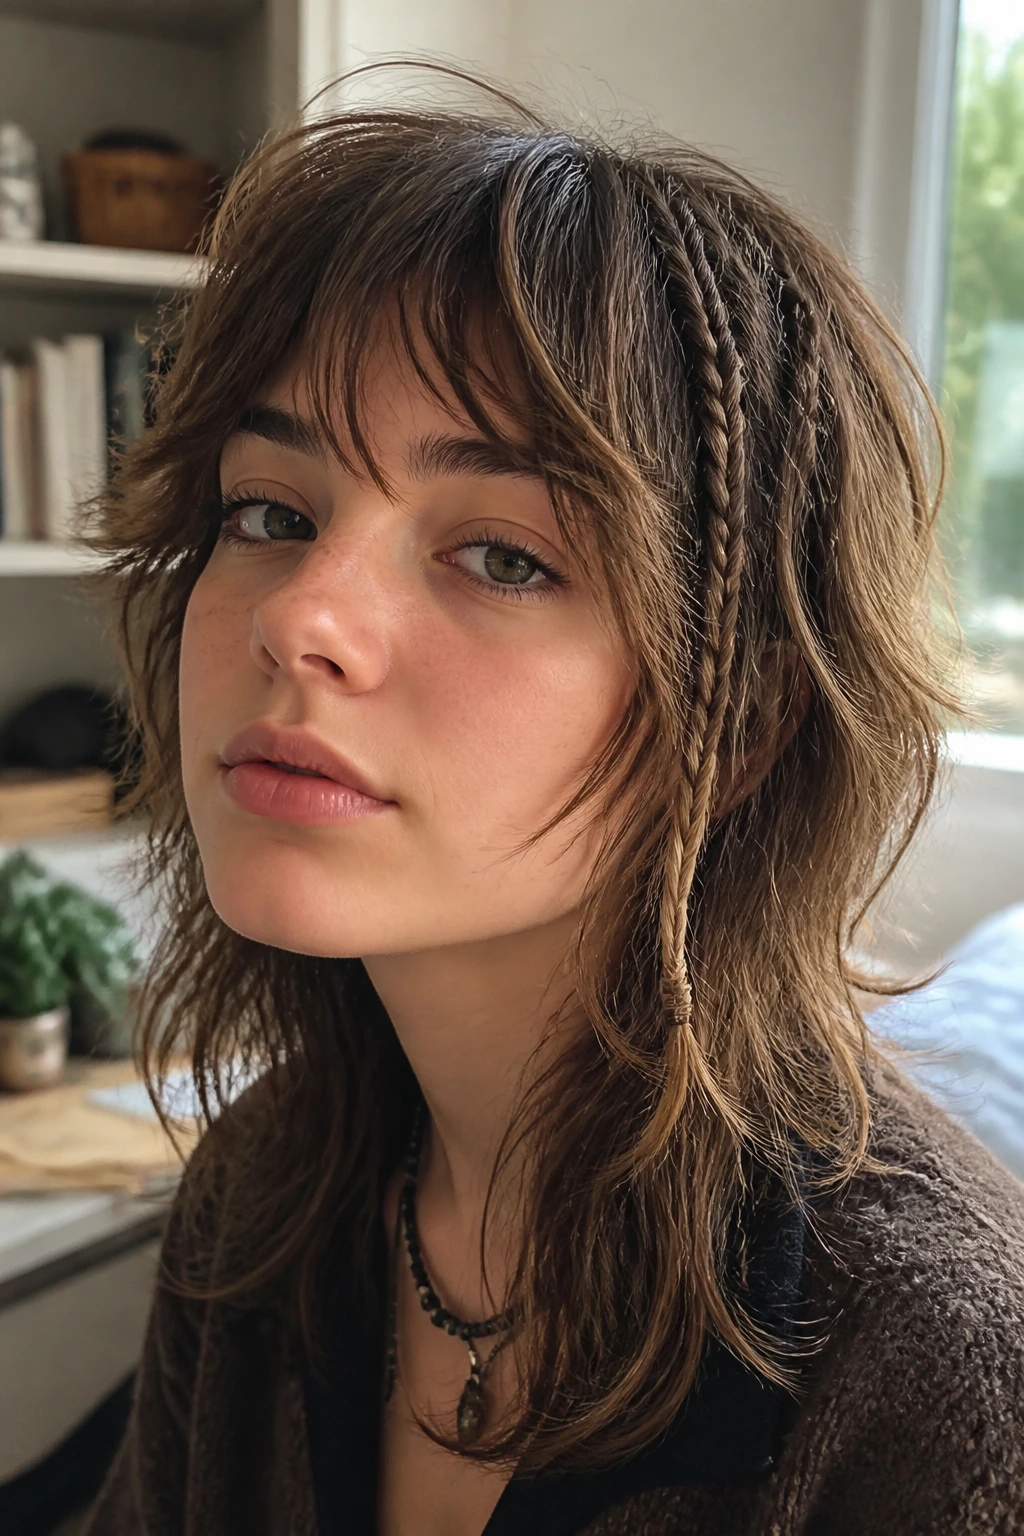
Why does this work? It embraces the messy, rock-and-roll vibe of a shag cut while adding tiny, delicate details that make it feel intentional and decorative.
How to Style It
Start by enhancing your hair’s natural texture. Spray a generous amount of sea salt spray or texturizing mist onto damp hair, scrunching it with your hands as it air-dries or using a diffuser on your blow dryer. The goal is to get a loose, piecey texture with plenty of movement.
Once your hair is dry, take two or three random, half-inch sections of hair from the top layer and braid them tightly into tiny micro-braids. Secure the ends of these tiny braids with small, clear elastics. Let them hang loose among your textured waves. The contrast between the chunky, messy waves and the tiny, precise braids creates a cool, bohemian look.
16. Wrapped Low Ponytail with Crease-Free Ribbon
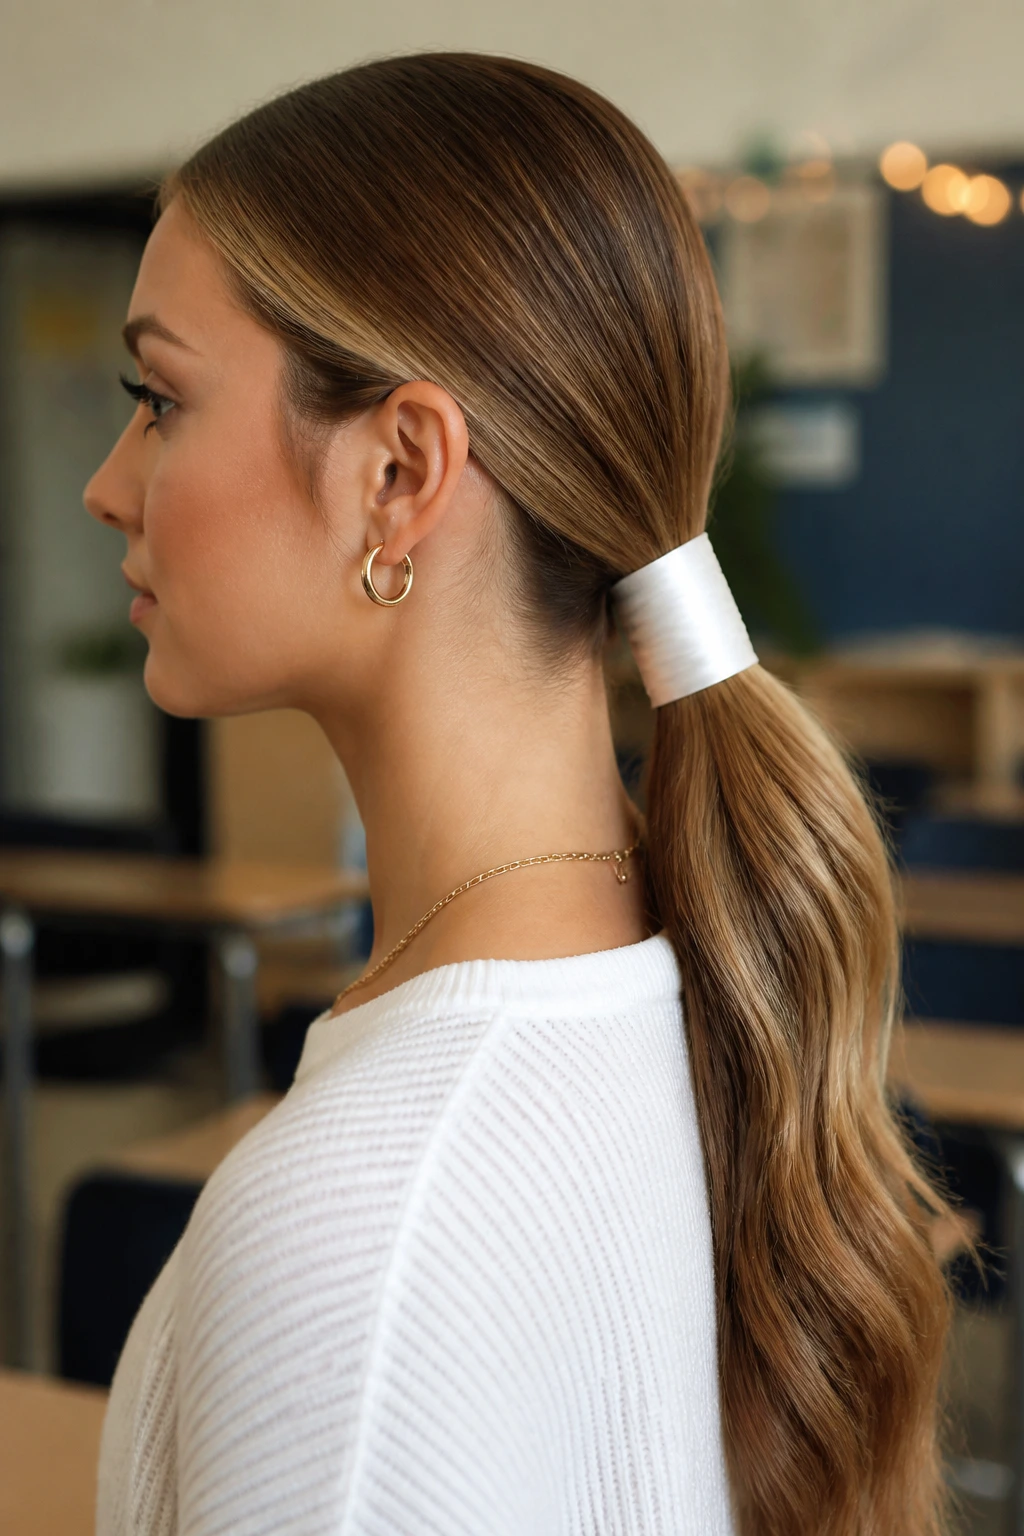
If you want a style that is incredibly fast but looks like it belonged on a fashion runway, a low ponytail wrapped with a beautiful ribbon is the perfect solution. It is clean, simple, and exceptionally comfortable.
Gather your hair at the very nape of your neck, ensuring the sides are smooth and neat. Secure the ponytail with a sturdy, crease-free elastic band. Take a long length of wide grosgrain or satin ribbon and tie it securely over the elastic band.
Instead of leaving the ribbon in a simple bow, wrap the ends of the ribbon tightly down the first two or three inches of the ponytail shaft, overlapping the turns slightly. Tie the ribbon into a small knot on the underside of the ponytail. This elongated wrap creates a sleek, architectural detail that feels modern and incredibly chic.
17. High Topknot with Silk Scrunchie
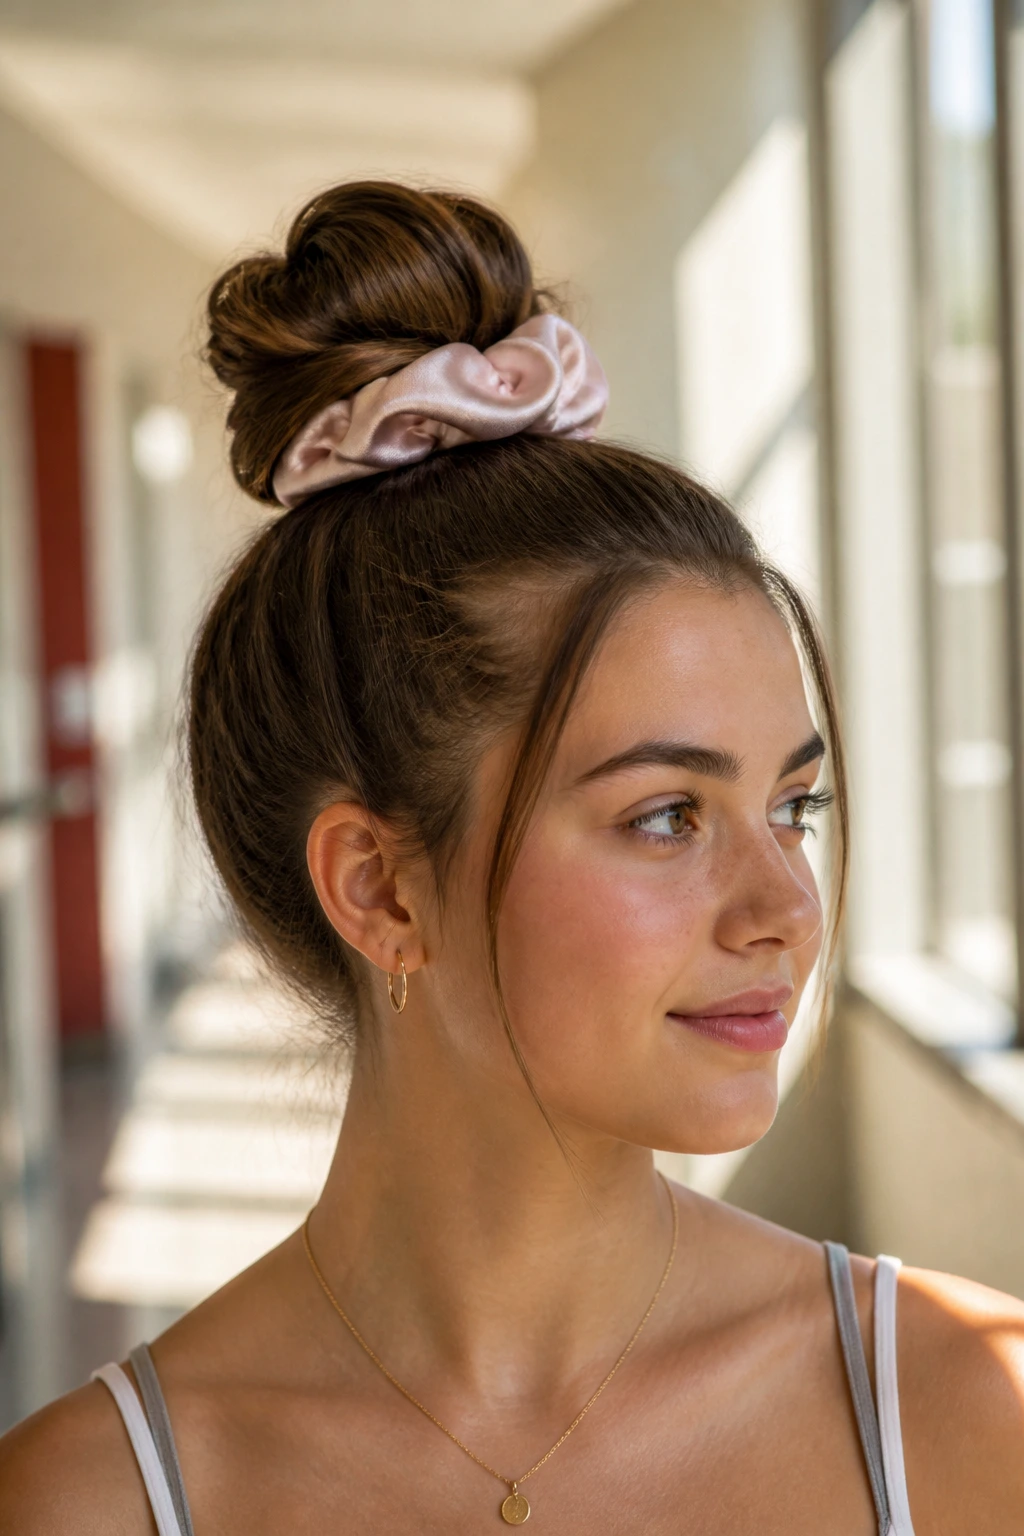
This style is a lifesaver for long school days when you simply do not want to worry about your hair falling into your eyes or sticking to your neck. It is high, secure, and effortlessly stylish.
Gather all of your hair at the very top of your head, brushing the sides smooth. Twist the length of your hair tightly until it begins to roll around the base, creating a tall, neat topknot. Secure the bun firmly with several U-shaped hairpins to keep it from wobbling.
Slide a soft silk scrunchie over the finished bun. The silk material is gentle on your hair, preventing breakage, while the soft sheen of the fabric adds a luxurious touch to an otherwise casual updo. It is a practical, comfortable style that looks incredibly polished from every angle.
18. Waterfall Braid with Loose Curls
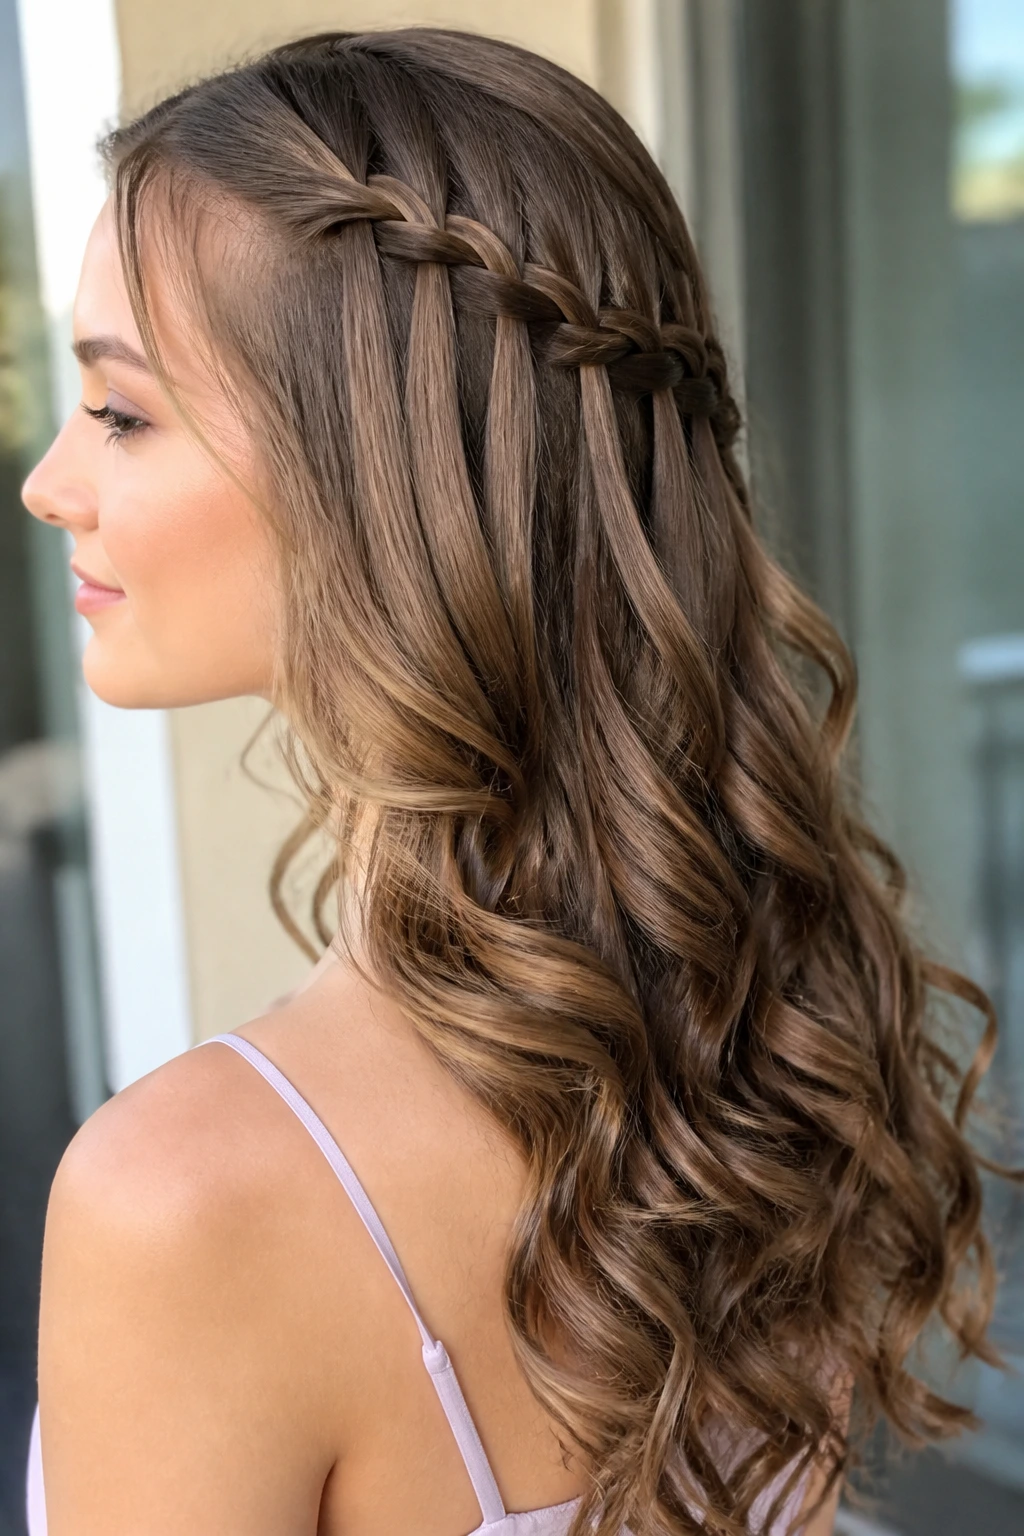
Unlike traditional braids that contain all your hair, the waterfall braid allows strands to cascade through the weave, creating a beautiful, flowing pattern across the back of your head.
This style is perfect for showing off long lengths and color variations, like highlights or balayage. It looks intricate and delicate, making it a favorite for formal events.
Who It Is Best For
This look is ideal for anyone with medium-to-long hair who wants a romantic, flowing style that still keeps the hair away from the face.
The Waterfall Technique
Start on the left side of your face. Take a section of hair and begin a regular three-strand braid. After the first stitch, drop the bottom strand of the braid and let it hang loose. Pick up a new section of hair from directly behind the dropped strand to replace it, and cross it over the middle. Repeat this process, dropping the bottom strand and picking up a new one, as you braid around the back of your head. Secure the end of the braid behind your right ear with a bobby pin.
19. Chunky Headband with Straight Beveled Ends
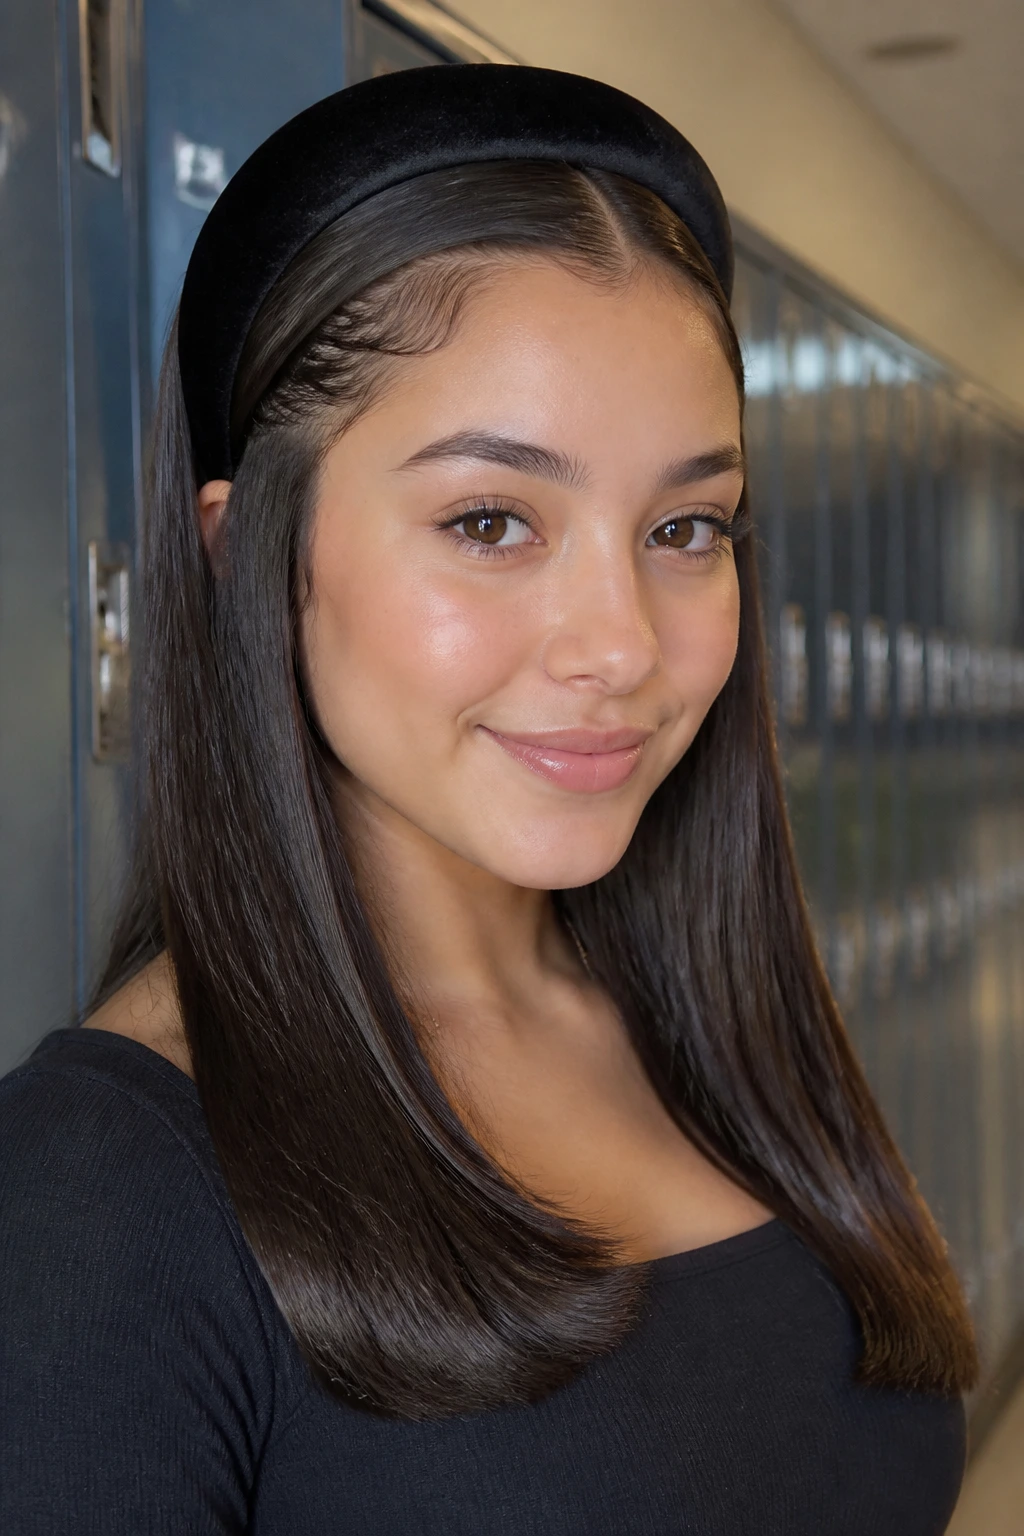
If you want a polished look but have zero time for braiding or curling, a chunky headband paired with sleek, straight hair is your secret weapon. It is a classic look that never goes out of style.
Preparing the Hair
Apply a heat protectant spray to your hair and use a flat iron to get it completely straight. As you reach the ends of your hair, curve the flat iron slightly inward toward your face. This creates a soft, beveled edge that looks much more polished than stick-straight, blunt ends.
Placing the Headband
- Slide a thick, padded velvet or satin headband onto your head, placing it about two inches back from your hairline.
- Use your fingers to gently push the hair behind your ears.
- Pull a few tiny baby hairs out in front of the headband to soften the look.
- Mist the hair with a high-shine spray for a glossy finish.
Pro tip: Choose a headband in a contrasting color to your hair—for example, a rich jewel tone like emerald or burgundy looks incredible against blonde or brunette locks.
20. Double Row Rope Twist Half-Up
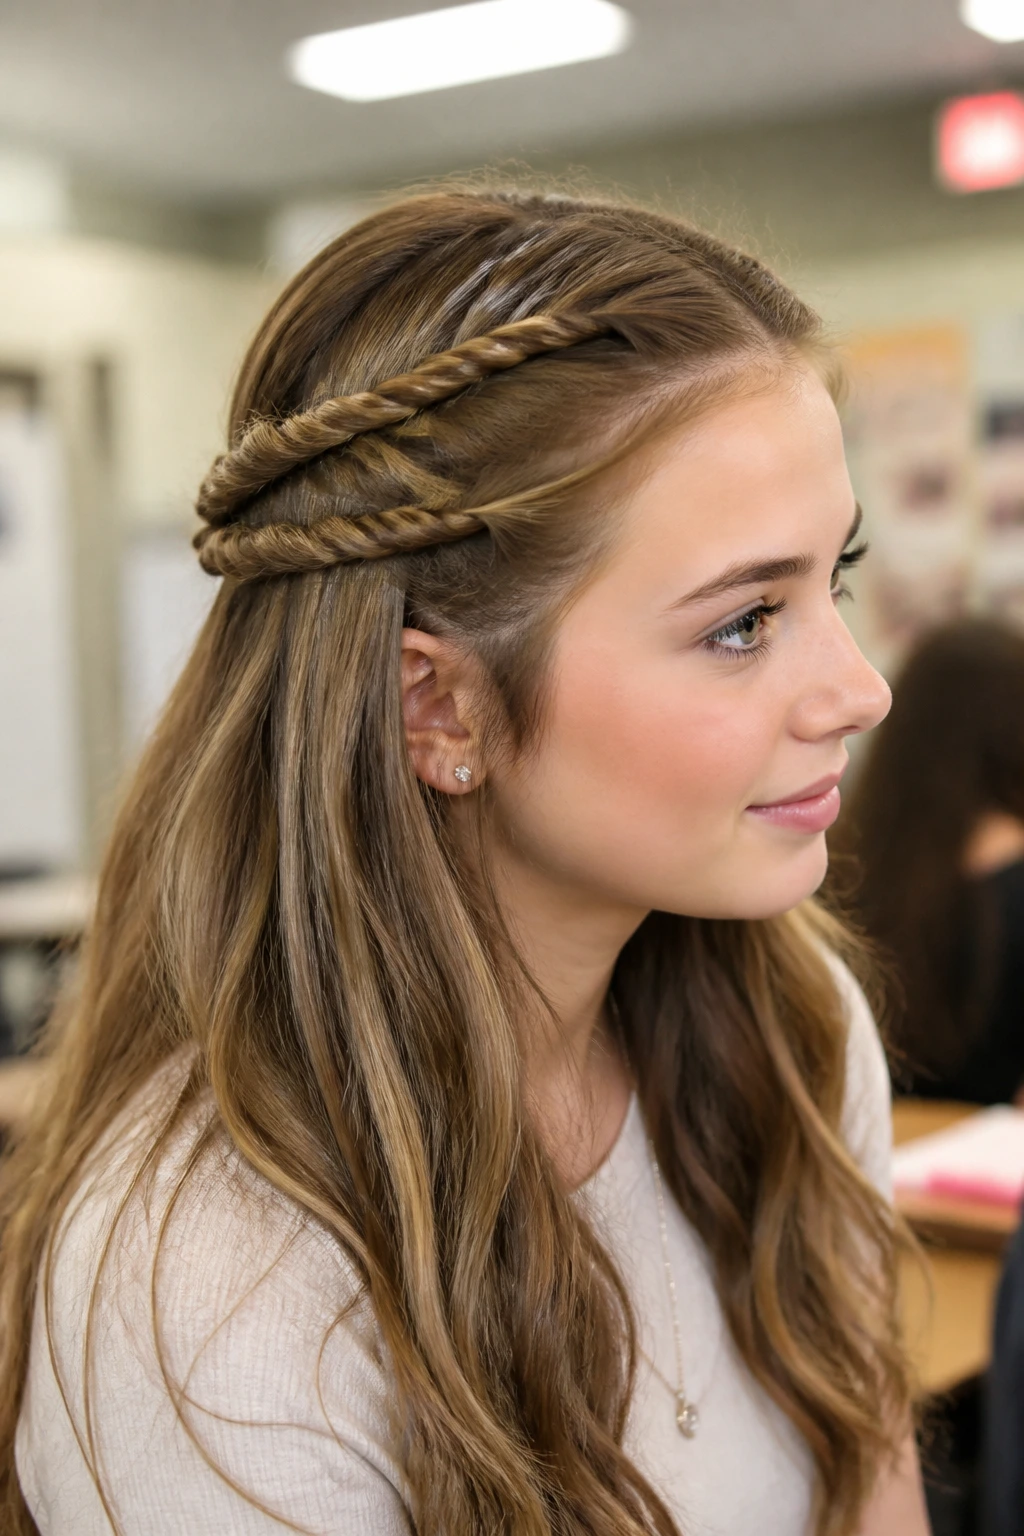
This style is a fantastic alternative to traditional braids, offering a clean, rope-like texture that looks highly detailed but requires very little effort to execute.
Start by taking a small section of hair near your part and dividing it into two equal strands. Twist both strands individually to the right, then cross them over each other to the left. This counter-twisting method is the secret to making a rope twist stay secure without unraveling.
Repeat this process with a second section of hair directly below the first one, creating two parallel rope twists on the side of your head. Secure them together at the back of your head. This double-row effect looks highly structured and elegant, making it a great choice for a polished school look that easily transitions to the dance floor.
21. Crown Twist with Textured Natural Curls
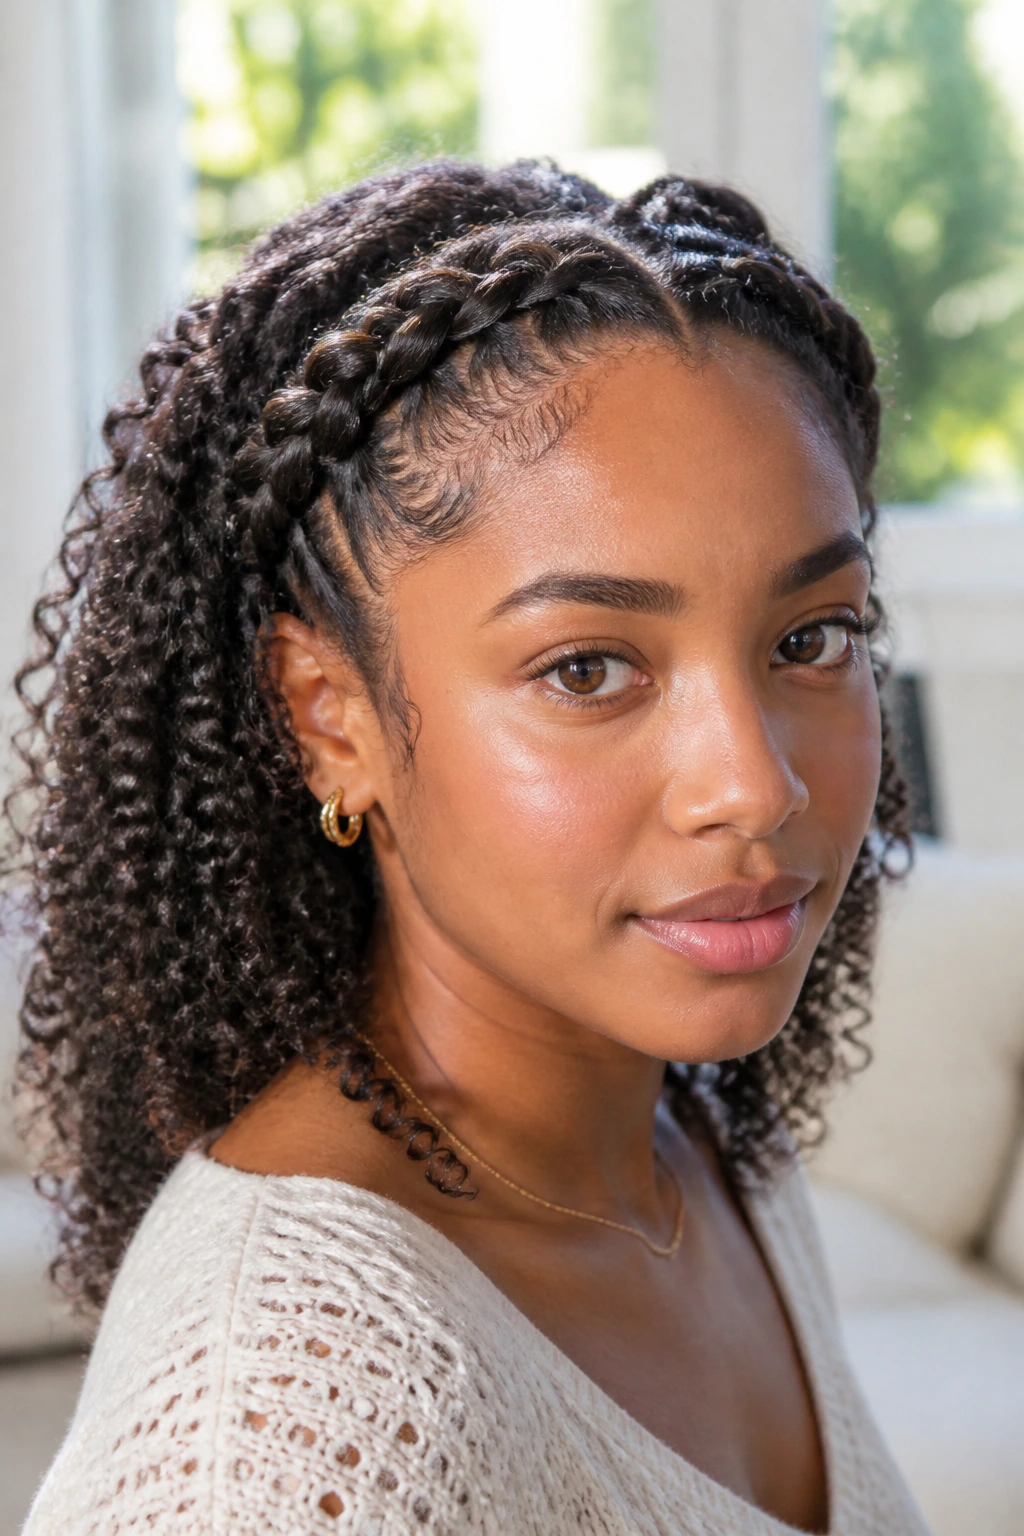
Why does this work? It celebrates and highlights the natural texture of curly and coily hair while creating a neat, elegant frame around the face. It is protective, practical, and beautiful.
How to Style It
Start with clean, moisturized curls. Take a section of hair from the front hairline, starting near your temple. Begin twisting the hair flat against your scalp, moving backward toward your ear and incorporating small sections of hair as you go, similar to a flat twist.
Secure the twist behind your ear with a sturdy hairpin. You can repeat this on both sides to meet at the back, or do a single dramatic side twist. Let the rest of your natural curls fall free and voluminous in the back. The contrast between the flat, neat twist and the big, beautiful curls in the back is absolutely stunning.
22. Side-Swept Hollywood Waves with Bobby Pin Stack
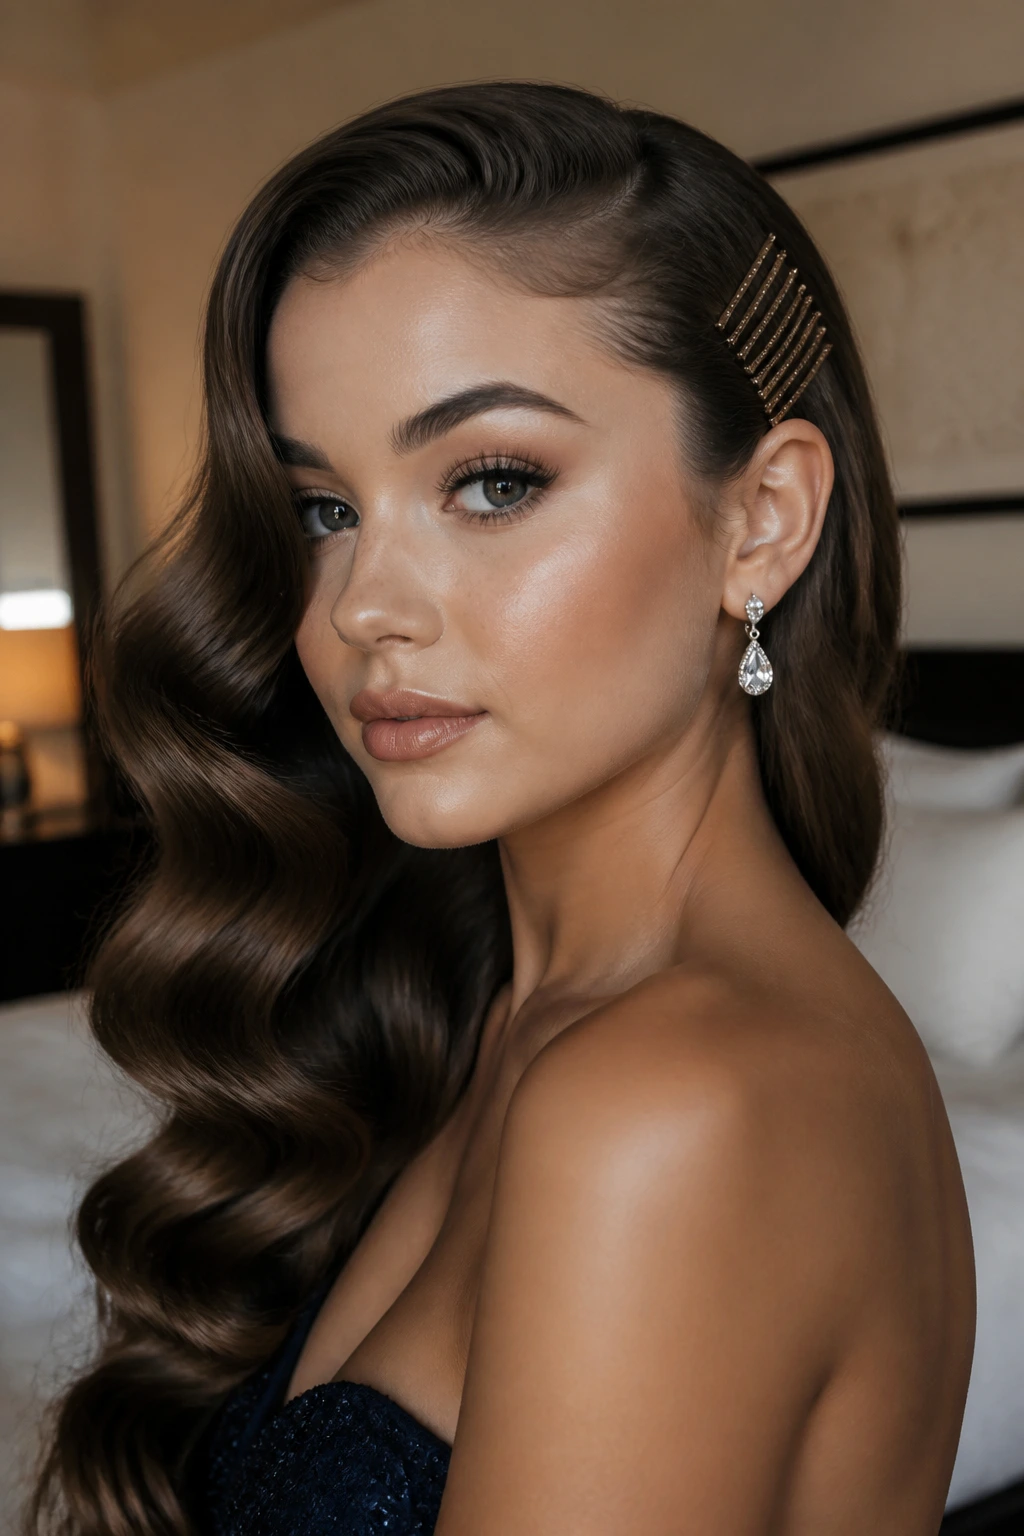
This style brings old-school movie star glamour down to earth for a school day by using a modern styling trick: stacking simple bobby pins in a neat, geometric pattern.
Gather all of your hair to one side, allowing it to drape over your shoulder. Use a large-barrel curling iron to curl the lengths in the same direction, creating a uniform, vintage wave pattern. Gently brush through the waves with a paddle brush to blend them together into a smooth, shiny sheet of hair.
On the sleek side of your head, pull the hair tight behind your ear. Take six to eight plain bobby pins and slide them into the hair horizontally, stacking them directly on top of each other. This creates a neat silver or gold metallic block that holds the hair firmly in place while adding a cool, industrial element to the vintage waves.
23. Braided Headband with Sleek Back Lengths
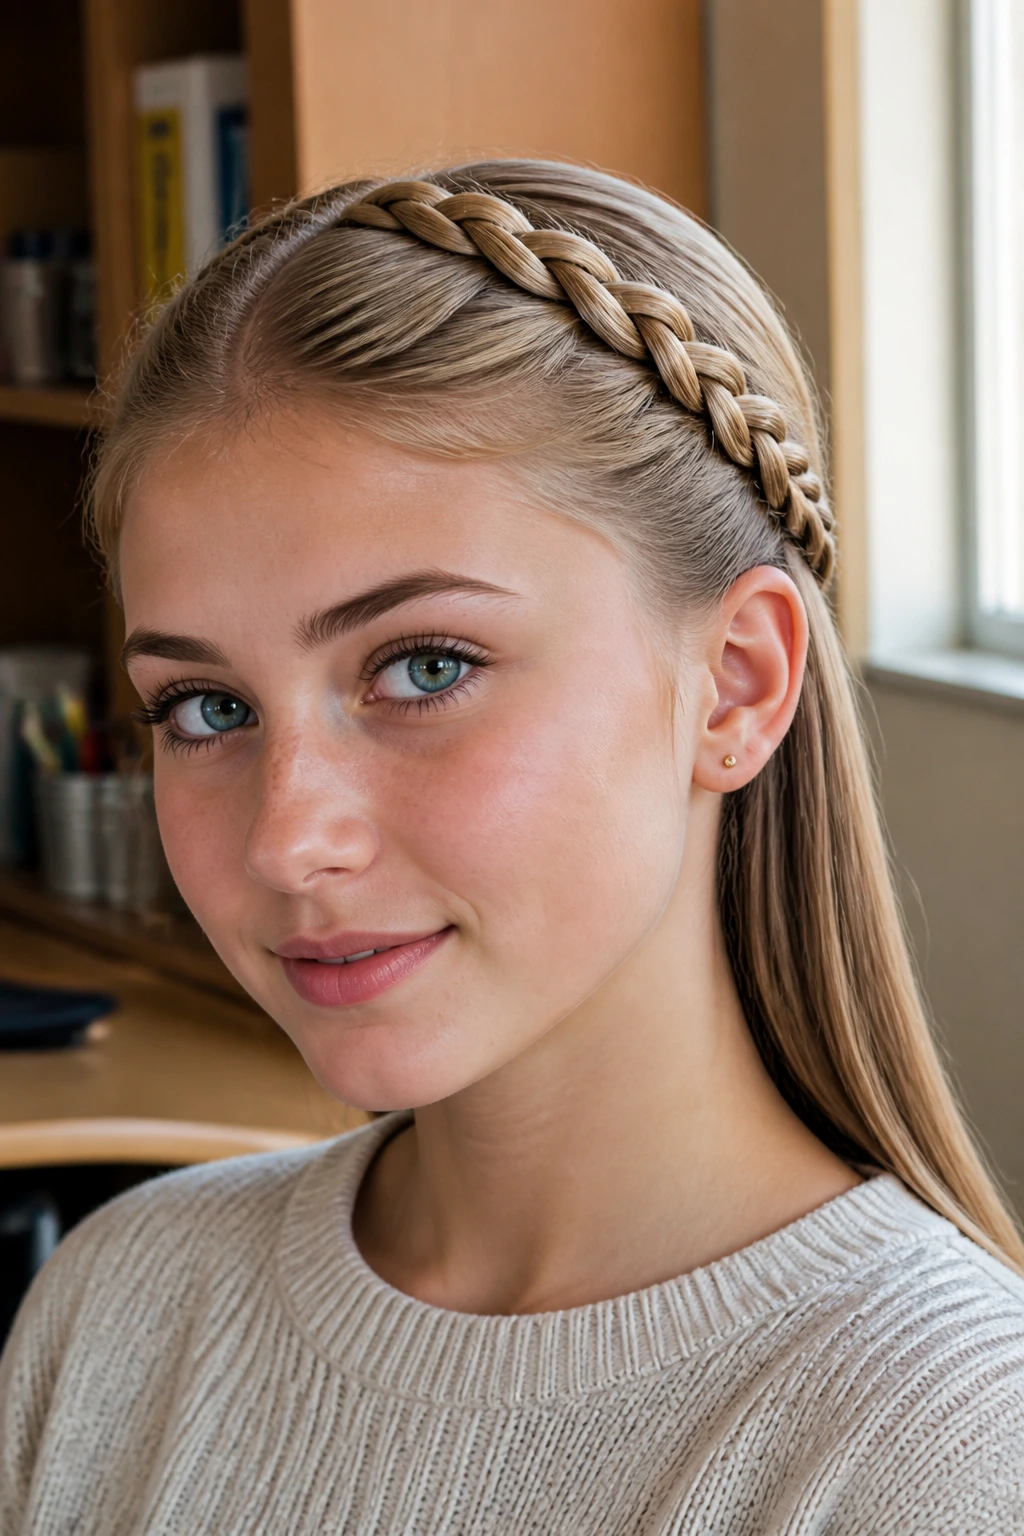
This style uses your own hair to create a beautiful, natural headband. It is a fantastic way to keep your bangs or front layers completely out of your face without using any plastic or metal accessories.
Create a deep part behind your ear and section off a two-inch band of hair running over the top of your head to the opposite ear. Clip the rest of your hair out of the way. Begin a Dutch braid at one ear, working your way over the top of your head to the other side, keeping the braid tight and flat to the scalp.
Once you reach the opposite ear, secure the braid with a small elastic and pin it flat under the loose back hair. Release the back sections and brush them sleek and smooth. The braided band acts as a natural crown, holding your hair back neatly while looking incredibly intricate and elegant.
24. Low Bubble Braid with Colorful Micro Elastics
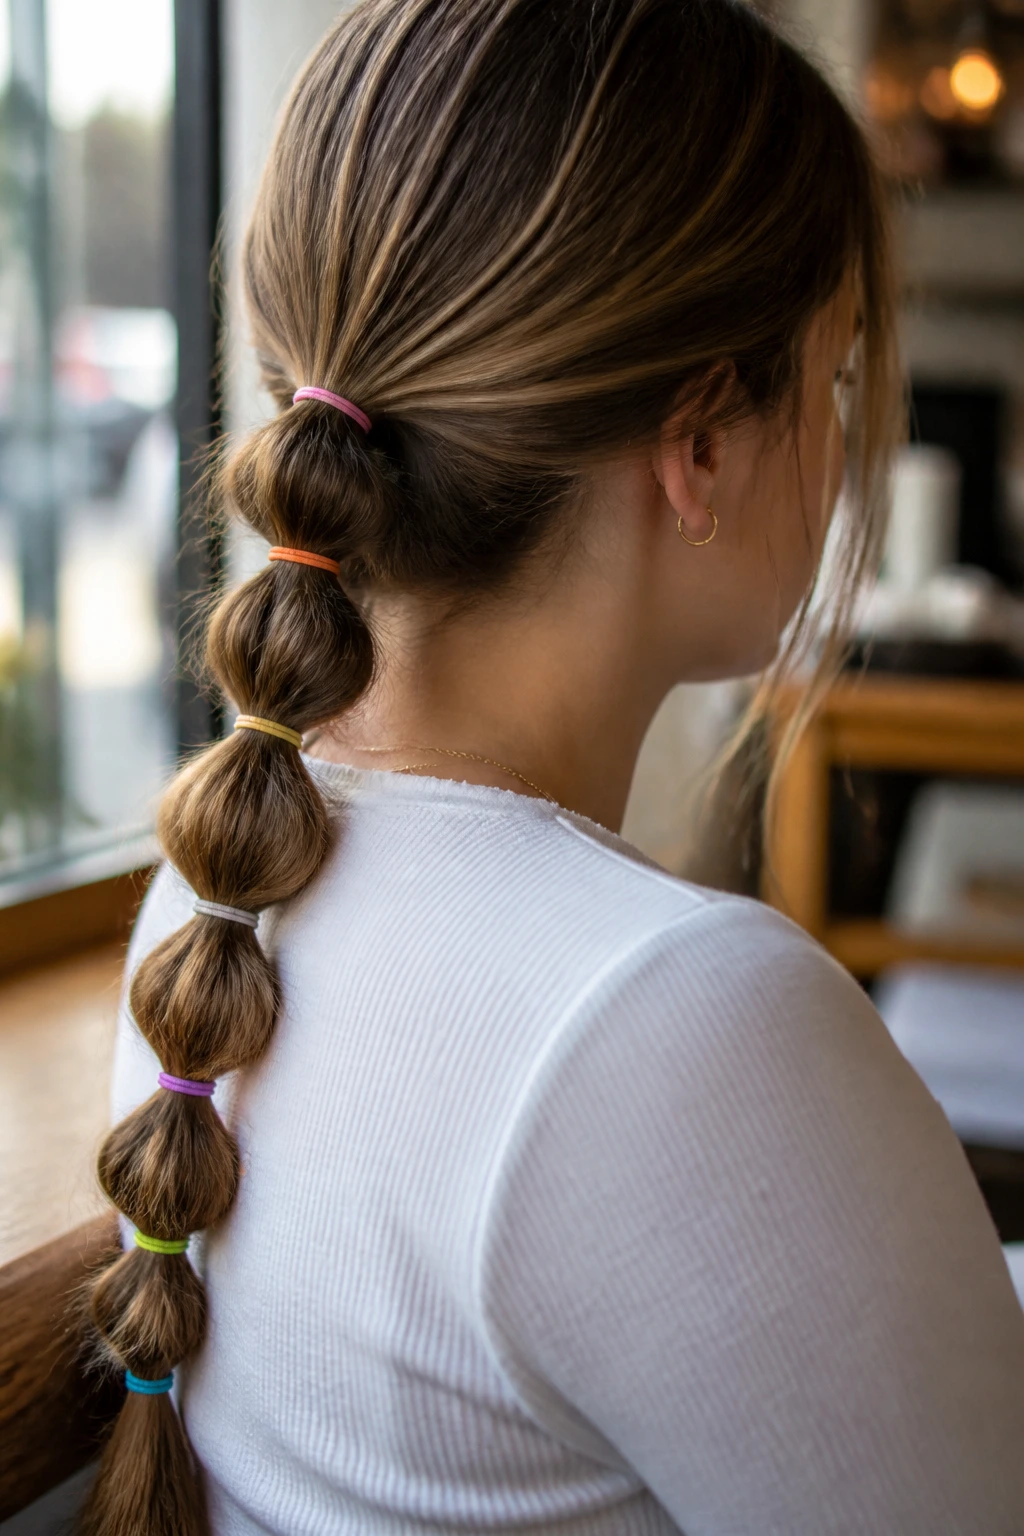
This is a fun, youthful spin on the standard bubble ponytail that is perfect for a casual school day but can easily be dressed up with metallic bands for the dance.
This style works best on medium-to-long hair and is incredibly quick to put together. It keeps your hair completely contained and tangle-free all day long.
Who It Is Best For
This is the perfect look for anyone who wants a low-maintenance style that still looks playful, creative, and highly styled.
Building the Low Bubble Braid
Pull your hair back into a low, neat ponytail at the nape of your neck and secure it with a clear elastic. Move down two inches and secure another elastic. Gently pinch the hair between the two bands and pull it outward to create a rounded bubble. Repeat this down the length of the ponytail. To make it more fun, use small, colorful micro elastics that coordinate with your outfit or school colors.
25. Flapped French Twist with Matte Claw Clip
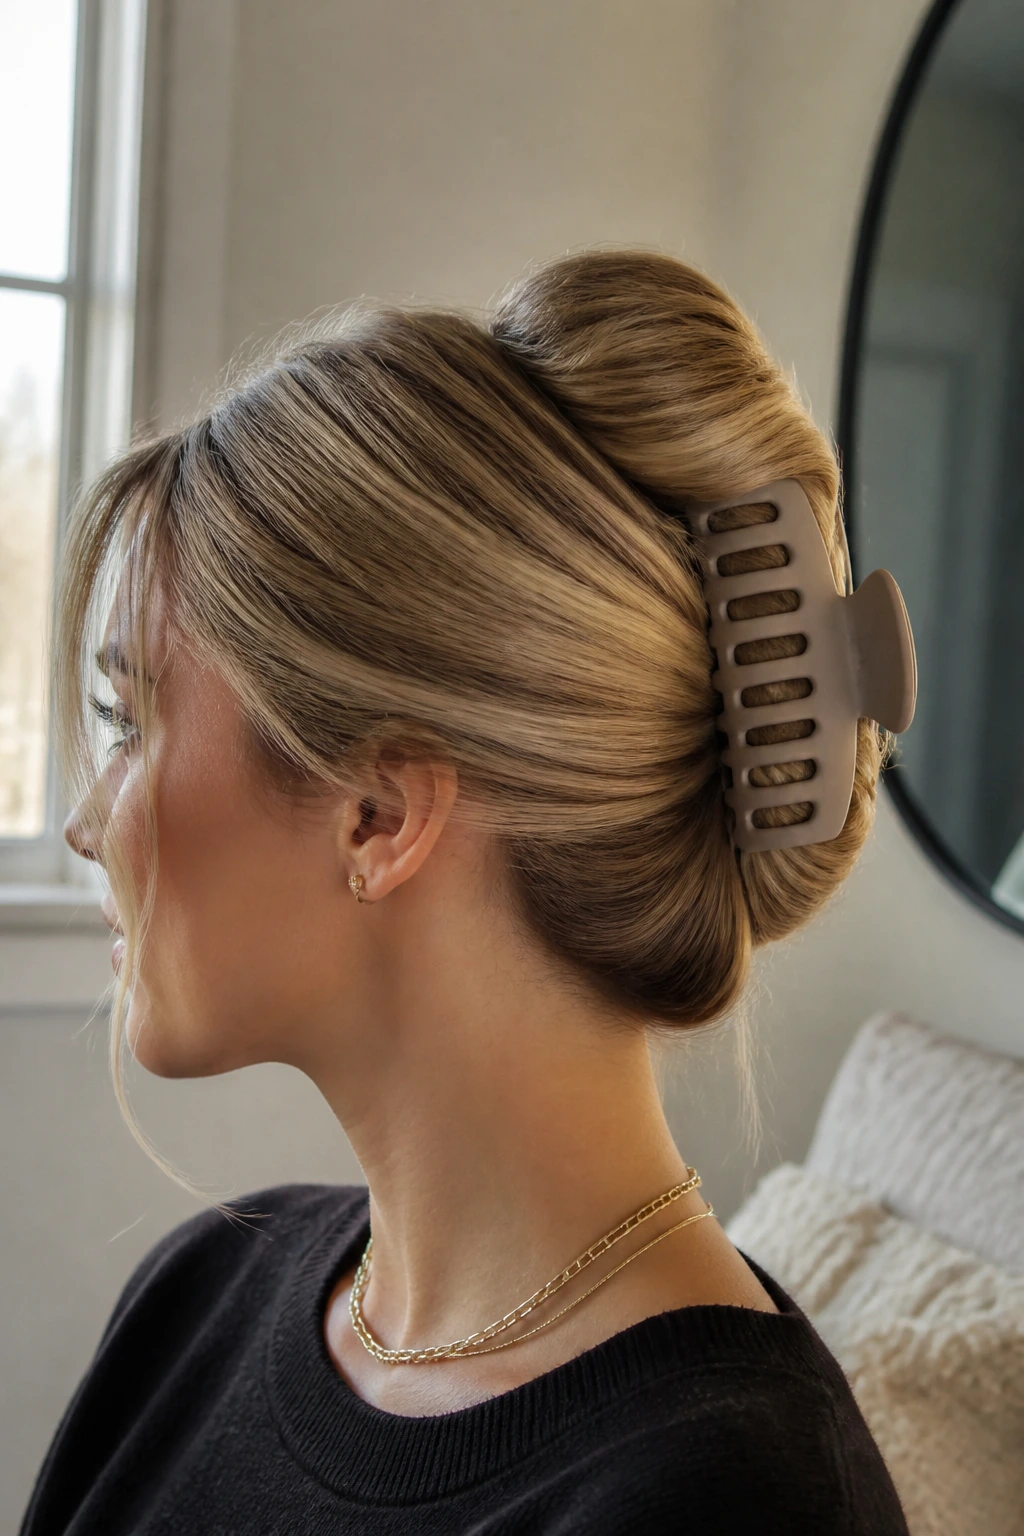
Why does this work? It is a modern, slightly casual take on the ultra-formal French twist. It is quick to do in the morning but looks incredibly sophisticated and put-together.
How to Style It
Gather your hair at the nape of your neck as if you were making a low ponytail. Begin twisting the ponytail upward against the back of your head. As you twist, the hair will naturally form a neat roll along the center of your head.
Once you reach the top, fold the remaining loose ends of the hair back down inside the roll. Secure the entire twist with a large, high-quality matte claw clip in a neutral shade. The clip holds the twist firmly against your head, keeping it comfortable and secure all day long. The finished look is clean, modern, and has an effortless elegance that works beautifully for any occasion.
The Bottom Line
Choosing the right look does not have to be a stressful decision. The secret is finding a style that makes you feel comfortable and confident, whether you are sitting in a classroom or dancing under the gymnasium lights.
When you are prepping your hair, remember that prep work is everything. A great style starts with a solid foundation. If your hair is clean and slippery, use a little dry shampoo or texturizing spray to give it some grip. If your hair is dry or prone to frizz, a tiny bit of hair oil or smoothing cream will keep it looking polished and healthy.
Don’t be afraid to experiment with these styles in the days leading up to homecoming. Try a few out on a regular school day to see how they hold up and how comfortable they feel. You might be surprised at how easy it is to transform a simple, practical daytime look into something truly special for the big night. Use these ideas as a starting point, make them your own, and enjoy every single minute of the celebration.
