Thin hair often feels like a puzzle that refuses to be solved. You try a volumizing mousse, you tease at the roots, and within twenty minutes, gravity has reclaimed the day. The secret isn’t just in the product; it is in the architecture of the style itself. When you have fine strands, the goal is to create the illusion of density while preventing the hair from collapsing under its own weight. This is where “girly” styles—those with soft textures, intentional movement, and delicate accessories—actually shine.
Forget the heavy, slicked-back looks that draw attention to every gap in your part. Instead, look toward styles that embrace airiness. Thin hair is remarkably easy to style because it is manageable, but it requires a strategic approach to layering, pinning, and texturizing. Whether you are aiming for a romantic, loose vibe or something polished for a professional setting, the right cut and the right technique will change how you view your hair entirely.
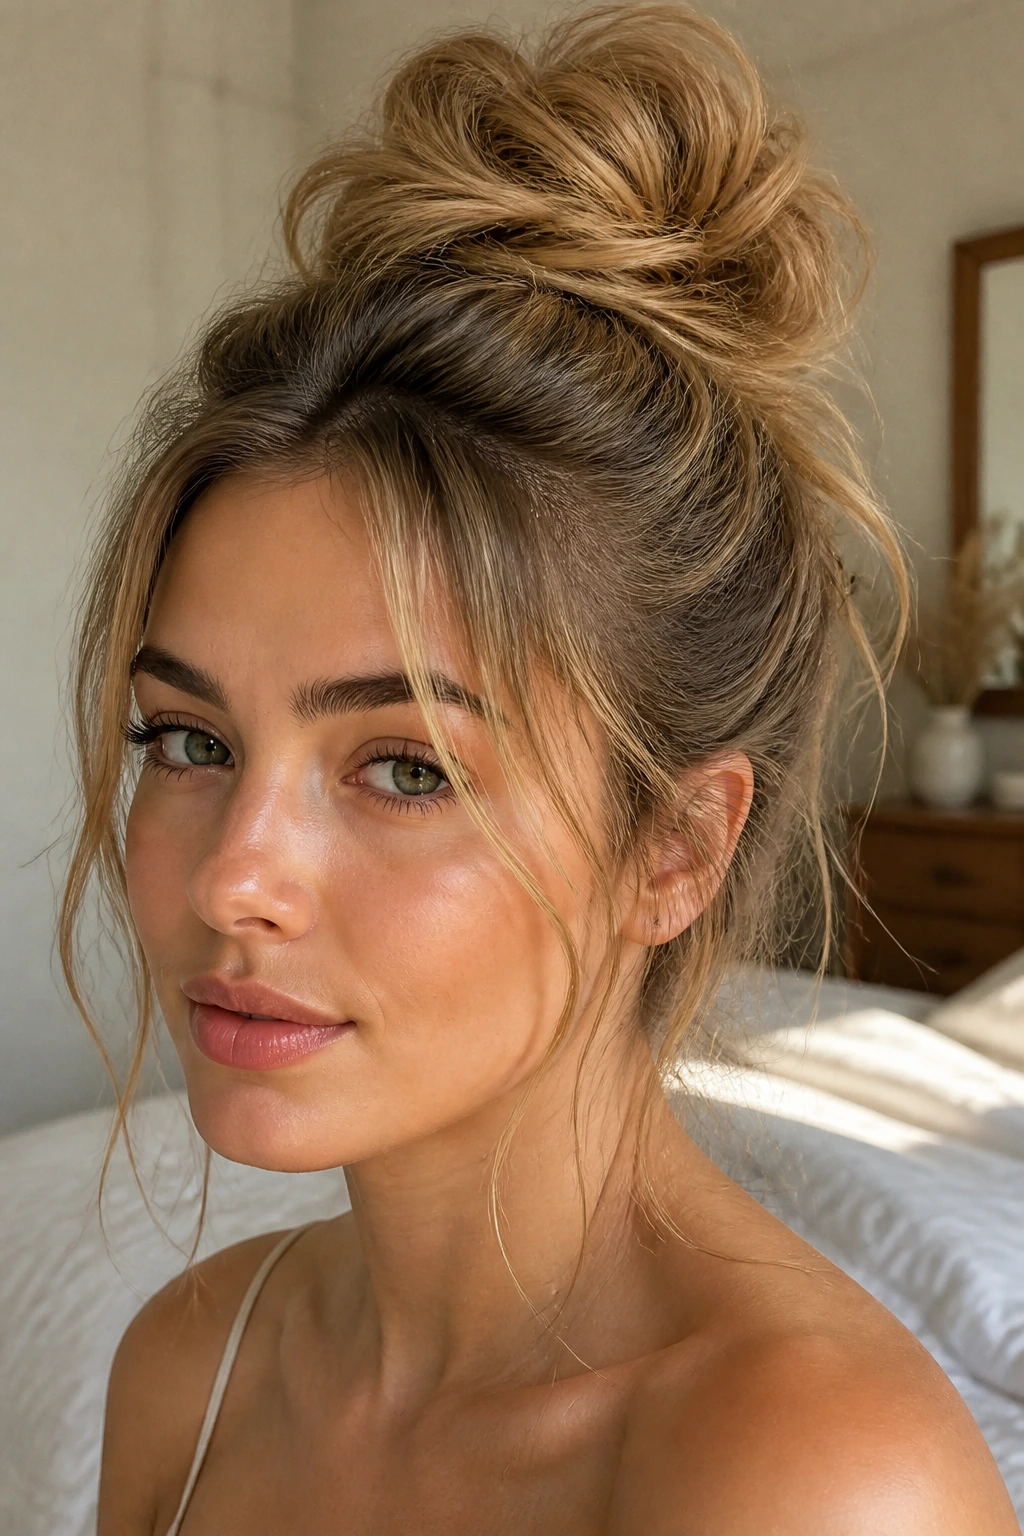
1. The Textured Messy Bun with Face-Framing Tendrils
The messy bun is a staple for a reason, but for those with thin hair, it needs a specific structure to look intentional rather than sparse. Start by gathering your hair into a high ponytail, but do not pull the last loop of the hair tie all the way through; this creates a small, anchored base. Use your fingers to gently pull at the loops of the bun to expand its volume.
Why This Works for Fine Strands
The key here is the “looseness.” When you pull sections of the bun outward, you create negative space that tricks the eye into seeing more hair density. Always leave two thin sections near your temples to frame your face. These soft, wispy pieces add a romantic, “lived-in” quality that makes the style feel purposeful.
How to Style It
- Apply a texturizing spray to damp hair before drying to create “grip.”
- Use a clear elastic band to secure the base so it blends with your natural hair color.
- Bobby pin the edges of the bun to the base rather than using more hair ties, which can cause the bun to droop.
- Pro tip: Use a tiny bit of dry shampoo on your roots even if your hair is clean; it provides the grit needed for the hair to hold its shape.
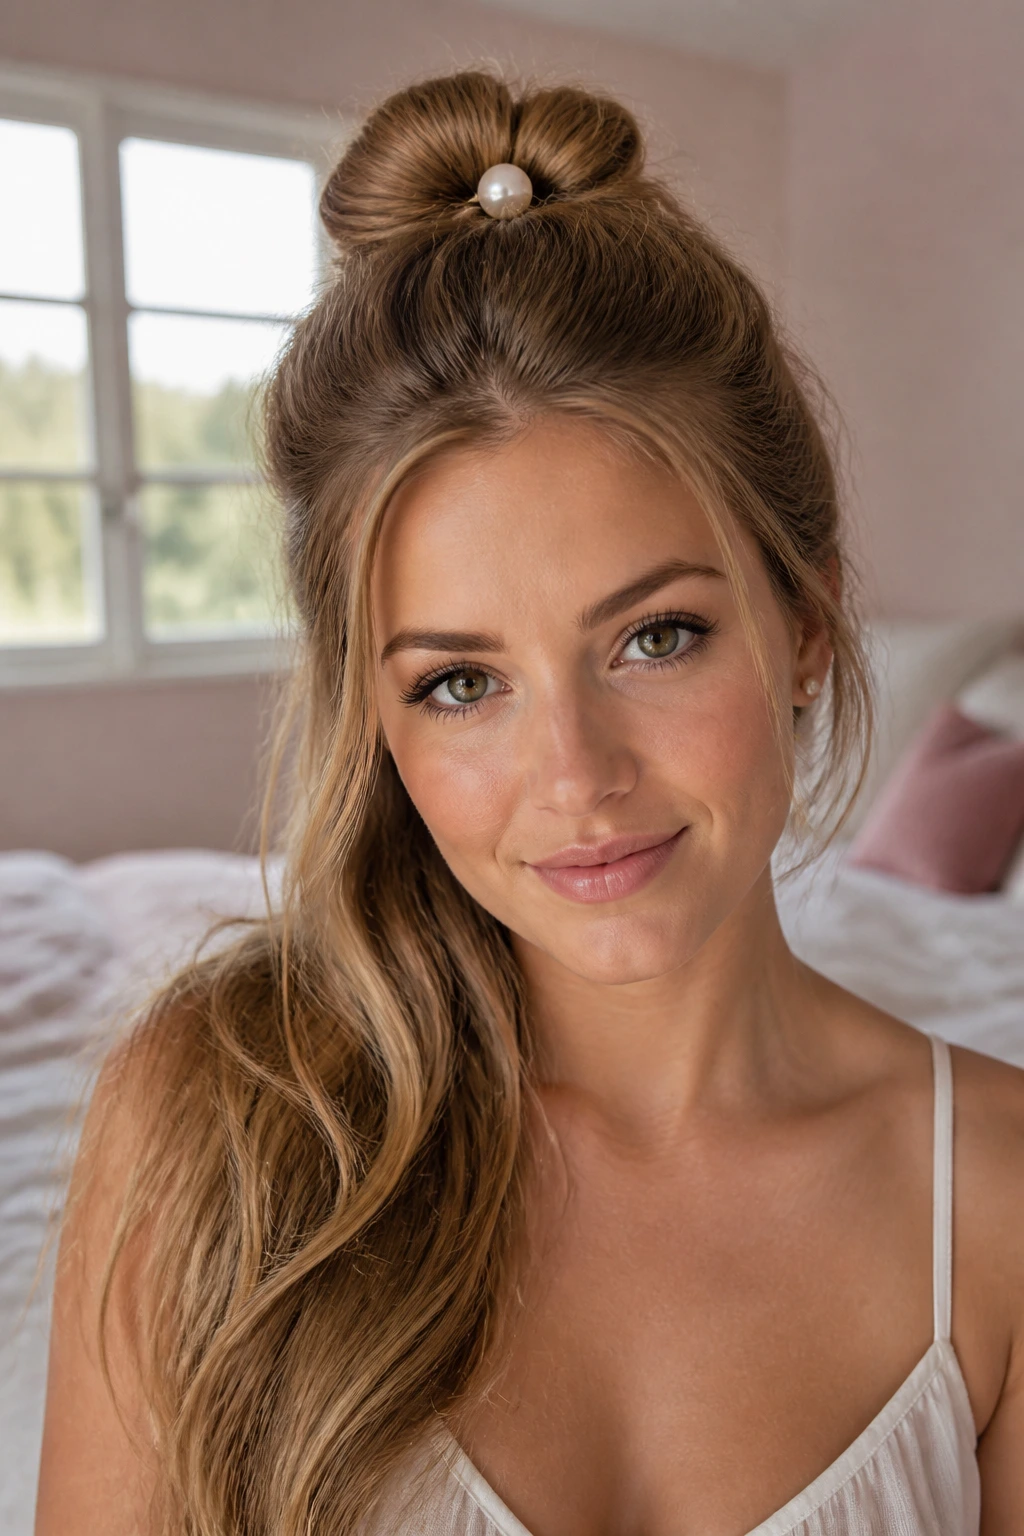
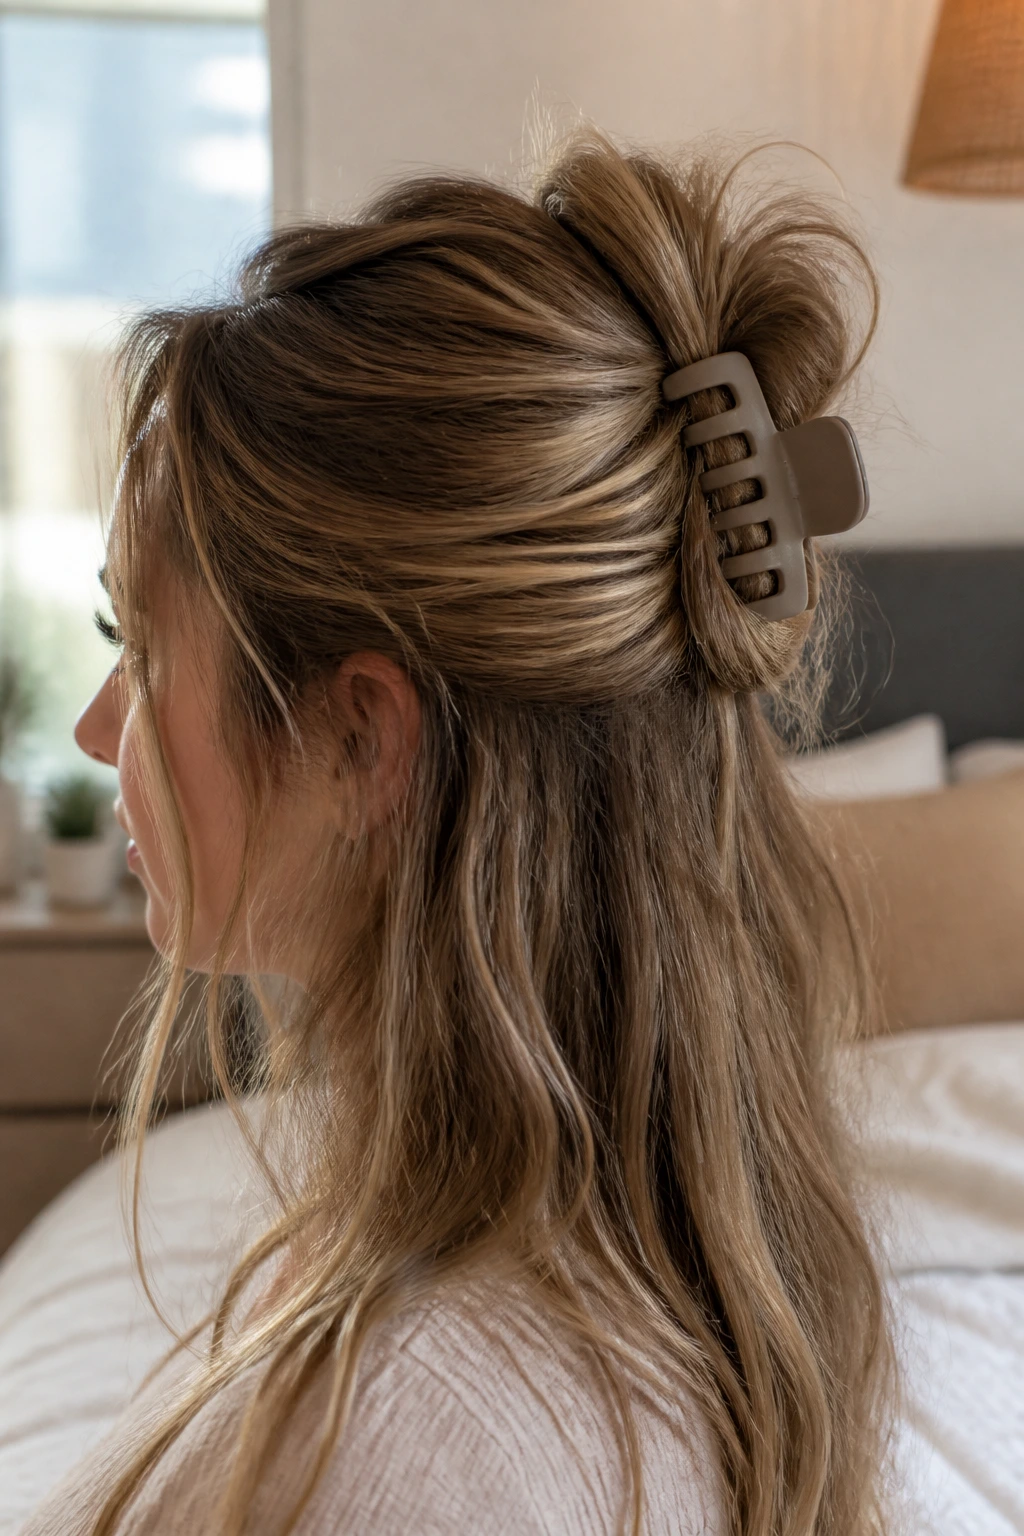
2. The Half-Up Mini Top Knot
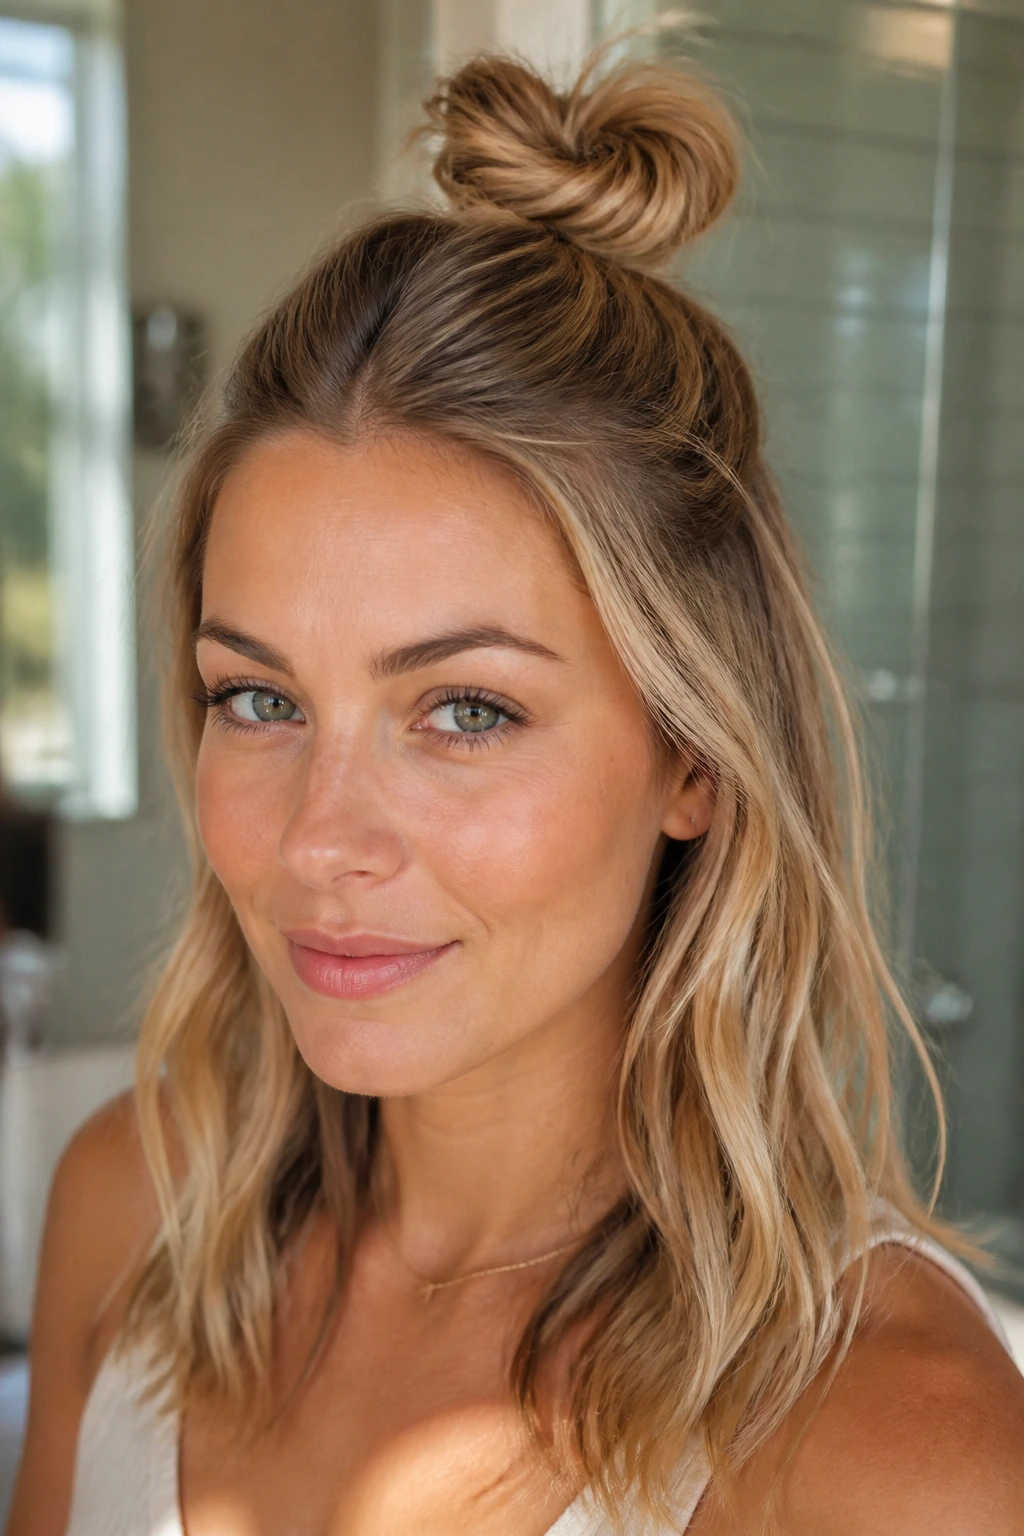
A top knot often swallows thin hair whole, leaving you with a tiny nub on top of your head. The solution? A half-up variation. By only taking the top section of your hair—from the temples back—you maintain the appearance of length and weight in the back while still getting the trendy height of a bun.
Achieving the Perfect Lift
Before you tie the bun, tease the crown section lightly with a fine-tooth comb. You only need two or three firm strokes at the roots. This creates a cushion for the bun to sit on, ensuring it doesn’t lay flat against your skull. The result is a feminine, playful look that feels much thicker than it is.
Elevate the Look with Accessories
- Swap the basic hair tie for a silk scrunchie to add a pop of color or texture.
- Place a small decorative hairpin at the base of the knot for a bit of extra personality.
- Let the rest of your hair fall in soft, natural waves to increase the illusion of volume.
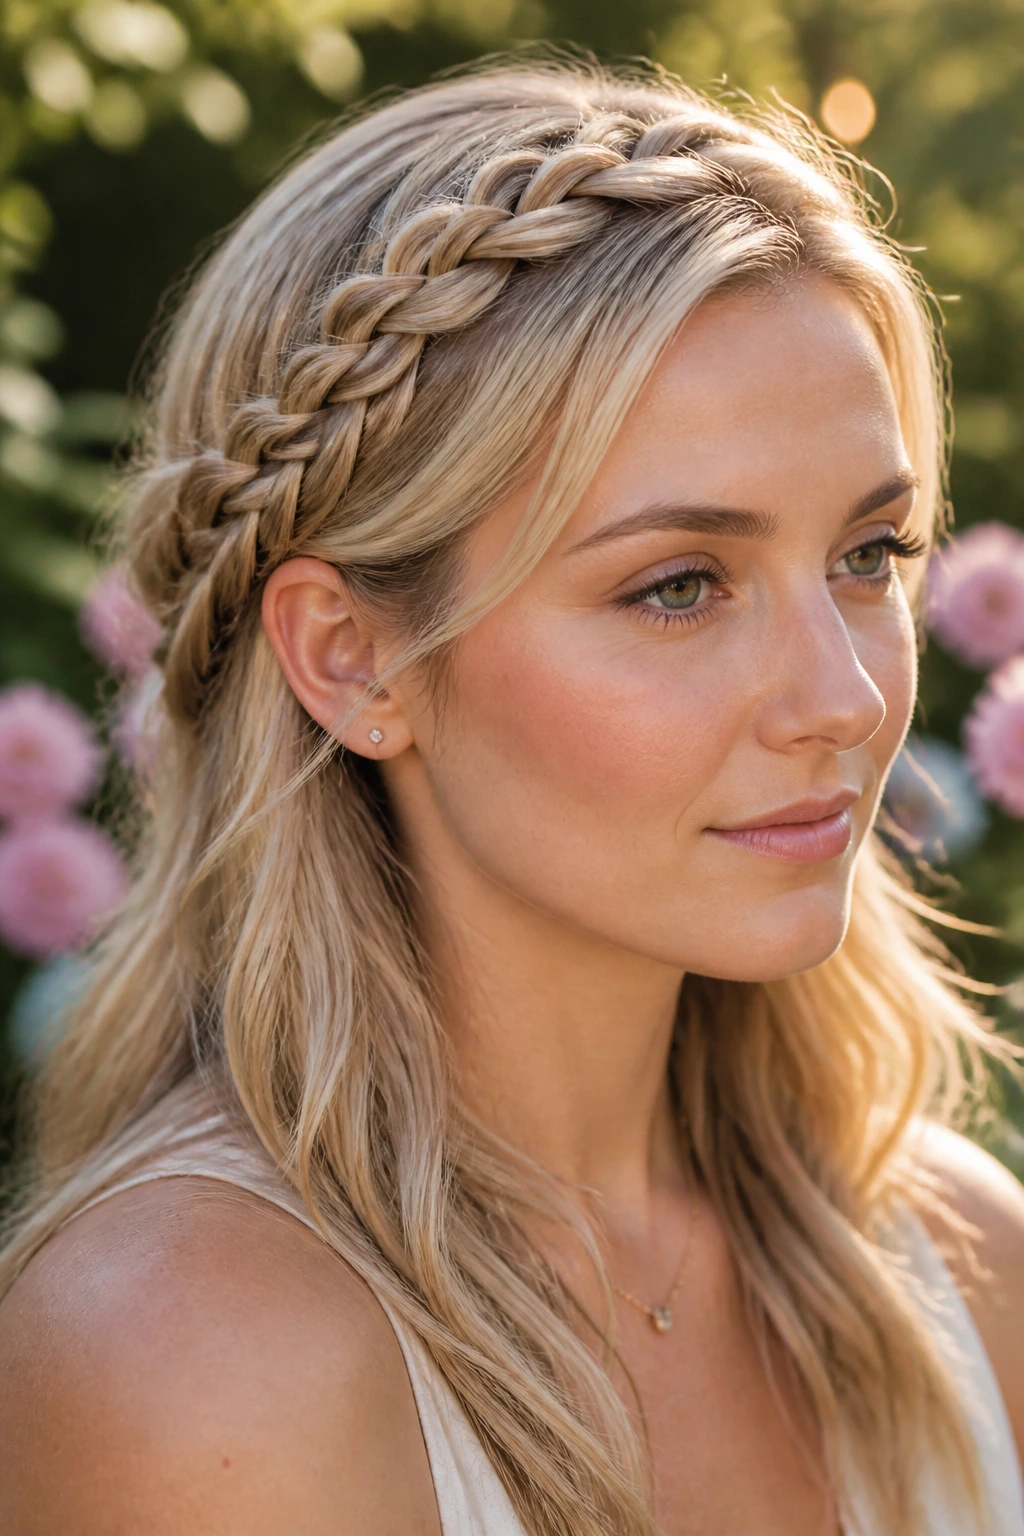
3. The Soft Dutch Braid Crown
Braids are the ultimate test for thin hair, as a standard tight braid often looks like a thin rope. The trick is to braid loosely and then “pancake” the braid. This means using your thumb and forefinger to gently pull the sides of each woven section outward once the braid is secured.
Transforming the Braid
A Dutch braid, where the strands are crossed under rather than over, pushes the braid to the surface of the hair. This makes it look naturally lifted. If you lack the thickness for a full crown, a single side-swept Dutch braid that transitions into a loose ponytail offers the same romantic aesthetic without needing massive volume.
Maintenance Tips
- Always mist your hair with a light-hold hairspray before you start braiding to keep flyaways at bay.
- Do not aim for perfection; slight imperfections in the braid actually make the hair appear thicker by creating more visual dimension.
4. The Deep Side Part with Soft Waves
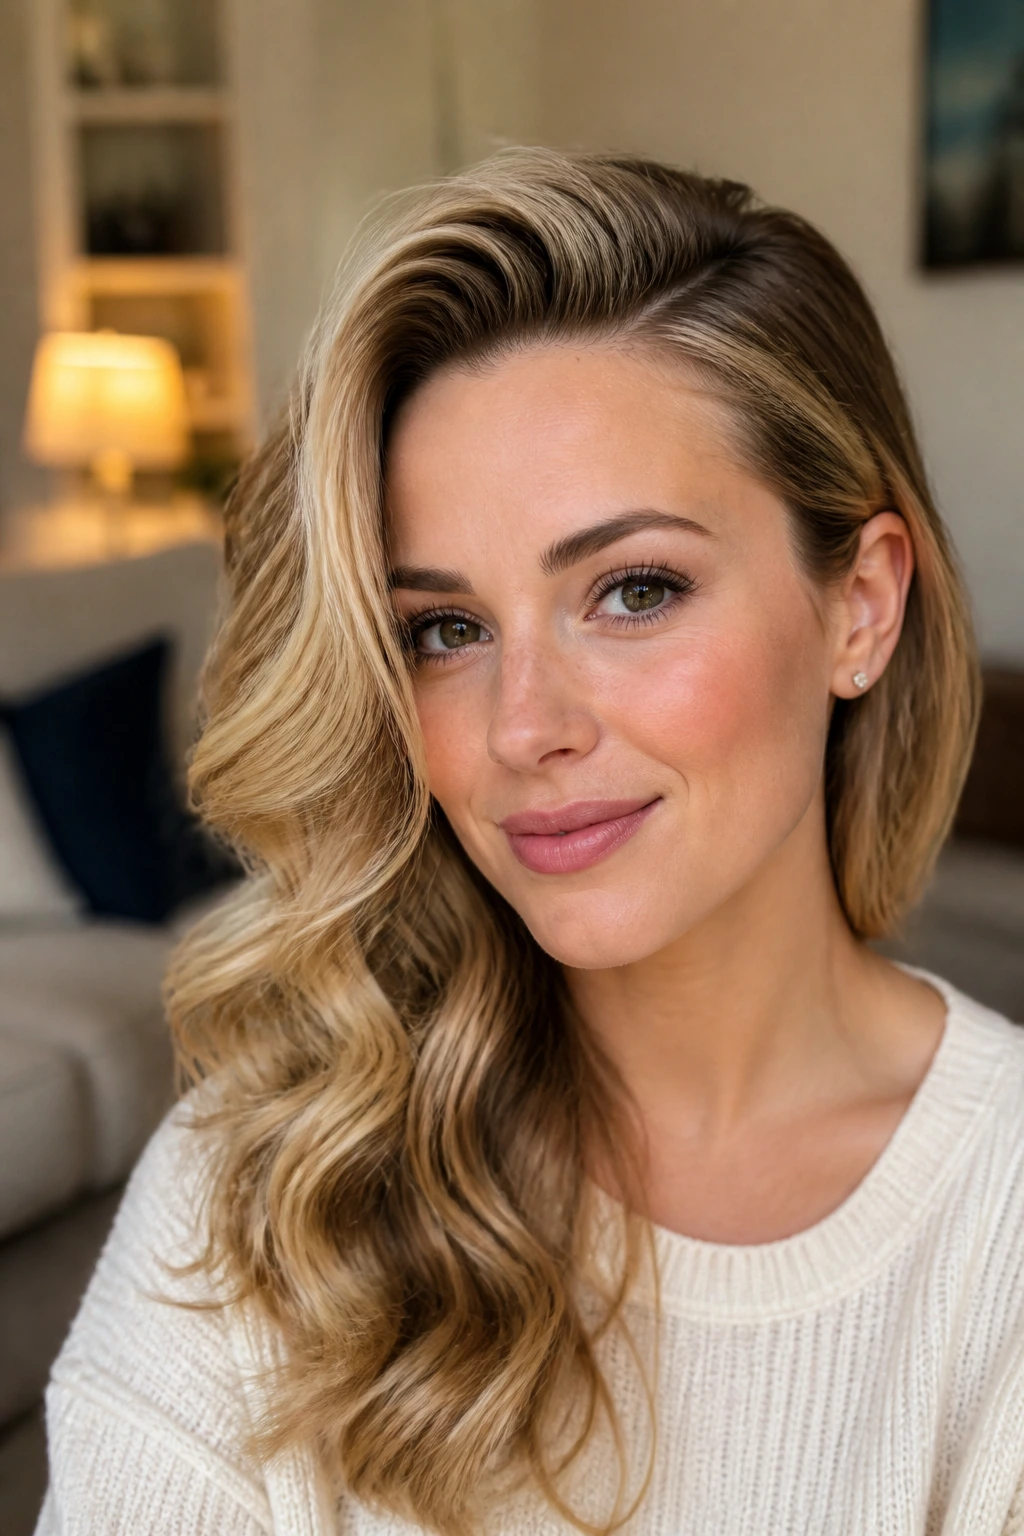
When you have thin hair, a middle part can act like a spotlight on your scalp. A deep side part, however, creates an immediate diagonal line of volume across your forehead. By sweeping more hair to one side, you instantly double the appearance of thickness on that side of your face.
The Role of Waves
Waves are essential for thin hair because straight hair naturally sits closer to the scalp. A curling wand with a one-inch barrel works best for this. Curl your hair in alternating directions—one piece toward the face, the next away—to create a chaotic, voluminous pattern that prevents the hair from clumped-together strands.
Daily Styling Routine
- Blow-dry your hair upside down until it is about eighty percent dry.
- Switch to a round brush only for the final shaping and to smooth the ends.
- Use a lightweight sea salt spray rather than heavy oils or creams, which will weigh your hair down and make it appear greasy.
5. The Elegant Velvet Headband Look
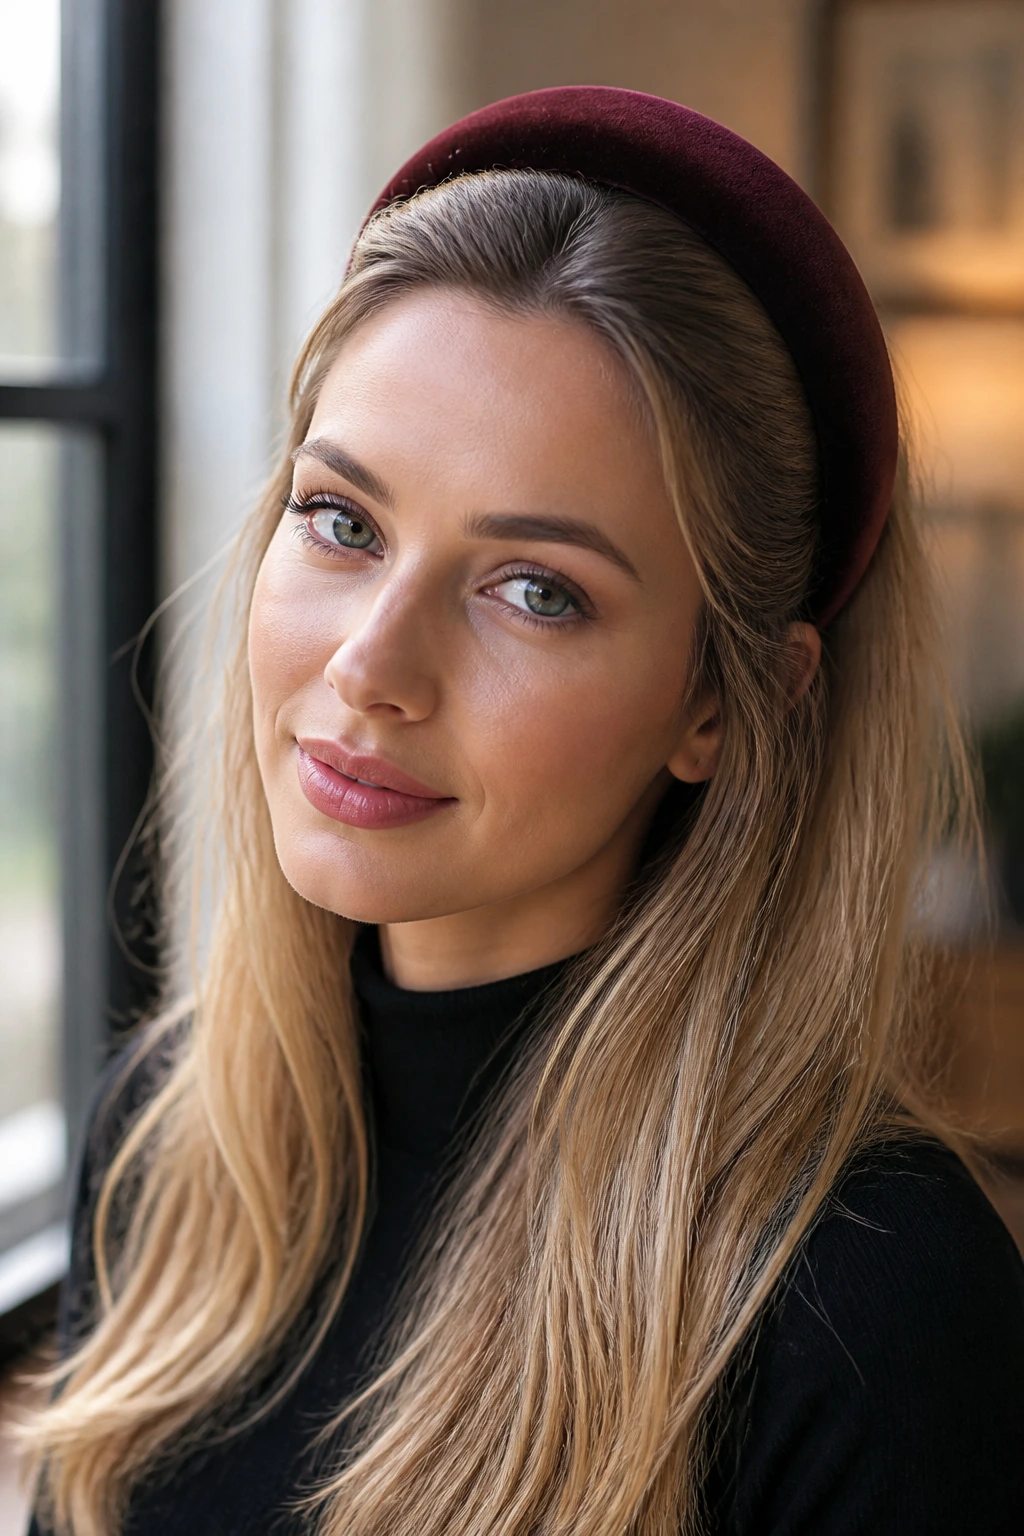
Accessories are the thin-haired person’s secret weapon. A thick, padded velvet headband acts as a frame, drawing the eye upward and adding an immediate sense of weight and luxury to your style. It hides the flat areas at the crown and allows you to wear your hair completely down without worrying about it looking limp.
Why This Style Succeeds
The headband provides a clean, polished line that contrasts with the softness of your hair. You can wear this with a straight style or loose curls. If your hair feels particularly flat, give the crown a quick blast of texturizing powder before sliding the headband on. This creates a tiny bit of lift that stays put all day.
Selecting the Right Headband
- Choose velvet or satin fabrics for a feminine touch that doesn’t snag or break delicate, fine strands.
- Look for headbands that are slightly wider; narrow headbands can sometimes make thin hair look even thinner by creating a sharp contrast.
6. The Low Chignon with a Ribbon Tie
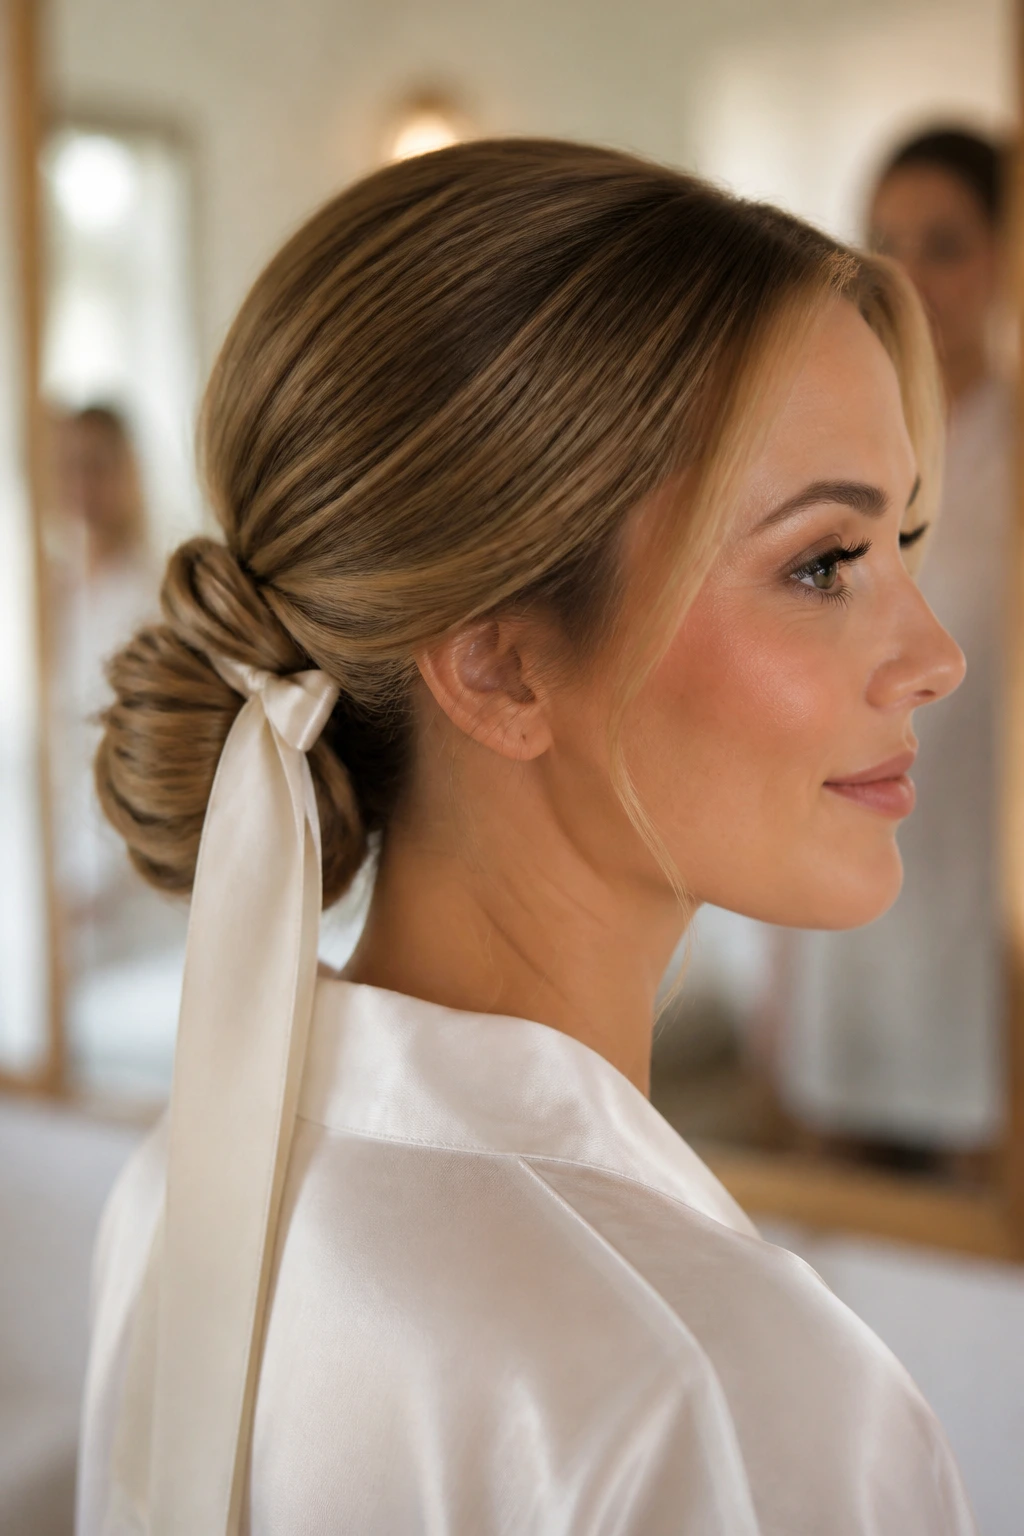
A low chignon is sophisticated, but when done on fine hair, it often lacks the necessary “heft.” Using a long silk or velvet ribbon is the fix. By incorporating the ribbon into your low ponytail and wrapping it around the chignon, you add volume and decorative flair that masks the actual amount of hair being used.
The Construction Process
- Gather your hair into a low, loose ponytail at the nape of the neck.
- Tie a long, thin ribbon around the base of the ponytail.
- Twist your hair into a loose bun and pin it in place.
- Wrap the ribbon around the bun in a crisscross pattern and tie it in a small bow at the bottom.
Why Ribbons Matter
The ribbon acts as a structural support system. Because it is a physical material, it occupies space, making the bun appear larger than your hair could achieve on its own. It is a classic, girly aesthetic that is perfect for weddings, brunches, or simply elevating a standard work day.
7. The Layered Shag Cut
Sometimes, the best “hairstyle” is the haircut itself. A modern shag with heavy layers removes weight from the ends of the hair, allowing the remaining strands to spring up and create natural volume. Thin hair that is cut to a single length tends to drag itself down, creating a “stringy” appearance at the ends.
Understanding the Layers
Ask your stylist for “invisible layers”—these are soft, internal layers that provide lift without thinning out the ends too much. This creates a “breathable” style where the hair has movement. A shag cut also pairs perfectly with curtain bangs, which add width around the eyes and forehead.
Maintenance Considerations
- This style requires regular trims to keep the layers bouncy.
- Use a lightweight volumizing mousse on damp hair before blow-drying to maximize the effect of the layers.
8. The Half-Up Waterfall Twist
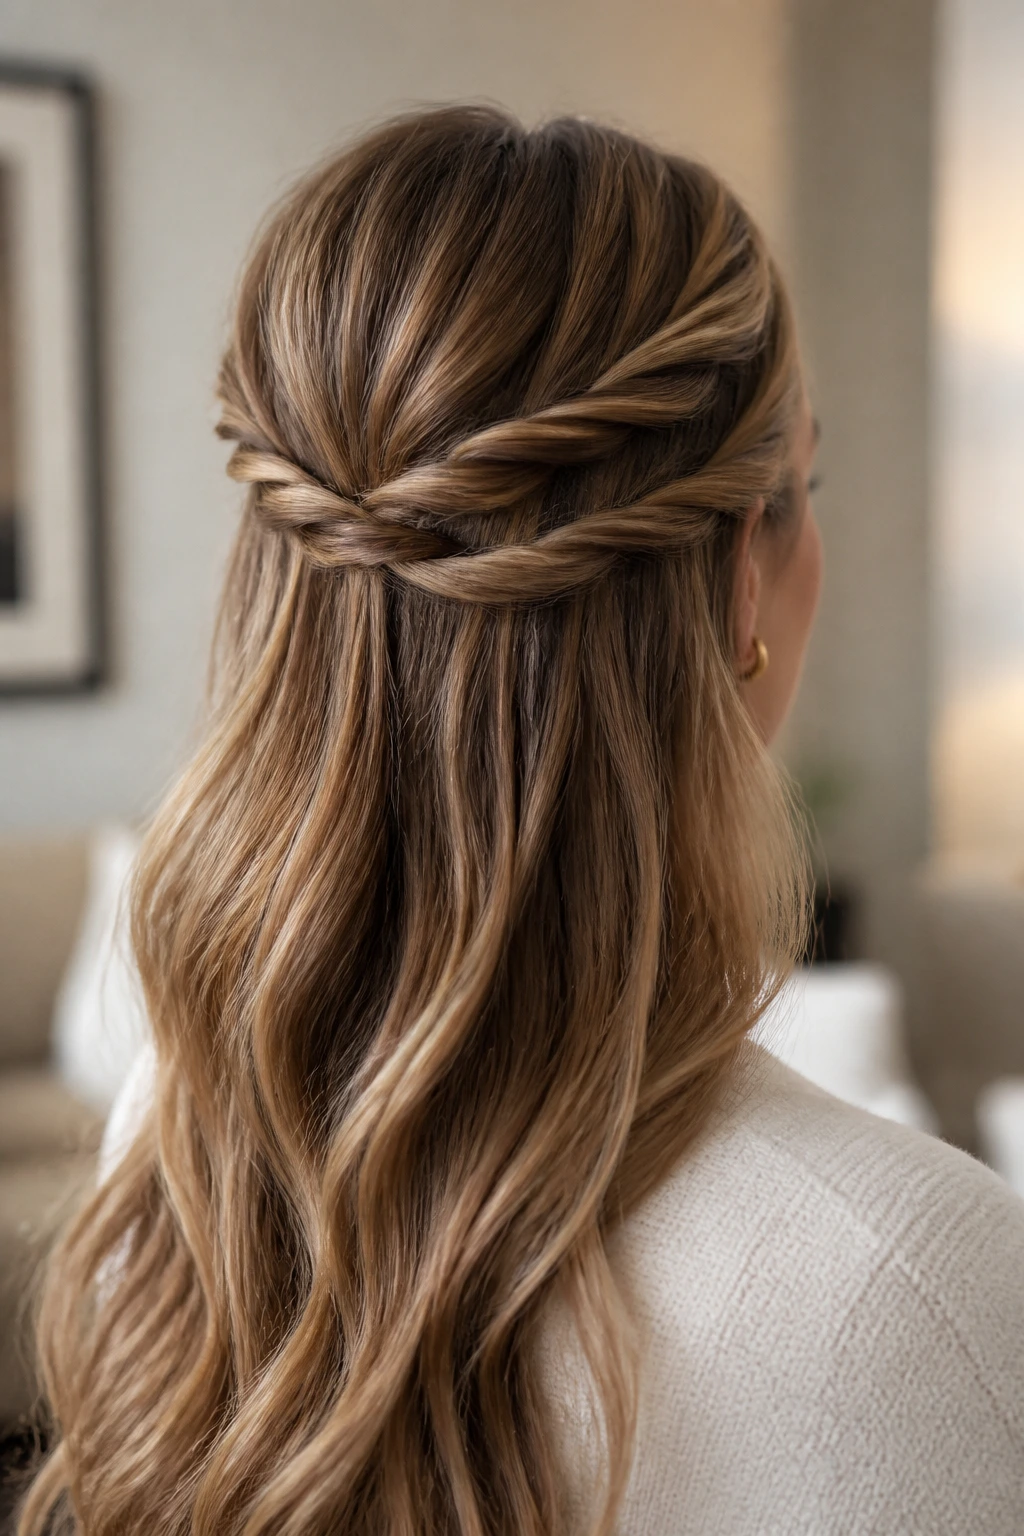
If you want something that looks intricate but requires minimal effort, the waterfall twist is the answer. It keeps the hair off your face while showcasing the length in the back. By twisting sections of hair from the temples toward the back, you create horizontal lines of hair that look surprisingly full.
How to Execute the Twist
- Take a small section of hair at the temple.
- Twist it toward the back of your head.
- Pin it in place with a decorative bobby pin.
- Repeat on the other side and secure both twists together with a small, discreet elastic.
- Gently pull the twists apart with your fingers to increase their width and texture.
Styling Tip
- This is one of the few styles that works better on “second-day” hair. The natural oils in your hair provide a bit more grip, making the twists hold their shape more securely than they would on freshly washed, slippery hair.
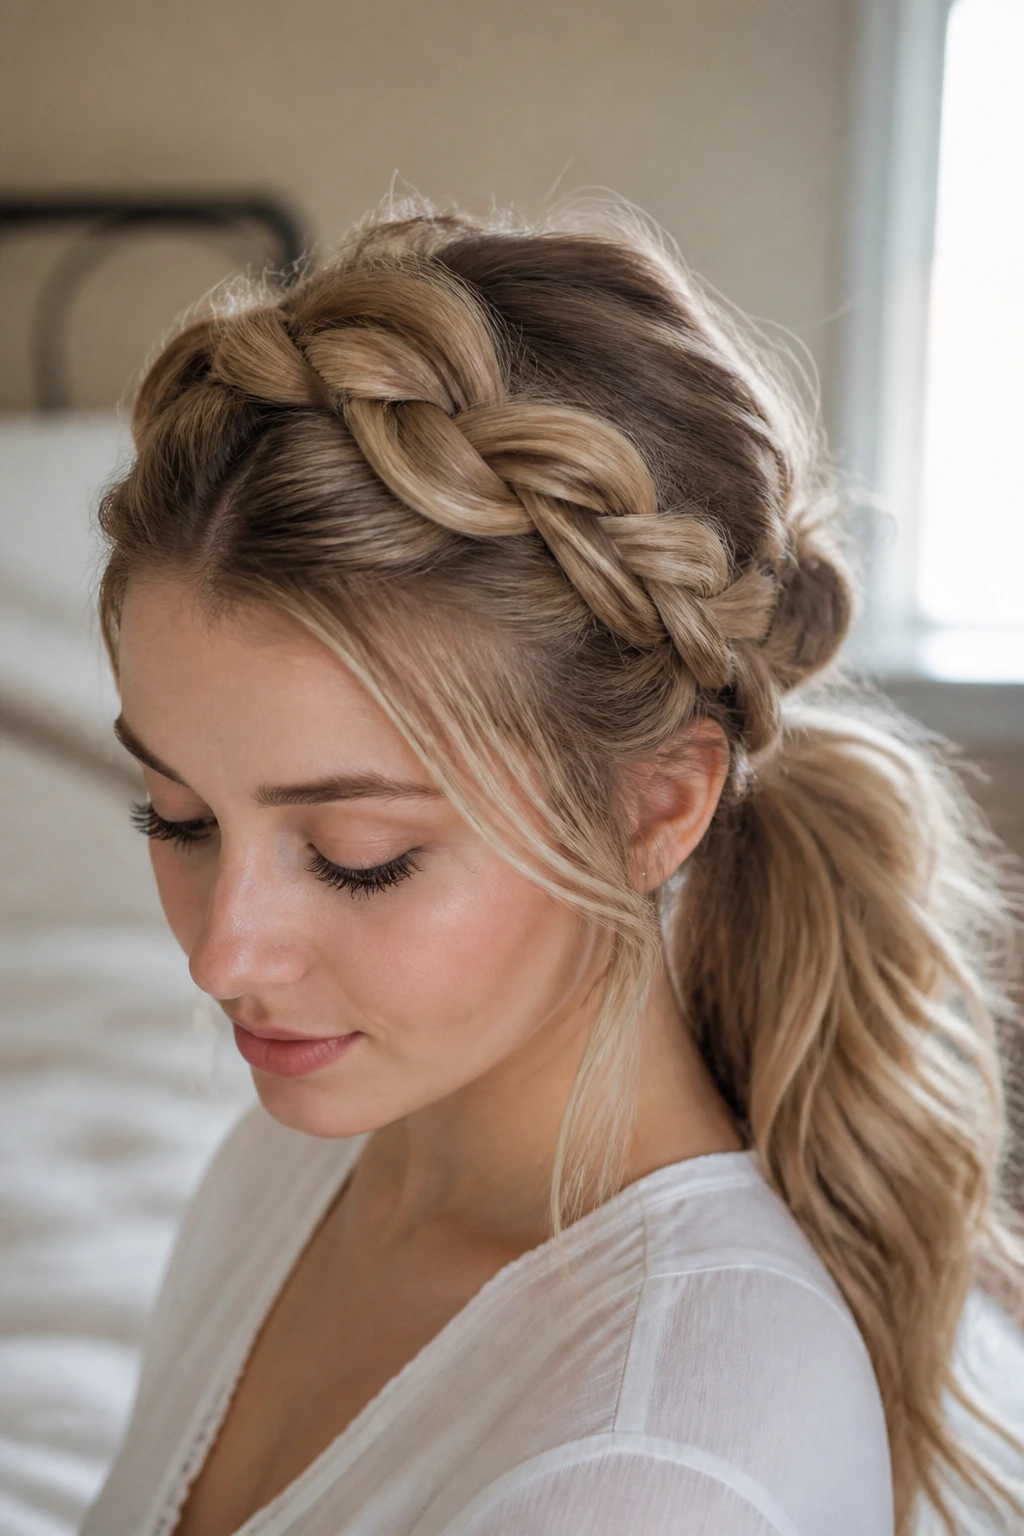
9. The Low Side-Swept Braided Ponytail
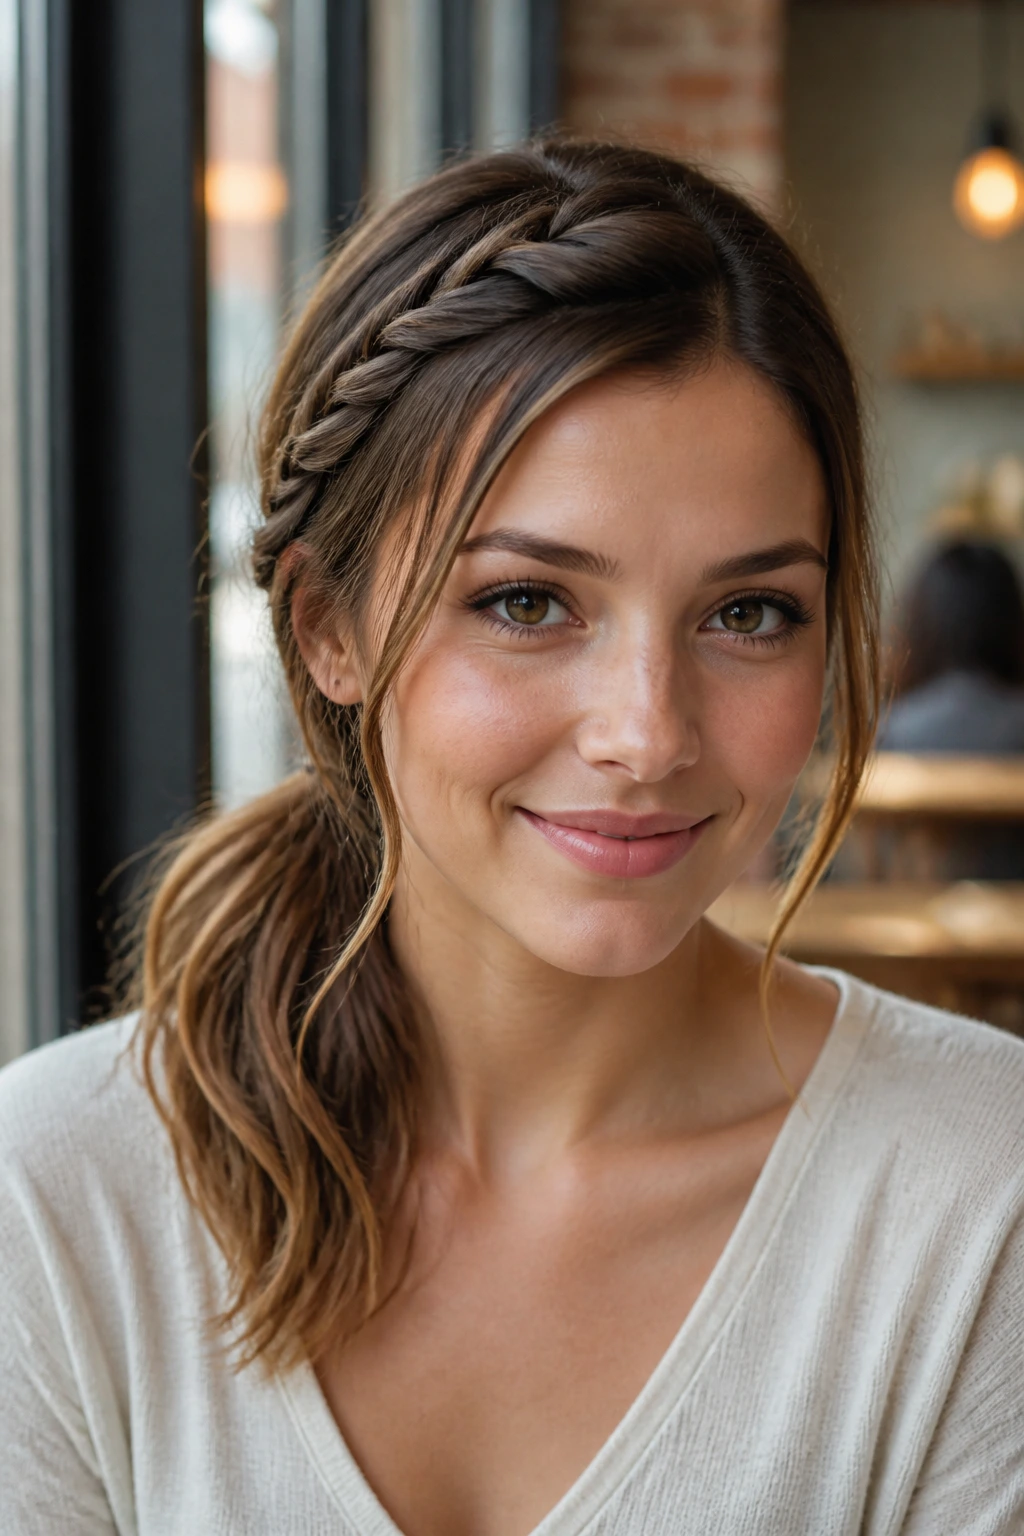
This is a “girly” style that feels very put-together. By combining a side braid with a low ponytail, you create a complex silhouette that distracts from the thinness of the individual strands. Start by braiding a small section of hair on one side of your head and pull it back to meet the rest of your hair in a low ponytail.
Building Visual Interest
The braid adds texture to the front of the style, while the ponytail adds length. If you pull the braid apart slightly, it looks wider and more substantial. For the ponytail itself, you can wrap a small piece of hair around the elastic to give it a polished, professional finish.
When to Use This Style
- This is an excellent option for days when your hair is not quite fresh but you need to look polished. The braiding provides enough structure to hide any oiliness at the roots.
10. The Space Buns with Loose Ends
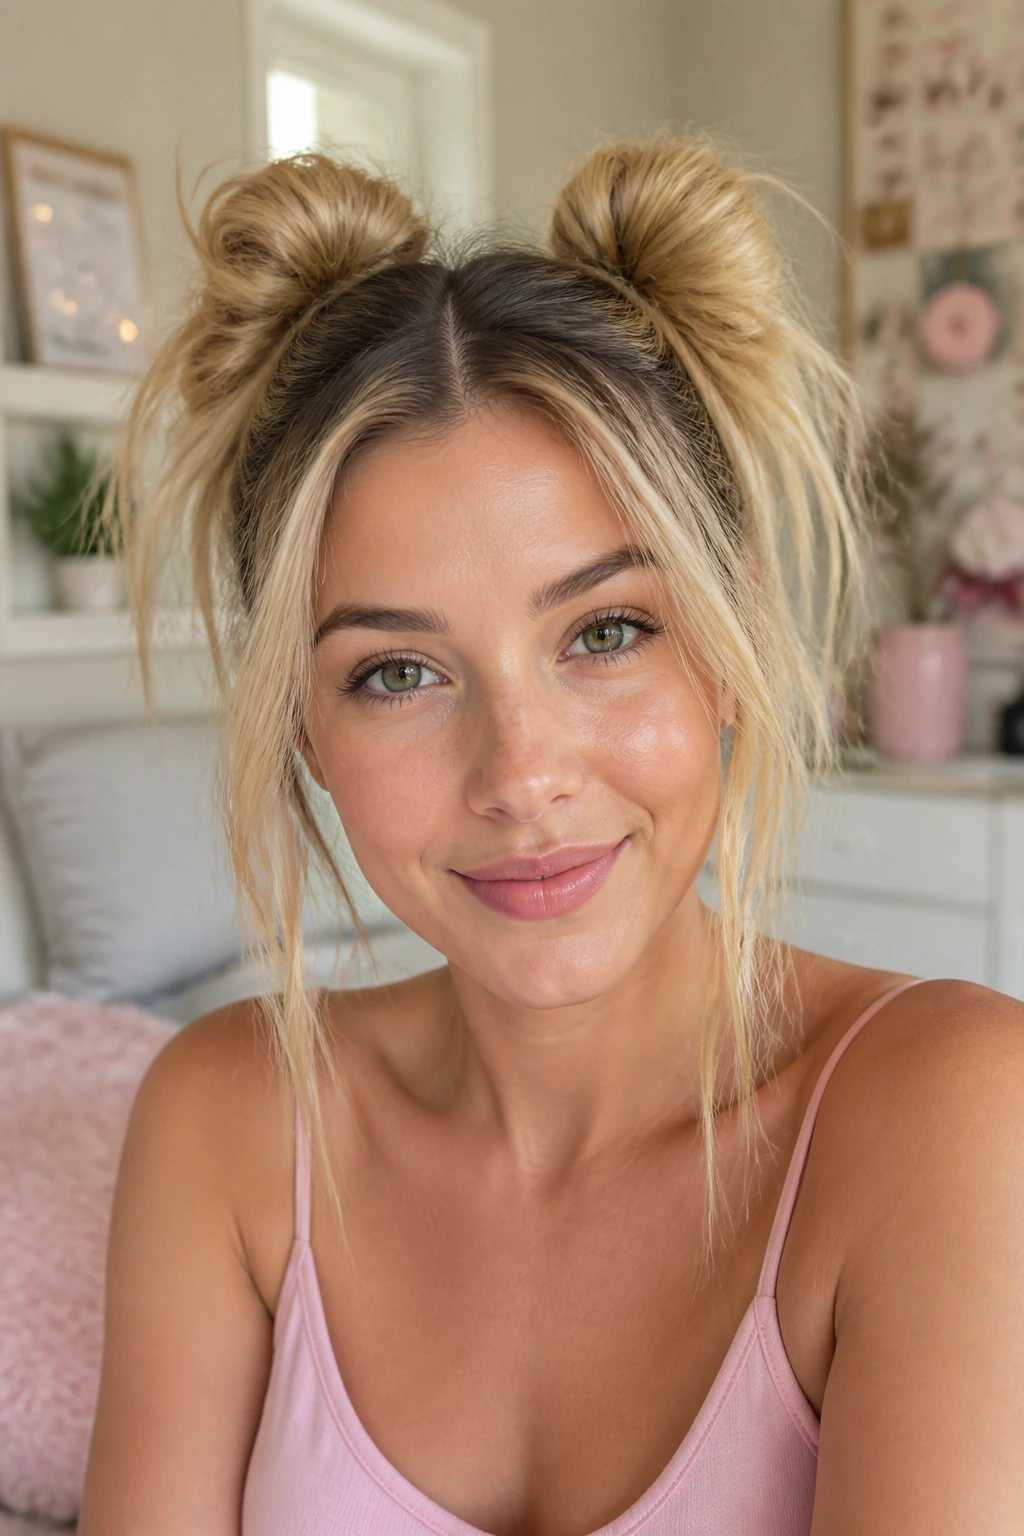
For a younger, more playful look, space buns are ideal for fine hair. Because they are smaller, they don’t look overwhelming. To keep them looking full, leave the ends of the buns sticking out rather than tucking them in completely.
Achieving the Volume
- Part your hair in the middle.
- Gather each side into a high ponytail.
- Twist the hair loosely and wrap it around the base.
- Secure with a clear band and fan out the loose ends to create a “spiky” but feminine look.
Why This Works
The two buns create symmetry, which naturally makes the hair look more balanced. By leaving the ends out, you add a bit of height and messiness, which creates a larger silhouette that belies the actual density of your hair.
11. The French Roll with a Decorative Clip
The French roll is a classic, but it is often seen as too formal or severe. To make it “girly” and suitable for everyday wear, opt for a loose, slightly undone version held together by a large, ornate hair claw or a set of decorative pearl pins.
Creating the Roll
- Tease the hair at the back of your head to create a base.
- Gather your hair as if you are making a low ponytail.
- Twist it upward and tuck the ends into the roll.
- Secure with pins and finish with a decorative clip at the side of the roll.
Why It’s Great for Thin Hair
The roll naturally hides the scalp, and the loose, undone nature of the twist adds an air of softness. The clip serves as both a functional tool and a focal point that draws attention away from the volume of the hair itself.
12. The Wispy Updo with a Floral Accessory

Sometimes, all you need to make thin hair look great is the right distraction. A wispy updo, where small sections are left out deliberately around the face and nape of the neck, provides a romantic, soft look. By adding a delicate floral accessory, you transform the style into a focal point.
The “Wispy” Technique
- Do not use a brush to pull your hair back. Use your fingers to create a soft, non-uniform gathering.
- Leave out plenty of small, thin pieces.
- Once the updo is secured, use a curling iron to add a slight bend to these wispy pieces.
Styling for Success
- Choose an accessory that isn’t too heavy. If the flower or clip is too large, it will pull the hair down and make your updo look flat and uninspired by the end of the day.
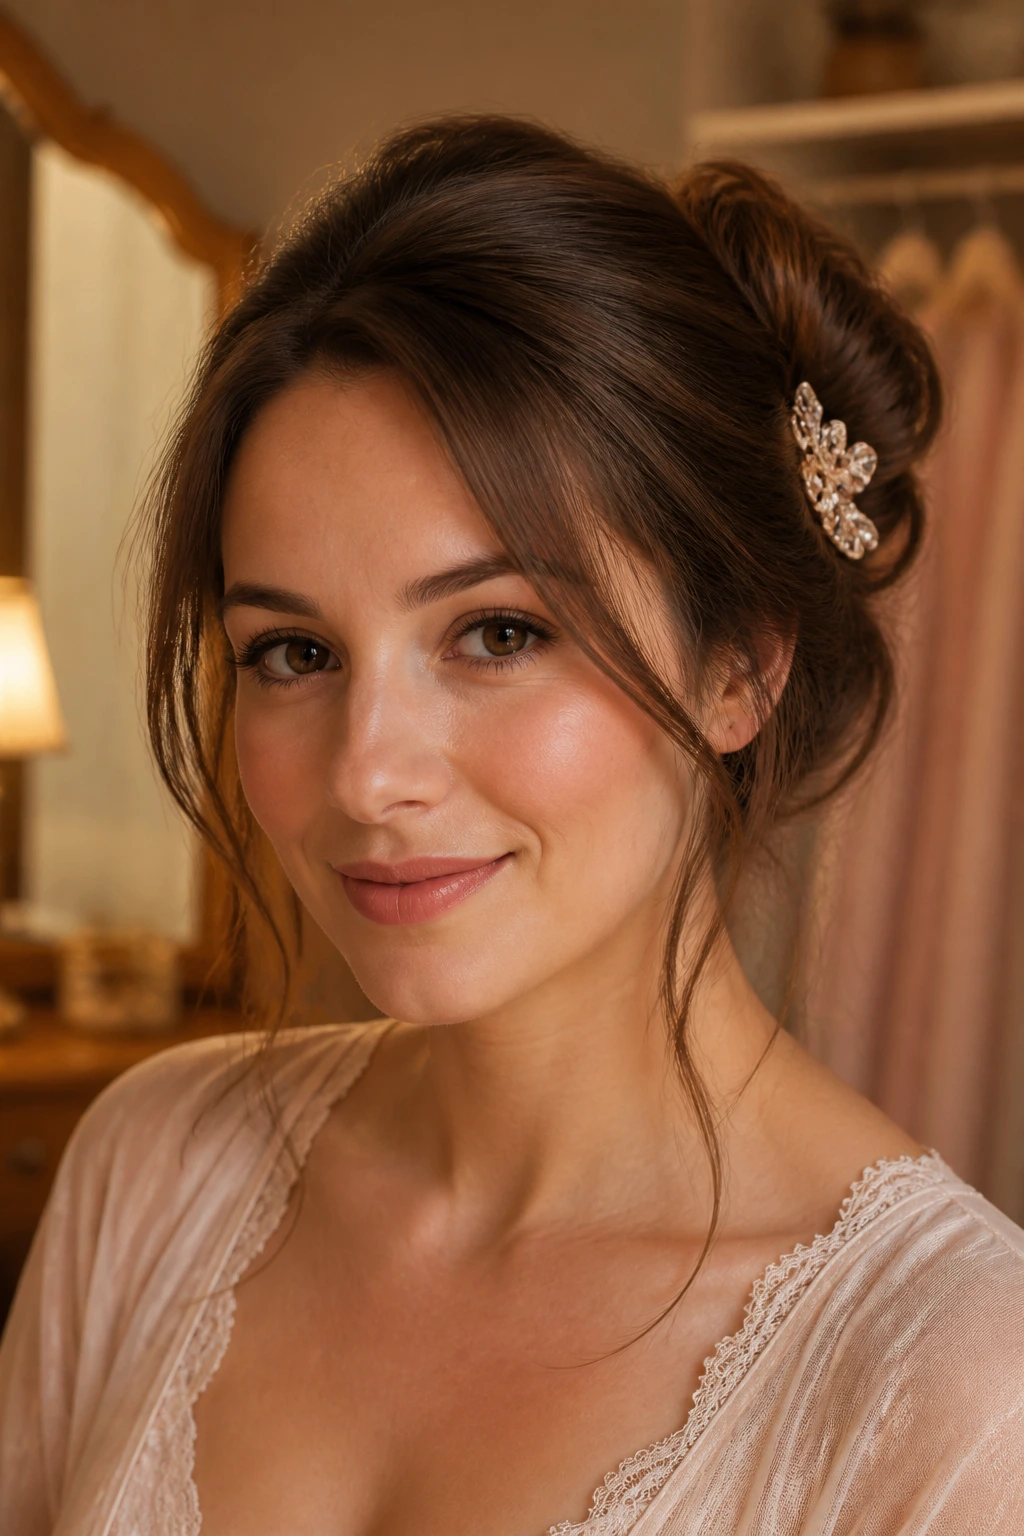
13. The Half-Up Chignon with a Pearl Pin
A half-up chignon is the perfect blend of casual and chic. By taking the top section and pinning it into a small, tight bun, you create a point of interest that lifts the rest of the hair. Adding a single, large pearl pin to the center of the chignon adds a classic, feminine finish.
Why It Works for Thinness
The chignon acts as a “mini-base” for the rest of your hair to hang from. It creates volume at the crown and prevents the hair from falling forward into your face. The pearl pin isn’t just decoration; it’s a subtle signal of intentional style that makes a simple hairdo look curated.
Placement Matters
- Try placing the chignon slightly higher than you think you should. This creates more lift at the crown, which is usually the area of concern for those with fine, thinning hair.
14. The Low Ponytail with a Knotted Scarf
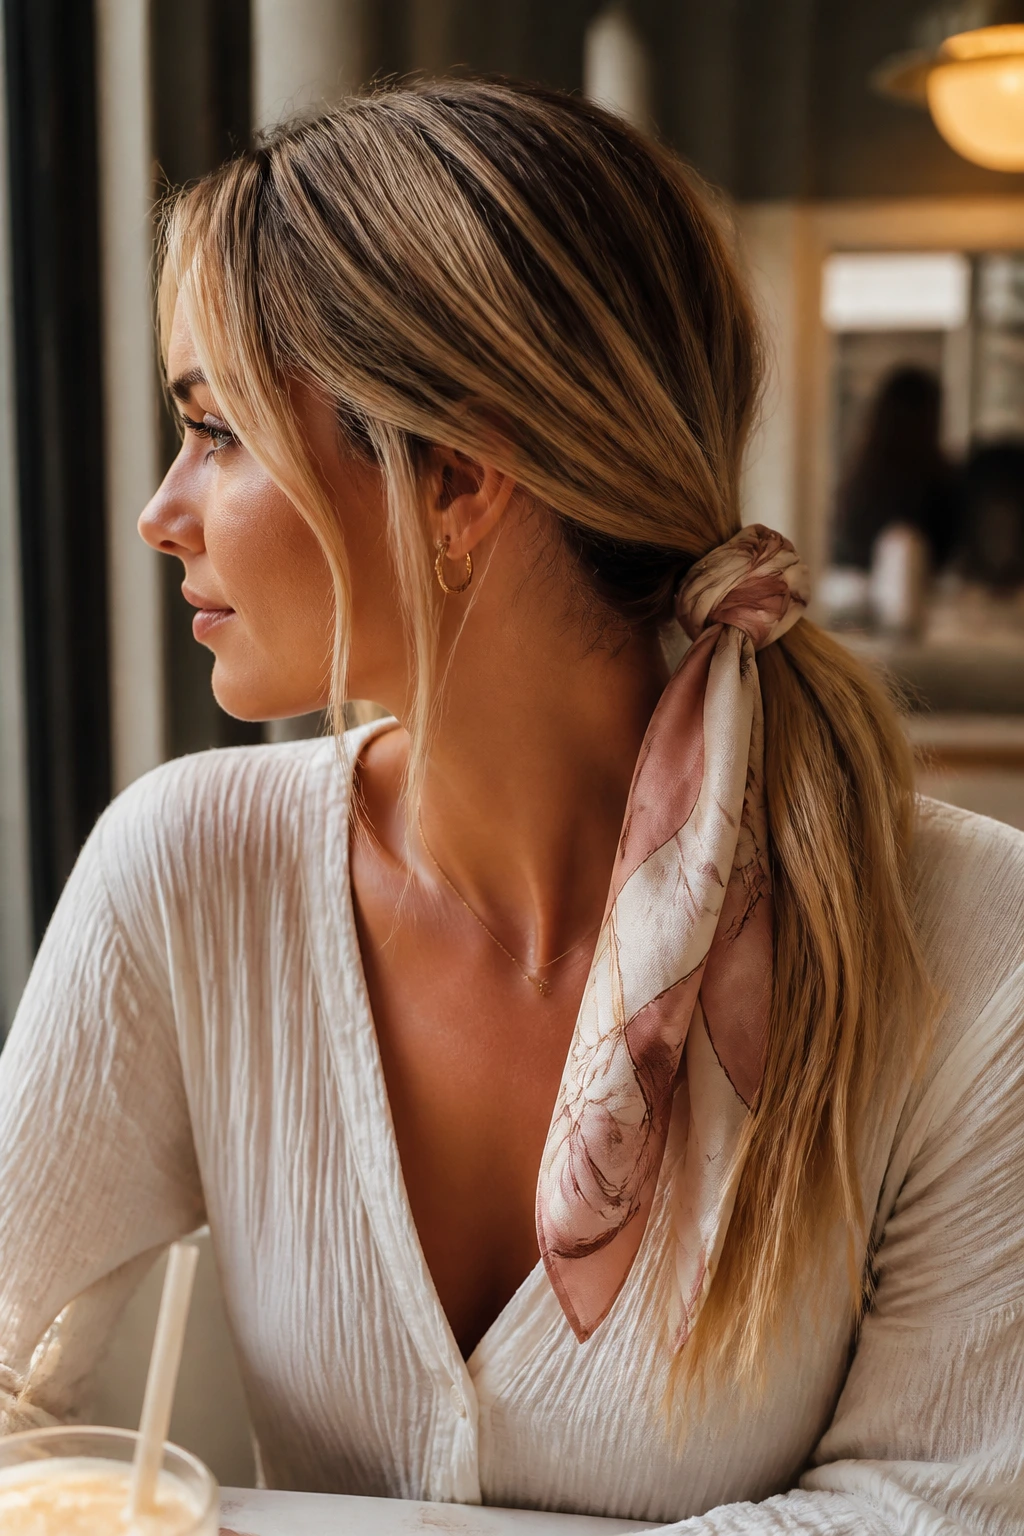
A low ponytail can look sad on thin hair, but adding a printed silk scarf changes the narrative entirely. The scarf adds color, texture, and volume. You can tie it in a knot around the elastic or weave it through the length of the ponytail for a Bohemian, feminine look.
How to Style the Scarf
- Use a lightweight silk or chiffon scarf; a heavy wool scarf will weigh the hair down.
- Leave the tails of the scarf long so they fall alongside your hair, creating the illusion of extra thickness.
Why This Style Succeeds
The scarf provides a structural element that isn’t dependent on your hair’s density. It’s a great way to mask the fact that your ponytail might be thin, turning the focus to the accessory rather than the hair volume.
15. The Braided Headband
If you want to keep your hair down but feel like it lacks shape, a braided headband is a brilliant trick. You take a section of hair from behind one ear, braid it, and bring it across the top of your head, pinning it behind the other ear. It mimics the look of a headband but uses your own hair.
The Illusion of Width
The braid adds a physical ridge of hair that breaks up the flatness of the crown. It creates a “frame” that makes your hair look like it has more depth. For thin hair, do not braid too tightly. Loosen the braid once it’s pinned to make it look as thick as possible.
Expert Advice
- Use clear elastic to secure the end of the braid. If you have any baby hairs, use a tiny amount of pomade to smooth them down so the braid looks seamless.
16. The Side-Pinned Curls
For a very “girly” and vintage-inspired look, curl your hair in tight, structured ringlets and pin one side back behind your ear with a sparkling barrette. This style relies on the contrast between the tight curls and the sleek side.
Why It Works
By pinning one side back, you bring more hair to the other side, effectively doubling the density on the visible portion of your head. The sparkle of the barrette draws the eye, making the style feel like a deliberate, sophisticated choice rather than a necessity.
Essential Tools
- Use a smaller barrel iron (half-inch or three-quarter-inch) to create the curls. Smaller curls last longer and hold more bounce than large, loose waves, which often fall flat on fine hair.
17. The High Ponytail with a Volume-Boosting Tease
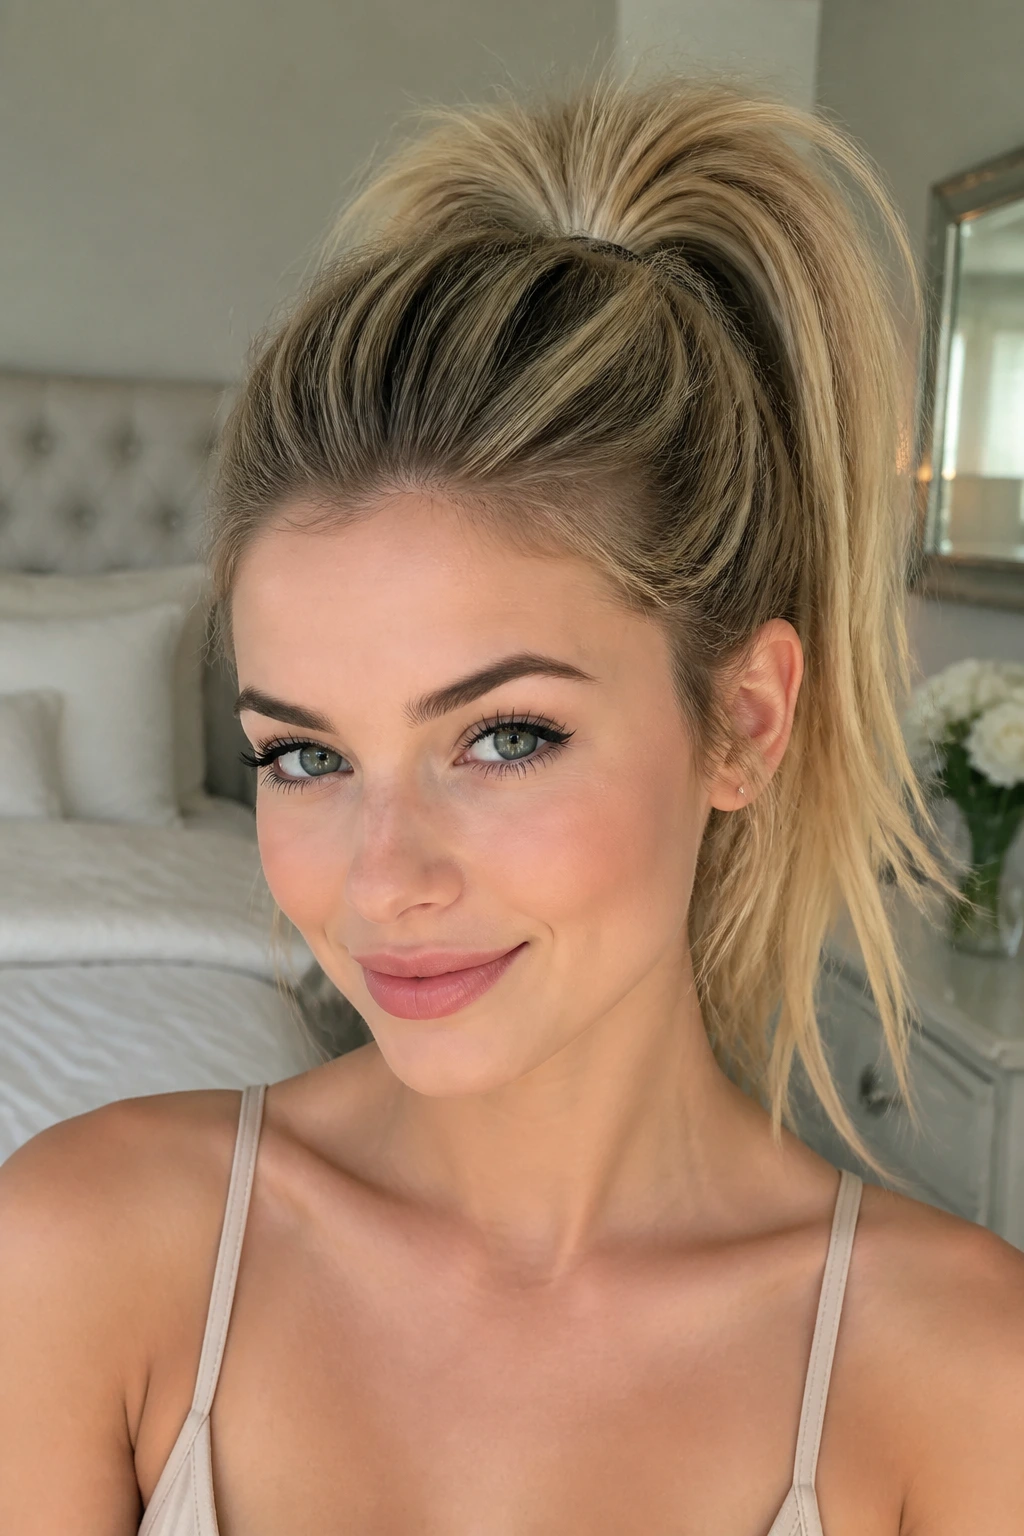
A high ponytail is a classic, but for fine hair, it needs a “boost.” Before you tie your hair up, tease the section directly behind your forehead. This creates a “bump” of volume that prevents the ponytail from lying flat against the back of your head.
The Mechanics of the Lift
- Use a teasing brush to backcomb the roots.
- Spray with a light-hold hairspray.
- Gently smooth the top layer over the teased section before securing the ponytail.
- Pull the ponytail tight to create a sleek, elevated look.
Why This Works
The lift at the roots creates an angled profile, making your head look fuller and your features more defined. It’s a sporty yet feminine look that works for almost any occasion.
18. The Low Side Bun with Tendrils
A low side bun is softer than a standard ballerina bun. Because it sits at the side, it naturally creates a sense of asymmetry that distracts from thinning areas. Leave out long, face-framing pieces to give it that “girly,” romantic feel.
Why It’s Perfect for Thin Hair
Asymmetry is a powerful tool in styling. When the eye has to travel across the head to see the bun, it pays less attention to the volume of the hair itself. This style is perfect for those who want a formal look that doesn’t feel forced.
Pro-Tip for Texture
- Curl the tendrils before you start the bun. Having wavy tendrils makes the entire look appear more lush and finished.
19. The “Half-Up” Messy Twist
Instead of a bun or a braid, use a large, high-quality hair clip to twist the top half of your hair into place. This is faster than any other style on the list and creates a great amount of volume at the crown.
Why It’s a Go-To
The clip holds the hair away from the scalp, allowing the air to circulate and the hair to maintain its lift. It’s a simple, everyday look that feels intentional. Choose a clip in a matte finish or a tortoiseshell pattern to add a touch of style.
Improving the Grip
- If your hair is too thin and the clip keeps sliding out, give your roots a quick spritz of dry shampoo or texturizing spray before you twist. That extra grip is all you need to keep the style secure.
20. The Bohemian Twisted Crown

This is similar to the braided headband, but instead of braiding, you twist two sections of hair away from your face and pin them at the back of your head. The twists create a soft, rounded shape that adds height and dimension.
Why This Style Rocks
The twist technique is much easier for those who aren’t experts at braiding. It creates a soft, ethereal look that is very popular for summer events. By pinning the twists together, you create a focal point at the back of your head, which makes the hair look gathered and substantial.
Finishing Touches
- Tuck the ends of the twists under the loose hair to hide the pins and elastics. This creates a clean look that looks like it took hours, even if it took you less than five minutes.
The Bottom Line
Thin hair does not have to be a styling limitation. By embracing soft textures, utilizing the right accessories, and focusing on techniques that build internal lift, you can transform your hair’s presence. Whether you are using a silk scarf to add width or a simple teaser comb to build a base, the goal is always to create visual interest. Once you stop trying to force your hair to be something it isn’t and start working with its natural, lightweight properties, you will find that a world of “girly” and elegant styles is suddenly within reach. Remember that the best style is the one that makes you feel confident and comfortable, regardless of your hair’s density.