Getting out the door on a Monday morning usually feels like a race against the clock. By the time you’ve dealt with email alerts, coffee, and finding matching shoes, styling your hair often gets relegated to a messy bun or a quick ponytail. But your hair doesn’t have to be the casualty of a packed schedule. With a few refined techniques, you can achieve a polished, professional braided style that stays secure from the first meeting until you finally clock out for the evening.
Braids are the ultimate office hack because they thrive on texture. Second-day hair—or even hair that has been treated with a bit of dry shampoo or texturizing spray—has exactly the kind of grip needed to keep your strands in place. You don’t need a degree in cosmetology to master these looks; you just need to understand how to manipulate tension and secure your ends so they look like you spent twenty minutes in front of the mirror, rather than five.
1. The Professional Three-Strand Side Braid

A standard three-strand braid might feel a little schoolgirl, but when you shift it to the side and loosen the loops, it transforms into an elegant, office-appropriate style. Start by gathering all your hair to one side—whichever side feels most natural to you—and securing it with a small, clear elastic at the nape of your neck to create a side ponytail. This base ensures the braid doesn’t slip throughout the day.
How to Refine the Look
Once you’ve braided down to the ends and secured them with another elastic, go back and “pancake” the braid. This means gently pulling on the outer edges of each loop to make the braid look wider and more effortless. For a professional finish, take a tiny piece of hair from the tail of your braid, wrap it around the elastic, and pin it underneath with a bobby pin to hide the plastic band.
Why It Works for the Office
This style keeps hair off your face, which is essential if you find yourself leaning over documents or typing at your desk for long hours. It is polished enough for a formal boardroom presentation yet relaxed enough for a casual Friday. If you have layers, you might find a few wisps falling out; don’t fight them. Use a light-hold pomade to smooth them down, or let them frame your face for a softer appearance.
2. The Sleek Low Rope Twist
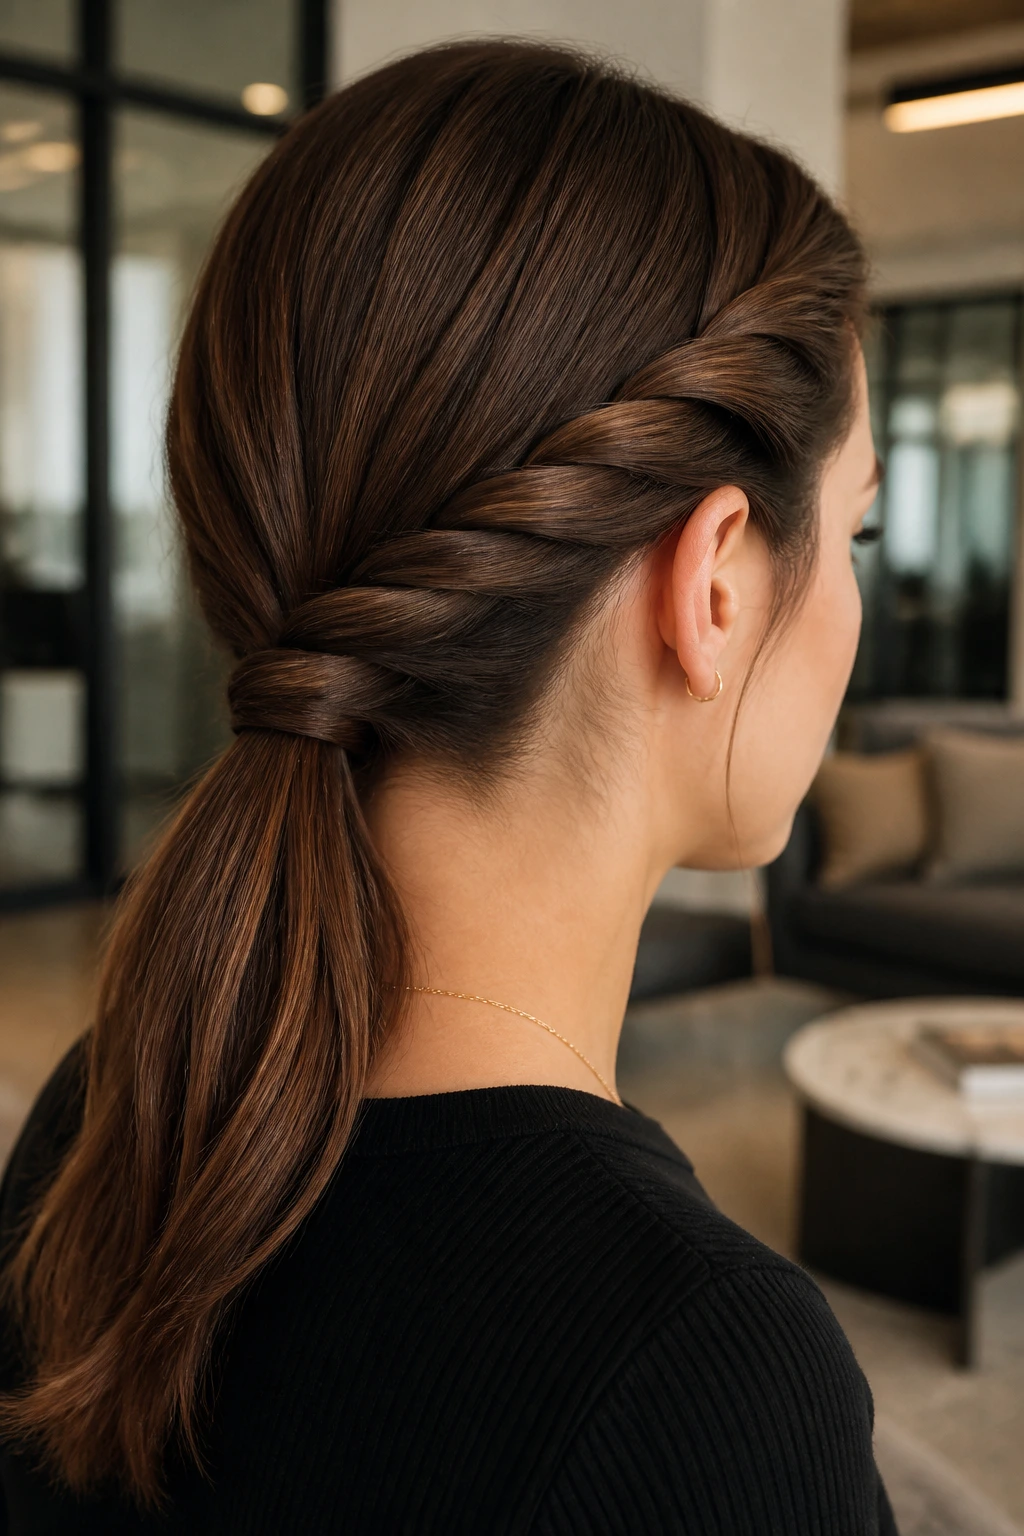
If you want something that looks complex but takes less than two minutes, the rope twist is your best friend. A rope twist only uses two strands of hair, which makes it faster to execute than a traditional braid. Start by pulling your hair into a low ponytail. Split the ponytail into two equal sections.
Mastering the Twist
To create the rope effect, twist each individual section toward the right, and then cross those two sections over each other toward the left. This counter-twisting technique is what keeps the rope from unraveling. If you twist everything in the same direction, the braid will immediately uncoil the moment you let go. Once you reach the bottom, secure it firmly with a snag-free elastic.
Pro Maintenance Tip
To keep this look pristine during long commutes, finish with a light mist of flexible-hold hairspray. Avoid high-hold sprays that make the hair crunchy; you want the twist to look soft and touchable. If you find the ends look a bit thin, use a small dab of styling cream on the tips to give them weight and prevent fraying as the day progresses.
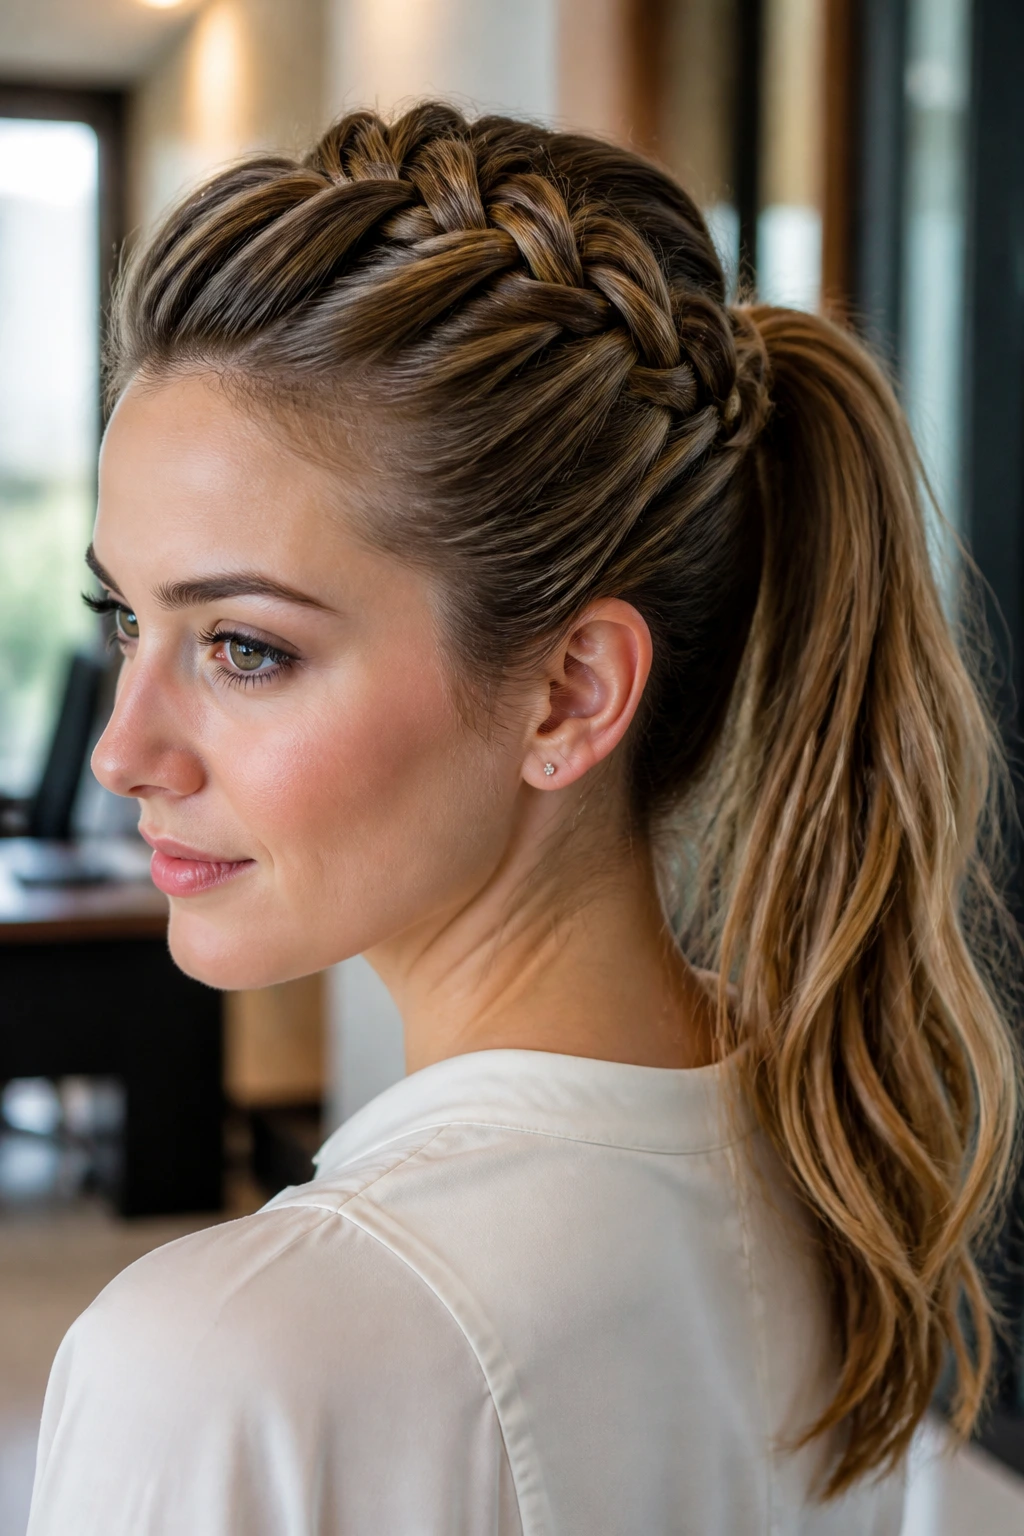
3. The Half-Up Dutch Crown
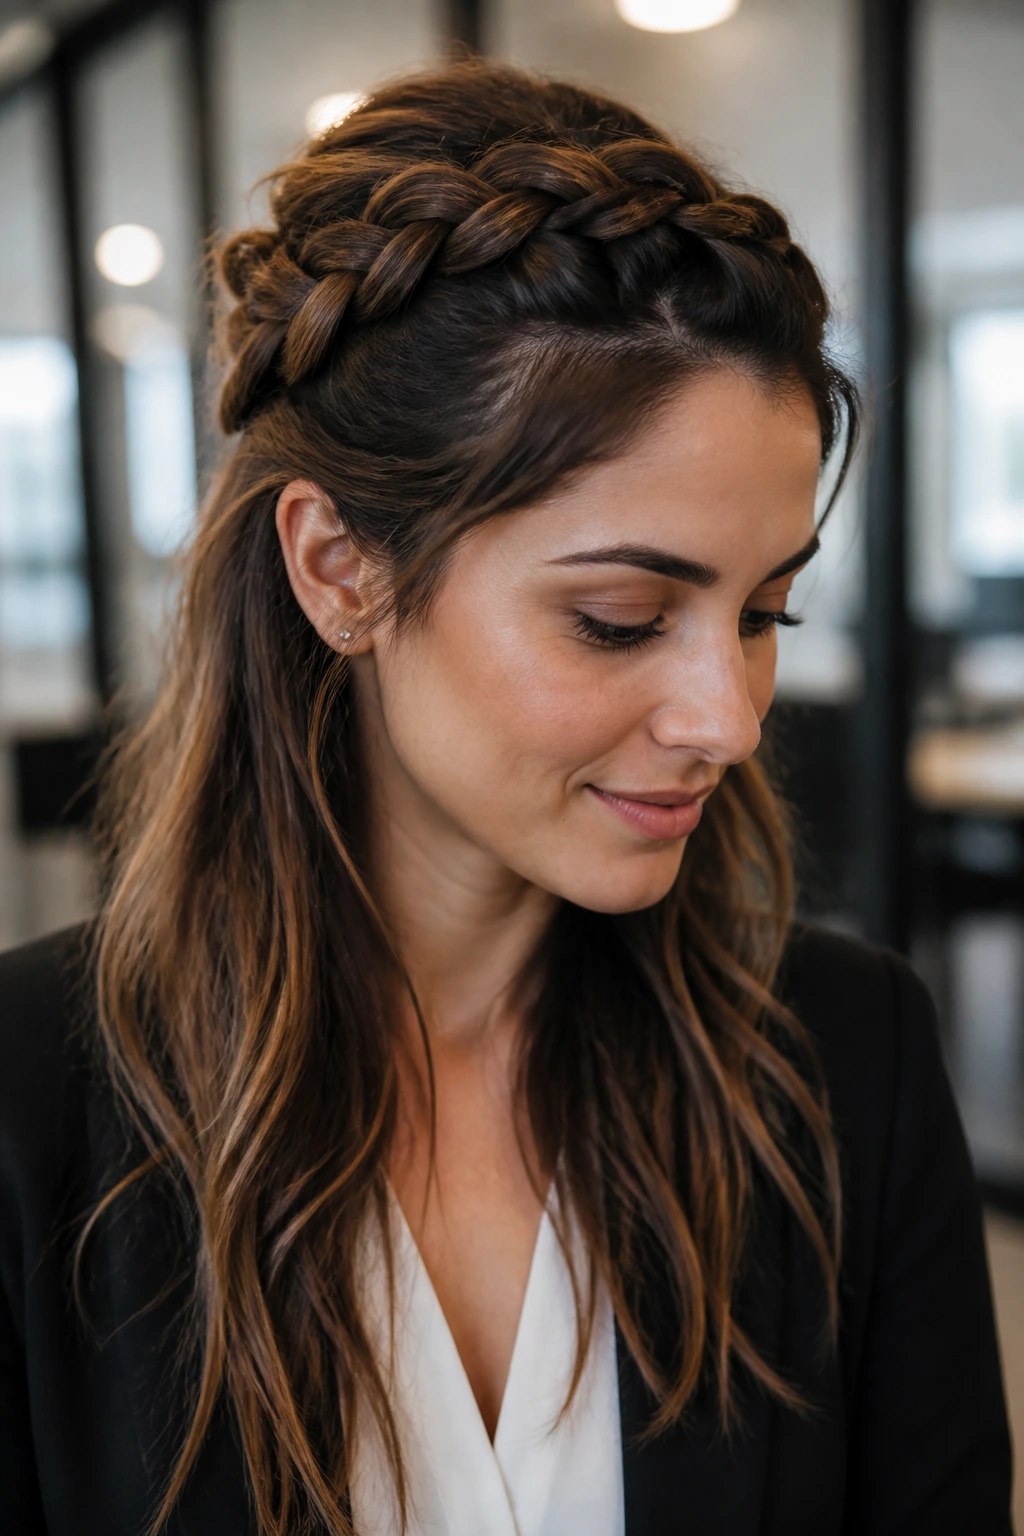
The Dutch braid, which is essentially an inside-out French braid where you cross the strands under rather than over, creates a beautiful, dimensional effect that sits on top of your hair. For an office-friendly variation, you only need to braid the top sections of your hair, leaving the back loose and polished. This keeps your hair looking styled without the commitment of an updo.
Step-by-Step Execution
Start at your hairline, sectioning off a V-shape of hair. Divide this into three pieces and begin your Dutch braid. As you work toward the back of your head, continue to pull in small sections of hair from the sides. Once you reach the mid-crown, stop adding hair and finish the braid normally for an inch or two before pinning it back.
The Secret to Symmetry
Symmetry is the hallmark of a professional look. If one side of your Dutch braid is noticeably tighter than the other, it can make the whole style look unbalanced. When you reach the back, try to pin both braids so they overlap slightly. This hides the ends and creates a seamless, crown-like effect that looks incredibly sophisticated when paired with a blazer.
4. The Chic Braided Low Bun
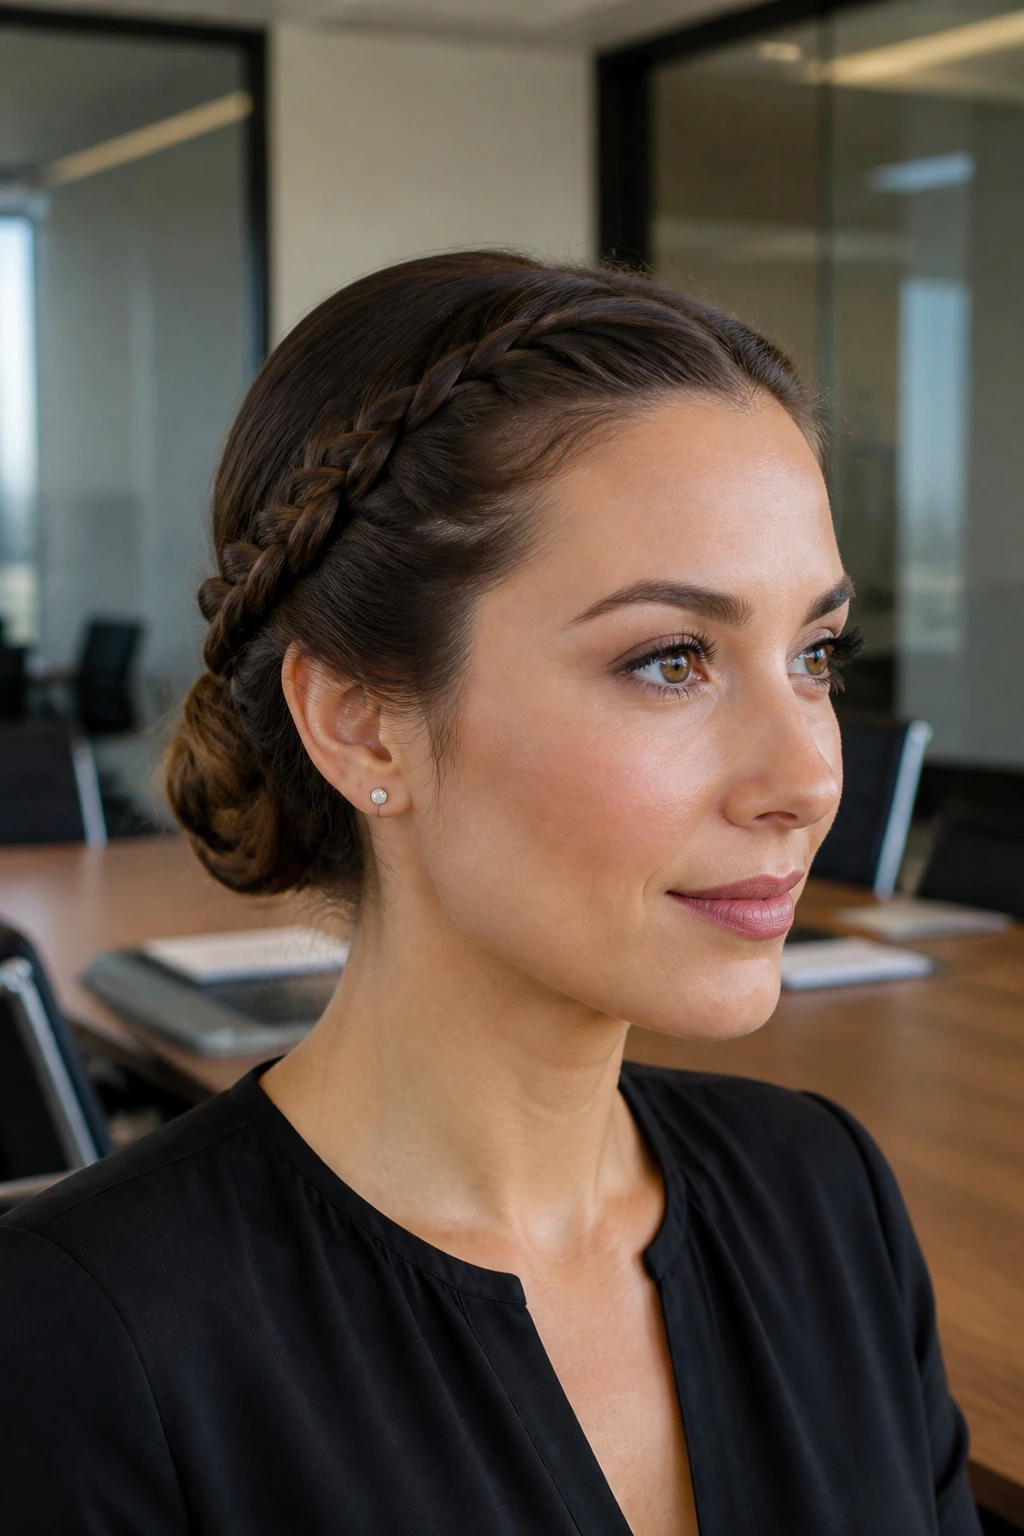
Combining a braid with a bun is a classic way to elevate your morning routine. Start by parting your hair as you usually do. Create two simple braids—one on each side of your head, starting from the temples and working backward. Once both braids are finished, gather the remaining hair at the nape of your neck into a ponytail, incorporating the tails of the two braids into the band.
Creating the Bun
Twist the ponytail into a circular bun and secure it with hairpins rather than a thick rubber band. Pins are far more forgiving and allow you to adjust the shape of the bun to fit your head perfectly. If your hair is on the finer side, gently tease the ponytail before twisting it; this adds the necessary volume to make the bun look substantial rather than skimpy.
When to Use This Style
This is the ultimate “power” hairstyle. It keeps every single strand contained, making it ideal for days when you have back-to-back meetings or need to look sharp for a video conference. It also survives the elements quite well, so if you are walking to the office in windy or humid weather, you won’t have to worry about your hair losing its shape by 9:00 AM.
5. The Messy-Yet-Polished Fishtail
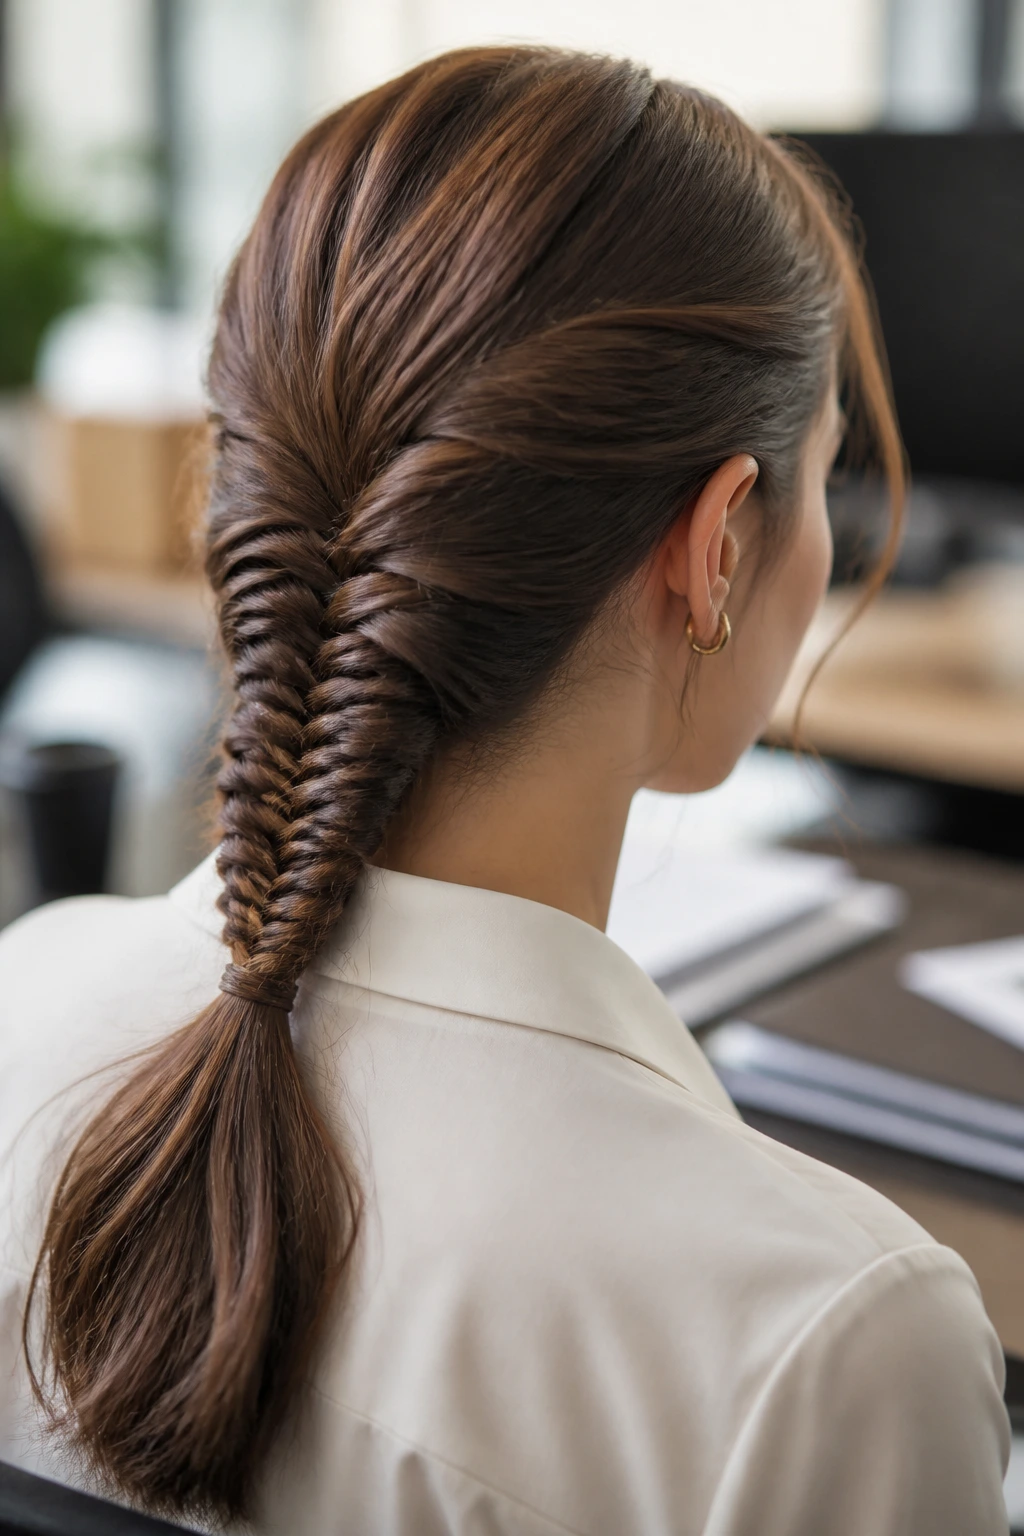
Fishtail braids often look intricate and time-consuming, but the technique is surprisingly simple. The key to making it work for the office is to avoid over-pulling the strands. A tight, precise fishtail braid looks much more structured and deliberate than a loose, boho-style one. Start with a low ponytail to provide a stable anchor.
The Fishtail Technique
Divide your ponytail into two equal sections. Take a tiny strand from the outer edge of the right section and cross it over to the inner side of the left section. Repeat this on the other side. The smaller the strands you cross, the more detailed the finished braid will appear.
Keeping It Neat
Don’t worry about being perfect on your first attempt. Even if the crossing looks a bit uneven, a fishtail braid tends to blend beautifully once it’s finished. If you feel like your fishtail looks a little flat after a few hours at your desk, a quick spritz of texturizing spray at the roots and a gentle fluffing of the braid can bring it right back to life.
6. The Headband Braid
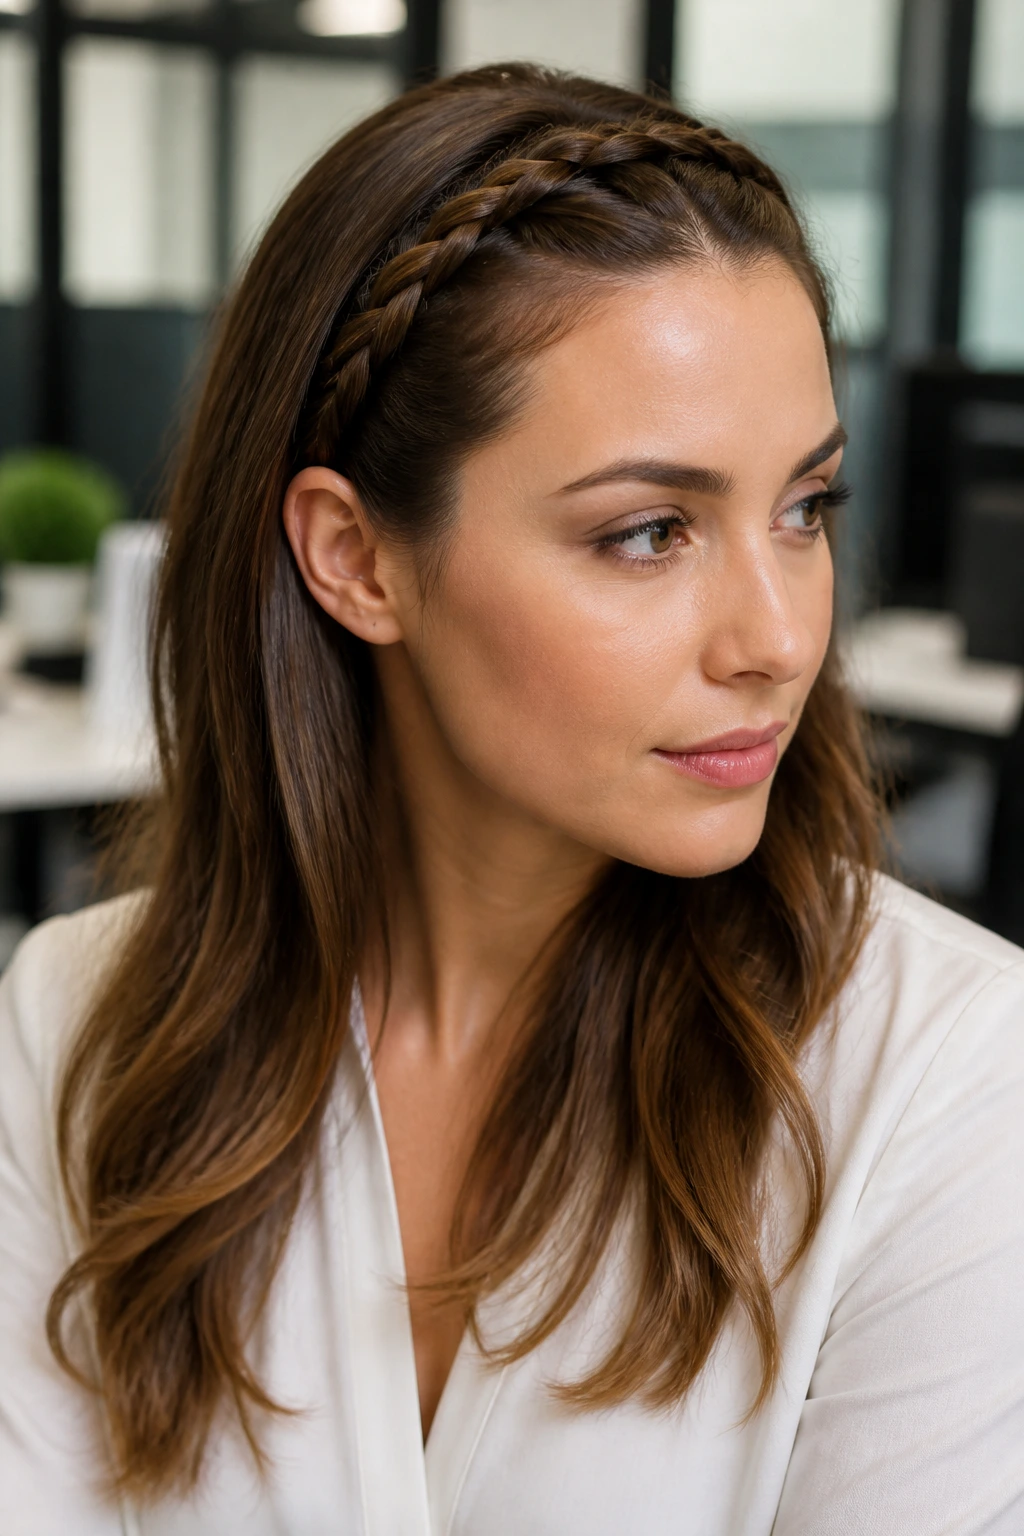
If you have bangs or layers around your face that tend to get in your eyes, a headband braid is the perfect solution. This style effectively acts as an accessory, pulling hair back while adding a touch of personality to a simple hairstyle. Start by creating a deep side part and sectioning off the front portion of your hair near the hairline.
Braiding Along the Edge
Start a French braid starting from your part and moving along your hairline toward your ear. As you braid, add small sections of hair from the front only. This ensures the braid hugs the contours of your forehead and stays secure. Once you reach behind your ear, you can either continue the braid down the side or secure it with a bobby pin hidden underneath the rest of your hair.
Styling Advice
This look works particularly well for people with shoulder-length hair or bobs, where a full-head braid might be difficult to manage. You can leave the rest of your hair straight or add a soft wave with a curling iron to contrast the structure of the braid. Because this style stays close to the scalp, it doesn’t shift or frizz up during the day.
7. The Wrapped Braided Ponytail
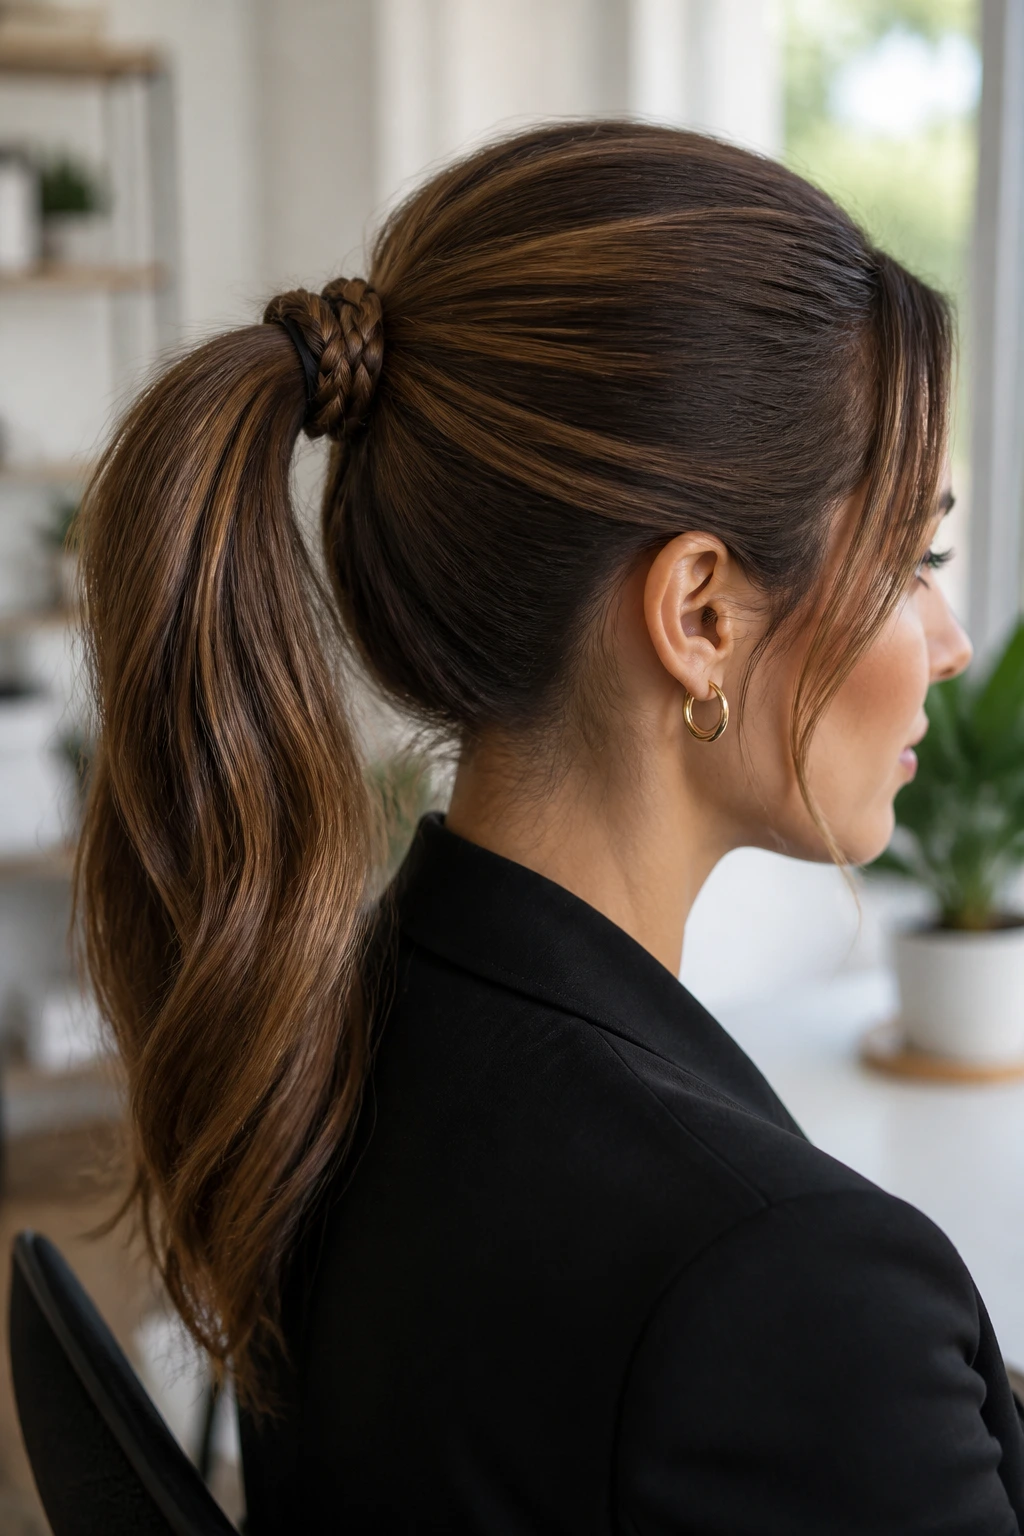
Sometimes a simple ponytail feels too basic, but you don’t have time for a full updo. A wrapped braided ponytail provides that little bit of extra detail that makes you look put-together. Pull your hair into a mid-height ponytail. Separate a thin section of hair from the underside of the ponytail.
The Finishing Touch
Braid that thin section all the way down to the ends and secure it with a tiny elastic. Take that braid and wrap it around the base of your ponytail to cover the hair tie. Use a bobby pin to tuck the end of the braid into the underside of the pony. It’s a subtle detail, but it shows intentionality in your appearance, which is always a plus in a professional environment.
Why This Style Succeeds
It’s understated. You aren’t making a loud statement, but you are proving that you pay attention to the details. This is an excellent choice for a busy morning where you barely have time to brush your hair. Adding a braid wrap takes about forty-five seconds and elevates a standard ponytail to something that looks like it belongs in an office setting.
8. The Pull-Through “Braid”
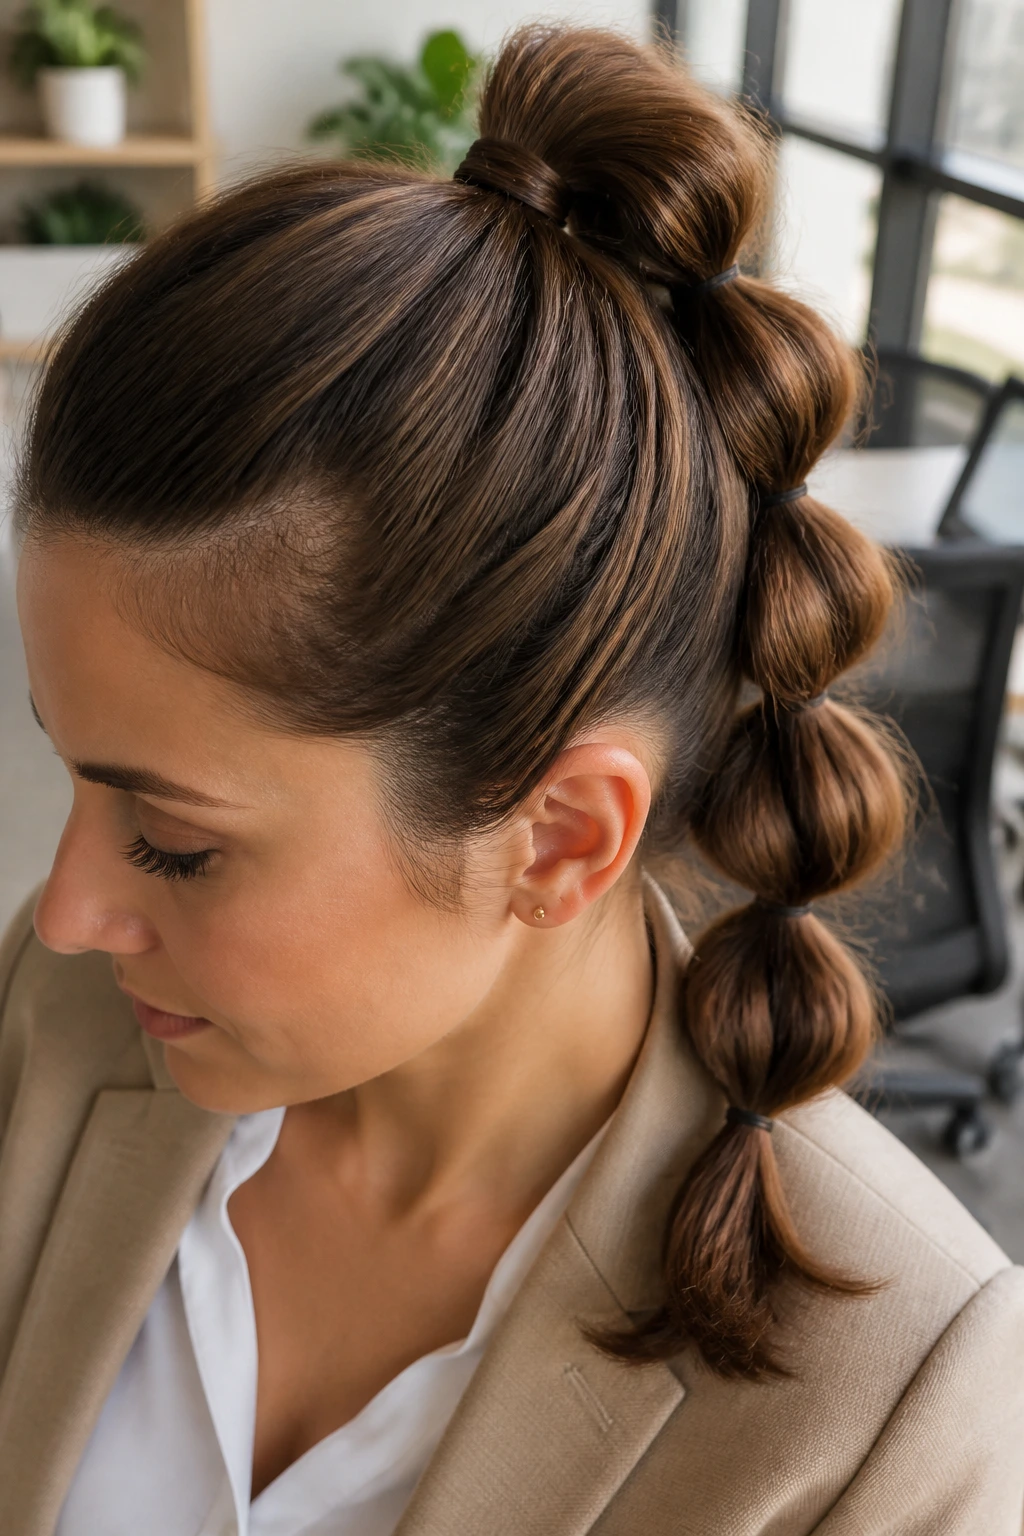
Technically a series of tied-off sections rather than a traditional braid, the pull-through “braid” is a fantastic way to fake a thick, voluminous braid if your hair is naturally thin. You will need a handful of clear elastic bands for this one. Start with a high ponytail and divide it into two parts.
Building the Volume
Tie off a section of the top part of your pony. Take the bottom section, split it in two, and wrap it around the first section, tying it together in the middle. Repeat this down the length of your hair. As you move downward, gently pull on the edges of each section to create a rounded, braid-like shape.
Durability Concerns
This style is incredibly durable because it is anchored by multiple elastics. If one part of your hair feels like it’s slipping, it won’t unravel the entire braid because each section is tied off individually. Just be sure to use high-quality clear elastics so they don’t snap in the middle of a meeting. If you have blonde or light brown hair, try to find clear elastics that are specifically designed to be invisible.
9. The Double-Braided Accent

If you prefer to wear your hair down but want to keep it out of your face, two thin accent braids on one side of your head offer a modern, clean look. Part your hair and take two small sections near the temple. Create two separate three-strand braids and secure them with small elastics.
Securing the Style
Pin the ends of these two braids back behind your ear, tucking them under your loose hair. This frames your face and keeps the style looking tidy throughout the day. It’s a very low-maintenance look, but it adds a nice bit of texture to straight or slightly wavy hair.
Versatility
This style works for almost any hair texture. If you have curly hair, the braids will look more prominent and add a nice contrast to the volume of your curls. If your hair is very sleek and straight, the braids act as a sharp detail that highlights your facial features. It is arguably the fastest braided style you can do in under three minutes.
10. The Waterfall Braid with a Twist

A waterfall braid creates a cascading effect that looks beautiful if you are wearing your hair down. While it sounds complex, it’s really just a French braid where you drop one strand after every crossing. It takes a little practice to get the hand motion down, but once you do, it becomes muscle memory.
Making It Office-Ready
For the office, keep the waterfall braid tight and close to the head rather than letting it hang loosely. After you have completed the waterfall effect across the back of your head, secure the final braid behind your ear. It’s a lovely way to add interest to a simple blowout.
Why It’s a Favorite
This is one of the few braided styles that looks just as good at the end of the day as it did at the beginning. Since you aren’t pulling all your hair into a tight style, you won’t have to deal with the “scalp ache” that can sometimes happen with tighter braids. It is sophisticated, feminine, and perfectly appropriate for any professional setting.
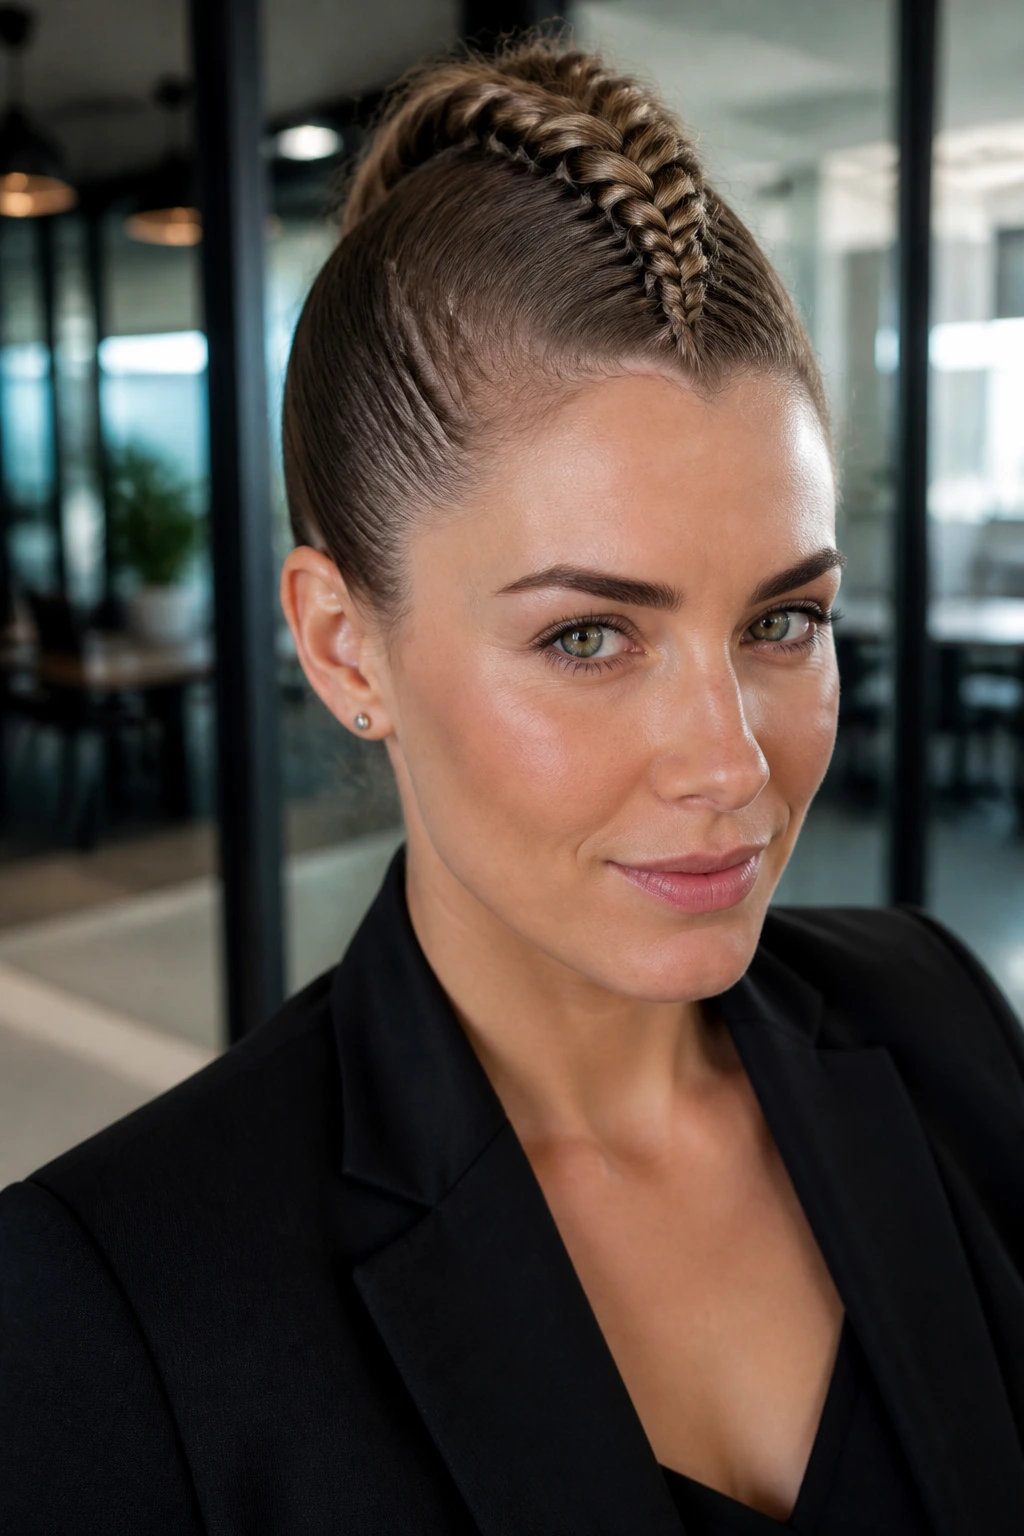
11. The Upside-Down Braided Bun
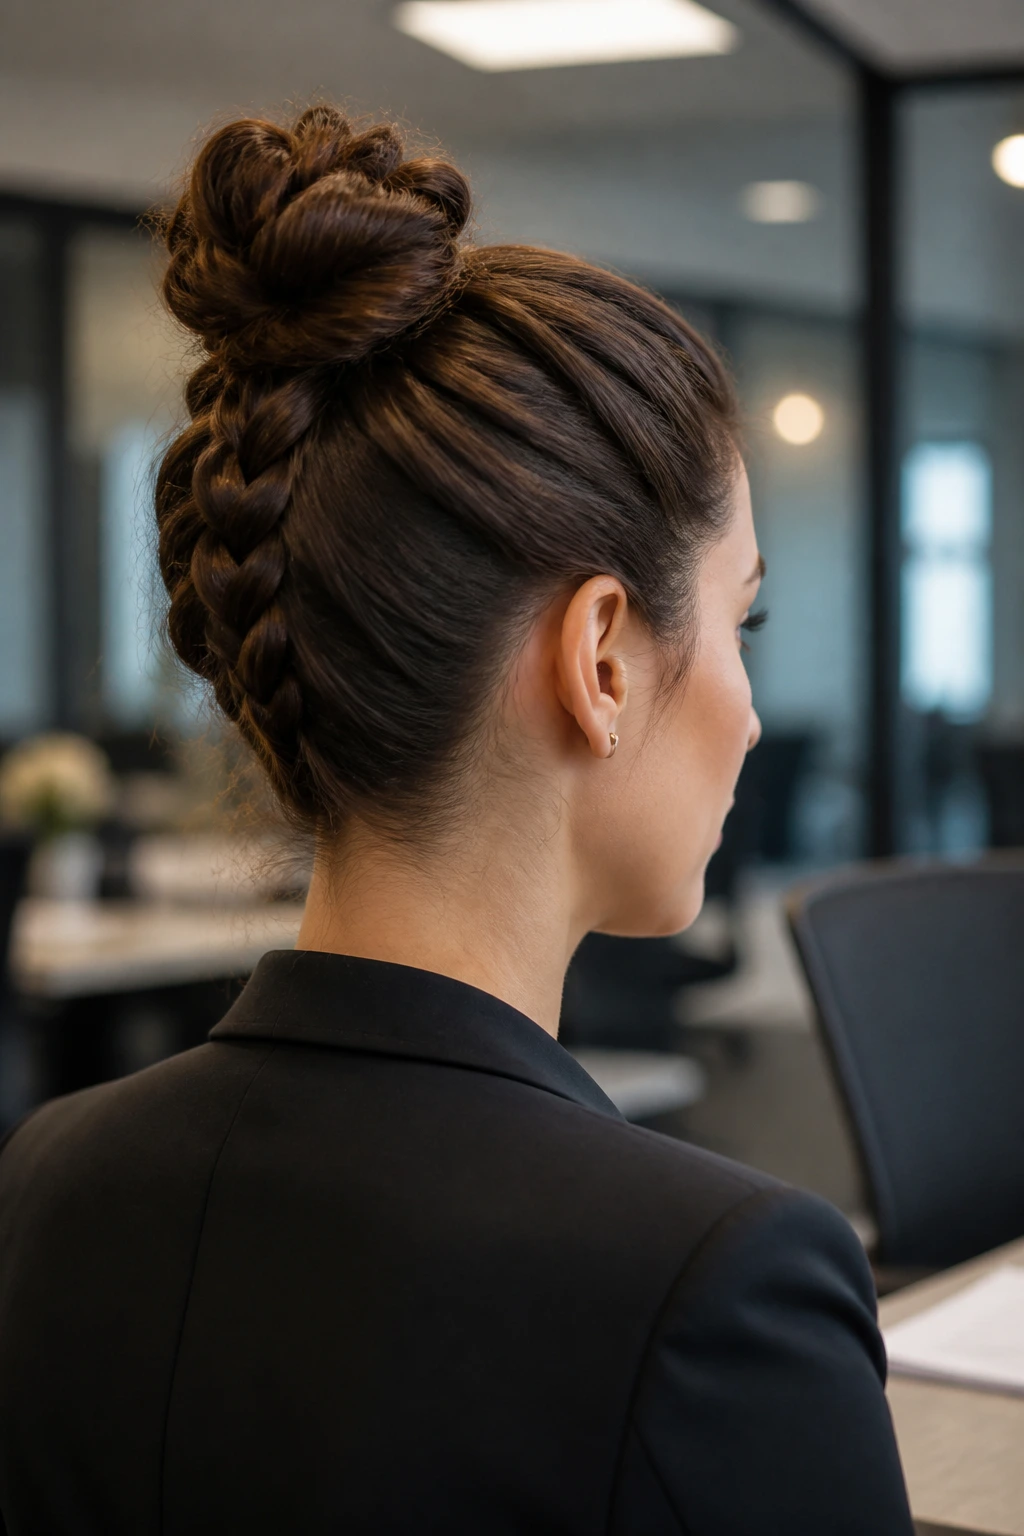
This is for the woman who wants to be bold while remaining professional. Start by flipping your head over and creating a Dutch braid starting at the nape of your neck and moving up toward the crown. Stop when you reach the top of your head and gather the remaining hair into a high bun.
Achieving the Height
By starting the braid at the bottom, you create a beautiful visual line that draws the eye upward. This adds natural height to your head and makes the bun look more intentional. The key here is to keep the braid tight; if it’s too loose, it will sag as the day goes on.
Managing Layers
If you have shorter layers at the back of your neck, use a bit of wax or pomade as you braid to catch those shorter pieces. This prevents a “fuzzy” look at the neckline. It’s a clean, sharp, and very modern way to wear an updo that feels both creative and serious.
12. The Classic French Braid
Don’t underestimate the power of a standard French braid. It is the gold standard for a reason. By gathering hair from all sides and braiding it down the center, you ensure that every strand is contained. This is the most “all-day” style on the list, as it rarely needs touching up.
The Professional Adjustment
To make a French braid feel like an office look rather than a workout look, try a deep side part before you start braiding. This changes the silhouette of the braid and makes it look more tailored. You can also finish the braid by tucking the tail underneath and pinning it to create a faux-bob effect.
Essential Gear
If you are doing this style, keep a travel-sized bottle of dry shampoo in your desk drawer. Even if you start the day with clean hair, a little bit of texture spray or dry shampoo toward the end of the day can help give the braid a bit more grip and keep it looking fresh until you get home.
13. The Half-French Twist
This style involves creating a single French braid that starts at the hairline and stops at the back of the head, leaving the rest of the hair in a simple ponytail or half-up look. It creates a seamless transition from the front to the back and keeps your hair looking neat and tidy.
Balancing the Look
The goal here is to blend the braid into the rest of the hair smoothly. When you stop braiding, use a small, discreet elastic that matches your hair color. If the transition looks bulky, use a tiny section of hair from the ponytail to wrap around the elastic and hide it completely.
The Best Hair Type
This style works exceptionally well for thick hair that would otherwise be difficult to braid into a full, tight style. By only braiding the top, you reduce the amount of bulk you have to manage, making it a much more comfortable style for long workdays.
14. The Braided Headband and Low Chignon
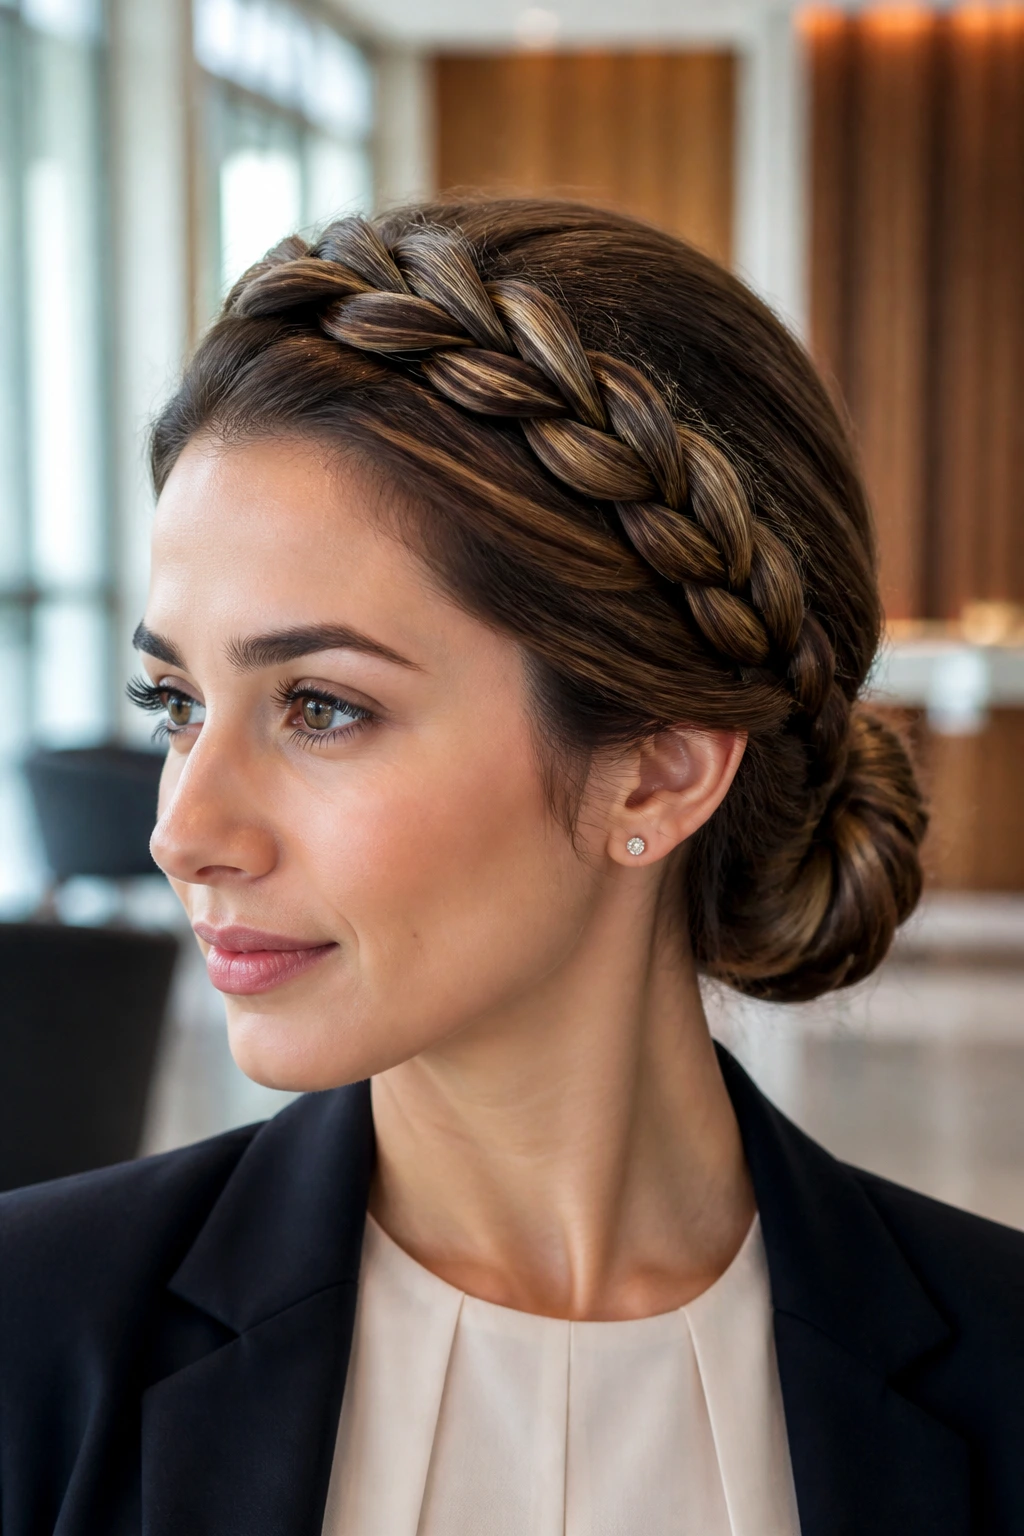
If you want to go for a truly elegant look—perhaps for an important presentation or a client dinner—this combination is hard to beat. Start by creating a thick braid on one side of your hair, starting near your part and braiding down along your hairline. Secure it temporarily.
Completing the Style
Gather the rest of your hair into a low, neat chignon at the nape of your neck. Bring the braided headband over to meet the chignon and pin it securely underneath. The combination of the sleek braid and the soft, rounded chignon is timeless and looks incredibly expensive.
Time Commitment
This is the most time-intensive style on the list, but it’s worth it for days when you need to feel your best. It creates a polished appearance that frames the face and leaves the neck clean. It’s a very sophisticated look that pairs beautifully with a suit or a formal blouse.
15. The Faux-Hawk Braid
If you have an edgy sense of style and want to bring a little bit of that into the office, the faux-hawk braid is a fun way to do it without being unprofessional. Braid a center section of your hair from the hairline to the crown, adding hair as you go, and secure it with pins to create a mohawk-like shape.
Softening for the Office
To make it suitable for a conservative office, keep the sides of your hair smoothed back tightly with gel or pomade. This creates a high contrast between the volume of the center braid and the sleekness of the sides, which looks very intentional and sharp.
Personality Matters
This style is about confidence. If you wear it, wear it with the understanding that it is a statement piece. It’s a great way to showcase a bit of your personality while still adhering to the “hair off the face” standard that most offices appreciate.
16. The Side-Swept Dutch Braid

Similar to the side braid, the side-swept Dutch braid has more volume and texture because it is a Dutch braid rather than a French one. By braiding it across the side of your head rather than straight back, you create a lovely visual line that accentuates your cheekbones.
When to Use It
This is a great style for an early morning when your hair is slightly greasy, as the Dutch technique works best with a bit of product in it. It’s quick, it stays secure, and it provides enough visual interest to keep you looking great without needing additional accessories.
The Final Detail
Don’t be afraid to leave a few strands loose around your ears. It makes the look feel less rigid. Professionalism doesn’t have to mean “robotic”—you can have a soft, feminine style that is still perfectly orderly and respectful of the office environment.
17. The Simple Braided Pigtails

Pigtails aren’t just for children. When you braid them tight, keep them low, and part your hair down the center, they are a very sleek, high-fashion-inspired look that works quite well for the office. Start by parting your hair down the middle and creating two even, tight braids that sit behind your ears.
Styling the Ends
Instead of leaving the ends loose, try pinning them upward behind your ears or crossing them at the nape of your neck and pinning them into each other. This creates a structured, crown-like effect that feels much more mature and intentional than standard pigtails.
The Power of Parts
If a center part feels too severe, try a zig-zag or a deep side part. The placement of your part can completely change the vibe of the pigtails. It’s an incredibly simple technique, but it’s one that many people overlook when they are rushing through their morning routine.
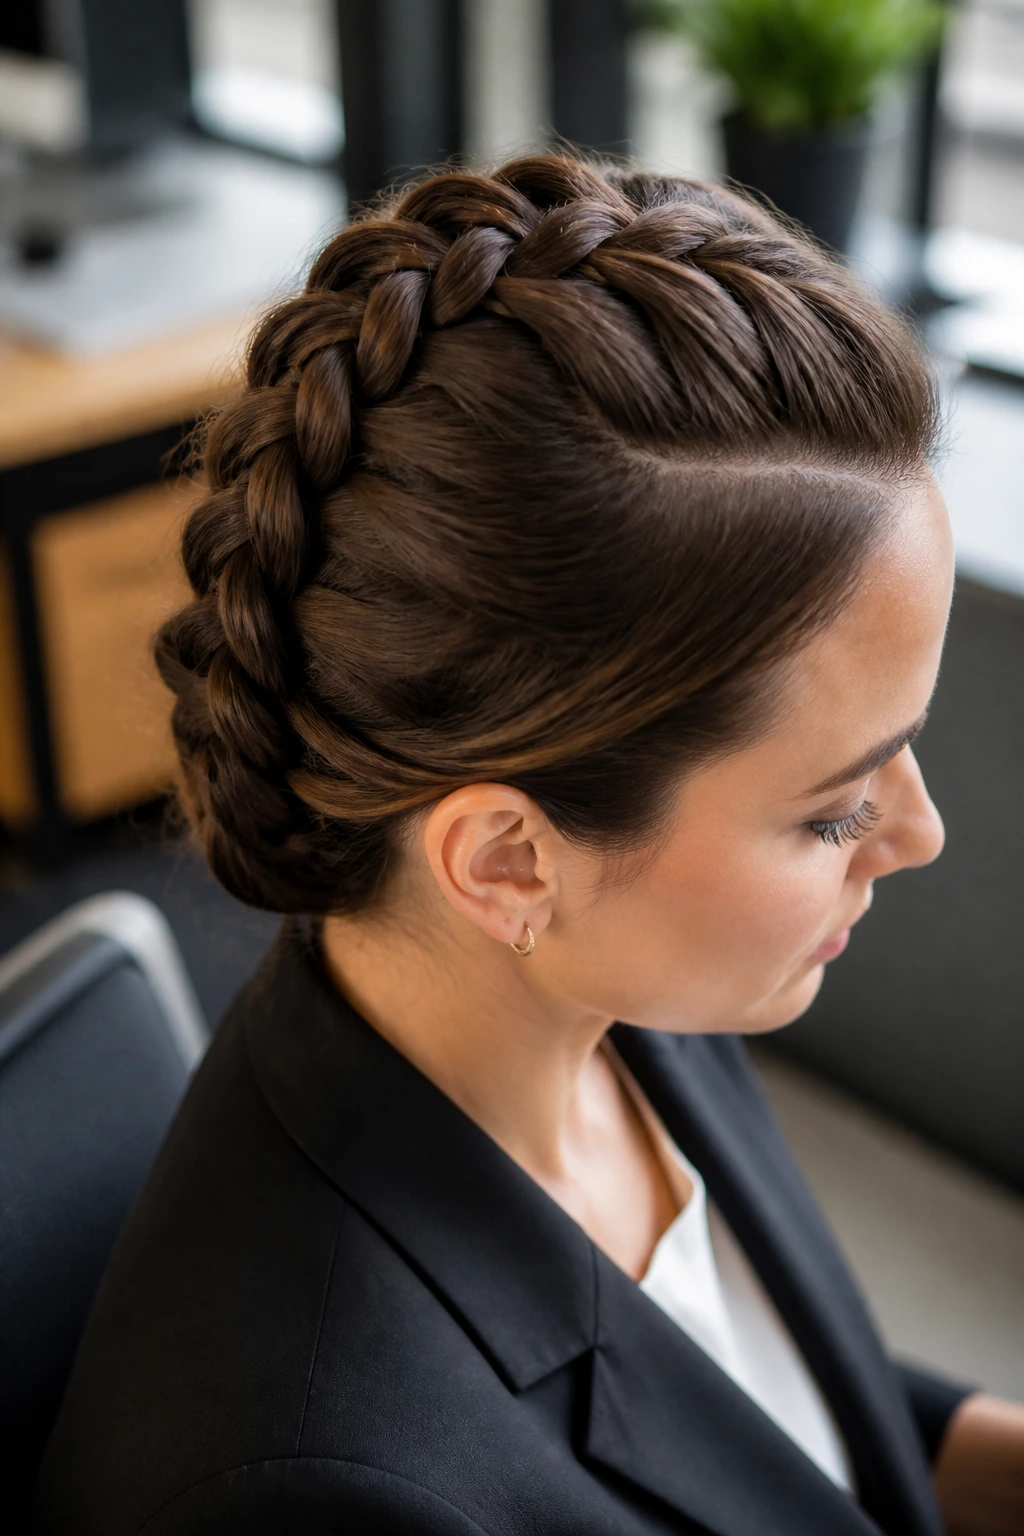
18. The Crown Braid with a Side Part
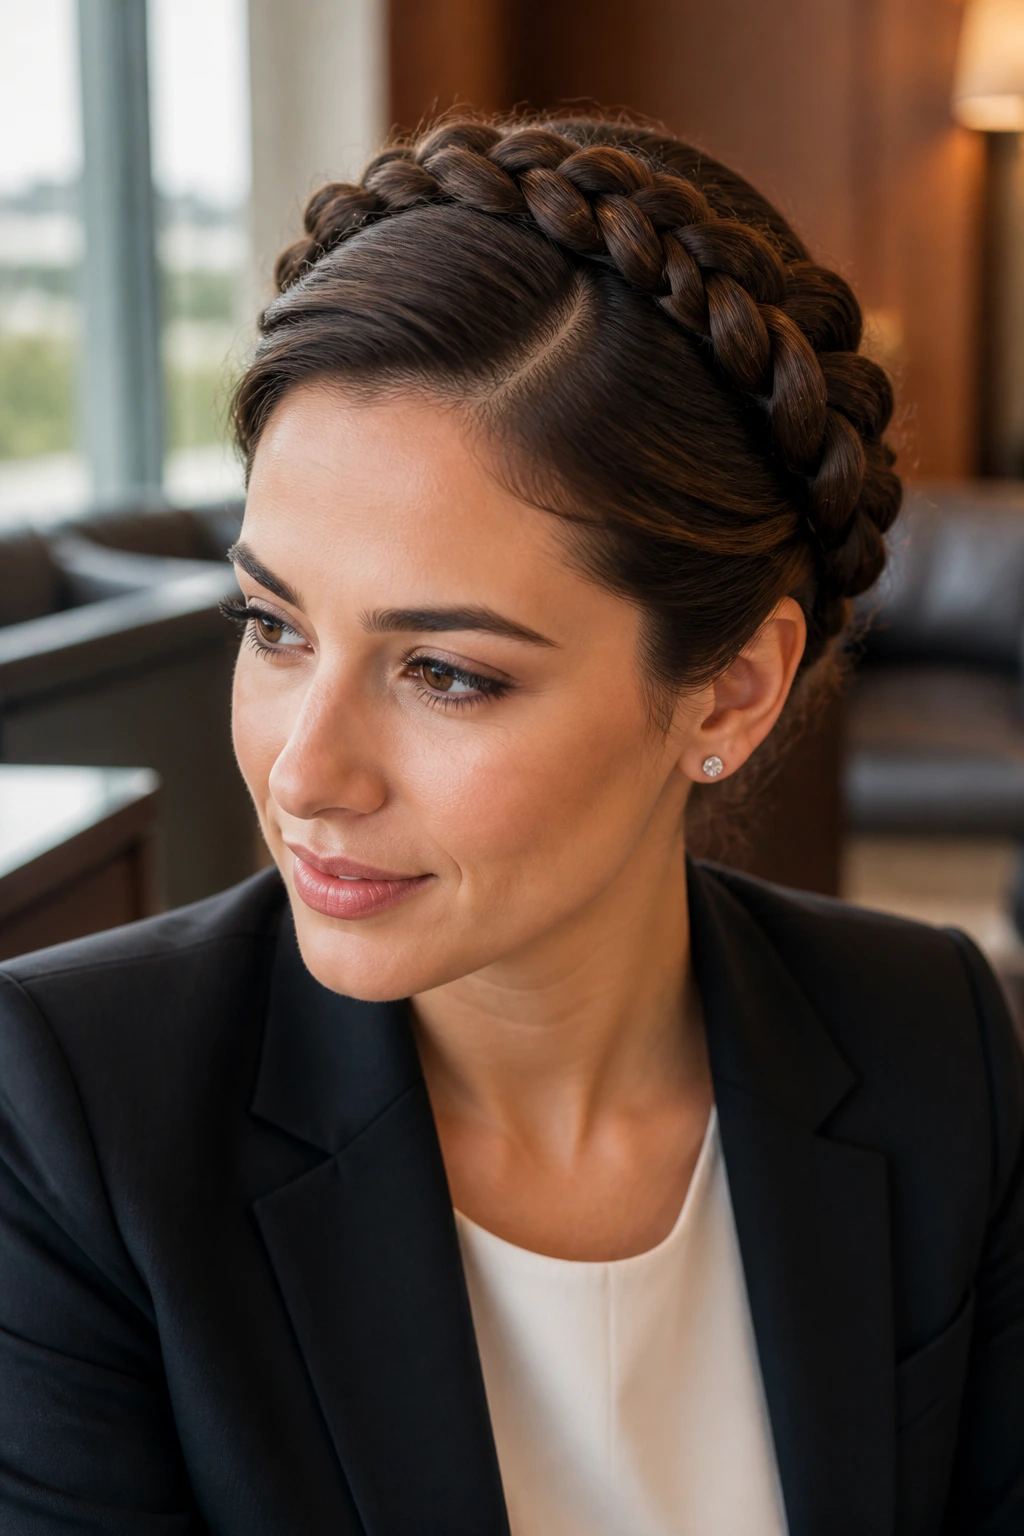
A full crown braid is the ultimate “I have my life together” hairstyle. It involves braiding your hair around the entire circumference of your head. For an office look, try a deep side part and start the braid from the larger side of the part. This gives the crown a more modern, asymmetrical look.
Achieving Perfection
If you find that your crown braid is slipping, use mini bobby pins that match your hair color to secure it at various points around your head. Don’t rely on just one or two big pins; use ten small ones. It’s the difference between a style that lasts two hours and a style that lasts twelve.
Final Thoughts
Whatever braid you choose, remember that the goal is comfort and longevity. Your hair is an accessory that supports your professional goals; it shouldn’t be something you’re worrying about during a meeting. Find the two or three styles here that you can execute in your sleep, and keep them in your rotation. When you stop stressing about your hair, you have more energy to focus on what actually matters at your desk. Stay consistent, keep your pins handy, and never underestimate the power of a well-placed elastic.