Sweat-drenched strands clinging to your neck or stray hairs whipping into your eyes are the fastest way to ruin a perfectly good workout. When you are in the middle of a high-intensity interval training session or finding your balance in a difficult yoga pose, the last thing you want to do is stop to fix your hair. Practicality is the primary goal here, but there is no reason your gym style cannot hold its own against the rest of your aesthetic. The best workout hairstyles do more than just keep hair out of your face; they provide a secure foundation that survives movement, sweat, and friction without causing unnecessary tension or damage to your hair follicles.
Choosing the right style often comes down to your hair texture and the specific type of activity you have on the calendar. A sleek, high-tension style might be fine for a brisk walk, but for a session filled with floor work and back-to-back inversions, you need something that lies flat against the scalp. Over the years, braiding has become the go-to solution because it integrates the hair into a single, cohesive unit. Whether you have thick curls that need taming or fine, straight hair that tends to slip out of clips, there is a woven configuration that will stay locked in place until you are ready to shower.
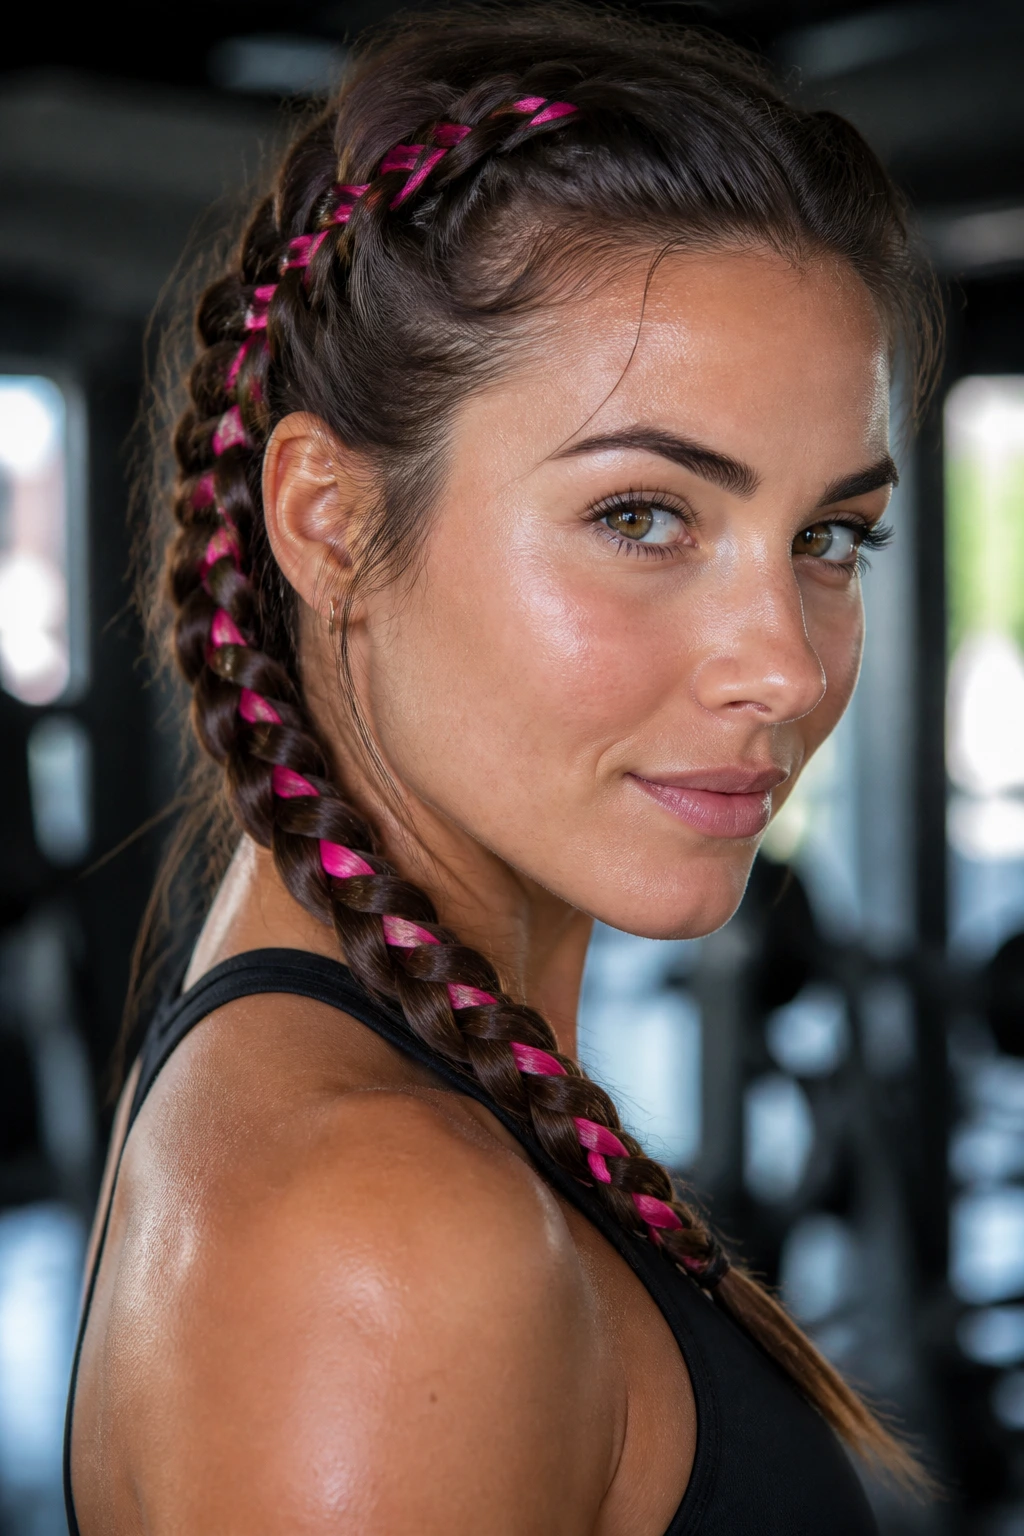
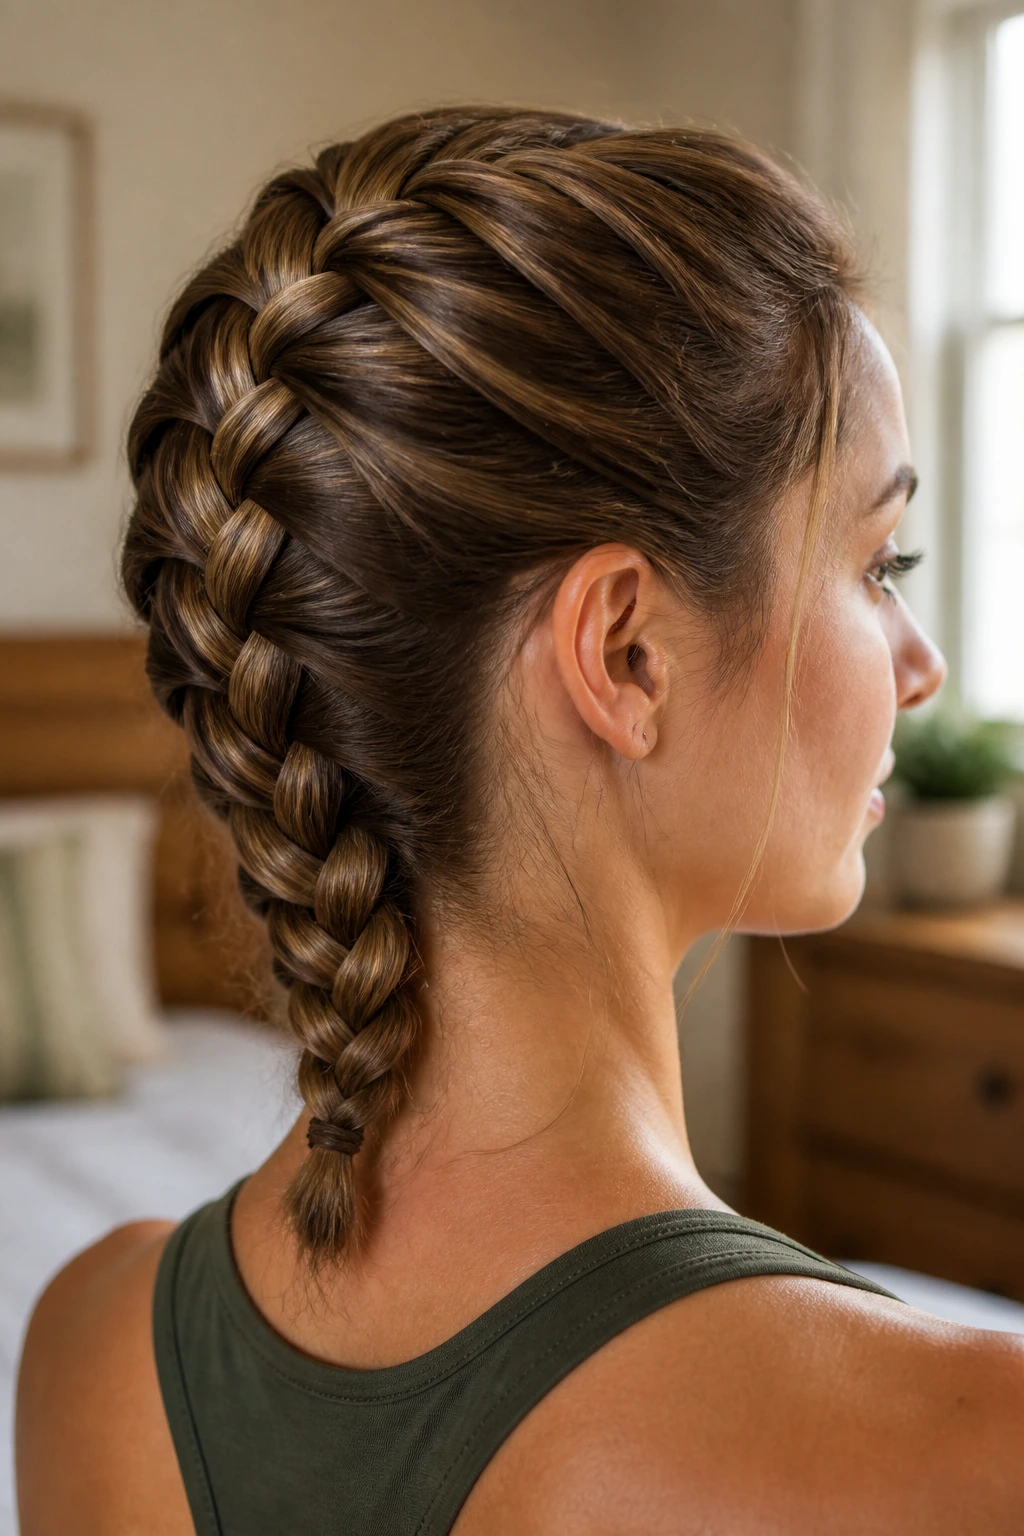
1. Classic French Braid
The French braid remains the gold standard for workout hair because it anchors the hair directly to the scalp, preventing it from swinging around during movement. By incorporating small sections of hair as you work your way down the head, you create a snug fit that stays secure even through heavy perspiration. If you find your hair feels too loose after a few minutes of jumping, pull the sections tighter as you cross them over.
Why It Works for High-Intensity Movement
This style is inherently durable because every strand is locked into a tight weave. Unlike a ponytail, which relies on a single hair tie that can stretch out or slide down mid-session, the French braid distributes the weight of your hair evenly across the crown. This reduces the “pulling” sensation on your hairline, which is a common complaint for anyone who exercises with a heavy, swinging ponytail.
Pro Tips for Long-Lasting Hold
- Start with slightly damp or second-day hair to give your strands more grip.
- Use a small amount of texturizing spray or dry shampoo at the roots before you begin braiding.
- Secure the end with a snag-free elastic that matches your hair color to prevent unnecessary breakage.
- If you have layers that tend to poke out, lightly mist your hands with hairspray before smoothing the braid down to keep flyaways contained.
2. Double Dutch Braids

Often called “boxer braids,” the Dutch braid is essentially an inverted French braid where the strands are crossed under instead of over. This creates a raised, 3D effect that looks sharp and stays remarkably secure during contact sports or heavy weightlifting. Because the braid sits on top of your head, it stays clear of your neck, making it an excellent choice for activities where you might be lying on your back or using a weight bench.
The Mechanism of the Under-Braid
Crossing the hair underneath creates a distinct visual depth that also provides superior tension. Because the weave is essentially “bolted” to the scalp, it resists the lateral forces of head movement better than almost any other style. Even if you are tossing your head during a high-energy dance class or performing burpees, the braid stays exactly where you placed it.
How to Achieve the Sleek Look
- Part your hair perfectly down the center using the tail of a rattail comb for a symmetrical base.
- Divide the two sides into distinct sections, clipping one side out of the way so it does not interfere with your work.
- Apply a small amount of smoothing cream to your hands to keep your strands together as you feed them into the braid.
- As you reach the nape of the neck, finish the braid as far down as possible to ensure the ends do not fray during your workout.
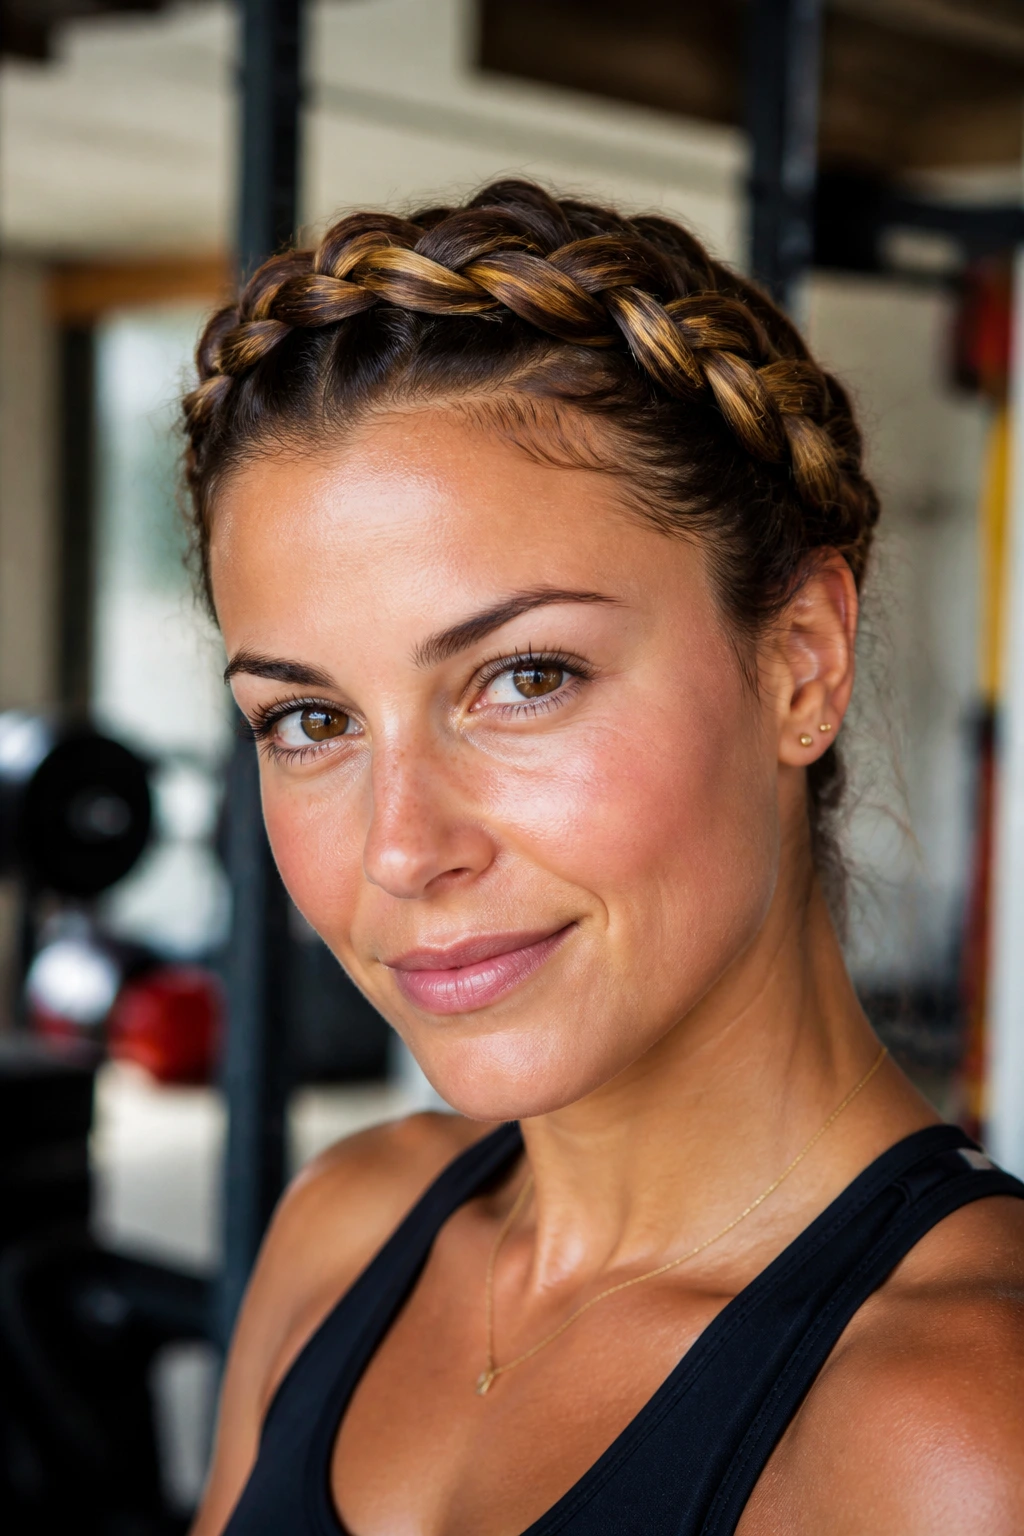
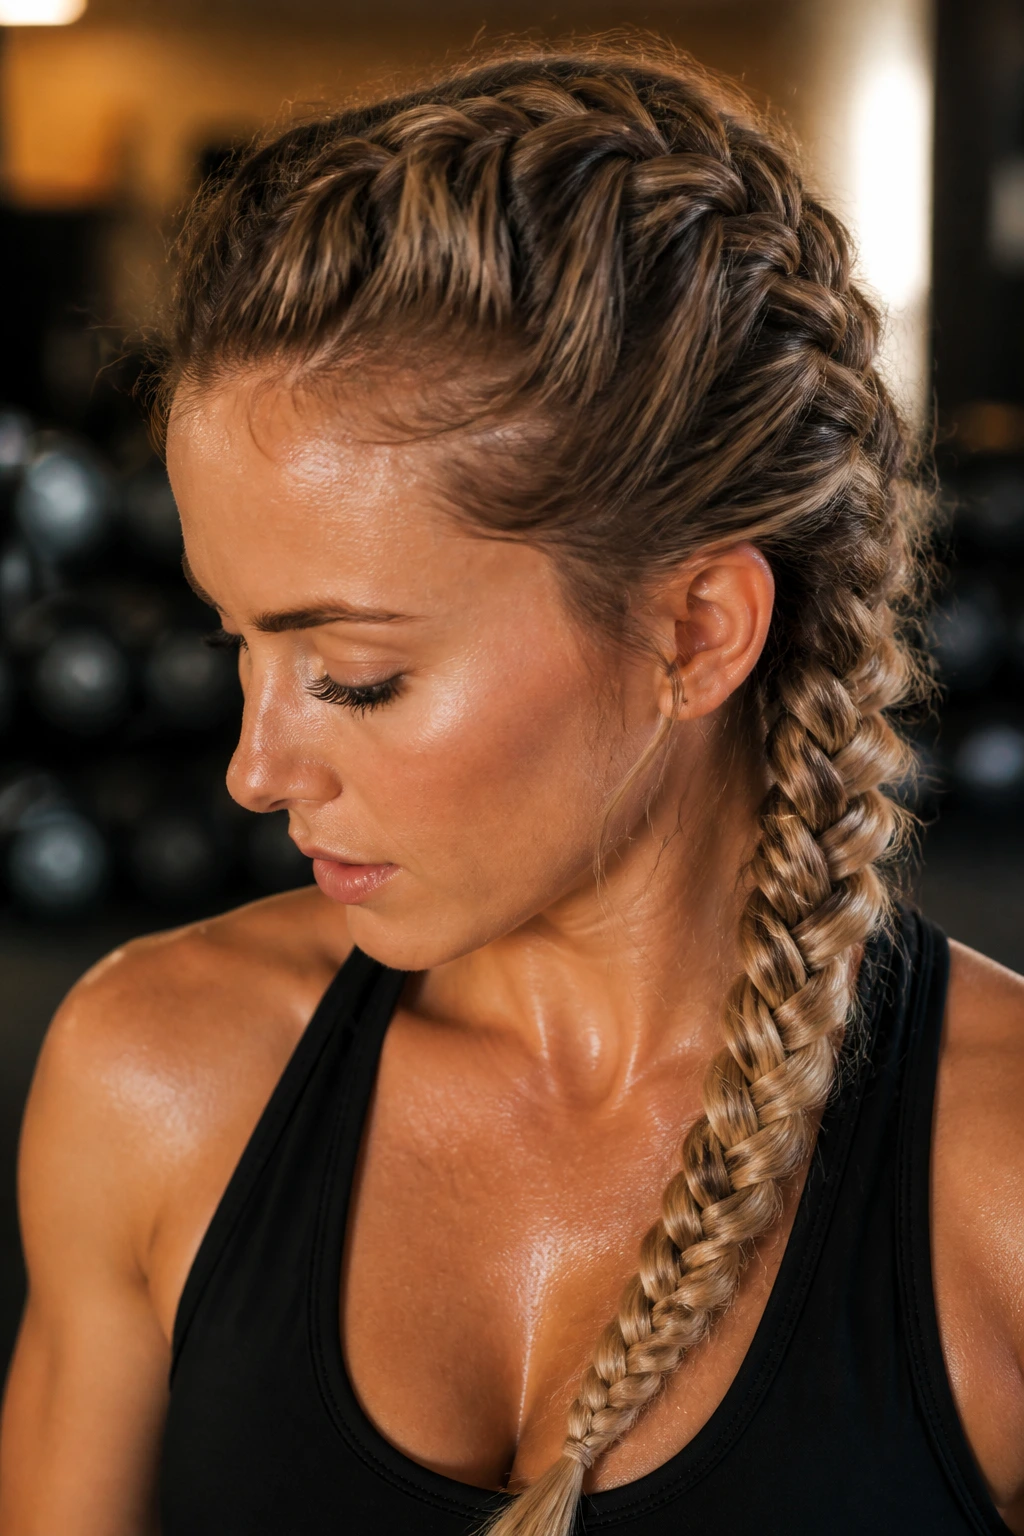
3. The Fishtail Crown
If you are looking for a style that transitions well from a morning gym session to the rest of your day, the fishtail crown is hard to beat. This look involves braiding two fishtails and pinning them across the top of your head in a halo shape. It keeps the hair off the face entirely while protecting the ends, which is particularly helpful if you are trying to minimize split ends caused by constant friction against exercise equipment or clothing.
Why This Style Protects Your Ends
By tucking the ends of your hair into the structure of the crown, you effectively shield them from the mechanical damage that occurs when your hair rubs against gym mats or hoodies. This is a subtle but effective way to maintain hair health over time. The tight, intricate weave of a fishtail also ensures that even if one or two small strands break free, the rest of the structure will remain entirely intact.
Essential Gear for Stability
- Use small, clear silicone elastics to secure the ends of the two fishtail braids before pinning them.
- Invest in high-quality, matte-finish bobby pins that match your hair color; shiny pins tend to slide out during intense sweat sessions.
- Anchor the braids at the back of the head using at least four pins per side to ensure the halo does not sag or droop as you move.
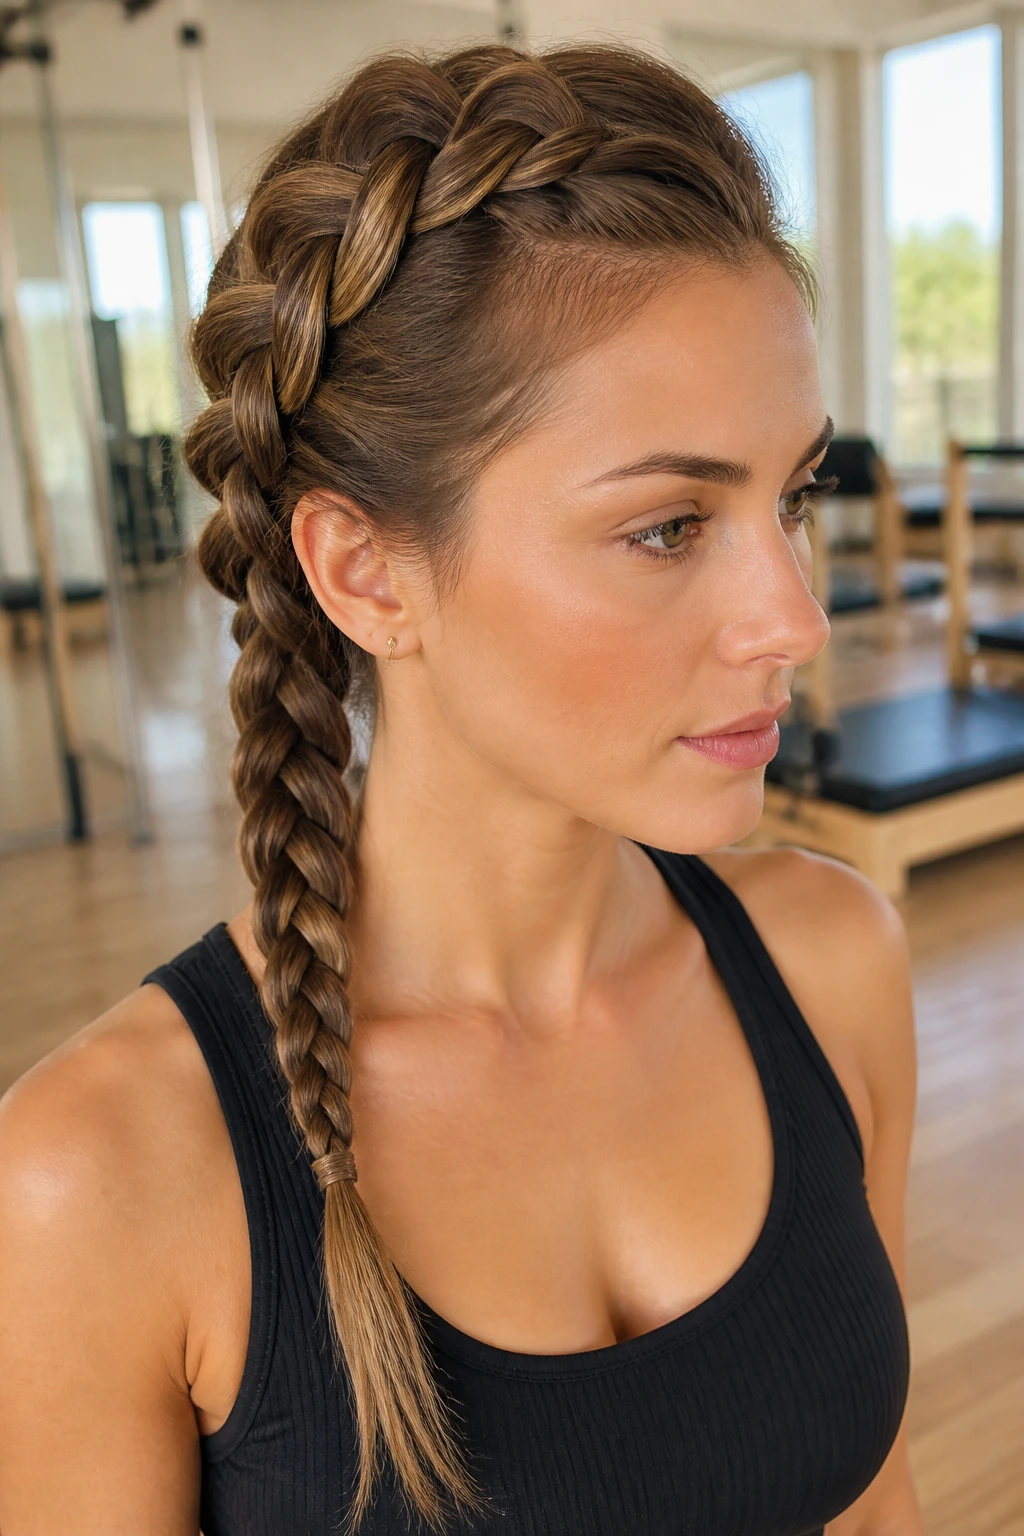
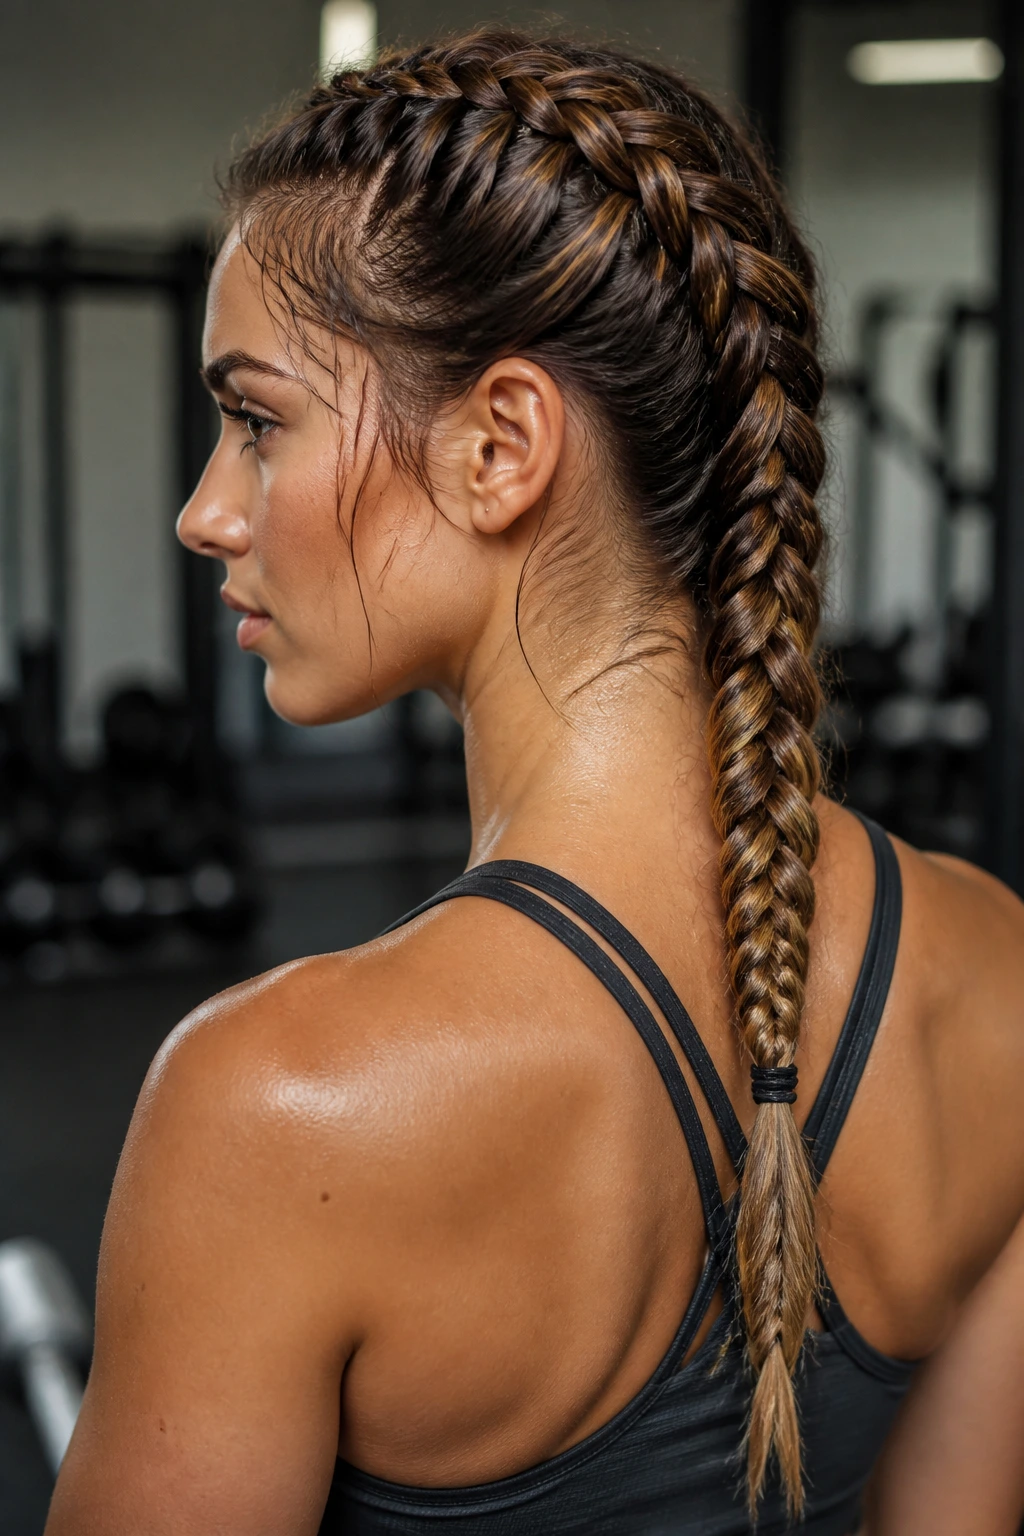
4. Single Rope Braid
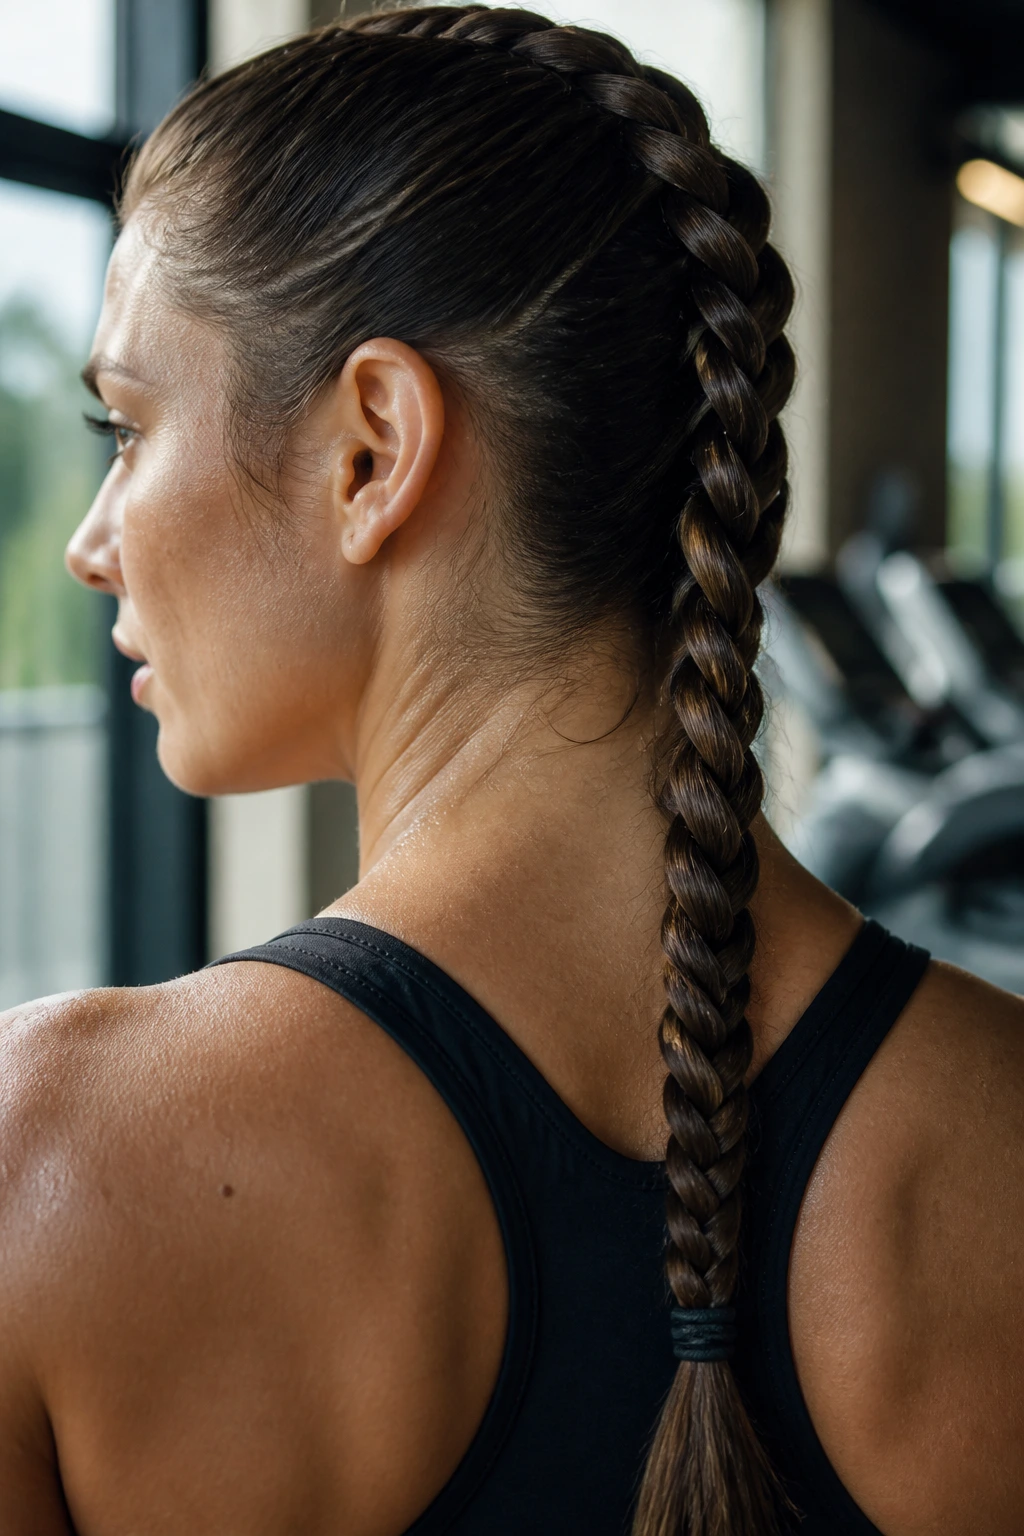
When you need a quick, no-fuss solution, the rope braid is the perfect alternative to a standard ponytail. It is created by taking two sections of hair and twisting them around each other, creating a dense, cord-like appearance. It is exceptionally fast to put together, which makes it ideal for those mornings when you are running slightly behind and need to get to the gym without wasting time on intricate styling.
Performance Benefits for Weights and Cardio
Rope braids are incredibly sturdy because the inherent tension of the twist prevents the strands from unraveling. It keeps the hair contained in a single bundle that does not sway or slap against your back. It is arguably the most “sweat-proof” style because there is very little surface area exposed; the hair is wound so tightly that moisture has a harder time penetrating the core of the braid.
Troubleshooting and Adjustments
- If your hair is very silky or freshly washed, it may be difficult to keep the twist tight. Apply a light-hold pomade to your palms before you begin twisting to provide the necessary friction.
- If the braid feels loose, twist the individual sections in the opposite direction of the main braid. This “counter-twist” technique creates a much tighter, more durable structure that will not unravel during a heavy squat session.
5. The Braided Top Knot
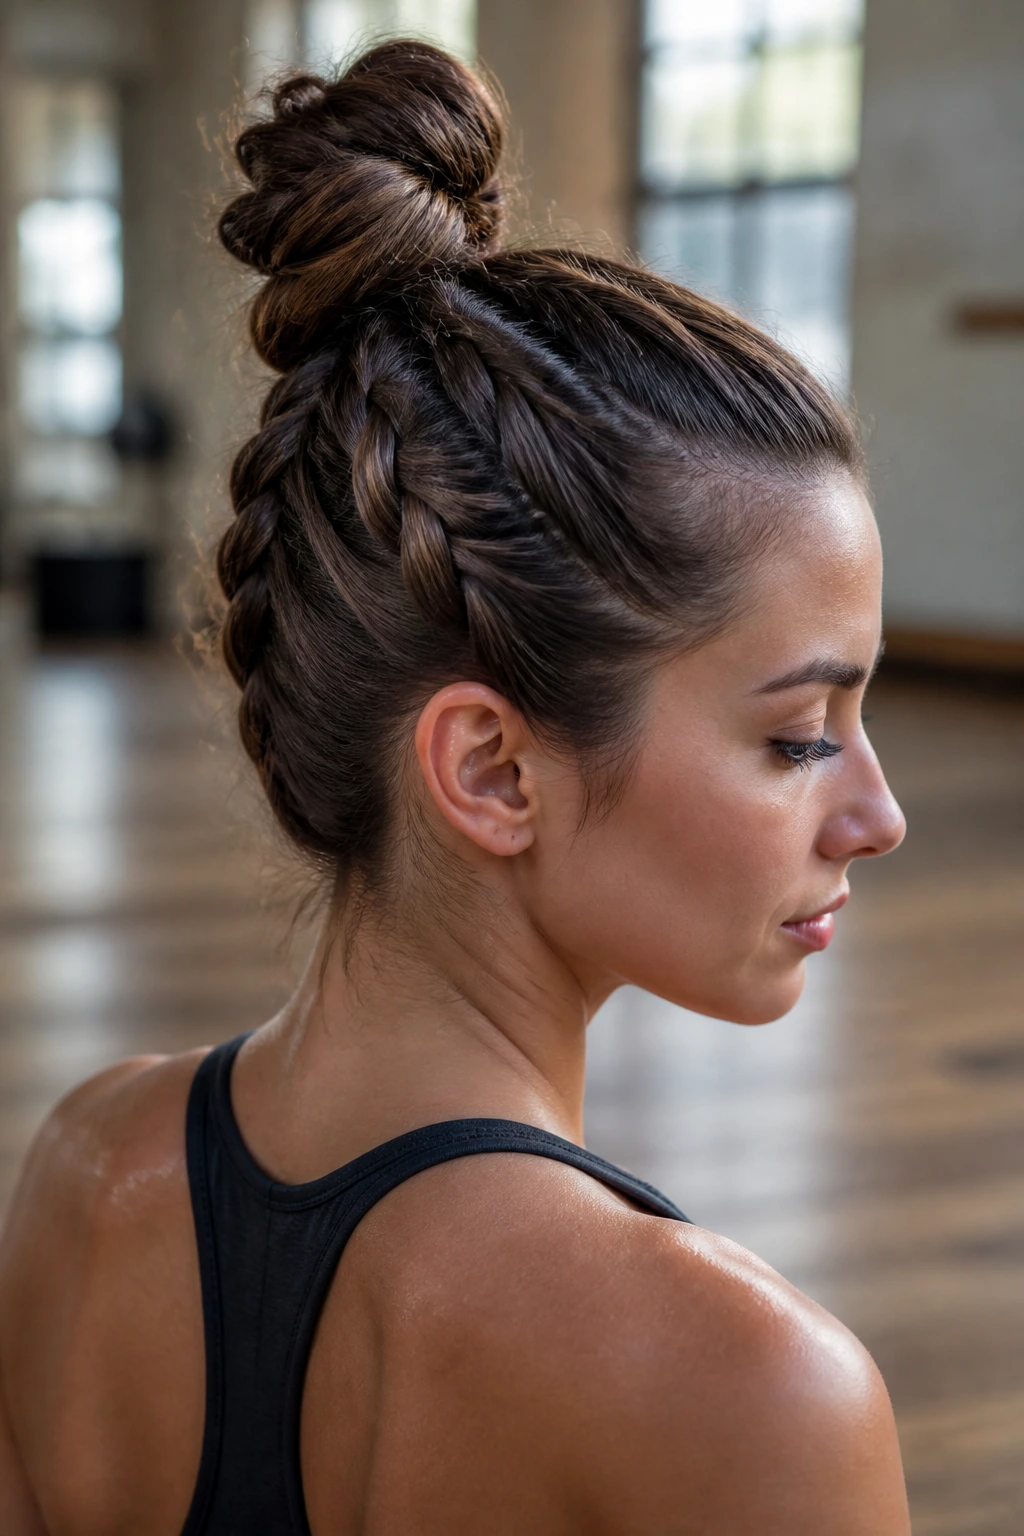
Combine the security of a braid with the height of a top knot for a look that is both functional and chic. Start by braiding a section of hair from the nape of the neck upward, then gather the rest of your hair into a high ponytail and wrap it into a bun. This style provides the best of both worlds: the braid catches all the loose hairs at the back of your neck, and the bun keeps the rest of your hair safely out of the way.
Why This Works for Yoga and Floor Work
In yoga, you often find yourself in poses like child’s pose or savasana, where having a bulky bun at the back of your head is uncomfortable. A high, sleek top knot ensures your head stays flat against the floor, while the upward-reaching braid at the base of your skull keeps those annoying nape hairs from tickling your neck. It is a win-win for comfort and control.
Maintaining the Shape
- Use a thick, fabric-covered hair tie to secure the base of your bun; thin elastics often snap under the weight of a long, heavy top knot.
- When you reach the nape of the neck with your braid, tilt your head forward to ensure you are catching all those fine baby hairs that usually escape.
- Pin the ends of your braid into the base of the bun to create a seamless transition between the two elements.
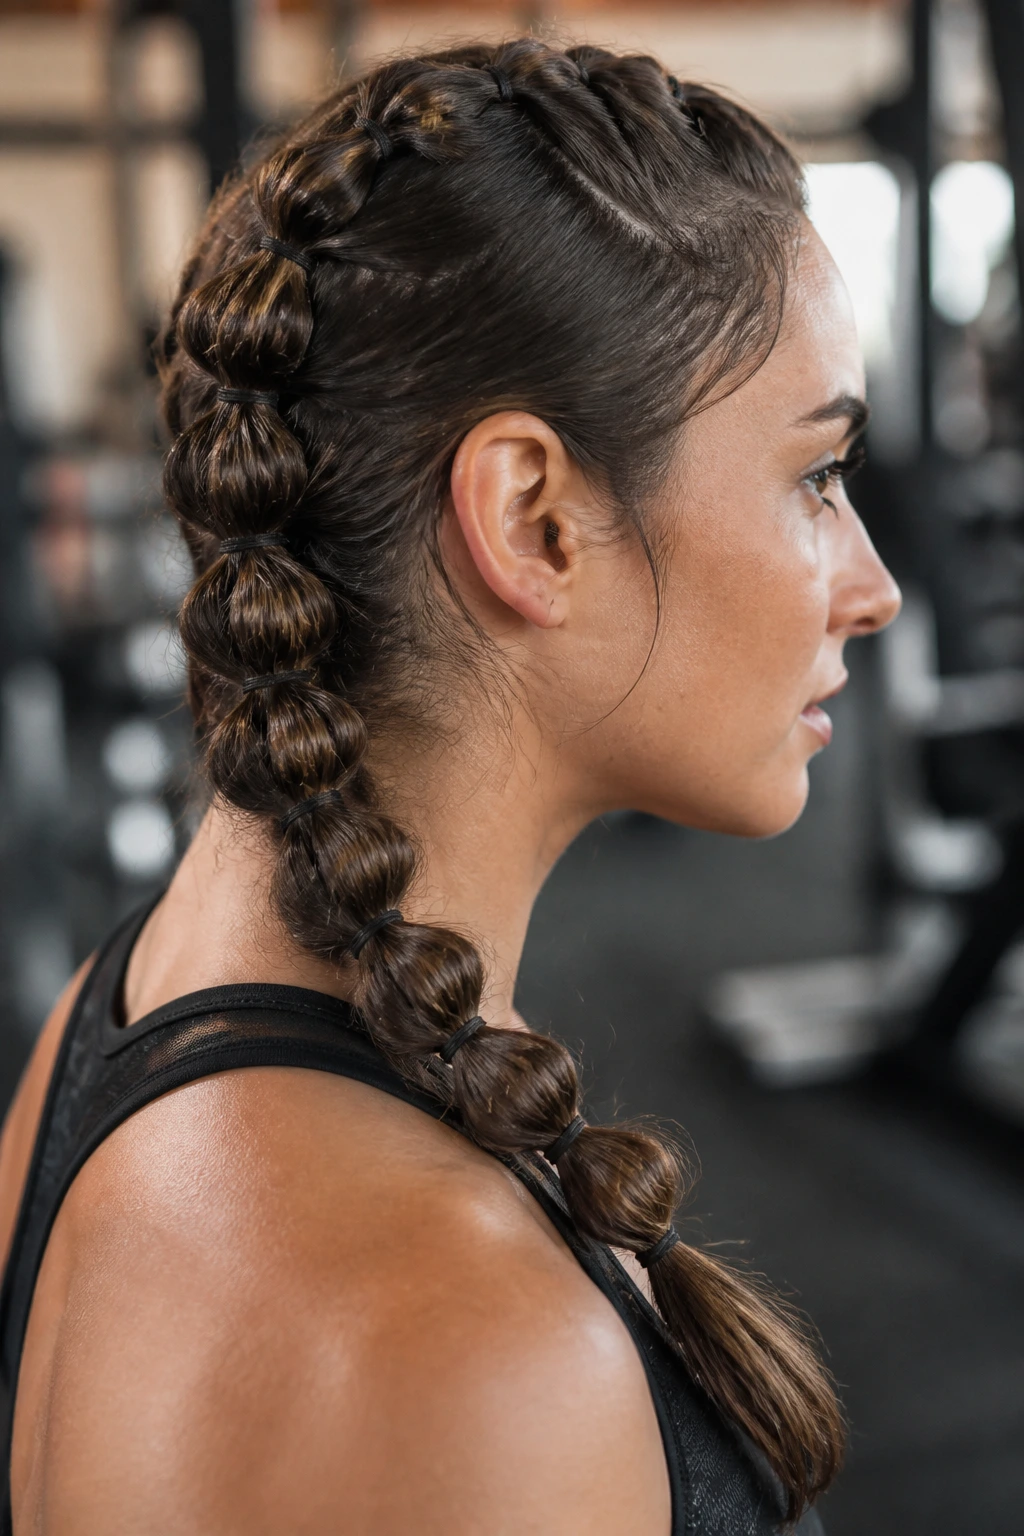
6. Pull-Through Braid
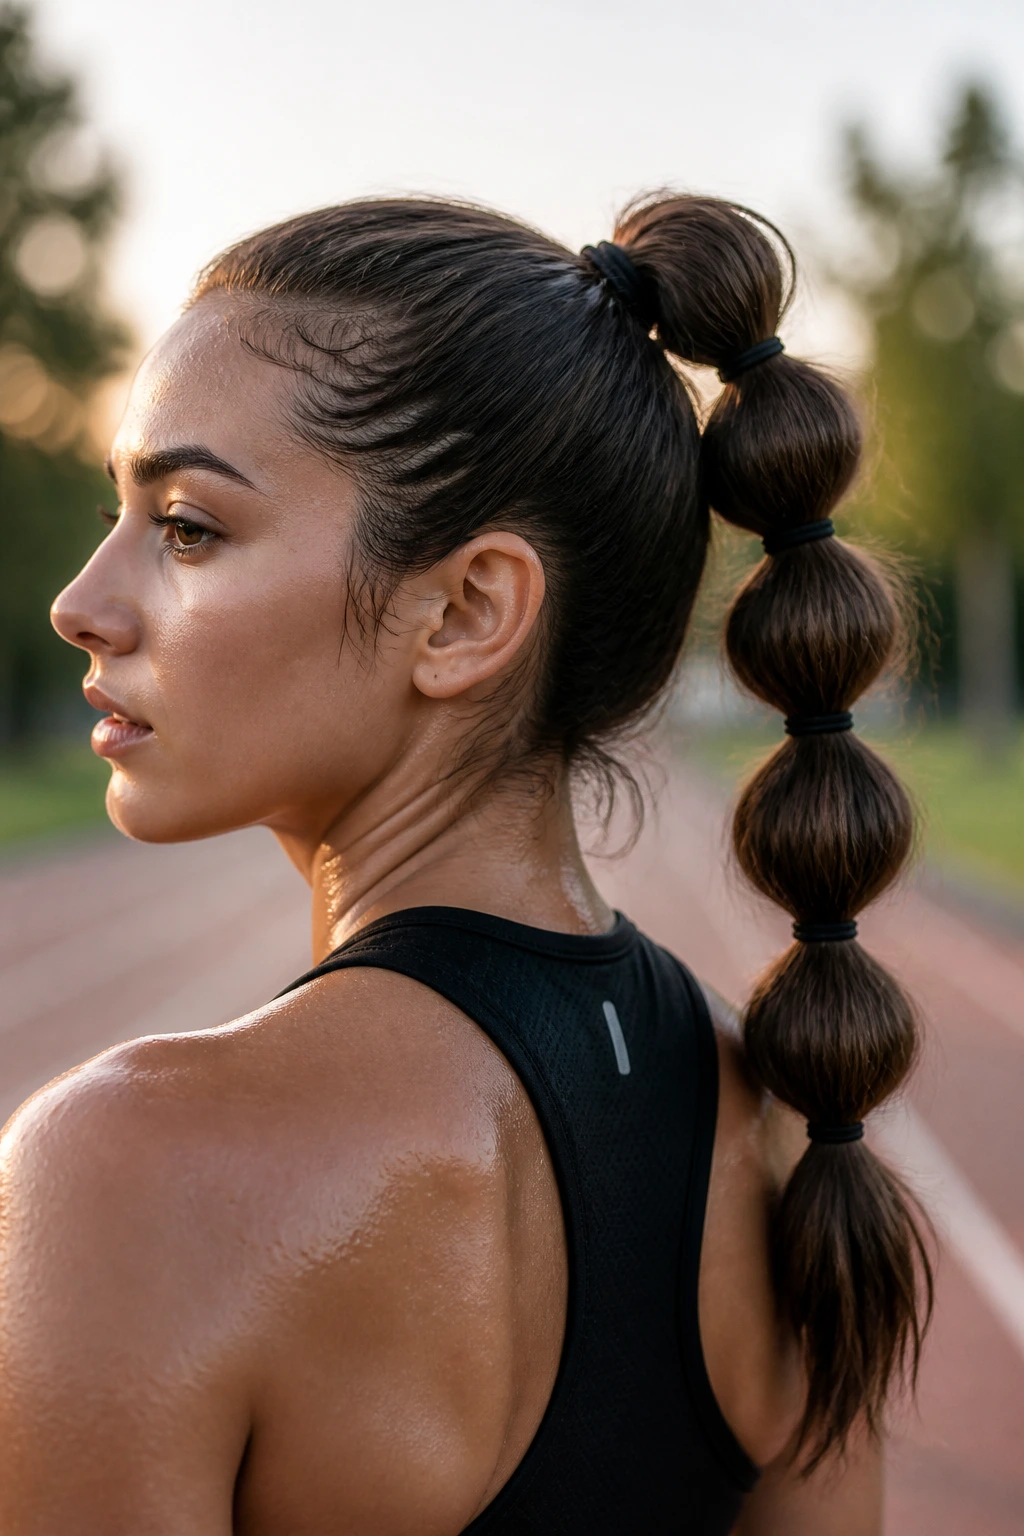
The pull-through braid is a “faux” braid that uses multiple small elastics to create the appearance of a thick, voluminous plait without the need for traditional weaving skills. It looks incredibly complex, yet it is arguably the most secure hairstyle you can choose for a long run or a marathon. Because it is reinforced by tiny elastic bands at every “segment,” it simply cannot fall apart, even if you are out in the elements for hours.
The Physics of the Pull-Through
Each segment of the pull-through acts as its own individual anchor point. If you pull on the edges of the braid to make it look fuller, the elastics hold the foundation firm. This means you get a style that looks voluminous but stays incredibly tight, which is excellent if you have thinner hair that usually looks flat in a traditional braid.
Application Strategy for Workouts
- Start by gathering your hair into a high ponytail as the base.
- Add an elastic every two inches, pulling the hair between the elastics to create “bubbles.”
- For a workout, do not pull the bubbles too wide or they may lose their shape. Keep the segments tight to the center to maximize the holding power.
7. Side-Swept Dutch Braid
If you prefer a style that sits over one shoulder, the side-swept Dutch braid is a stylish way to keep your hair contained during lower-intensity movements like barre or pilates. By braiding across the side of the head, you avoid having a braid lying flat against your back, which can sometimes be distracting during certain floor exercises. It frames the face nicely while keeping your neck clear.
Why It Excels in Pilates and Barre
These activities involve a lot of side-to-side movement and rotation. A side braid keeps your hair out of the way of your shoulders, allowing for a full range of motion. Because it is a Dutch braid, the raised texture provides a great grip, ensuring it stays tucked behind your ear rather than falling forward into your eyes when you look down.
Managing the Tension
- Start at the temple rather than the hairline to prevent the braid from pulling too hard on your delicate front edges.
- As you reach the shoulder, pull the braid firmly to the side before you finish.
- If you have layers, use a tiny amount of styling wax on the ends of the shorter strands to keep them from poking out of the braid.
8. Braided Headband
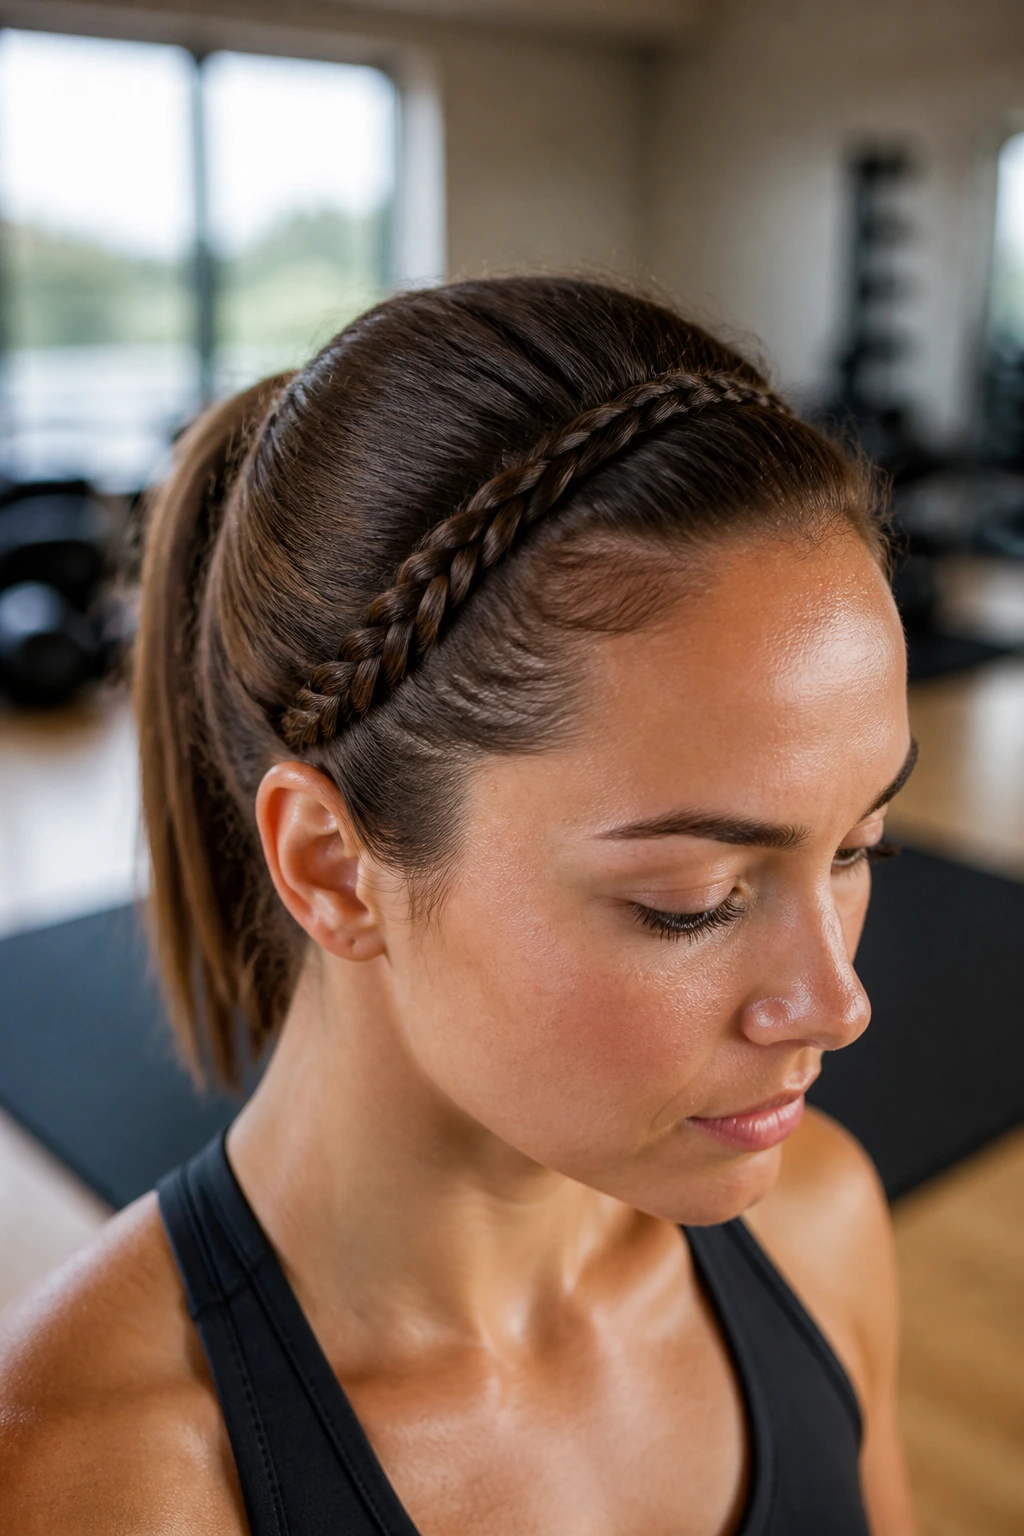
For those who prefer to keep their hair down—or perhaps in a low ponytail—a braided headband is a genius solution for keeping bangs and face-framing layers out of your vision. This technique involves taking a section of hair from the temple, braiding it, and pinning it behind the opposite ear. It effectively acts as a physical barrier that prevents hair from falling into your eyes.
How It Keeps the Face Clear
The braided headband essentially “walls off” your hair. By pinning the braid flat against the crown, you eliminate the need for headbands, which have a tendency to slip backward once you start sweating. It is a permanent, structural solution that doesn’t rely on elastic tension, meaning it won’t pinch or slide over the course of a long workout.
Securing the Style
- Use a fine-tooth comb to part your hair clean, ensuring the section you use for the braid is uniform.
- Braid tightly and pull the braid slightly toward the back of the head as you pin it to create a smooth, clean line.
- Use at least two bobby pins crossed over one another at the end of the braid to ensure it stays locked in place for the duration of your training.
9. Waterfall Braid into Ponytail
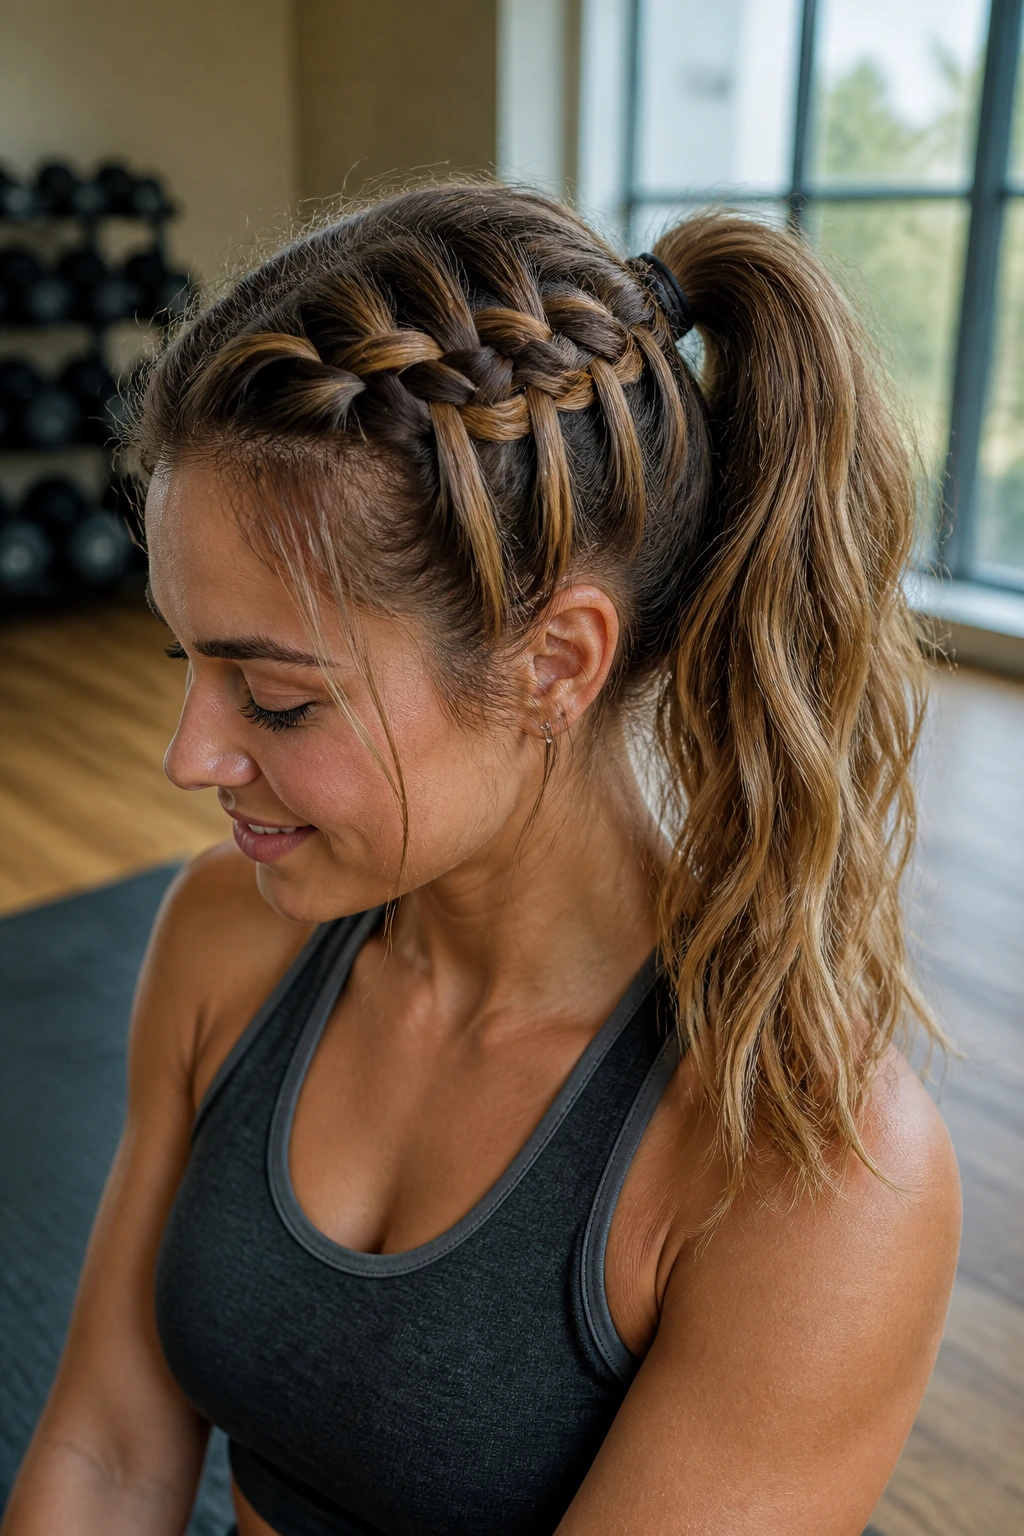
The waterfall braid is often seen as a decorative style, but when you transition it into a sturdy ponytail, it becomes a high-performance workout look. It starts like a French braid but involves dropping sections of hair, which creates a unique, woven look. By gathering the remaining ends into a high ponytail, you secure the style and prevent the “dropped” sections from becoming messy or tangled.
Aesthetic Meets Functionality
Many people avoid decorative braids during workouts because they assume they will fall apart, but this style uses the ponytail as a safety net. The waterfall section keeps your hair tightly pulled back at the temples, which is crucial if you have long bangs or layers. Once you secure everything with a strong elastic, the braid acts as a reinforcement for the rest of your hair.
The Importance of the Base
- Start by brushing your hair thoroughly to remove any snags; a waterfall braid relies on smooth, clean sections.
- When you reach the side of the head, stop adding sections and tie the ponytail securely.
- If you notice the “dropped” sections are looking loose, you can lightly mist them with water to keep them cohesive with the rest of your hair.
10. Multi-Braid Ponytail
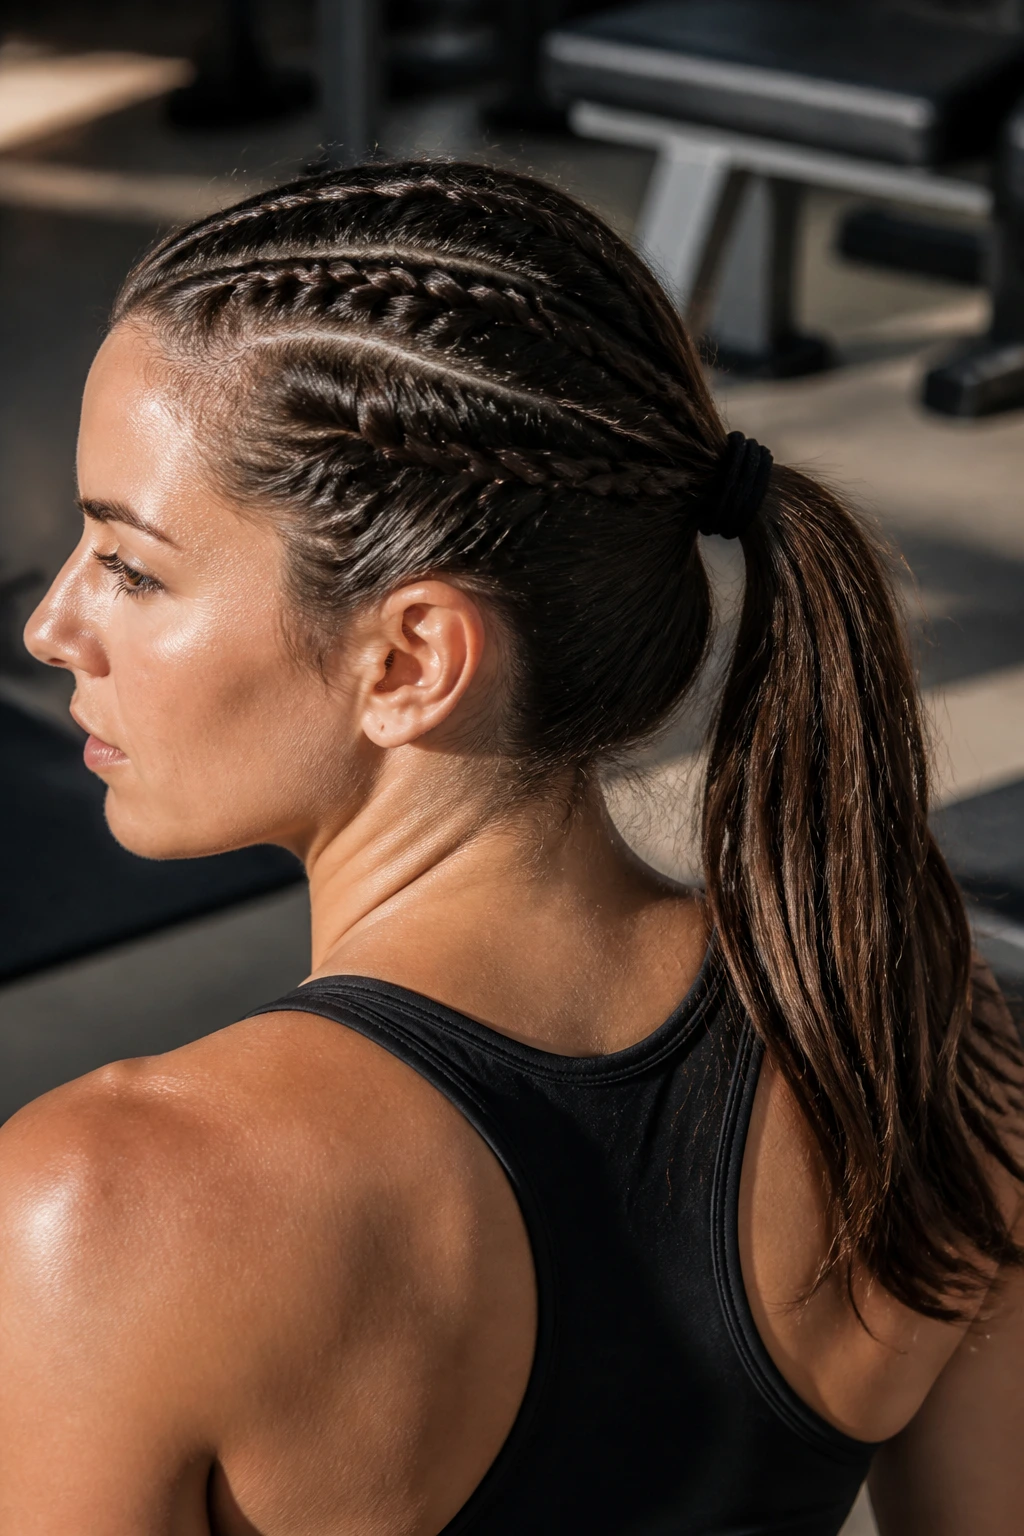
If you are doing an activity that requires extreme movement—like sprinting, jump rope, or box jumps—a single ponytail might not be enough to keep your hair from whipping around. A multi-braid ponytail involves sectioning your hair into three or four small braids and then gathering those braids into one large, secured ponytail. This limits the “swing” of the hair significantly.
Why Less Swing Means Less Tangle
The primary cause of post-workout tangles is the friction of loose hair whipping against itself. By braiding the hair before putting it into a ponytail, you effectively remove the possibility of individual strands crossing over and knotting. This is the ultimate “damage-prevention” strategy for anyone with long, tangly hair.
Tips for Success
- Braid each section separately to ensure they are consistent.
- Do not worry about making the individual braids perfect; they are merely structural components for the ponytail.
- Use a heavy-duty, snag-free hair tie for the main ponytail to prevent the weight of the braids from pulling the elastic out of place.
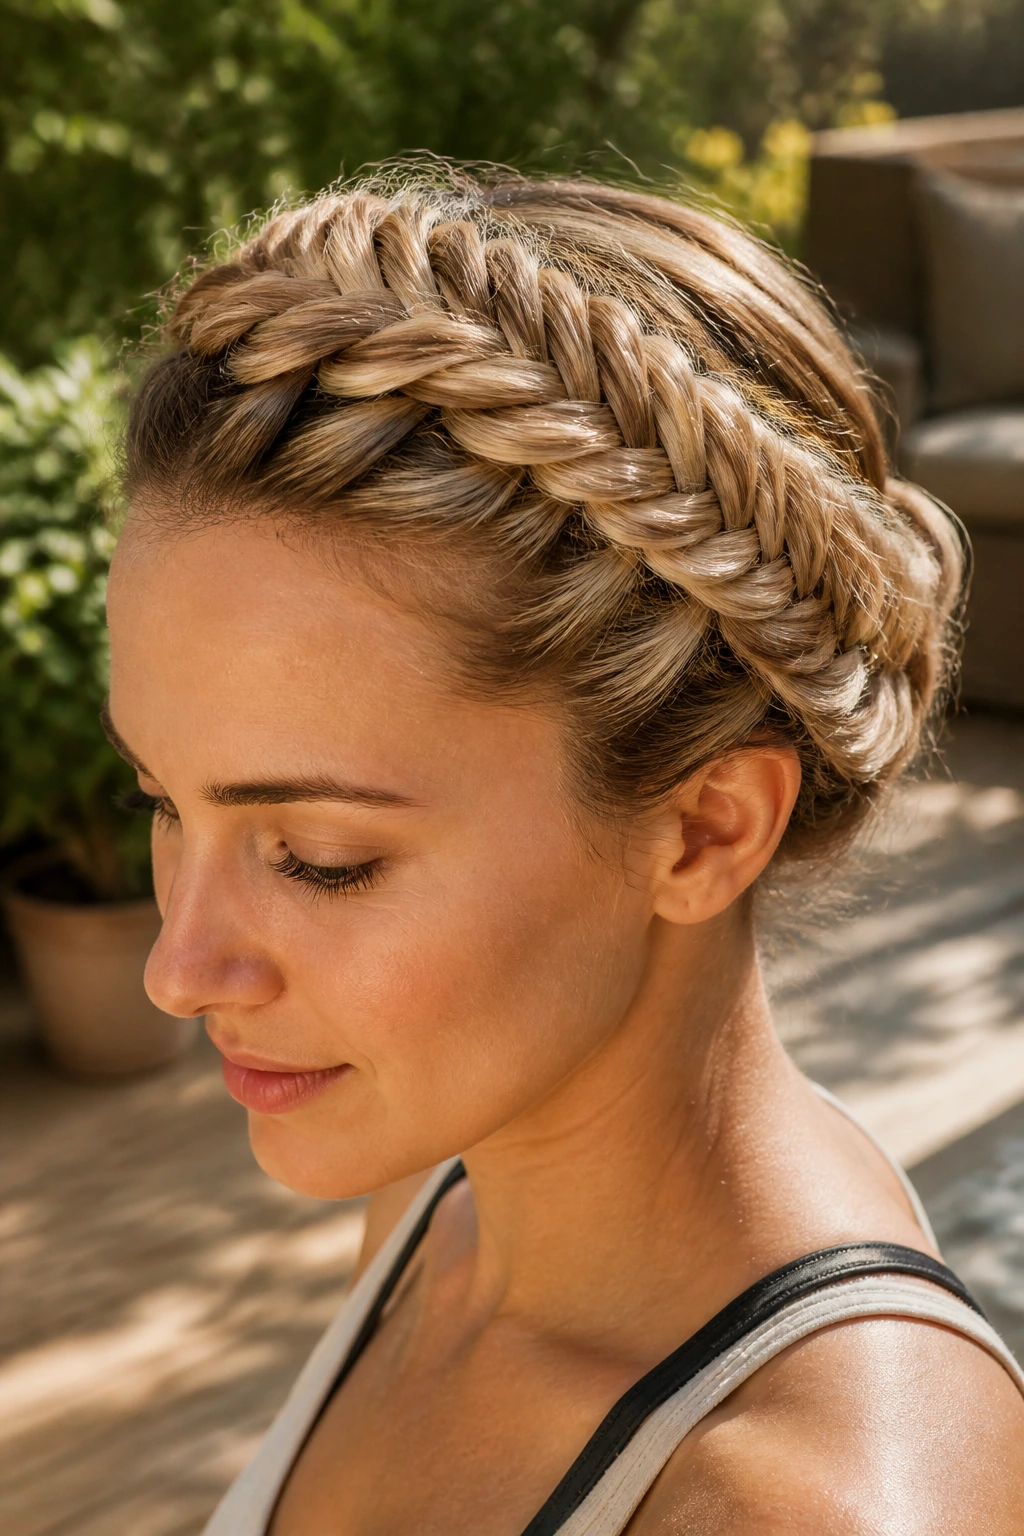
11. The Crown Braid
The crown braid is the ultimate “no-flyaway” style. By wrapping a braid around the entire perimeter of your head, you ensure that every single hair is accounted for. This style is virtually bulletproof, making it the top choice for athletes who participate in activities that involve helmets, goggles, or hats, as it lays perfectly flat against the scalp and does not shift.
Why Athletes Choose the Crown
When you wear a hat or a helmet, a ponytail can cause a pressure point that becomes painful after an hour. The crown braid is flat, so it distributes pressure evenly across the head. It also protects your hair from being pulled by the strap of a helmet, as the braid acts as a cushioned layer between the hair and the gear.
Construction Detail
- Begin at the nape of the neck and work in a full circle.
- As you weave, ensure the sections you pick up are small and even to maintain the tension all the way around.
- When you finish the circle, tuck the tail of the braid under the start and pin it deeply into the center of the crown.
12. Mohawk Braids
Mohawk braids, or “faux-hawk” styles, involve creating a line of braids down the center of the head. This style is bold and incredibly functional. It keeps the hair very tight to the scalp, and because it is centered, it doesn’t get in the way of your peripheral vision or movement during contact training. It is a fantastic way to handle thick, heavy hair that feels cumbersome in a traditional ponytail.
The Benefit of Centered Weight
By concentrating the weight of your hair in a line down the middle of your head, you achieve a balanced look that feels stable. It prevents the hair from drooping to one side or becoming lopsided as you move through your workout. The tight nature of the braids also makes this a very cooling style, as it exposes more of the scalp to airflow.
Styling for Maximum Hold
- Divide your hair into three or four vertical sections running from forehead to nape.
- Braided each section as a tight French braid.
- Once you reach the bottom, you can either keep them as separate braids or combine them into one at the nape of the neck for extra security.
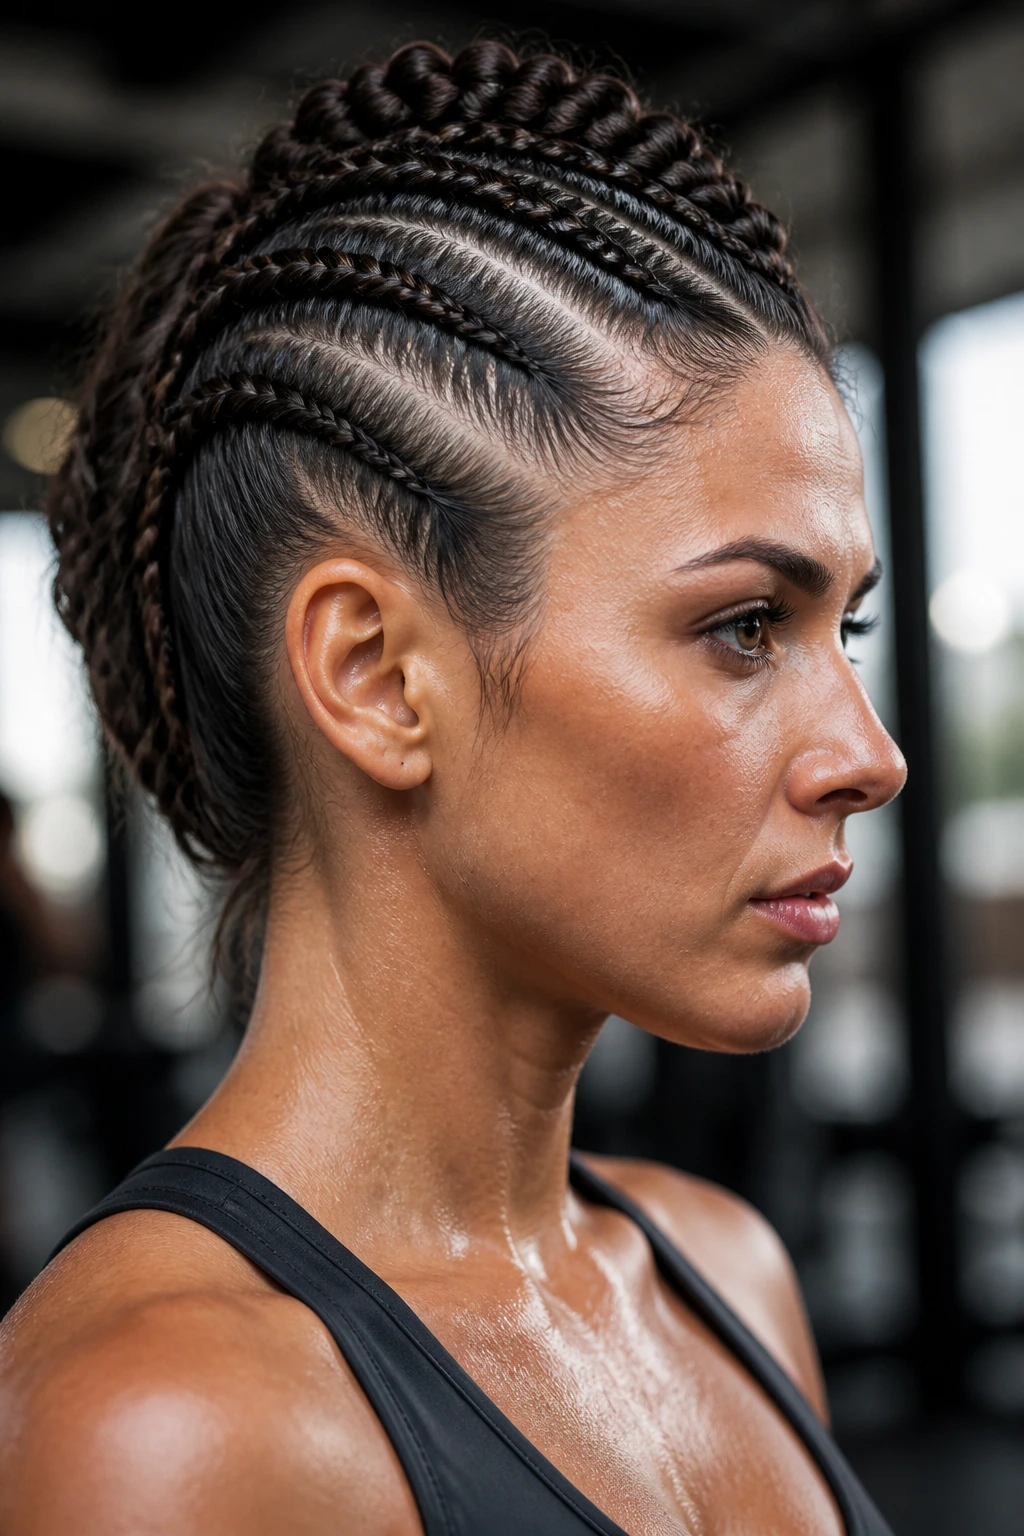
13. Braided Undercut Faux-Hawk
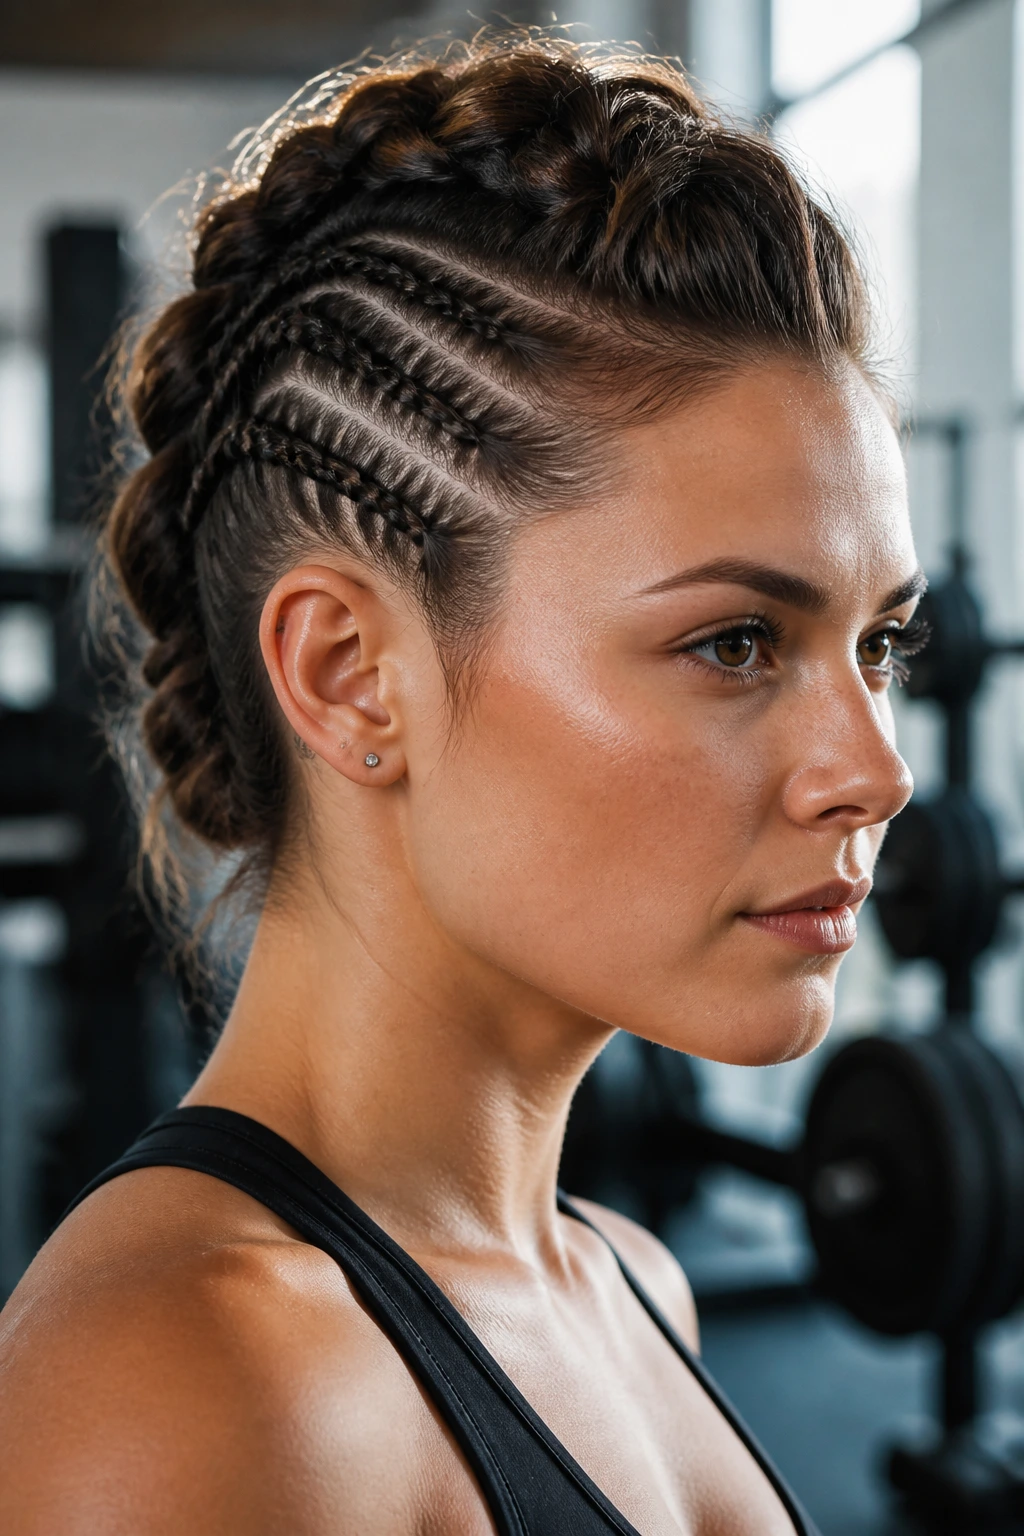
For those who want the look of an edgy, shorn style without actually cutting their hair, the braided undercut is a brilliant alternative. By tightly braiding the hair along the sides of the head—almost tight to the scalp—you create the illusion of an undercut while keeping the hair completely out of the way. It is a highly practical choice for gym-goers who find that hair around the ears is the most annoying part of their workout.
Precision for Performance
This style is all about the tension. By pulling the hair taut along the sides, you eliminate all movement around the ears and temples. It is a clean, minimalist style that doesn’t distract you. The “center” section can be left loose in a ponytail or twisted into a knot, depending on how much activity you have planned.
Maintenance and Care
- Use a high-shine pomade or gel to ensure the “undercut” sections are sleek and tight.
- Keep the braids small—aim for three or four braids on each side to create that classic “shaved” appearance.
- Re-tighten the braids every few days if you are using this as a go-to style for your daily training schedule.
14. Criss-Cross Braid
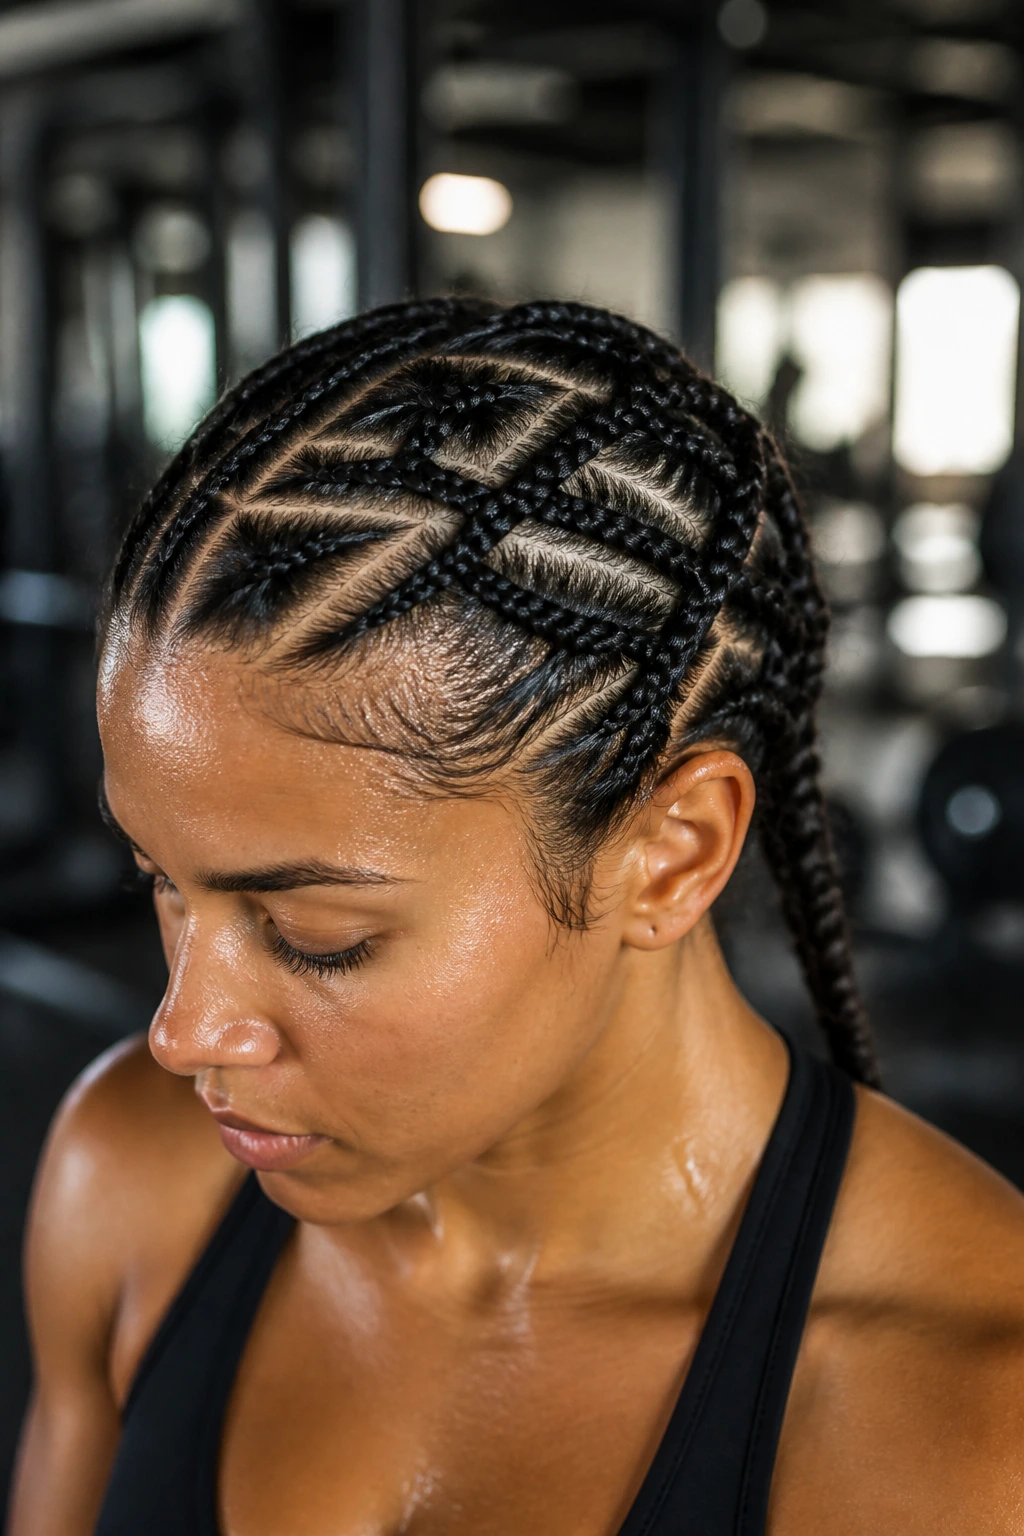
The criss-cross braid is a playful and highly effective way to secure hair that is layered. By braiding diagonally across the scalp and having the braids cross each other, you create a web-like structure that is nearly impossible for hair to escape from. It looks sophisticated but acts as a heavy-duty hair net.
Why Layers Benefit from Cross-Braiding
Layers are notorious for slipping out of traditional braids. Cross-braiding essentially “traps” the shorter layers between the larger sections of the weave, preventing them from poking out as you move. It is the best way to manage a shag or a layered bob during a workout.
Step-by-Step Security
- Start with a diagonal part.
- Braid from the top left toward the right, and then do the same from the right toward the left.
- Where they intersect, weave the two braids together for one or two “stitches” to join them into one, then finish them off as a single unit.
15. The Triple Threat Braid
The triple threat is a combination of three distinct braid types: a French braid at the crown, a rope braid in the middle, and a fishtail at the end. This is not just a style choice; it is a tactical approach to hair management. The French braid handles the roots, the rope braid handles the weight, and the fishtail handles the ends.
Why Combining Techniques Works
Different parts of your hair have different needs. The roots need the most control, the middle needs the most support, and the ends need the most protection. By using a different technique for each zone, you are optimizing the strength of your style across the entire length of your hair.
The Transitioning Process
- Start with the French braid, but tie it off with an elastic once you reach the crown.
- Transition into the rope braid, tying it off again.
- Finish with the fishtail, which can be secured at the very end.
- This segmenting also makes it easier to redo part of the style if one section starts to loosen up during a long session.
16. Knotted Braid
The knotted braid looks intricate, almost like a piece of ropework, but it is actually quite simple to execute and incredibly strong. It involves tying knots with your hair as you go down. Because each knot is physically tied, the braid does not rely on tension alone to hold its shape. Even if the hair is slippery or fine, the knots act as “stoppers” that prevent the braid from sliding or undoing itself.
The Strength of the Physical Knot
Physical knots are the ultimate mechanical stop. In a regular braid, the hair is just overlapping, so it can shift and loosen. In a knotted braid, the hair is looping through itself, which creates a friction-locked structure that is incredibly resistant to movement. It is perfect for activities with a lot of jumping, like box jumps or high-impact aerobics.
How to Execute Properly
- Keep the tension consistent with every knot. If one is too loose, the entire line will look uneven.
- Make sure you are using your fingertips to pull the knot tight against the scalp before moving to the next one.
- If you have very long hair, this might take a few extra minutes, but the result is a style that will last through a two-hour gym session without needing a single adjustment.
17. The Twisted Half-Up Braid
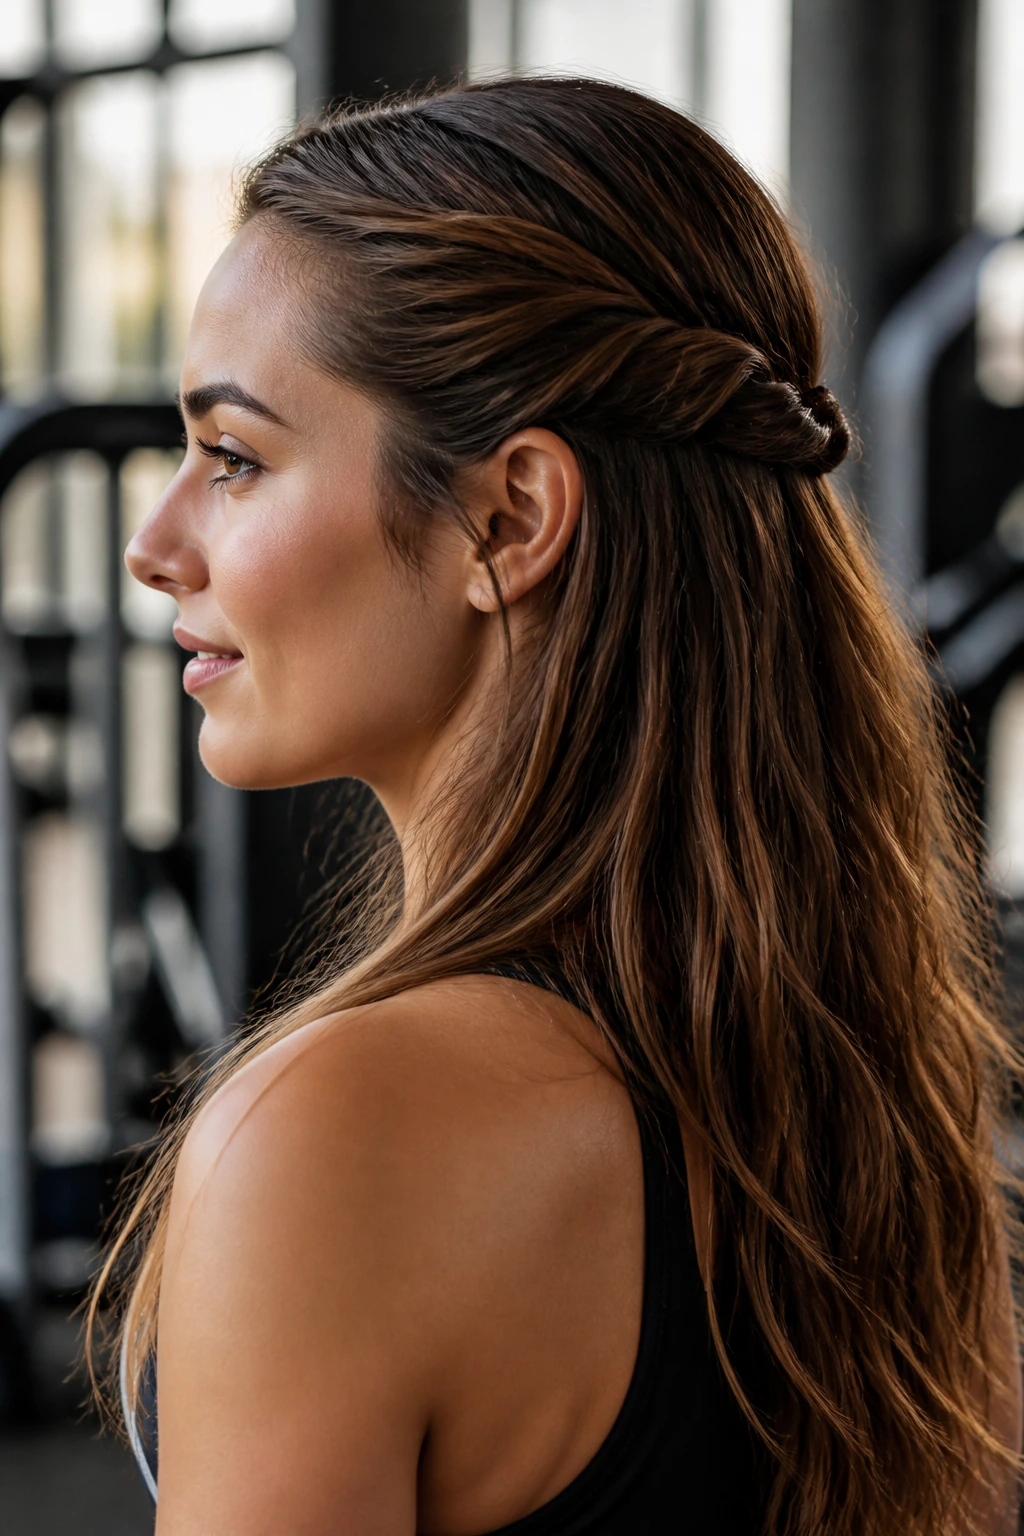
If you prefer to keep some hair down but need to manage the front layers, the twisted half-up braid is a great compromise. By braiding only the top section of your hair and pulling it back, you ensure your vision remains clear while still maintaining the comfort of having your hair mostly down. This is ideal for lower-impact days where you want to look good but don’t want the tension of a full-scalp braid.
Balancing Style and Comfort
Sometimes a full-head braid can cause a headache if it is too tight. A half-up style alleviates that tension while still providing the control you need to keep hair out of your eyes during exercise. It is a lighter, more relaxed look that works beautifully for walking, yoga, or light weights.
Securing the Half-Up
- Section the top half of your hair from ear to ear.
- Braid the section tightly, then use a small clip to secure it at the back of the head.
- If you find the braid slides down, use a small clear elastic to tie it off first, then use bobby pins to tuck the end of the braid underneath the loose hair for a cleaner, “hidden” look.
18. The “Invisible” Braid
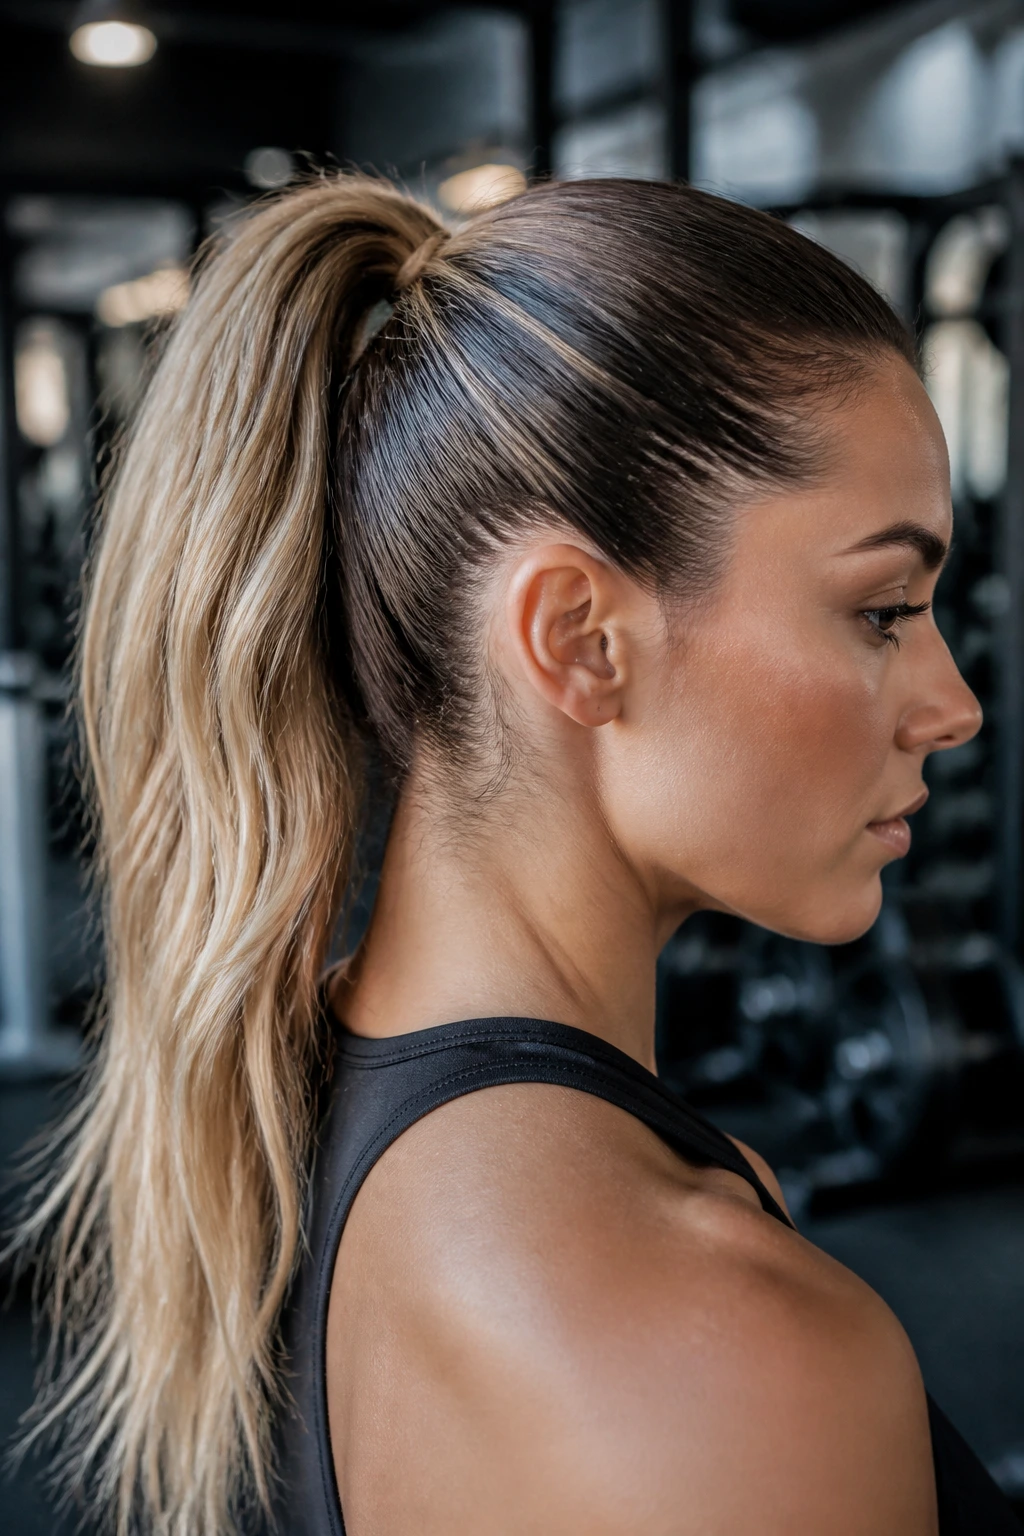
For those who want the performance of a braid without the look of one, the invisible braid is your best friend. This technique involves braiding very small sections of hair underneath the top layer, creating a “secret” support system. It’s an expert-level move for people who love the look of a ponytail but hate the way it constantly slips down or gets tangled during movement.
Why This is an Expert-Level Hack
You get all the aesthetic benefits of a loose ponytail but the structural integrity of a braided style. The “hidden” braid prevents the ponytail from sagging, as it acts as a permanent anchor for the elastic. It is subtle, effective, and incredibly useful for those who want to avoid the “braided” gym aesthetic altogether.
Execution Tips
- Part your hair and take a thin section from the crown.
- Create a tight, small French braid running toward the center of your head.
- Gather all your hair—including the end of the hidden braid—into a high ponytail.
- The braid will essentially disappear into the hair tie, but it will provide a rigid support that keeps your ponytail lifted and tight throughout your workout.
19. Ribbon-Reinforced Braid
If your hair is particularly silky or layered and simply will not stay in a braid, try weaving a thin ribbon into the hair as you braid. The ribbon acts as a grip-enhancing material, providing texture where your hair might be lacking. It also adds a pop of color and makes the braid nearly impossible to loosen during intense movement.
The Role of Texture
Many workout hair problems come down to a lack of surface area friction. A smooth, shiny ponytail will always slip. By adding a ribbon, you are physically increasing the surface area and adding a non-slip component to the braid. This is a classic trick used by dancers and athletes to keep their hair secure for long performances.
How to Weave Safely
- Fold the ribbon in half and tie it around the center section of your initial braid.
- As you weave, ensure the ribbon is kept taut alongside your hair.
- Secure the end with the same ribbon for a cohesive, professional look that is built to last.
20. The High-Volume Fishtail
The high-volume fishtail is the best choice for someone with fine hair who wants the security of a braid but the look of thickness. By gently pulling on the edges of the fishtail braid after it is finished (a technique known as “pancaking”), you can create the illusion of double the volume. This style stays tight against the scalp but looks soft and full, which is a great psychological boost during a tough workout.
The Illusion of Volume
Fishtail braids are naturally dense. By pancaking them, you increase their visual footprint without compromising the hold. Because the fishtail is composed of so many small sections, you have dozens of anchor points, which means it will not unravel even after you’ve pulled on the edges to fluff it up.
Maintenance and Styling
- Always pancake from the bottom up to ensure you don’t accidentally pull the whole braid apart.
- Use a light-hold hairspray once you are finished to lock the “fluffed” sections in place.
- If you are doing an especially sweaty workout, skip the hairspray and instead use a texturizing powder for more grip that won’t get sticky when wet.
Final Thoughts
When it comes to workout hair, the goal is always to find the balance between security and scalp comfort. You are not looking for a look that lasts for a gala; you need a style that can withstand sweat, gravity, and the occasional awkward angle. Don’t be afraid to experiment with different tension levels—sometimes a tighter braid is better for cardio, while a looser, flatter style works wonders for floor-based flexibility training.
Remember that your hair’s health matters just as much as your performance. Avoid using harsh metal clips or elastics that are too small, as these can cause significant breakage when combined with the friction of a workout. A little prep work—using the right texturizing product or taking an extra minute to ensure your part is clean—goes a long way in ensuring your hair stays put. Ultimately, the best braid is the one you can set, forget, and then focus entirely on your movement.