When you think of Fulani braids, you likely envision those striking, clean-lined patterns that trace the scalp, often featuring a distinct center part and those iconic, dangling beads near the temples. It is a look rooted in history, radiating a sense of regal tradition, yet it adapts beautifully to modern textures. If you have wavy hair, you might assume these protective styles are only for tightly coiled textures, but the reality is that with the right technique and tension management, these styles can work effectively for your hair as well.
The secret to pulling off this look on a wavy texture lies in how you prep the hair. Because wavy hair has a softer cuticle than 4C hair, it tends to slide or frizz if you try to braid it bone-dry. We are talking about using a high-quality edge control, a leave-in conditioner that provides a bit of grip, and sometimes a very light mousse to lock those stray waves into place. You want the hair to feel firm and smooth before the extensions are even introduced.
Finding the right balance of tension is the most critical part of the entire process. If you braid too tightly, you risk the protective style becoming a breakage catalyst, which defeats the purpose entirely. Let us look at how you can navigate the world of these intricate, beaded styles without compromising the health of your natural waves.
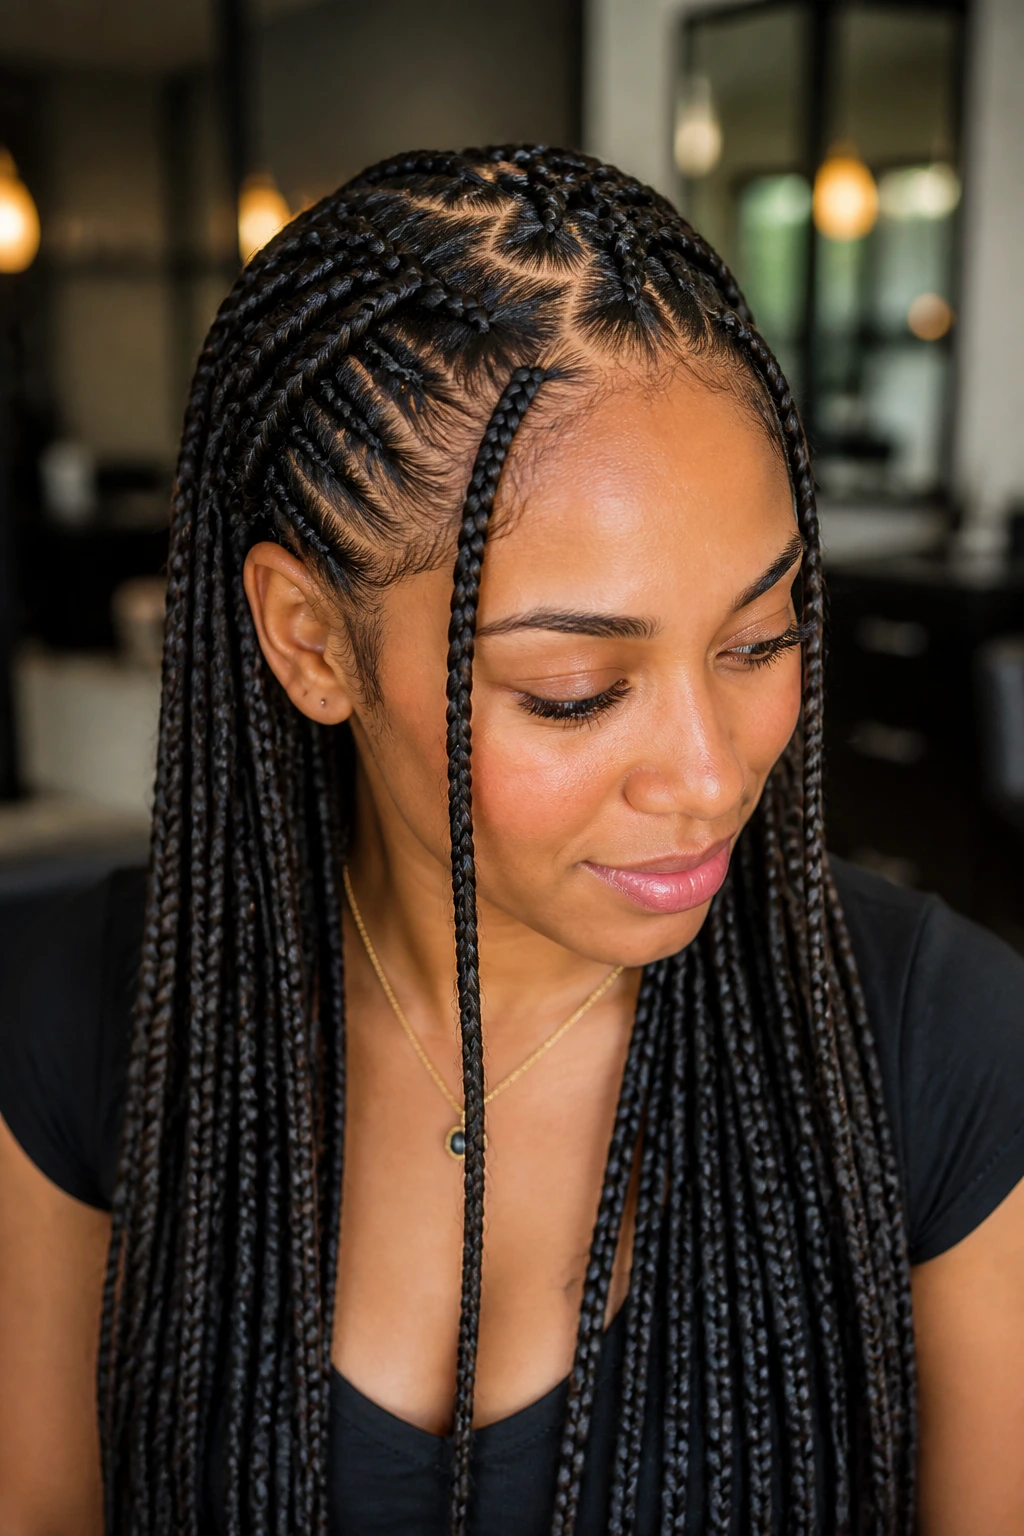
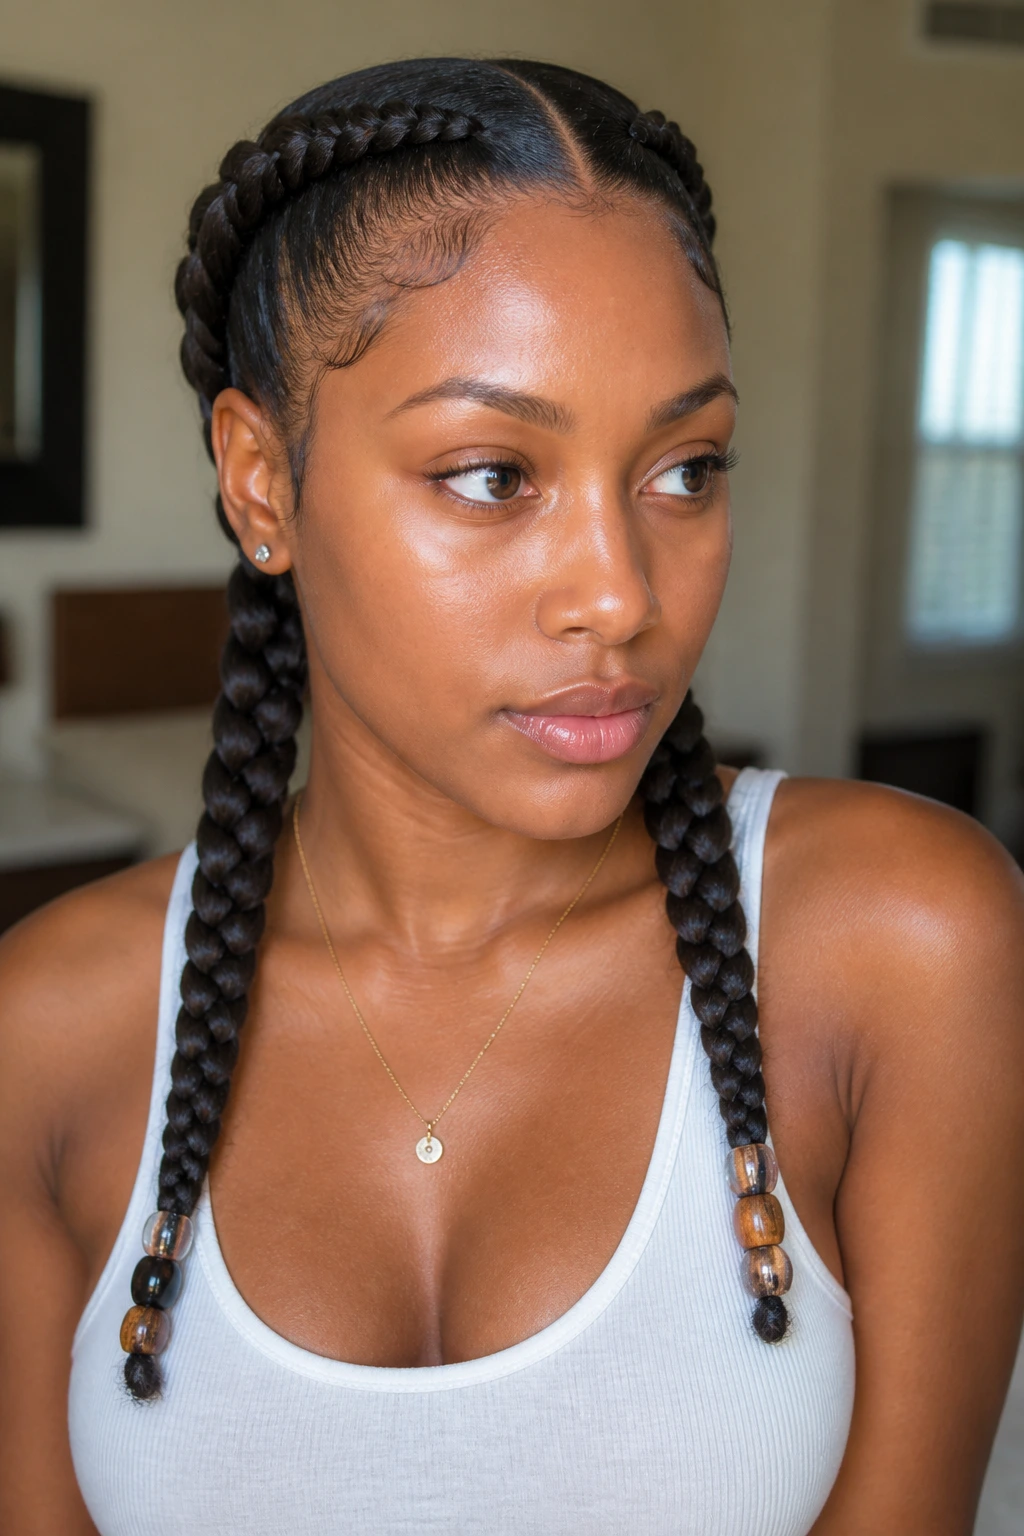
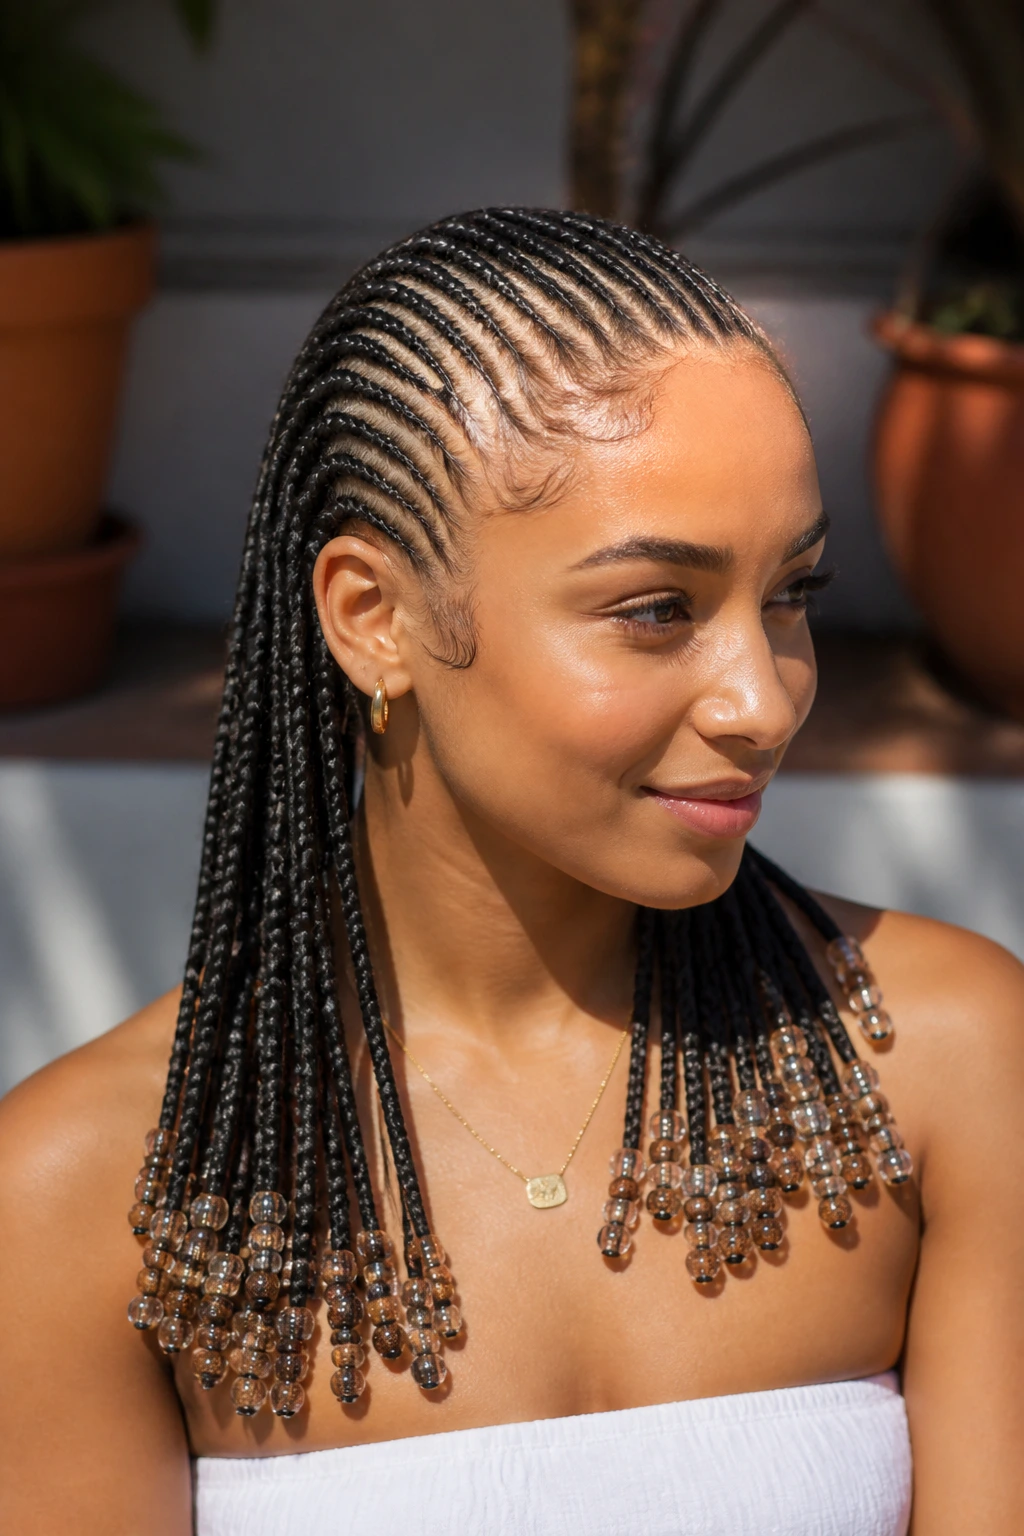
1. The Classic Center Part and Side Swoops
This is the quintessential look that most people associate with the style. It features a sharp, razor-straight part down the center, flanked by two or three braids that swoop gracefully toward the ears. For wavy hair, the key here is the base work. You need to use a tail comb to create lines that are so precise they look like they were drawn with a ruler.
Why This Style Works for Wavy Textures
The structure of these braids relies on the artificial hair added at the root. By braiding your natural wavy hair into the extension early, you secure the texture, preventing the waves from “popping out” of the braid mid-day. This style also keeps the most delicate front edges protected under the synthetic hair.
Essential Tools for the Setup
- A fine-tooth tail comb for exact parting
- A firm-hold pomade or edge wax
- Beads of your choice (wooden, gold, or clear)
- A crochet hook for the final accessory placement
2. Incorporating Gold Cuffs and Loops
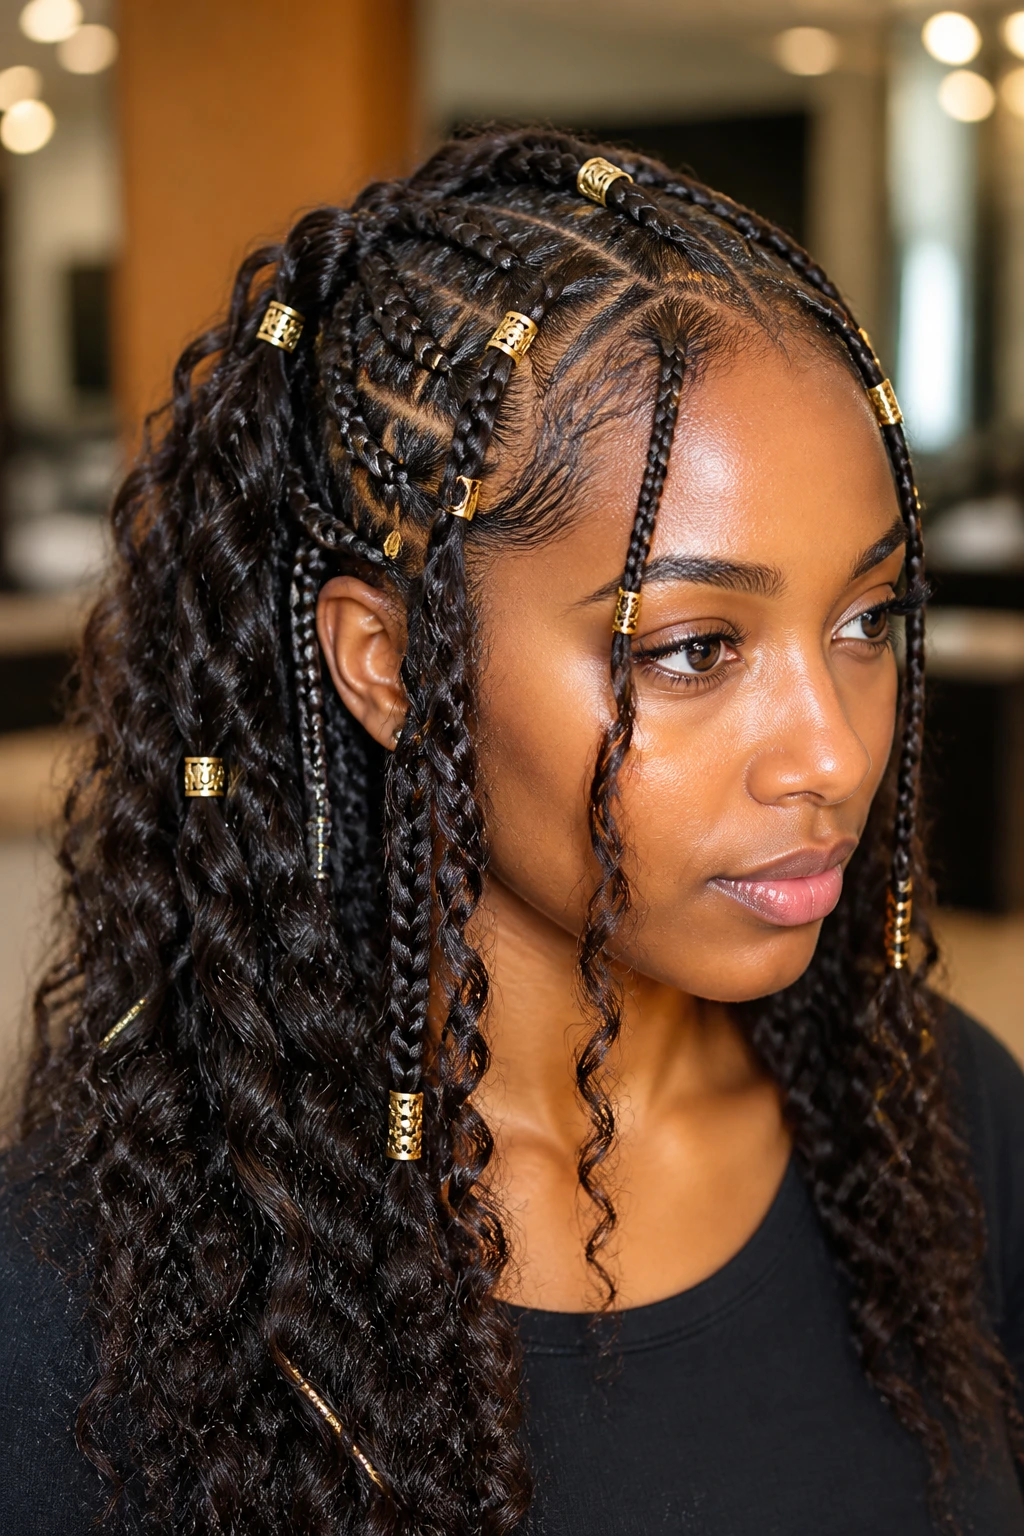
Gold cuffs are not just decorative; they add a layer of sophistication that turns a standard protective style into a statement piece. When you are working with wavy hair, the hair can sometimes be a bit slippery, meaning gold cuffs might slide off if they aren’t squeezed tight enough.
Styling Tips for Longevity
Always ensure your hair is slightly damp when applying the product before braiding. This makes the waves pliable, ensuring that the braid sits flat against the scalp. Once the braid is finished, place your gold cuffs at varying intervals—perhaps one near the root, one in the middle, and one right before the bead—to create visual rhythm.
The Best Way to Secure Cuffs
Avoid pushing the cuffs too close to the scalp, as this can irritate the skin. Instead, space them out where the braid is thickest. If you find they are slipping, a small drop of clear nail polish on the inside of the cuff before clamping can provide the extra friction you need.
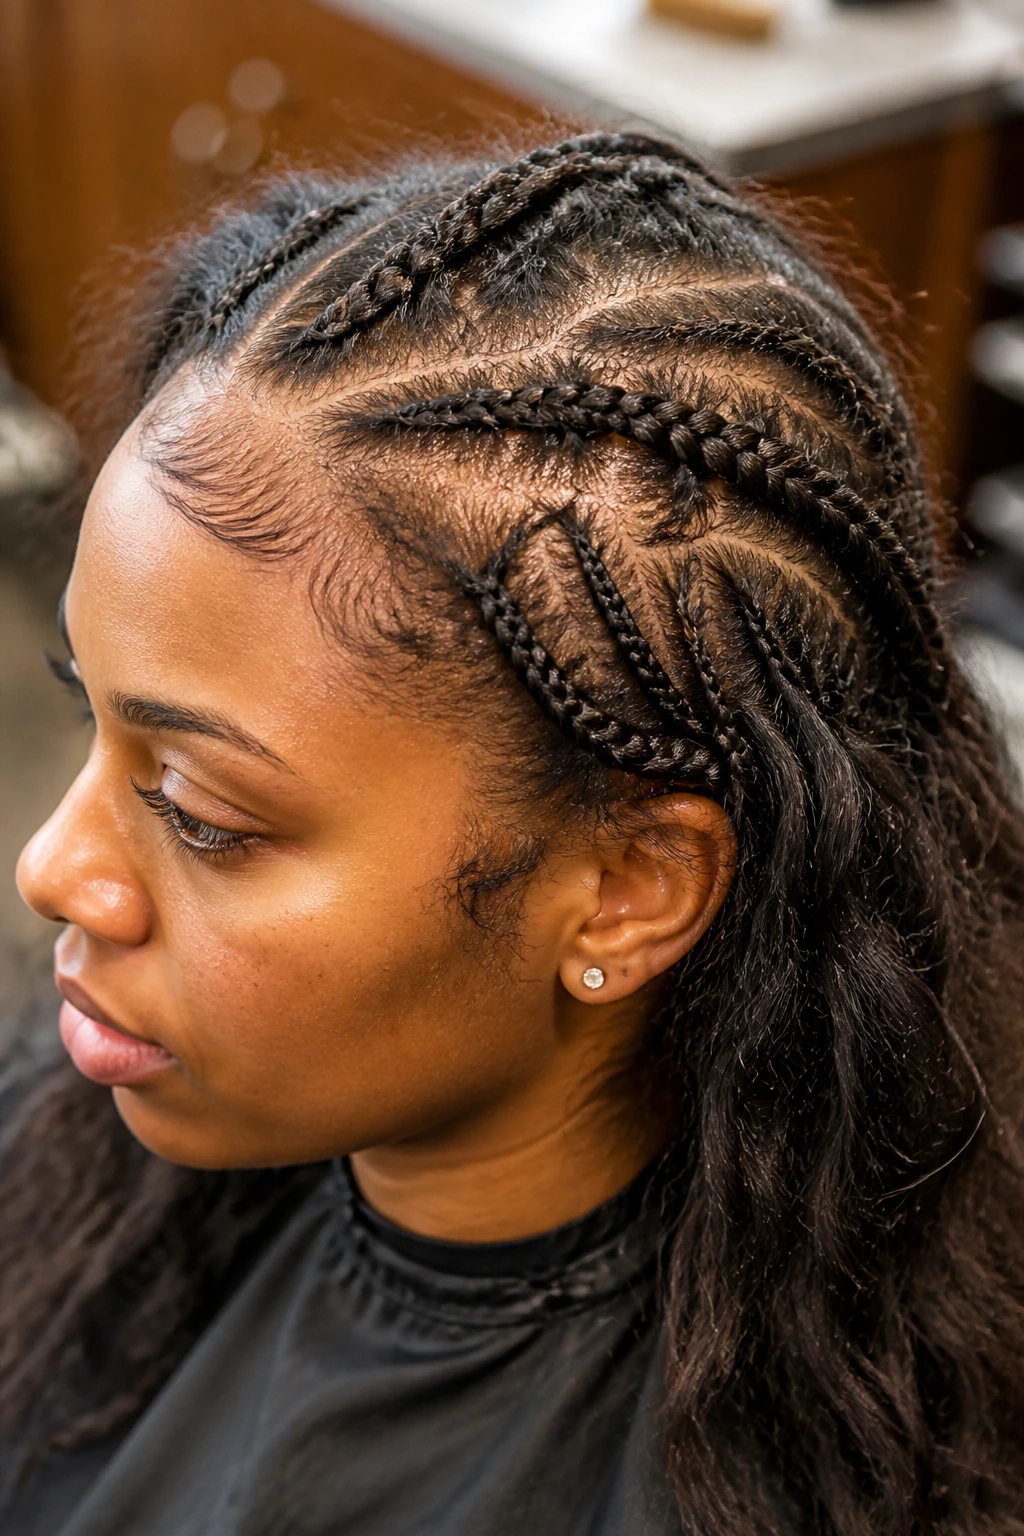
3. The Tribal-Inspired Zig-Zag Parting
If you want to break away from the traditional straight lines, a zig-zag pattern adds a level of complexity that looks incredibly high-end. This is an excellent choice for wavy hair because the movement in the parting distracts from the potential frizz that can sometimes occur when the hair isn’t perfectly straight.
Why It’s a Bold Choice
The zig-zag part forces the eye to focus on the geometry of the scalp rather than the texture of the hair itself. It is a perfect way to show off a creative stylist’s skill. Make sure you spend extra time on the “points” of the zig-zag. These areas are prone to lifting, so keep them saturated with a bit of extra gel during the initial braiding phase.
Styling Variation
Try using contrasting colors for the braids themselves. Adding a few strands of honey-blonde or deep red synthetic hair into the mix can make the zig-zag pattern pop even more. It creates a multidimensional look that feels fresh and modern.
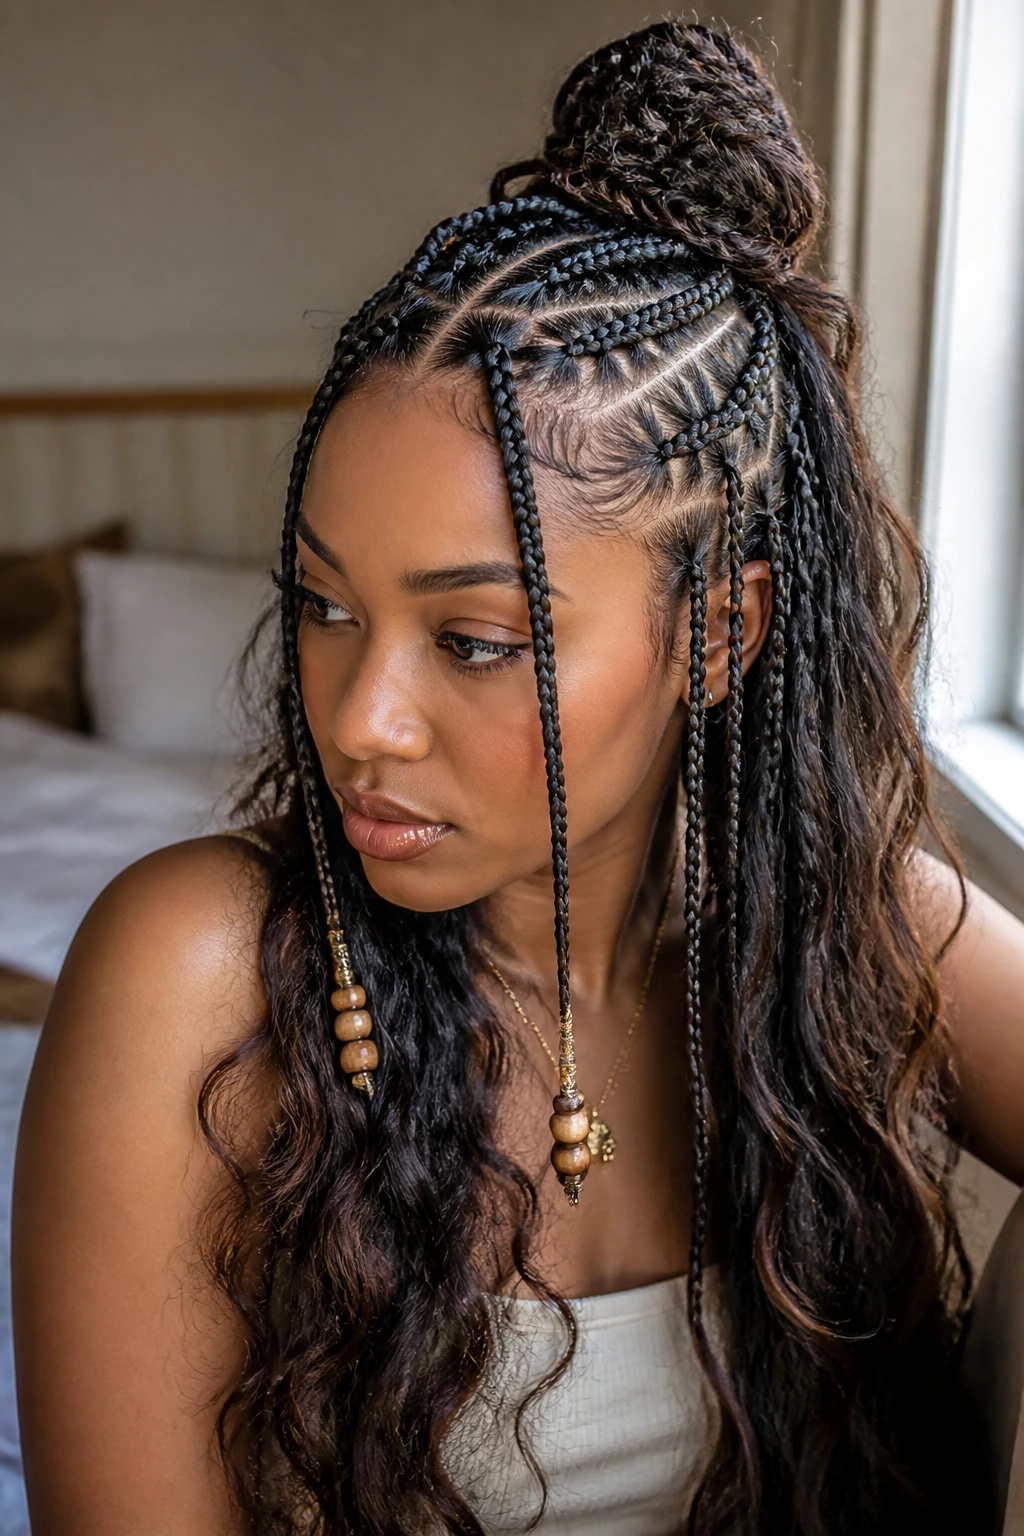
4. The High-Volume Beaded Crown
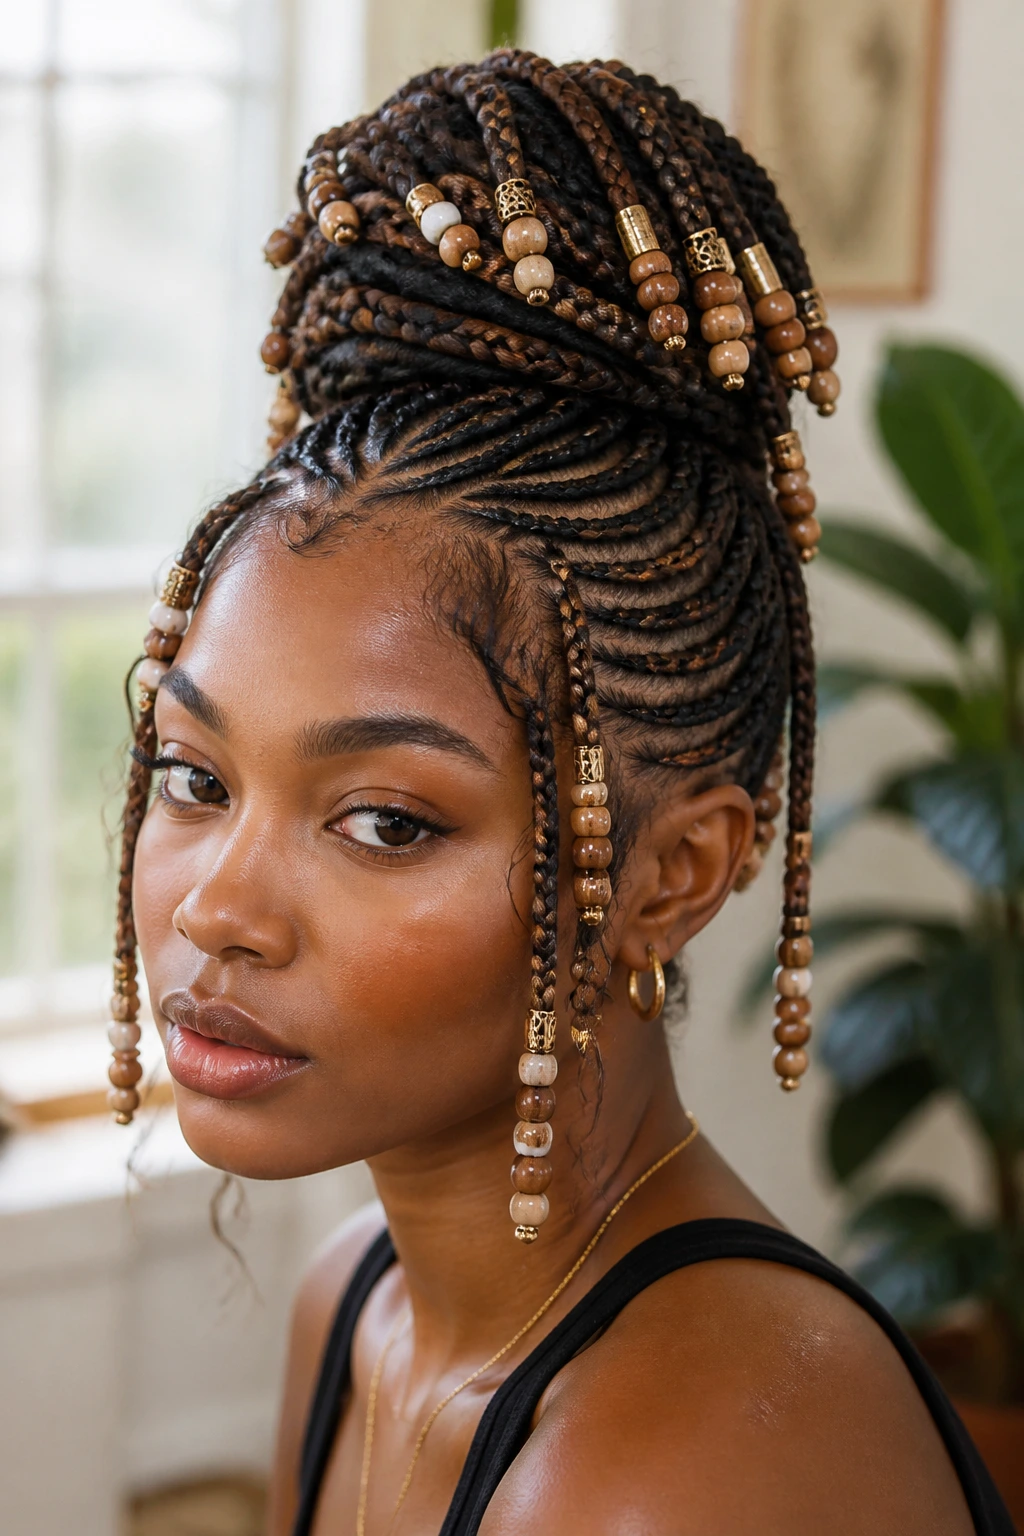
This look is all about drama. By gathering the braids into a ponytail or a bun and layering them with an abundance of beads, you create a regal, crown-like effect. For wavy-haired individuals, this is a great way to manage the weight of the extensions, as the bun keeps the heavy hair off your neck.
Managing Weight for Comfort
Weight is the enemy of a long-lasting style. If you have fine wavy hair, do not overload your head with too many large, heavy beads. Opt for a mix of lighter wooden beads and smaller metallic accents to keep the tension manageable.
How to Achieve the Full Effect
- Section the top of your hair into smaller, more numerous braids.
- Gather the braids into a loose bun at the crown.
- Let two or three braids hang loose at the temples, adorned with multiple beads for that signature face-framing effect.
5. Sleek Side-Swept Braids
There is an elegance to the side-swept look that feels slightly more mature than the center-parted style. This involves pulling all the hair toward one side of the head, creating a cascading effect. Because your natural wavy hair has inherent body, this style will look less flat than it would on straight hair.
The Role of Edge Control
You cannot skip the edge control with this style. Since you are creating a deep side part and sweeping everything across, your edges are going to be under constant tension. Apply a generous amount of product to the hairline and use a small brush to smooth it back before you start the main braiding process.
Why This Style Lasts
By sweeping everything to one side, you are naturally reducing the friction the hair experiences against your pillow at night. It is a more “stable” style than symmetrical braids, meaning you will likely get a few extra days of freshness before you need to touch up the edges.
6. The Minimalist “Two-Braid” Look
Sometimes, you do not need twenty braids to make an impact. Two large, thick braids running from the front of the scalp to the back, adorned with a few simple beads at the ends, can be just as striking. This is a much faster, lower-tension process.
Ideal for Beginners
If you are new to the world of braids, start here. It takes a fraction of the time, and you are not putting nearly as much stress on your natural wave pattern. It allows you to test how your hair reacts to the added weight of the extensions without the commitment of a full head.
Pro Maintenance Advice
Because there is less “support” from other braids, make sure your natural hair is braided tightly into the extension base. If you leave your wavy hair too loose inside the thick braid, it will start to puff out after about 48 hours. Wrap your hair in a silk scarf every single night to keep those two braids smooth.
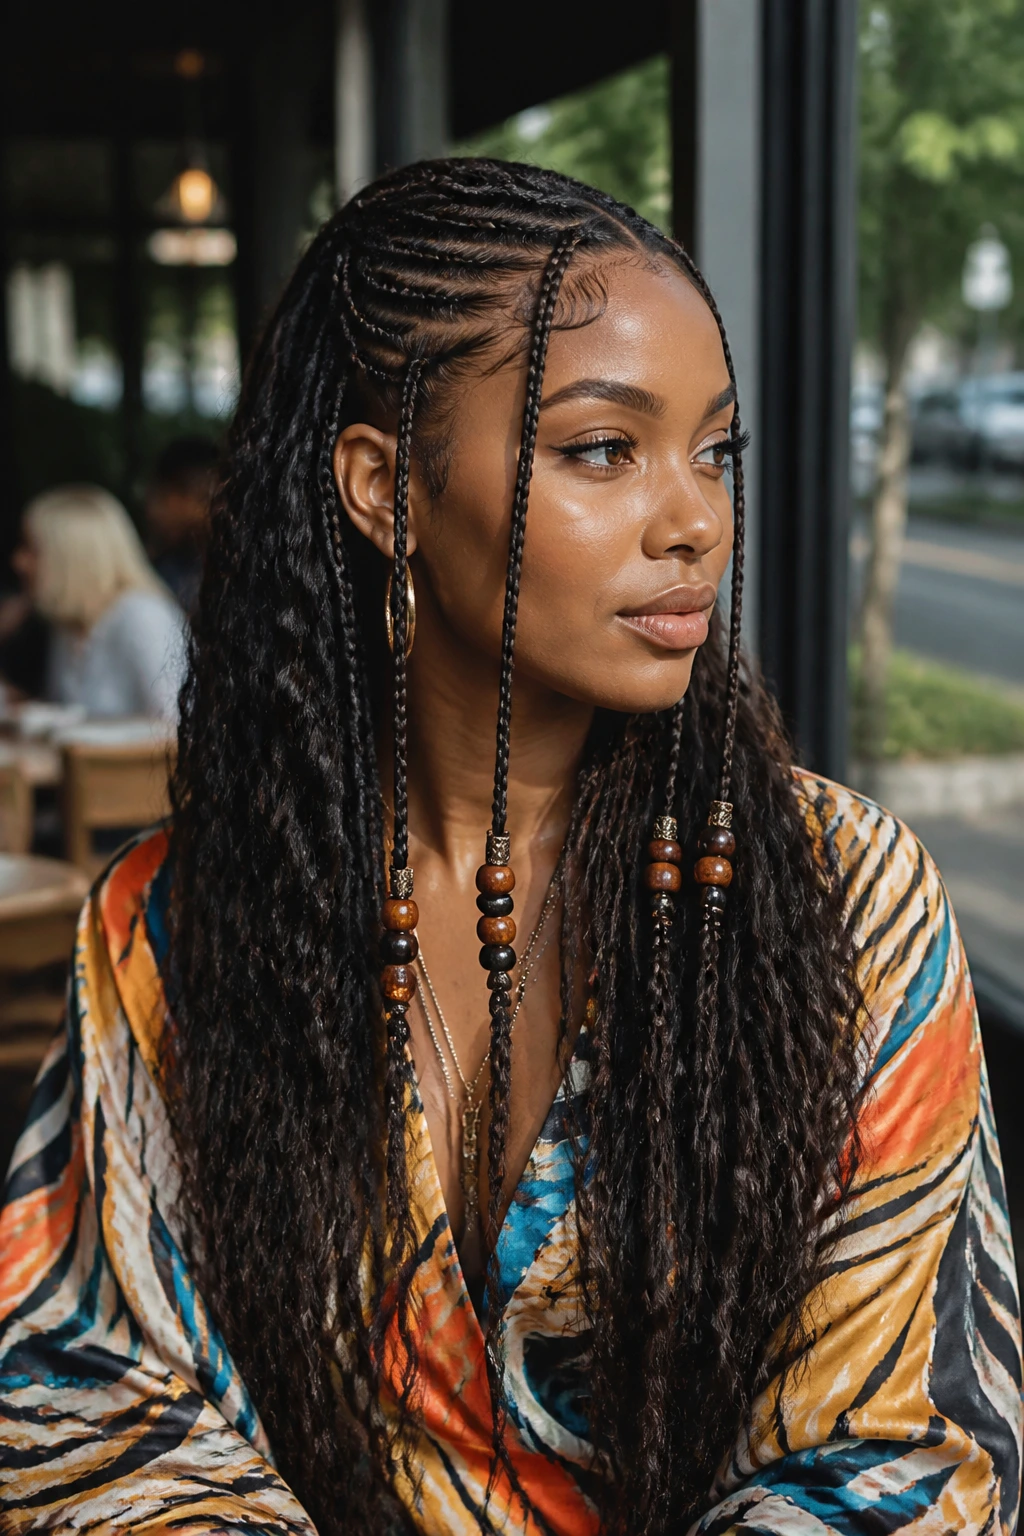
7. Chunky Bohemian-Inspired Braids
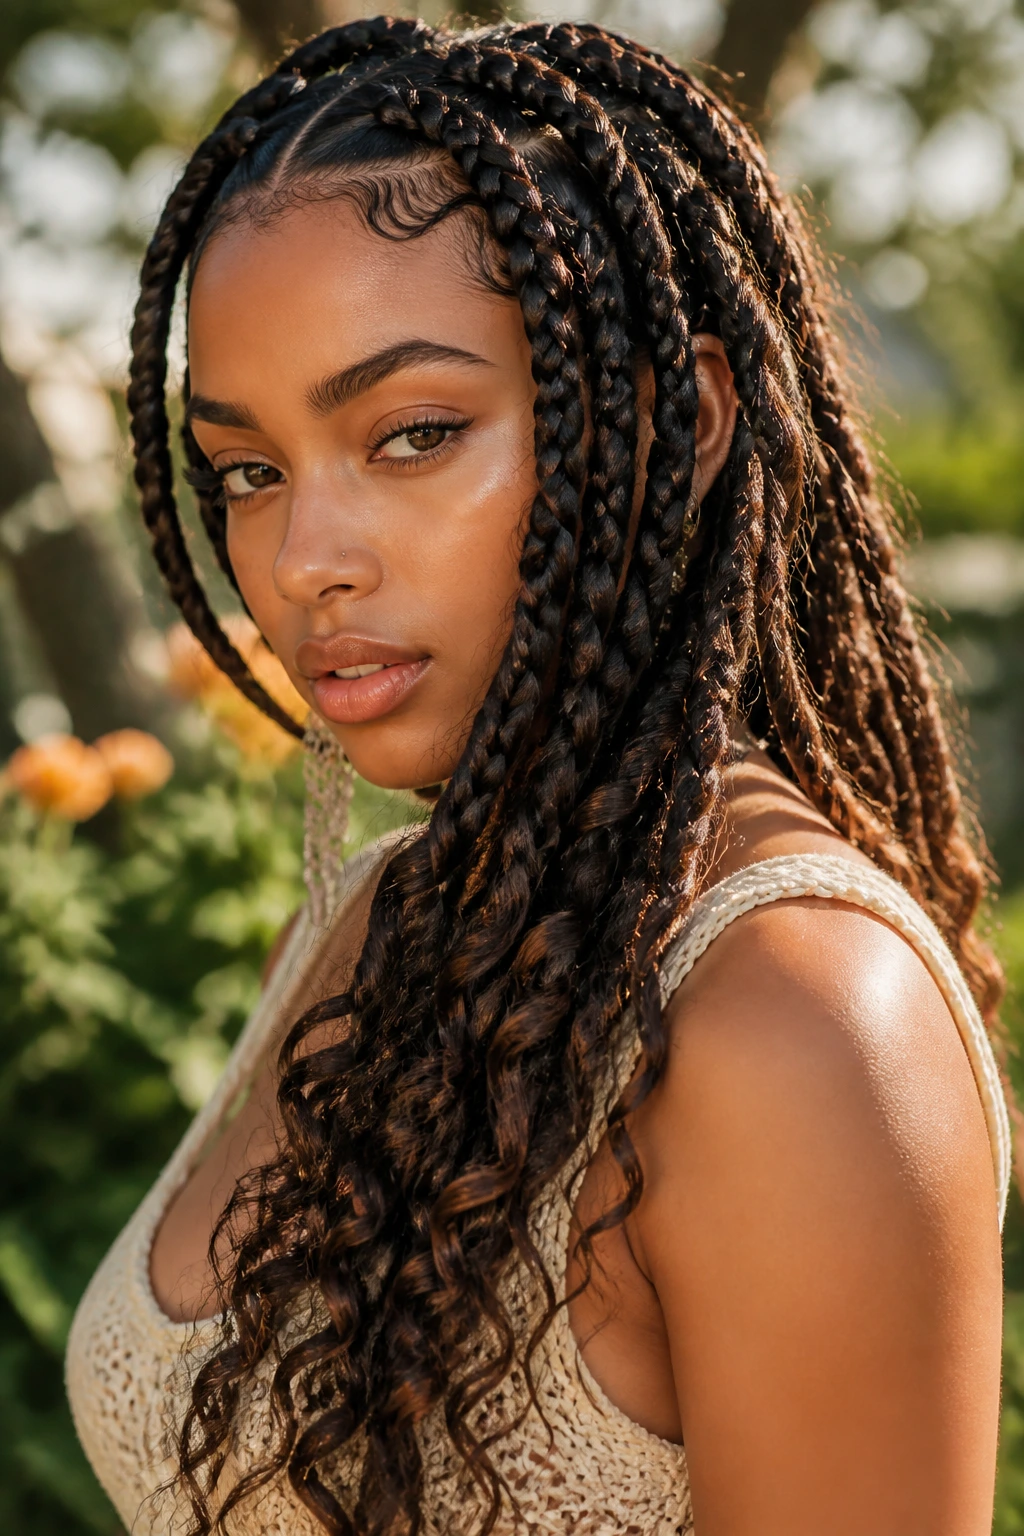
This is a relaxed take on the traditional style. The braids are a bit thicker, and instead of being pulled tight, they have a looser, more natural drape. This look pairs wonderfully with wavy hair because it celebrates texture rather than trying to suppress it entirely.
What Makes Them Different
You don’t need a high-shine gel for this look. A matte-finish styling cream is actually better here. It provides enough control to keep the braids neat, but it doesn’t leave that “wet” look that many people prefer to avoid.
Who Should Choose This
If you prefer a softer, more romantic aesthetic, this is the one. It looks great for summer days or casual outings. You can even leave a few wispy strands out around the ears for a softer look that complements the natural wave of your hair.
8. The Geometric Triangle Parting
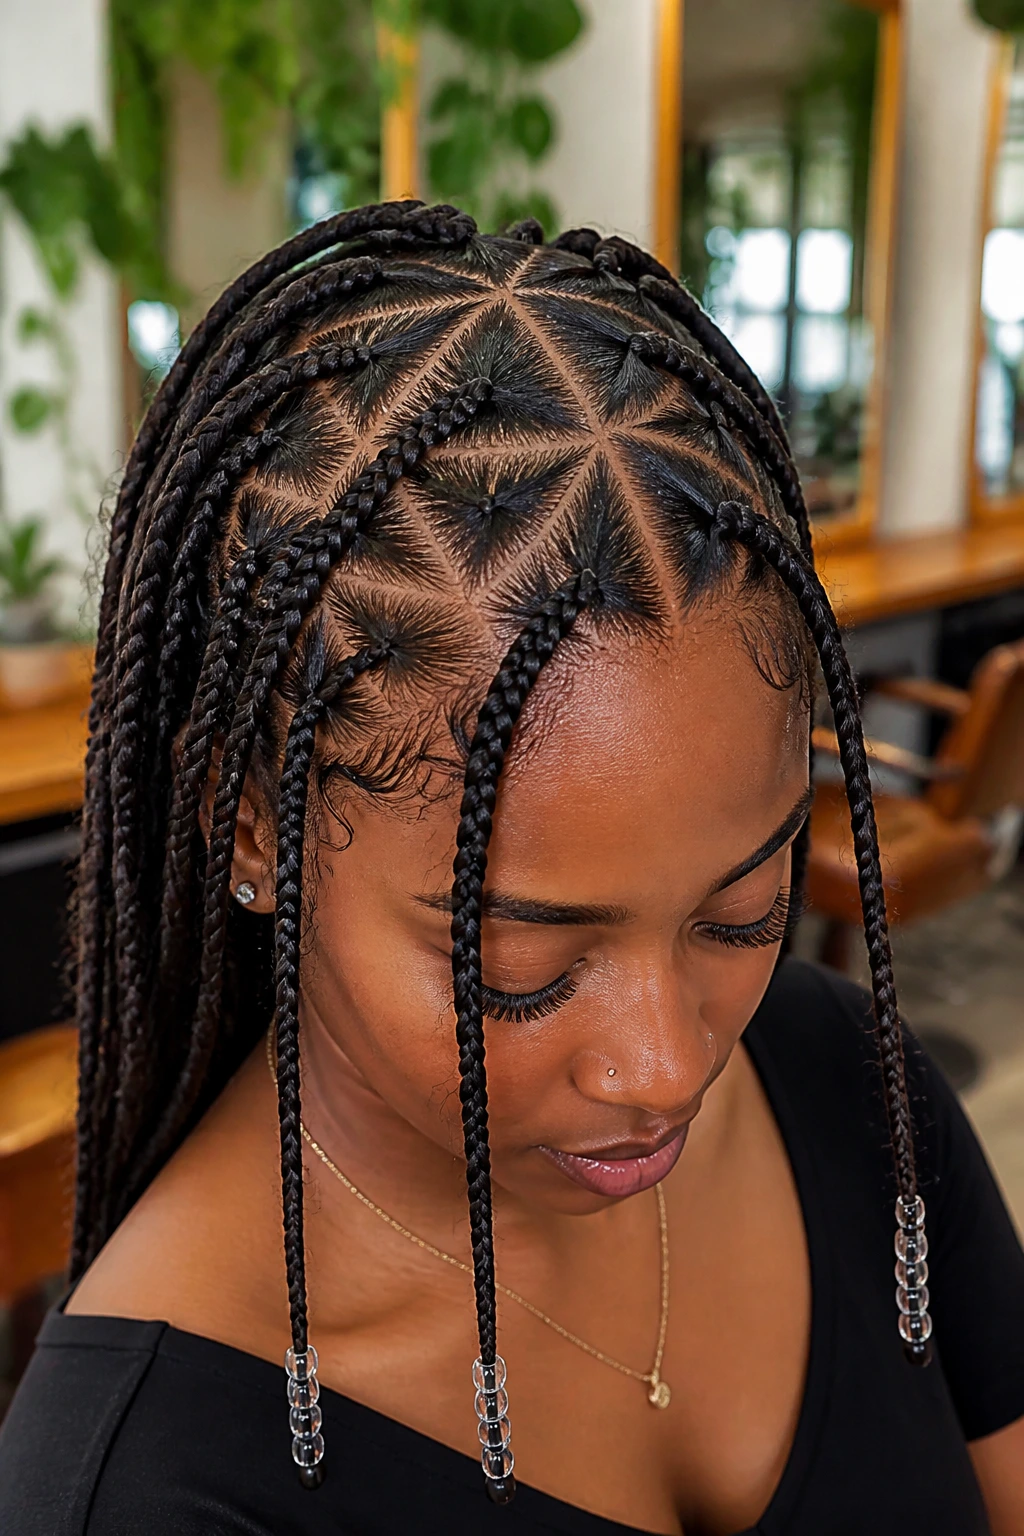
Instead of squares or diamonds, try partitioning your scalp into perfect triangles. This is very popular right now and creates a distinct, modern look. The precision required for triangle parts is high, so this usually requires a professional touch.
Why It’s a Top Pick for Texture
The triangles act as a grid, keeping each braid separated and secure. This is fantastic for wavy hair because it limits the amount of hair in each section, making it easier to control the frizz that naturally occurs when wavy hair is exposed to the elements.
Styling Tip for Sharp Lines
Ask your braider to use a little bit of foundation or concealer on the parts to make the lines look even sharper. This technique is often used in film and photography to clean up the look, and it works just as well in real life to make your braids look incredibly polished.
9. Braids with Vibrant Color Accents
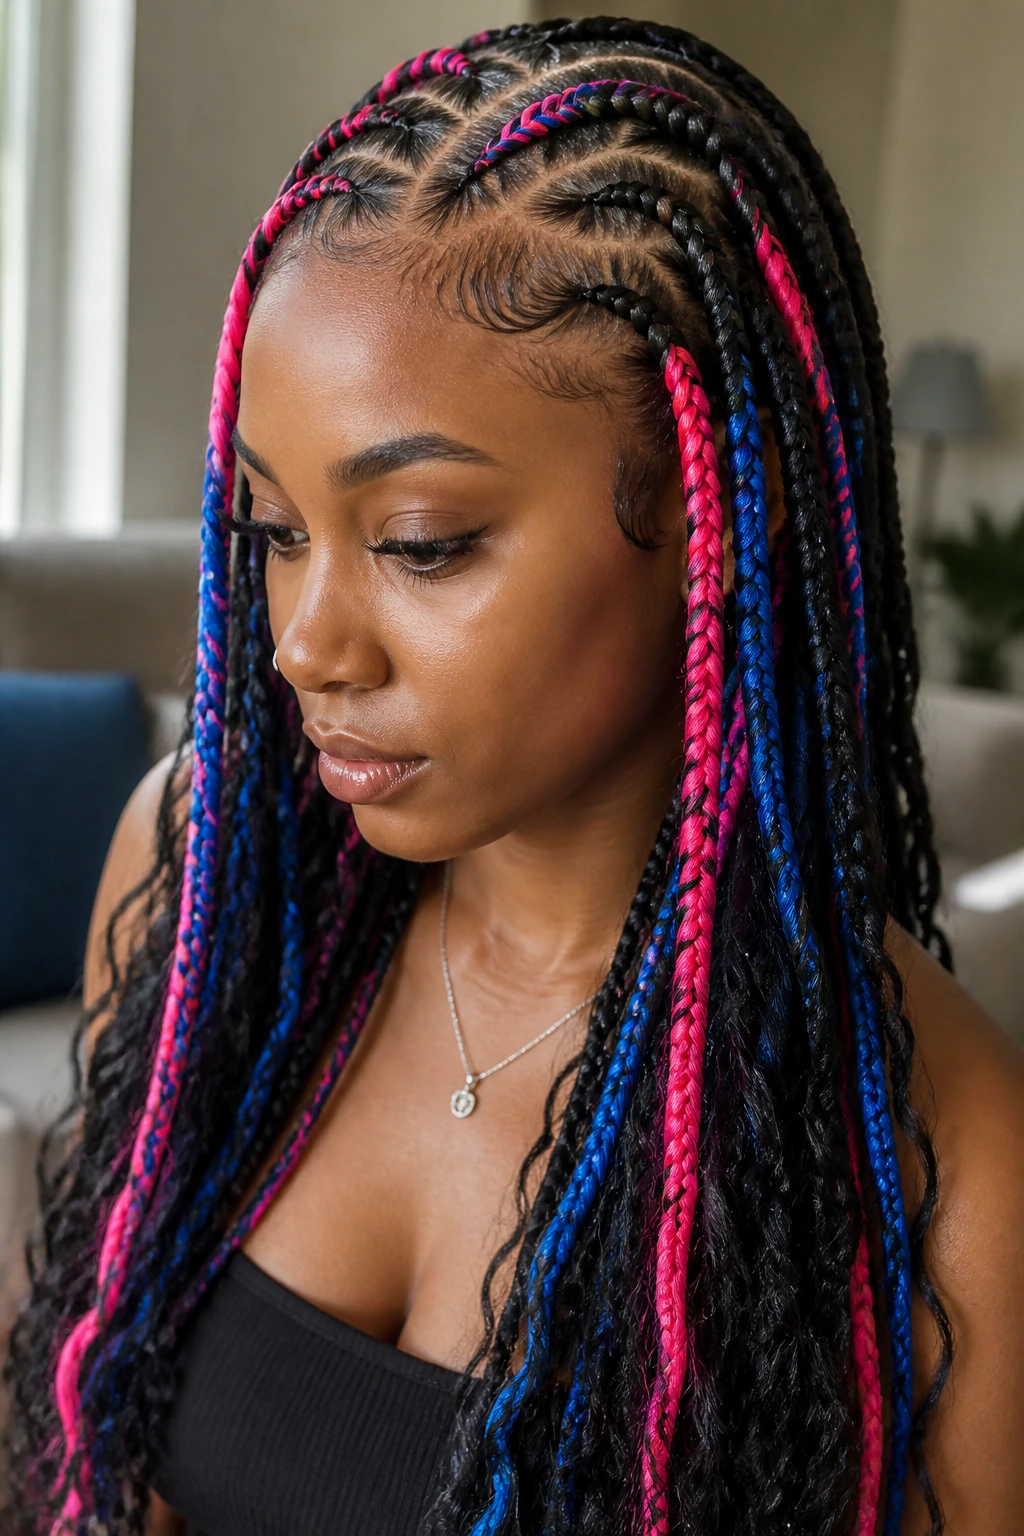
Using color is the fastest way to change your look. Adding neon pink, electric blue, or even a soft pastel braid into the mix can turn a simple hairstyle into a conversation piece. For wavy hair, the contrast between your natural dark roots and a colorful braid is striking.
Choosing the Right Synthetic Fiber
Look for Kanekalon fiber that has been “pre-stretched.” It is much easier to work with, especially when you are blending it with your own hair. It is less prone to tangling, which is vital when you are trying to incorporate a color that is vastly different from your natural shade.
Color Combinations That Pop
- Dark brown hair + Lavender accents
- Black hair + Metallic silver or grey
- Light wavy hair + Warm honey blonde or caramel
10. The Asymmetrical “Up-Do” Braid

This style involves creating a heavy cluster of braids on one side and a light, airy design on the other. It is essentially a sculptural approach to hair. Because your wavy hair has volume, it will provide a nice “cushion” for the bun, making it look fuller than it would with straight, thin hair.
The Mechanics of the Up-do
You need to secure the base of the bun with heavy-duty pins. Since you are working with wavy hair, it might have a tendency to want to “expand” out of the bun over time. Use a good setting spray to lock the finished bun in place.
When to Use This Style
This is the perfect look for formal events. It looks sophisticated, stays out of your face, and shows off your features. It is arguably the most “glamorous” of the traditional braided styles.
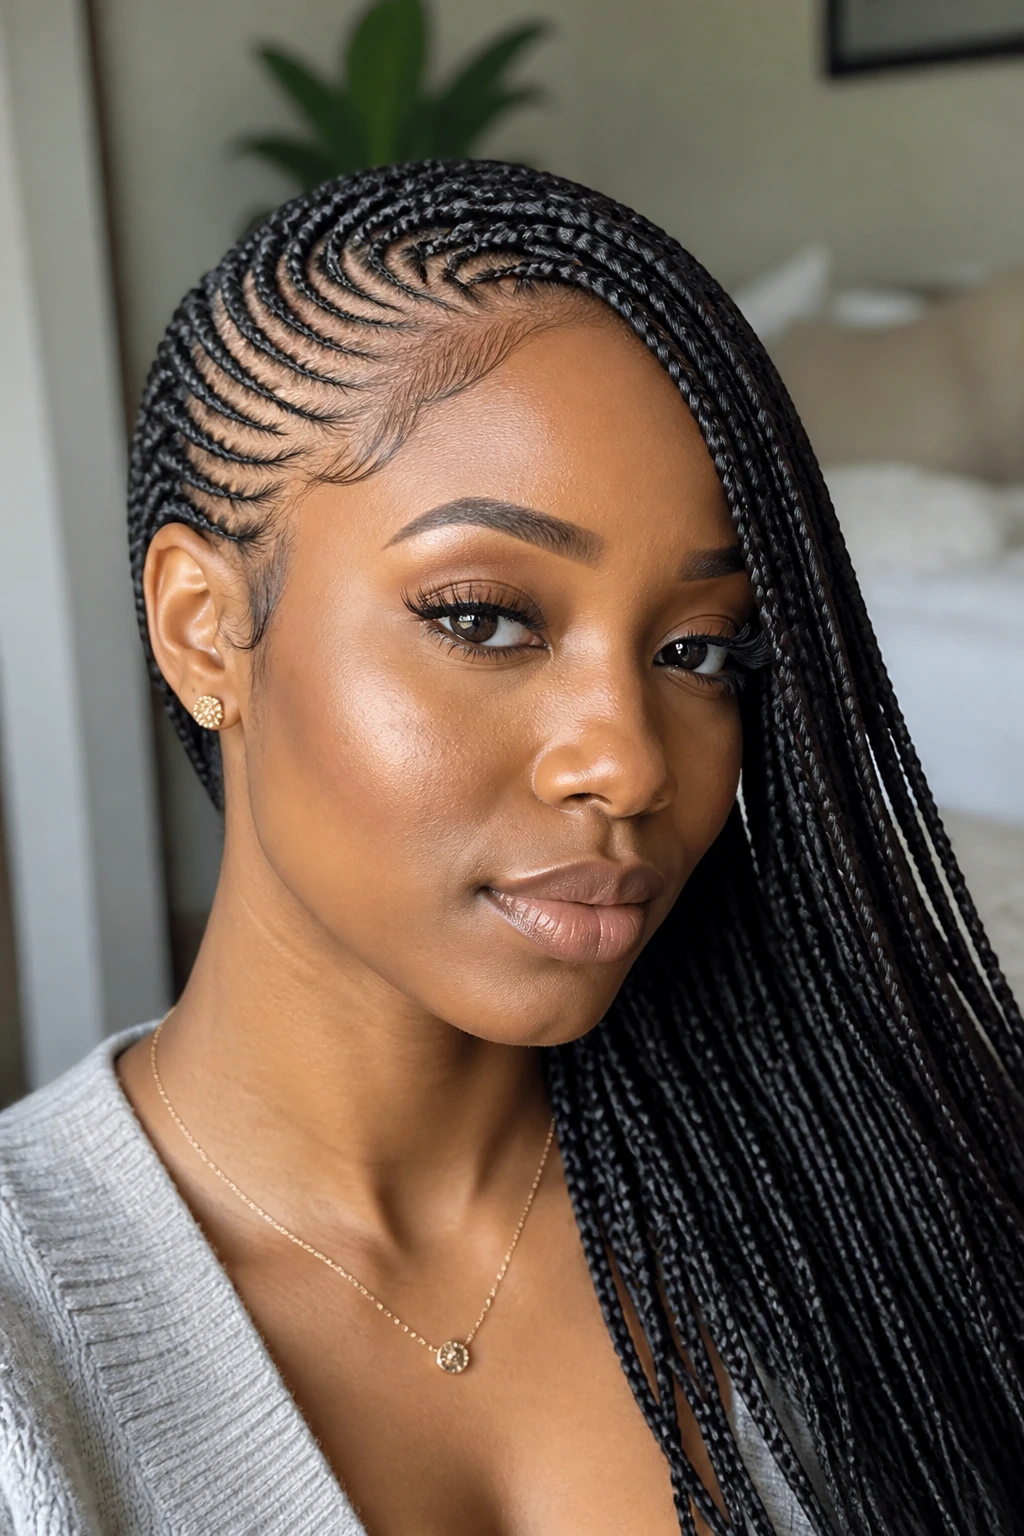
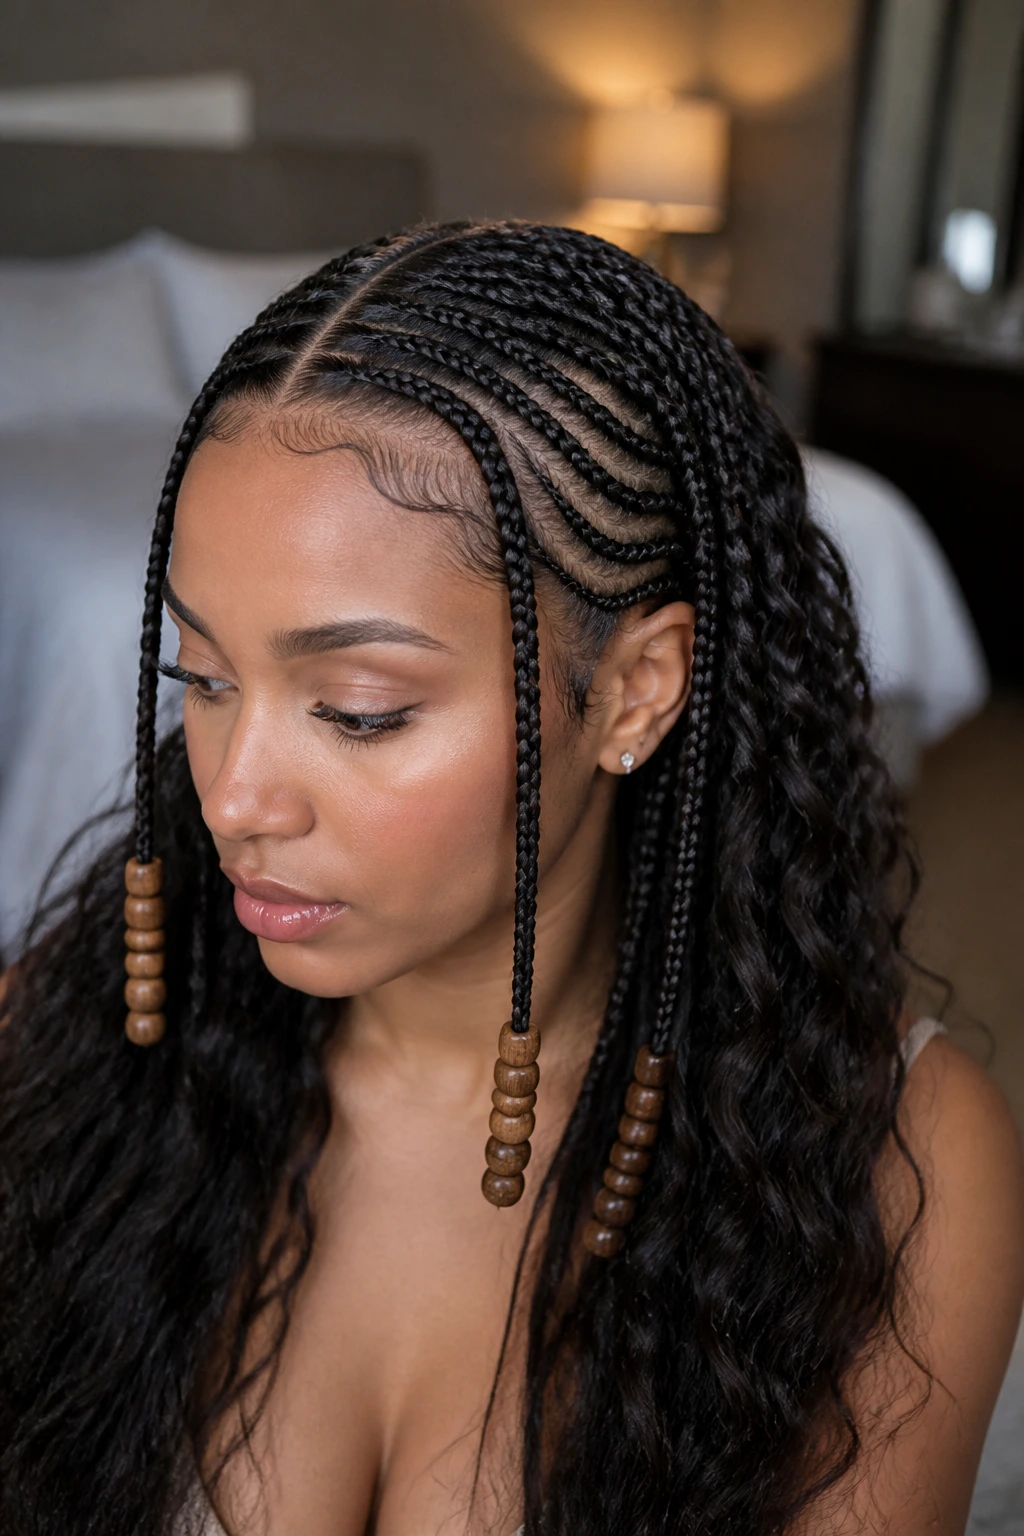
11. Thin Cornrows with Beaded Ends
Sometimes, less is more. Thin, intricate cornrows that run from the front to the back allow you to showcase a larger number of beads at the ends. This gives you that “tinkling” sound and look when you move, which is a classic feature of these styles.
How to Get the Best Sound
The sound comes from the weight and type of the beads. Wooden beads provide a soft, earthy sound, while metallic or glass beads provide a sharper “clinking” sound. Mix and match to find the sound profile you enjoy most.
Practicality in Daily Life
Because the braids are thin, they are very flexible. You can wear them down, throw them in a ponytail, or wrap them in a headscarf without any trouble. They are truly a “set it and forget it” kind of style.
12. The “Half-Up” Braided Look
This combines the best of both worlds: you get the intricate scalp patterns of a traditional style, but you let the back of your hair flow free. This is a very popular option for those who aren’t quite ready to commit to having all their hair braided.
Managing the Transition
The most important part of the half-up look is the transition point. You want the braids to end and the loose hair to start in a way that looks intentional. If your hair is wavy, you might want to apply a bit of curl-defining cream to the loose section so the transition from braided-to-free looks cohesive.
Maintenance for the Loose Section
The loose part of your hair will still be exposed to the elements. You should tie it up in a pineapple at night to keep the wave pattern defined and prevent it from becoming a tangled mess. This will ensure the style stays looking fresh much longer.
13. Double-Beaded Temple Braids
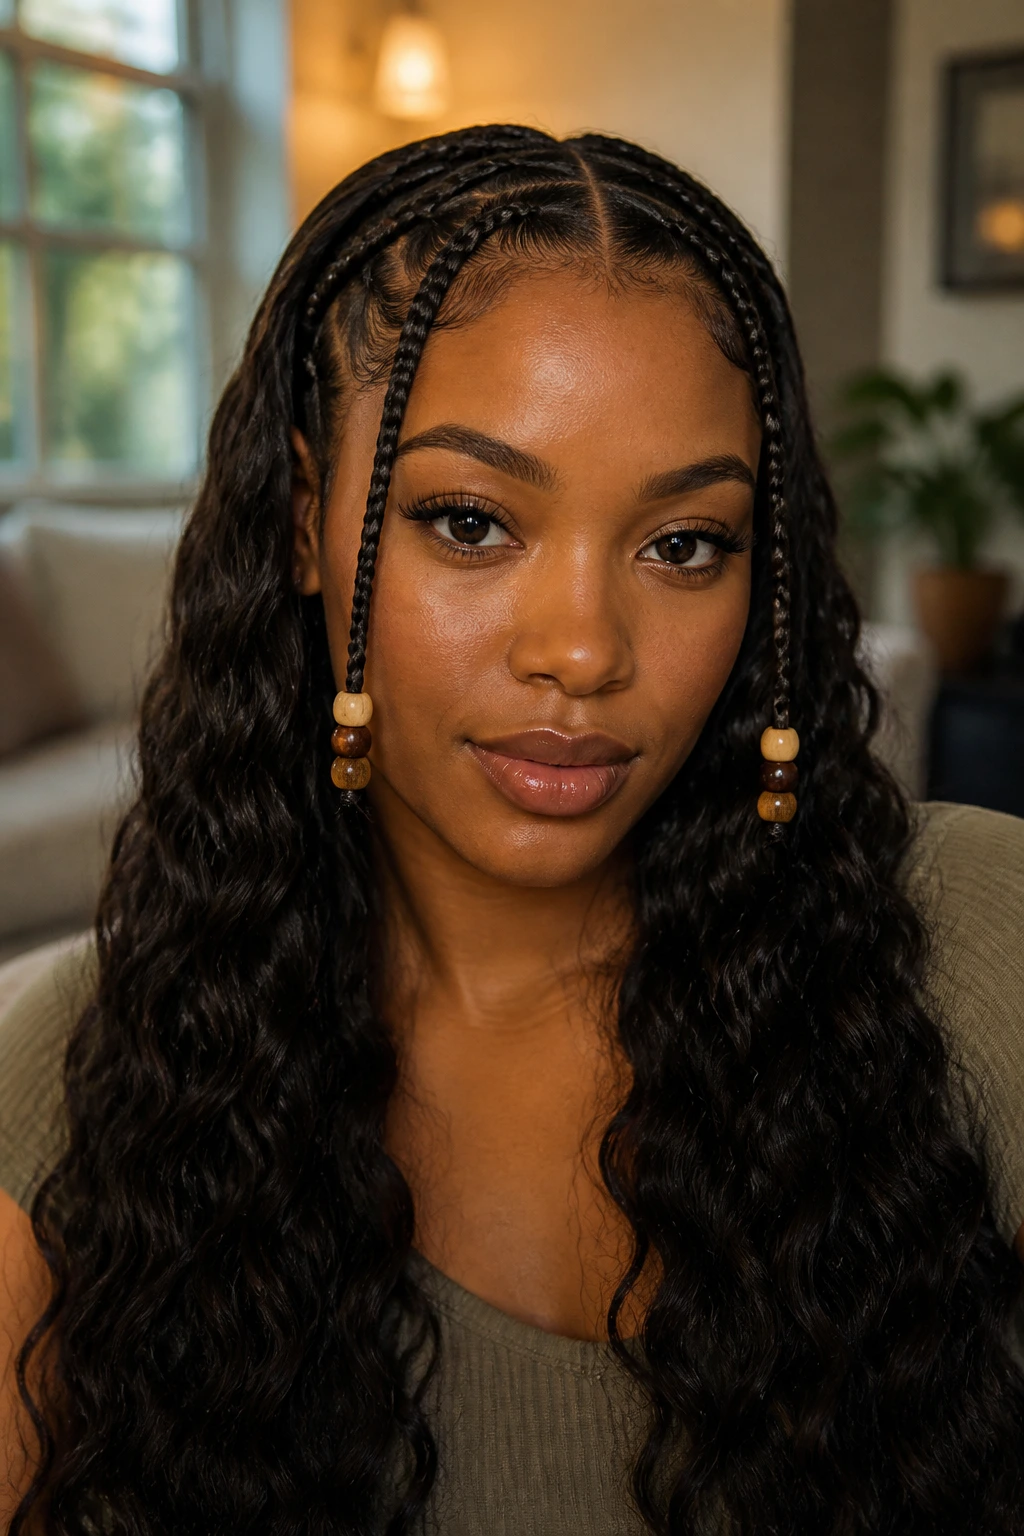
This is a small detail that makes a huge difference. Instead of just one braid at each temple, do two. It doubles the number of beads and creates a more intense framing effect around your face. It is a simple modification that completely changes the “vibe” of the traditional look.
Why It Works for Wavy Hair
Double-braiding the temples gives extra protection to the hair around your face, which is typically the most fragile part of anyone’s head. By putting this area into a more stable protective style, you are actually doing your hair a favor while looking stylish.
Styling Tip
Try using different types of beads on each of the two braids. For example, use a wooden bead on the inner braid and a gold cuff on the outer braid. The mix of materials adds a layer of depth that looks high-end.
14. The “Zig-Zag” into a Bun
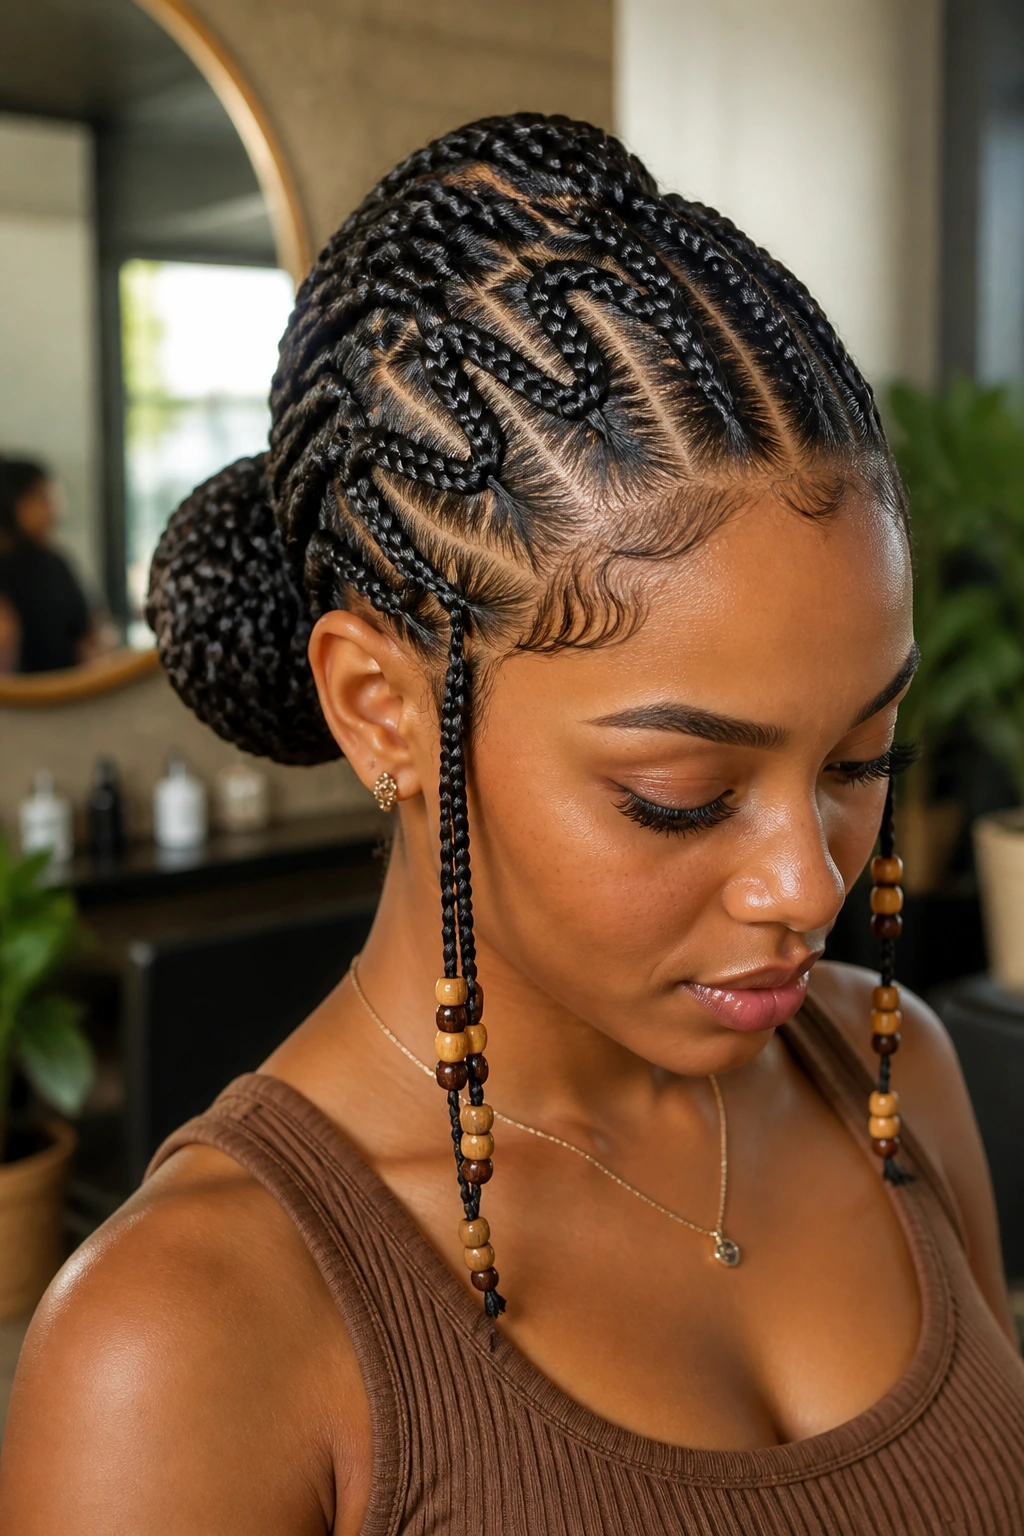
This style takes the complexity of a zig-zag part and finishes it with an elegant bun at the back. It is arguably the most secure way to wear this style. The zig-zag pattern keeps the hair tension distributed evenly across the scalp, and the bun keeps the ends protected.
Why This Style Is Long-Lasting
The bun acts as a barrier, preventing your ends from rubbing against your clothing or your pillow. If you want this style to last for six weeks or more, this is the layout you should choose. It is practical, beautiful, and low-maintenance.
Tips for Removal
When it is time to take the braids down, never rush the process. Use a leave-in conditioner spray to soften the hair as you undo the braids. Since you have wavy hair, your natural texture might feel a little dry after being in braids for a few weeks; a deep conditioning treatment right after removal is non-negotiable.
Common Mistakes to Avoid When Braiding Wavy Hair
The biggest error people make is failing to prepare the hair properly. Wavy hair isn’t as coarse as 4C hair, so it doesn’t “grip” as well on its own. You must use a setting product. If you skip this, your braids will look fuzzy and messy within a few days. Don’t worry about the product build-up; that’s what wash day is for. Prioritize the longevity of the style while it’s in.
Another mistake is ignoring the scalp’s health. Just because you have a protective style doesn’t mean you stop cleaning your scalp. Use a witch hazel or tea tree oil spray on your scalp once or twice a week to keep it fresh and prevent buildup.
Finally, never let the braids stay in for too long. Six to eight weeks is the absolute maximum. Your wavy hair will eventually start to mat at the root if you leave it in braids past this point, and you really do not want to deal with that kind of breakage when it comes time to take them out.
Storage and Care After Removal
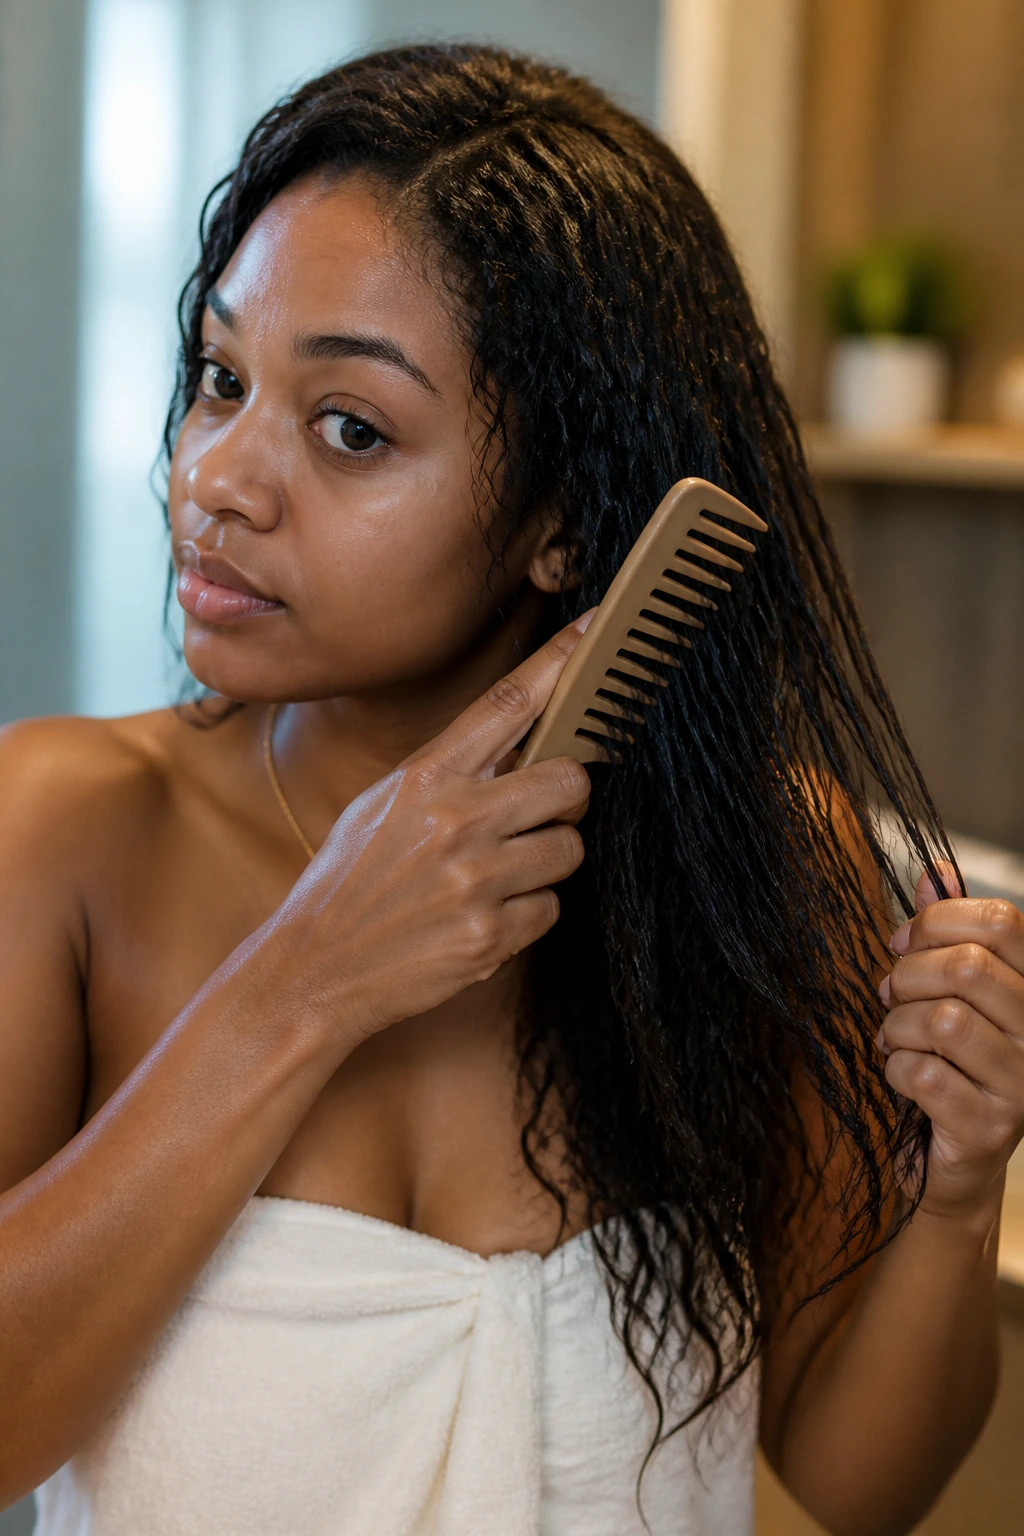
Once you take your braids down, your hair will need some TLC. It has been stretched and held in place for weeks. Give your hair a very thorough detangling session with a wide-tooth comb and plenty of slip. Do not rip through it—work from the tips to the roots.
Follow this up with a protein-moisture balancing treatment. Your hair will be thirsty after being wrapped in synthetic fibers, and a good balance of protein and hydration will help restore the natural wave pattern. You might find that your hair feels a bit different for a few days, but with the right care, it will bounce right back.
Best Serving of Styling and Pairing
These braids are versatile enough to pair with anything. If you are wearing a bold, geometric-patterned top, go for the simple center-parted style. If you are going for a more bohemian or flowing look, the chunky, wavy-friendly braids are your best bet.
As for occasions, they transition seamlessly from the office to a night out. They are, quite simply, one of the most functional yet beautiful styles you can choose for your hair. Whether you opt for a dramatic beaded crown or a simple pair of side-swept braids, you are tapping into a tradition that is as much about honoring the past as it is about looking forward to your next great style.
Final Thoughts
When you commit to these braided styles, you are doing more than just picking a look; you are investing in the health of your hair. By protecting your waves under a well-executed design, you are giving your natural hair a break from heat tools and environmental stress. The key, as always, is patience with the process.
Take your time choosing the beads and the parting pattern that suits your face shape. Don’t be afraid to experiment with color or cuff placement. Once you have found the combination that feels like you, the maintenance becomes second nature. Treat your scalp well, keep the braids clean, and enjoy the confidence that comes with a perfectly crafted protective style.