



People often think straight hair lacks options. They assume that without curls or waves, open hair is just… flat. It’s a frustrating misconception. In reality, the clean, reflective surface of straight hair makes it the perfect canvas for precise styling. It catches light like nothing else. With the right techniques, you can turn straight, loose hair into a striking statement.
The trick lies in working with the natural behavior of your hair. Straight strands can be remarkably stubborn. They slip out of pins, refuse to hold volume at the roots, and sometimes look limp by midday. But once you understand how to prep the hair and use strategic anchoring, those challenges disappear.
Over the years of styling and testing various techniques, it becomes clear that preparation is everything. From choosing the right lightweight shine sprays to understanding how tension affects half-up styles, a few simple adjustments can completely change your results. Let’s look at the best ways to wear straight hair loose, down, and full of life.
1. Sleek Center-Parted Liquid Hair
The liquid hair look is all about achieving a level of shine so intense that the hair appears fluid. It relies on a flat, smooth surface that reflects light like water. This style works best on healthy, deeply hydrated hair, making it a brilliant showcase for your daily conditioning routine.
The Mechanics of Glossy Reflection
To get this ultra-glossy finish, the hair cuticles must lie completely flat. Any raised cuticles will scatter the light, making the hair look dull rather than reflective. Using a combination of a high-quality heat protectant and a precise blow-drying technique is the key to achieving this glass-like surface.
Quick Hair Facts
- Blow-dry with a concentrated nozzle pointing downward to flatten the hair cuticle.
- Run a flat iron on low-to-medium heat in single, slow passes rather than multiple fast ones.
- Work a pea-sized drop of lightweight finishing oil from the mid-shafts to the tips.
- Use a boar-bristle brush to distribute natural scalp oils. Pro tip: Spritz hairspray onto a clean mascara wand to sweep away flyaways along the center part without weighing down your lengths.
2. Deep Side Part with One Side Tucked Behind the Ear
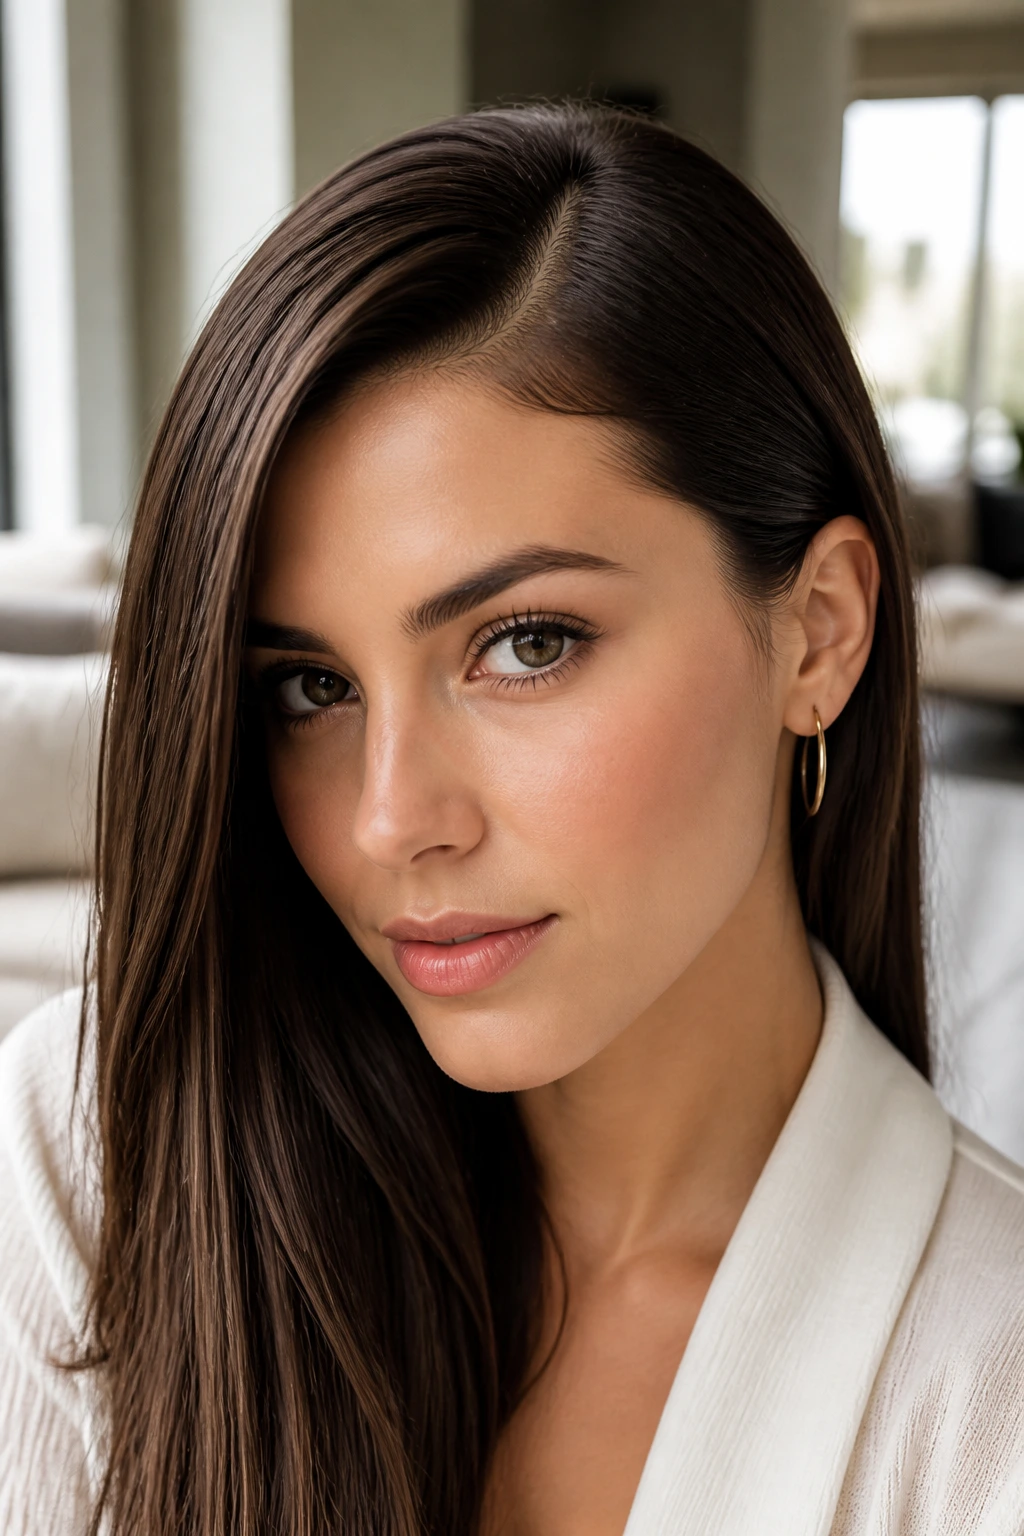
Changing your part is the easiest way to trick the eye into seeing instant volume. By shifting your line three inches past the center, you force the hair to sit against its natural growth pattern. This creates a natural lift right at the front of your crown.
The elegance of this style comes from the contrast of asymmetrical balance. One side falls forward, framing your cheekbone, while the other side is pinned back flatly behind your ear. It is simple, dramatic, and works on any length of straight hair.
To get this right, use the arch of your eyebrow as a guide for where to split the hair. Comb the tucked side back firmly, applying a dab of styling cream to keep it secure against the scalp. If your hair is particularly slippery, slide a small bobby pin horizontally behind your ear, hidden beneath the top layers, to lock the tucked side in place.
3. Half-Up Top Knot with Cascading Lengths
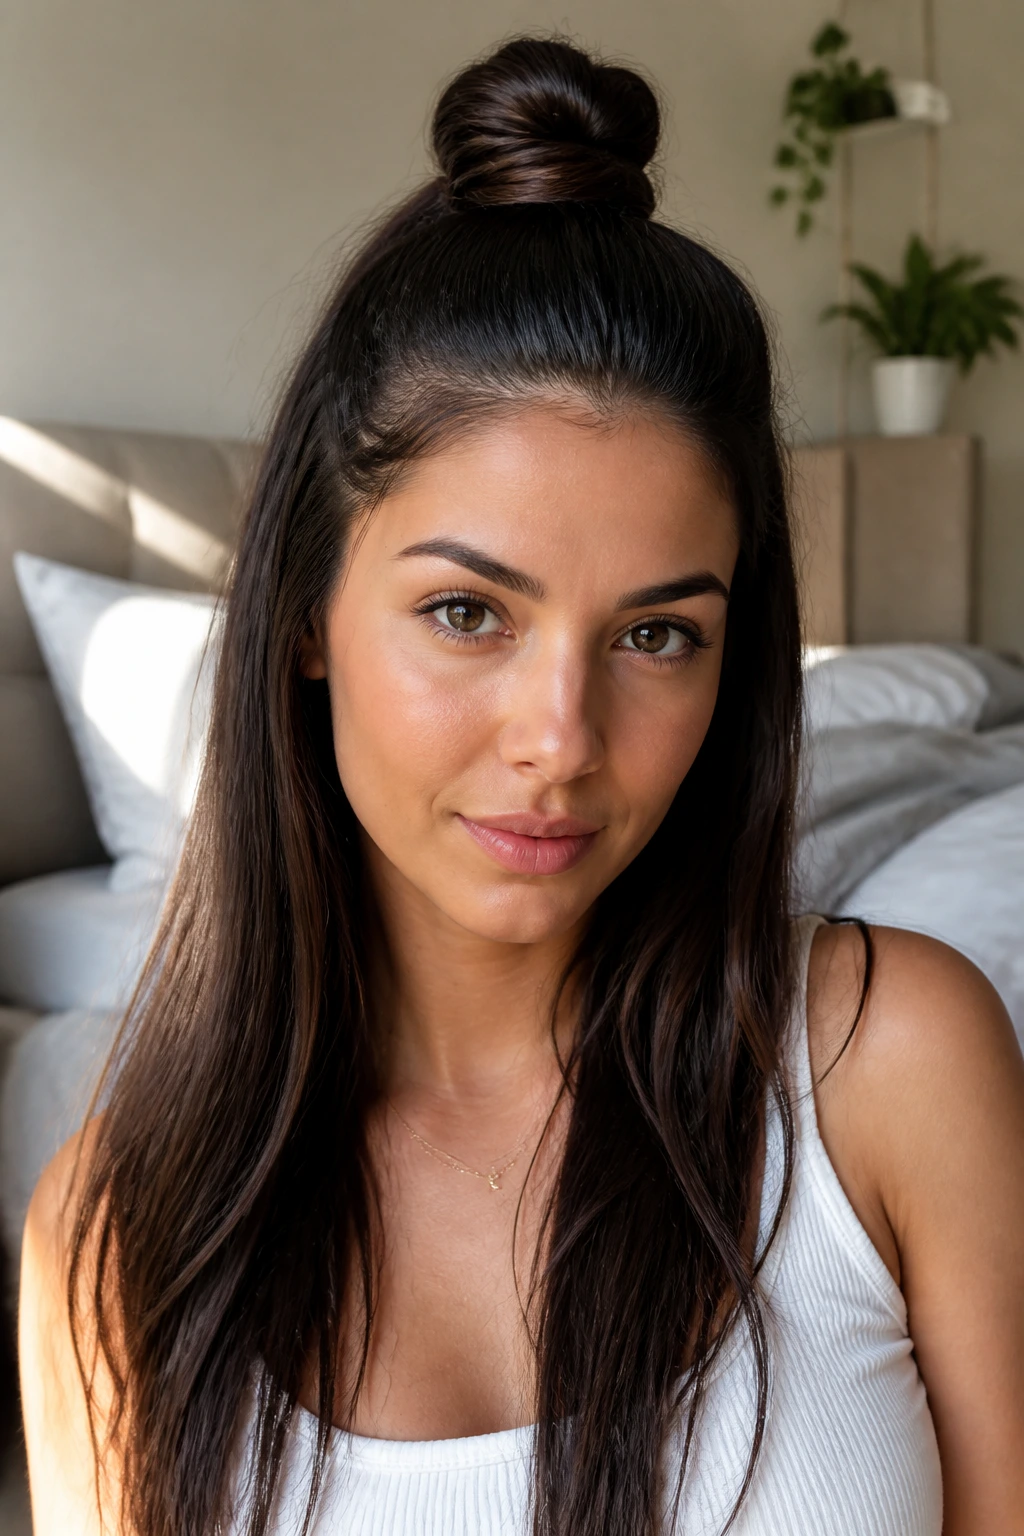
Why does this style remain a favorite for straight hair? The answer lies in the structural contrast. Straight hair can sometimes look uniform, but pulling the top section into a textured knot creates an immediate focal point that breaks up the long, vertical lines of your tresses.
This approach keeps your hair completely out of your face while still letting you show off your length. It works wonderfully on second-day hair when your strands have a bit more natural grip.
Securing the Perfect Knot
To make this work, section off the top third of your hair, starting from just above your ears and meeting at the crown. Secure this section into a high ponytail first, then twist the length of the ponytail into a rope. Coil it around the base to form your knot, securing it with a couple of U-shaped hairpins rather than a tight elastic. This prevents the bun from looking too stiff or pulling too tightly on your scalp.
4. Wispy Face-Framing Curtain Bangs with Straight Tresses
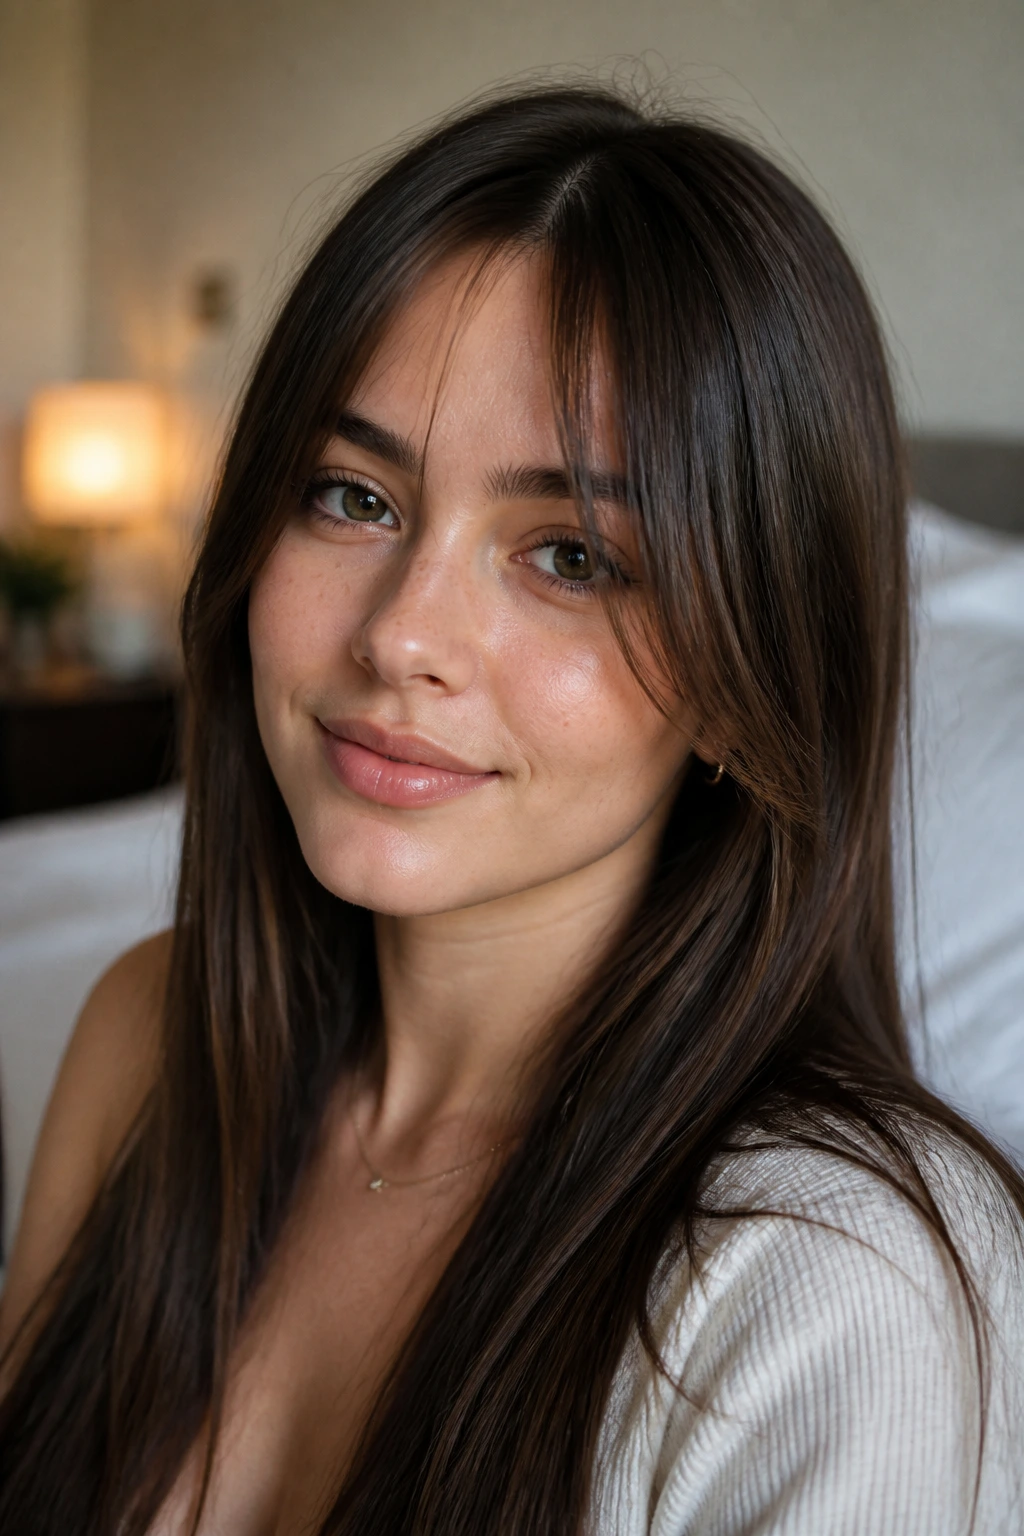
Imagine waking up with perfectly straight hair that looks just a little too plain. You do not want a complete cut, but you need some movement around your face. This is where curtain bangs save the day, acting as a soft frame that breaks up the flat planes of straight locks.
The trick to making curtain bangs work with straight hair is the way they are cut and styled. They should be longer on the outer edges, blending into the rest of your hair, and shorter in the middle. This graduation prevents them from looking like a solid block of hair.
Key Styling Details
- Blow-dry your bangs with a medium round brush, directing them forward and then rolling them back away from your face.
- Use a lightweight dry shampoo on the underside of your bangs to keep them from sticking to your forehead.
- Avoid heavy silicone products near your face, as they will make the wispy strands look greasy by midday.
- Trim the bangs every four to six weeks to maintain that light, feather-like drape.
By focusing the styling effort on just these few short strands, the rest of your straight hair can fall naturally without looking flat or lifeless.
5. Flipped-Out Ends
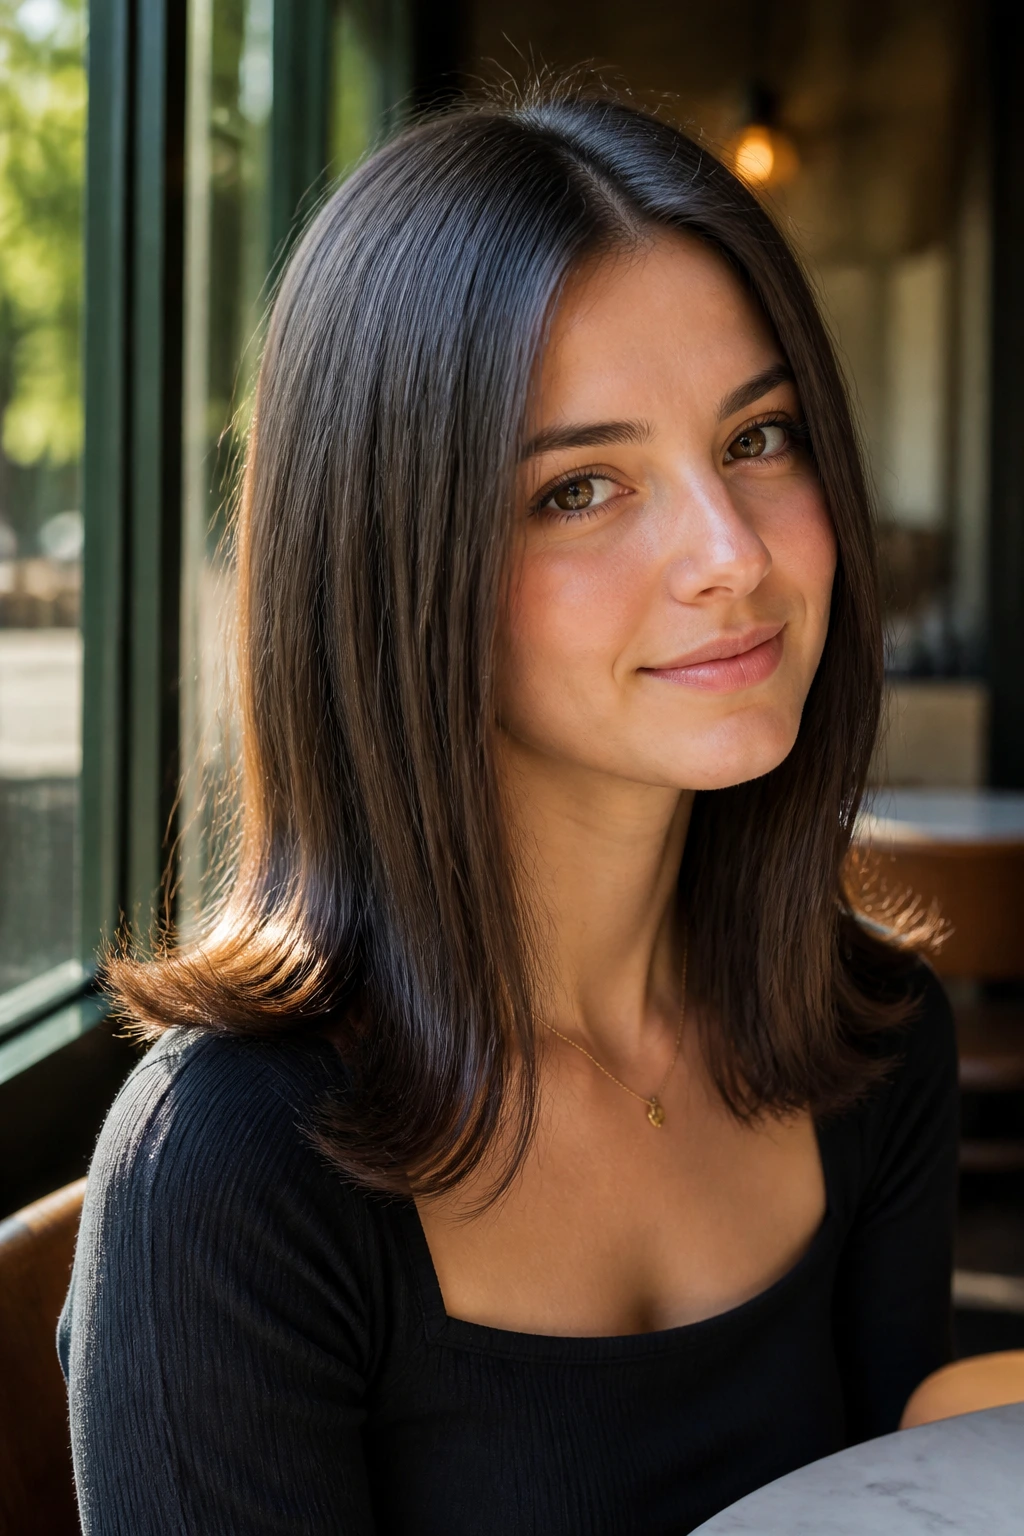
Straight hair does not have to mean perfectly vertical lines. Adding a retro flip to the ends of your hair is a simple way to introduce swing and personality. This look draws inspiration from vintage styles but keeps a clean, modern edge by keeping the shaft completely straight until the very bottom.
You will want to start with clean, blow-dried hair. Run your flat iron down each section as you normally would, but as you reach the last two inches of your hair, curve your wrist upward in a smooth, continuous C-shape. Do not hold the iron in one place for too long, or you will create a harsh crease instead of a soft flick.
The size of your section matters here. If you grab too much hair at once, the heat will not distribute evenly, and the flip will fall flat within an hour. Stick to one-inch sections for the best hold.
Once all your ends are flipped out, let them cool completely before touching them. If you brush them while they are still warm, you will stretch out the shape. Finish with a light mist of flexible-hold hairspray to lock in the bounce without making your ends feel crunchy.
6. Messy Bedhead Straight Shag
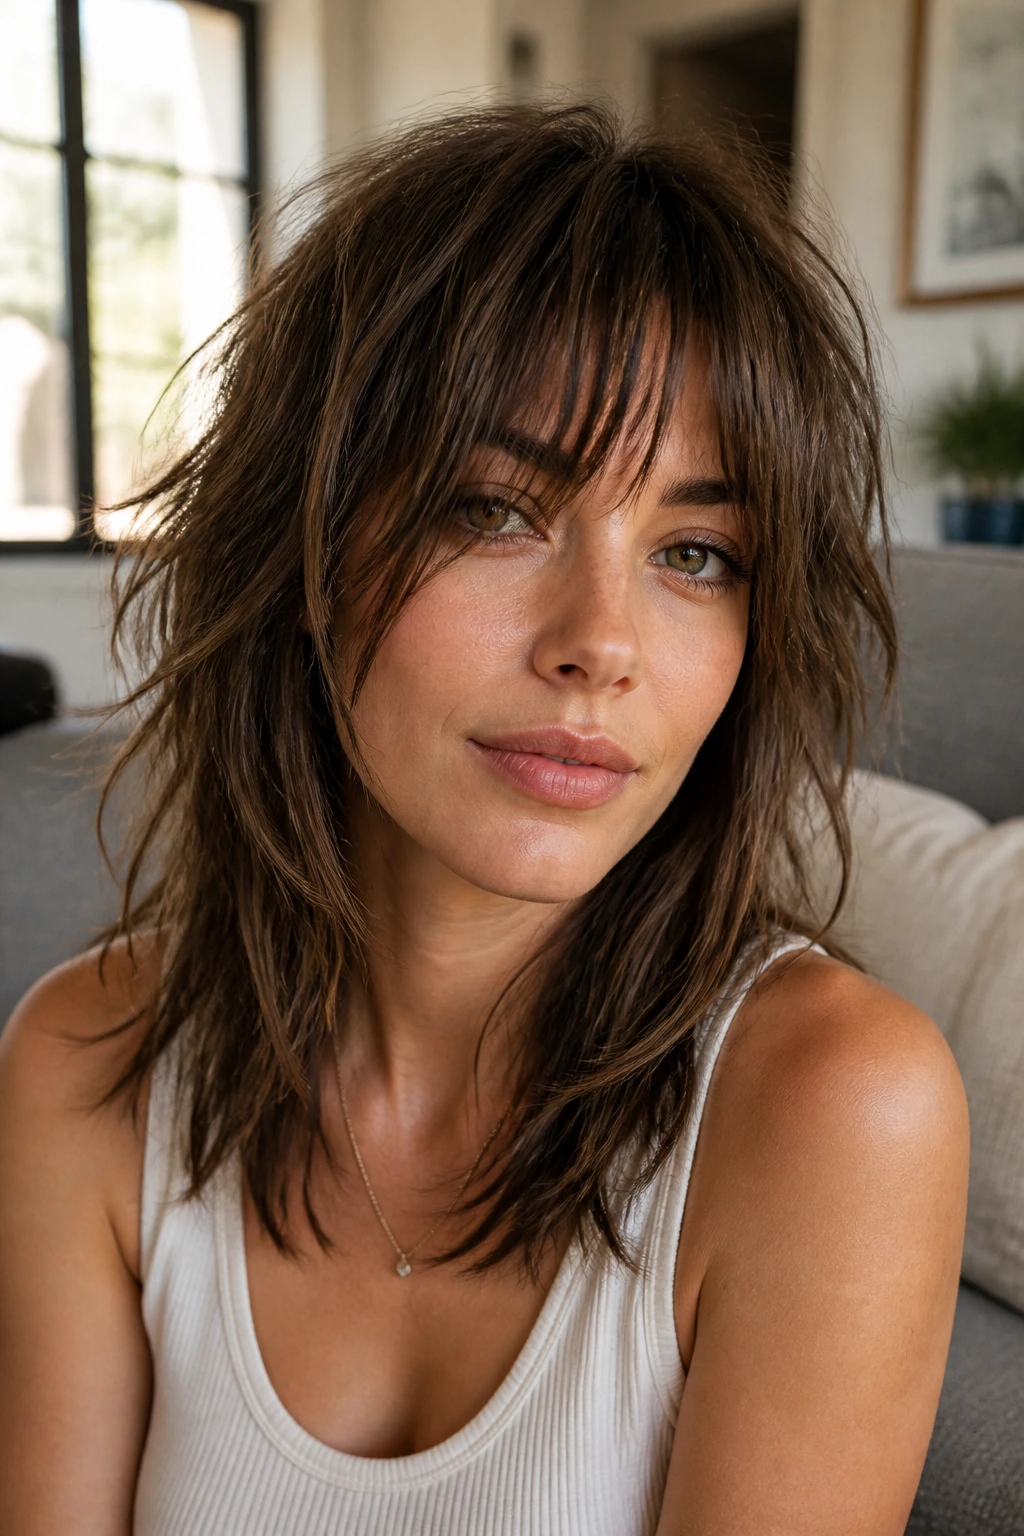
Unlike the hyper-polished look of liquid hair, the straight shag relies on texture, movement, and a deliberate lack of perfection. It proves that straight hair can look incredibly textured without needing curls or waves.
What makes this style stand out is the heavy use of interior layers. Instead of cut-glass blunt ends, a shag uses point-cutting techniques to thin out the weight, creating piecey ends that flip and split naturally.
This style is best for those with thick, heavy straight hair that usually feels weighed down. The layers remove bulk, giving the scalp breathing room and allowing the hair to move when you walk.
To style this at home, bypass the flat iron entirely. Rub a nickel-sized amount of texturizing paste between your palms and scrunch it directly into the mid-lengths and ends of damp hair, then let it air-dry.
7. Half-Up Bubble Ponytail
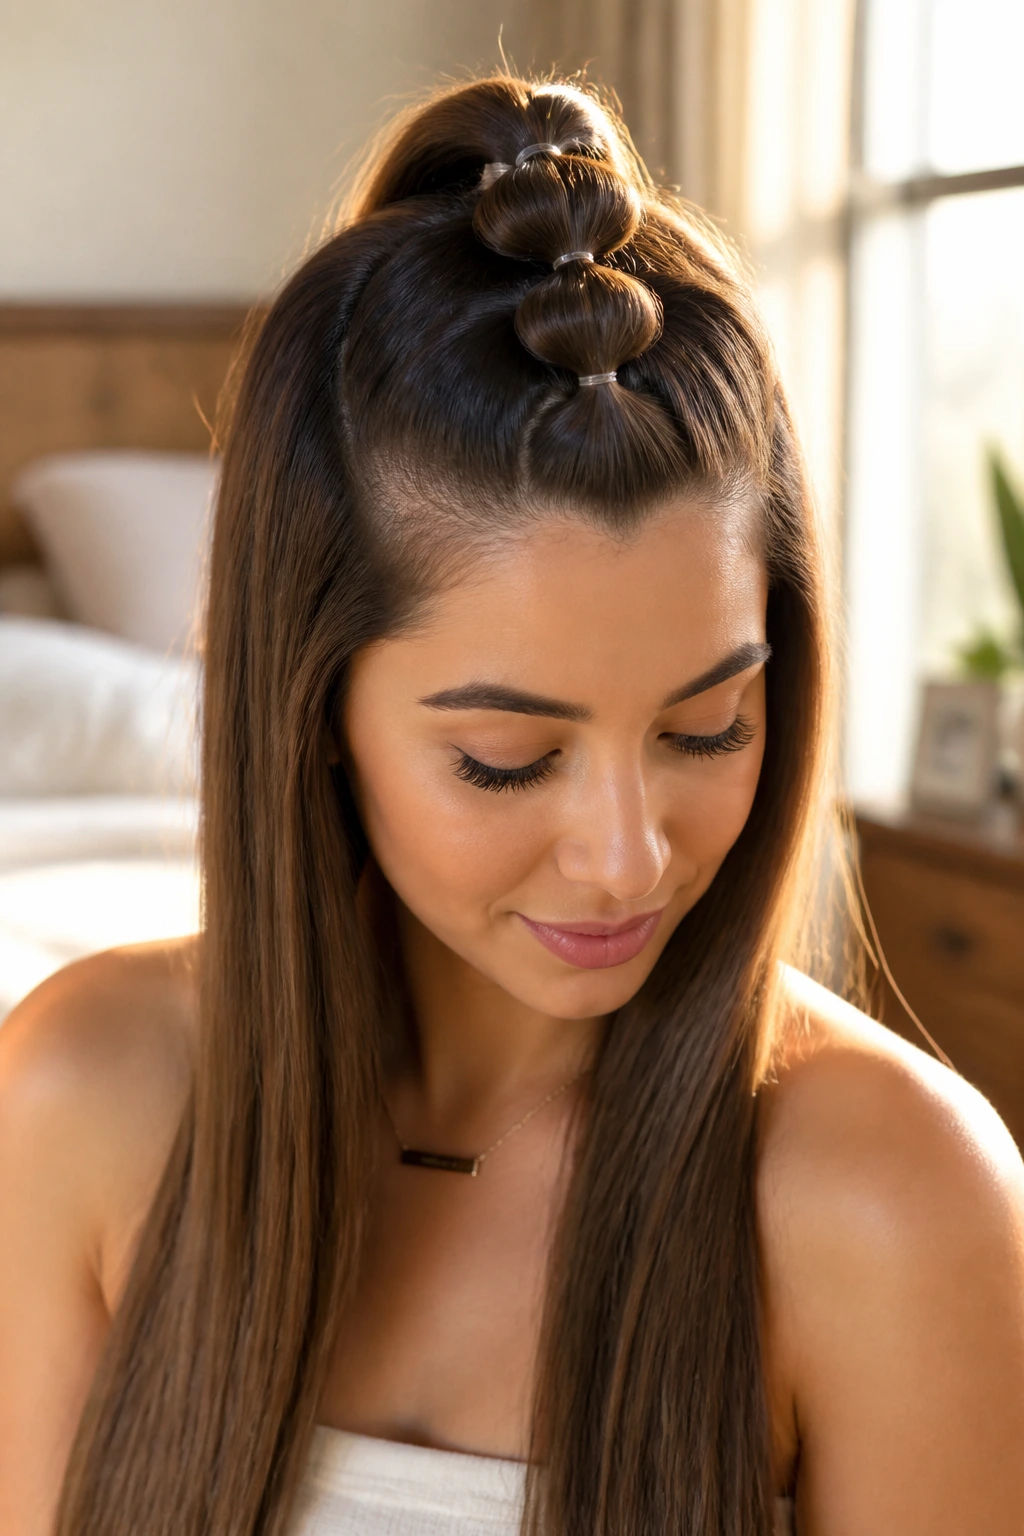
Add a playful touch to straight hair with a style that uses clean lines to its advantage. The bubble ponytail is exceptionally easy to do on straight hair because the lack of wave allows the bubbles to look sharp, clean, and perfectly defined.
Creating Symmetric Bubbles
The key is using small, clear elastics and teasing each section slightly to create the bubble shape.
Step-by-Step Bubble Styling
- Pull the top section of your hair back into a standard half-up ponytail.
- Slide another elastic down the ponytail length, about three inches below the first one.
- Gently pull the hair between the two elastics outward with your fingers to create a rounded bubble.
- Repeat this process down the length of the half-up section, depending on how long your hair is. Pro tip: Wrap a tiny strand of hair around each elastic and tuck it into the band with a hairpin to hide the rubber bands and make the look look incredibly polished.
8. Slicked-Back Wet Look Style
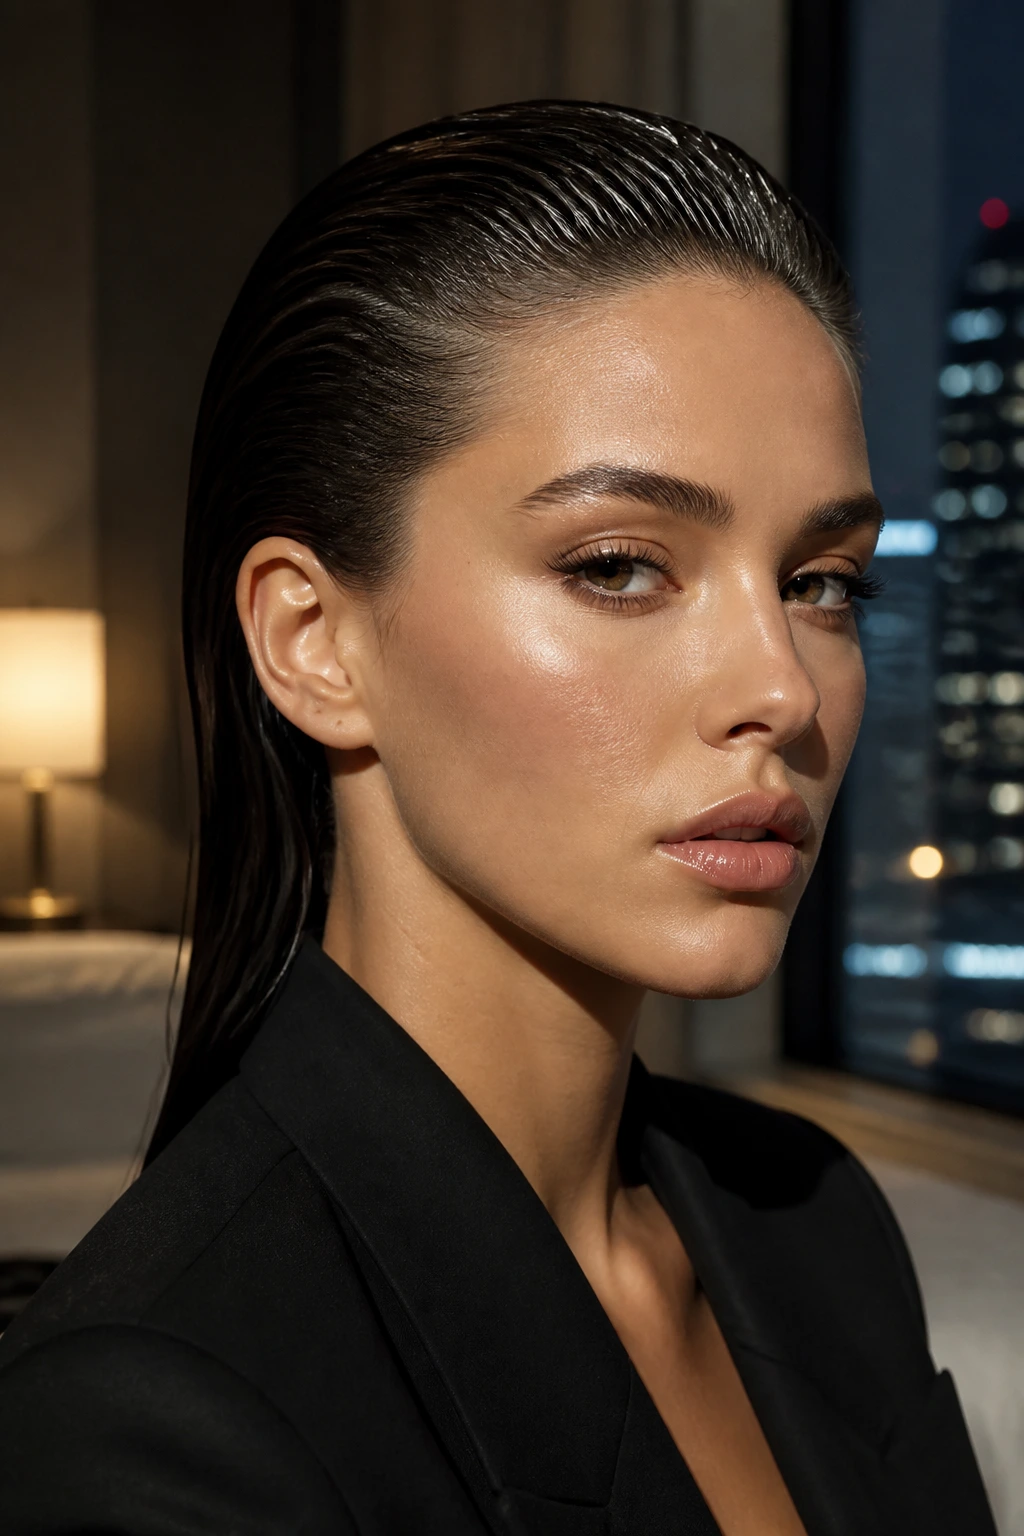
You do not need to soak your hair to achieve the high-fashion wet look. In fact, using actual water will only make your straight hair look flat and eventually frizzy as it dries. The secret lies in using a blend of high-shine pomade and hair oil on dry hair.
This style is incredibly powerful because it keeps your face completely open and draws all attention to your facial features. It is a fantastic option for evenings out when you want something dramatic but do not want to spend hours styling.
To create this look, brush your dry hair straight back away from your face. Mix equal parts of strong-hold gel and hair oil in your hands, then smooth it from your hairline down to just behind your ears. Leave the rest of your hair completely dry and flowing to create a beautiful contrast of textures.
9. Front Micro-Braids
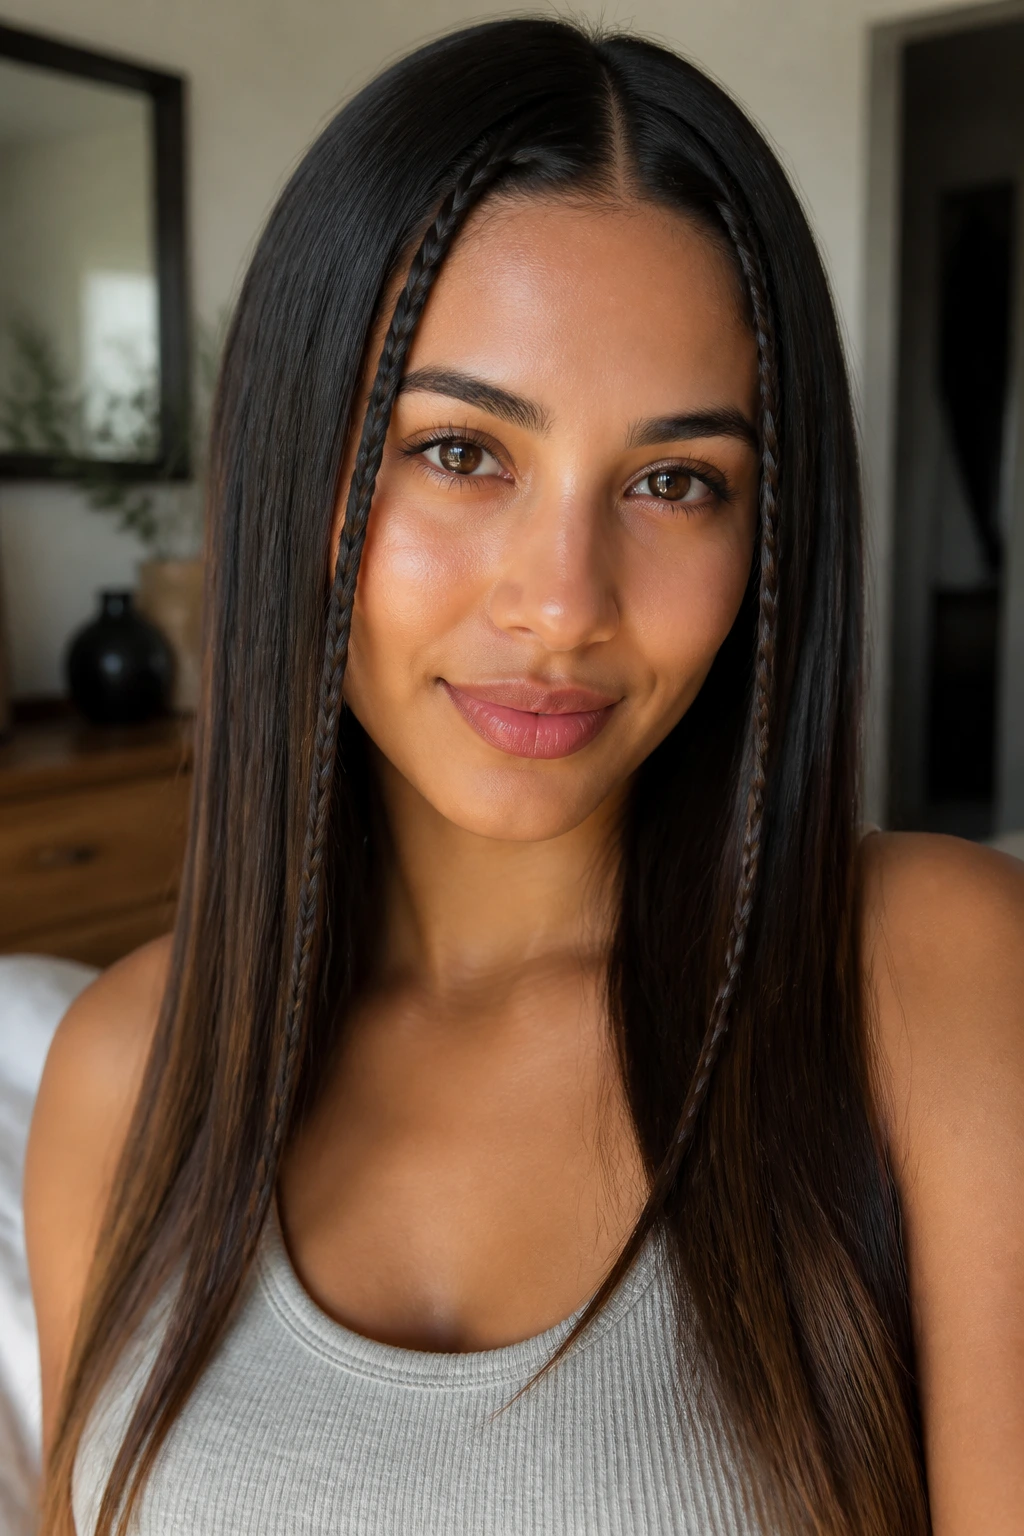
Why are front micro-braids so popular for straight hair? They offer a quick, low-effort way to add detail to your hair without needing hot tools. These tiny braids, sometimes called baby boho braids, frame your face and prevent your front layers from falling forward.
Straight hair provides the perfect, sleek backdrop for these braids, making them look neat and clean. They add a touch of texture without disrupting the smooth flow of the rest of your hair.
Braiding with Tension
To weave these successfully, section out two tiny portions of hair right at your forehead, on either side of your part. Braid them tightly all the way down to your ends, keeping the tension consistent so the braids do not look bumpy. Instead of using bulky elastics, spray the ends of the braids with heavy-hold hairspray and tease them slightly to keep them from unraveling.
10. Subtle Crown Braid with Flowing Ends
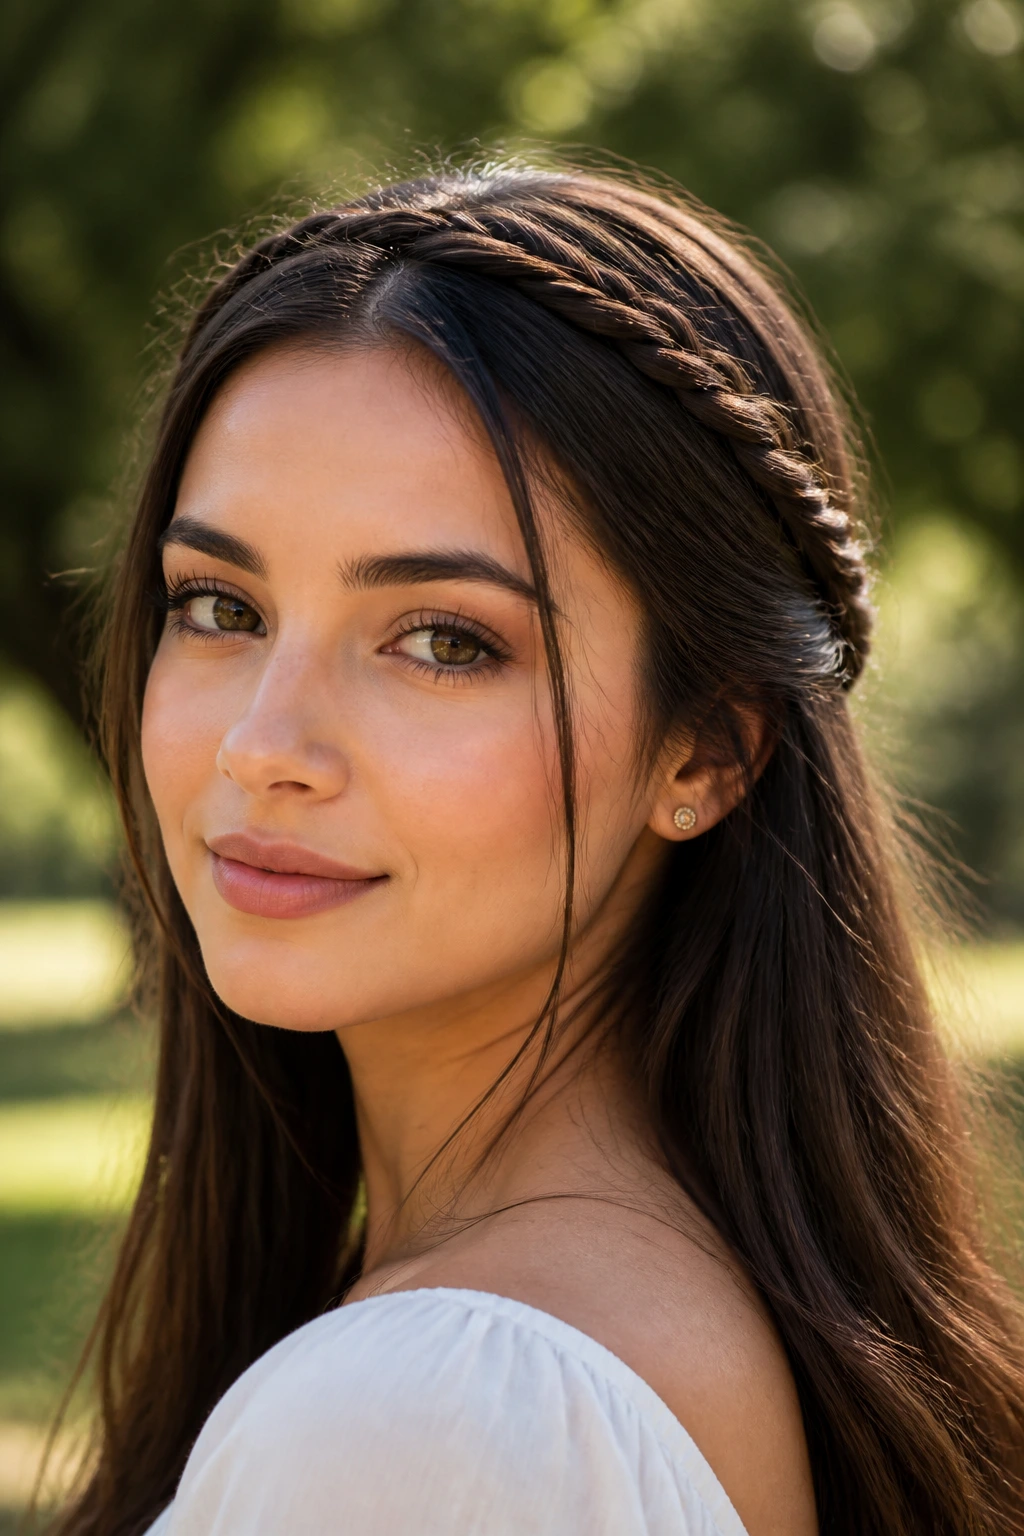
Imagine you are heading to an outdoor event and want to keep your hair loose, but you are worried about the wind blowing your strands across your face. A crown braid that blends into your straight lengths is the perfect compromise. It acts as a natural headband while letting your straight hair flow freely behind you.
This style works by taking two small sections of hair from behind your ears, braiding them, and then wrapping them over the top of your head. It creates a beautiful, structured detail that contrasts with the long, straight lines of your hair.
Key Execution Steps
- Separate a one-inch section of hair from just above each ear.
- Plait both sections into simple three-strand braids and secure the ends with clear hair ties.
- Bring one braid over the top of your head like a headband and pin it behind the opposite ear.
- Repeat with the second braid, positioning it right behind the first one to create a double-braid effect.
By hiding the pins beneath your loose hair, you create a seamless band of braided texture that holds your style in place all day.
11. Twisted Rope Half-Crown
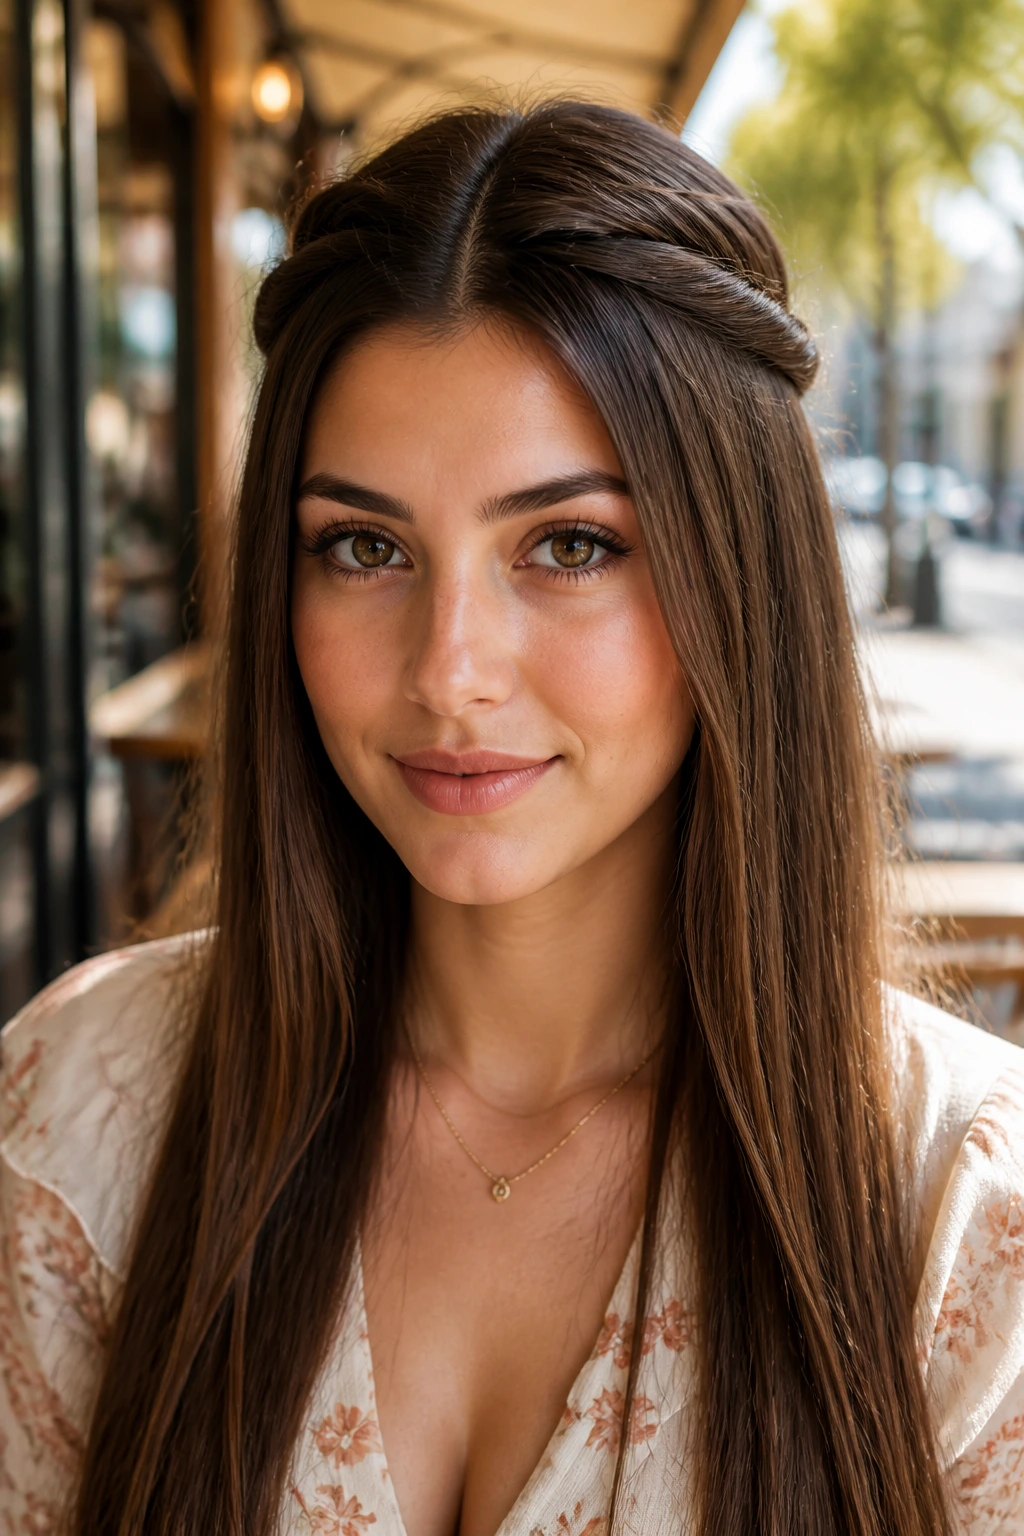
If braiding feels too complicated or time-consuming, a twisted rope style offers a quicker path to a similar look. Twisting your hair creates a softer, more romantic line than a standard braid, and it looks beautiful against the sleek backdrop of straight strands.
To start, take a small section of hair near your temple on one side of your head. Divide it into two equal parts, then twist each part individually to the right before crossing them over each other to the left. This opposing twist technique is the secret to keeping the rope from unraveling immediately.
As you work your way back toward the center of your head, add a tiny bit of loose hair to each twist, similar to how you would create a French braid. Secure the twist temporarily with a clip while you repeat the process on the other side of your face.
Once both twists meet at the back of your head, join them together with a small, clear elastic. You can pull gently on the outer edges of the twists to make them look fuller, then let the remaining length blend into your straight hair below.
12. Blown-Out Voluminous Straight Hair with Rounded Edges
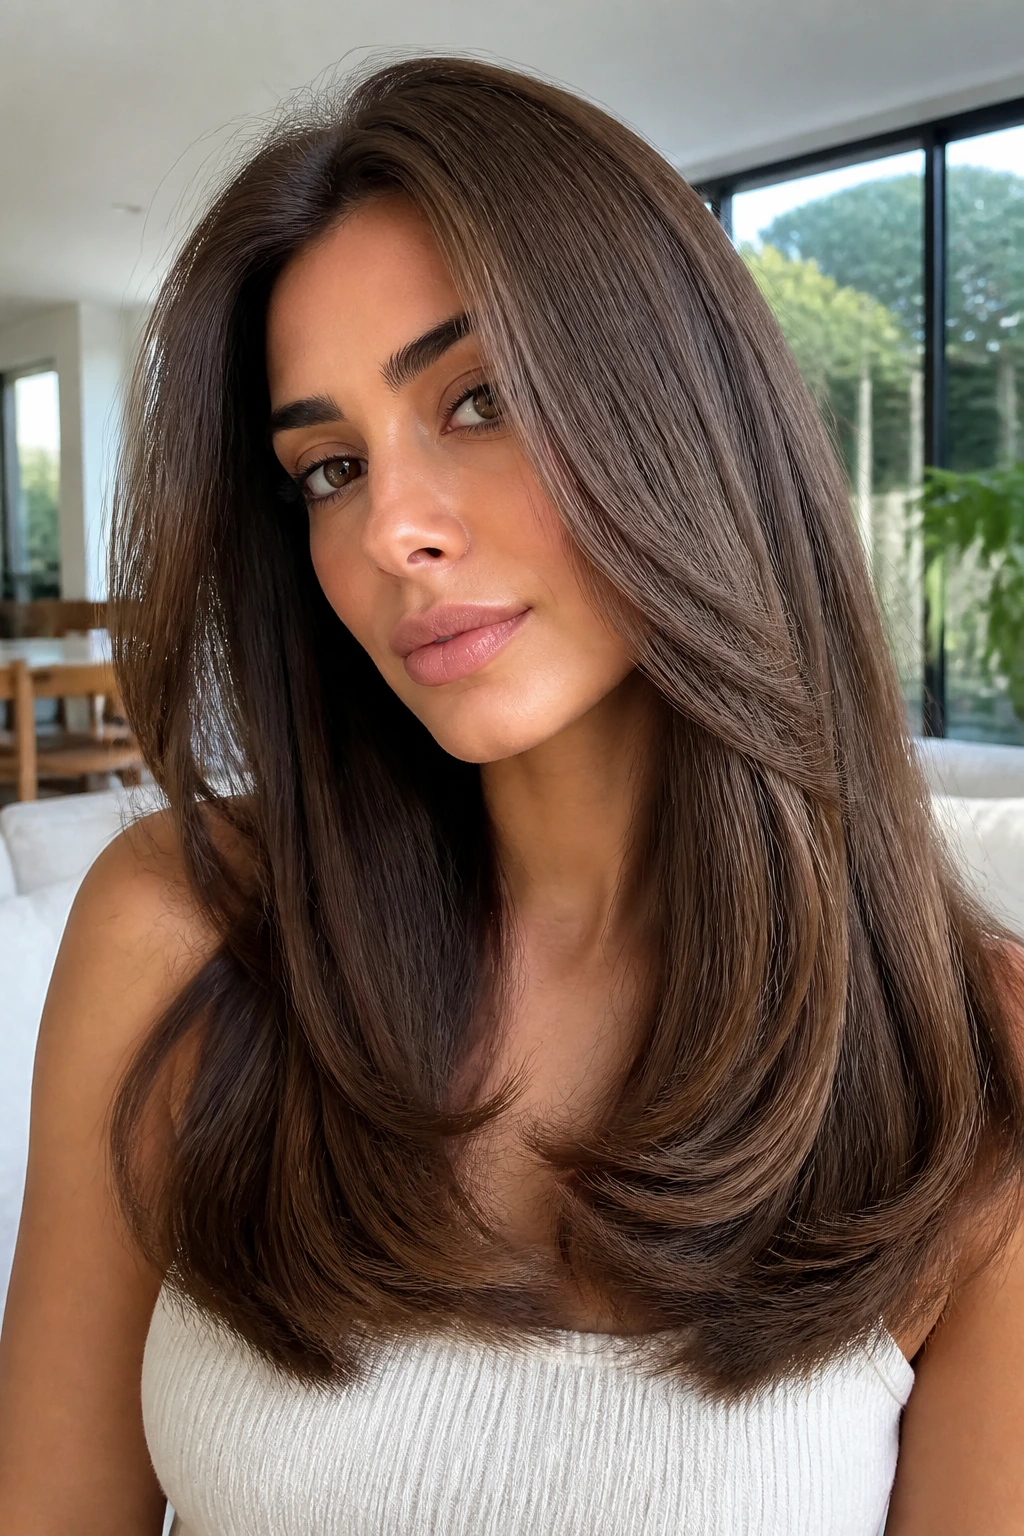
Unlike the stick-straight look of flat-ironed hair, a classic blowout is all about movement, soft volume, and gently rounded ends. It gives straight hair a luxurious, healthy bounce that looks incredibly polished.
What makes this style different is the lift at the roots. While a flat iron presses hair down, a blowout uses a round brush and hot air to lift the hair upward, creating a soft cushion of air at the scalp.
This style is best for individuals with fine or medium straight hair who struggle with flat roots. It gives the illusion of thicker hair without needing extensions or heavy styling products.
We recommend using a large ceramic round brush and a hair dryer with a concentrator nozzle. Work in sections, rolling each section from the ends up to the roots and blowing hot air along the shaft, finishing with a blast of cool air to set the shape.
13. Asymmetrical Side-Swept Locks
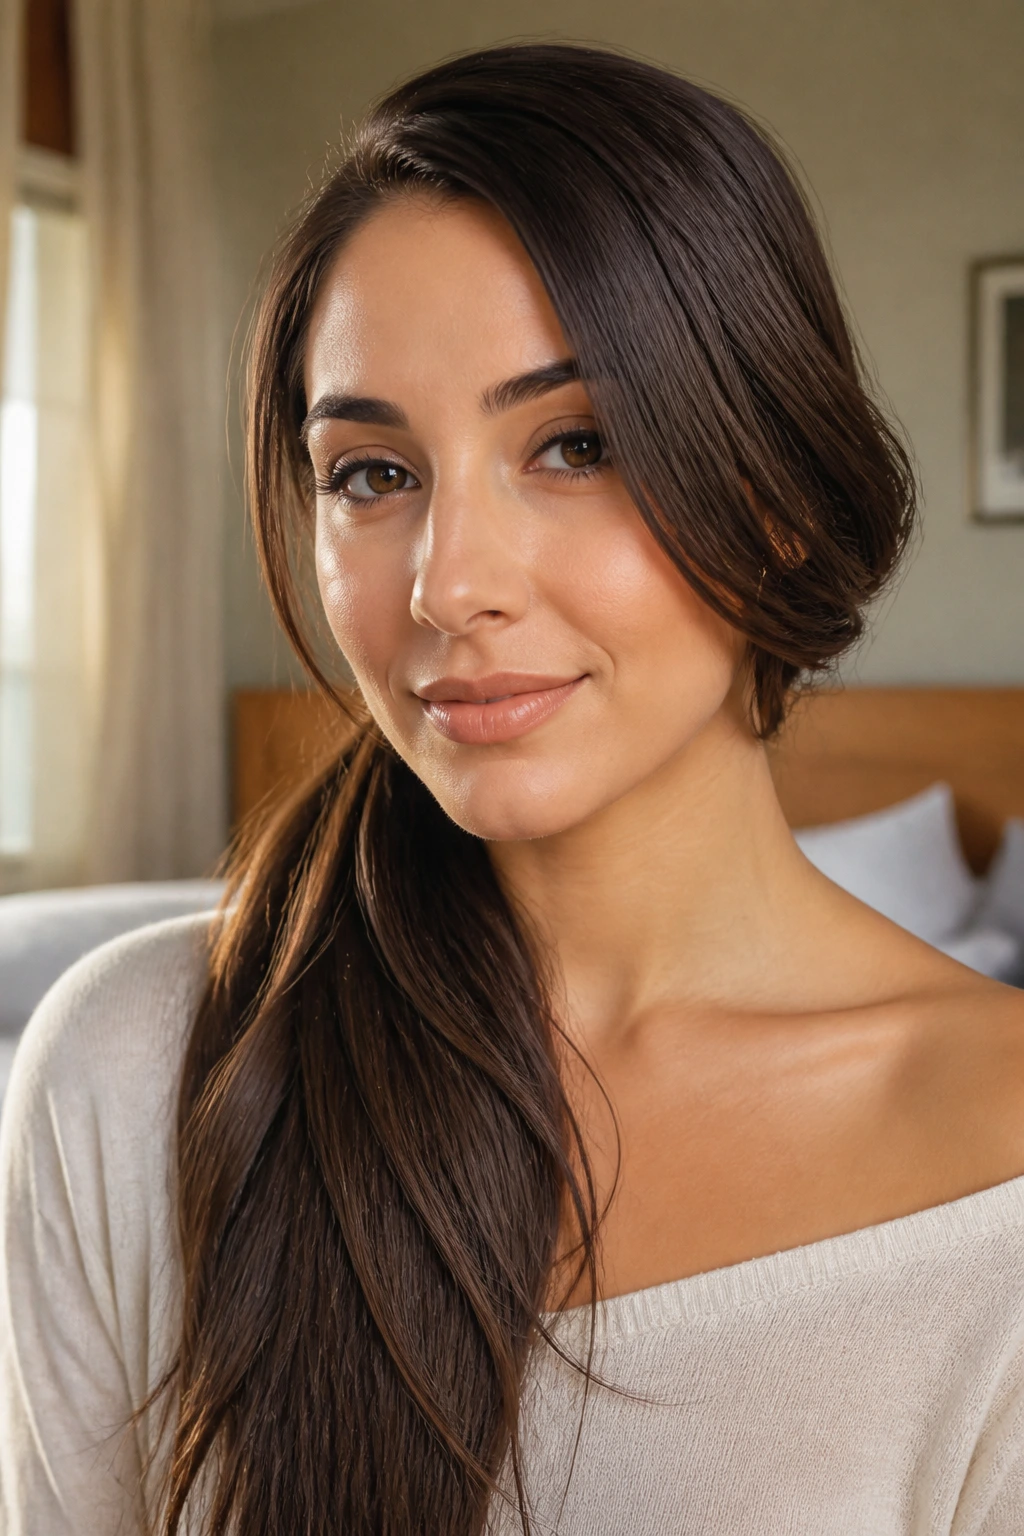
Create instant drama by sweeping all of your straight hair over one shoulder. This style plays with asymmetry and volume, making it look like you have spent hours styling when it actually takes less than two minutes to assemble.
Mastering the Side Sweep
The key is securing the back of your hair so it does not slide back over to the empty shoulder.
Quick Setup Steps
- Create a deep side part on the opposite side of where you want your hair to fall.
- Sweep all your hair from the back of your neck over to your preferred shoulder.
- Secure the back of your hair along the nape of your neck with a row of bobby pins pushed vertically upward.
- Spray the pinned section with a strong-hold hairspray to keep everything locked in place. Pro tip: Cross your bobby pins in an “X” shape at the back of your neck to ensure they do not slip, even if your hair is extremely soft or fine.
14. Razor-Cut Sharp Choppy Layers
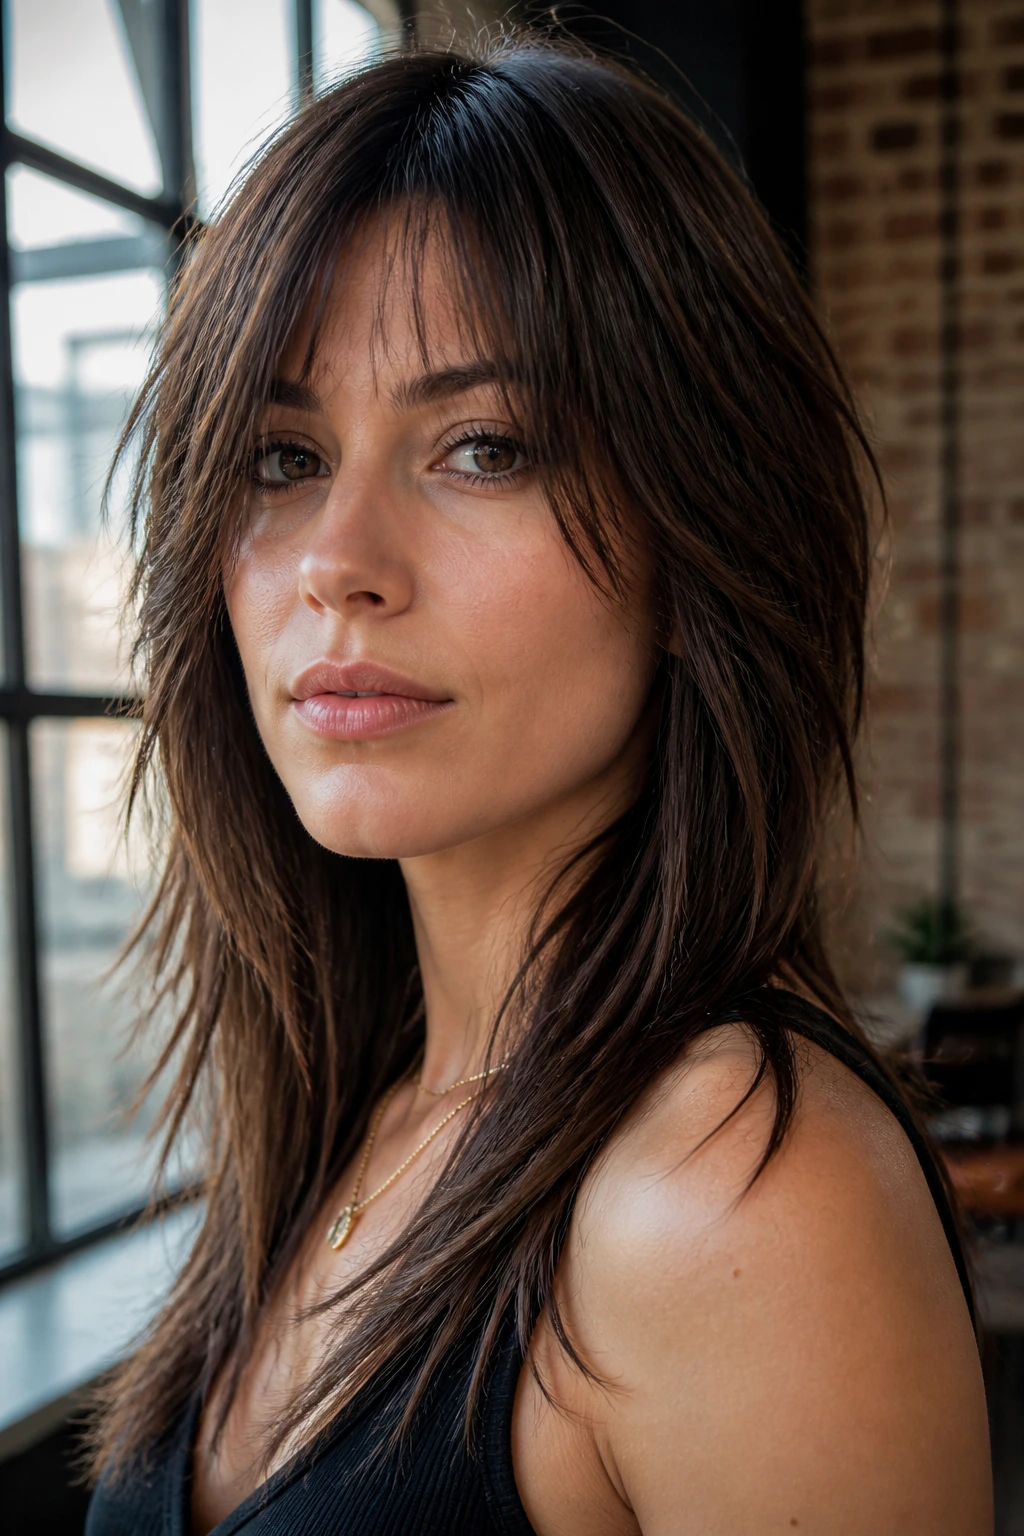
A razor cut is the ultimate enemy of heavy, lifeless straight hair. While scissors create clean, blunt lines, a razor slice cuts the hair at an angle, resulting in tapered ends that drape beautifully and move with ease.
This cut is highly effective because it adds instant texture to straight hair without requiring any styling tools. The choppy layers catch the light differently than a solid block of hair, giving your overall look more depth and dimension.
To get the most out of this cut, ask your stylist to use a straight razor on dry hair. This allows them to see how your straight hair naturally falls and place the choppy layers exactly where they will frame your face best. Smooth a tiny bit of lightweight styling lotion through the ends to highlight the piecey texture.
15. Headband-Accentuated Sleek Tresses
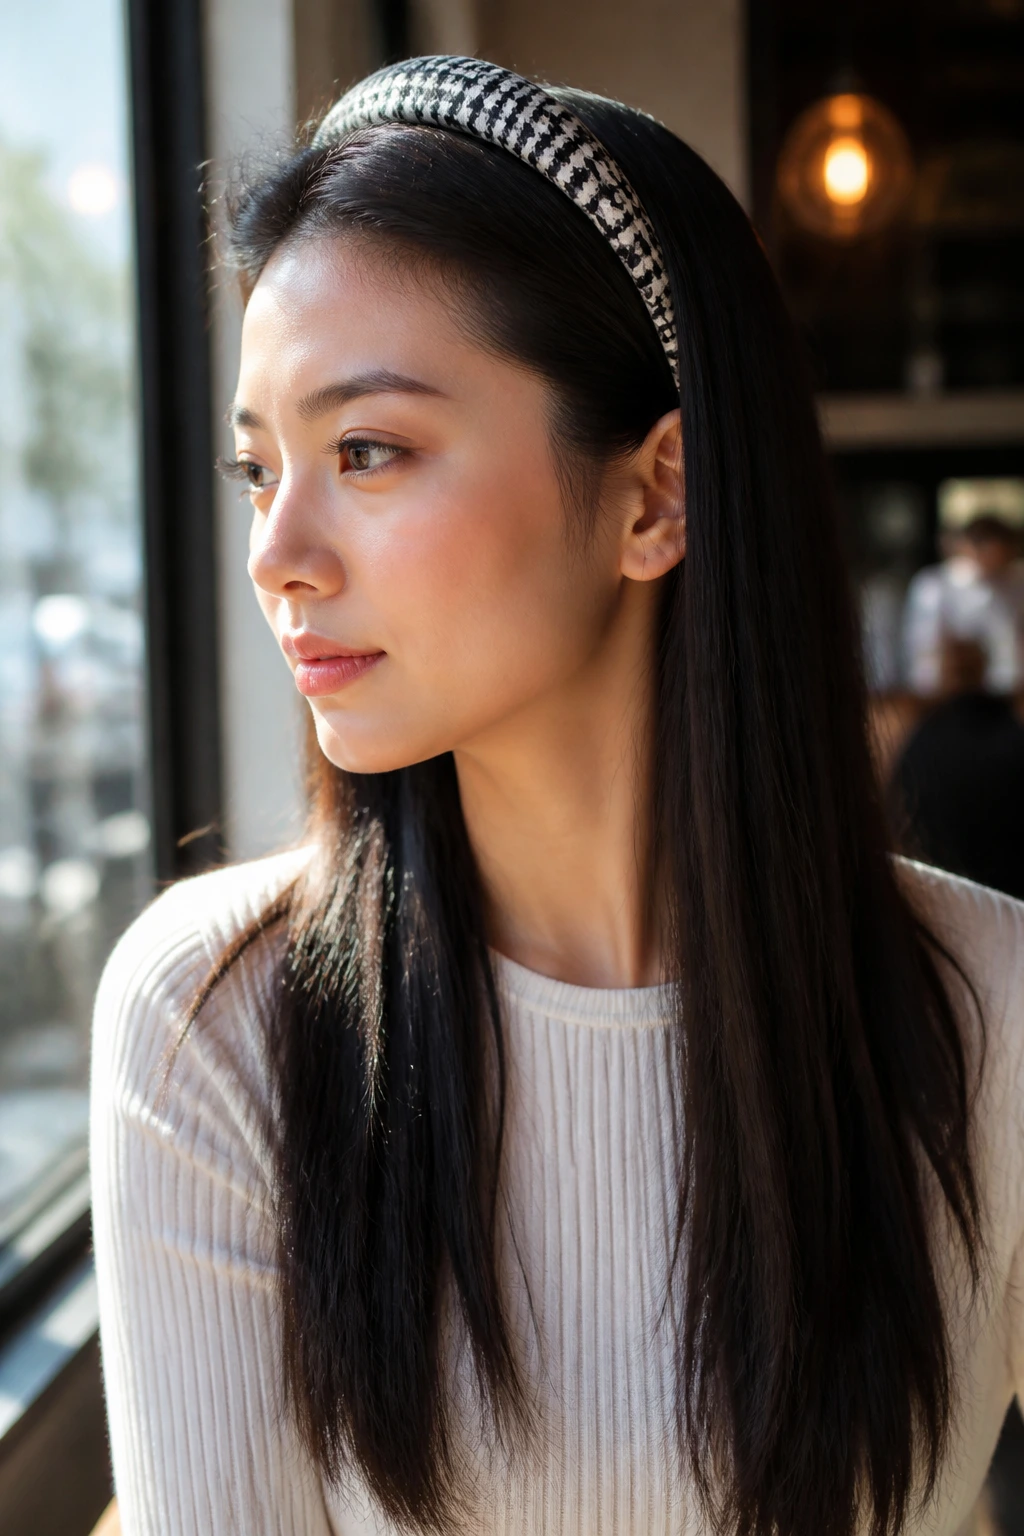
Why is the simple headband such a powerful tool for straight hair? It instantly solves the problem of flat roots by drawing attention to a structured accessory, while letting the rest of your straight hair drape naturally over your shoulders.
It is a classic look that can be adapted for any occasion, whether you want a casual cotton band for running errands or a padded velvet piece for a more formal setting. The band pushes your hair back, creating a small amount of volume right behind the accessory.
Positioning the Headband
To style this look, start by brushing your hair straight back. Slide the headband on starting from your hairline, pushing it back about two inches. Then, gently push the band forward by half an inch; this creates a subtle puff of volume at the front of your crown rather than pulling your hair flat against your scalp.
16. Double French Braided Half-Up Style
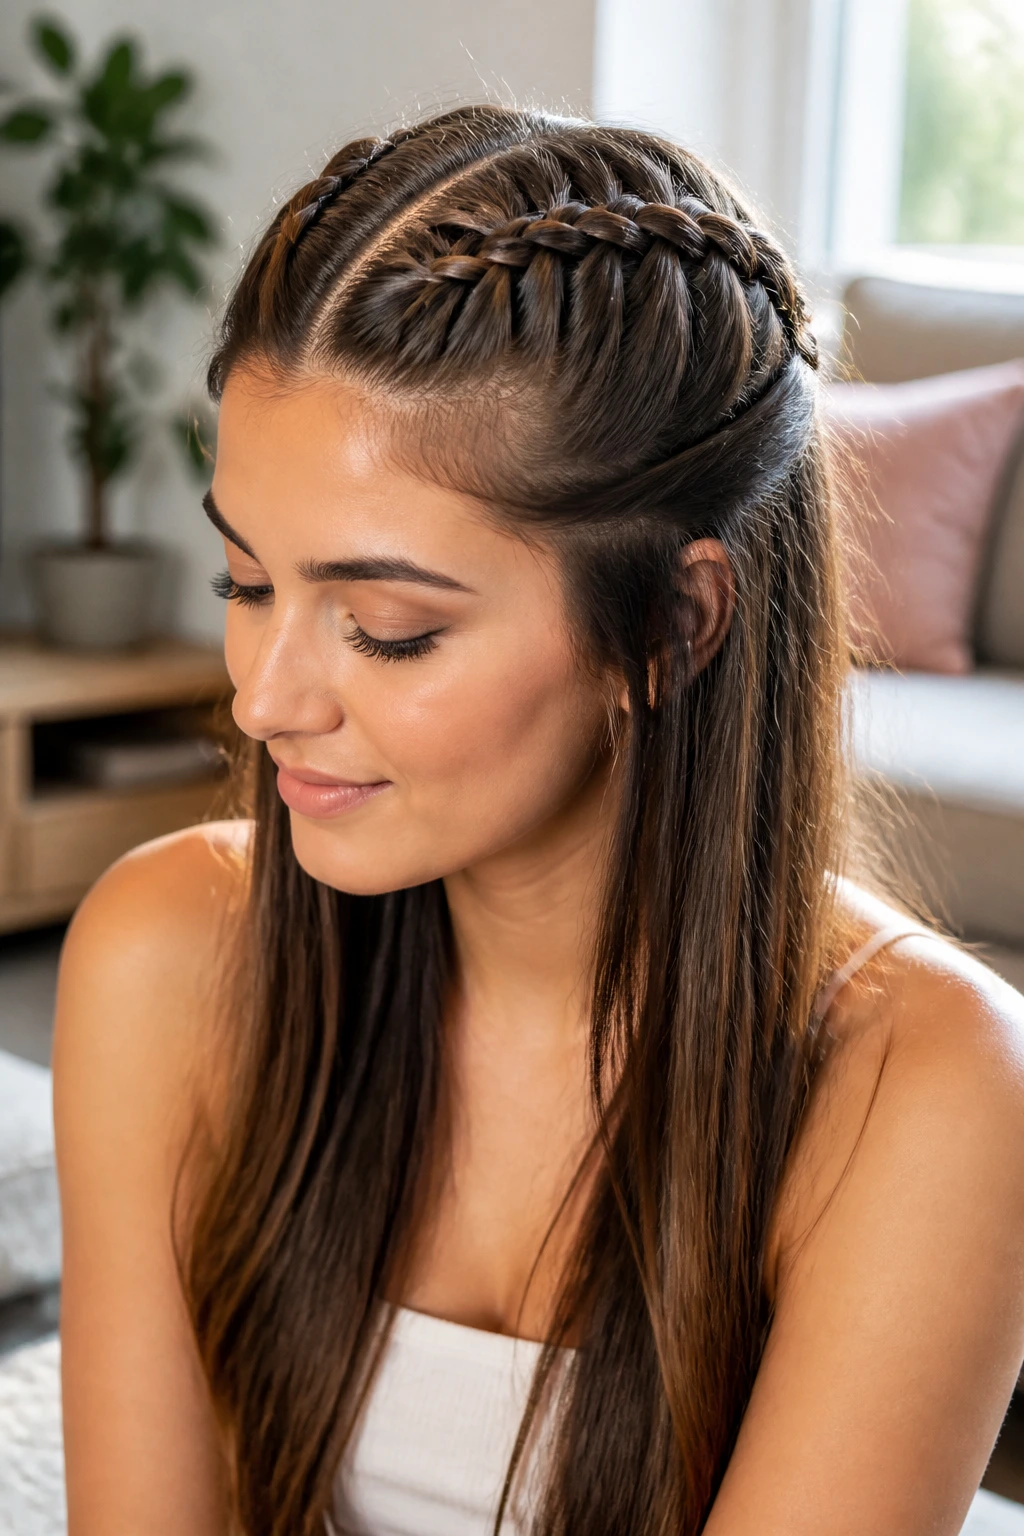
Imagine you want a style that looks intricate and holds up through an active day, but you still want the comfort of keeping your hair down. A double French braided half-up style offers the perfect mix of sportiness and elegance. The braids keep the top of your hair firmly in place while the rest of your straight hair flows out from below.
This style works by creating two parallel French braids along the top of your head, ending at the crown. It keeps your hair secure and flat along the sides of your head while adding a beautiful, woven texture to the top.
Key Steps for This Style
- Part your hair down the center, extending the part back to your crown.
- Create a small French braid on one side of the part, incorporating hair only from the top section of your head.
- Stop braiding at the crown and secure the tail with a small elastic.
- Repeat the process on the other side of your part, ensuring the braids are symmetric.
By leaving the tails of the braids to blend into your loose straight hair, you create a dynamic look that holds up beautifully from morning to night.
17. Choppy Straight Lob with Micro-Bangs
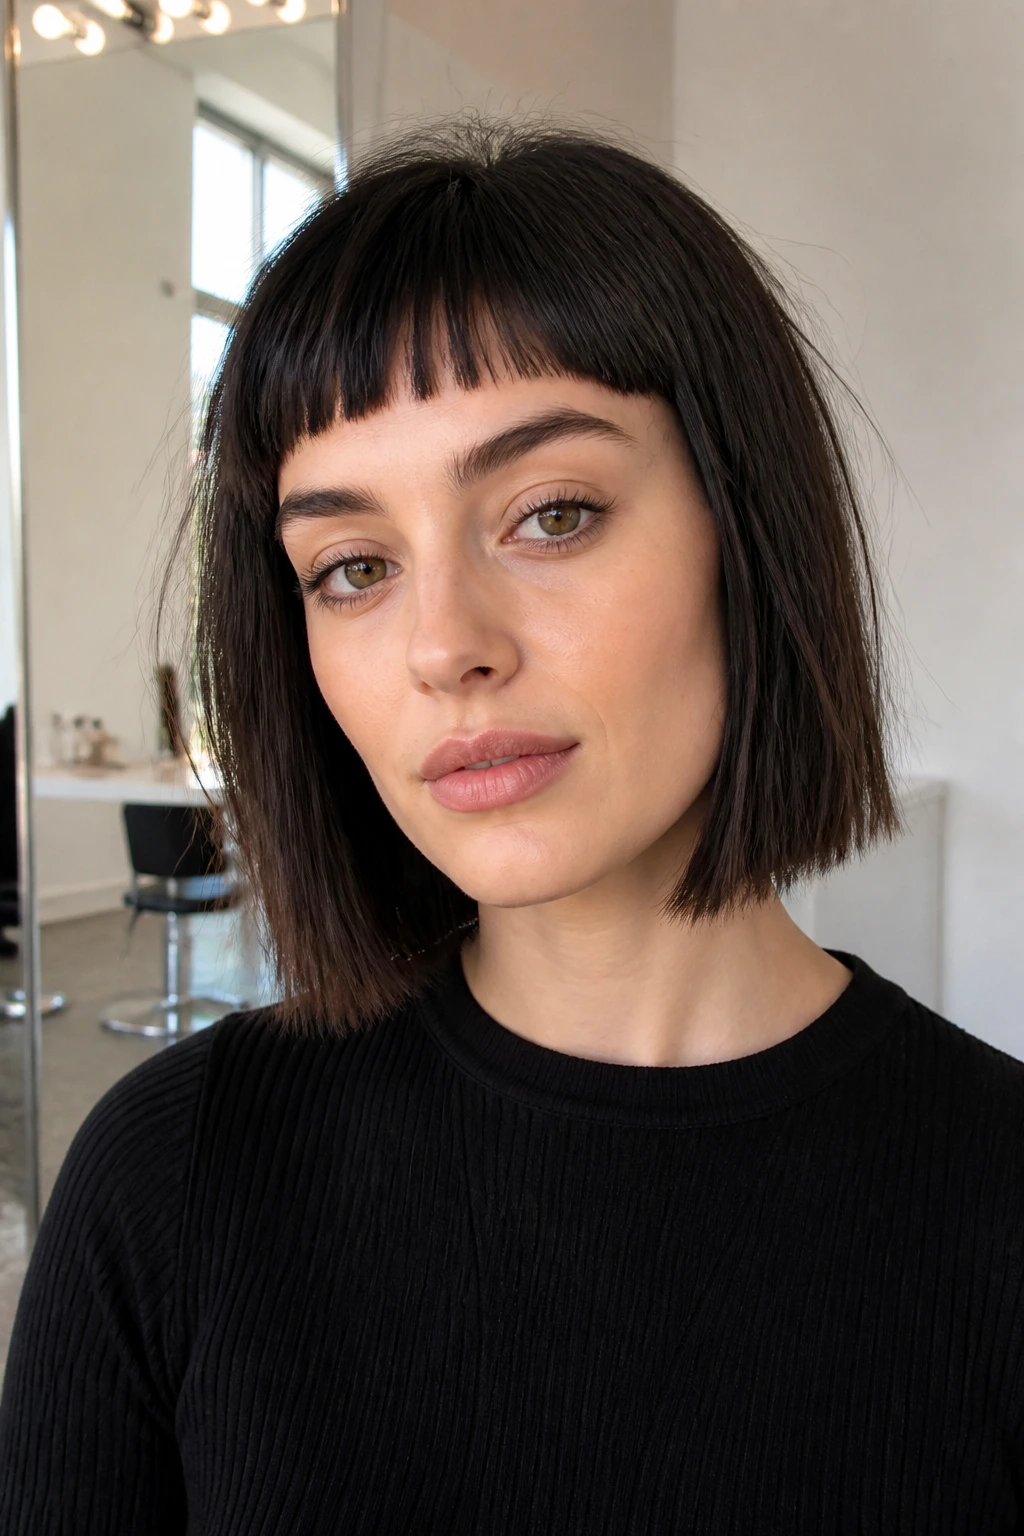
A long bob, or lob, is one of the most versatile cuts for straight hair, but adding micro-bangs takes it into a completely different style territory. This look is sharp, modern, and has a clean geometry that only works on straight hair. The micro-bangs sit a full inch or two above your eyebrows, creating a striking frame for your eyes.
Because this style relies on precision, you will want to keep your hair looking as healthy as possible. Use a weightless leave-in conditioner after washing to keep the ends of your lob from looking dry or frayed.
To style the micro-bangs, you cannot rely on a large round brush, or they will curve outward like a bubble. Instead, use a small flat comb and your hair dryer nozzle pointing straight down. Comb the bangs back and forth across your forehead as you dry them to neutralize any cowlicks.
The rest of your lob can be styled with a flat iron for a sleek finish. Keep the ends cut bluntly to contrast with the short, choppy texture of your bangs, creating a high-contrast style that feels fresh and structured.
18. Hidden Colored Peekaboo Strands
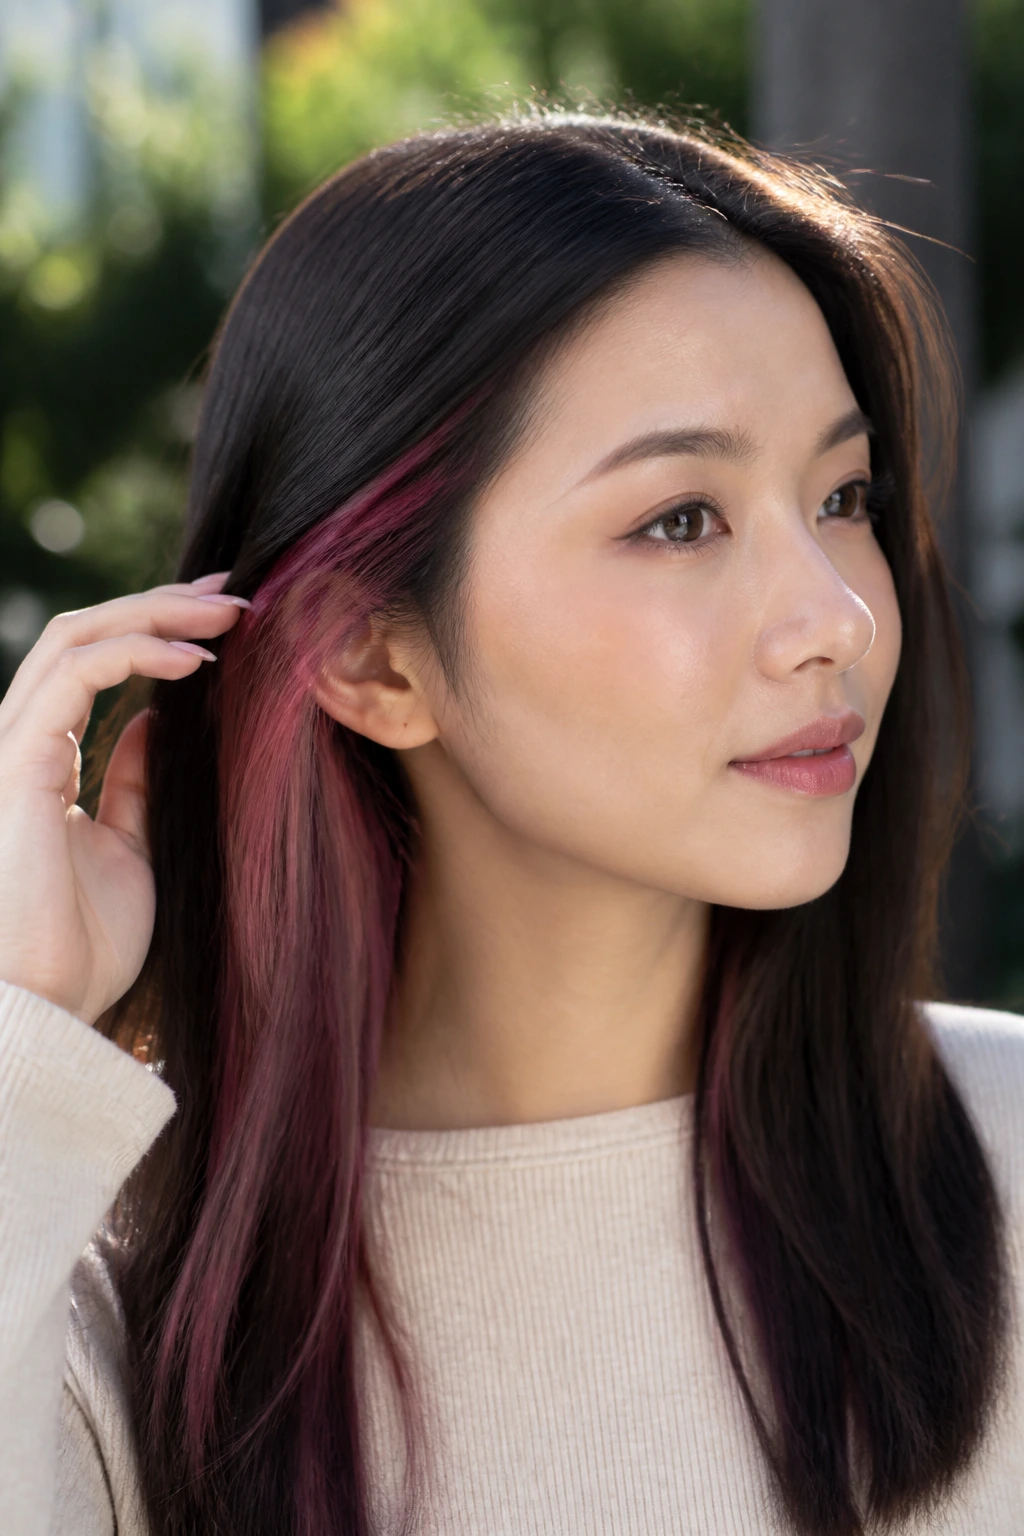
Unlike a full dye job or traditional highlights that sit on top of your hair, peekaboo color is hidden underneath the top layers. It only reveals itself when you move your head, tuck your hair behind your ears, or walk in a breeze.
What makes this option so exciting for straight hair is the sudden contrast of color against a solid, sleek base. The movement of straight hair allows these colorful strands to slide in and out of view like ribbons.
This is perfect for anyone who wants to experiment with bold fashion colors—like pastel pink, rich copper, or deep blue—without committing to a full head of bleached hair or worrying about visible root regrowth.
We recommend placing the color panels directly behind your ears or along the nape of your neck. This keeps them completely hidden when your hair is combed straight forward, but lets them flash brilliantly when you sweep your hair back.
19. Criss-Cross Bobby Pin Accent Style
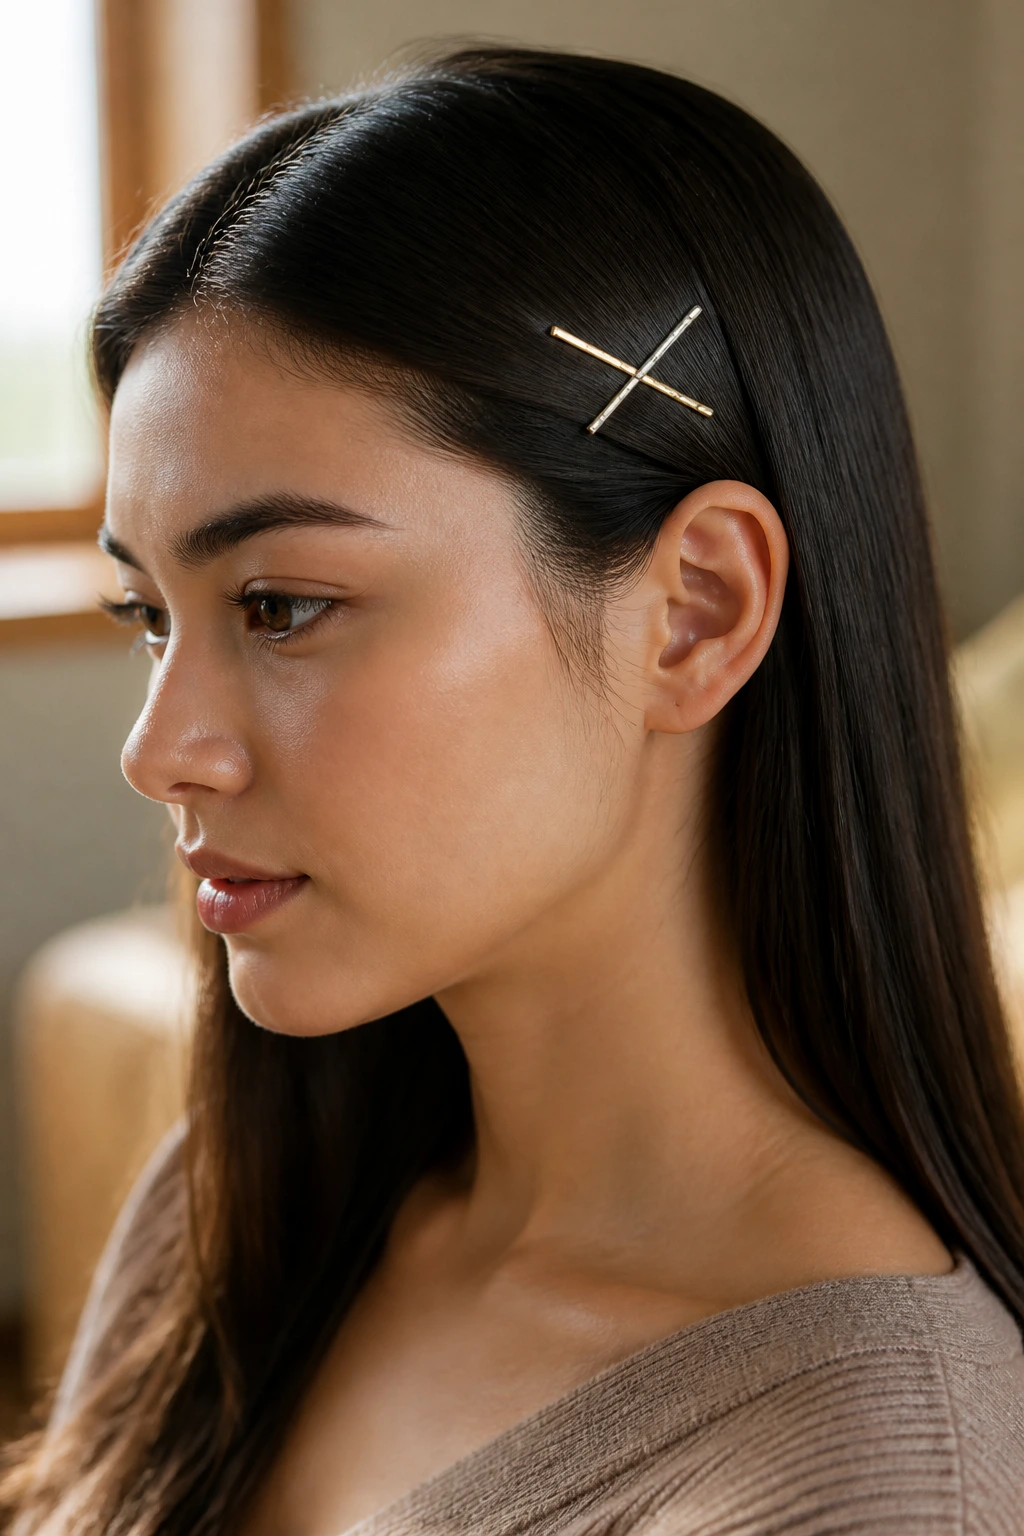
Turn a simple utility item into the star of your hairstyle by using bobby pins as decorative accents. This look uses the flat, smooth surface of straight hair as a canvas to display geometric patterns created with metallic pins.
Designing with Pins
Instead of hiding your pins, choose ones that contrast with your hair color—like gold pins on dark hair or black pins on blonde hair.
Quick Setup
- Create a deep side part and smooth down the shallower side of your hair with a light pomade.
- Slide one pin in horizontally just above your ear, holding the hair flat to your scalp.
- Slide a second pin across the first one at an angle to create a perfect “X” shape.
- Repeat this process with two more pins right next to the first set to create a double-cross pattern. Pro tip: Spray your bobby pins with a bit of dry shampoo before sliding them into your hair; this gives them a chalky grip that prevents them from sliding out of straight hair.
20. Soft Face-Framing Tendrils with High Half-Ponytail
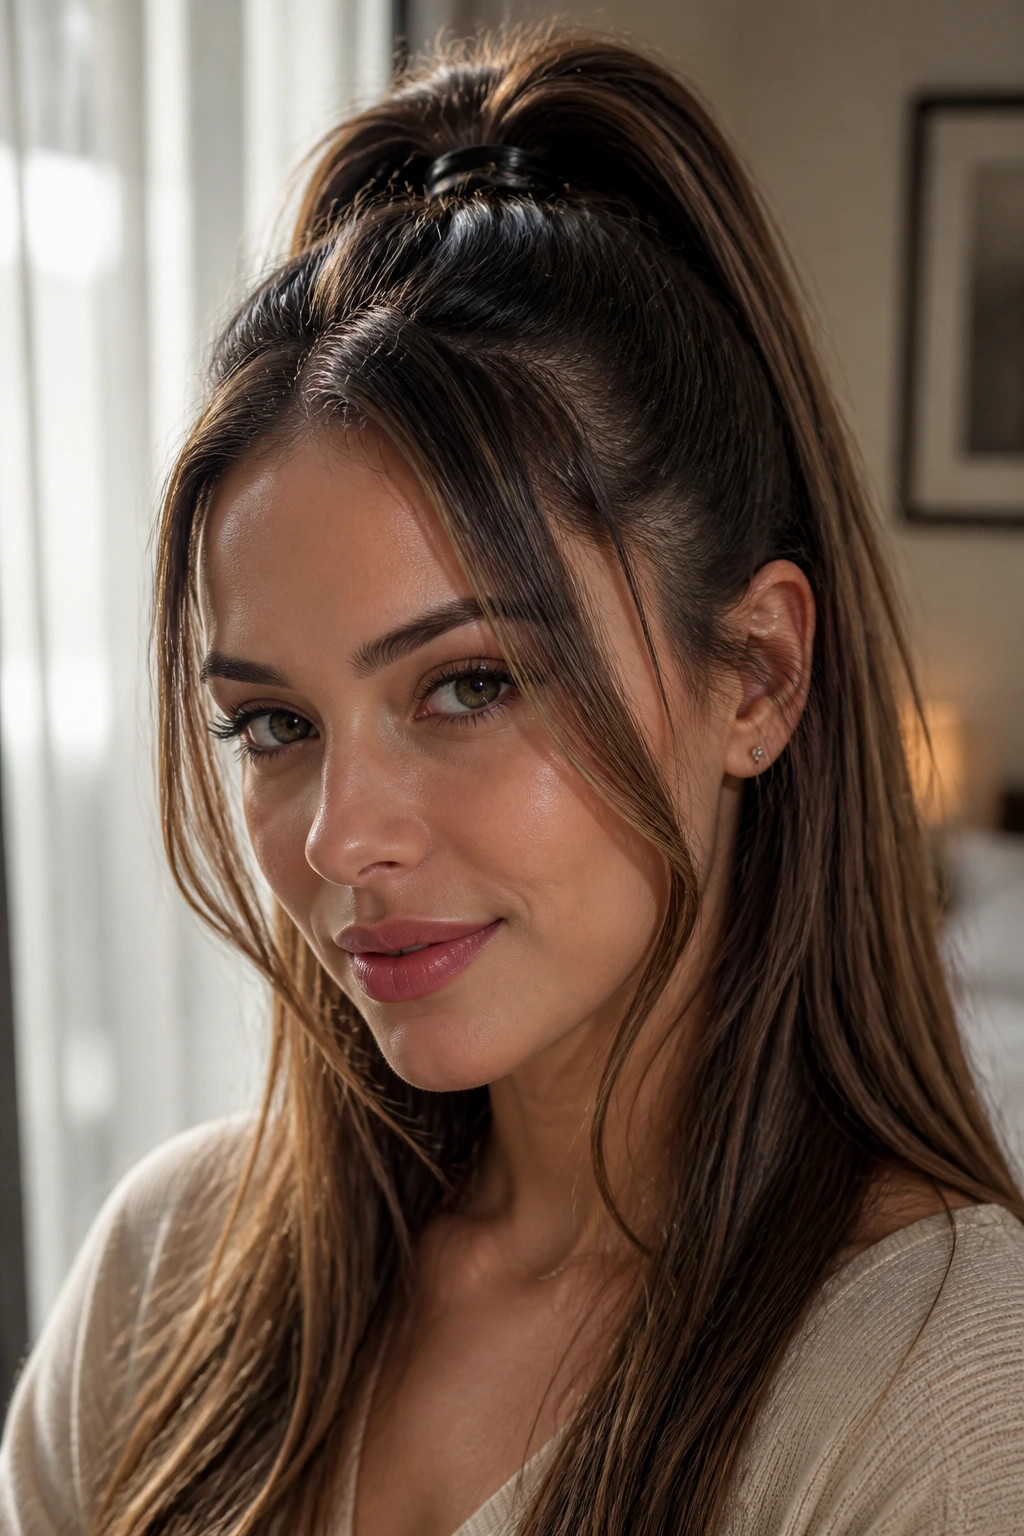
A high half-ponytail is the ultimate way to get instant height and lift on straight hair. By pulling the top half of your hair up to the very top of your head, you create an upward diagonal line that elongates your face and adds a youthful energy to your style.
The key to keeping this look soft rather than severe is leaving a few delicate tendrils loose around your hairline. These soft strands break up the sharp pull of the ponytail and frame your face with gentle movement.
To style this, use your cheekbones as an angle guide for where to pull the top section back. Secure it firmly at the crown of your head with a strong elastic, then pull two small, thin sections of hair free from your temples. Run a warm flat iron over these tendrils, curving them slightly toward your face to create a soft, face-framing frame.
21. Feathered Layered V-Cut Ends
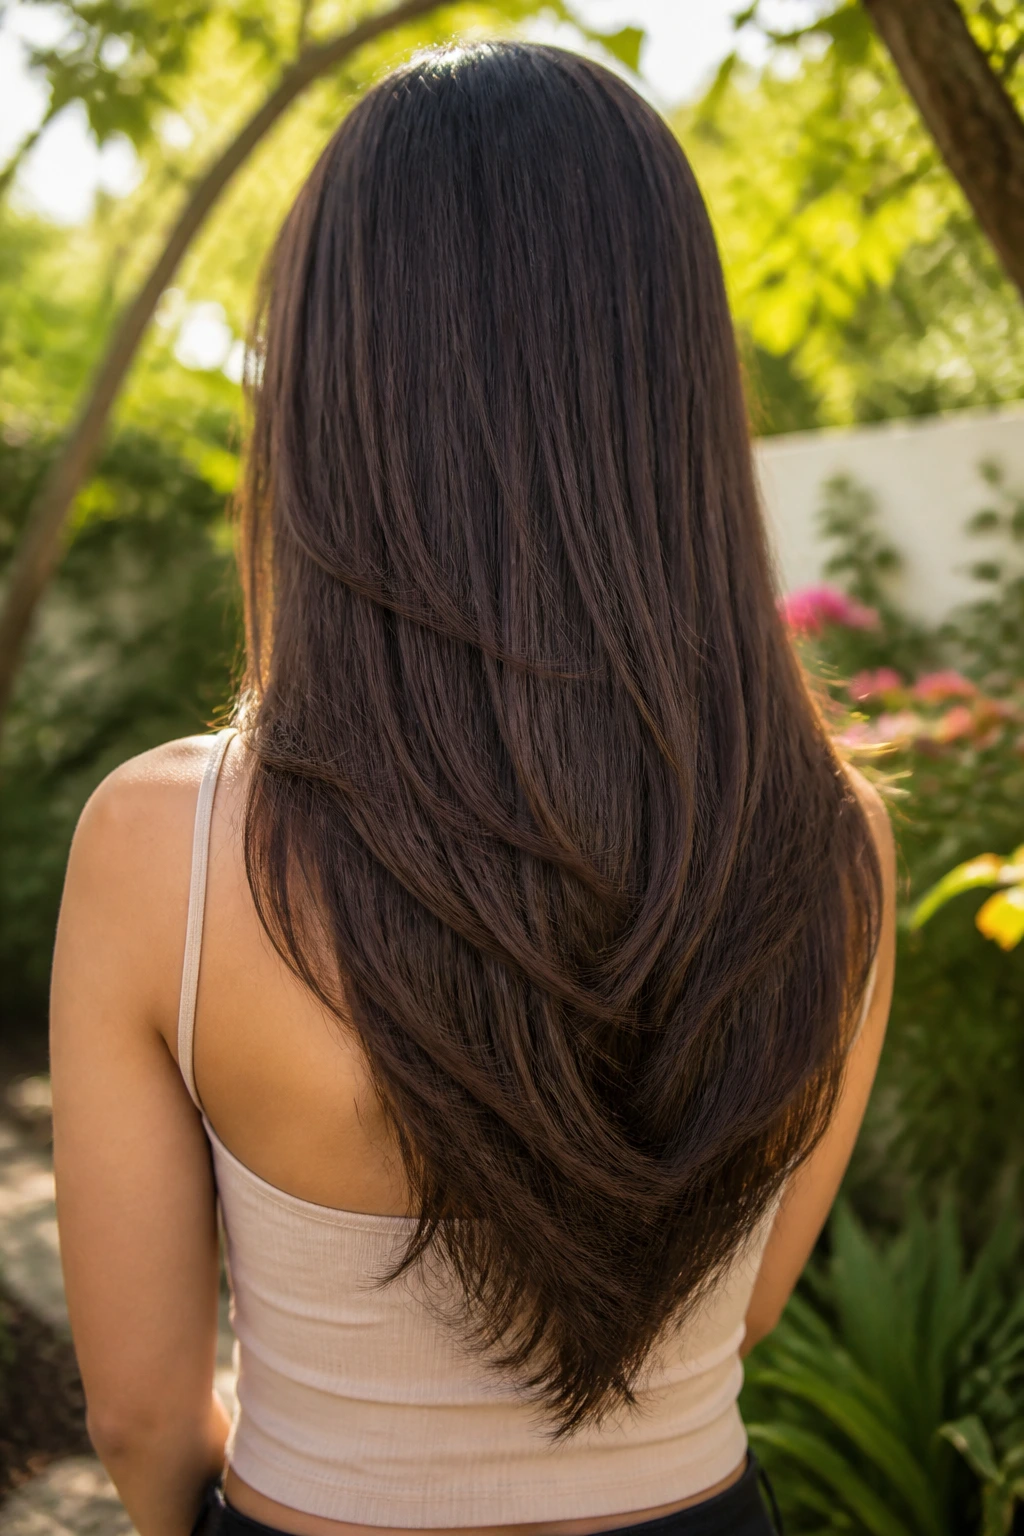
Why do V-cut layers work so well for long, straight hair? A traditional blunt cut can sometimes look heavy and curtain-like on long hair, but a V-cut shapes the ends into a point at the center of your back, with shorter, feathered layers cascading down the sides.
This cut removes weight from the ends of your hair, preventing it from pulling flat at the roots and giving it a beautiful, winged movement when you walk. It looks incredibly soft and romantic from the back.
Maintenance for Feathered Ends
To keep these delicate, feathered layers looking sharp, you will need to protect your ends from splitting. Apply a silicon-free split-end sealer to your damp ends before blow-drying. When drying, use a medium round brush to roll the ends of the layers back away from your face to emphasize the feathered shape.
22. Scarf-Tied Half-Up Drape
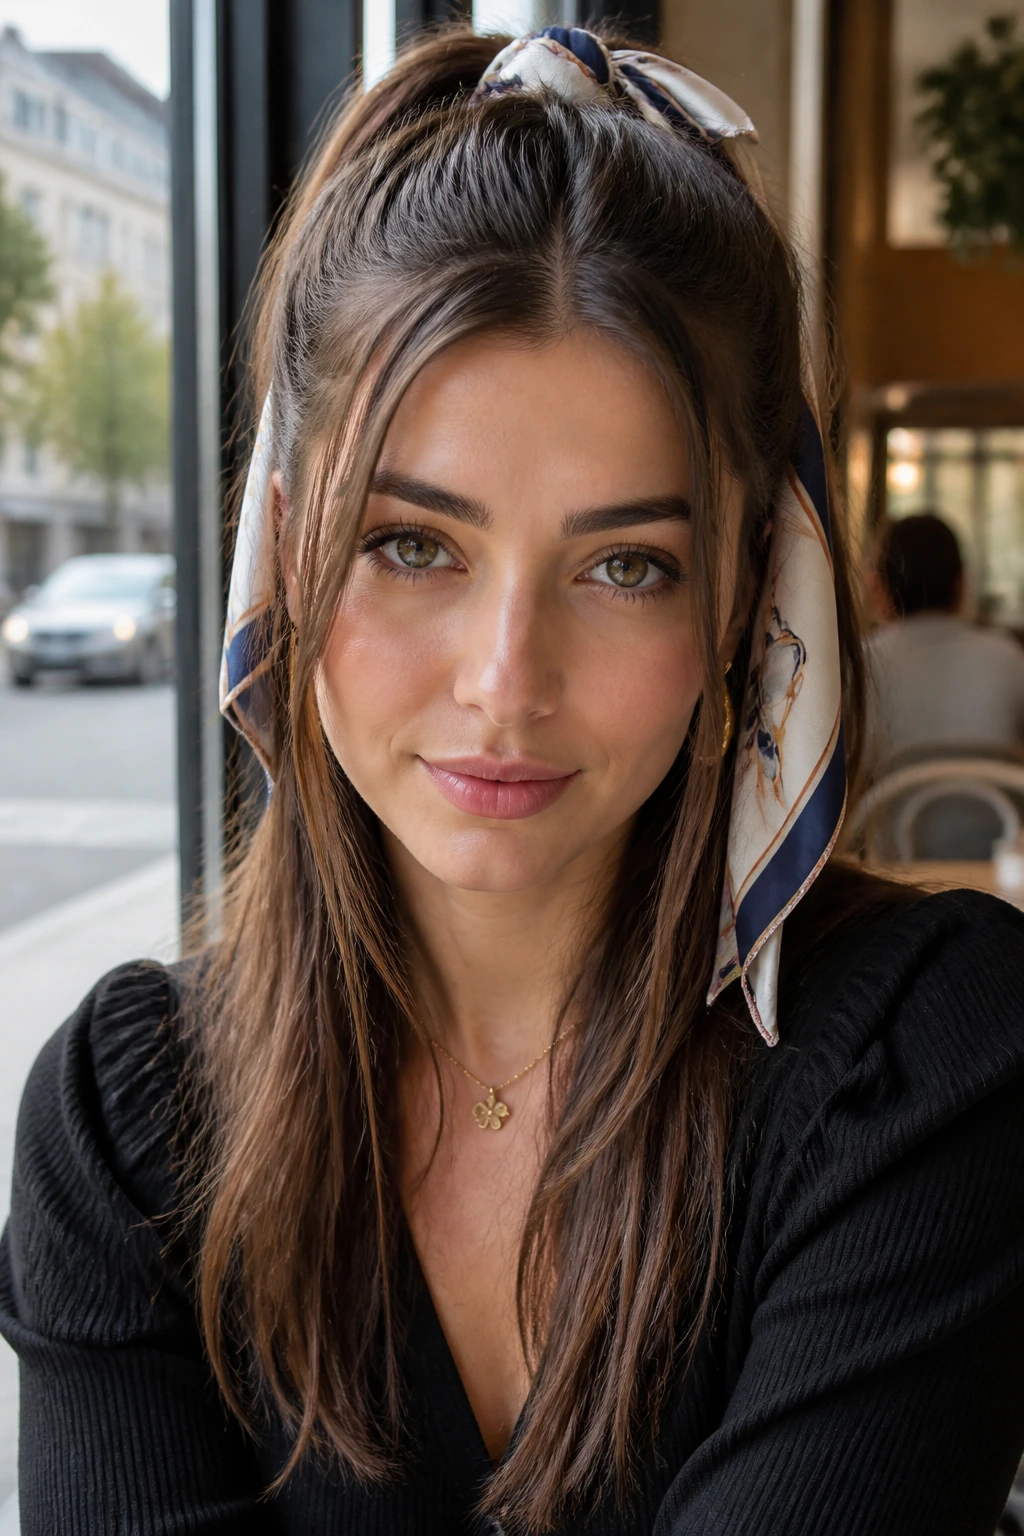
Imagine you want a style that feels effortless and elegant for a weekend brunch, but you do not want to spend more than five minutes on your hair. A silk scarf tied around a simple half-up section adds instant color and texture, making the style look incredibly thoughtful.
The contrast of the soft, flowing fabric against your straight hair creates a beautiful, tactile look. The scarf also helps to hide the hair tie, keeping the overall aesthetic clean and classic.
Steps to Get the Perfect Drape
- Gather the top section of your hair from above your ears and tie it into a loose ponytail at the back of your head.
- Fold a square silk scarf into a narrow band, about two inches wide.
- Wrap the scarf around the elastic tie once, then tie it into a simple double knot.
- Let the tails of the scarf drape down alongside your straight hair.
By choosing a scarf that coordinates with your outfit, you create a cohesive, polished look that requires almost no styling skill at all.
The Bottom Line
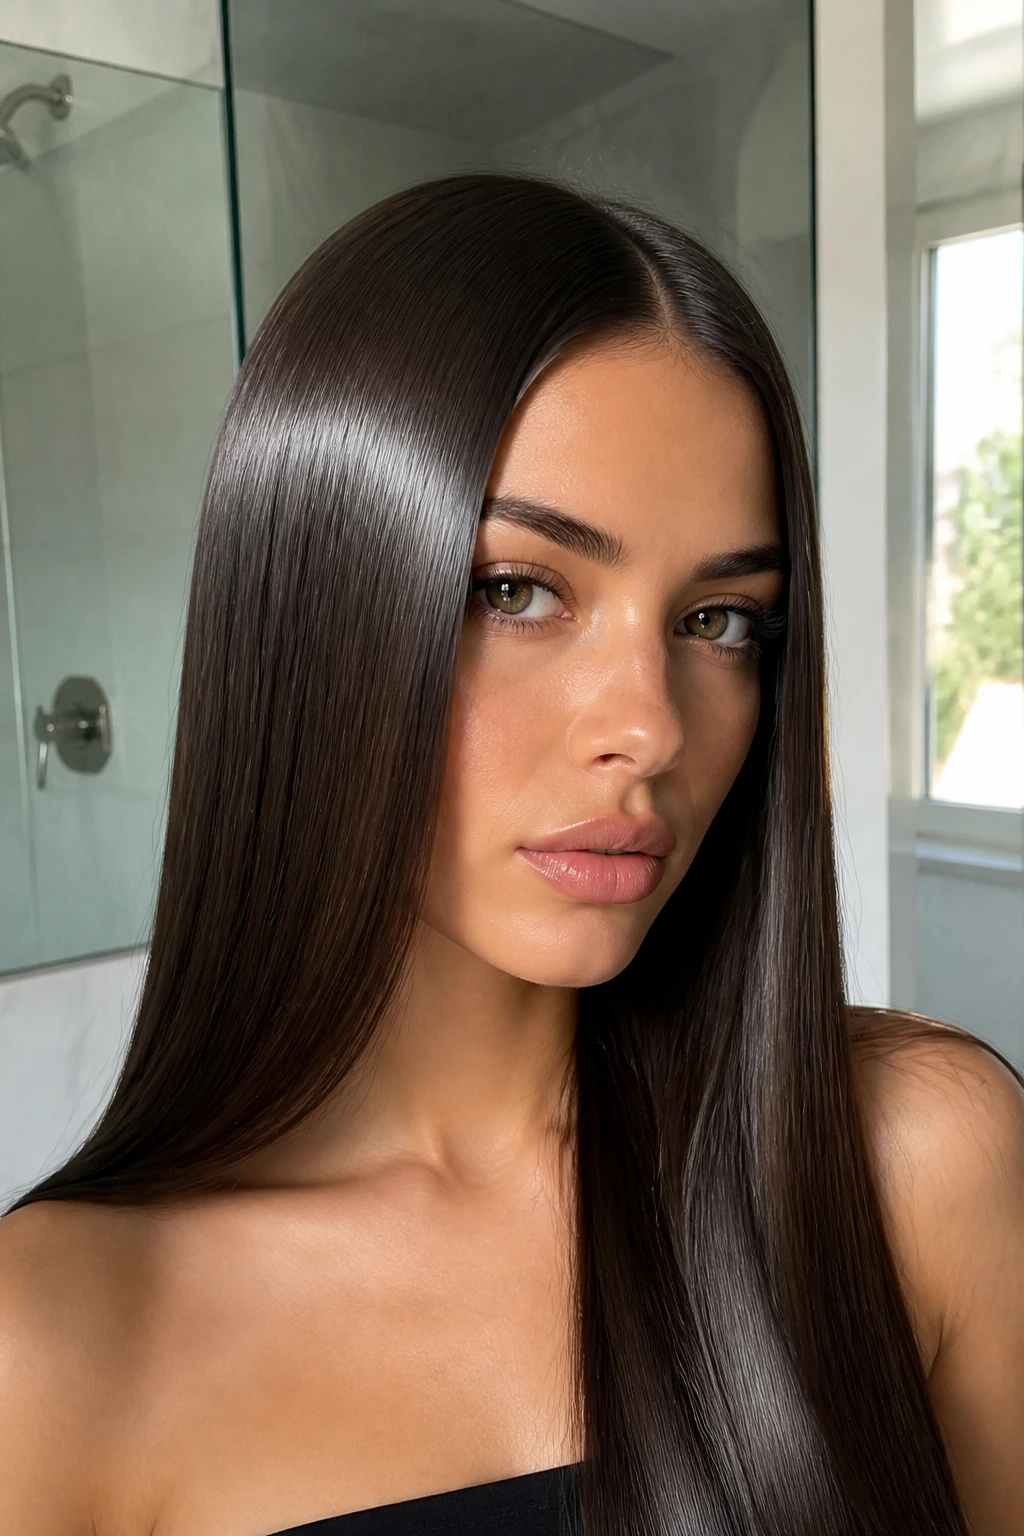
Finding the right look for straight hair does not require changing your hair’s natural texture. Instead, it is about celebrating the clean lines, sharp geometry, and incredible light reflection that only straight strands can provide.
By experimenting with parts, accessories, and simple braided details, you can easily find a style that works with your daily routine. Healthy, well-moisturized hair remains the foundation for every look, so prioritize protection and hydration as you style. Straight hair is anything but boring—it is a versatile canvas waiting for your next creative idea.
