Braids are the ultimate chameleon of the hair world. They are the only style I know that can look just as appropriate during a frantic morning commute as they do at a low-key dinner. When your hair feels uncooperative, greasy, or just plain boring, a well-placed braid acts as an instant architectural fix. You do not need to be a professional stylist or spend forty minutes in front of a mirror to pull these off. Most of the styles that look the most complex are actually just simple maneuvers repeated in a specific sequence.
The trick to mastering these styles isn’t necessarily dexterity—it is about the prep work. If you start with hair that is too clean and slippery, your braids will unravel before you hit the door. Adding a bit of texture is the secret, whether you use a light dusting of dry shampoo, a texturizing spray, or even a bit of salt spray to give your strands some “grit.” Once you have that foundation, these twenty styles become significantly easier to execute. Let’s look at how to get these done without the frustration.
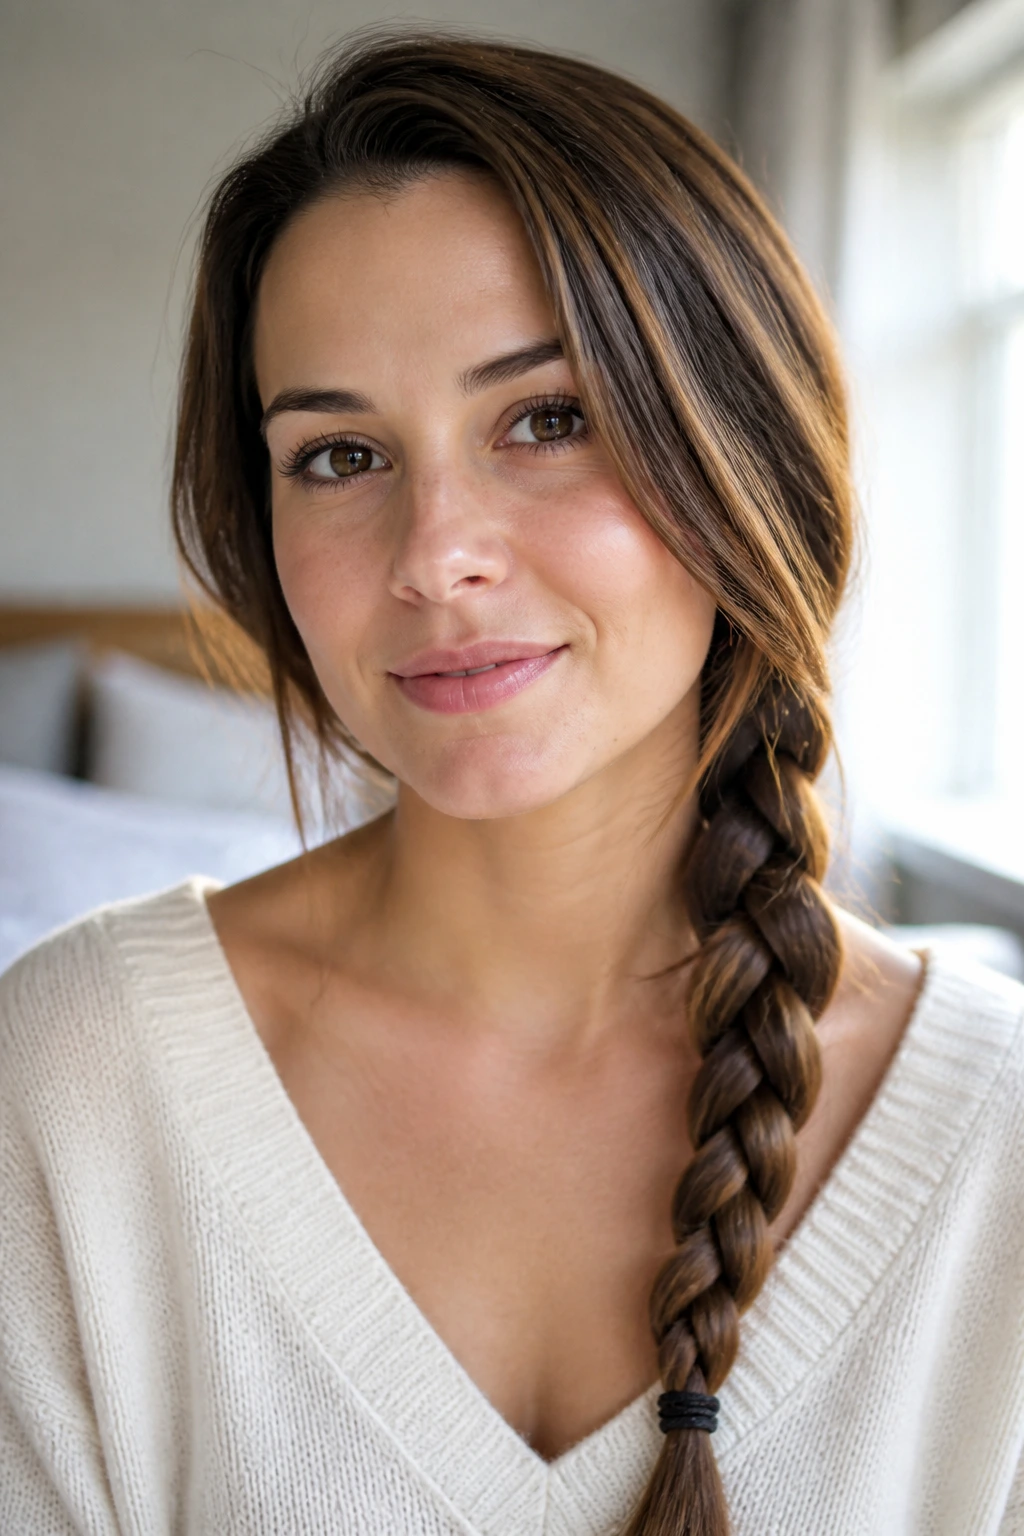
1. The Classic Three-Strand Side Braid
This is the foundational movement for every other style on this list. If you can master the three-strand technique, you can eventually master everything else. You begin by gathering all your hair over one shoulder and dividing it into three equal sections. Cross the right section over the middle, then the left over the new middle. Keep going until you reach the ends, securing it with a small, clear elastic that matches your hair color.
Making It Look Polished
Instead of pulling the braid tight, which can look a bit primary-school, gently tug at the edges of each loop once you are finished. This technique, often called “pancaking,” adds instant volume and makes the braid look twice as thick as it actually is. It also gives the hair that soft, lived-in feel that looks intentional rather than accidental.
When to Choose This Style
- When you are running five minutes late and need a style that holds for the entire day.
- On “second-day” hair, where the natural oils help the braid stay together without flyaways.
- During high-humidity days when letting your hair down leads to instant frizz.
Pro tip: If you find the ends look wispy, spray a little bit of hairspray onto a clean mascara wand or a soft toothbrush and smooth down the stray hairs along your hairline.
2. The Messy Bohemian Fishtail
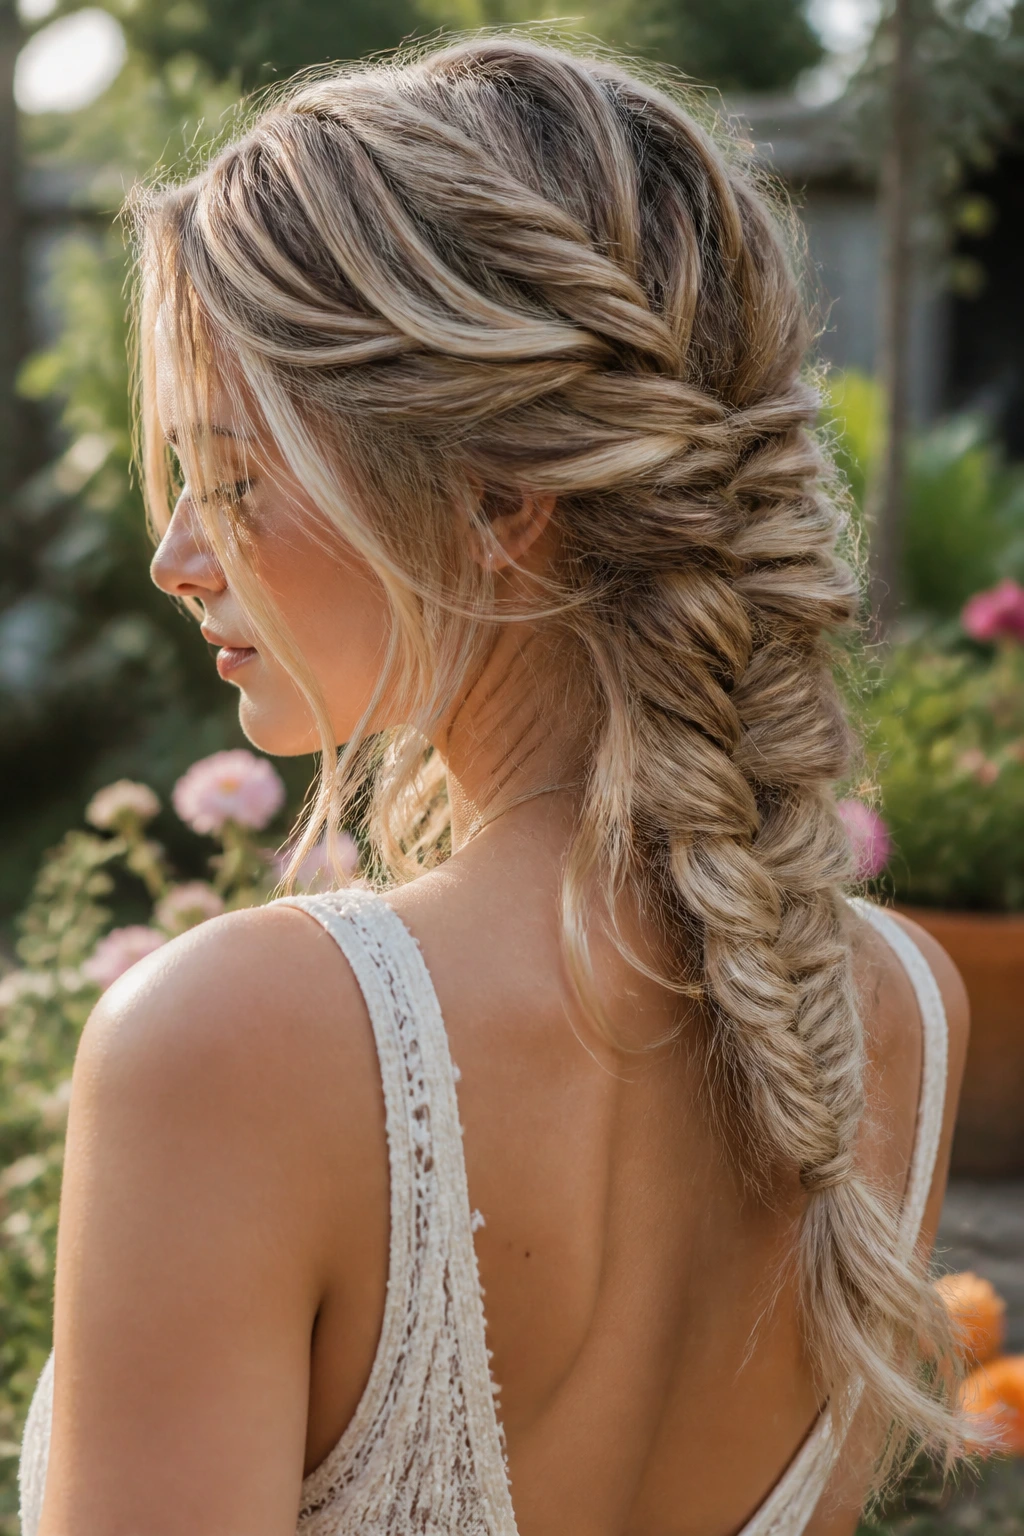
Fishtail braids always look like you spent an hour on them, but they are surprisingly repetitive. Divide your hair into two large sections. Take a tiny sliver of hair from the outer edge of the left section and cross it over to the inside of the right section. Repeat this on the other side, pulling tiny pieces from the right and crossing them to the left. The smaller your sections, the more intricate the braid will appear in the final result.
The Secret to Speed
You do not have to be precise with the sizing of your strands. In fact, variations in strand thickness give the braid more dimension. If you get lost in the pattern, just remember: take from the outside, cross to the inside. That is the only rule you need to follow.
Texture Matters
A fishtail braid looks best when it is slightly chaotic. After securing the ends, hold the bottom of the braid and use your other hand to pull and loosen the weave from the bottom up. Do not be afraid to let a few face-framing pieces fall out; it frames the face and softens the look.
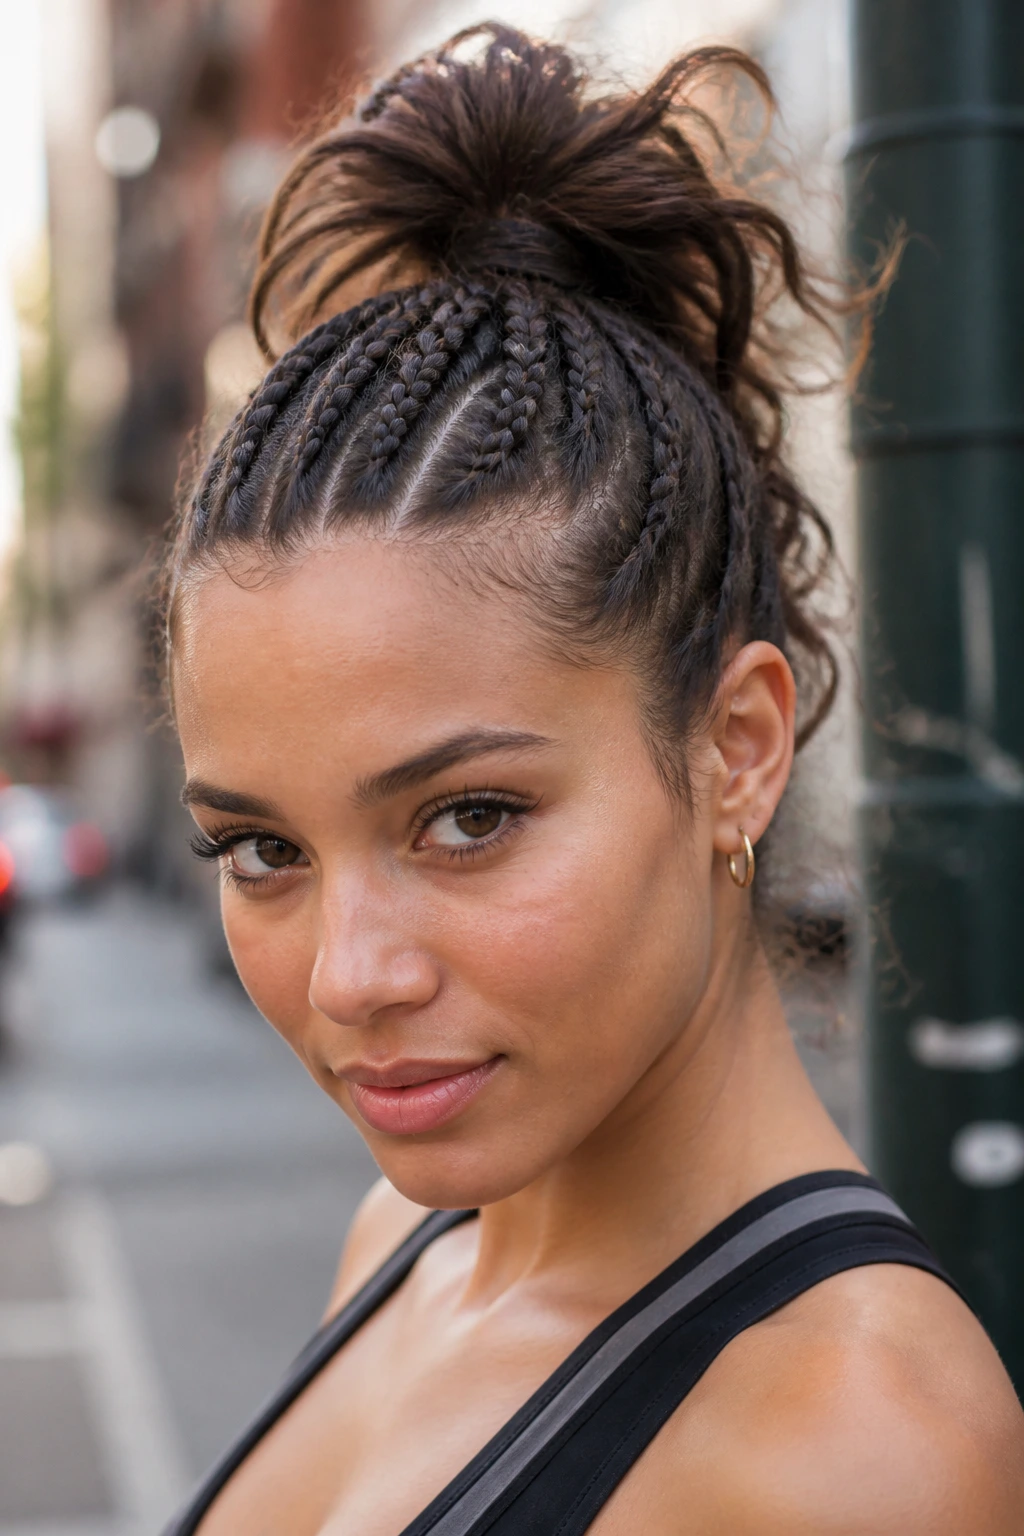
3. The Double-Dutch Crown Braid
A Dutch braid is essentially an inverted French braid—instead of crossing strands over the top, you tuck them underneath. This creates a 3D effect where the braid appears to sit on top of the hair. Start at your hairline near the part and work your way back toward the nape of the neck, adding small sections of hair as you go.
Why Inversion Is Better
Because the braid is tucked under, it is much easier to tug on and fluff up later. This style stays incredibly secure because the “under” movement creates tension against the scalp. It is a fantastic option for people with thick, heavy hair that usually pulls out of standard braids by midday.
Styling the Ends
Once you finish two braids (one on each side), you can tuck the ends behind your ears or pin them underneath at the back for a faux-updo look. It is a clean, structured style that works for everything from a casual coffee run to a gym session.
4. The Half-Up French Braid
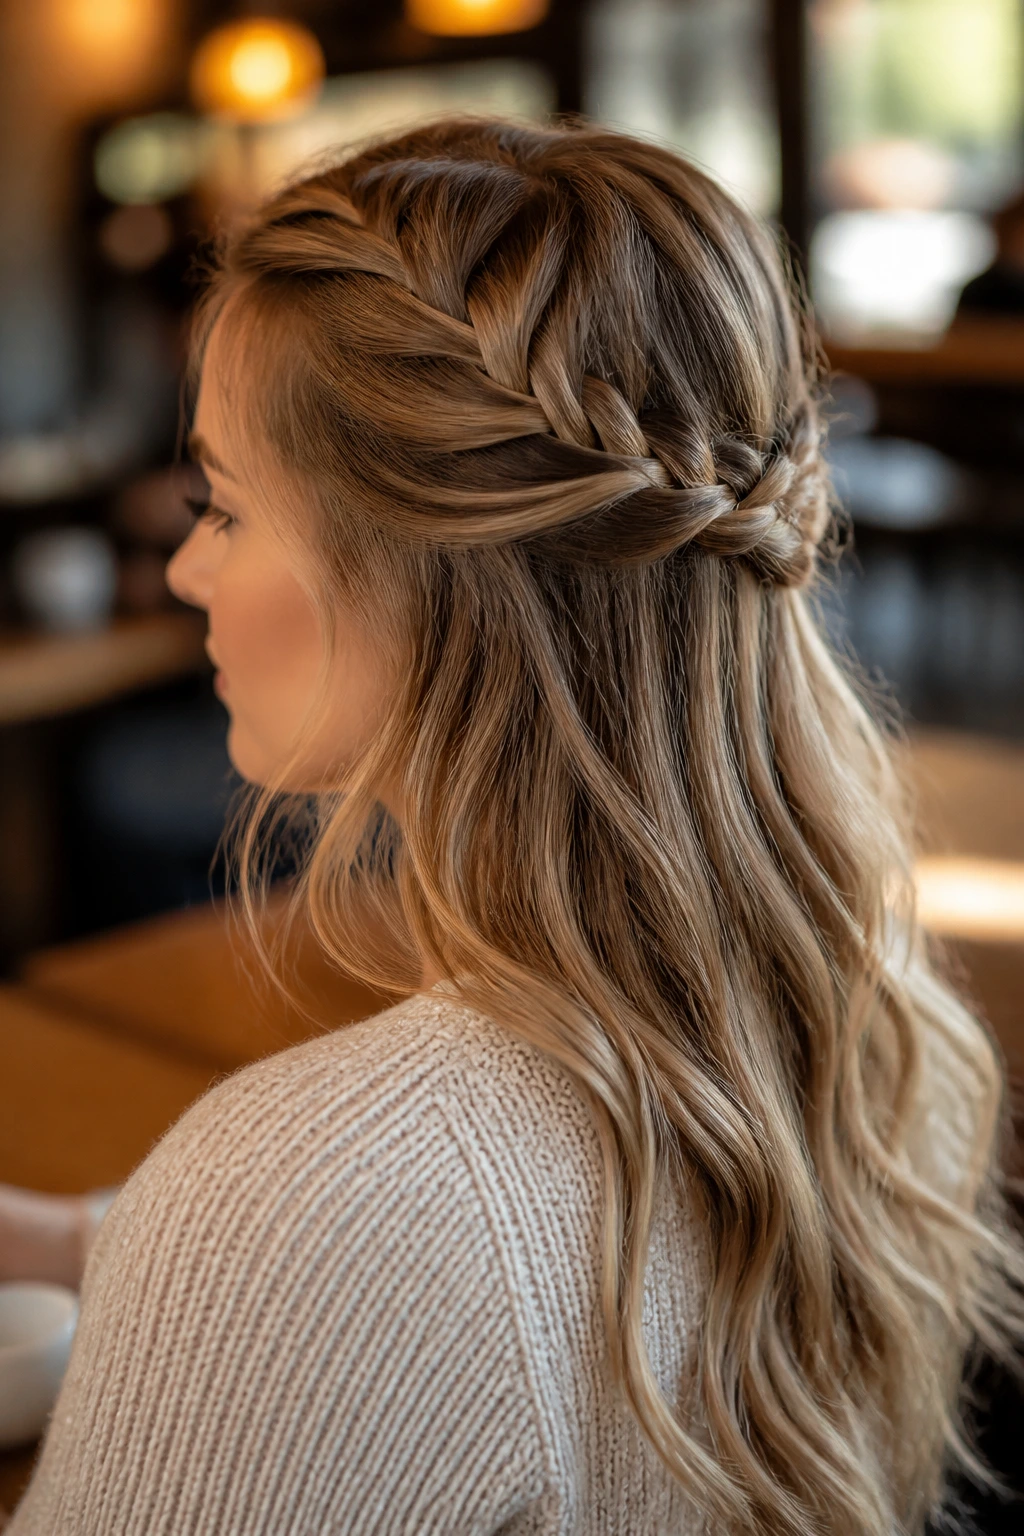
Sometimes you want the comfort of a braid but the freedom of wearing your hair down. This style pulls the hair away from your face while leaving the length loose. Begin by taking a section of hair at the crown, dividing it into three, and creating a standard French braid that follows the curve of your head.
The Anchor Point
Stop the braid right at the back of your head, halfway between your temples and the nape. Secure it with a small clear elastic or a decorative barrette. Use your fingers to loosen the braid so it blends seamlessly with the rest of your hair.
How to Style the Loose Length
To make this look professional, add a few loose waves to the bottom half of your hair with a wide-barrel curling iron. The contrast between the intricate, tight braid at the top and the soft, flowing waves at the bottom is consistently flattering.
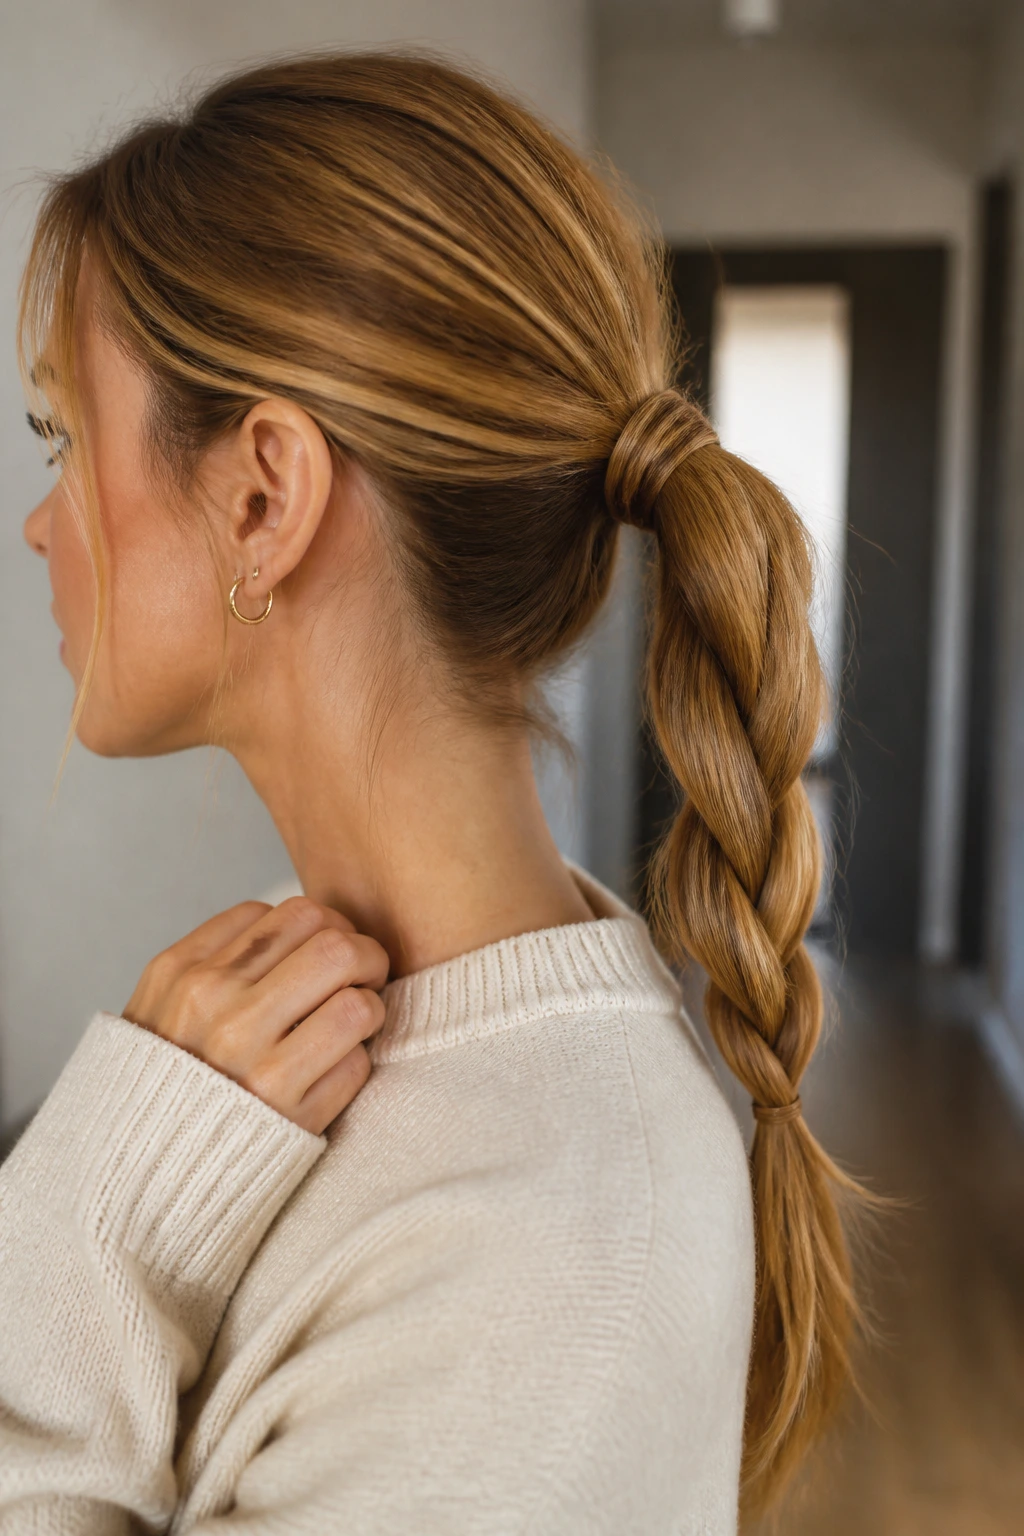
5. The Twisted Rope Braid
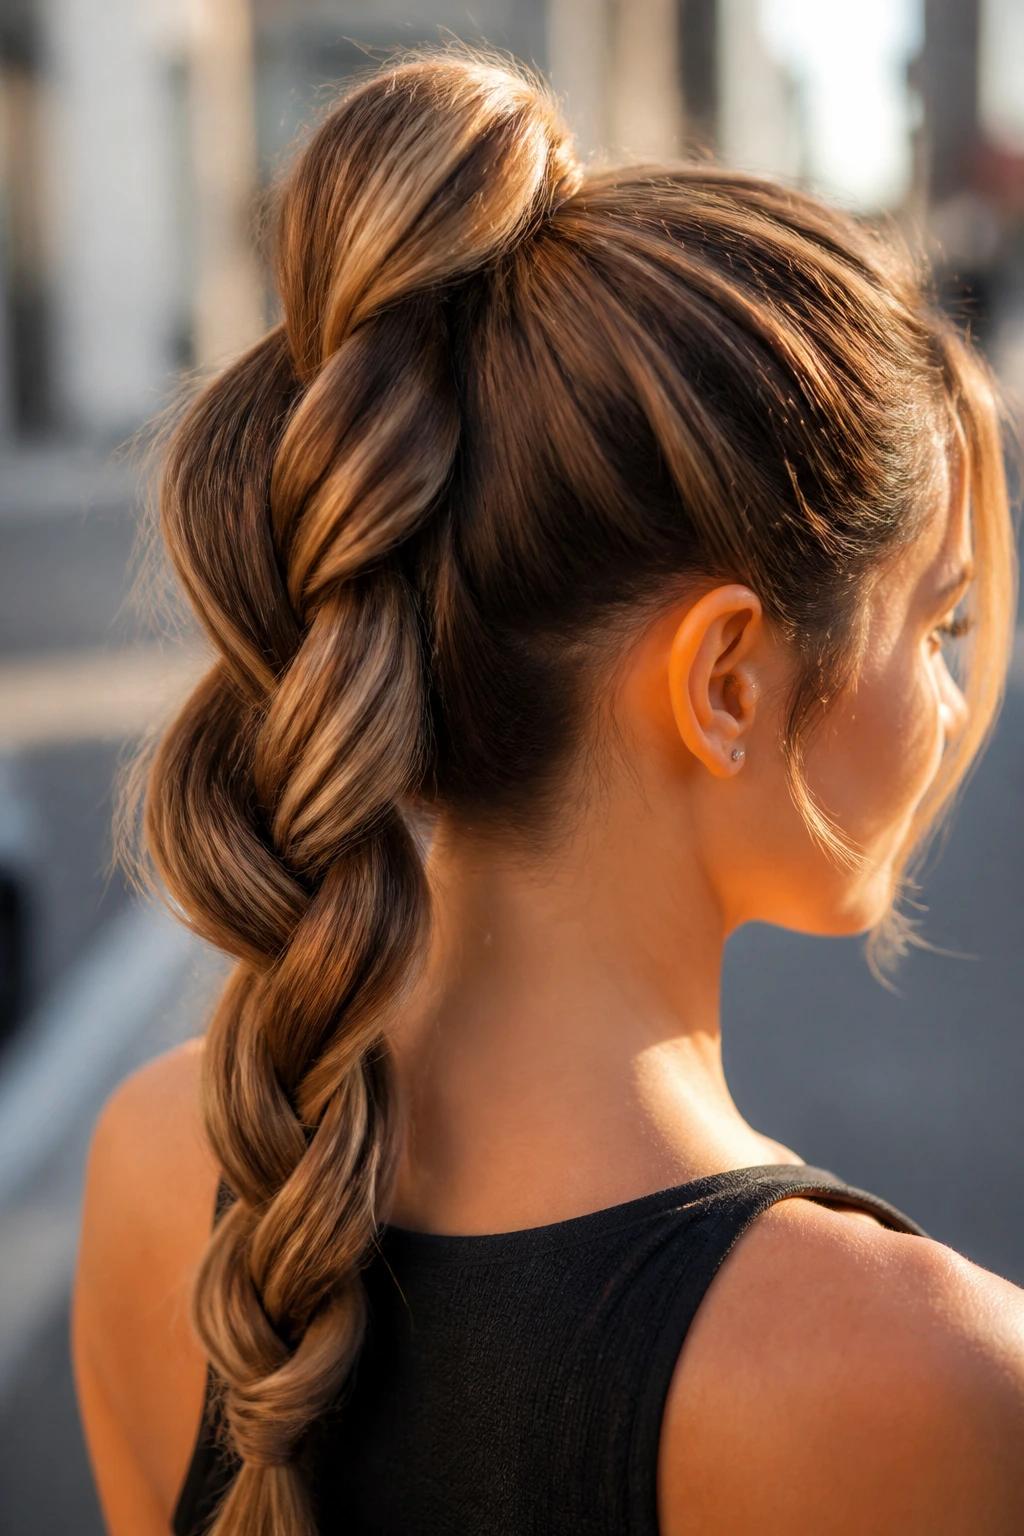
If you find traditional braiding too difficult, the rope braid is the perfect alternative. It is technically a twist rather than a weave. Start by pulling your hair into a high ponytail and securing it with an elastic. Divide the ponytail into two equal sections.
The Execution
Twist each section individually to the right. Then, cross the two twisted sections over each other to the left. Repeat this all the way down. The trick is to keep the twist tight as you cross the strands, otherwise, the whole thing will unspool.
A Modern Take
Instead of leaving the ends plain, wrap a small piece of hair around the elastic to hide it. This subtle detail elevates the look from “gym hair” to “brunch-ready” in about ten seconds.
6. The Pull-Through Faux Braid
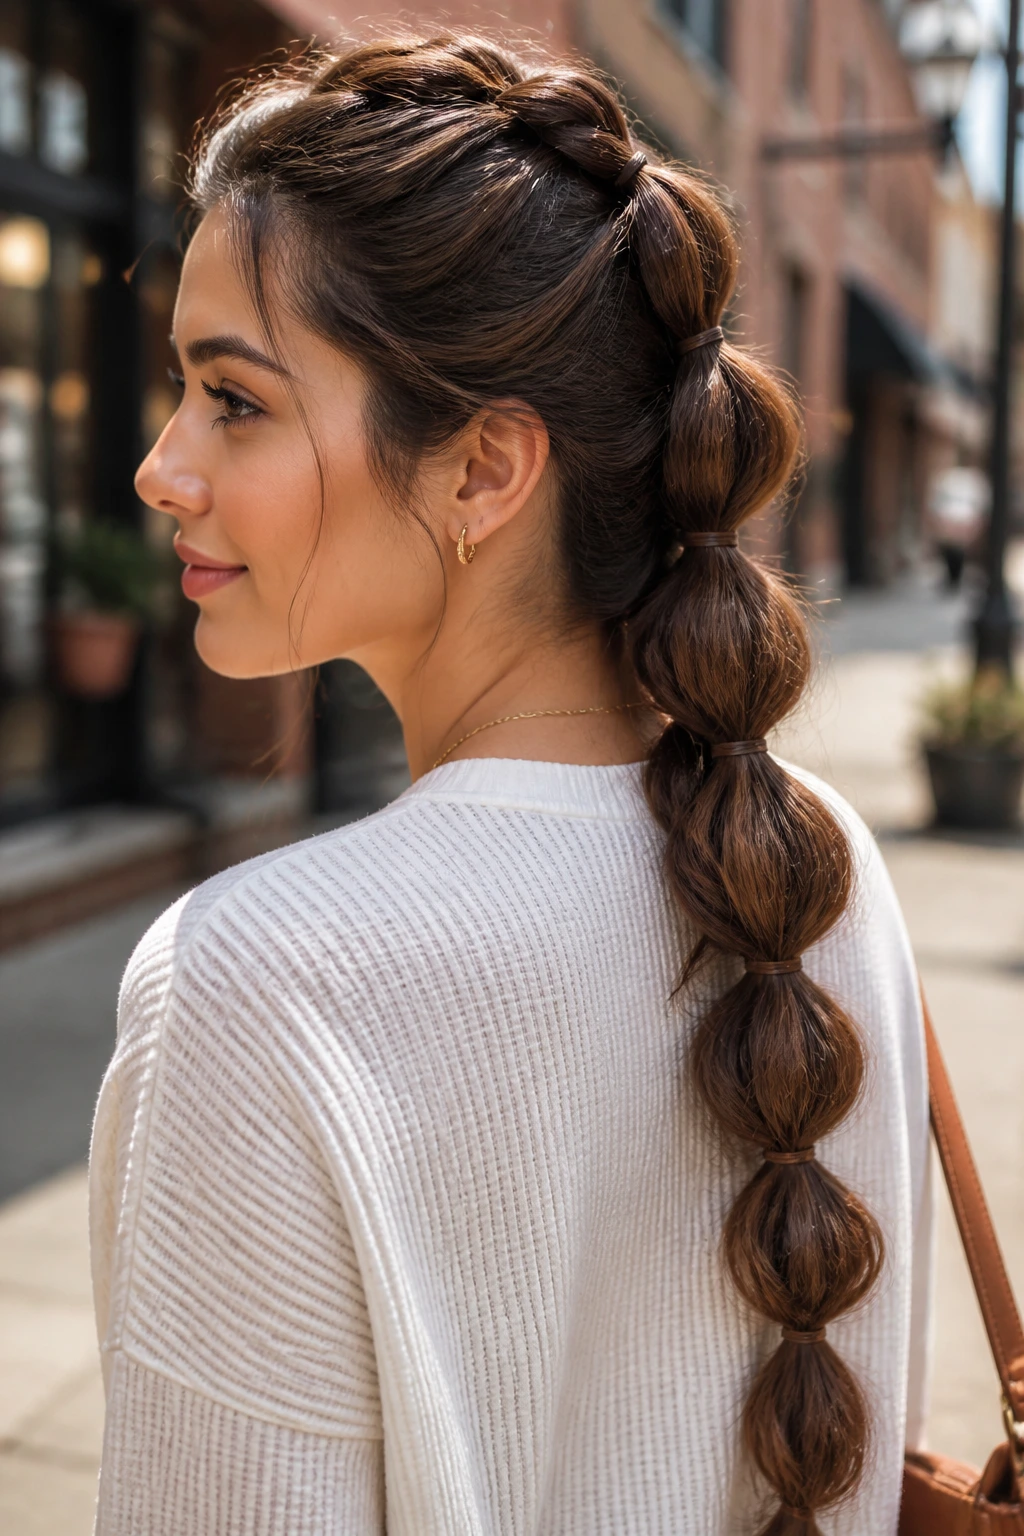
This is a game-changer for people with fine hair. You don’t actually braid anything—you use a series of elastics to create the appearance of a thick, voluminous braid. Start with a high ponytail, then add another elastic a few inches down. Split the space between the first and second elastic, pull the lower section up through that hole, and tighten. Repeat this down the length of your hair.
Volume Hacks
Each time you pull a section through, yank on the edges of the “bubble” to make it as big as you want. Because you are using elastics, the structure stays perfectly in place. You don’t have to worry about the hair slipping out like you might with a standard weave.
Ideal Hair Lengths
This works best on medium to long hair. If your hair is shoulder-length, you might only get three or four “bubbles,” but it still provides a chic, architectural look that holds up through wind and activity.
7. The Single Messy Side-Swept French
The key to a good side-swept French braid is the starting point. Do not start at the top of your head; start at the side of your hairline and angle the braid downward toward the opposite ear. This creates a natural diagonal line that is visually interesting.
Managing the Hairline
If you have bangs or layers, don’t try to force them into the braid. Leave them out. Having a few stray pieces around the face makes the entire look appear more effortless and less “done.”
The Finishing Flourish
Once you reach the end, secure the braid with an elastic and hide it under a small silk ribbon or a velvet scrunchie. The combination of the classic French weave and a soft accessory is a subtle way to polish your look.
8. The Accent Mini-Braid
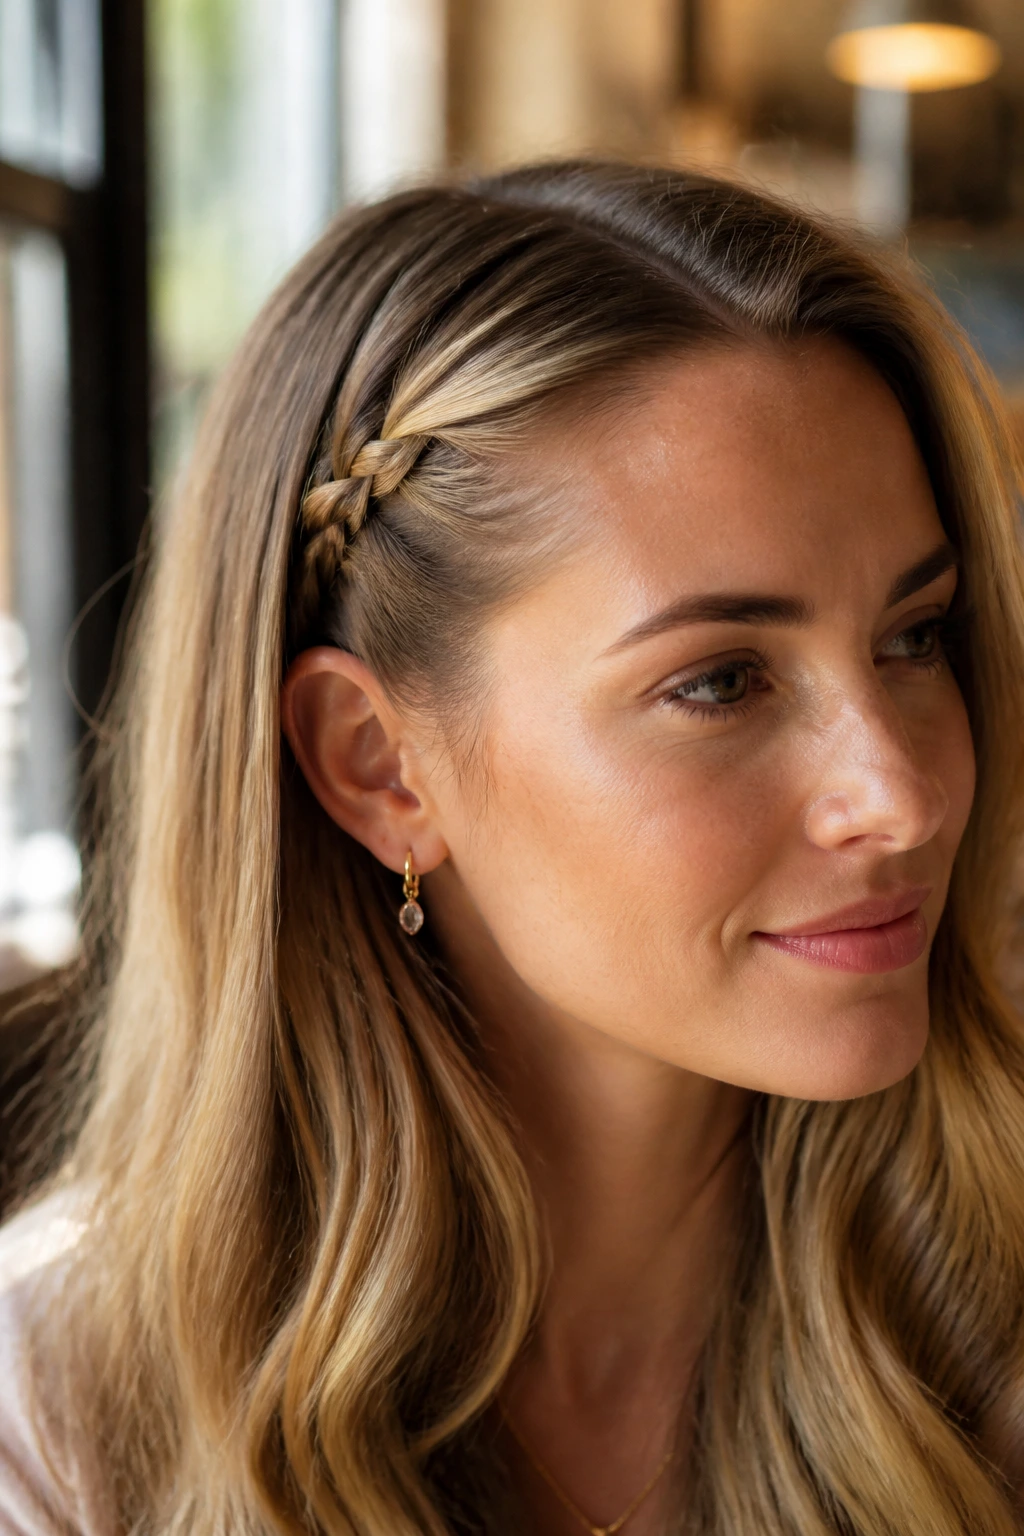
Sometimes you don’t want a full head of braids—you just want a hint of detail. Part your hair down the center or side, take a one-inch section of hair near your hairline, and create a simple three-strand braid that runs back toward your ear.
Integrating the Braid
Pin the end of the braid behind your ear with a bobby pin, then cover the pin with a small section of your loose hair. It creates a “hidden” braid effect that looks like it just magically stays in place.
Why This Works
It keeps hair out of your eyes, which is essential for busy days, but it doesn’t commit you to an updo. It is the perfect entry-level style if you are feeling intimidated by more complex techniques.
9. The Low-Slung Waterfall Braid
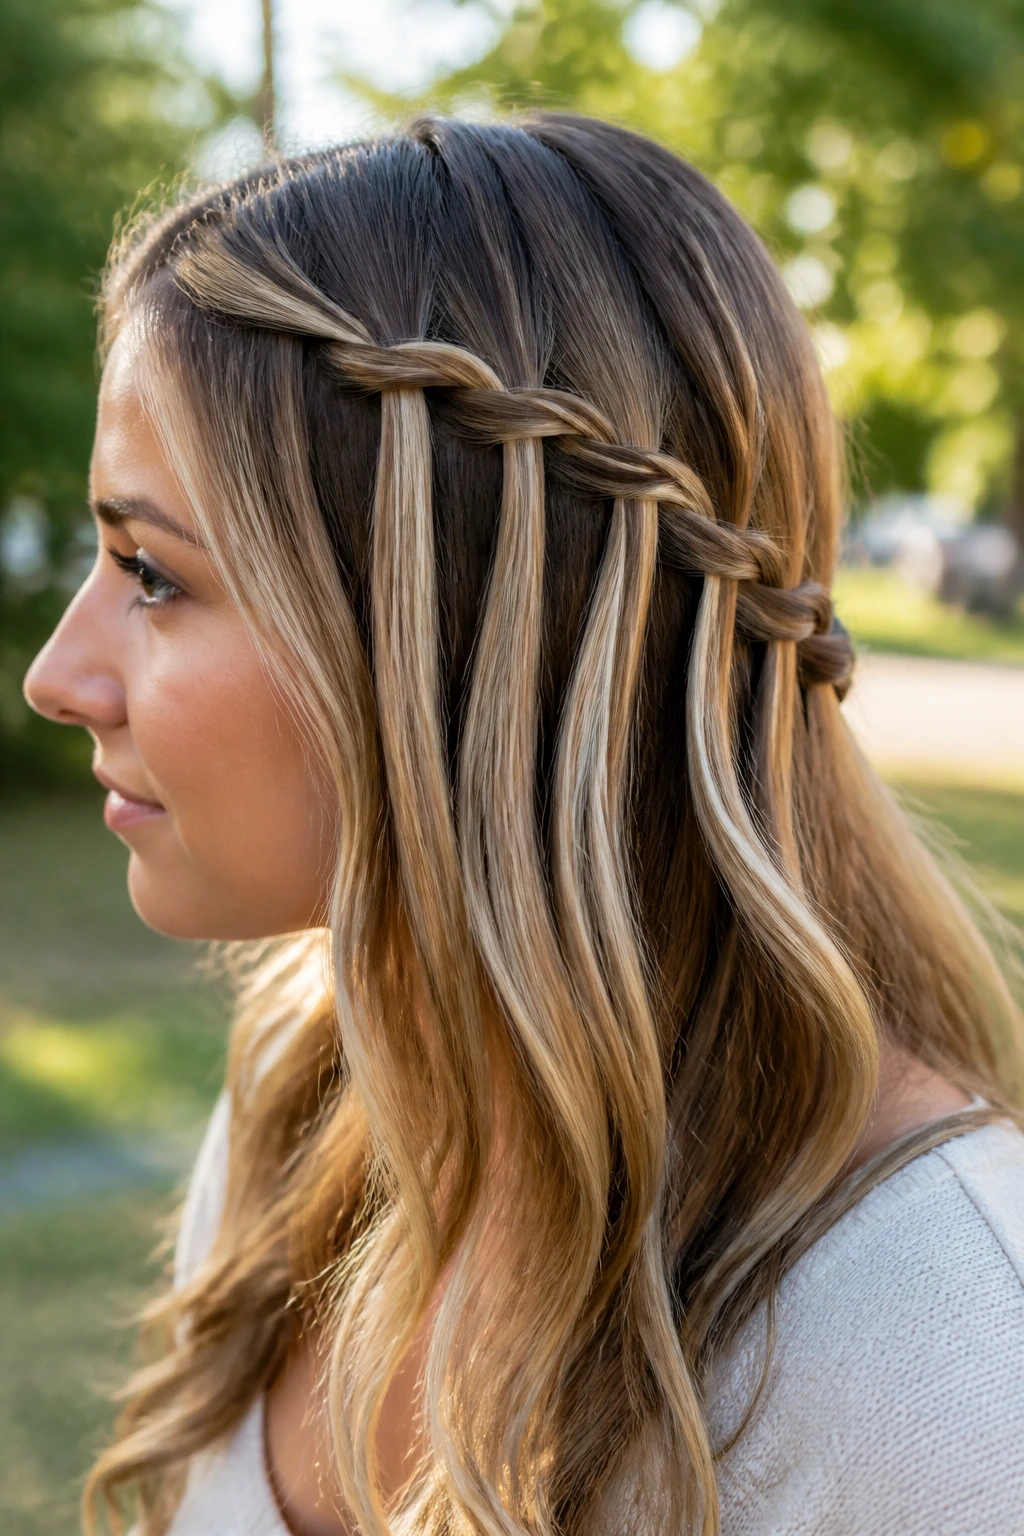
Waterfall braids are stunning but require a bit of practice. The core concept is dropping a strand of hair with each movement rather than keeping it inside the braid. Take a section at your temple, begin a French braid, and as you cross a strand over, let the bottom strand drop and pick up a new piece of hair from underneath to replace it.
Perfecting the Flow
The secret is to keep the tension even. If you pull too hard, the “waterfall” effect disappears. You want the dropped strands to flow naturally with the rest of your hair.
Best Hair Types
This looks incredible on hair with highlights or balayage because the different colors create a visual “staircase” effect. If your hair is one solid color, you might need to add a bit of texture to the loose hair to make the waterfall strands pop.
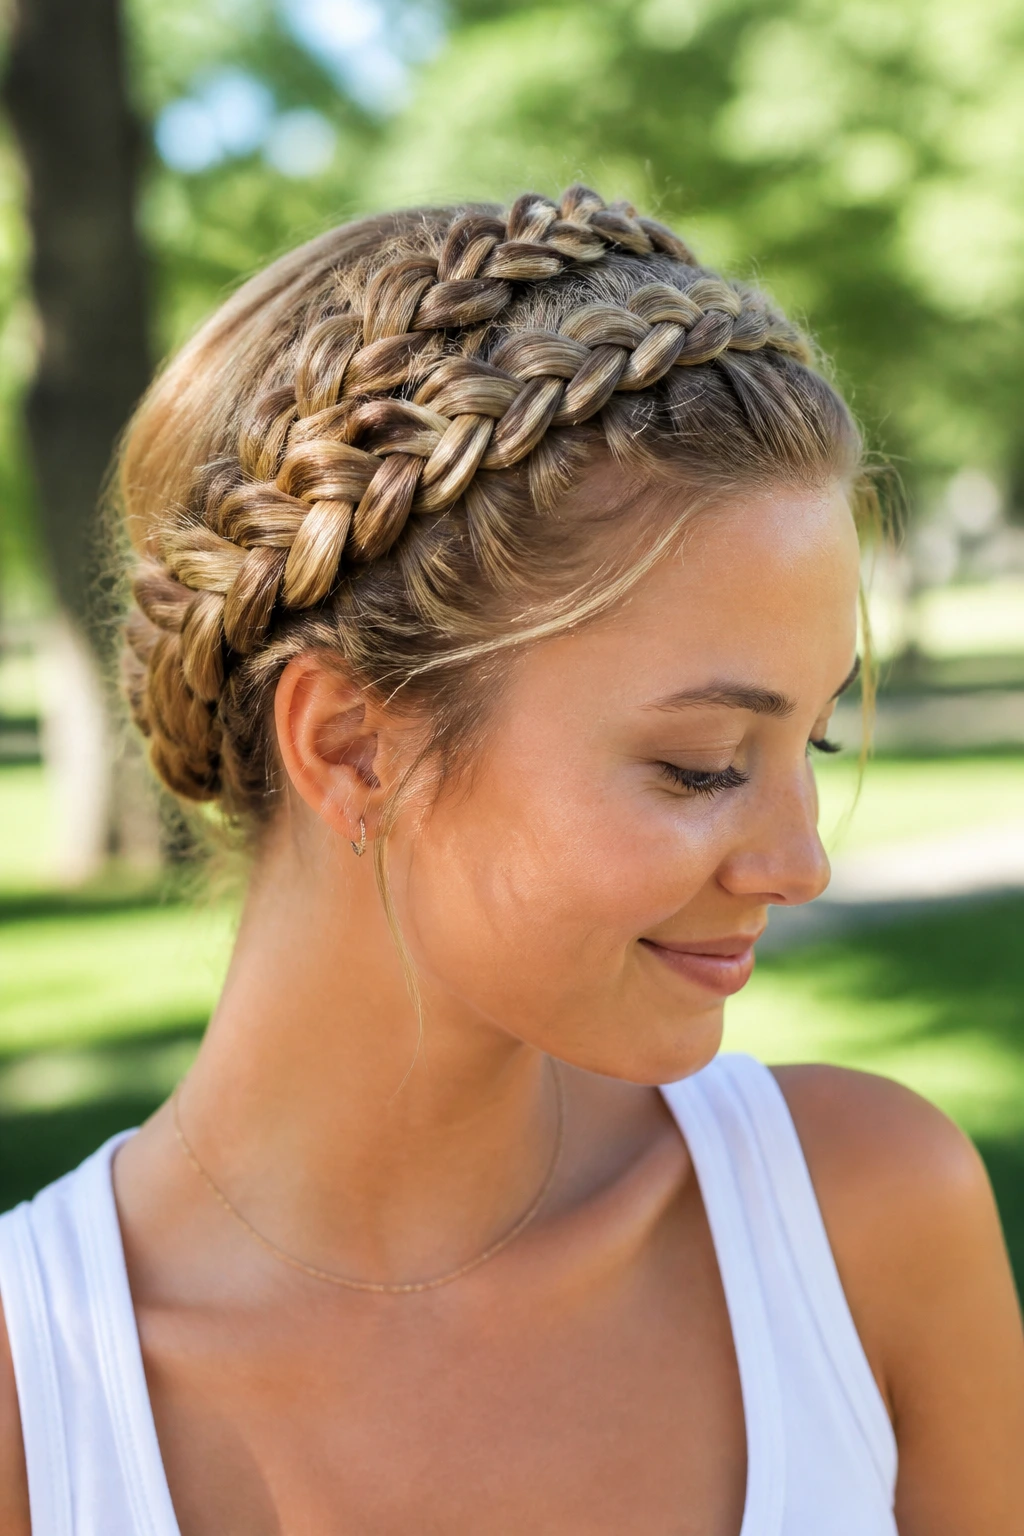
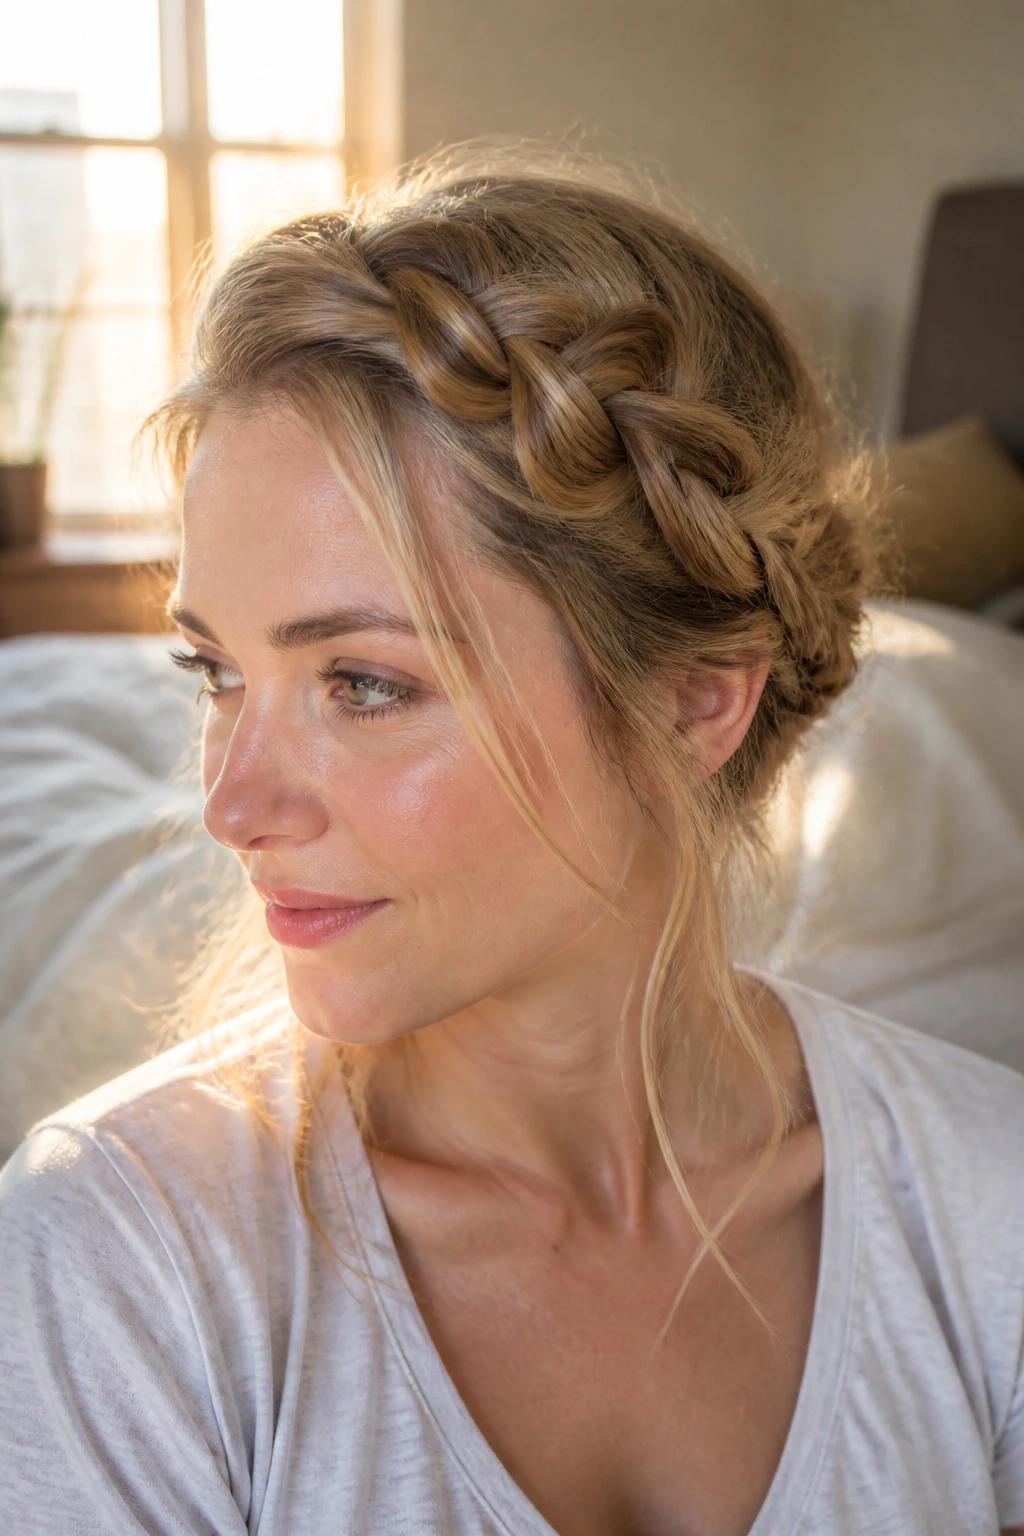
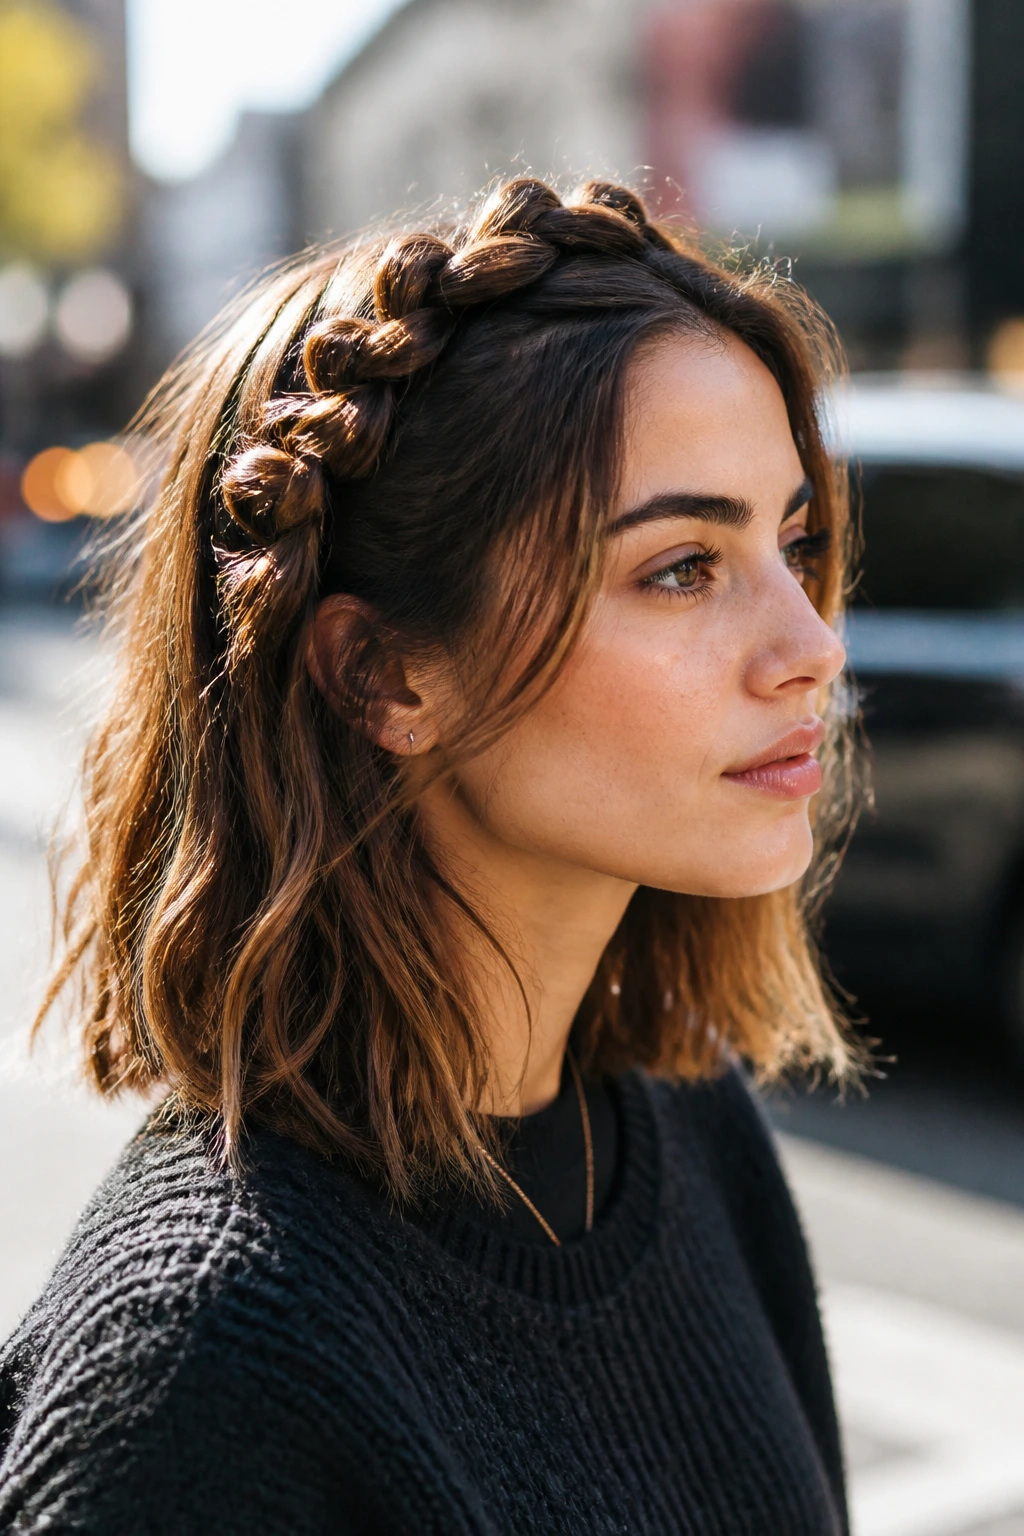
10. The Boho-Chic Crown Braid
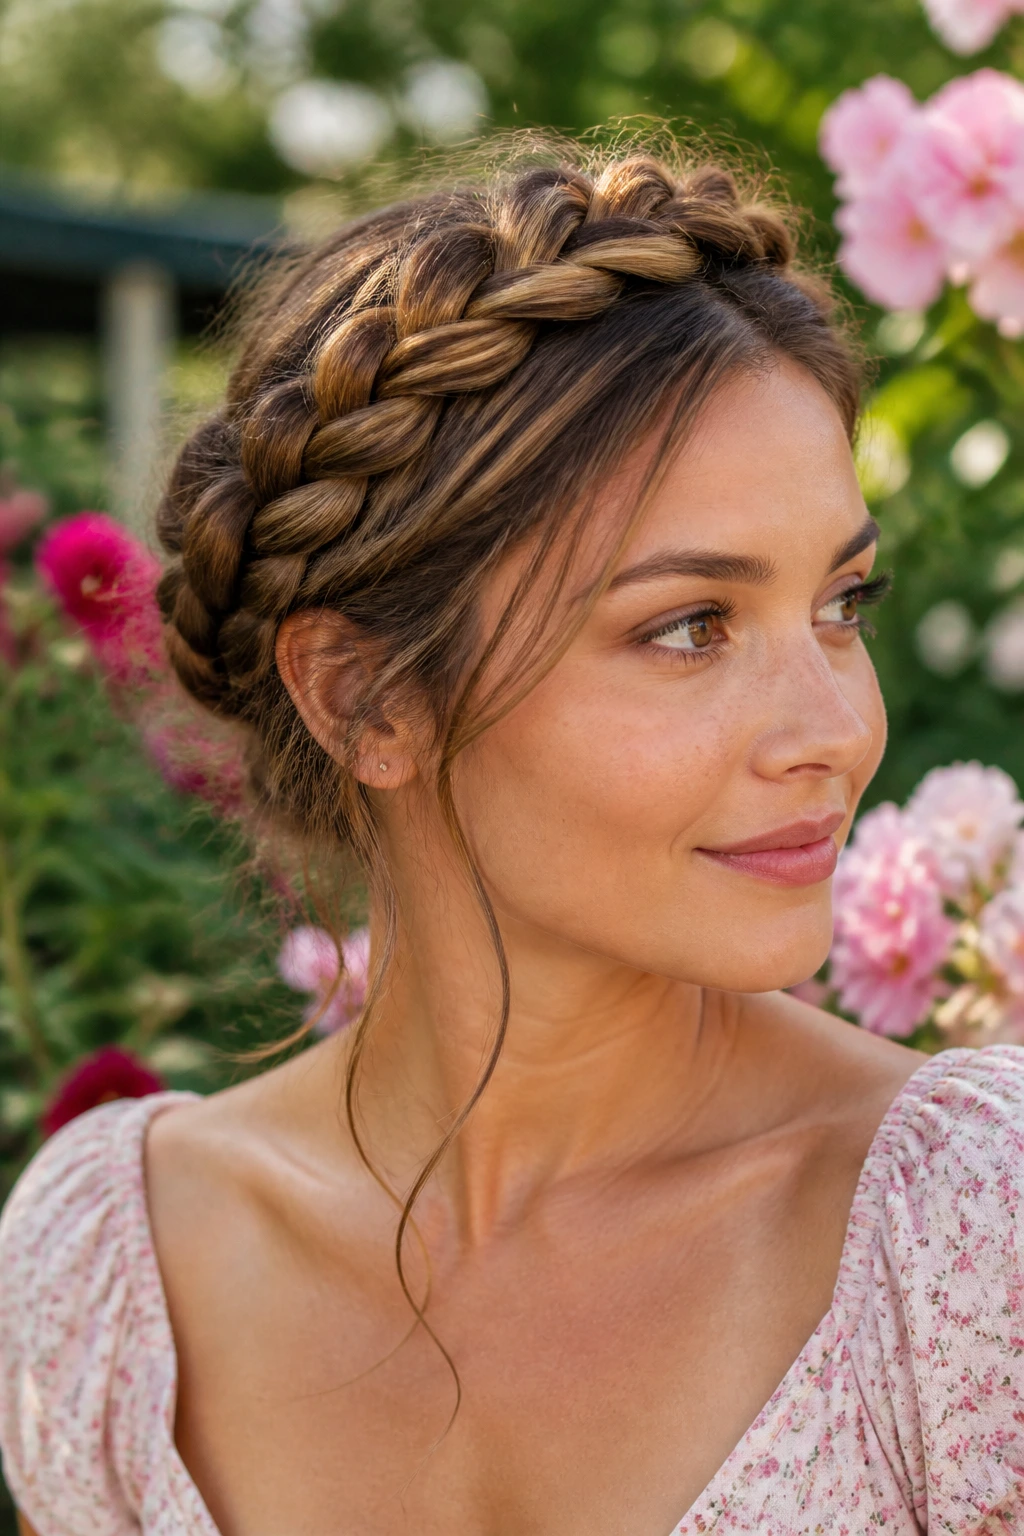
This style is essentially a halo of hair around your head. Part your hair in the middle and create two separate Dutch braids starting at the nape of the neck, working up toward the front of your hairline. Once you reach the top, wrap the ends around the crown of your head and pin them into place.
Hiding the Pins
Use U-shaped hairpins rather than standard bobby pins. They hold better in thicker braids and are much easier to tuck into the weave so they remain invisible.
Adjusting for Comfort
Since this style sits near the hairline, don’t braid too tightly. A loose, slightly messy crown braid is more comfortable and looks more modern than a tight, flat version.
11. The Double-Elastic Ponytail Braid
This is a high-speed style for when you need to be out the door in three minutes. Pull your hair into a mid-height ponytail, then take a one-inch piece of hair from the underside and wrap it around the elastic to hide it. Then, split the ponytail into two and create a simple twist braid.
Why It’s Unique
By adding the wrap at the base, you create a separation between the scalp hair and the braid. This makes the braid look like it was done separately and then attached, which always looks more professional than a simple ponytail braid.
The “Slick” vs. “Messy” Debate
If you want a polished look, use a dab of hair gel on your fingers when smoothing the ponytail back. If you want a casual look, use a texturizing powder at the base to give the ponytail some height before you start twisting.
12. The Triple-Braided High Bun
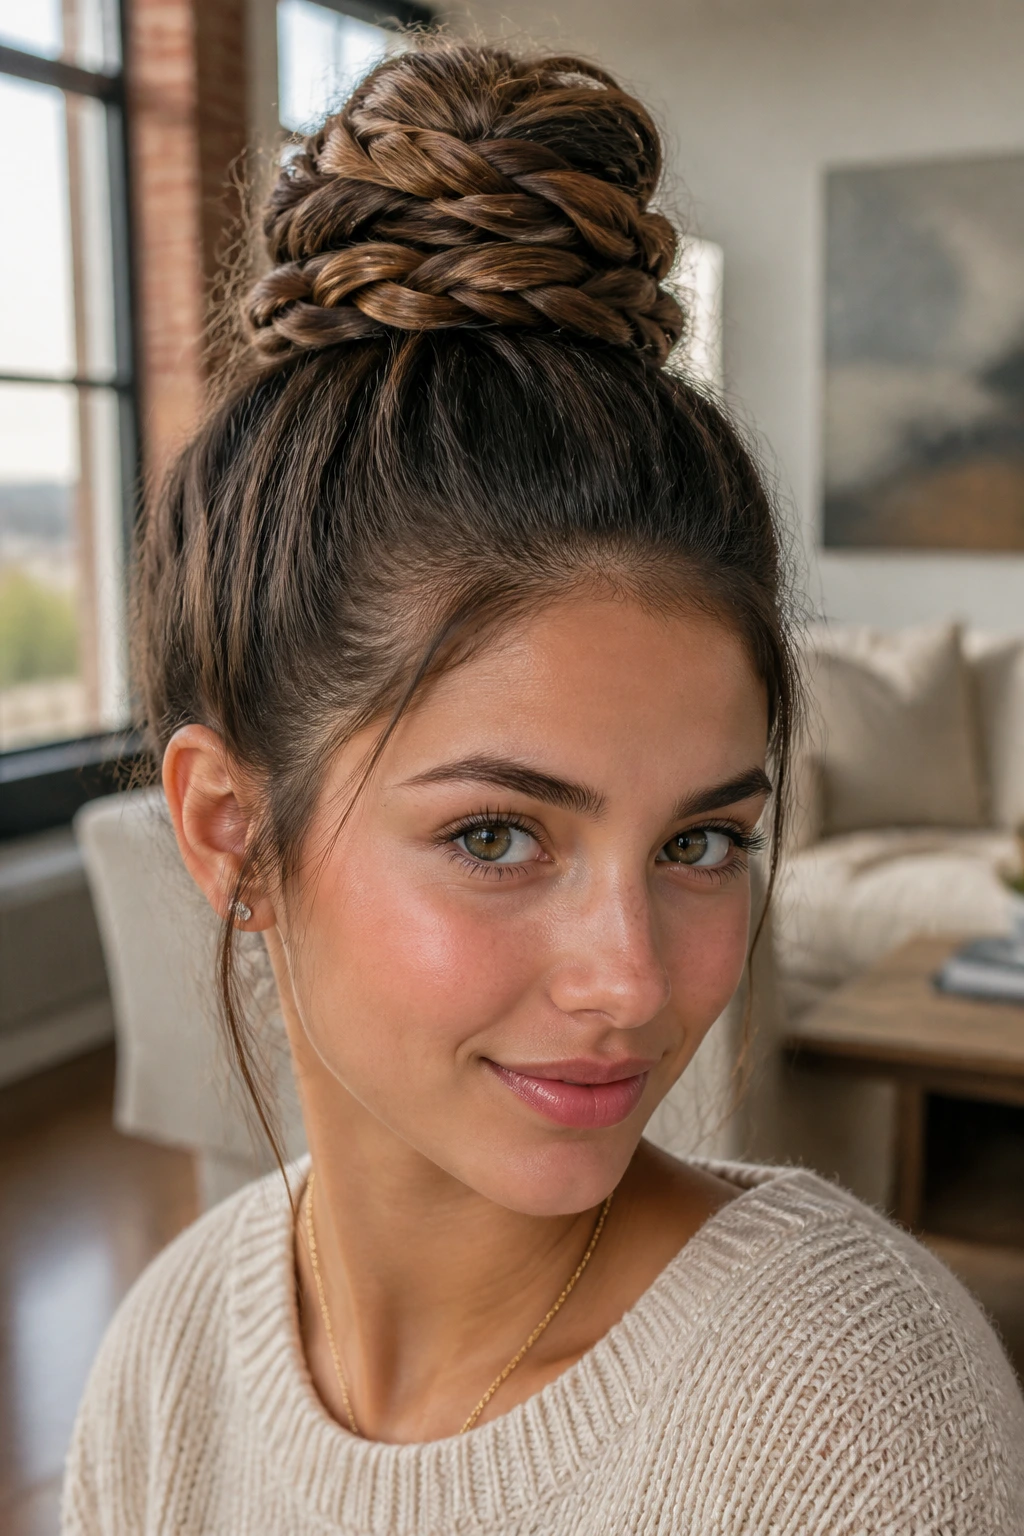
This is an excellent way to style hair that is a bit dirty but needs to look sophisticated. Start by pulling your hair into a high, tight ponytail. Braid the entire length of the ponytail into a tight three-strand braid.
The Construction
Wrap the braided ponytail around the base to create a bun. The texture of the braid makes the bun look much more interesting than a standard twisted bun. It creates depth and visual interest that catches the light.
Securing the Style
Don’t rely on one large hair tie. Use four or five small, discreet bobby pins placed at the perimeter of the bun. This prevents the “sagging” effect that happens with heavy buns.
13. The Headband Braid
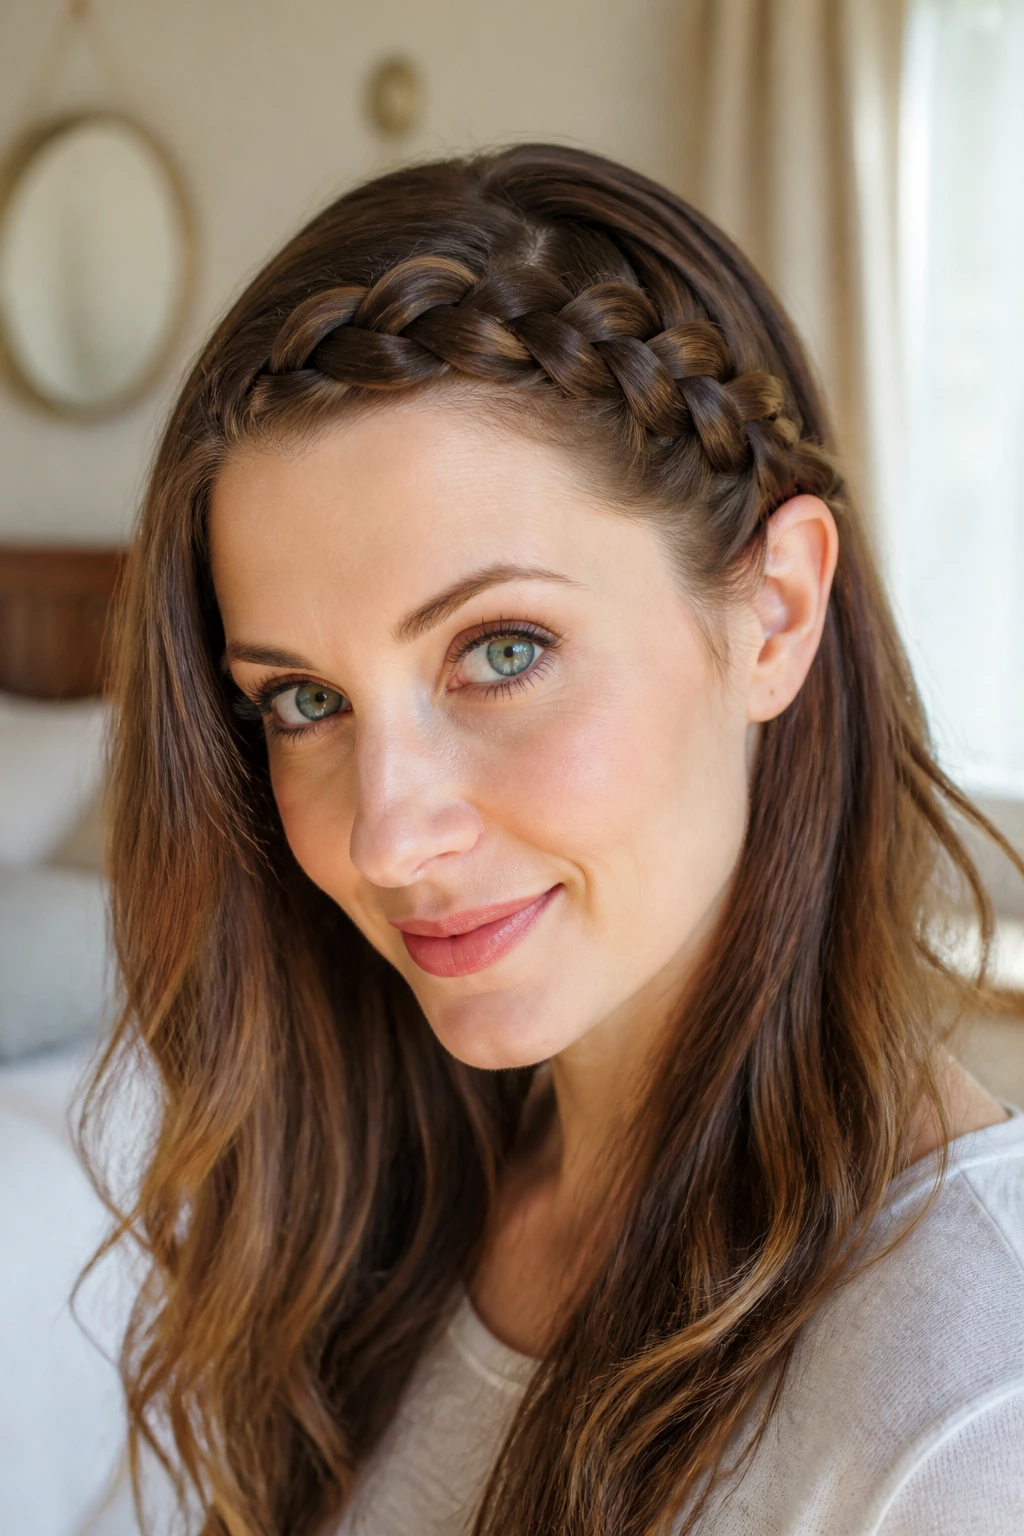
Create a deep side part. Take a large section of hair starting from the side part and begin a French braid, working along your hairline across your forehead to the opposite side.
The Finishing Point
Once you reach the opposite ear, stop adding hair and finish the braid normally, tucking it behind your ear and securing it with a small elastic. Let the rest of your hair hang loose or pull it back into a low ponytail.
Why It’s a Staple
It replaces the need for a headband, which can often give you a headache or slide off throughout the day. This style effectively keeps your bangs off your face and stays put from morning until night.
14. The Faux-Hawk Braid
If you want something with a bit more edge, the faux-hawk braid is a fantastic choice. Create three small, tight Dutch braids running from the front hairline back toward the crown of your head.
Connecting the Style
Once you reach the crown, gather the ends of the three small braids and the rest of your hair into one large, high ponytail or a messy topknot. The combination of three distinct lines on the scalp gives a structured, almost sporty aesthetic.
Best Occasions
This is a great look for active days or concerts where you want your hair to be secure but still look like you put in a lot of effort.
15. The Wrapped Fishtail Braid
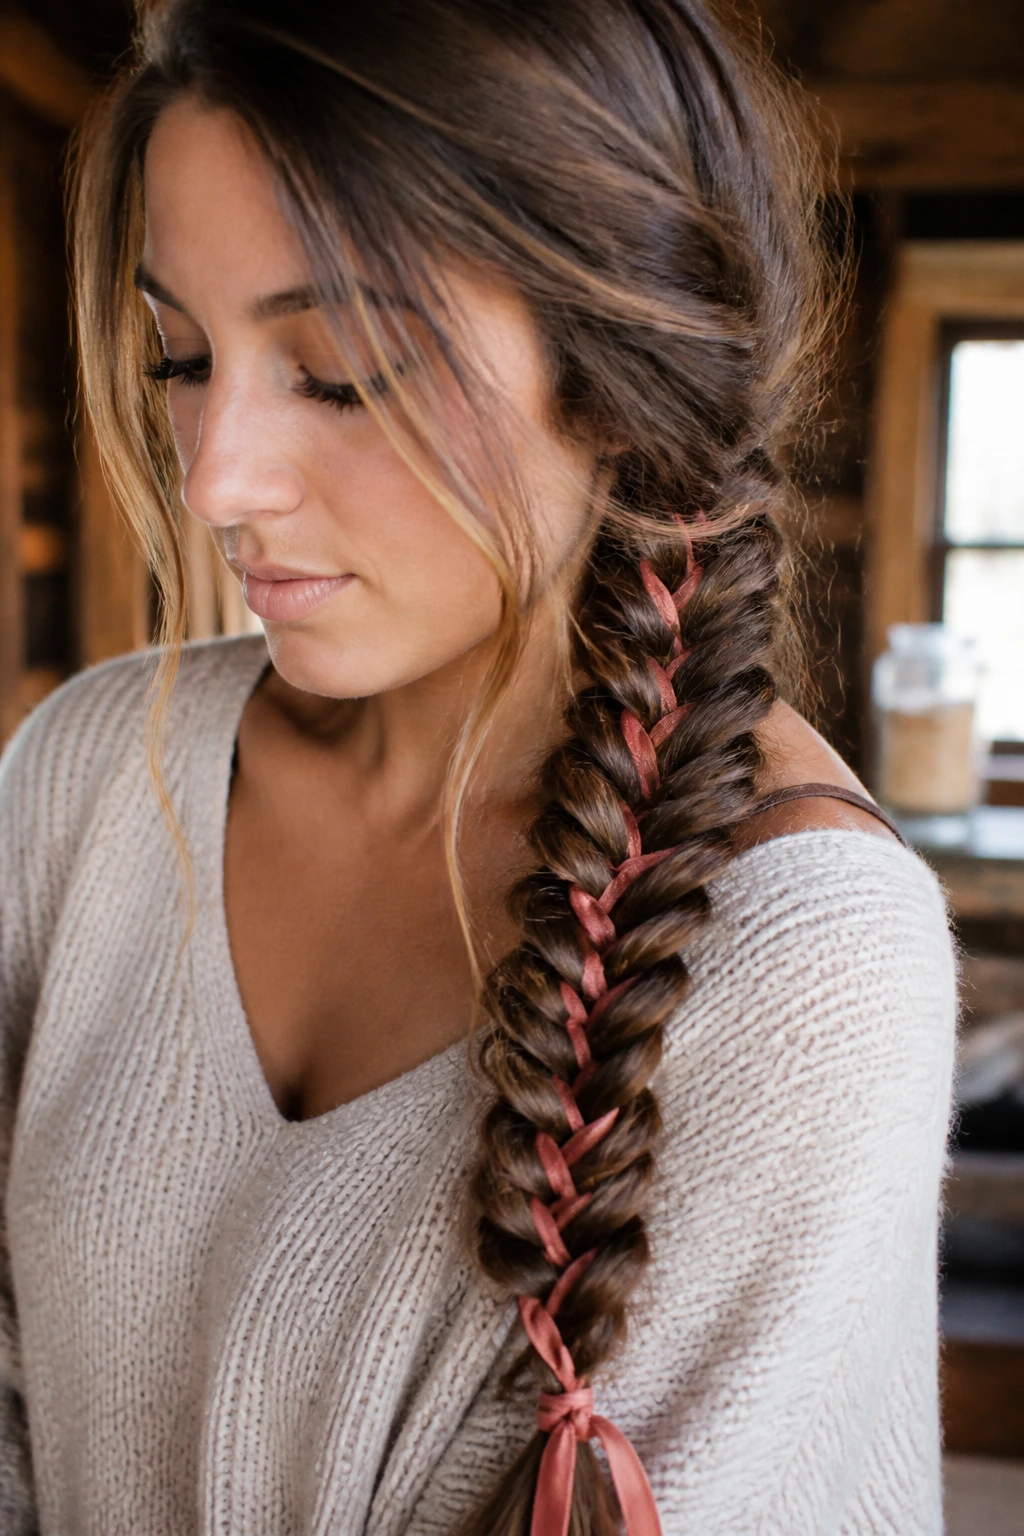
Take your standard fishtail braid and incorporate an accessory directly into the weave. You can use a thin ribbon, a leather cord, or even a piece of decorative twine.
Integrating the Material
Fold the ribbon in half and loop it over the center section before you start braiding. As you move the strands from outside to inside, incorporate the ribbon into the strands.
Why This Stands Out
The ribbon adds a pop of color and makes the fishtail braid appear much more complex than it actually is. It is an easy way to match your hairstyle to your outfit or a specific occasion.
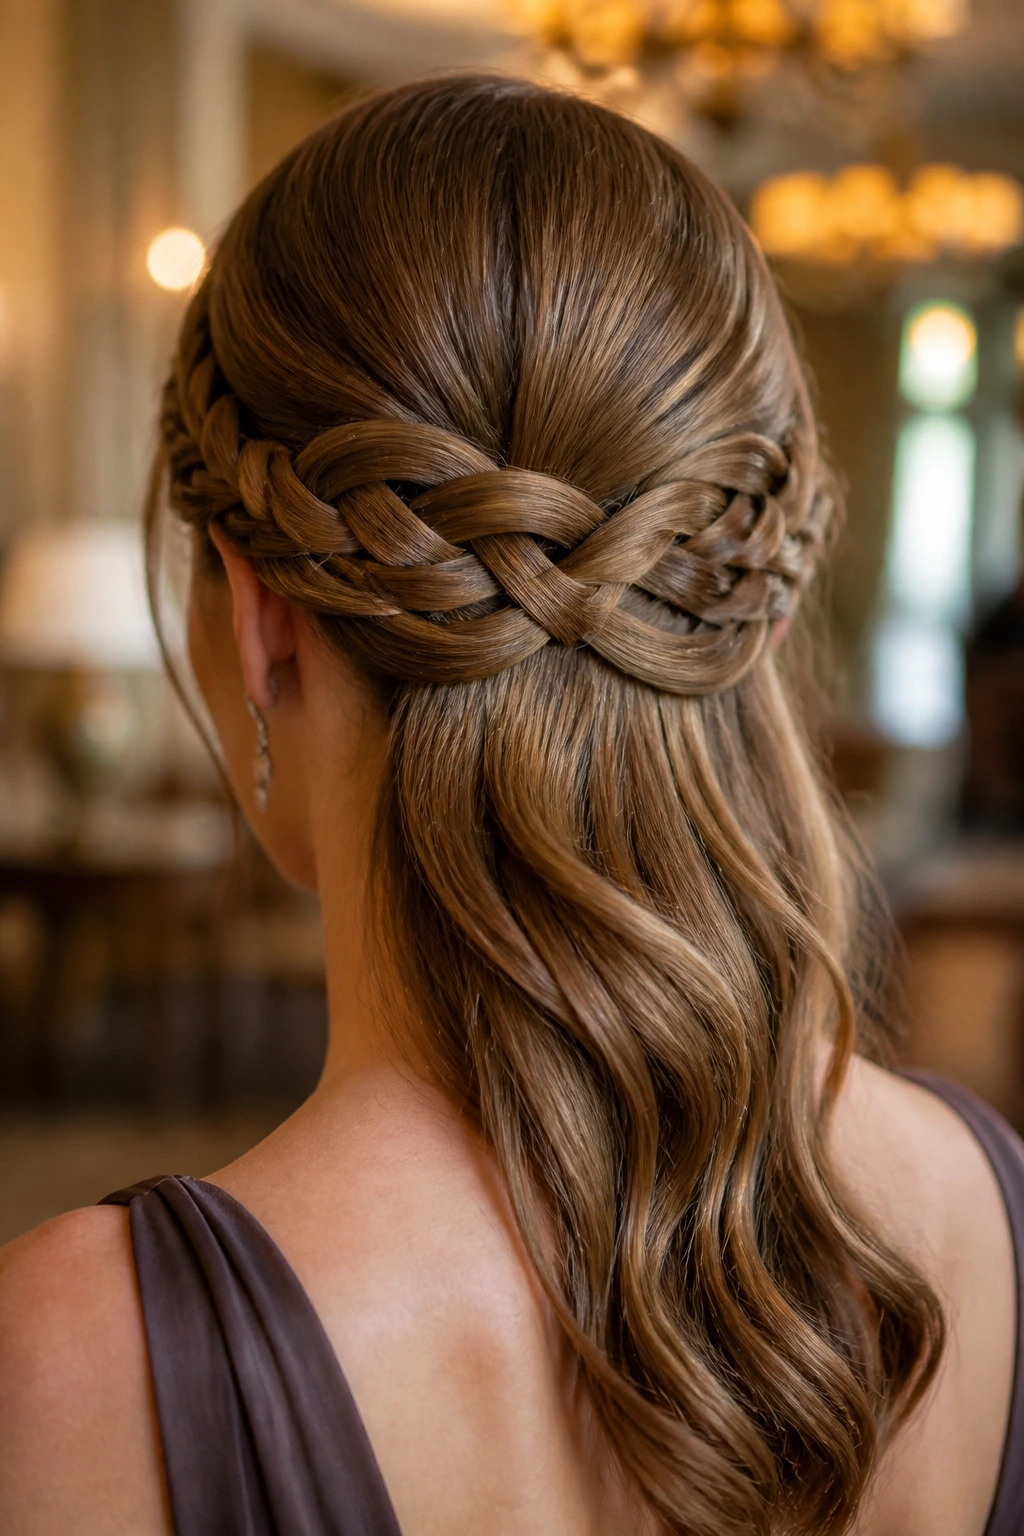
16. The Twisted Side-Braid Half-Up
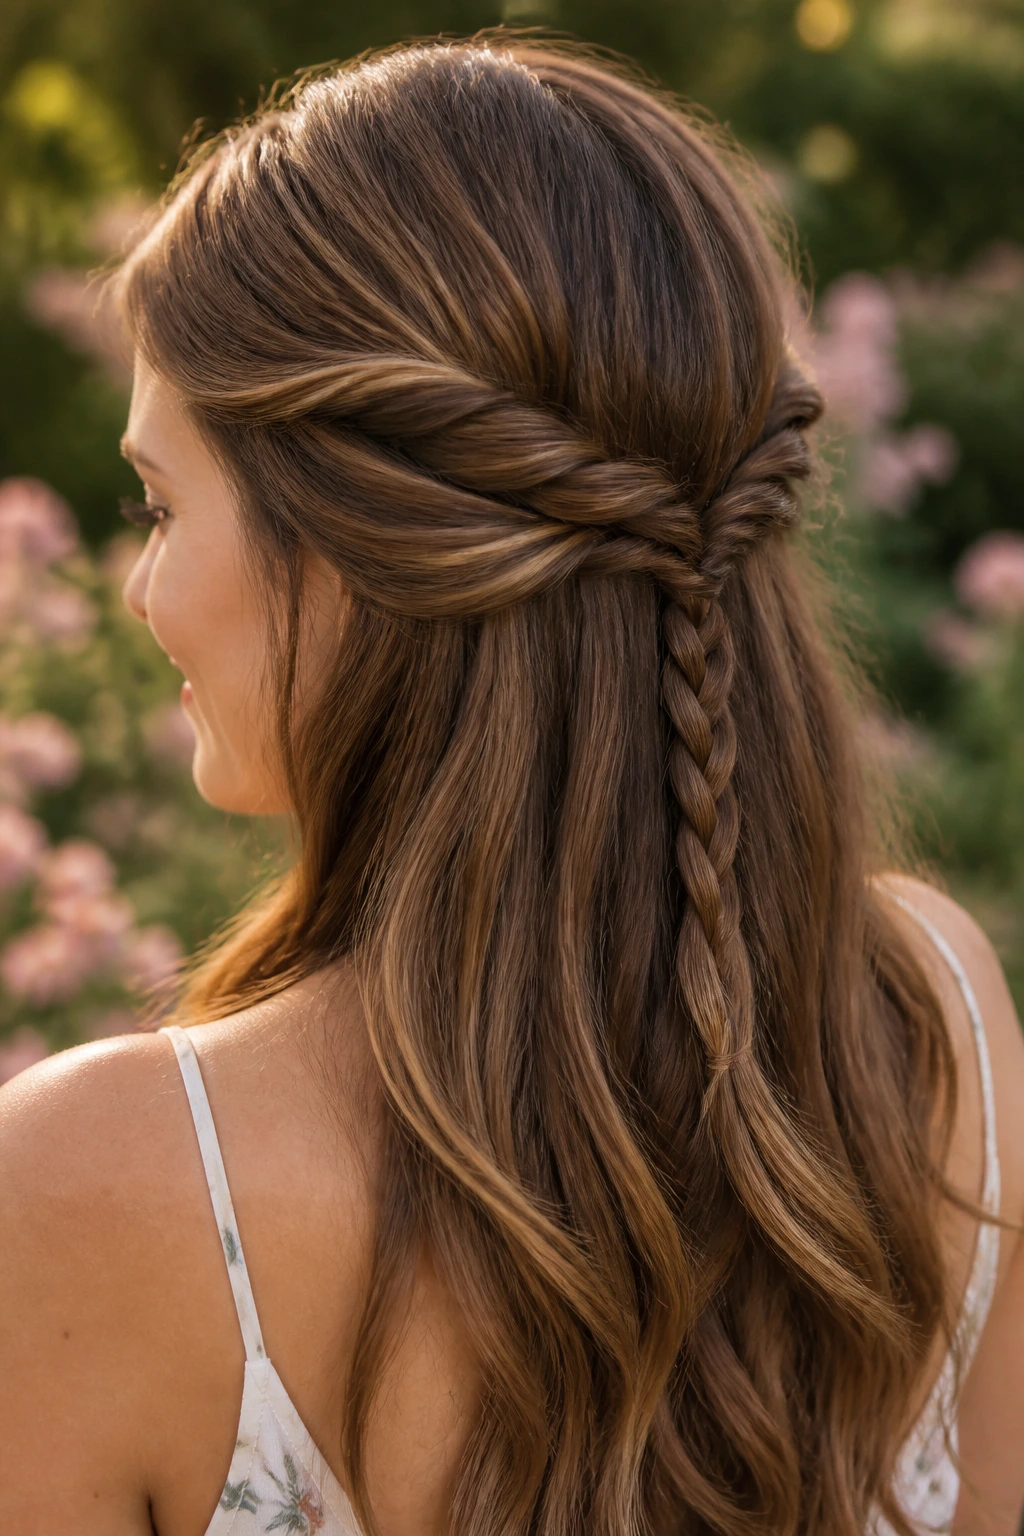
Part your hair on one side. Take a section near the front and twist it backward toward the back of your head. Once you reach the center, repeat the process on the other side.
Joining the Twists
Pin the two twists together in the center of the back of your head. Then, take a small section of hair from underneath the twists and create a small, tight three-strand braid that hangs down through the center of your loose hair.
The Result
It is a mix of twists and braids that looks incredibly layered. It feels like a bohemian, ethereal style that works perfectly for weddings or outdoor gatherings.
17. The Sleek French Braid Pony
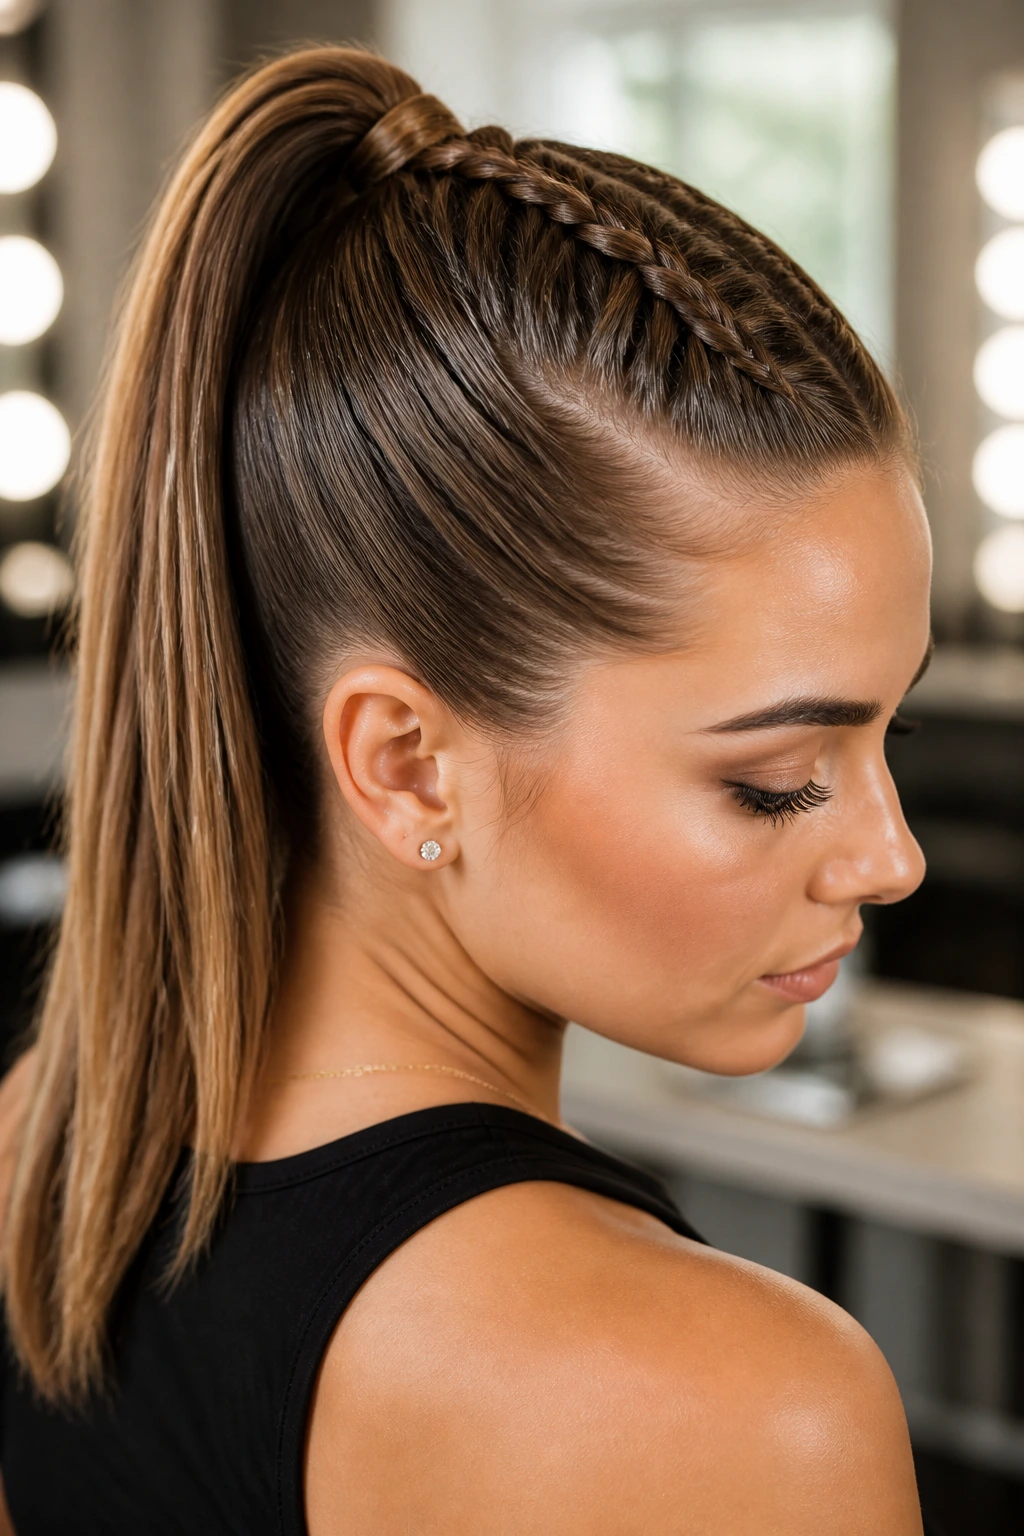
This style is all about contrast. Start by creating a very neat, tight French braid that starts at your forehead and ends at the crown of your head.
The Transition
At the crown, gather the end of the braid with the rest of your hair into a high, sleek ponytail. Use a boar-bristle brush to ensure the hair around your head is perfectly smooth before securing the elastic.
Pro Technique
If you have flyaways, spray a bit of hairspray on your palms and gently press them down onto the surface of your hair. This keeps the look clean and shiny without making it look “crunchy.”
18. The Infinity Braid
The infinity braid uses a figure-eight motion. You have two main sections of hair, and you weave a third section in an “8” pattern around them. It is a bit more advanced, but once you get the motion down, it becomes muscle memory.
Why It’s Special
The final look is flatter and wider than a traditional braid, creating an almost woven-fabric appearance. It is a very sophisticated, high-fashion look that does not require any extra accessories to stand out.
When to Use This
This is perfect for formal events where you want your hair to look like a piece of art. It holds very well and looks just as good at the end of a long night as it did at the start.
19. The Knotted Braid
This style uses a series of knots instead of weaves. Take two small sections of hair, tie them into a simple overhand knot, and then pull in a little more hair from each side before tying the next knot.
The Texture
The knots create a distinct, chunky look that is very popular in street-style photography. It is much easier than a traditional braid because it doesn’t require as much coordination of three strands.
The Finishing Touch
Secure the end with a clear elastic and pull at the knots to loosen them slightly. This gives the hair a soft, organic texture that is very flattering.
20. The Braided Pigtail Buns
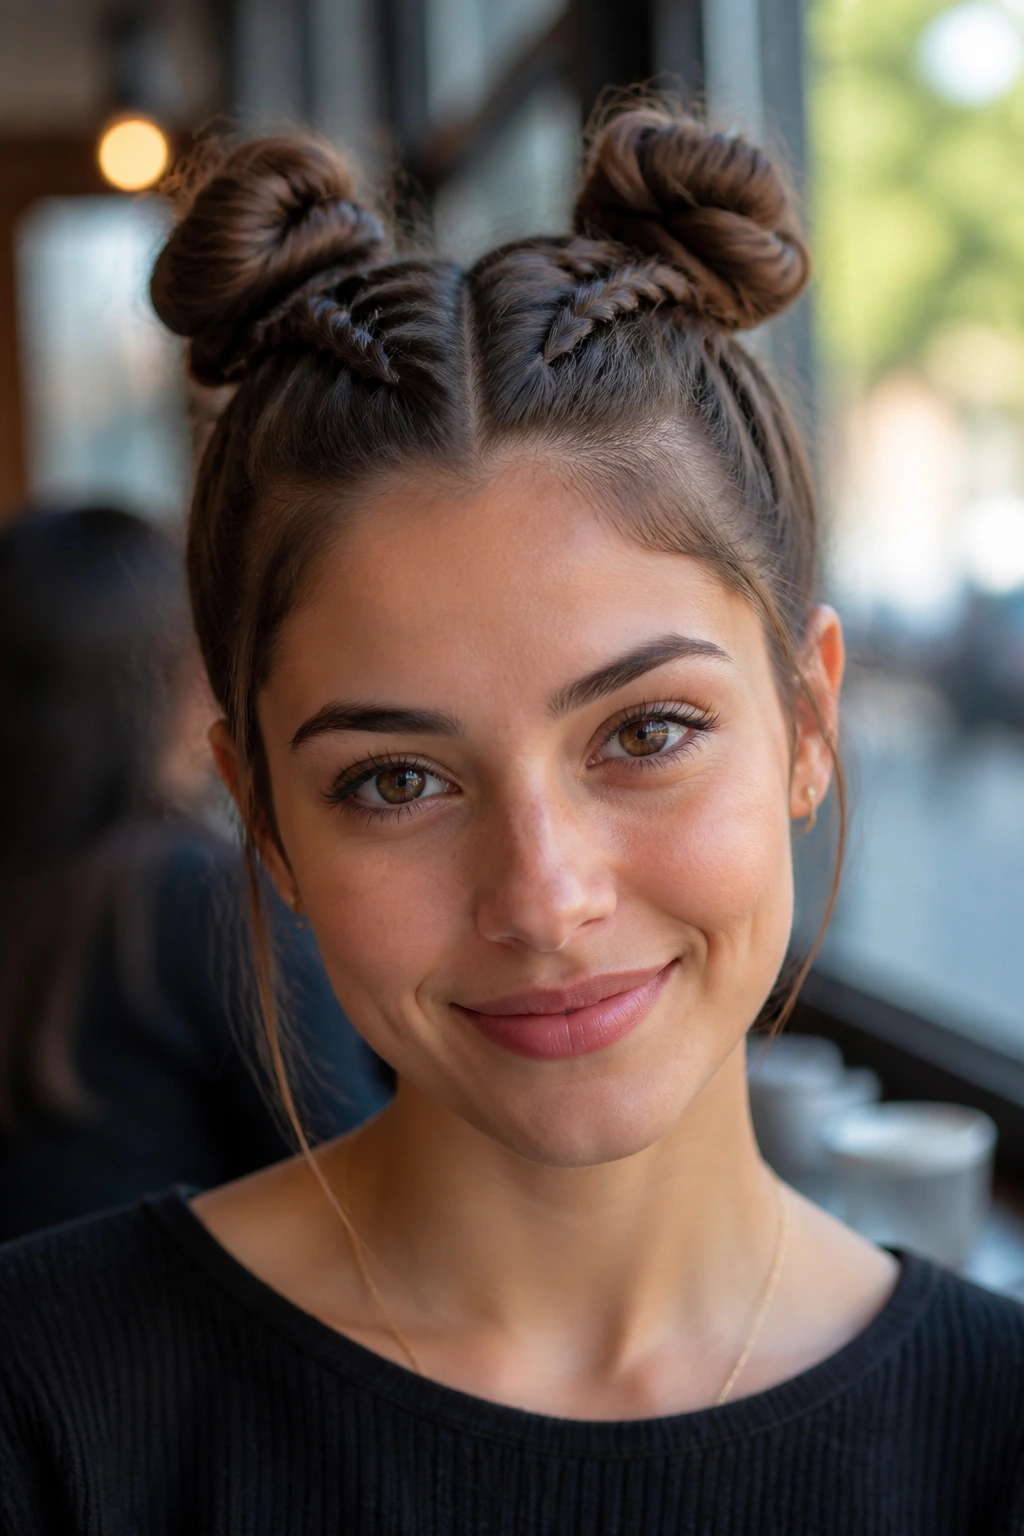
Divide your hair into two sections with a center part. Create two high Dutch braids, one on each side, starting from your forehead.
Creating the Buns
Instead of ending the braids at the nape, continue them all the way down to the ends of your hair. Twist each braid into a small bun at the top of your head and secure them with bobby pins.
Why This Style Rocks
It’s fun, youthful, and incredibly secure. If you are doing something active like hiking, dancing, or even just working in a messy environment, this style won’t budge.
Final Thoughts
Braiding is less about perfection and more about comfort with imperfection. Most of the styles that look the most impressive are simply a result of patience and a bit of texture. Start with the basics, get comfortable with the feel of the hair, and don’t worry if a few pieces fall out along the way—it usually just makes the style look better.
Remember that hair texture changes from person to person. If your hair is very silky, your braids will be looser. If your hair is coarse or thick, your braids will be tighter and hold their shape longer. Use the right products to bridge that gap. A little bit of salt spray goes a long way, and a light-hold hairspray is your best friend for keeping everything where it belongs without ruining the movement of the hair. Keep practicing, and you will eventually find three or four favorites that become your go-to look for any day of the week.