Wavy hair sits in that glorious, often unpredictable middle ground between stick-straight and full-on curly. It has a natural texture that loves to expand, possesses a mind of its own when the humidity hits, and holds a style with a certain lived-in charm that other hair types have to fake with texturizing spray. Braiding wavy hair is where things get truly interesting. Because your hair already has a bit of bend and grit, braids tend to hold better than they would in silky, straight strands. You don’t have to fight to keep a tail from slipping out, and you certainly don’t need a half-bottle of hairspray to keep things in place.
Whether you are looking to pull those stubborn pieces out of your face or want to create a formal look that leans into your natural wave pattern, the braid styles available to you are endless. The key is knowing how to work with that texture rather than against it. Most braids look softer and more romantic on wavy hair anyway, which is a massive bonus if you prefer an aesthetic that feels effortless rather than rigid. Let us move past the basic three-strand plait and look at the specific braiding techniques that make wavy hair shine.
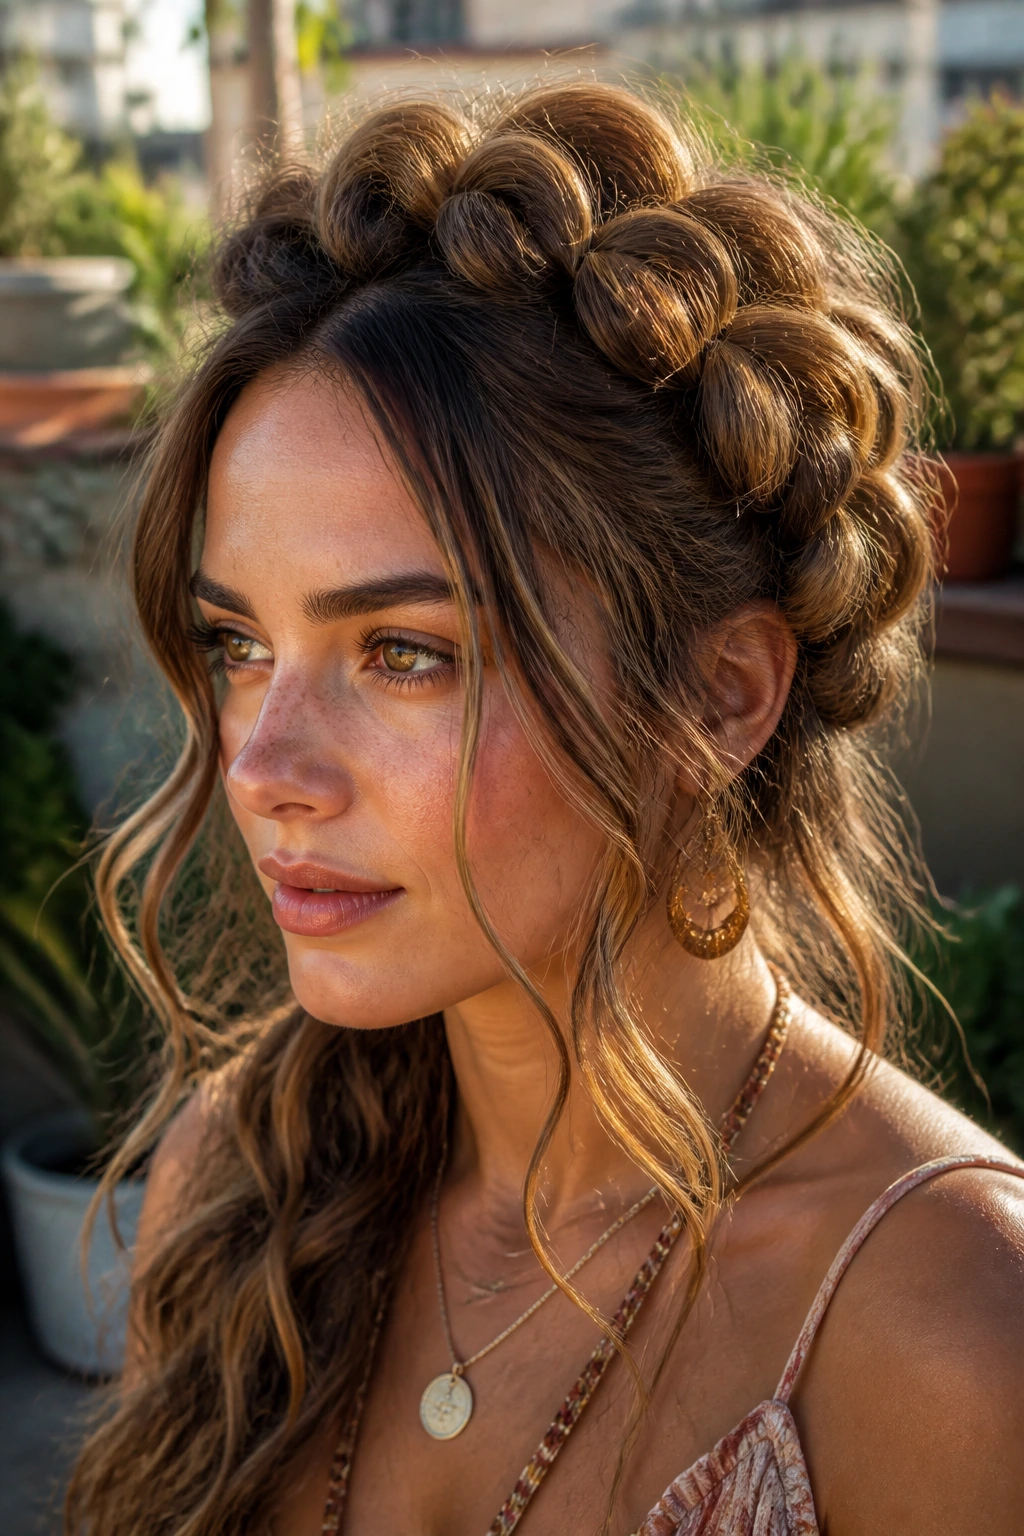
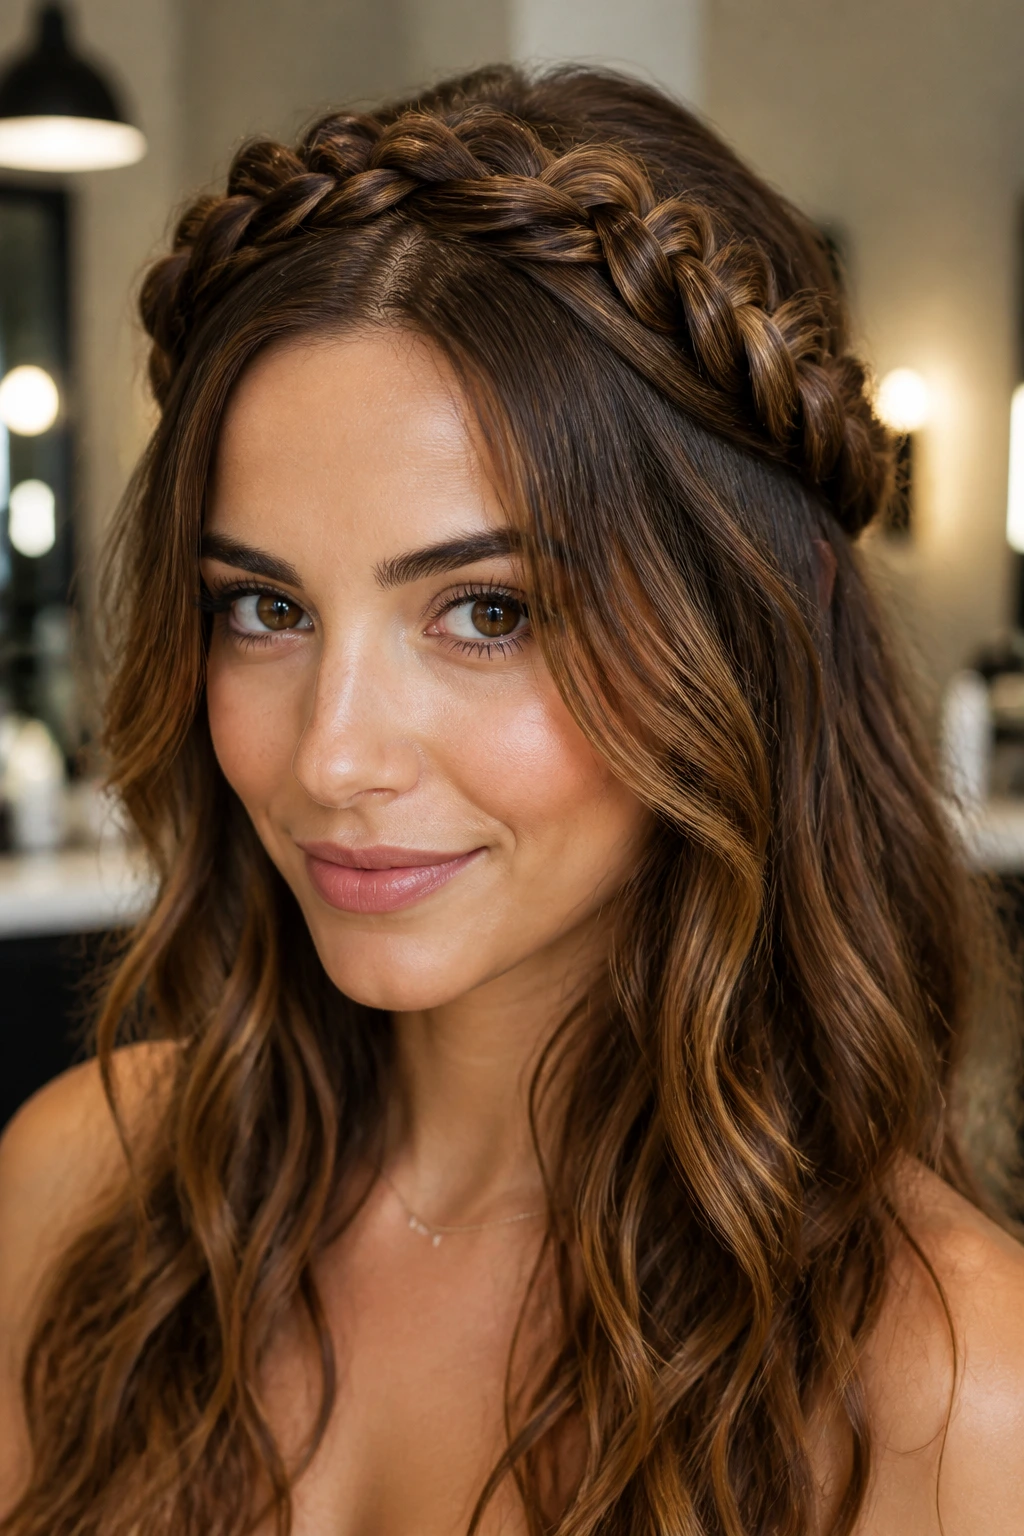
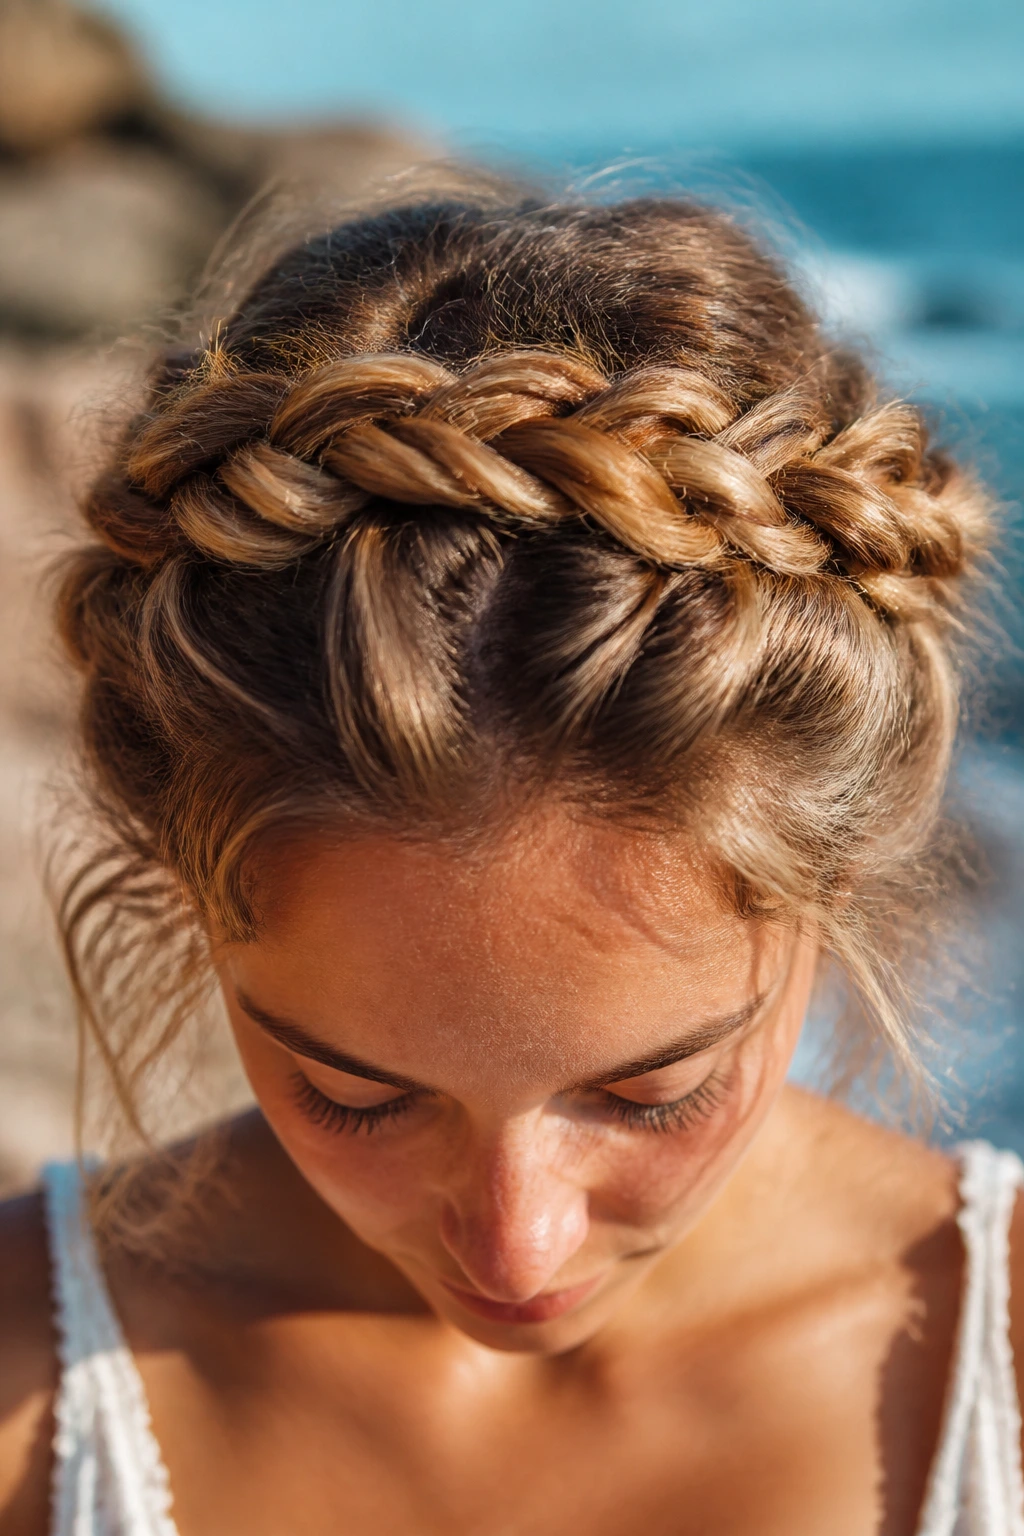
1. The Loose Boho Crown Braid
This style is the ultimate way to utilize your natural volume. By starting a Dutch braid at one temple and wrapping it across the top of your head, you create an ethereal, Grecian-inspired look that takes advantage of the way wavy hair holds shape.
Why It Works for Waves
Wavy hair has enough “grip” that you don’t need to over-tighten the braid to keep it secure. You want this style to look slightly lived-in, so avoid pulling the strands drum-tight as you weave. The soft, messy edges of the waves will naturally peek through, creating that coveted romantic finish.
Styling Tip
Before you start braiding, apply a light sea salt spray to your damp hair and let it air-dry. This gives your waves the necessary grit to hold the crown in place. If your hair is too clean or slippery, hit it with a little dry shampoo to add the friction needed for a successful hold.
2. Double Dutch Braids with Textured Ends
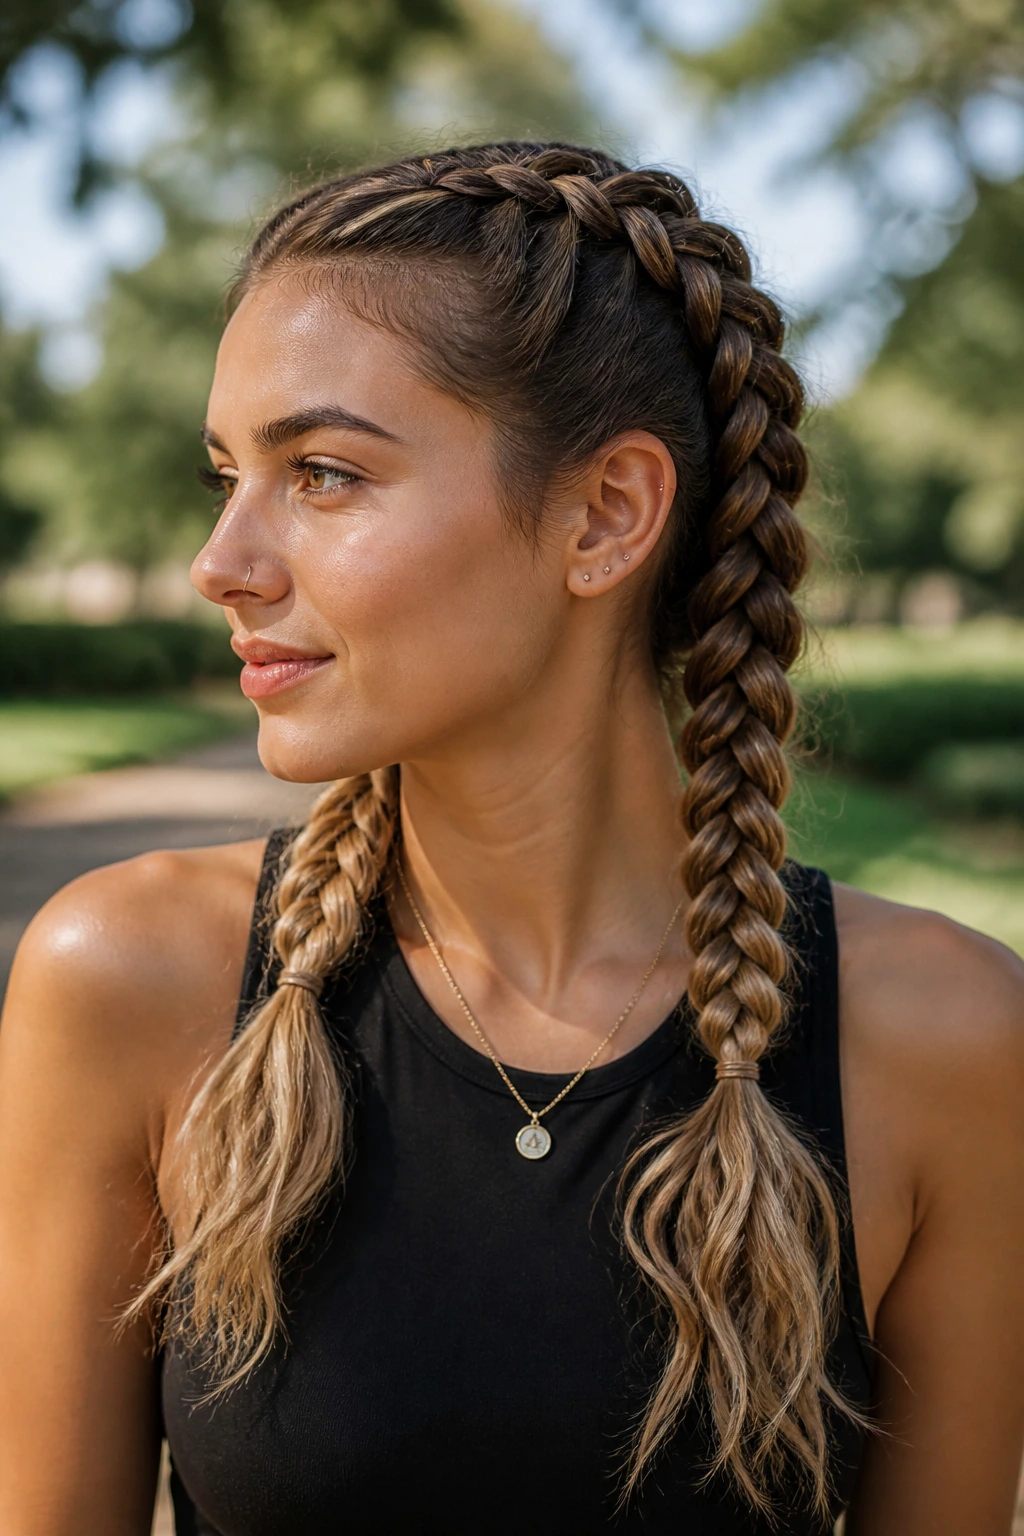
Dutch braids are the workhorse of the hair world, and they happen to look spectacular on wavy hair because the braid sits “on top” of the hair, showcasing the natural dimension and color variations of your waves.
Getting the Look
Part your hair down the center and create two Dutch braids—meaning you cross the sections under, not over—starting from your hairline and working down to the nape of your neck. Once you secure the ends with clear elastics, gently tug at the loops of the braid. This technique, often called “pancaking,” makes the braid look twice as thick and beautifully relaxed.
When to Wear It
This is a high-performance style. It is perfect for windy days, outdoor activities, or just keeping your hair completely out of your face for an entire day without constant readjustment. It manages the wave pattern while turning your volume into a style asset.
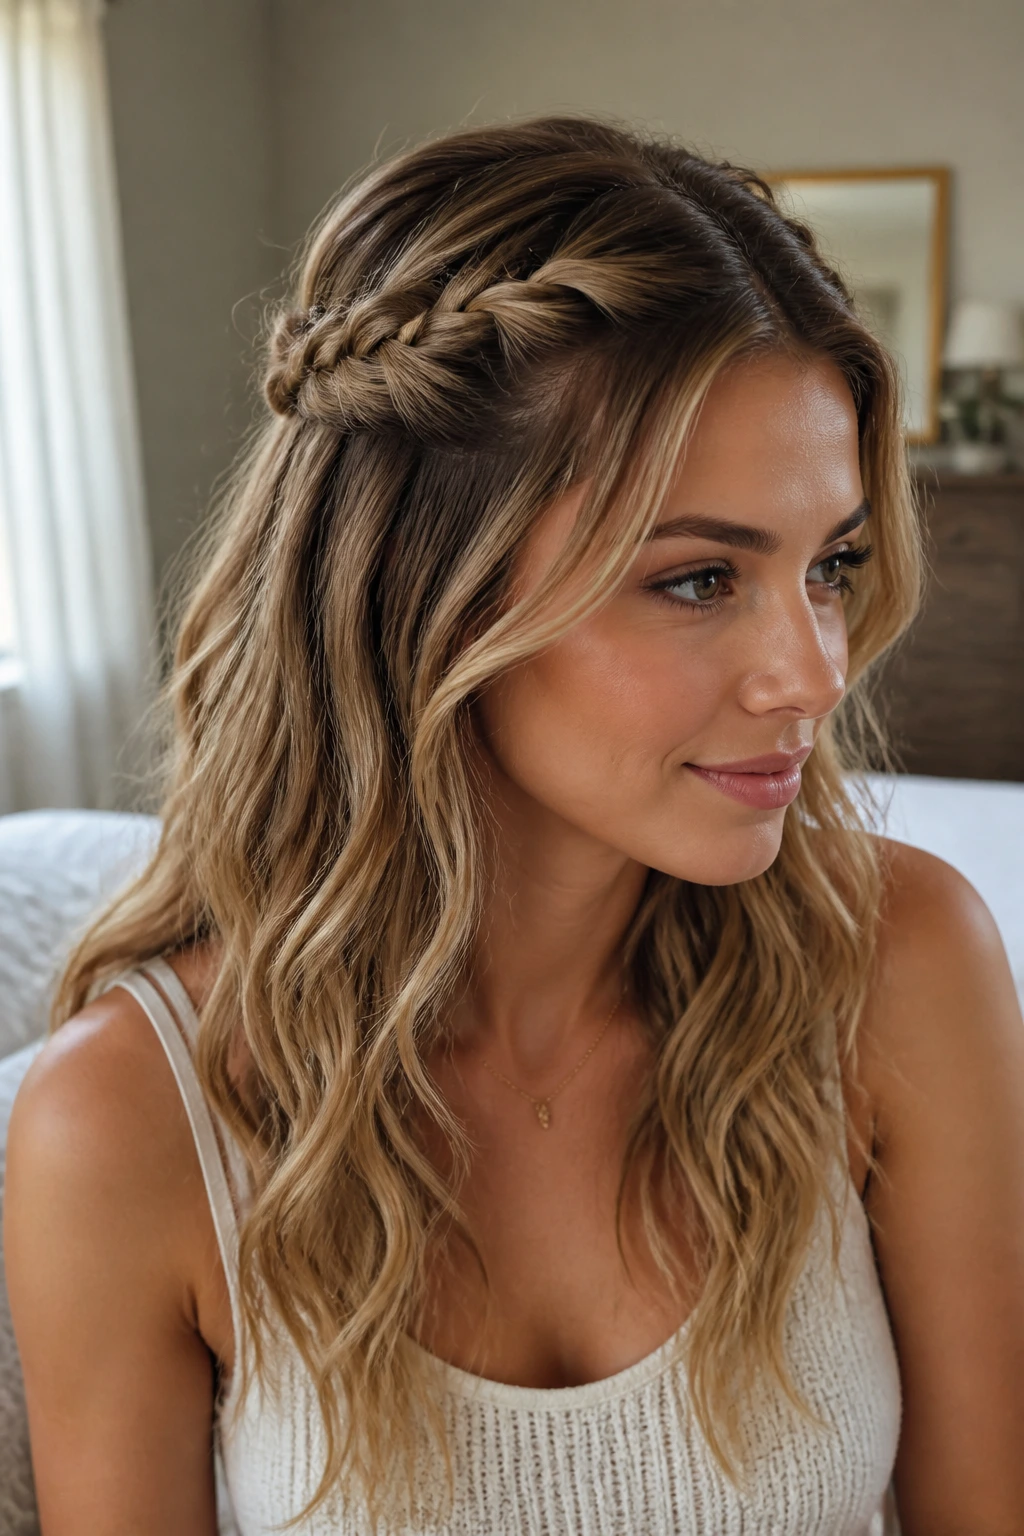
3. The Half-Up Waterfall Braid
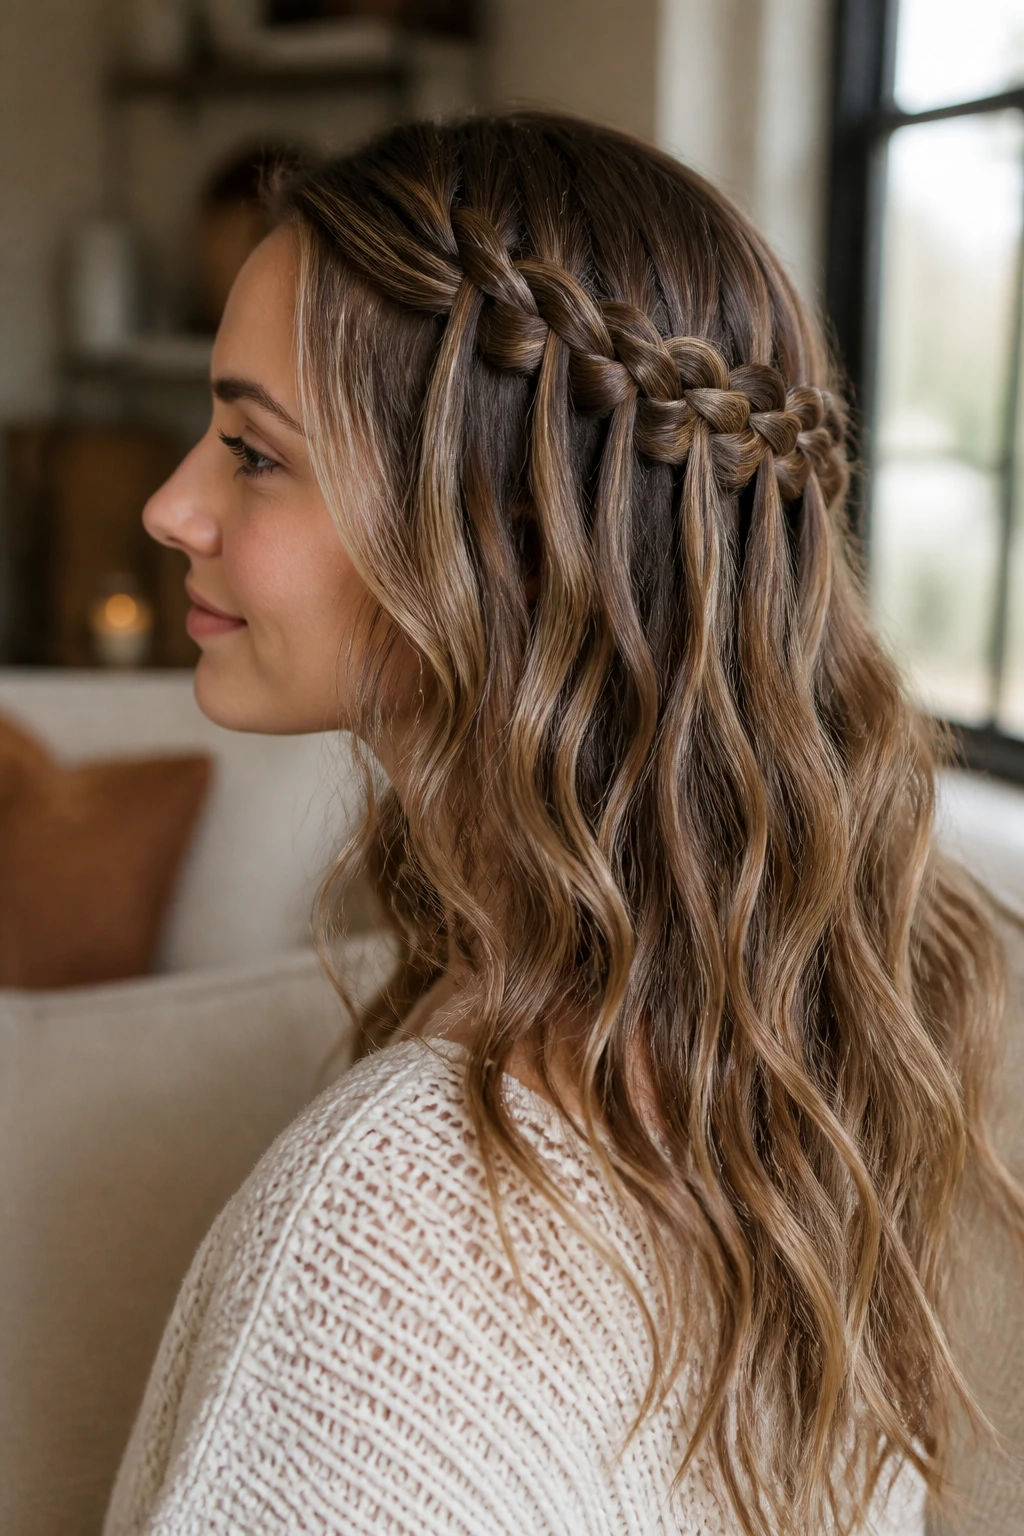
If you love the look of wearing your hair down but find that the front pieces are constantly falling into your eyes, the waterfall braid is your best friend. It allows you to keep the length loose while creating a beautiful, intricate detail across the back of the head.
The Mechanics of the Braid
You weave the top layer of your hair and “drop” strands as you go, which creates the illusion of water falling through the braid. On straight hair, this can look a bit clinical; on wavy hair, the cascading pieces blend perfectly with the rest of your natural texture.
Styling Variation
Try incorporating a few small braids on each side and meeting them in the middle with a decorative clip. This removes the need for a complex “drop” technique while still achieving that ethereal, half-up vibe that suits wavy hair perfectly.
4. Single Side-Swept Fishtail
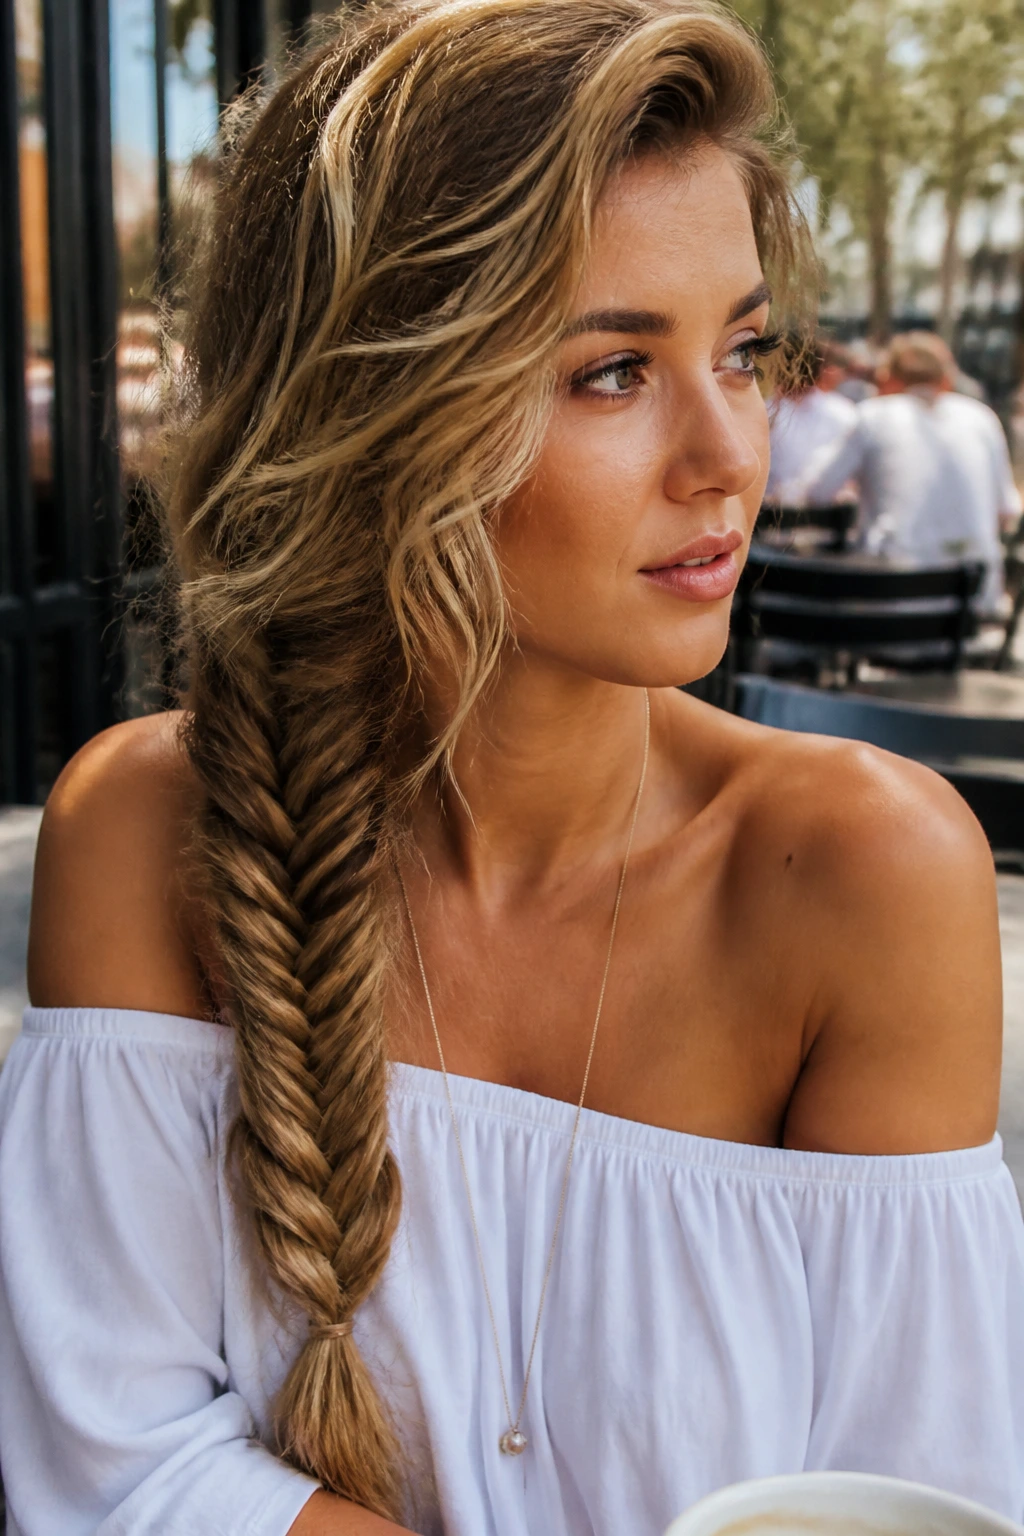
The fishtail braid looks deceptively complex, but it is really just a repetitive, two-strand process that creates a tight, intricate pattern. On wavy hair, a fishtail braid can sometimes feel too structured, so the secret is to keep it loose and pull it to one side.
Why This Style Succeeds
Fishtails require a bit of patience, but the result is a long, slender braid that feels sophisticated. Because wavy hair has natural volume, your fishtail will not look thin or spindly—it will be full and robust.
Pro Maintenance
If you find your waves are too “bouncy” and keep popping out of the weave, dampen your fingers slightly with water or a tiny bit of pomade as you braid. This keeps the rogue wavy strands in check without weighing the whole look down with heavy product.
5. The Messy Pull-Through Braid
This isn’t a true braid at all, which is the beauty of it. You use a series of clear elastics to create “bubbles” of hair, which you then tease and fan out to look like a thick, bohemian plait.
Advantages for Wavy Texture
Straight hair usually struggles with this style because it lacks the volume to fill the bubbles, making the hair ties visible. Wavy hair, however, fills those spaces perfectly. The natural texture provides the structure needed to make the braid look thick and full from the very first pull.
How to Enhance the Effect
Once the braid is finished, go back and pull at each individual section. Don’t be afraid to pull quite hard. You want it to look like you spent hours on it, even if the entire process took you less than five minutes.
6. French Braided Headband
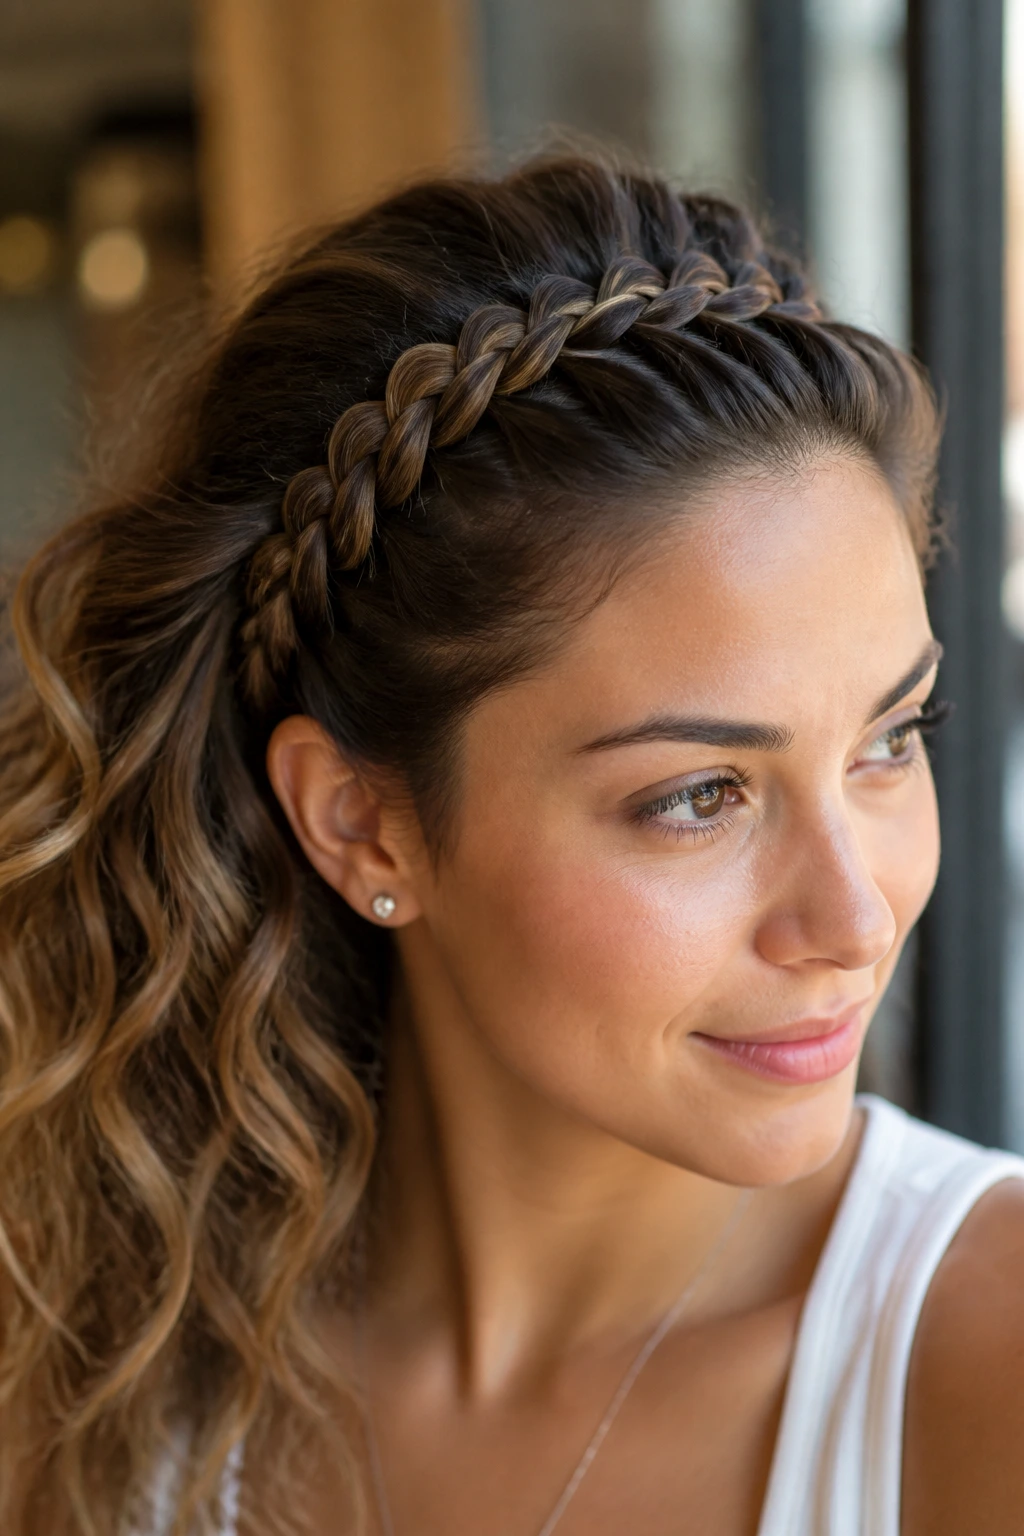
This is a classic for a reason. By braiding the hair along your hairline, you create a natural-looking headband that keeps your waves pulled back and keeps your forehead clear.
Styling Note
Keep the braid tight at the scalp to ensure it stays in place all day. However, once you reach the point where the braid transitions into the rest of your loose hair, switch to a looser technique or just leave the tail to blend into your waves.
The Aesthetic Outcome
This style highlights the texture of your waves at the back of your head while providing a very tidy, intentional contrast at the front. It is an excellent choice for a professional setting where you need to look put-together but still want to show off your natural hair.
7. The Wrapped Top Knot Braid
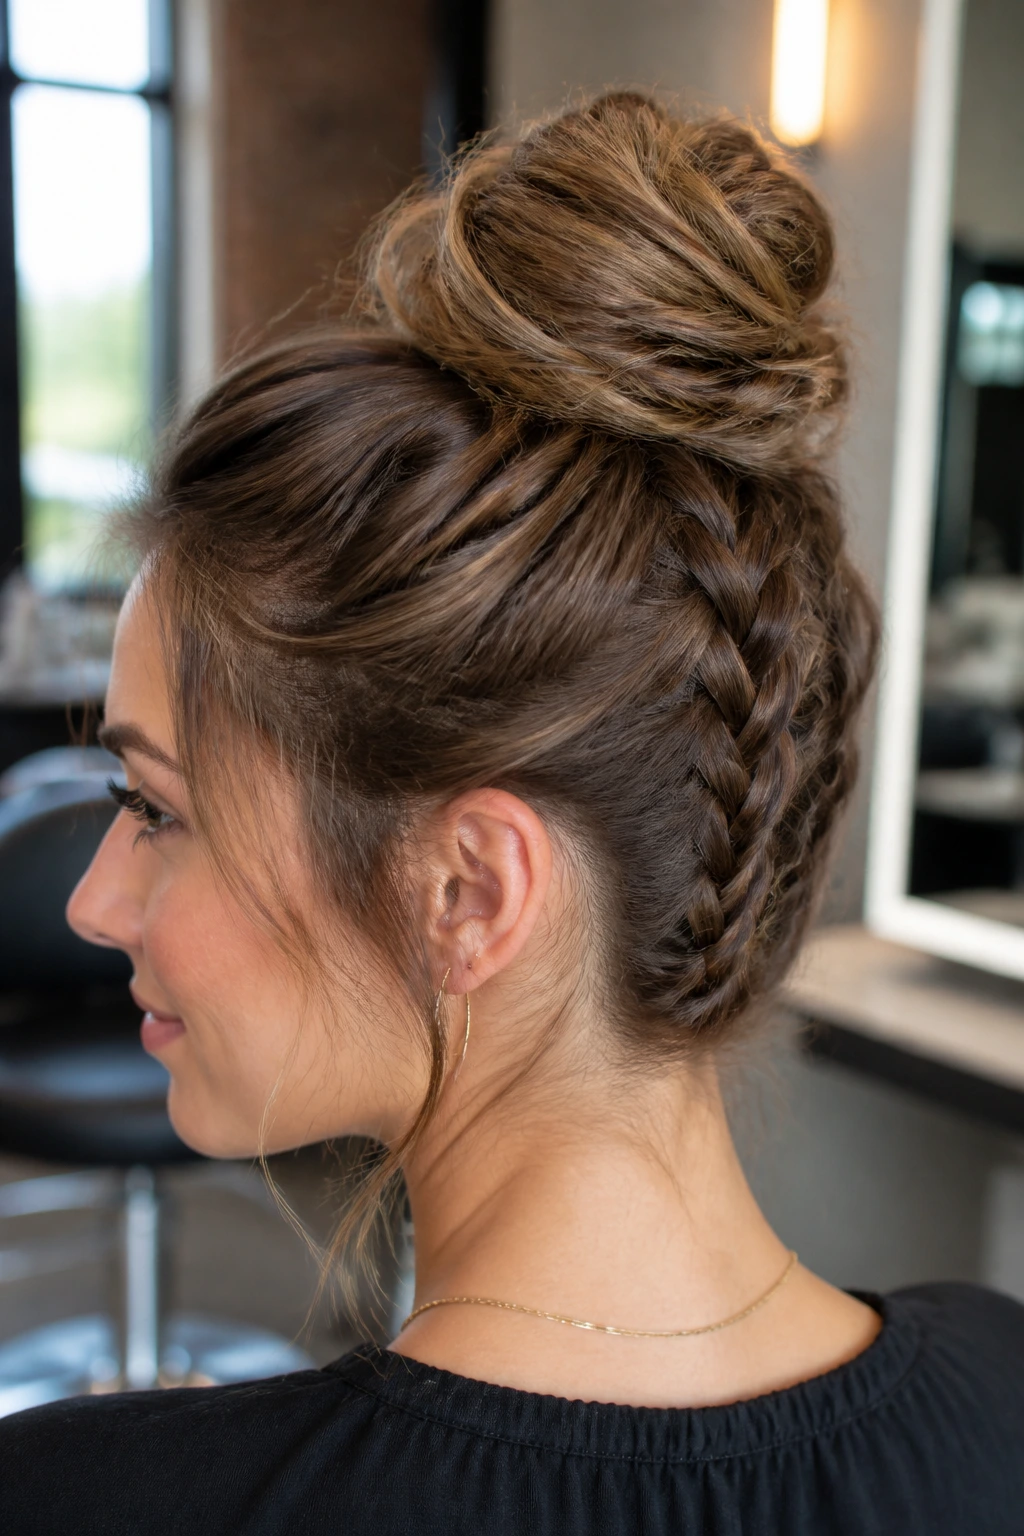
Combining a high bun with a braid is an elevated way to manage wavy hair. By starting your braid at the nape of the neck and working it upward into a top knot, you solve the problem of short, wavy layers falling out at the back.
Step-by-Step Logic
Flip your head upside down and begin a French braid at your neckline. Once you reach the crown of your head, gather the rest of your hair into a ponytail and twist it into a bun. The braid at the back provides an unexpected detail that turns a standard messy bun into a styled look.
Why It Works for Wavy Hair
Your waves provide the bulk and hold for the bun. If you have fine, straight hair, a bun like this can look tiny, but wavy hair has the natural density to make the top knot look impressive and balanced.
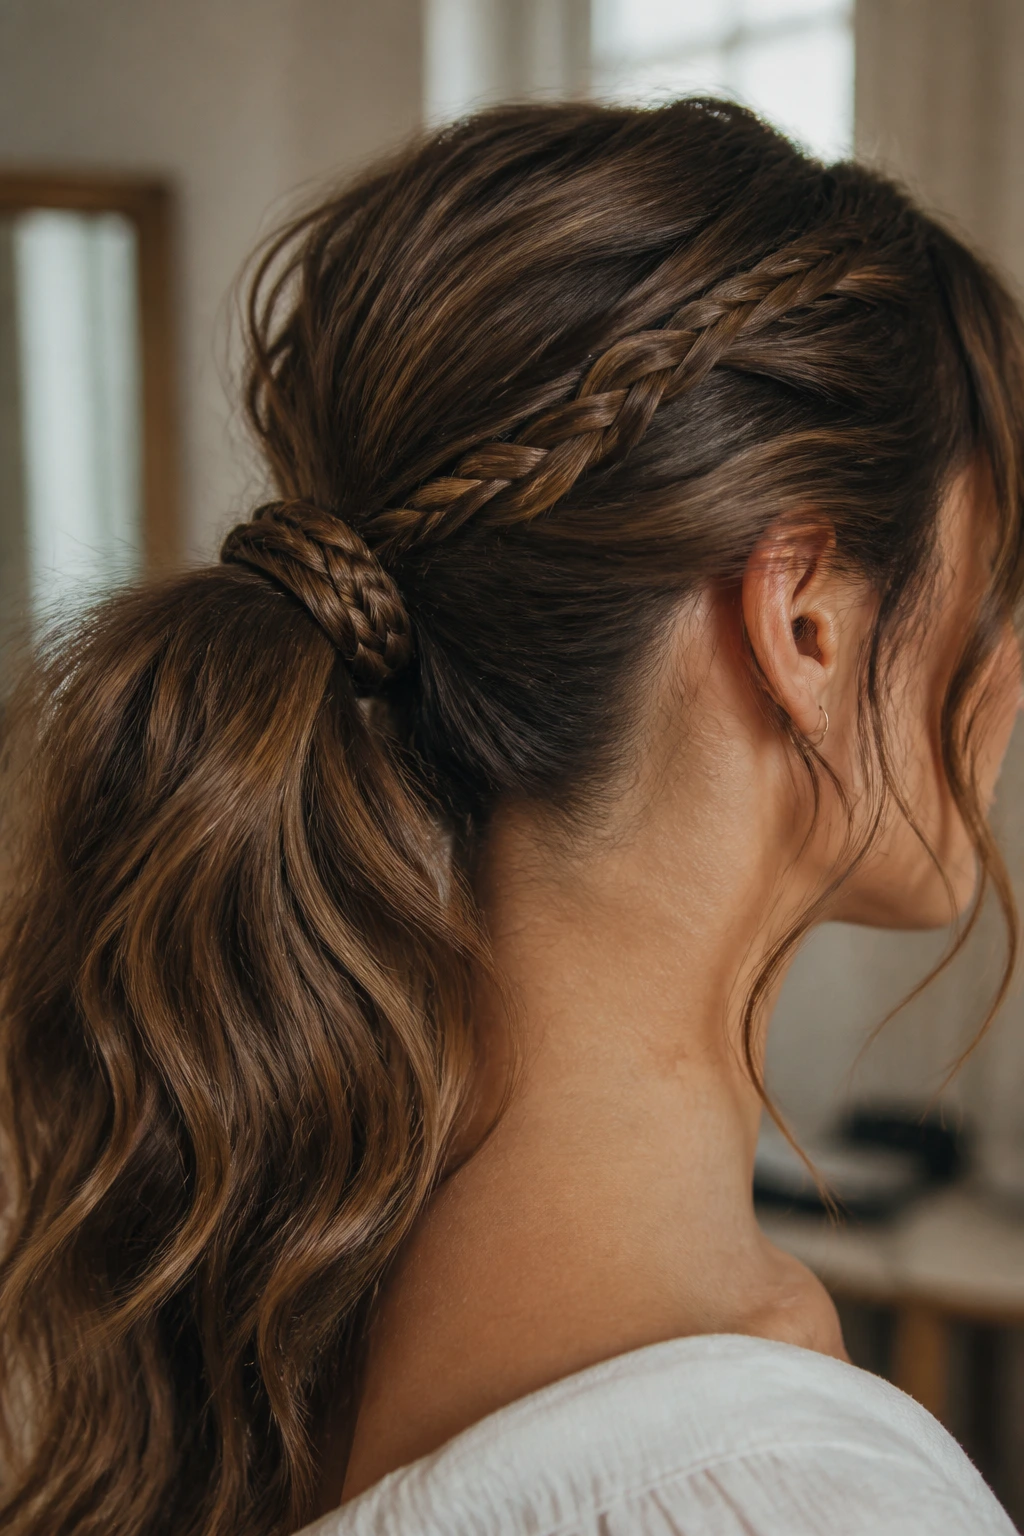
8. Rope Braid Ponytail
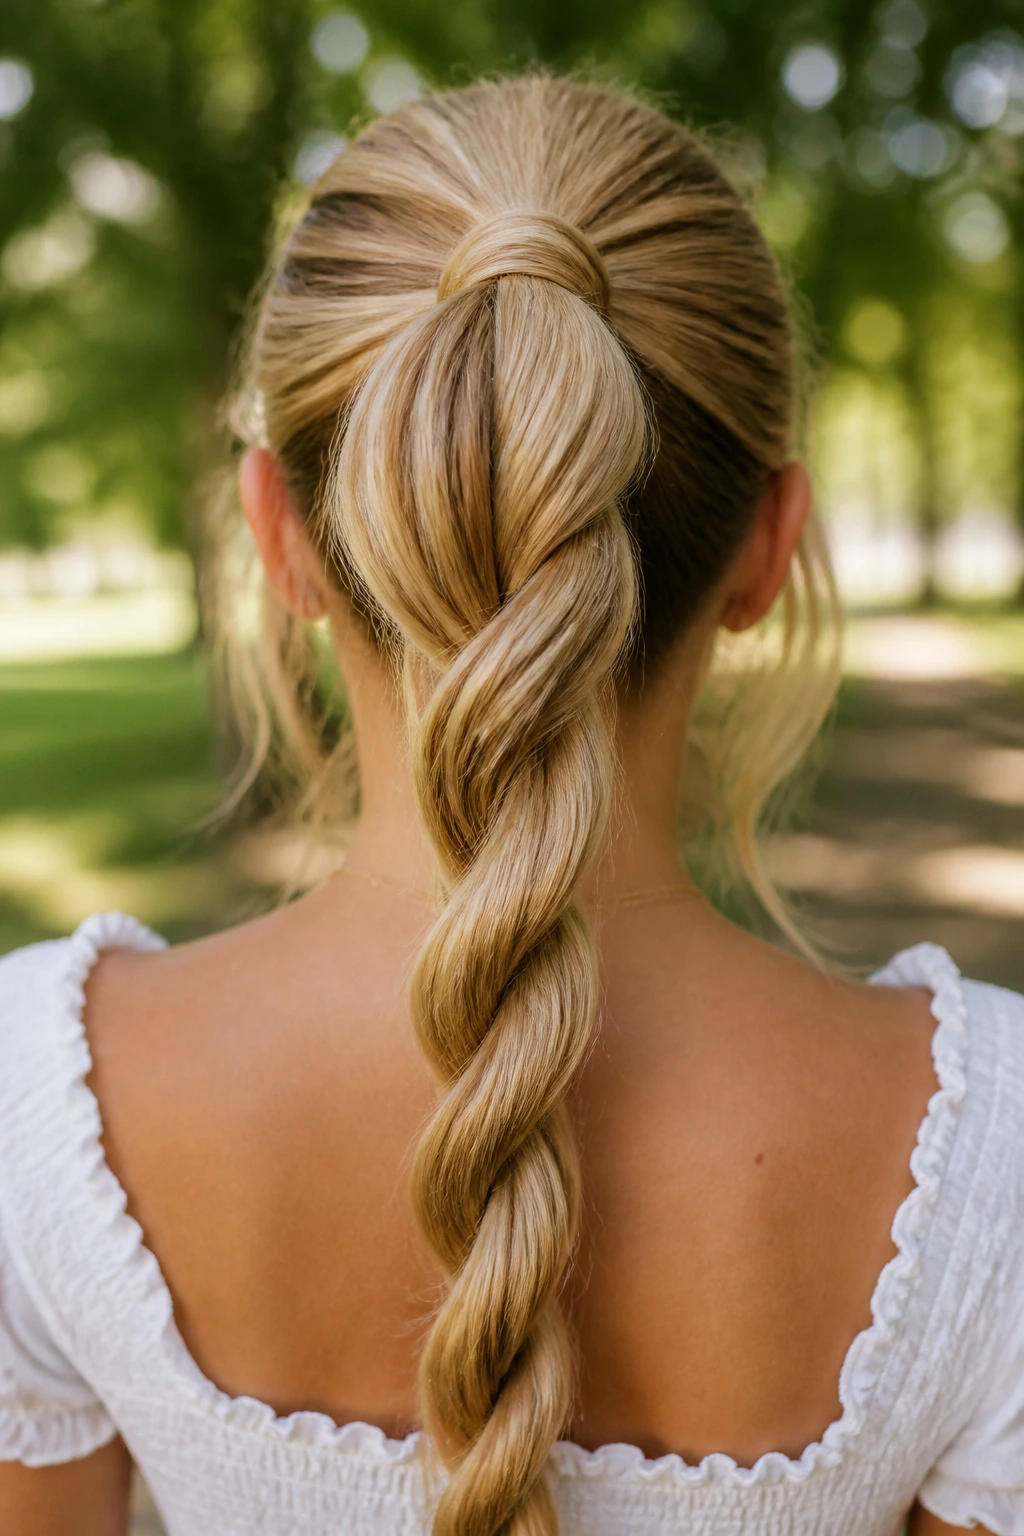
A rope braid is essentially twisting two sections of hair around each other. It is faster than a standard braid and looks incredibly clean and modern. When applied to a high ponytail of wavy hair, it creates a textured, sculptural look.
Achieving the Twist
To get the twist to stay, you must twist both sections in the same direction before wrapping them around each other. If you twist them in opposite directions, the braid will unravel immediately.
Finishing the Look
Once the braid is tied off at the bottom, wrap a small piece of hair around the base of the ponytail to hide the elastic. This small step makes the style look significantly more professional and polished.
9. Loose Side Braid with Face-Framing Pieces
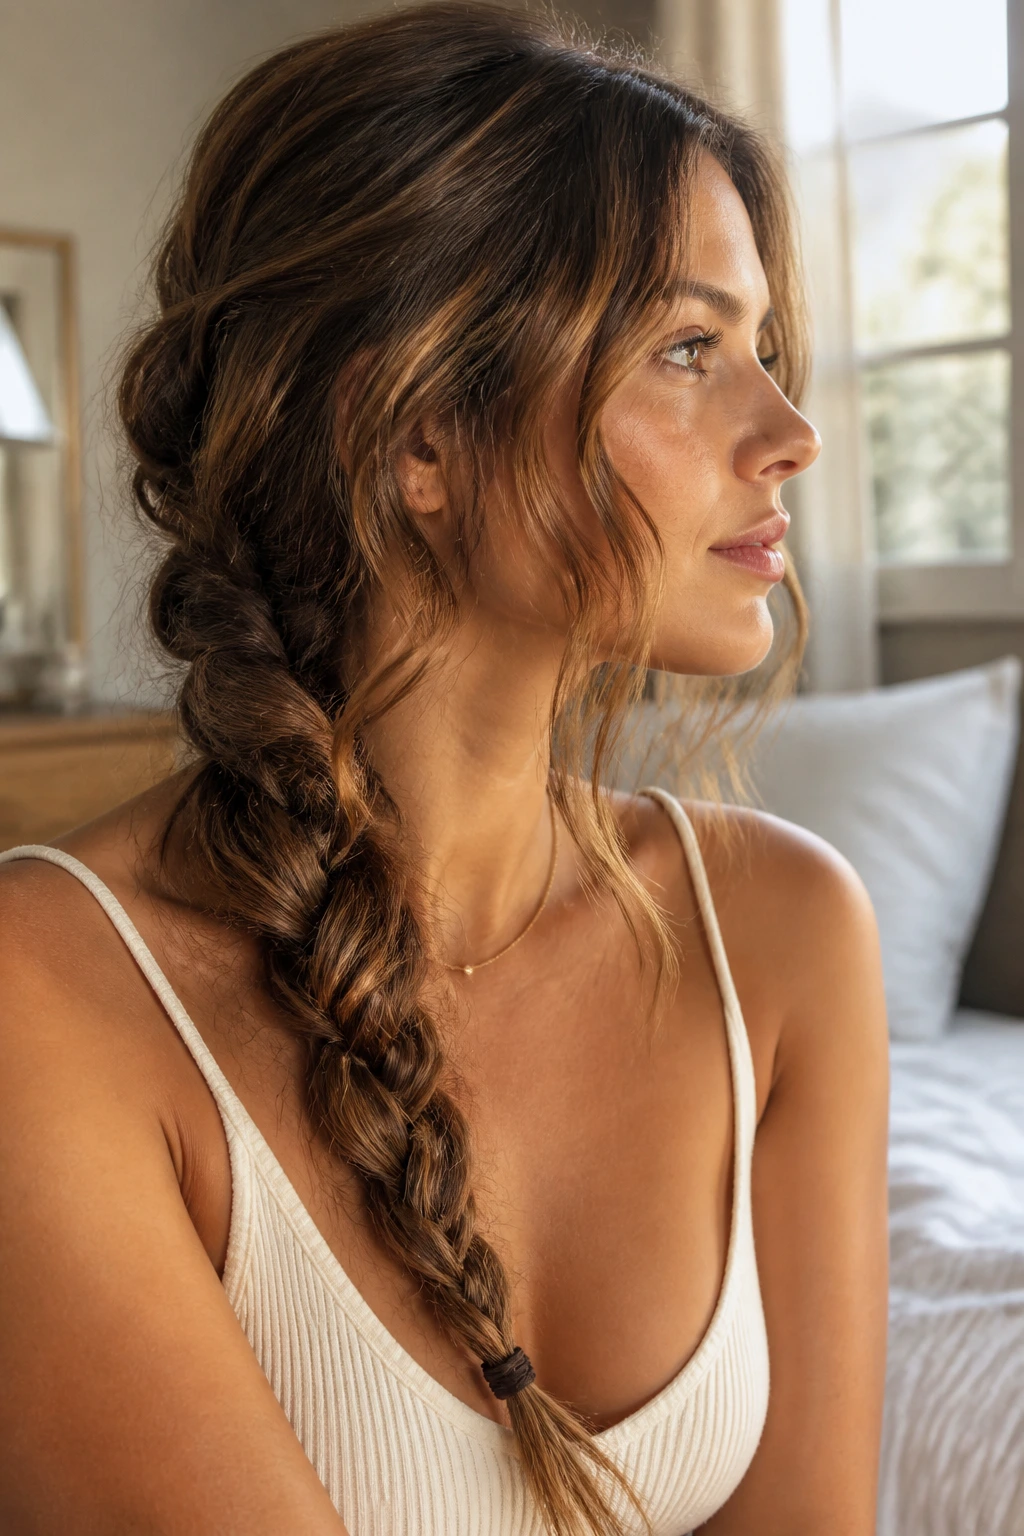
Sometimes the most beautiful style is the simplest. A single, loose three-strand braid thrown over one shoulder is a staple, but you can elevate it by leaving out long, wavy layers around your face.
The Role of Texture
Because your hair is wavy, those face-framing pieces will naturally curl or bend in a flattering way. This style is not about perfection; it is about the “undone” look that makes wavy hair look so intentional and chic.
Adding Volume
If you find your hair feels a bit flat, gently pinch the edges of the braid once you have secured it. Don’t be shy about making it look slightly “messy.” The more volume you create in the braid, the better the final style will look.
10. The Crown Fishtail
This is a more advanced version of the crown braid. By using the fishtail technique instead of a standard Dutch braid, you get a much more intricate look that showcases your hair’s texture in a very different way.
Managing the Tension
Because a fishtail requires so much precision, it is a great way to manage frizzy or unruly waves. The tight weave keeps the hair from expanding too much, acting as a natural containment system for your texture.
Perfect Pairing
This style looks incredible with minimalist accessories. A few small gold pins or hidden bobby pins can help secure the braid against your head without distracting from the complex pattern you have created.
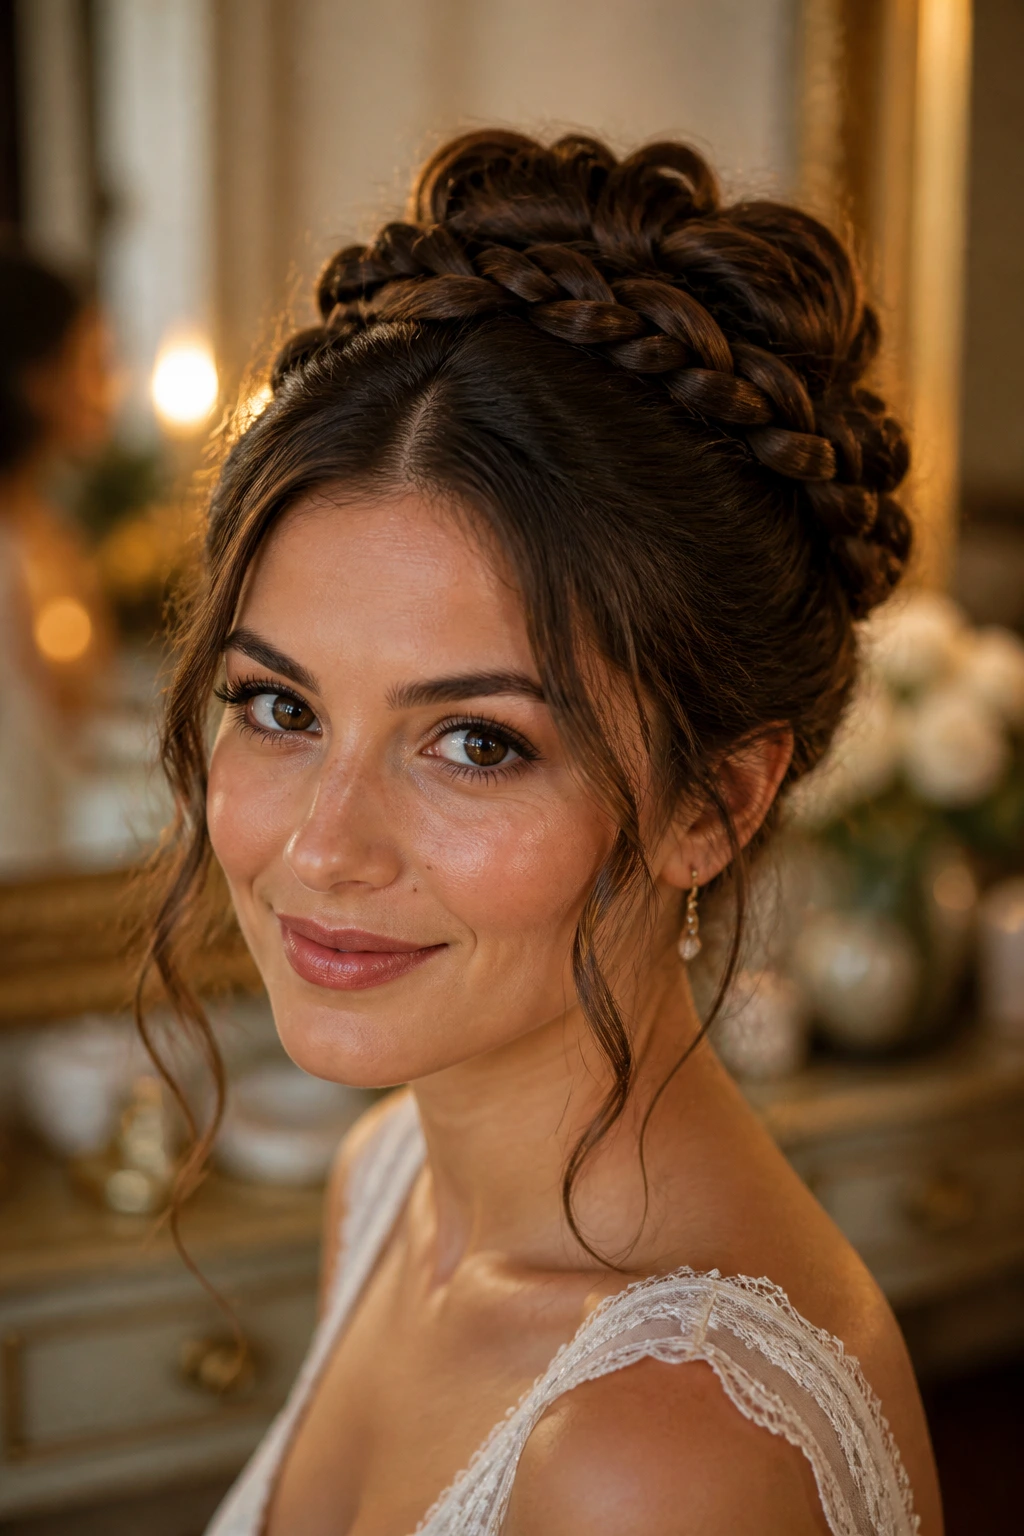
11. Braid-into-Bun Updo
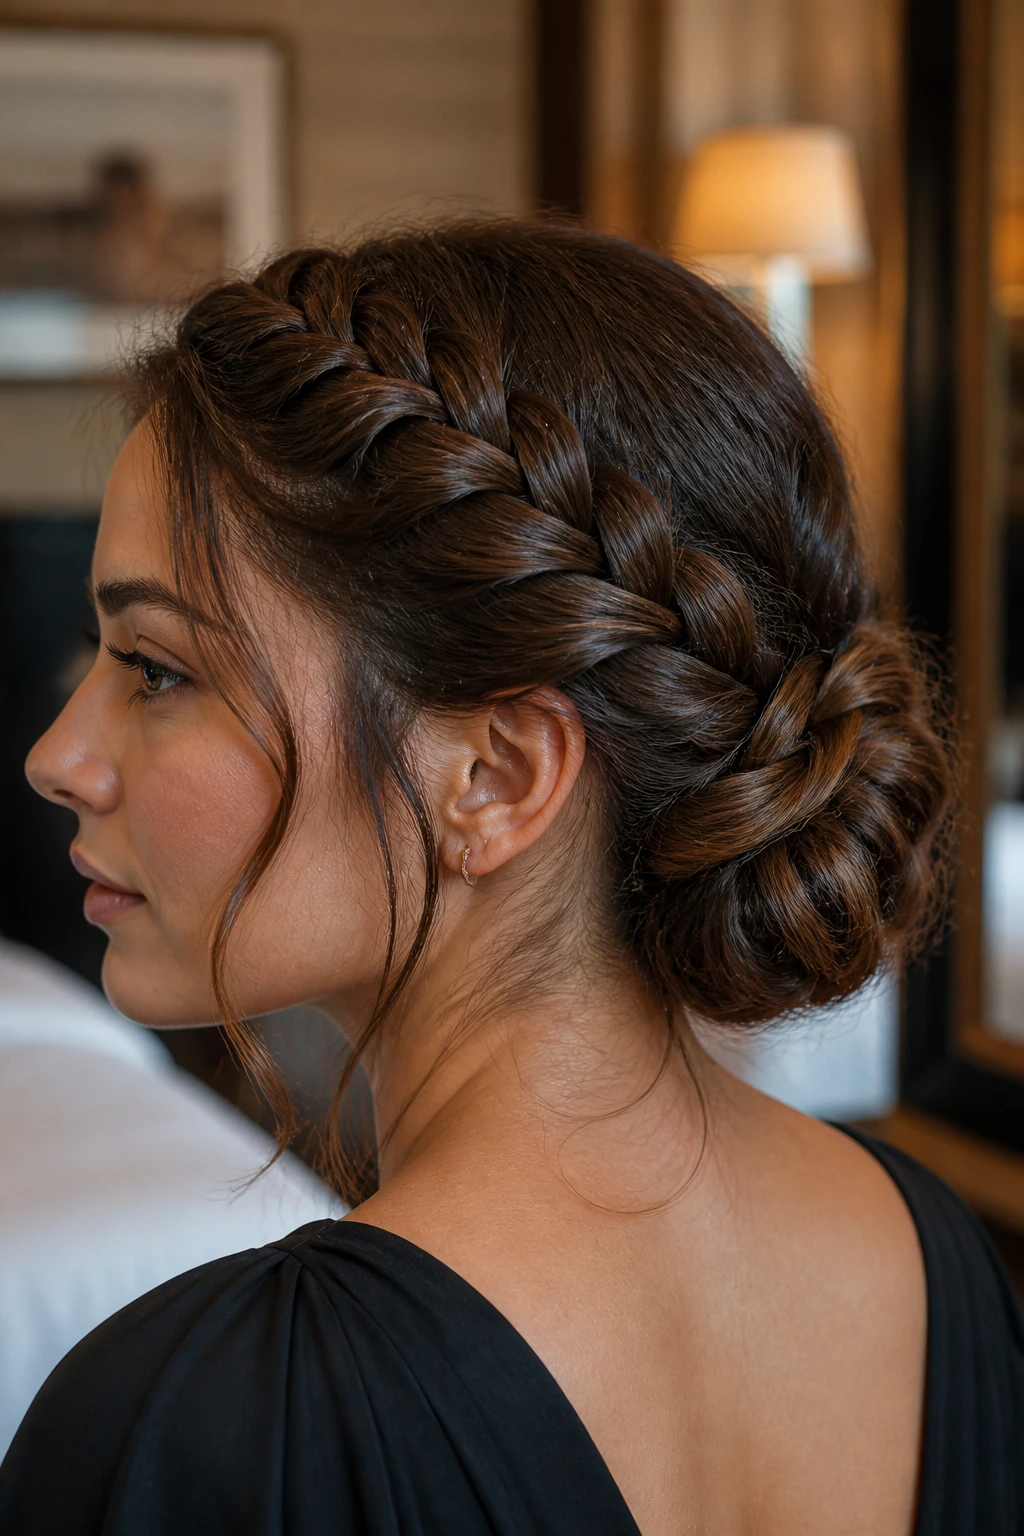
For formal occasions, nothing beats a braid that leads into a structured updo. Start a Dutch braid on one side of your head and gather the rest of your hair into a low, chignon-style bun at the nape.
Why Waves Help
A tight, sleek bun on wavy hair can be difficult because the texture tries to push out. By incorporating the hair into a braid first, you “tame” the wave and secure it before it even reaches the bun. This creates a base that is much more stable than if you had just pulled the hair back and pinned it.
Finishing Touch
Use a light-hold hairspray rather than a heavy wax. You want to maintain the softness of your waves, and heavy products can sometimes make wavy hair look greasy or stiff.
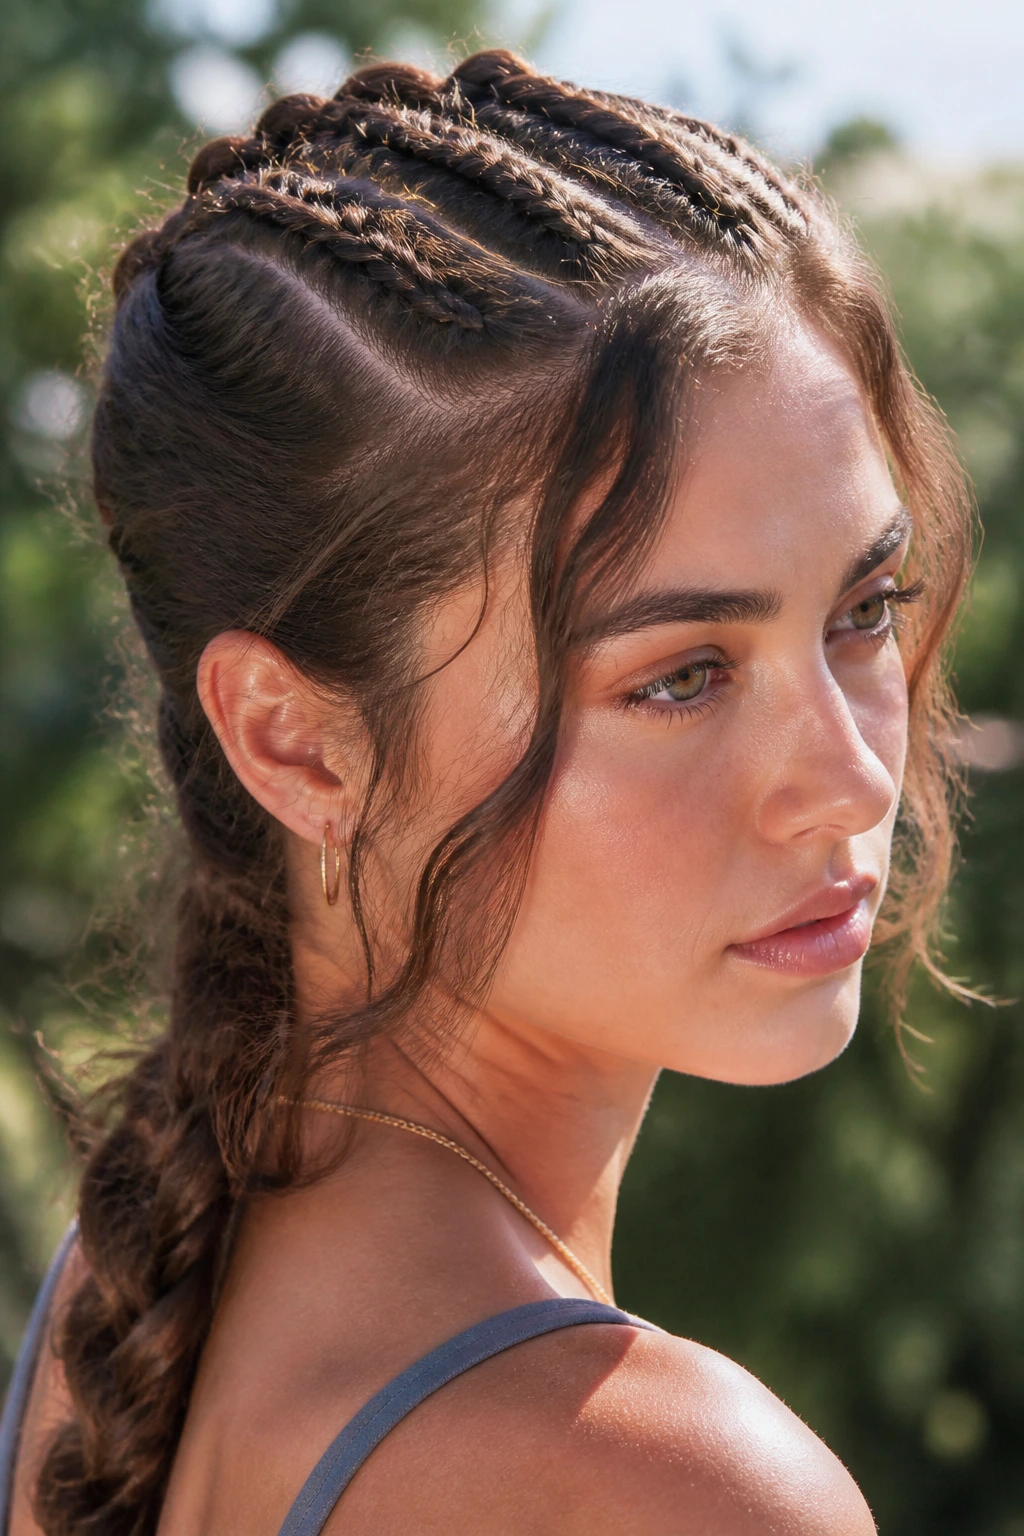
12. Mohawk Braid

If you want a style that feels a bit edgy, the Mohawk braid is your go-to. By creating a thick, high-volume braid right down the center of your head, you create a dramatic, sculpted look that is perfect for shows, parties, or just changing up your daily routine.
Styling the Center
The trick here is to ensure your sections are even. You want the braid to look centered and deliberate. Because wavy hair has extra volume, your “Mohawk” will naturally have more height and presence than it would on straight hair.
The Balancing Act
Leave the sides sleek and tight. Use a little bit of smoothing cream along the temples to keep the hair close to the scalp, providing a sharp contrast to the high-volume braid in the middle.
13. The Corset Braid
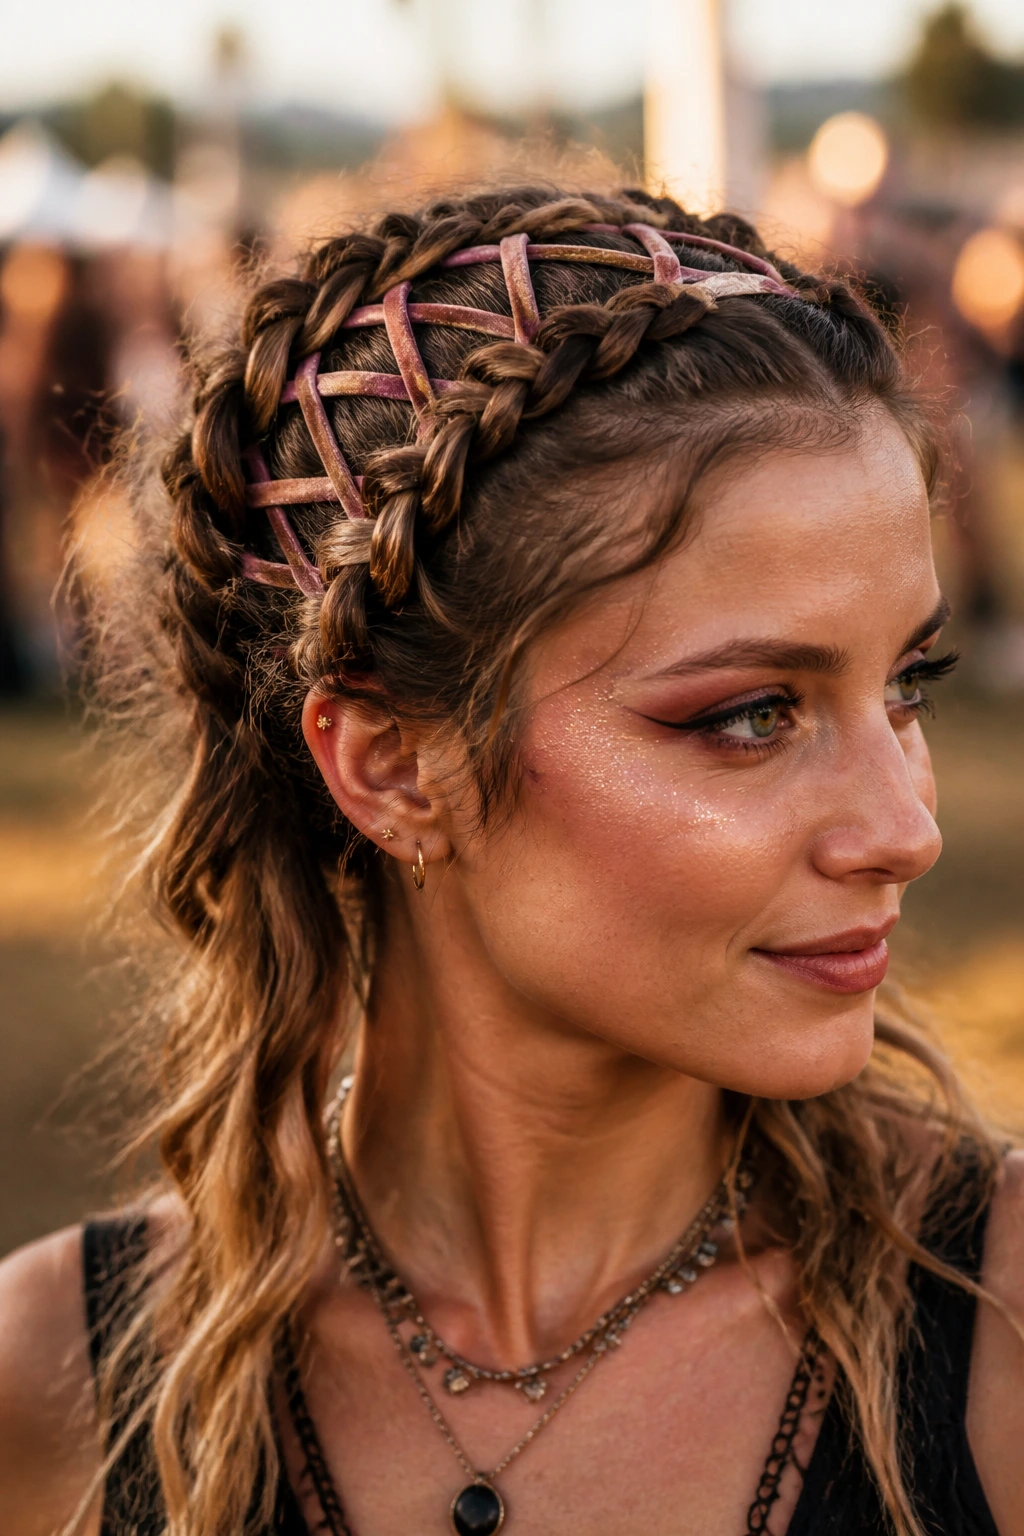
This is a style that uses ribbon or cord laced through an existing braid. It is a stunning, artistic choice that looks great at festivals or formal events.
How to Execute
Create two loose French braids, then take a piece of velvet or silk ribbon and lace it back and forth between the braids like a corset. The texture of wavy hair provides a perfect, slightly “fuzzy” surface that keeps the ribbon from sliding around.
Choosing Your Ribbon
Select a color that complements your hair shade. A dark navy or black ribbon against blonde or light brown hair provides a striking contrast, while metallic ribbons add a touch of glamour for evening events.
14. Wrapped Braid Ponytail
Take a standard ponytail and braid a small section of hair near the ear, then wrap that braid around the base of the pony. This is an incredibly simple way to take a basic hairstyle and make it look like you actually tried.
Why It Works for Wavy Hair
It hides the elastic band, which is the hallmark of a “quick” hairstyle. Because your waves provide natural bulk, the ponytail itself will look thick and styled even without any extra work.
Pro Maintenance
If you are worried about the braid unraveling, use a tiny, clear elastic to secure it before you start wrapping it around the ponytail base. Use a single bobby pin to tuck the tail of the braid underneath the ponytail for a seamless look.
15. The Triple Threat Braid
Why have one braid when you can have three? Start with three thin Dutch braids at the front of your head, then gather them into a single, loose braid or ponytail at the back.
The Visual Impact
This style is all about lines. It adds structure to your face and shows off the wave pattern as the braids converge. It is a very organized, clean look that still feels trendy and fresh.
Making It Last
Use a tiny bit of texture powder at the roots of each braid. This will prevent them from slipping backward as you move throughout the day and ensure the parting lines remain crisp and sharp.
16. The Side-Braid Accent
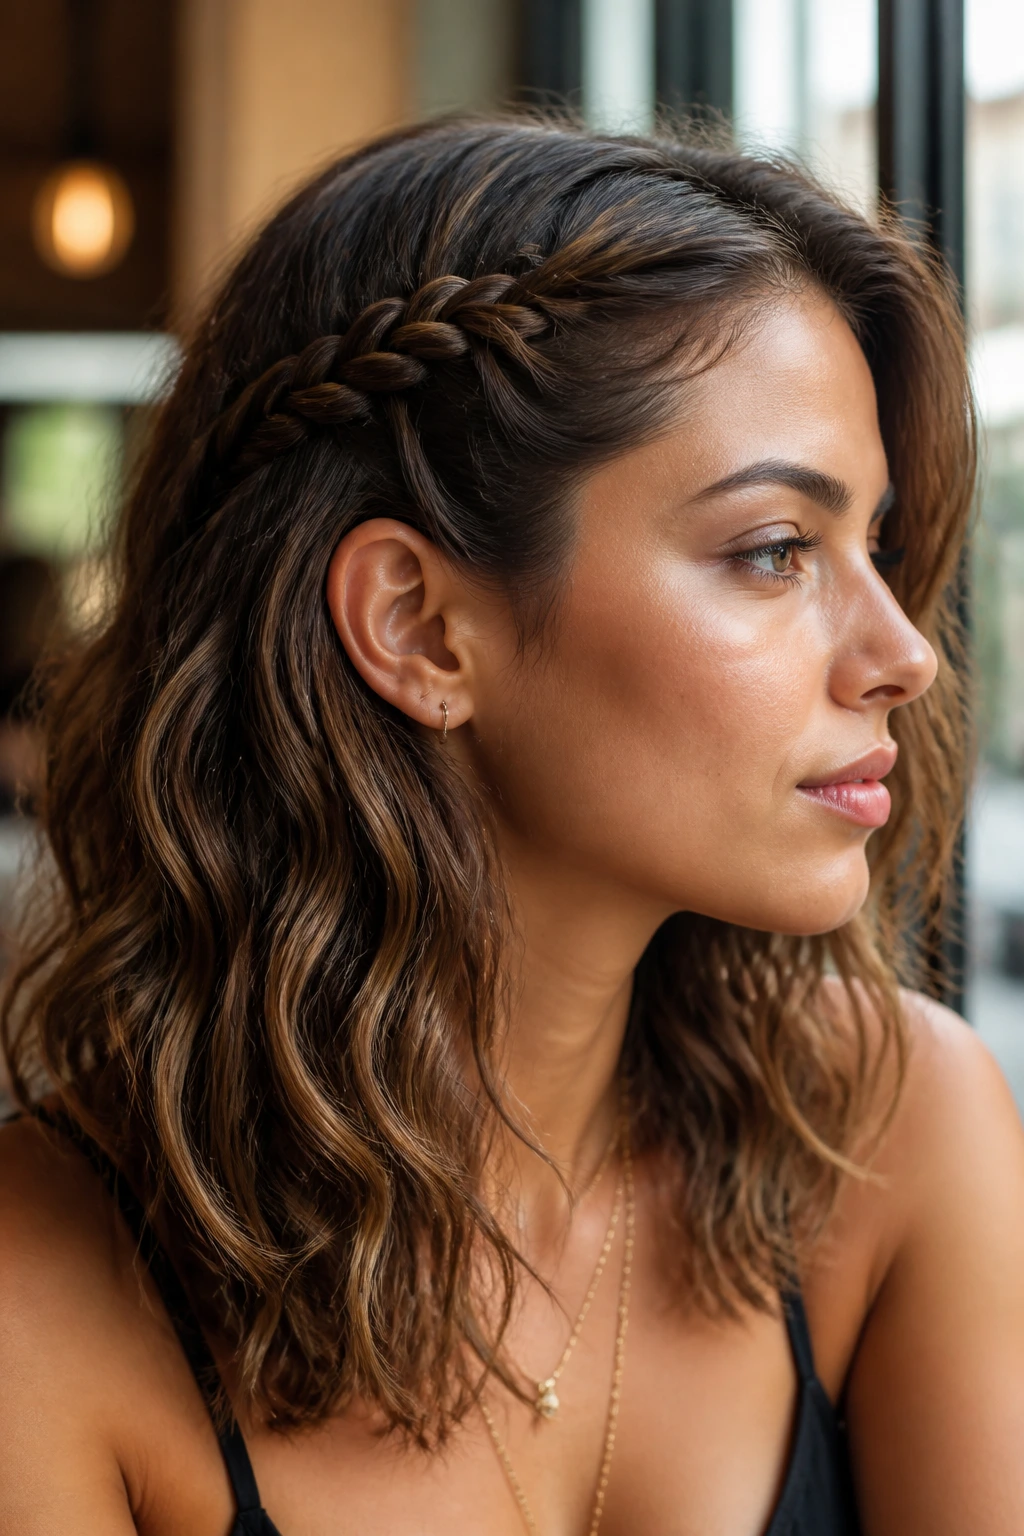
If you prefer wearing your hair down and loose, but you still want the security and detail of a braid, a small side accent is a great compromise. Braid a small section of hair just above your ear, pulling it back and securing it with a clip or a small, hidden elastic.
The Subtle Approach
This is the “barely there” braid. It keeps the hair out of your face, shows off your waves, and adds a nice, unexpected detail that people will notice once they get a closer look.
How to Style
Make sure the braid is long enough to reach behind your head. If your layers are short, you might need to use a decorative barrette to hold the braid in place rather than trying to tuck it under the rest of your hair.
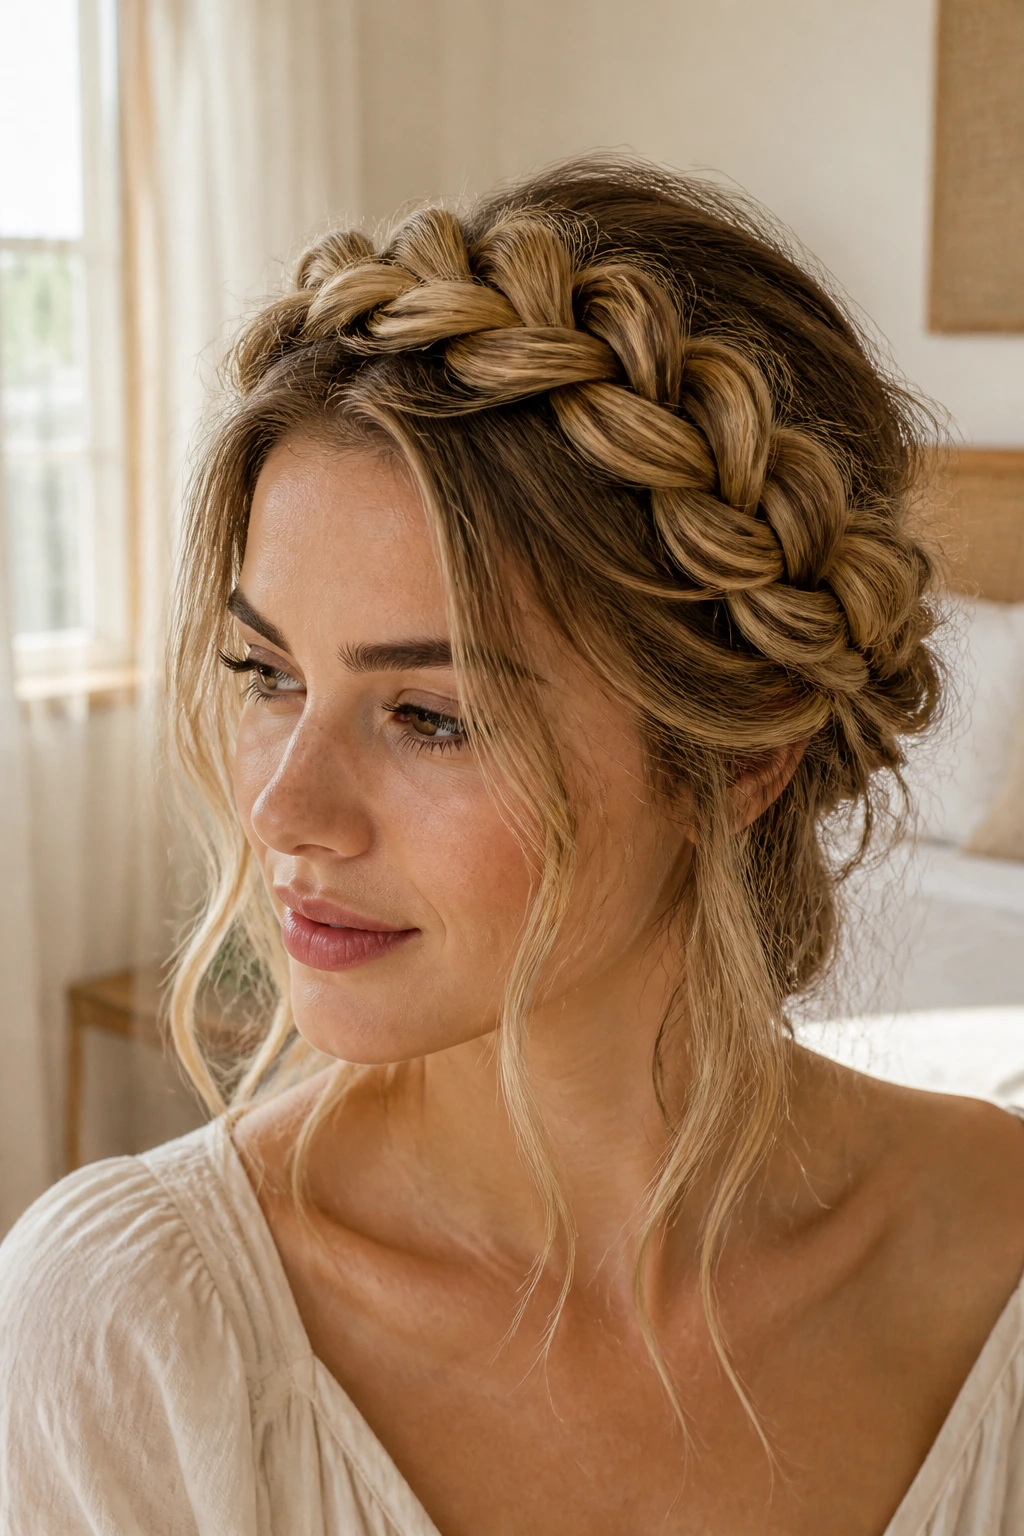
17. The Textured Milkmaid Braid
The milkmaid braid involves parting your hair in two, braiding both sides, and then pinning them across the top of your head. It is a classic, rustic style that feels right at home with a wavy, beachy texture.
Managing the Ends
On wavy hair, the ends can sometimes be messy. When you pin them across the top, tuck the ends of the braids underneath the braid itself to create a clean, seamless finish.
Accessories
If you are attending an event, you can weave small, delicate flowers or pearls into these braids. The texture of the waves makes the braid “grab” onto the accessories, so they are much less likely to slide out than they would be in straight hair.
18. Faux-Hawk Braid
Similar to the Mohawk braid but easier to achieve, the faux-hawk involves pinning sections of hair along the center of the head rather than braiding them. It is a great alternative if you are not particularly skilled at French braiding.
The Secret to the Look
It is all about the sectioning. Use small, clear elastics to tie off sections of hair down the center, then puff them out to create that high-volume “hawk” look.
Why Waves Shine Here
Because your hair is wavy, it will naturally puff up, making the faux-hawk look thicker and more voluminous than it ever could be on straight hair. It’s a low-effort style with a high-impact payoff.
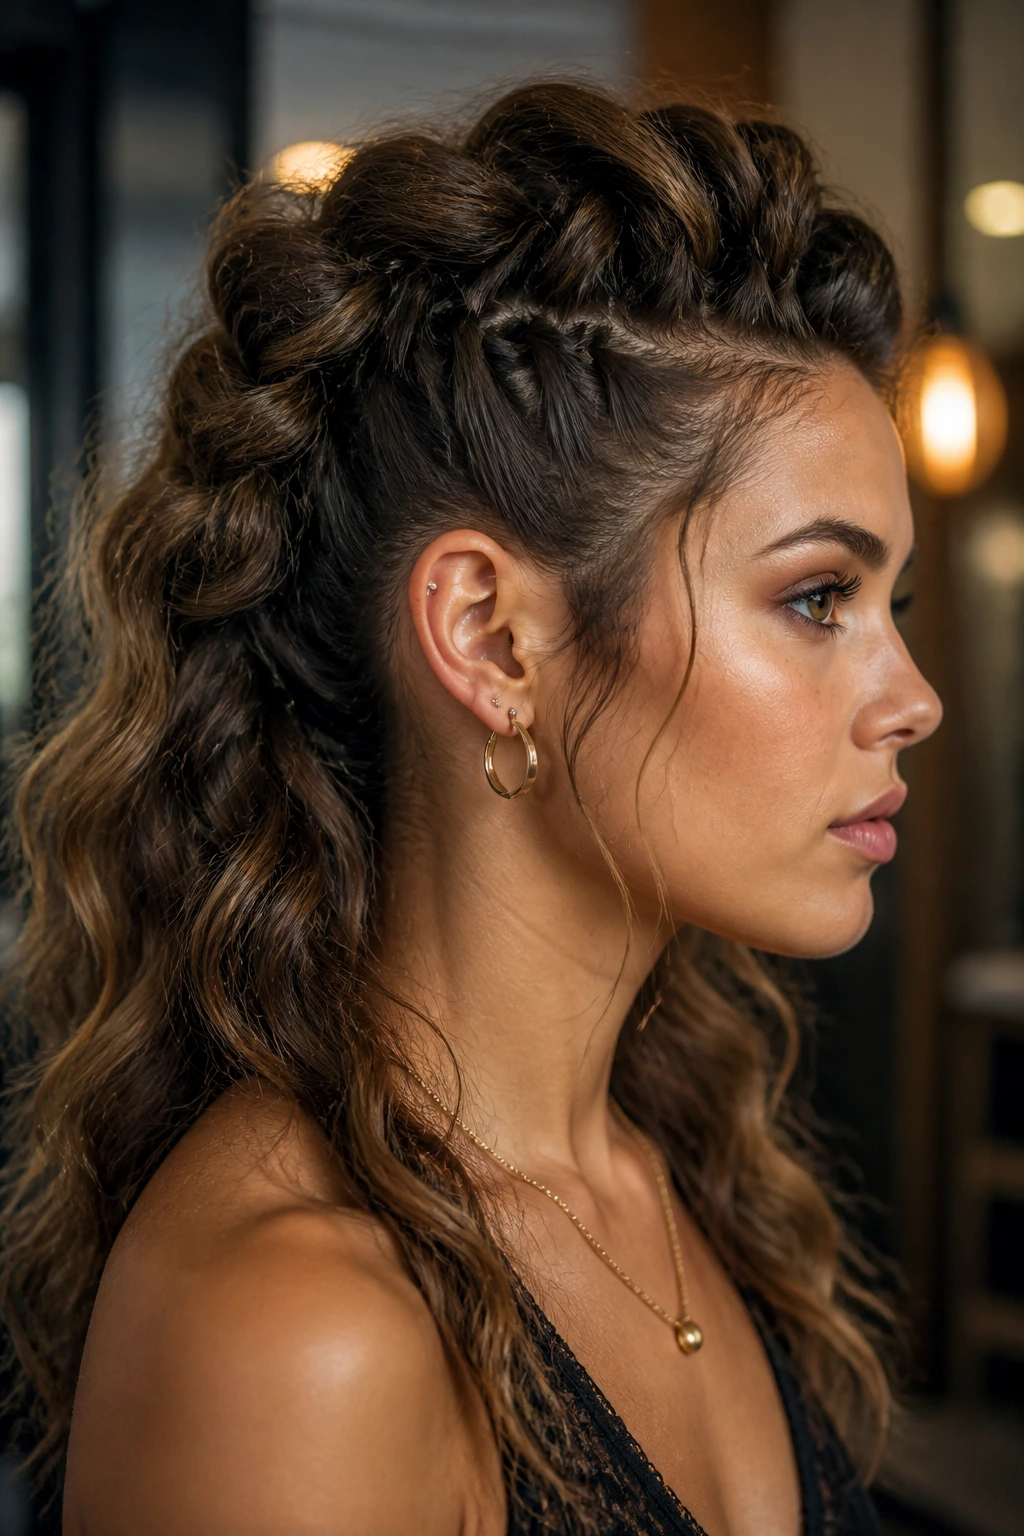
19. The Undercut Braid
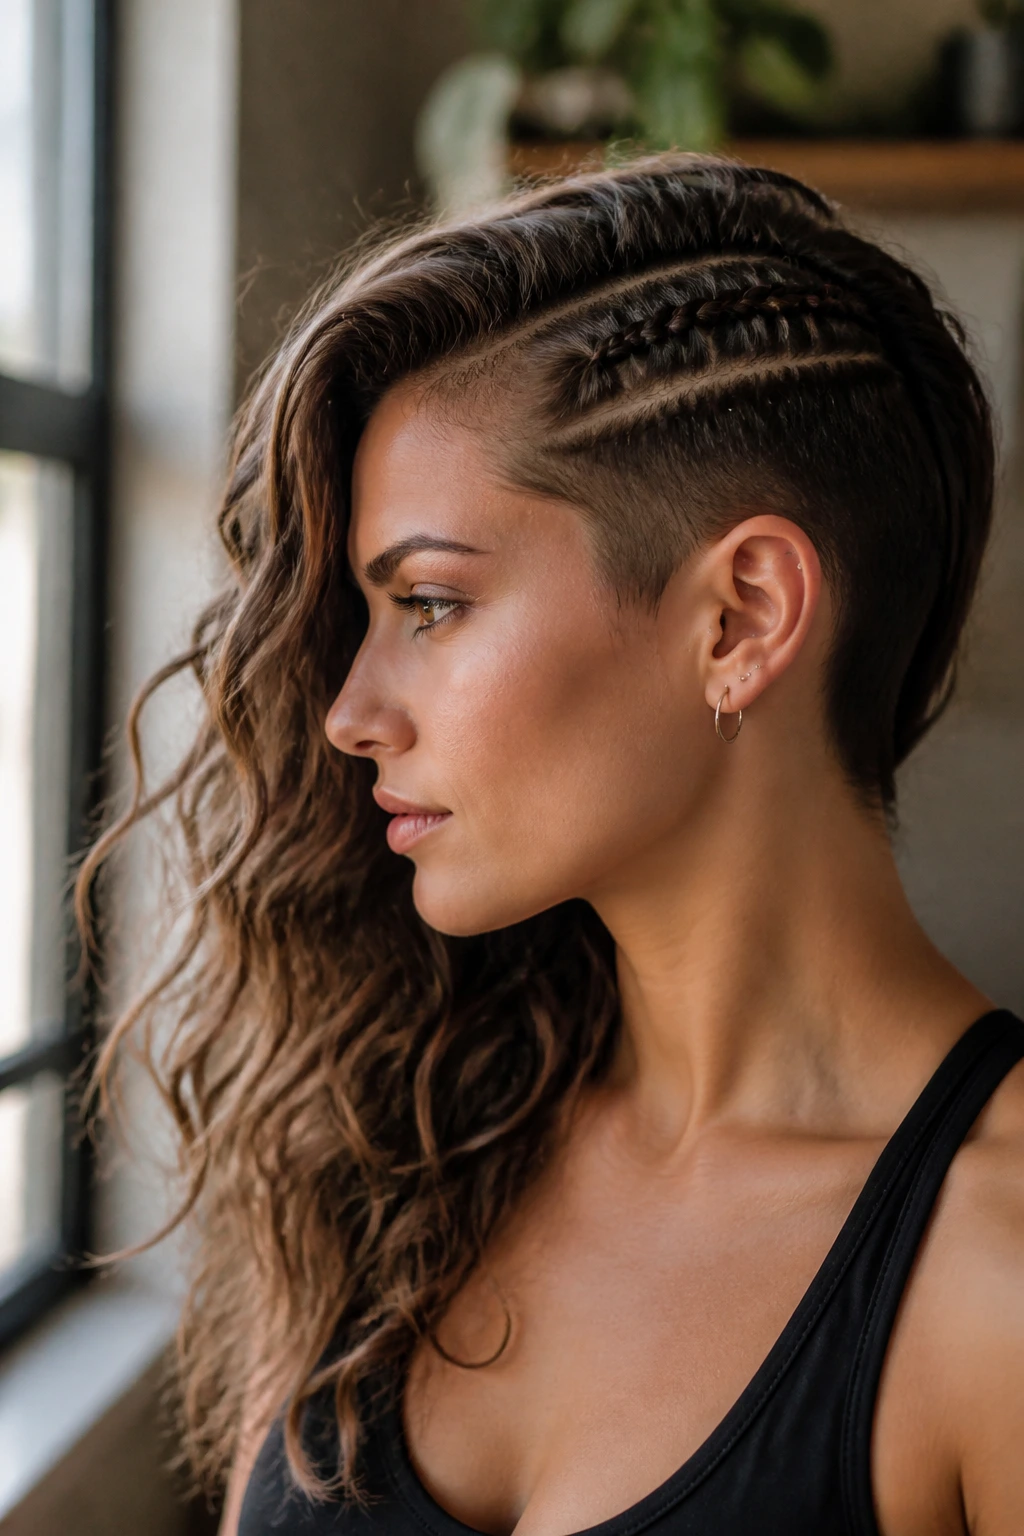
If you have a layered haircut, you can create the illusion of an undercut by braiding the hair tight against the scalp on one side of your head. It is a cool, asymmetric look that frames the face beautifully.
Precision is Key
This style requires the most tension of any on this list. You need to keep the braid tight against the scalp to get that sharp, contrasting look. If it is too loose, it will look messy rather than “cool.”
Pairing with Waves
Let the rest of your hair flow loose and wavy. The contrast between the tight, cornrow-style braid on one side and the loose, flowing waves on the other side is a dynamic, modern aesthetic that is very visually interesting.
20. The Double-Wrapped Braided Bun
Take two braids, wrap them around each other, and pin them into a bun. It creates a complex, braided texture that looks like an incredibly intricate piece of art.
Texture Control
On wavy hair, this is much easier to pin than on straight hair, as the waves provide natural grip. Use a few long, U-shaped hair pins rather than standard bobby pins to keep the bun secure without damaging the wave pattern.
The Aesthetic
This is an incredibly romantic, old-world style. It’s perfect for a formal wedding or a fancy dinner, especially if you pull a few soft waves loose around your temples to frame your face.
21. The Half-Back Braided Twist
Create two simple three-strand braids at your temples and twist them toward the back, pinning them together. It is a soft, gentle way to pull your hair back while keeping most of your length loose.
Simplicity Wins
This is the ultimate “five-minute style.” It requires almost no skill and looks significantly better than a simple hair tie ponytail because the braids add an intentional, decorative element.
Adding Volume
If you want this style to look more “done,” gently tug on the outer edges of the braids before pinning them. It will make the braid look wider and softer, which complements the loose, wavy hair perfectly.
Final Thoughts
Working with wavy hair is all about embracing the texture you were given. Instead of trying to force your hair into sleek, straight braids that will fight back the moment the air gets damp, choose styles that reward your natural volume. Whether you are leaning into a bohemian, loose braid or trying a tighter, more structured Mohawk-style plait, the most important thing is that you are working with the grit and volume that your waves provide.
The beauty of these styles is that they are meant to look slightly soft. If a few strands pop out, it only adds to the charm. Stop fighting the wave and start using it to your advantage. Your hair is naturally primed for these looks, and with a little practice, these braids will likely become the easiest, most reliable part of your daily routine.