Fine hair can be a blessing in many ways—it dries quickly, handles heat styling with minimal effort, and stays sleek without much coaxing. When Halloween rolls around, however, that same fineness often feels like a liability. You might worry that your hair lacks the “guts” to hold a structural updo or that an elaborate costume wig will simply slide right off your scalp. The trick to working with fine hair isn’t to force it into heavy, gravity-defying shapes; it’s to use its natural texture to your advantage. Fine hair is incredibly soft, which means you can create ethereal, ghostly, or vintage looks that feel light as air.
The biggest mistake people make is skipping the prep. If your hair is clean and silky, it is virtually impossible to keep a bobby pin in place. You need “grit.” Before attempting any of the styles here, spray your roots and mid-lengths with a texturizing spray or a light dry shampoo. This adds the friction necessary for bobby pins to actually grip the hair shaft rather than sliding out. Even a little bit of hair powder can change your entire styling experience, giving your hair enough body to look intentional rather than limp.
Keep your tools simple. You do not need industrial-strength hairspray that makes your hair feel like a helmet. Instead, rely on clear elastic bands, matte-finish bobby pins that match your hair color, and a teasing comb. These are the building blocks for every look that follows. You want styles that look effortless because, frankly, when you are balancing a costume and social plans, you do not have three hours to spend on a complex blowout. Let’s look at how to lean into your hair’s natural properties to create some festive, spooky, and surprisingly simple looks.
1. The Victorian Ghost Waves
This look is all about embracing the soft, wispy nature of fine hair. Because fine hair holds a wave surprisingly well when set correctly, you can achieve a hauntingly elegant silhouette without excessive weight. Start by applying a heat protectant and using a one-inch curling wand to create loose, irregular waves throughout your entire head.
The Secret to Soft Volume
The goal here is not tight, perfect ringlets; it is a brushed-out, ethereal texture. Once your hair has cooled completely, use a wide-tooth comb to gently break up the curls. Do not brush too aggressively, or you will lose the definition. Instead, rake your fingers through your hair to create a slightly disheveled, “risen from the grave” appearance.
Adding the Haunting Touch
- Keep your part centered or deeply side-swept for maximum drama.
- Use a light-hold dry texture spray to keep the waves from falling flat within the hour.
- Consider adding a lace veil or a small, antique-style hair comb to anchor the look. Pro tip: If your hair still feels too “smooth,” lightly backcomb the hair at the crown before you start curling. This creates a hidden cushion of volume that holds the waves in place all night.
2. Low-Maintenance Spiderweb Buns
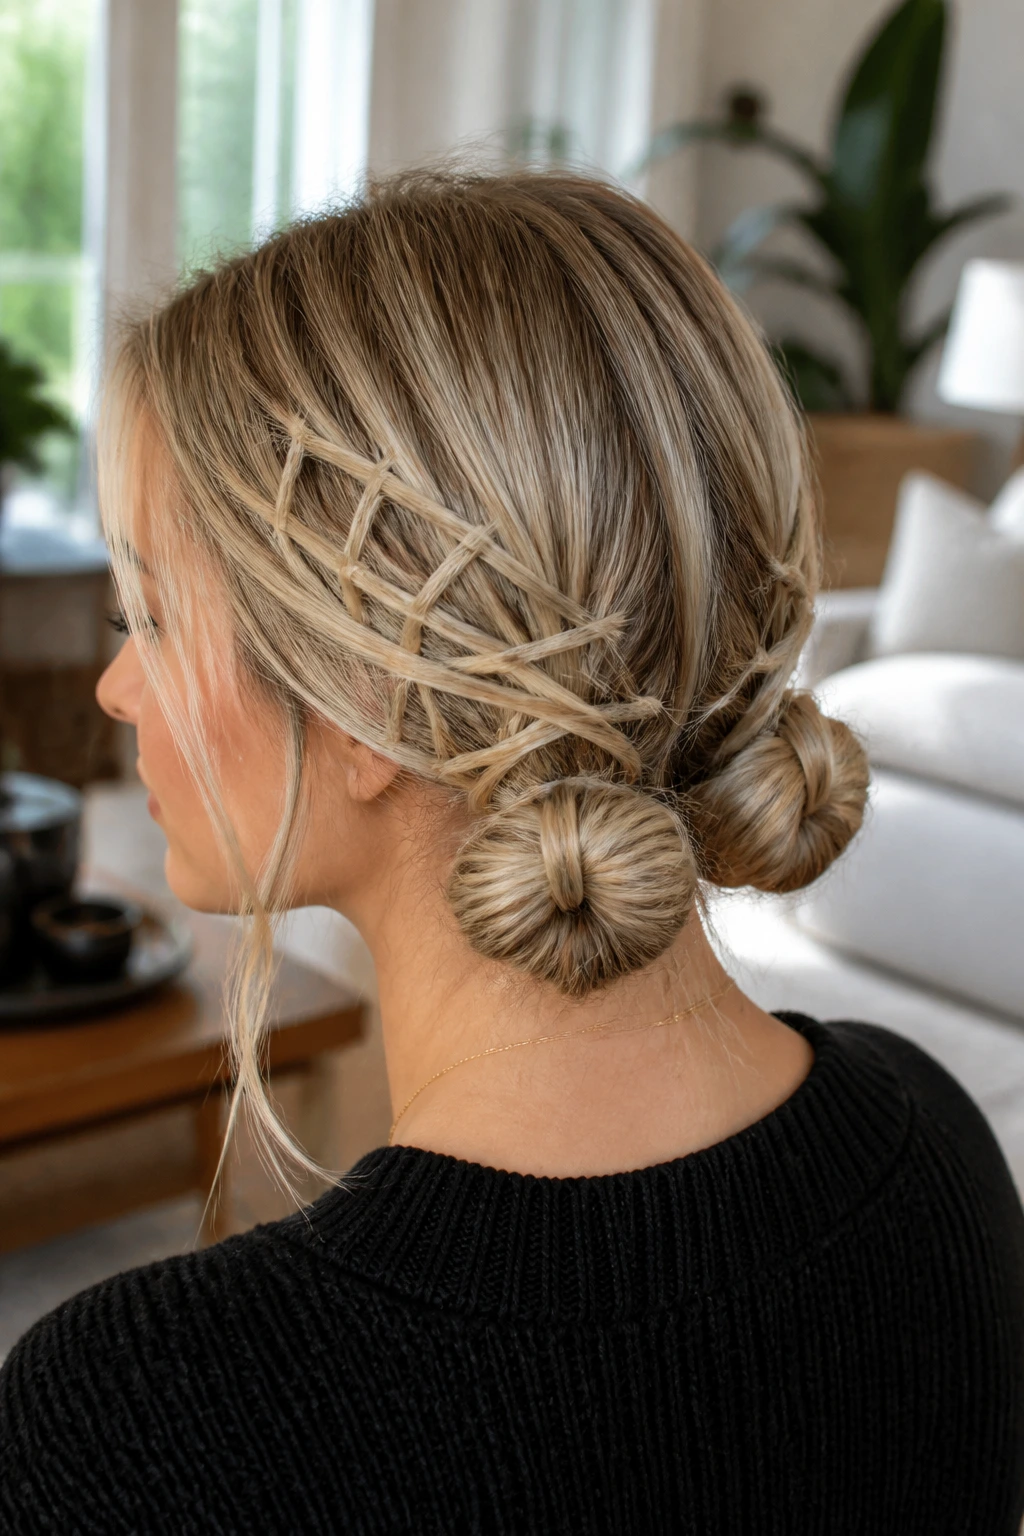
Spiderweb hair is a classic, but doing it with fine hair can be tricky if you try to use too many heavy clips. The best approach is to use the hair you have to create two small, messy buns at the nape of your neck. Fine hair creates beautiful, soft buns that look elegant rather than bulky.
Creating the Base
Part your hair down the center and gather two low sections. Secure each with a clear elastic, but leave a small loop so you have a “messy” bun look rather than a tight, ballerina knot. Pull a few wispy strands out around your face to soften the look, which will also prevent the style from looking too severe or sparse.
Weaving the Web
- Use small, white, or silver string to crisscross between the two buns to mimic a spiderweb.
- Stick to lightweight, plastic spider rings instead of heavy metal clips to avoid pulling on your hair.
- Secure the webs with tiny bobby pins that match your hair color. Remember: Fine hair breaks easily when pulled too tight, so keep the webbing loose and airy.
3. The Perfectly Imperfect Witchy Crown
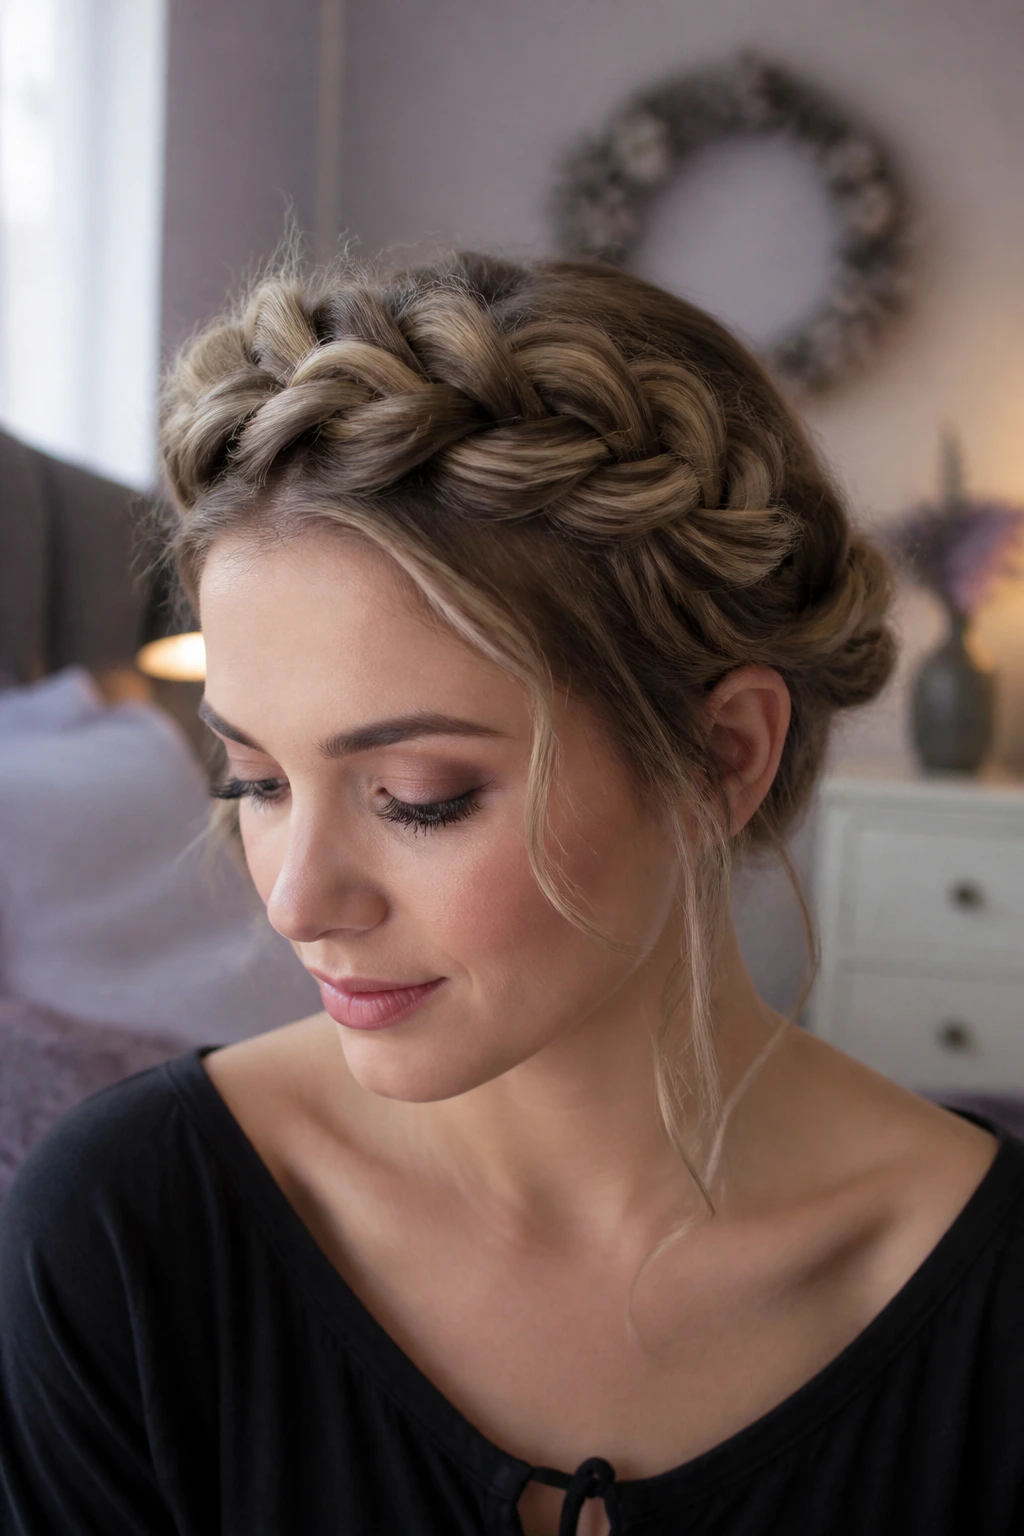
You might think a crown braid requires thick, luxurious hair, but the truth is that fine hair works beautifully for a “loose” crown. The secret is the “pancaking” technique. Once you have braided your hair, you gently pull at the loops of the braid to make them look wider and more voluminous.
Why This Works for Fine Hair
Because your hair isn’t overly thick, the braid will stay tight against your head, reducing the risk of it slipping down. Start with a French braid beginning at one temple and wrapping it around your head. If your hair is too short, use two separate braids that meet in the middle and pin them invisibly behind your ears.
How to Get the Look
- Prep with a volumizing mousse on damp hair before blow-drying.
- Braid tightly, then go back and “pancake” the braid from bottom to top.
- Secure with bobby pins that are pushed in toward the center of your head, not parallel to the braid. Pro tip: A few sprigs of dried lavender or mini faux-pumpkins tucked into the braid add a seasonal touch without weighing down the style.
4. Sleek Vampire Slick-Back

Sometimes, the best move for fine hair is to stop trying to add volume and go in the opposite direction. A slicked-back look is sharp, sophisticated, and perfectly suited for a vampire or dark-glamour costume. It takes advantage of the fact that your hair can easily look polished and shiny.
The Slicking Process
Use a small amount of styling pomade or a light-hold gel. Apply it to your palms and smooth it over your hairline and the top of your head. You want to bring all the hair away from your face and secure it behind your ears. Use a fine-tooth comb to ensure the lines are perfectly straight and clean.
Finishing the Look
- If you have a bit of length, keep the back loose and straight to contrast with the slicked top.
- This style is ideal for showing off elaborate ear cuffs or heavy earrings.
- A quick spritz of high-shine hairspray will give you that “supernatural” glow. Note: Be sure to wash this style out thoroughly the next day, as too much product can make fine hair look stringy if left to sit.
5. Messy Space Buns with Glitter Roots
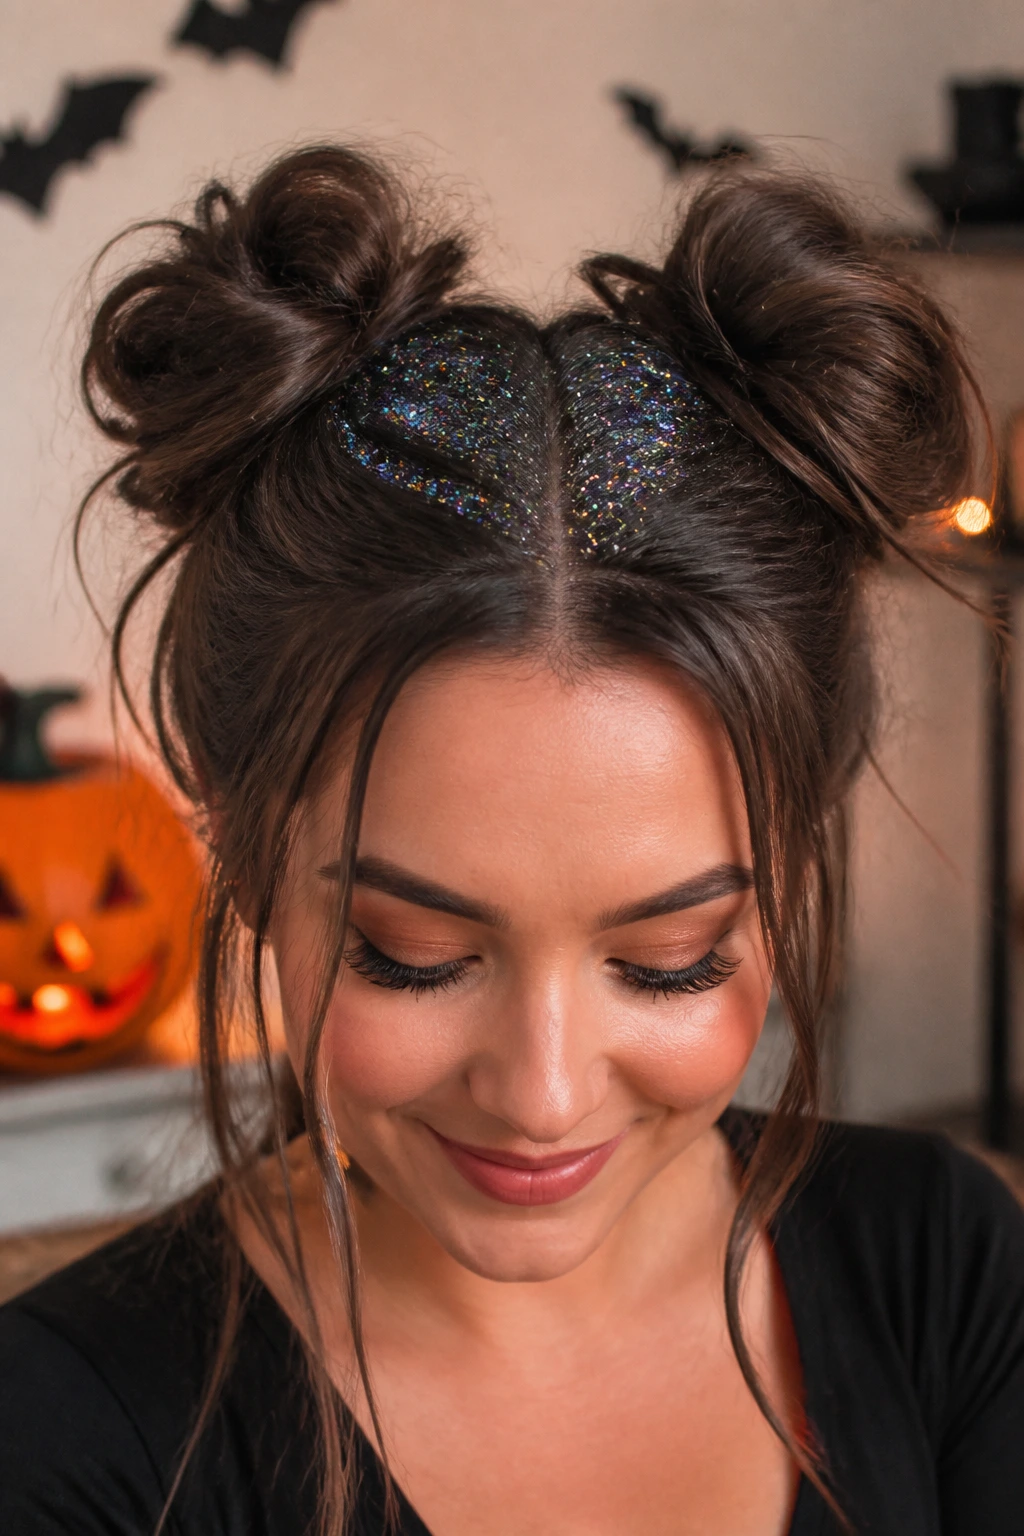
Space buns are a festive staple, and they happen to be much easier to execute when you don’t have massive amounts of hair to manage. The “messiness” of the buns actually helps fine hair look fuller. The addition of glitter at the roots covers any areas where your scalp might be visible, making the hair look denser.
Creating the Buns
Divide your hair into two high ponytails. Tease each ponytail before wrapping it into a bun. This adds the necessary surface area. Once the buns are secured with clear elastics, use your fingers to pull at the outer edges of the buns to give them a rounded, fluffy appearance.
Adding the Sparkle
- Mix a bit of hair gel with chunky cosmetic-grade glitter in a small bowl.
- Use a small paintbrush or a makeup sponge to dab the mixture onto your roots near the part.
- Choose iridescent colors like silver, lavender, or emerald to fit a space-witch theme. Caution: Always use biodegradable glitter to keep the celebration environmentally friendly.
6. The “Broken Doll” Half-Up
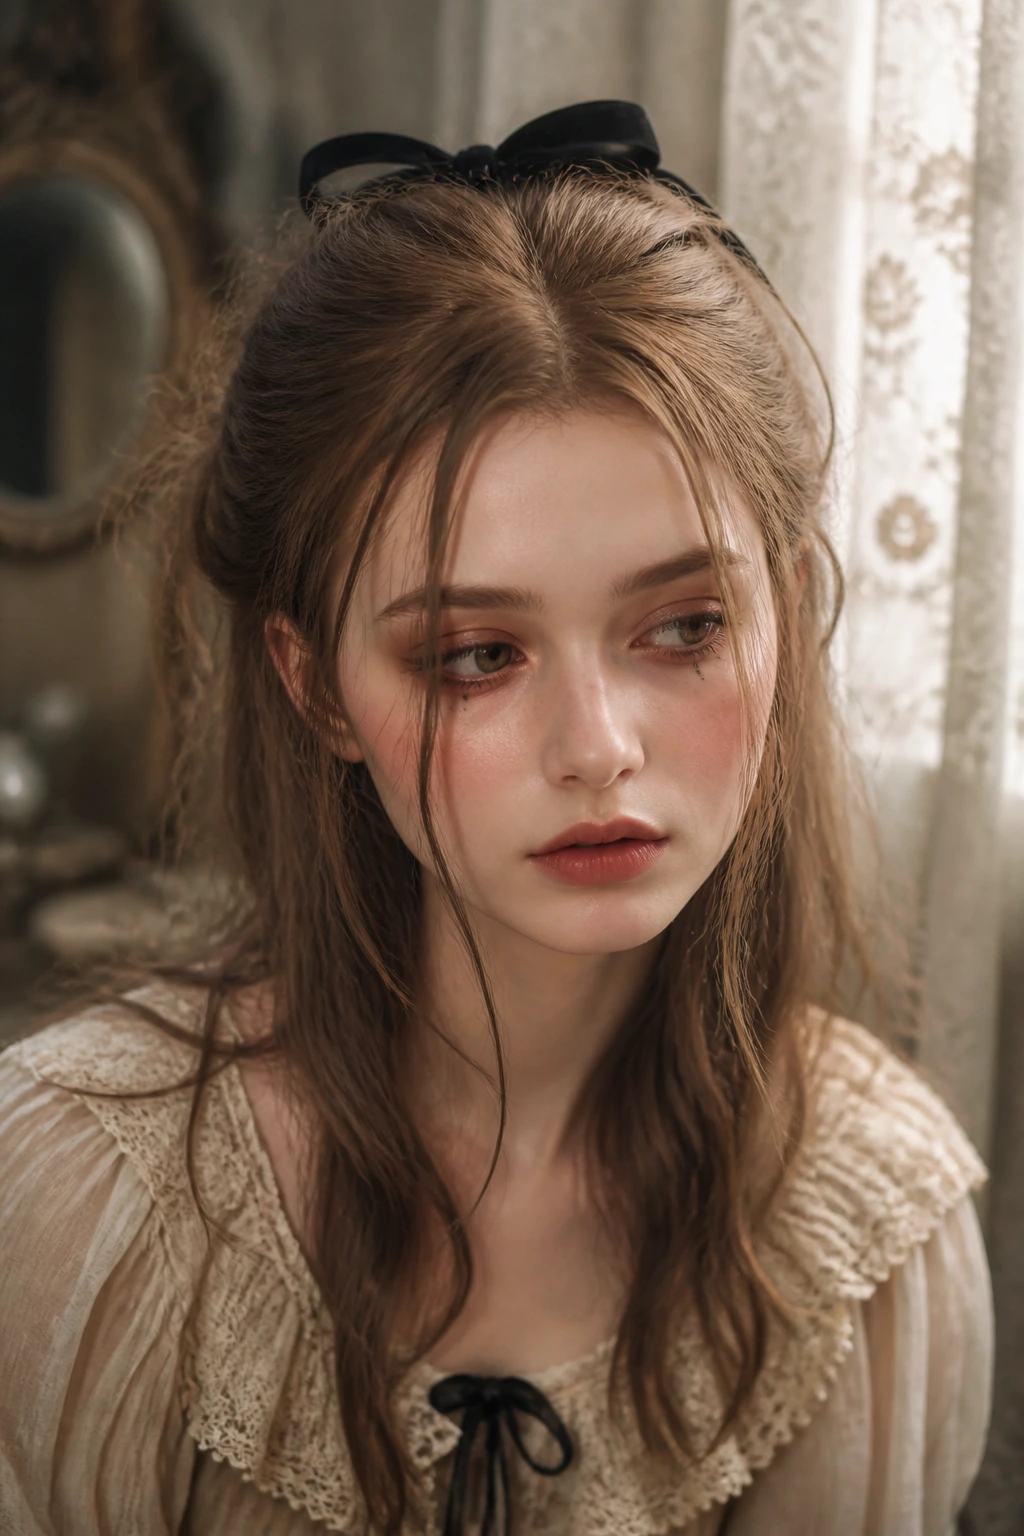
There is something inherently spooky about a Victorian or porcelain doll look. For this style, you want to focus on creating a half-up, half-down structure that allows for ribbons and lace. Fine hair is perfect for this because it doesn’t get weighed down by the accessories.
The Styling Technique
Use a curling iron to create soft, bendy waves, then pull the top half of your hair back into a small, delicate bow or a velvet ribbon. Don’t try to make it perfect. A slightly uneven, lopsided bow adds to that “slightly broken” doll aesthetic that looks intentional rather than messy.
Essential Accents
- Use a wide, satin ribbon to tie the half-up section together.
- Leave two thin strands out in the front to frame your face like doll ringlets.
- A dab of pale lipstick or a light dusting of white powder on the nose can complete the transformation.
7. The Faux-Bob
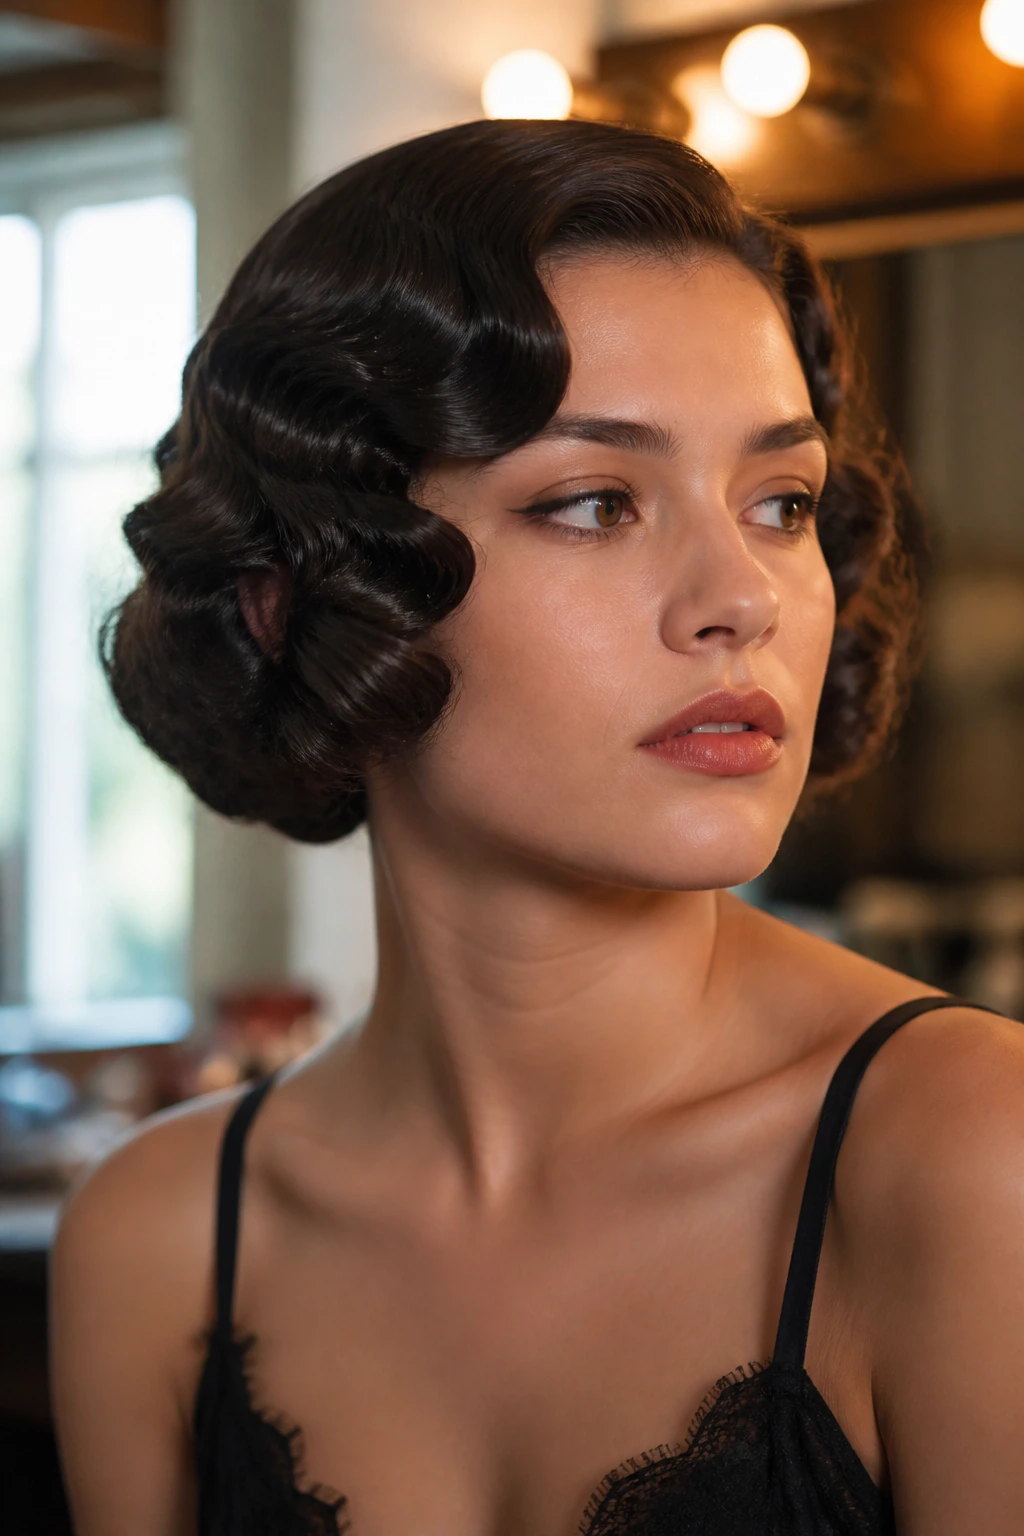
Do you want a shorter look without cutting your hair? The faux-bob is a classic, and because your hair is fine, it won’t be bulky when you tuck it under. This is ideal for 1920s flapper costumes or retro-noir looks.
Rolling the Hair
Start by curling your hair into tight, uniform waves. Gather the ends of your hair and tuck them under toward your nape, securing them with bobby pins. You aren’t rolling the hair tightly into a tube; you are folding the ends to create a shorter, rounded shape that sits just above the shoulders.
Making It Stay
- Use at least ten bobby pins hidden inside the tuck.
- Apply a generous amount of texture spray so the pins have something to grip.
- Pull a few soft pieces out around the face to make it look like a natural haircut.
8. Gothic Waterfall Braid
A waterfall braid is breathtakingly delicate, and it looks better on fine hair than almost any other hair type. Because the braid is woven through loose hair rather than being a tight, solid structure, it maintains an airy, light feel that won’t strain your scalp.
The Weave
Start a braid at your temple. As you cross the strands, drop the bottom strand and pick up a new piece from the top. It creates a cascading effect that looks like falling water. If your hair is too thin to hold this, keep the braid very loose and use a small dab of styling paste to keep the ends from flying away.
Styling the Cascade
- Curl the loose hair at the bottom of the waterfall so it blends into the rest of your hair.
- This style works best with a middle part.
- Add small, dark-colored beads to the braid for a mysterious, forest-dweller look.
9. The Spooky Headband Tuck
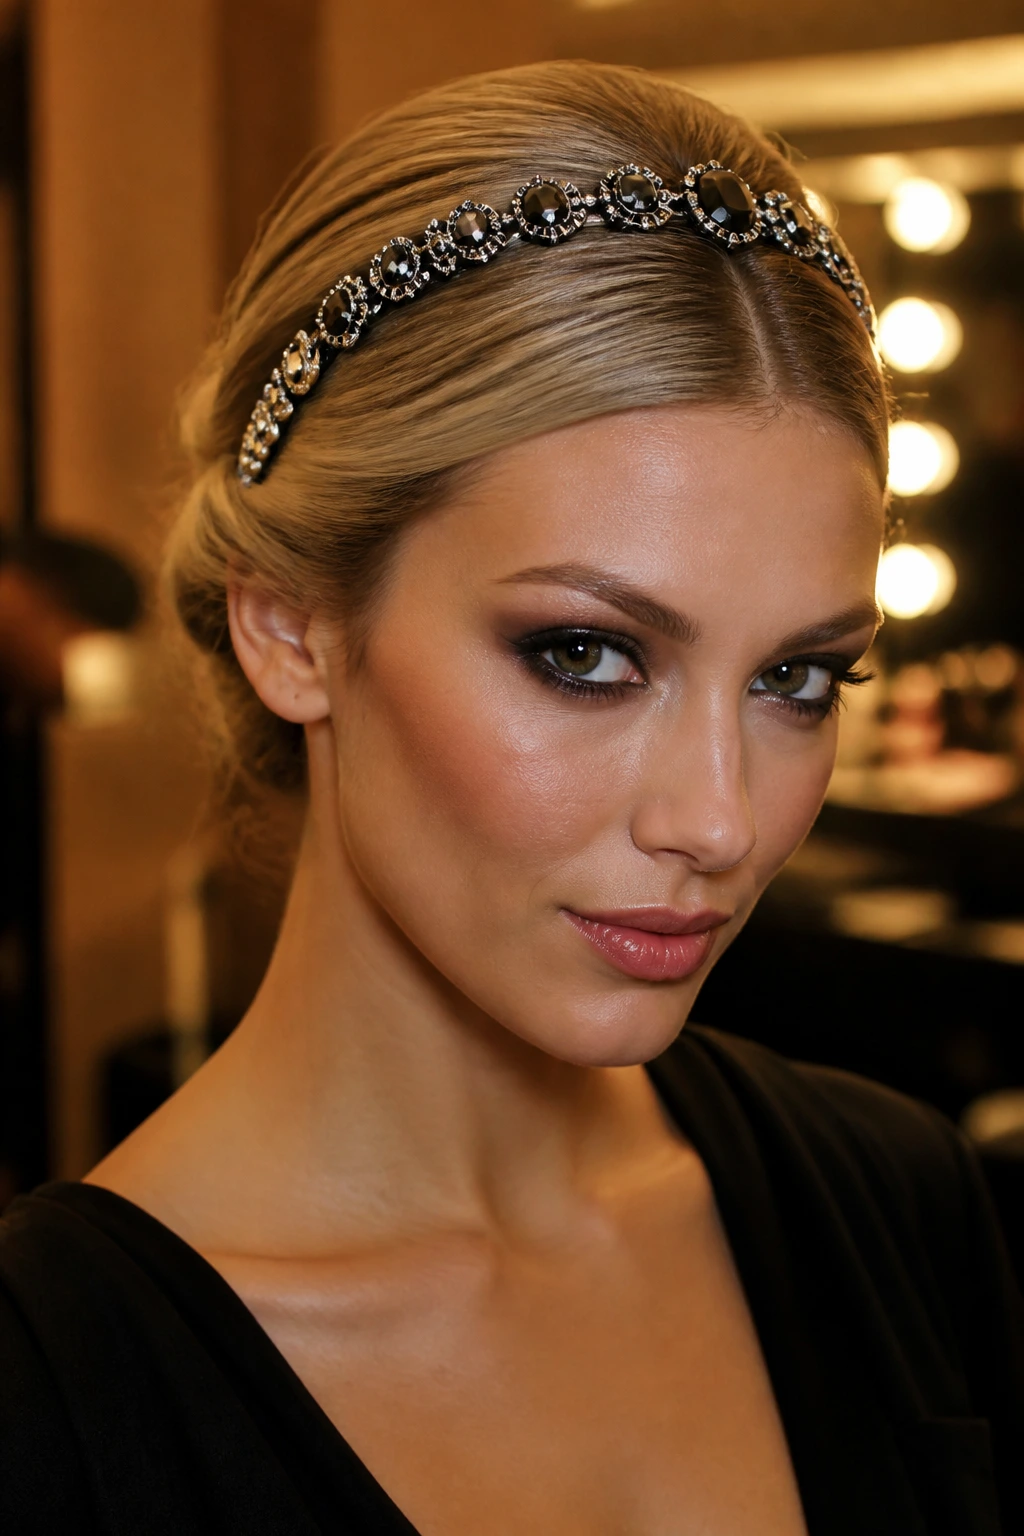
Sometimes the best hairstyle is the one that lets an accessory do the work. A metallic or jewel-encrusted headband is the perfect anchor for a “tucked” style. This gives the illusion of an intricate updo while essentially just being a headband and a few hidden pins.
Creating the Tuck
Put a decorative, elasticized headband on over your hair. Starting at the front, tuck small sections of hair up and over the headband, pulling them through from the bottom until they are hidden against the back of the band. Continue around your entire head.
Why It’s Perfect for Fine Hair
- The headband provides the structure that your hair might lack.
- Because your hair is fine, the “roll” around the headband stays flat and sleek.
- This is one of the most secure hairstyles possible for an active Halloween night.
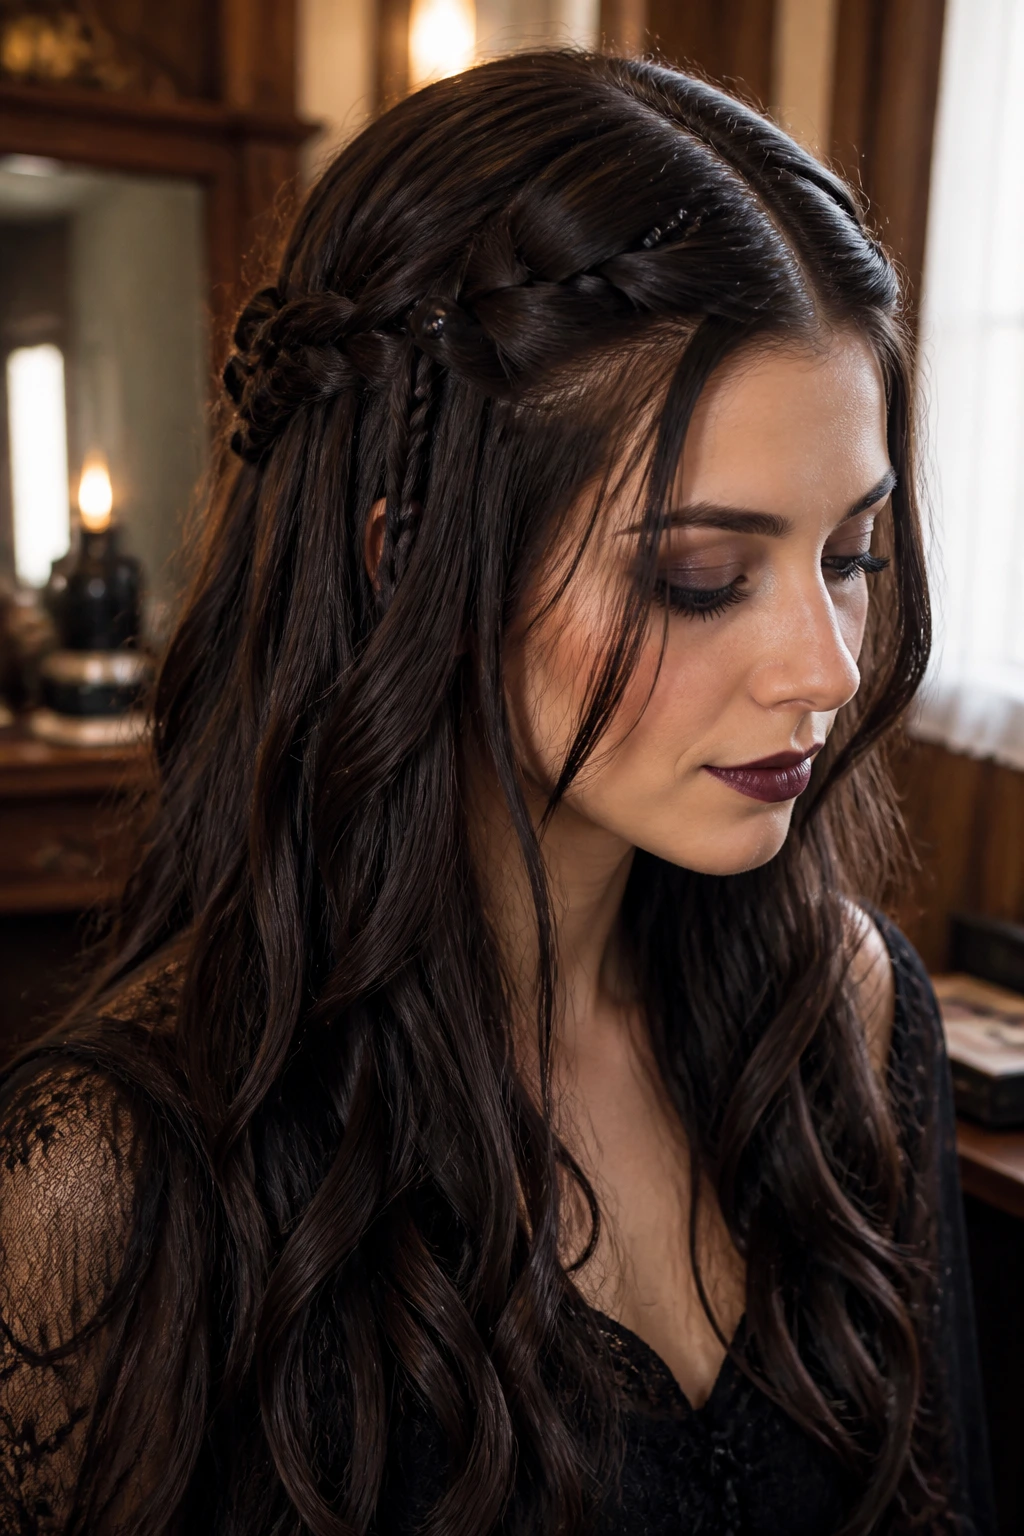
10. The Wispy Undead Braids
Think of this as the “undone” sister to the crown braid. You are essentially creating two loose, side-swept braids that look like they have been through a swamp or a long, restless sleep. Fine hair lends itself to this “wispy” texture naturally.
The Loose Braid Method
Do not tighten your braids as you go. In fact, pull the strands apart as soon as you finish the braid to make them look nearly translucent. Use a texturizing powder to prevent the braids from looking too “perfect” or stiff.
The Final Flourish
- Wrap the braids around each other loosely at the back for a messy, romantic effect.
- Pull out random, long strands around the temples to frame the face.
- Add some fake cobwebs or dead leaves for an authentic Halloween effect.
11. Minimalist Sleek Pony with Rings
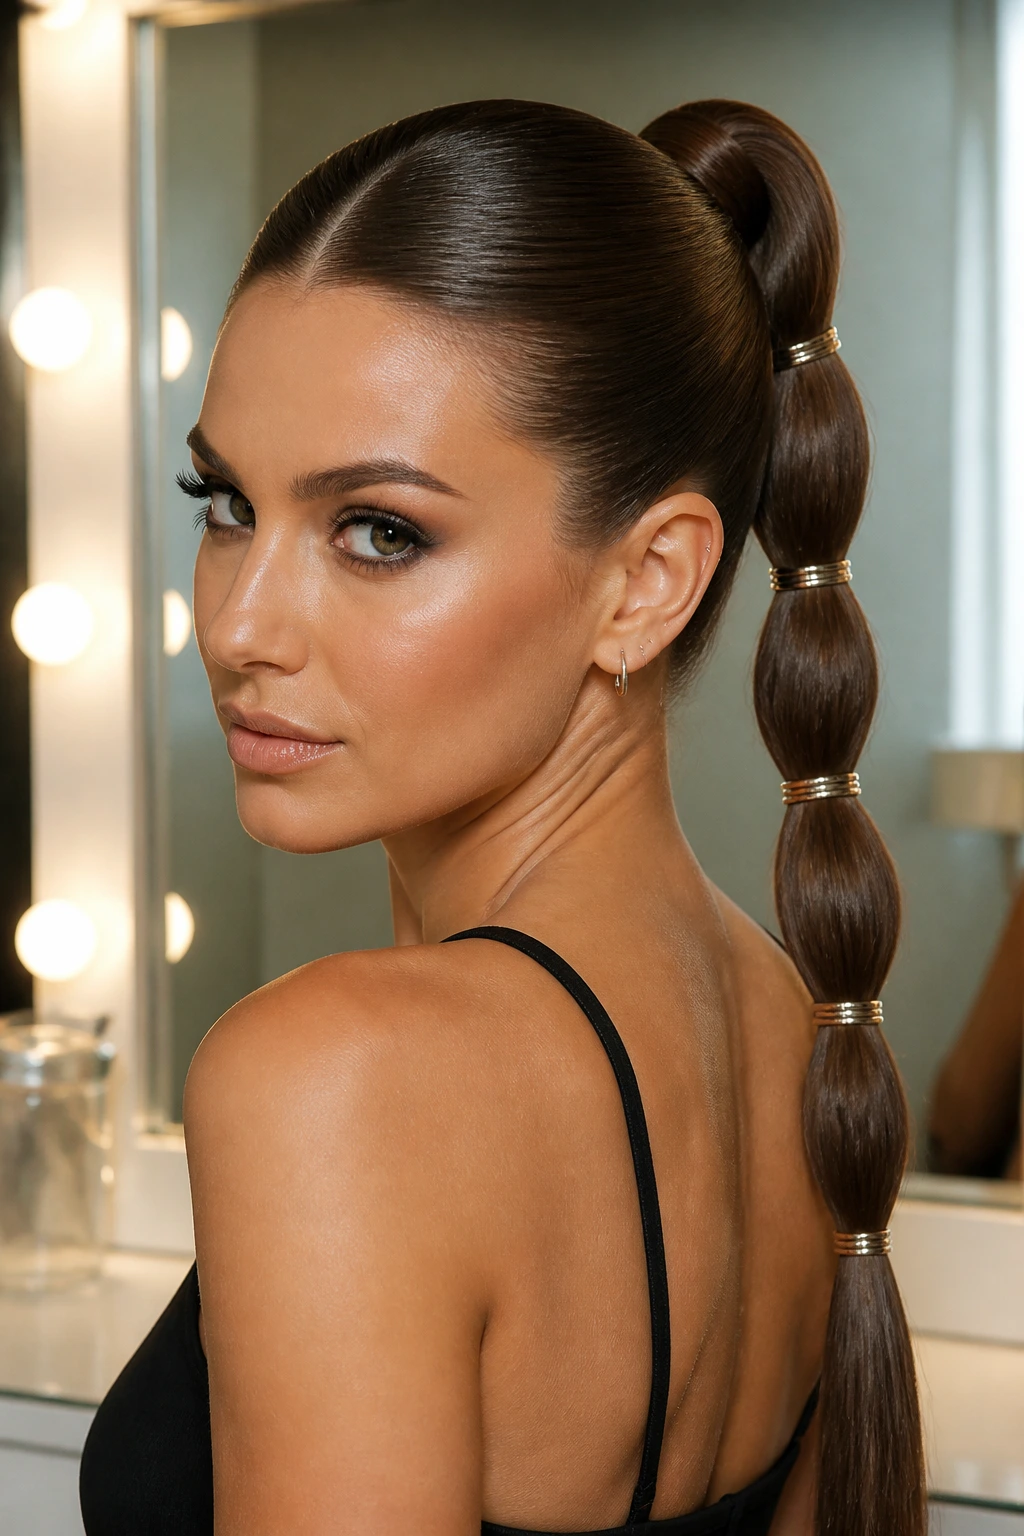
If your costume is bold, your hair should be clean. A high, sleek ponytail can be incredibly high-fashion. To make it work for fine hair, use a clear elastic to create a base, then wrap a tiny piece of hair around the elastic to hide it.
The Styling Detail
- Add small, gold, or silver hair rings (or even paperclips if you are in a pinch) along the length of the ponytail.
- Use a flat iron on the ends to ensure they are crisp and sharp.
- A center part with hair tucked behind the ears creates a very modern, sharp silhouette.
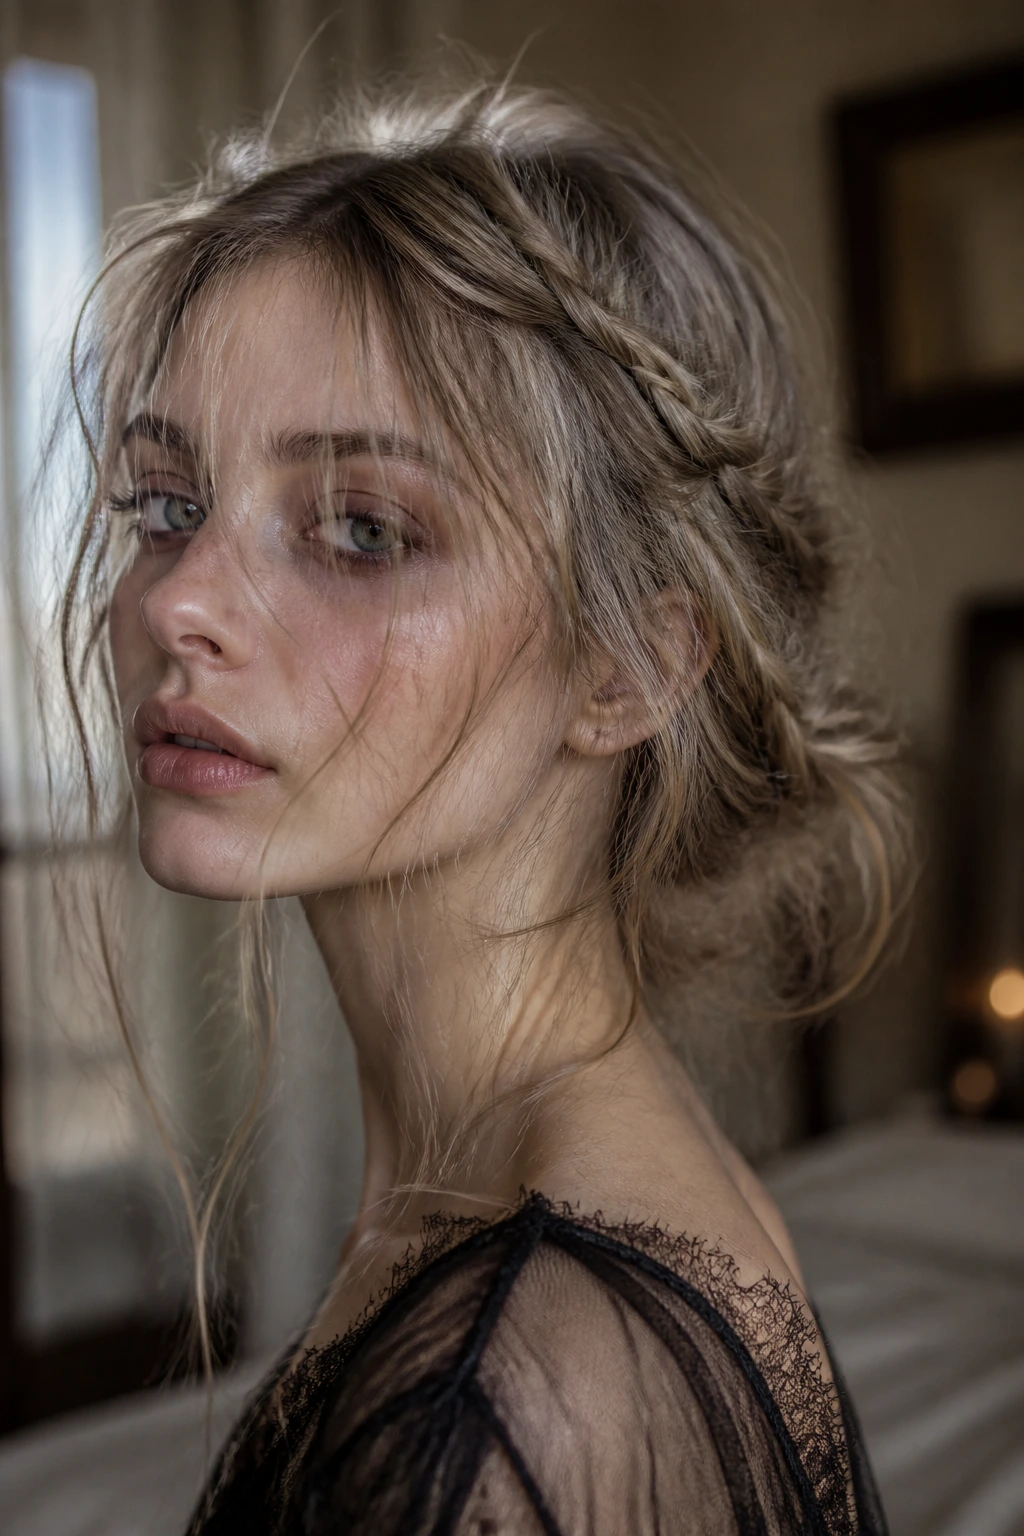
12. The Ethereal Fairy Tangle
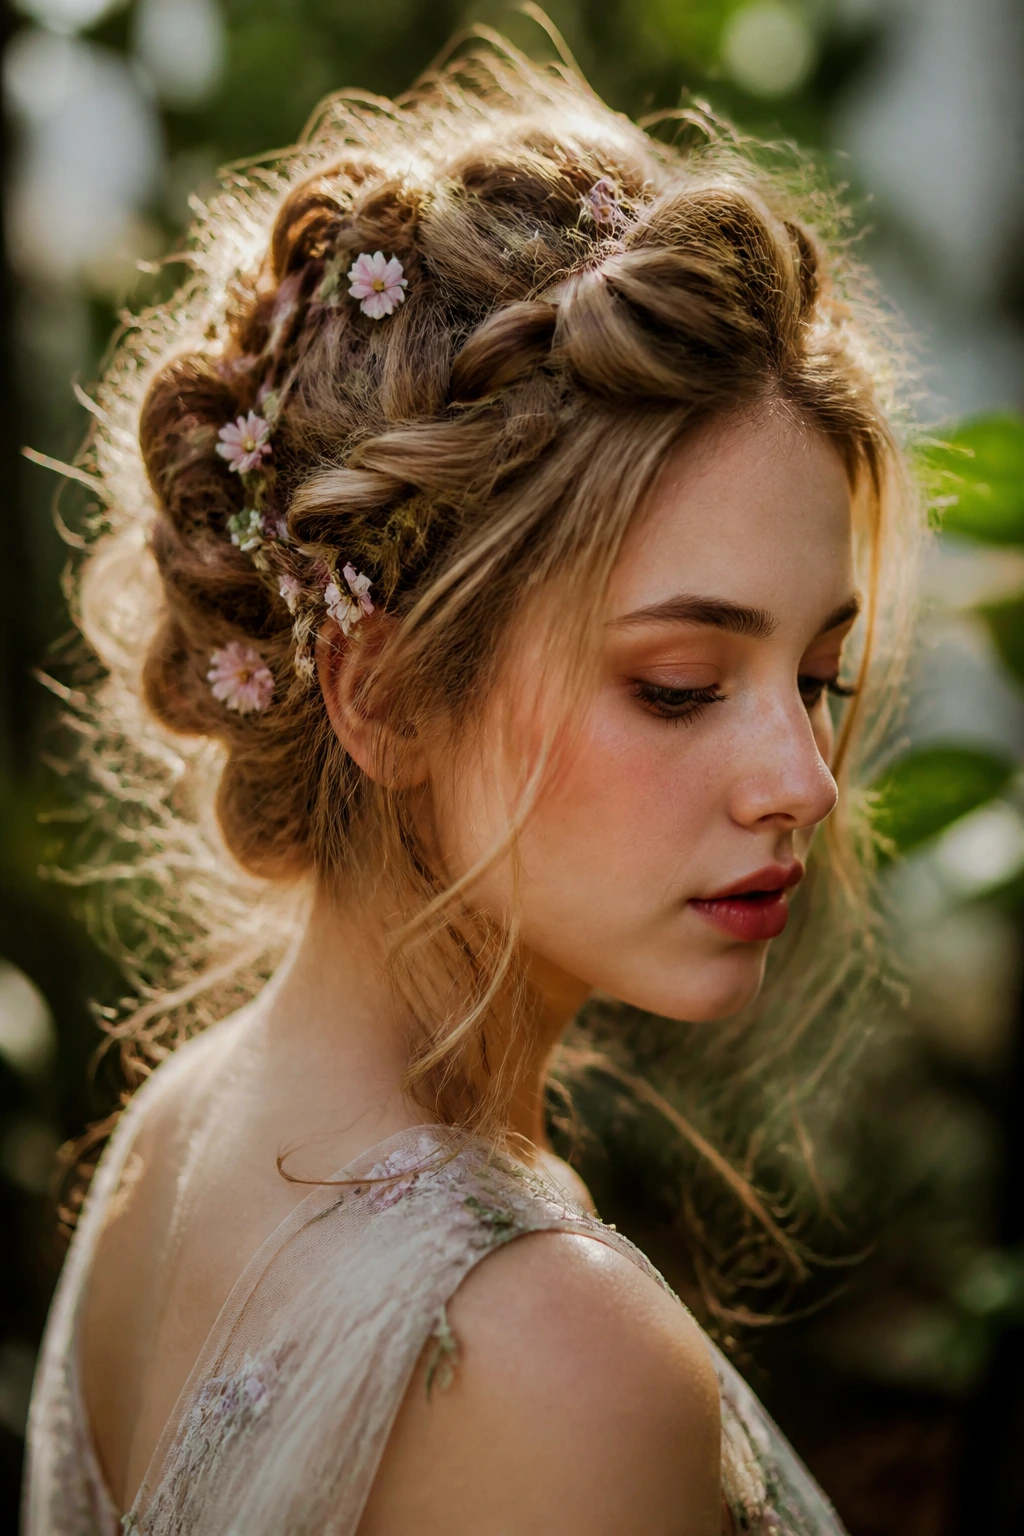
Fairy costumes often call for flowing hair, but fine hair can look thin if left completely loose. The solution is to create small, random knots and twists throughout the hair, secured with tiny, transparent elastics.
Creating the Illusion
- Take small sections of hair at random and twist them, then secure them with tiny, clear rubber bands.
- Do this all over your head to create a “forest fairy” look that is both intentional and slightly chaotic.
- Add small, silk flowers or faux-butterflies to the twists. Why it works: The twists add the volume and texture that your fine hair naturally lacks, making it look much fuller than it would otherwise.
13. The Retro Beehive
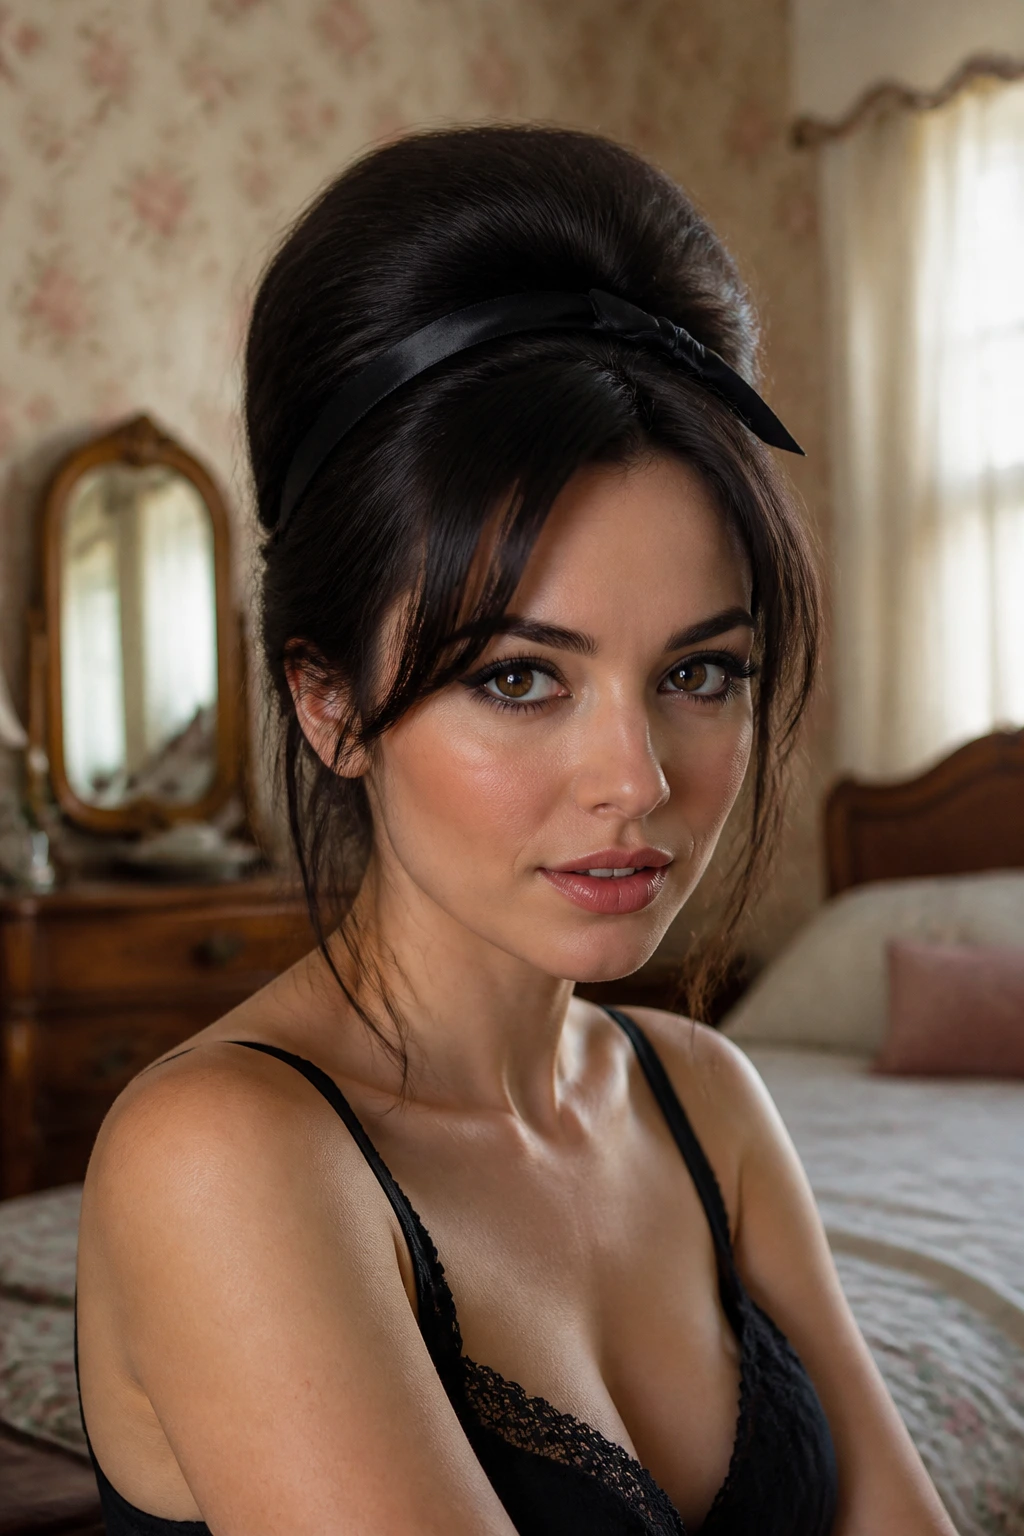
A beehive doesn’t need to be giant. A small, subtle lift at the crown can evoke a 1960s spooky glamour look without requiring an entire can of hairspray. You just need to create a hidden base of teased hair.
Building the Hive
- Tease the hair at the very top of your head, starting about two inches from the hairline.
- Smooth the top layer of hair over the tease and pin it back.
- This creates a soft, rounded silhouette that is the hallmark of the style. Pro tip: Finish with a thin black ribbon tied around the head to emphasize the shape.
14. Messy Top-Knot with Face-Framing Tendrils

Top-knots are the ultimate “I’m busy” hairstyle, but they can look a bit dull. For Halloween, make it a focal point by pulling out extra-long, thin strands to frame your face. If you have any baby hairs, let them fly loose to add to the “mad scientist” or “runaway ghost” vibe.
The Top-Knot Trick
- Use a donut-style hair accessory if your bun looks too small, but keep it lightweight.
- The key is in the tendrils: curl them slightly with a wand so they hang in soft, haunting ribbons.
15. The Braided Headband
Create a small, delicate braid starting from one ear and working toward the other, using it as a natural headband. This is a subtle, elegant look that works well for witches, forest creatures, or historical figures.
Ensuring It Stays
- Use a tiny bit of hair oil on your fingertips when braiding to keep flyaways at bay.
- Pin the end of the braid behind the opposite ear, hiding the ends under a layer of loose hair.
16. The “Scarecrow” Textured Pony

This style is all about volume, even if it feels counterintuitive for fine hair. By backcombing the ponytail rather than the roots, you create a “poofy” look that is perfect for a scarecrow costume.
The Volume Technique
- Once your hair is in a ponytail, take small sections of the ponytail itself and tease them firmly.
- This creates a wide, textured “shaggy” look that feels very rustic.
- Tie the ponytail with a piece of burlap string or a plaid fabric scrap.
17. The Twisted Greek Goddess
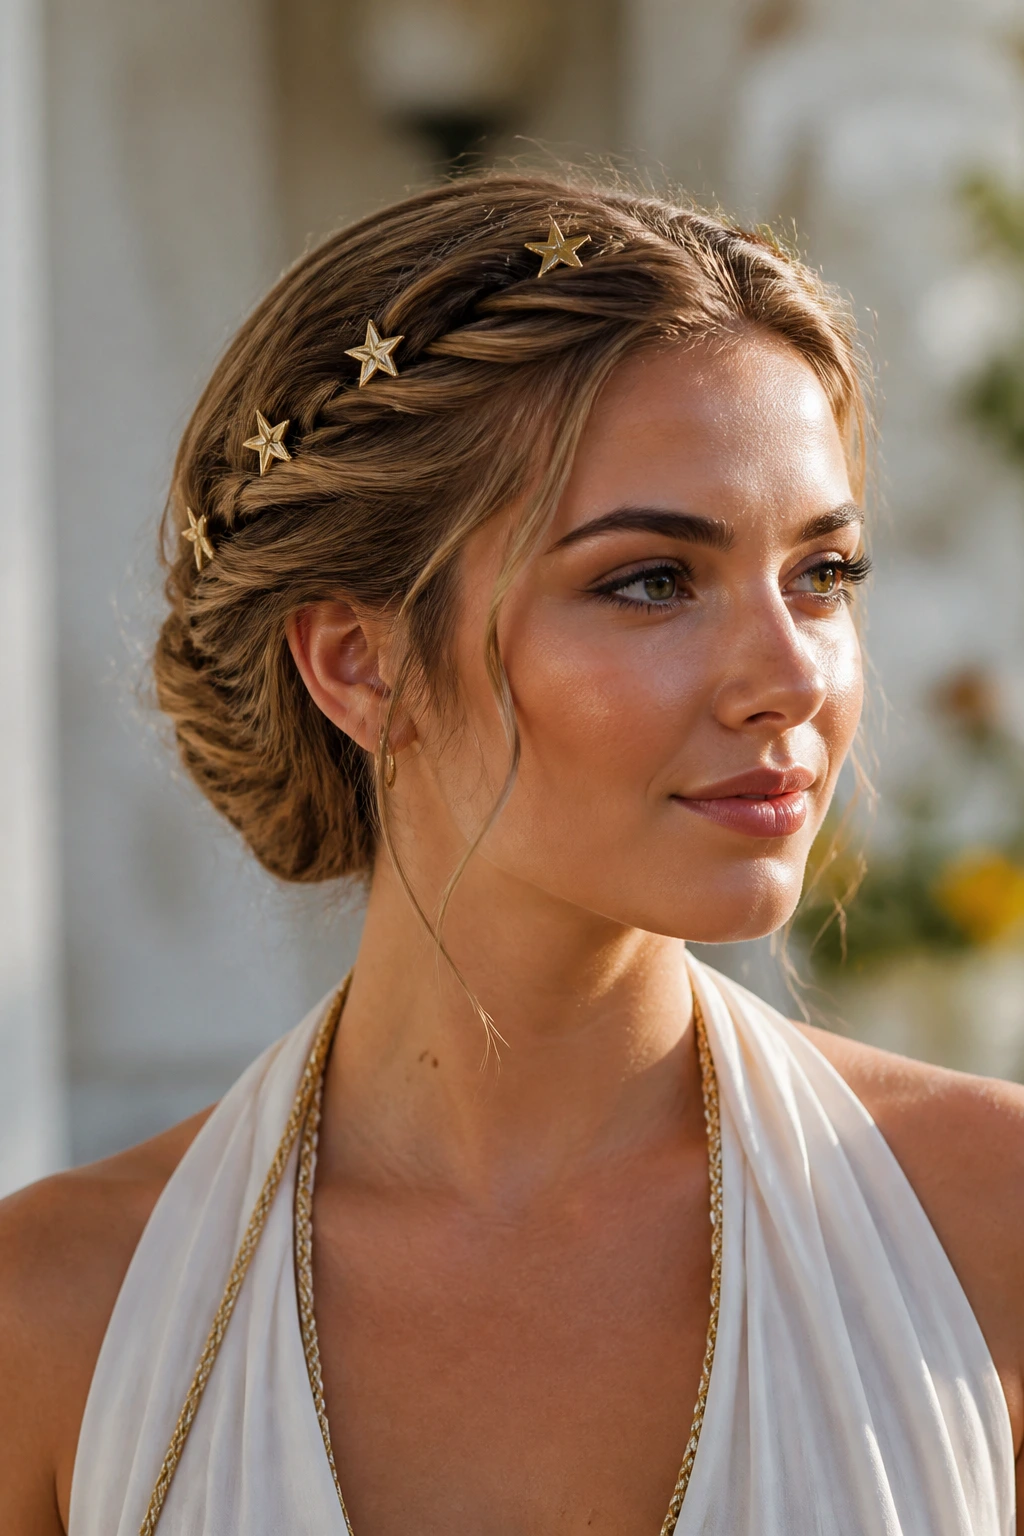
Twists are often easier to manage than braids for fine hair. Take two-inch sections of hair at the front and twist them back, pinning them as you go. Do this along the whole hairline for a soft, divine look.
The Goddess Finish
- Pin the twists into a loose chignon at the nape of the neck.
- Add small, star-shaped hairpins throughout the twists to look like a constellation.
- This works beautifully with a simple white or metallic dress.
18. The Gothic Side-Parted Tucks
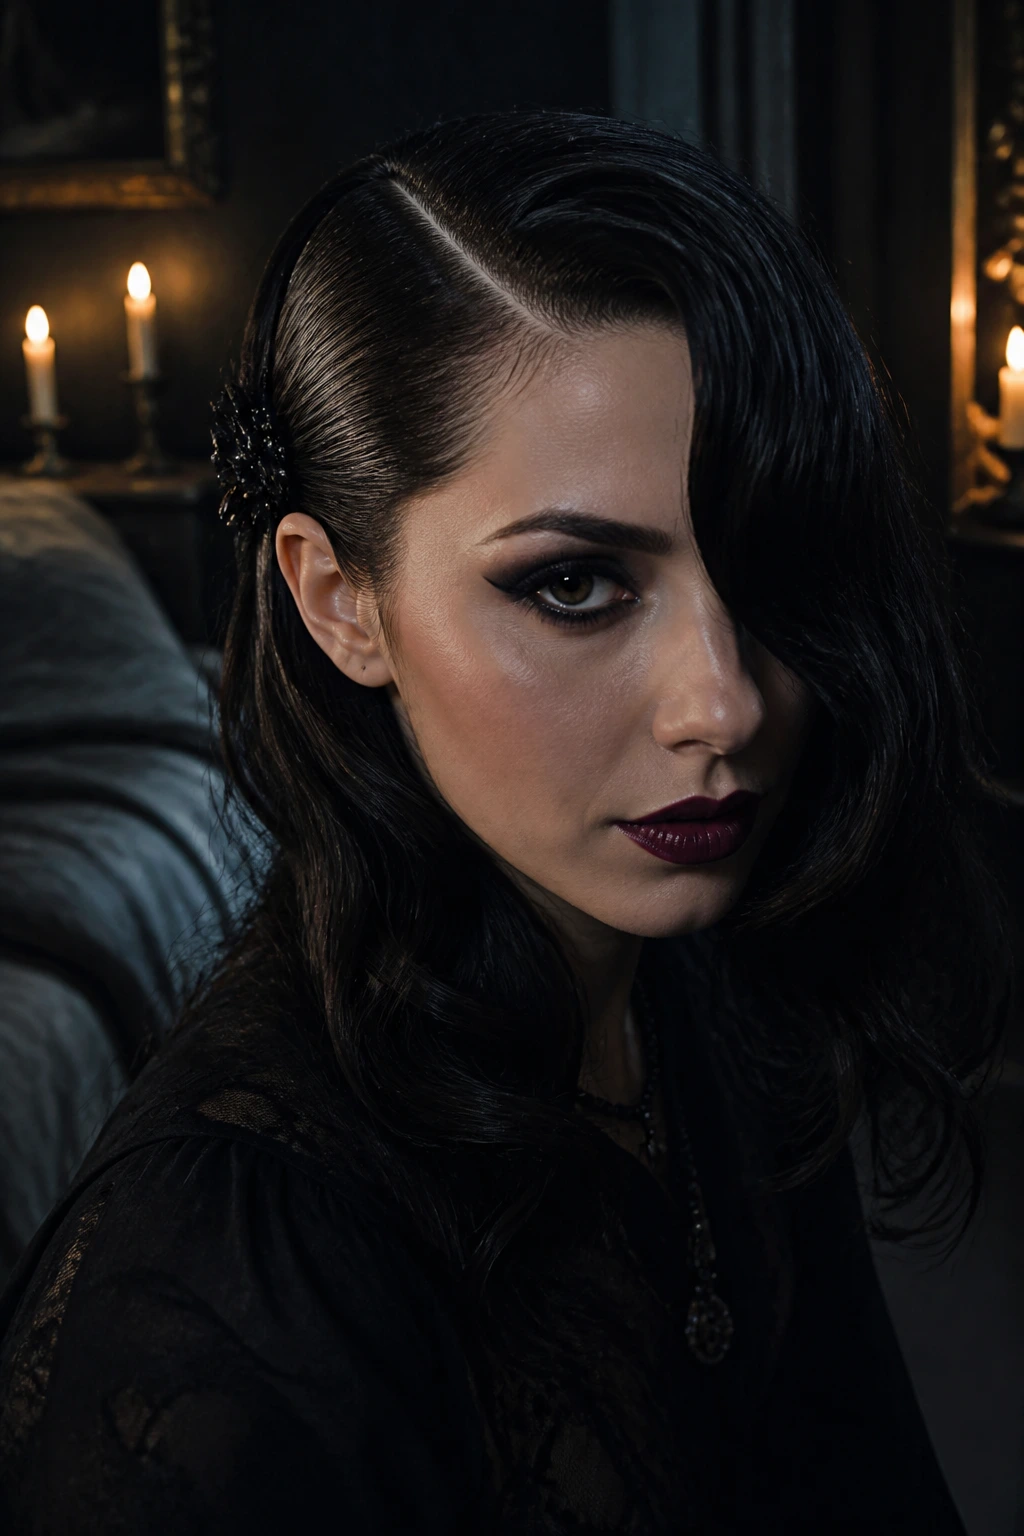
Sometimes, all you need is a dramatic part and a few pins. Move your part to the far extreme of your head and slick the hair back on the thinner side. On the thicker side, let the hair fall in a soft wave over your eye.
Styling the Drama
- Use a dark, bold hair clip—like a silver snake or a moon shape—to pin the hair behind your ear.
- It’s simple, striking, and incredibly easy to achieve on hair that doesn’t hold heavy weight.
19. The “Ghostly” Crimped Texture
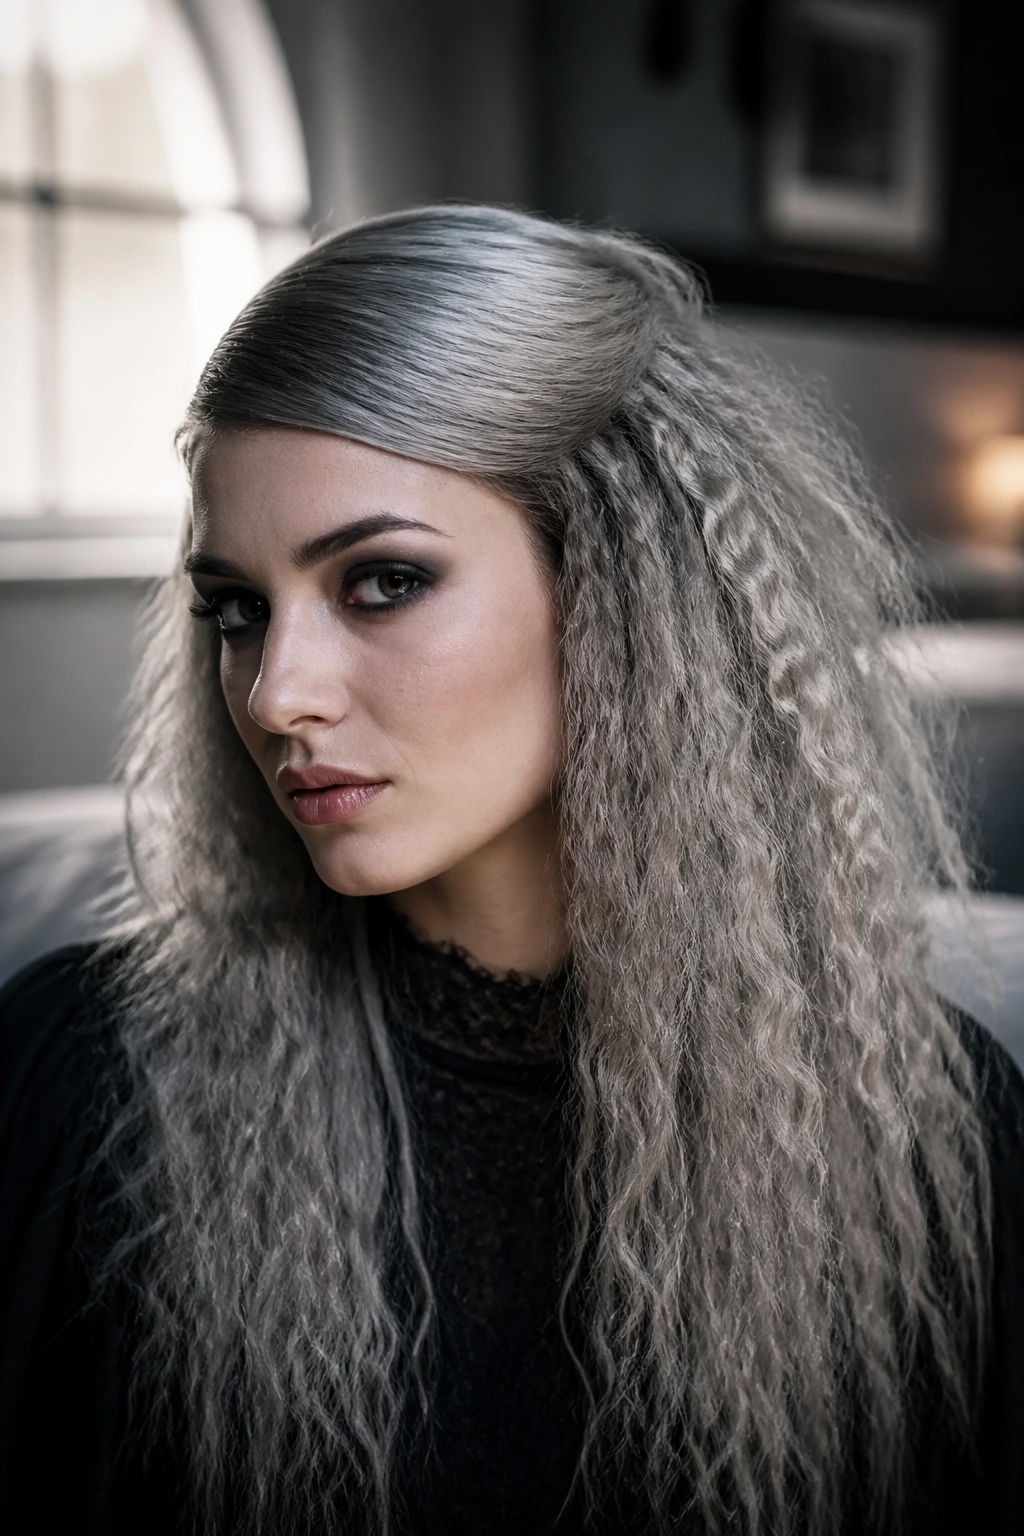
Crimping is back, and it’s a gift for fine hair. It adds instant, mechanical volume that lasts for days. Crimp your hair in small sections, then shake it out and brush it lightly to create a massive, wild texture.
Styling the Crimp
- Do not crimp the hair at the very top of your head; leave that layer smooth to act as a “lid” for the volume underneath.
- This style looks fantastic for wild animal costumes or “lost soul” vibes.
- Use a volumizing spray to hold the crimp shape.
20. The Double-Braided Mohawk
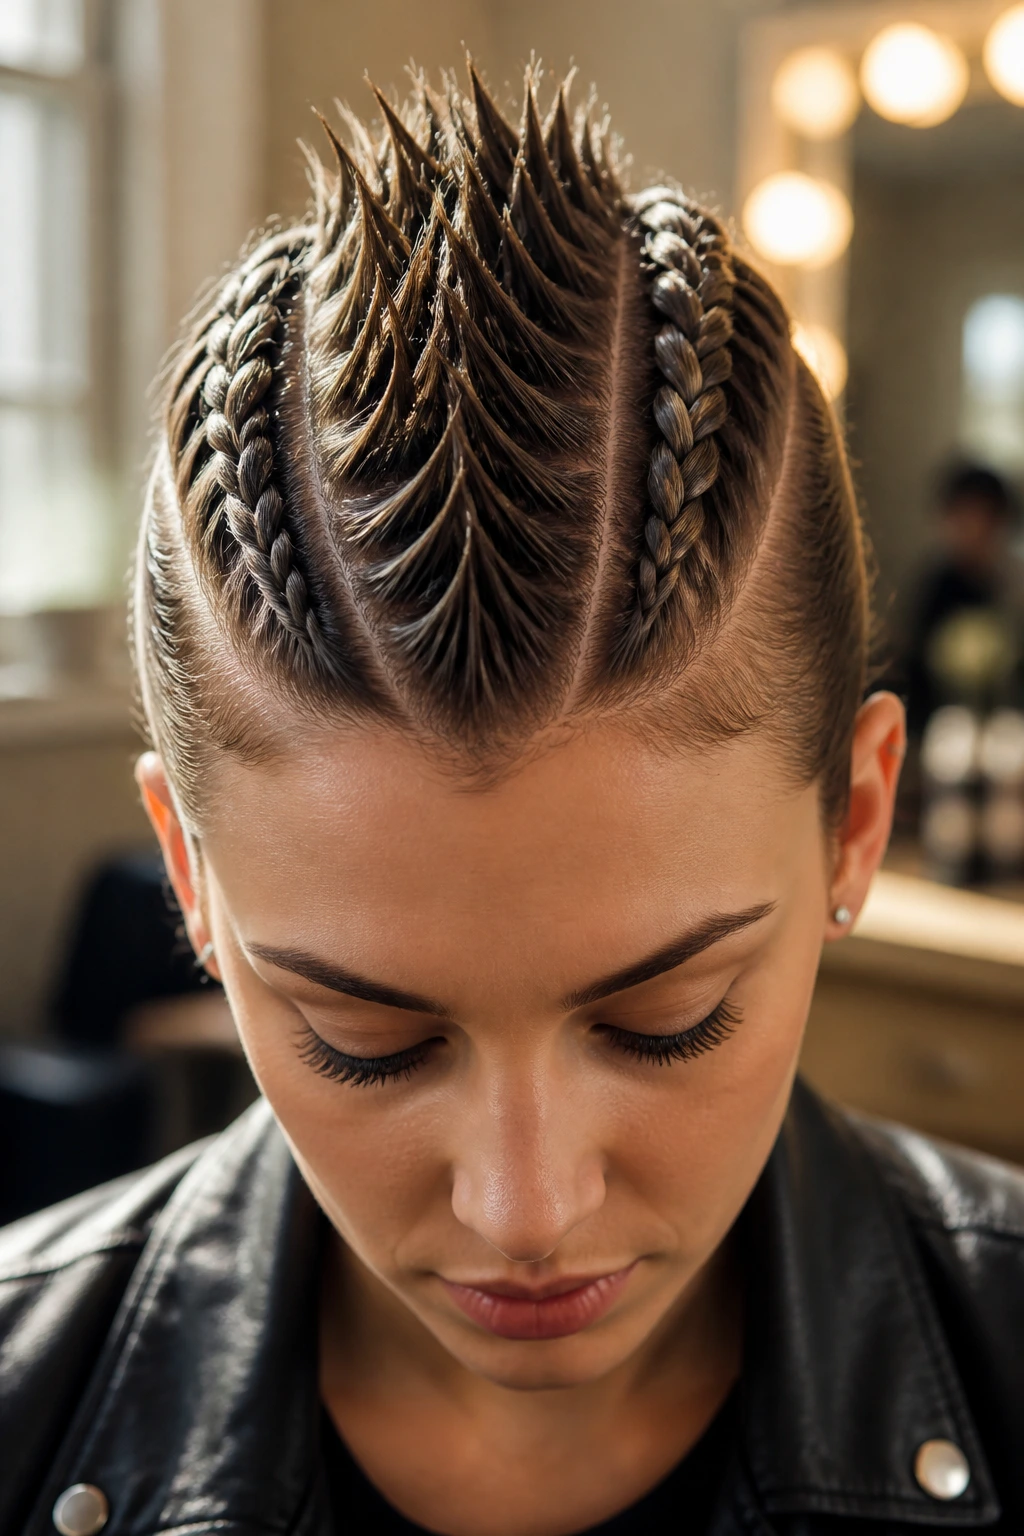
This is a “faux-hawk” achieved through braiding. Create two French braids leading from the front to the back, but leave a strip of hair in the center to be messy and spiked up.
Creating the Spike
- Use a strong-hold wax to pull the center hair into tiny, sharp points.
- The two braids on the side act as the “structure” that keeps the mohawk focused.
21. The Romantic Rose-Braid
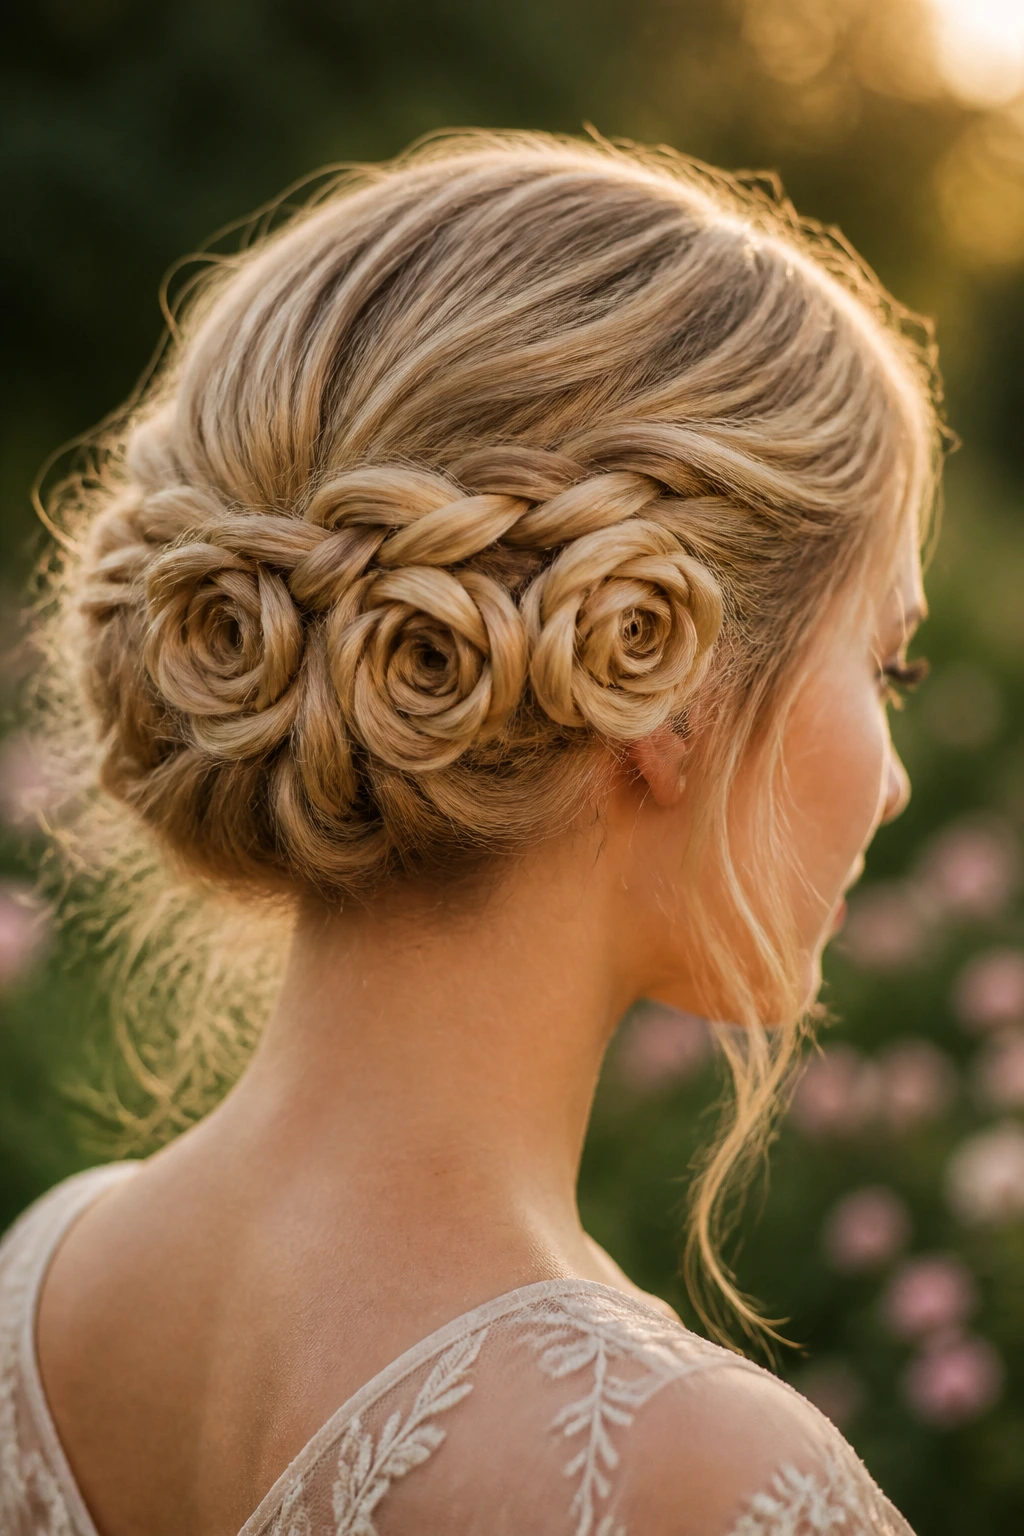
Take a section of hair, braid it, and then roll it into a small circle to resemble a rosebud. Pin it firmly against your head. These “roses” can be placed anywhere for a soft, ethereal Halloween look.
Adding the Details
- If you have three or four of these across the back of your head, it looks like a floral crown made of your own hair.
- This works surprisingly well with fine hair because the “roses” are light and won’t sag.
Final Thoughts
Fine hair is versatile because it lacks the weight that often complicates elaborate styles. Whether you are aiming for the sleek, sharp lines of a vampire or the messy, unkempt vibe of a forest spirit, your hair’s natural lightness is a strength. The biggest takeaway is to never fear texture. Sprays, powders, and a little bit of backcombing are your best friends in the world of costume hair.
Experimenting with your hair this month should be fun, not a chore. If a style doesn’t work the first time, simply brush it out, add a bit more texture spray, and try a slightly looser version. Remember that most “spooky” hairstyles are meant to look a bit worn, messy, or undone—so lean into the imperfections. Your fine hair can handle these looks beautifully, and you might find that the best costume accessory you have is the one already attached to your head.