Curly hair is a paradox. On one hand, it offers natural volume, texture, and a structural integrity that straight hair often lacks; on the other, it can feel like a unruly force of nature that demands total submission before you can even think about styling. Braiding curly hair is the ultimate equalizer. When you weave those tight coils and spirals into a structured braid, you aren’t just styling your hair—you are giving it a map. You are defining the shape and controlling the flyaways, turning chaotic texture into intentional design.
If you have spent your mornings wrestling with a detangling brush or wondering why your style looks great at the mirror but collapses by lunch, you are not alone. The secret isn’t more product; it is the right tension and the right technique. Braids work exceptionally well with curls because the texture provides the “grip” that other hair types have to fake with texturizing spray. You have a built-in advantage, provided you know how to work with the natural pattern of your hair instead of against it.
This resource explores the most effective ways to manage your curls through the art of braiding. We will move through styles that range from ten-minute morning savers to polished looks for events, all while keeping the health of your curls at the center of the process. Grab your favorite detangling cream, a handful of snag-free bands, and let’s get to work.
1. The Classic Three-Strand Side Braid
The side braid is the reliable workhorse of the curly world. It keeps your hair off your neck while showing off the definition of your curls at the ends. The trick here is to avoid pulling too tightly at the crown, which can cause tension and flatten the natural volume you worked so hard to maintain.
Why This Style Works
Because curly hair has so much built-in volume, a three-strand braid rarely looks thin or wispy. It naturally expands, giving you a thicker, more impressive braid than someone with pin-straight hair could achieve. You don’t need a volumizing powder; your hair is already doing the heavy lifting.
The Technique for Perfection
- Start with damp, well-moisturized hair.
- Gather your hair to one side, but leave two face-framing pieces out to soften the look.
- Braid loosely. If the braid looks too tight, go back and “pancake” it—pull gently on the outer loops of each stitch to create a wider, fuller appearance.
- Secure the end with a silk or satin scrunchie to prevent breakage on the fragile ends.
Pro tip: Apply a light layer of leave-in conditioner before you start. It provides the “slip” needed to braid without snapping your curls, and it keeps the hair hydrated until you take the style down at night.
2. The Halo Braid for Curly Volume
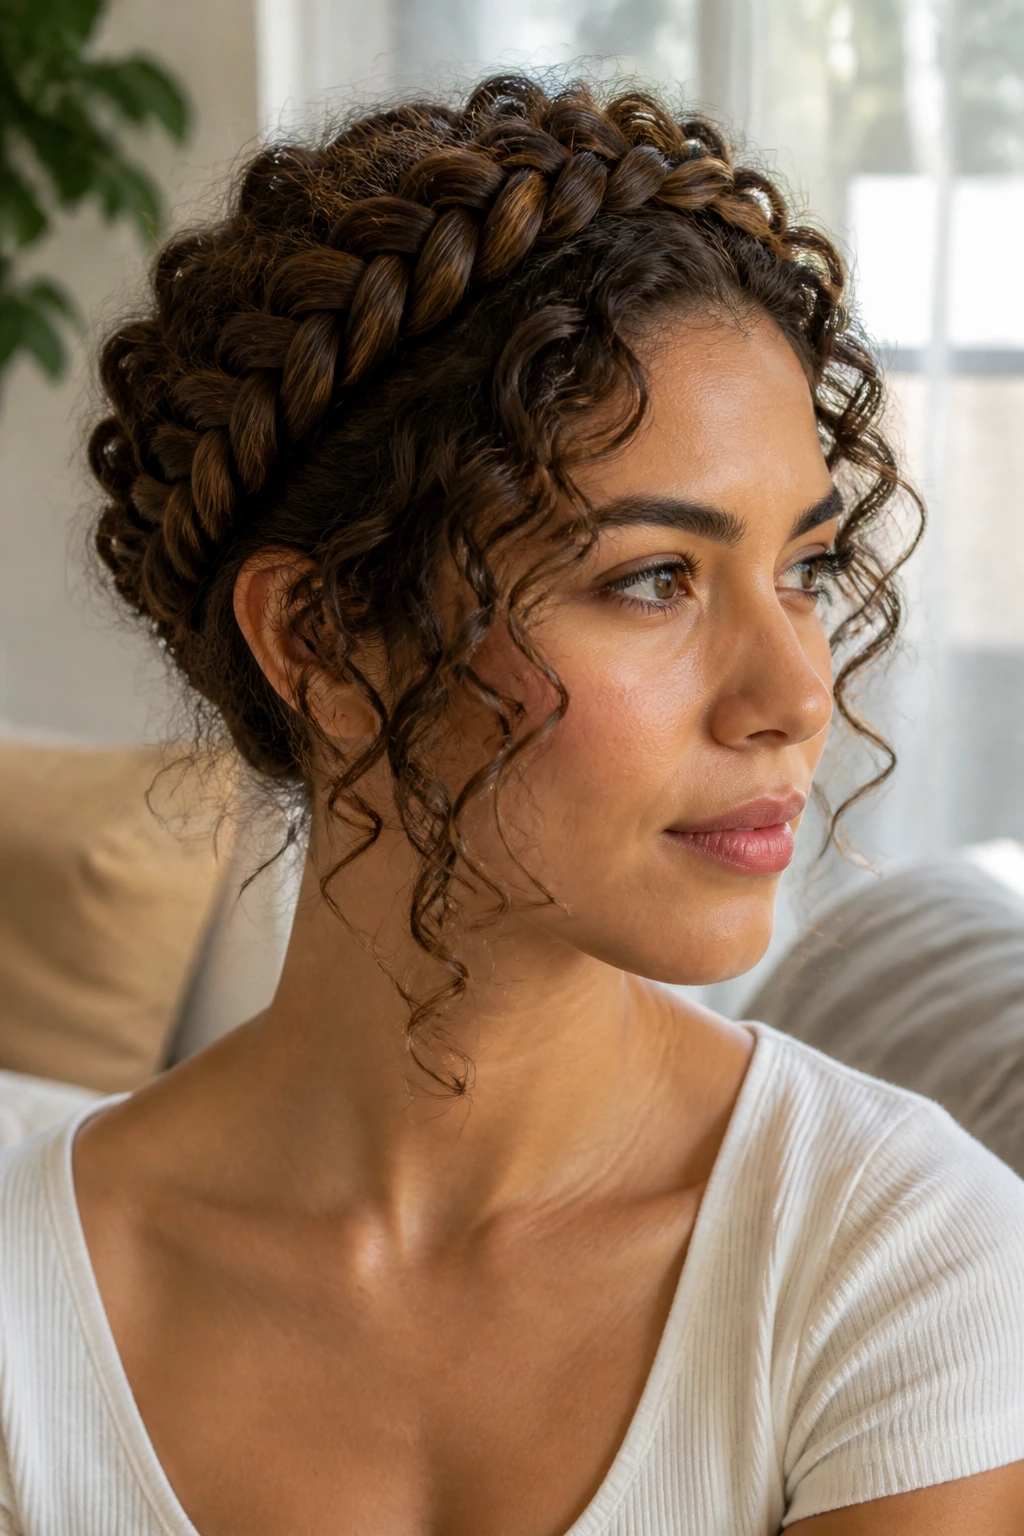
If you are looking for a style that feels regal but requires almost zero heat styling, the halo braid is your answer. It uses the density of your curls to create a soft, romantic frame around your face. It is essentially a Dutch braid that wraps entirely around the perimeter of your head.
Achieving the Crown Effect
The halo braid is deceptive. It looks like a complex weaving job, but it is actually a continuous Dutch braid. Start behind one ear, braiding along the hairline toward your forehead, and continue all the way around until you meet your starting point. Use bobby pins that match your hair color to tuck the tail of the braid into the base, effectively hiding the end of the weave.
How to Style It
For a more modern, relaxed vibe, pull out small tendrils around your temples. If your hair is particularly long, you might need a second braid to wrap the full circumference. Don’t worry about perfection; the halo style is supposed to look a bit ethereal and “lived-in.” A few loose strands are not a mistake—they are part of the aesthetic.
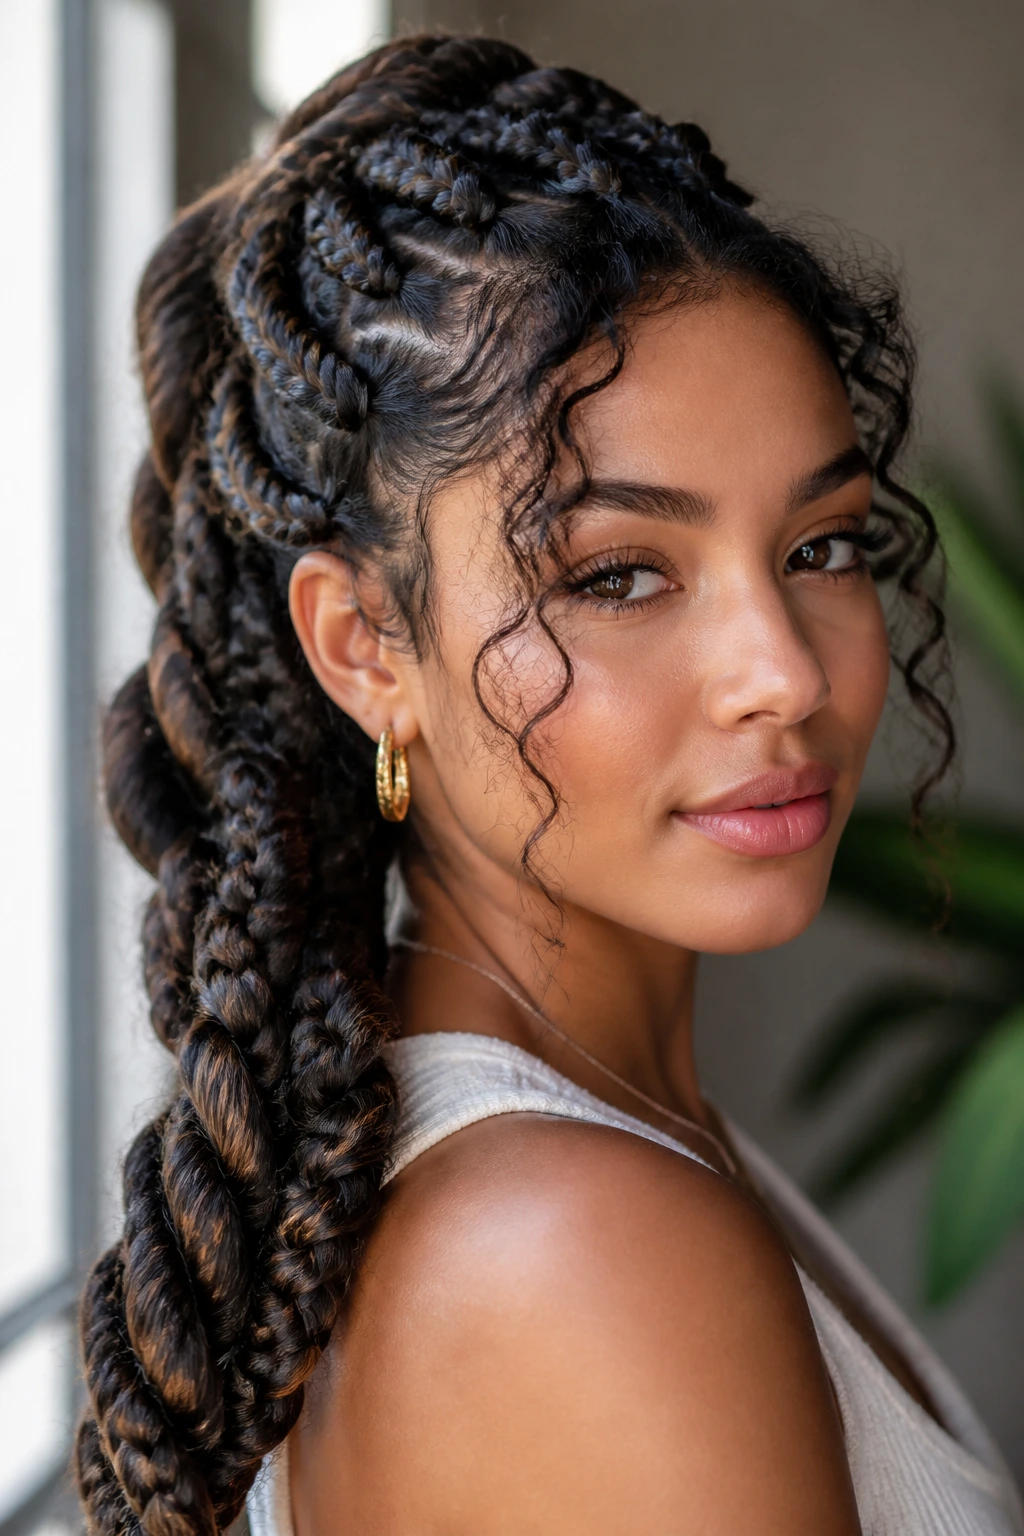
3. Double Dutch Braids
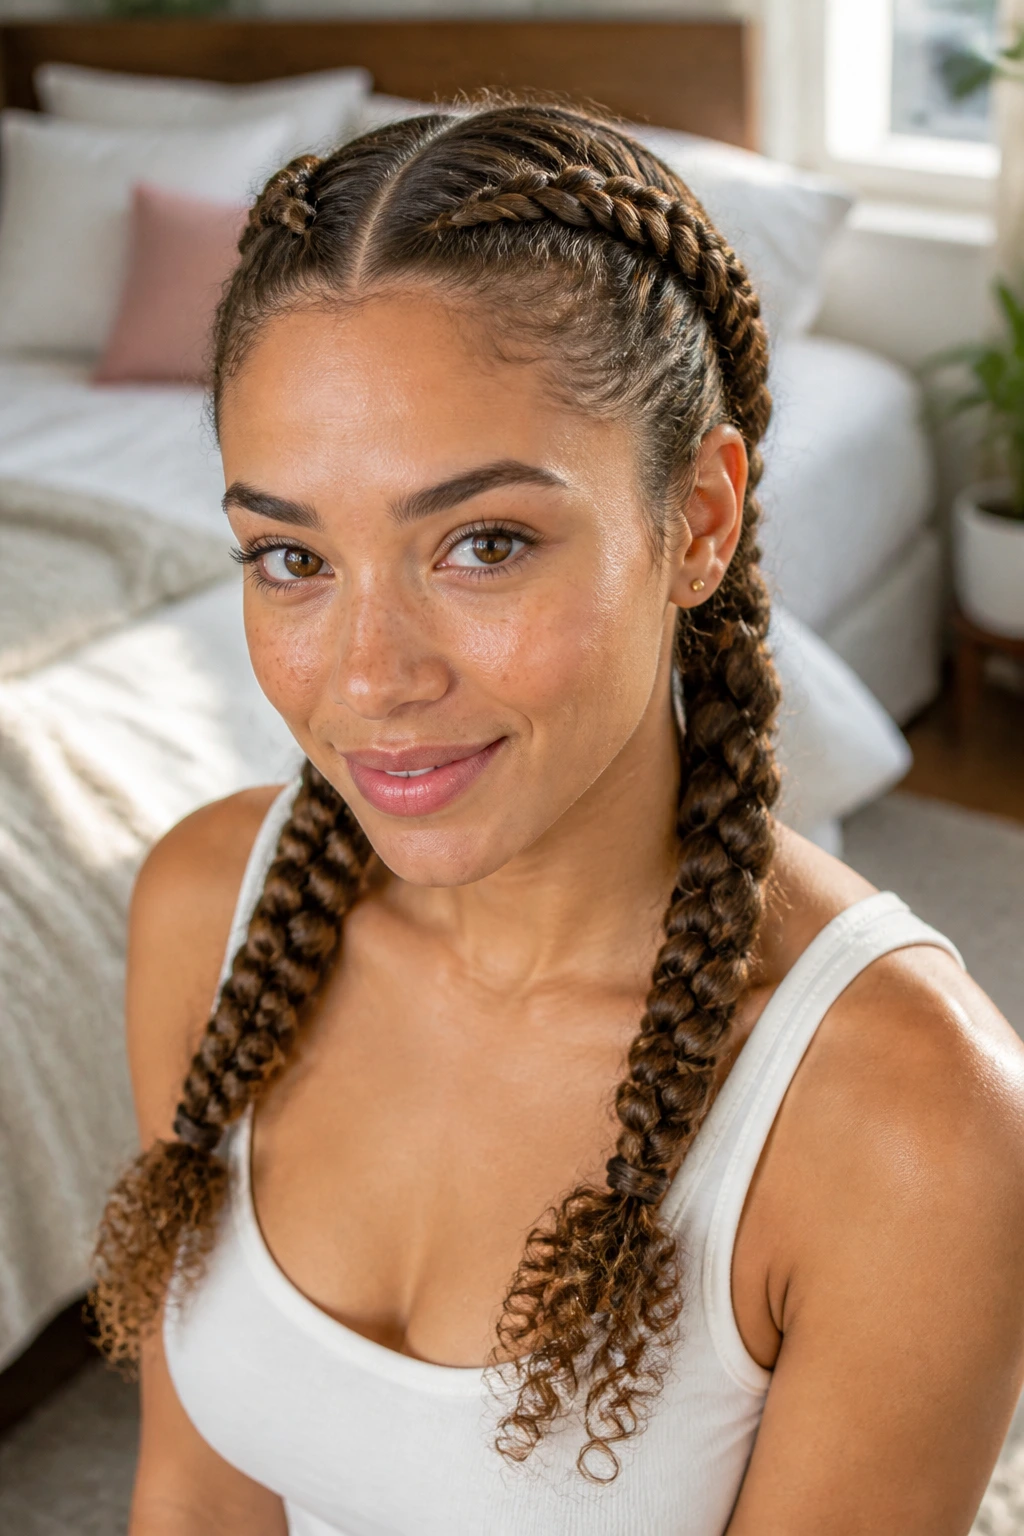
There is something incredibly practical about double Dutch braids. They are the go-to style for long days, gym sessions, or second-day hair when your curls have started to lose their uniform pattern. By sectioning the hair down the middle, you make a large, daunting head of hair much easier to manage.
The Mechanics of the Dutch Weave
Unlike a traditional French braid where you cross strands over one another, the Dutch braid requires you to cross them under. This keeps the braid sitting on top of your hair rather than sunken into it, which makes the detail of your curl pattern pop.
Tips for Success
- Use a rattail comb to get a clean part down the center. If the part is crooked, the whole look feels unbalanced.
- Use a small amount of edge control or styling gel at the hairline to keep the baby hairs tucked in.
- If you have layers, you might find that the ends of your braids start to look a bit wild. That is actually a benefit for curly hair—it creates a soft, textured finish that looks intentional.
4. The Half-Up Braided Crown
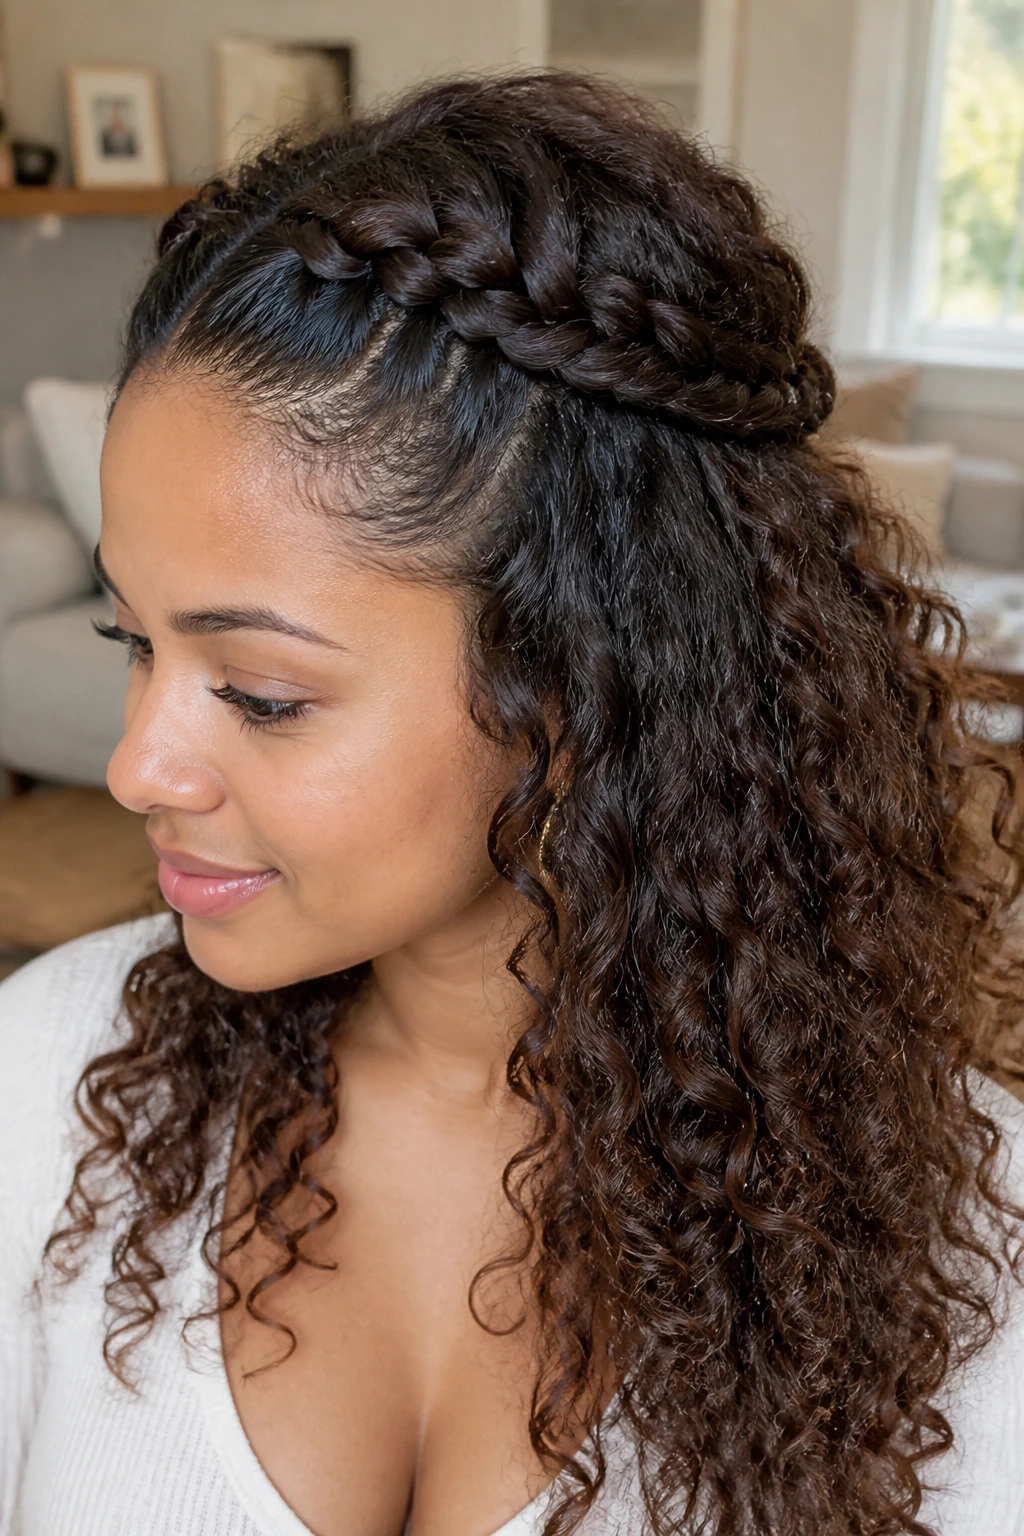
This is the ultimate “I need to look polished in five minutes” style. It takes the top section of your hair away from your eyes while allowing the majority of your curls to hang free, showcasing your length and volume.
Why It Works for Curly Hair
When you pull back only the top section, you avoid the “triangle shape” that can sometimes happen with curly hair when it is all worn down. You maintain the height at the crown while keeping the focus on your face.
Step-by-Step Styling
- Part your hair from ear to ear to create a horizontal section.
- Create two small Dutch braids starting from each temple and leading toward the back of your head.
- Once the braids reach the center, join them together with a small, clear elastic.
- Twist the remaining ends of the braids slightly and tuck them into the base of the small ponytail.
- Use a decorative clip to cover the elastic for a cleaner finish.
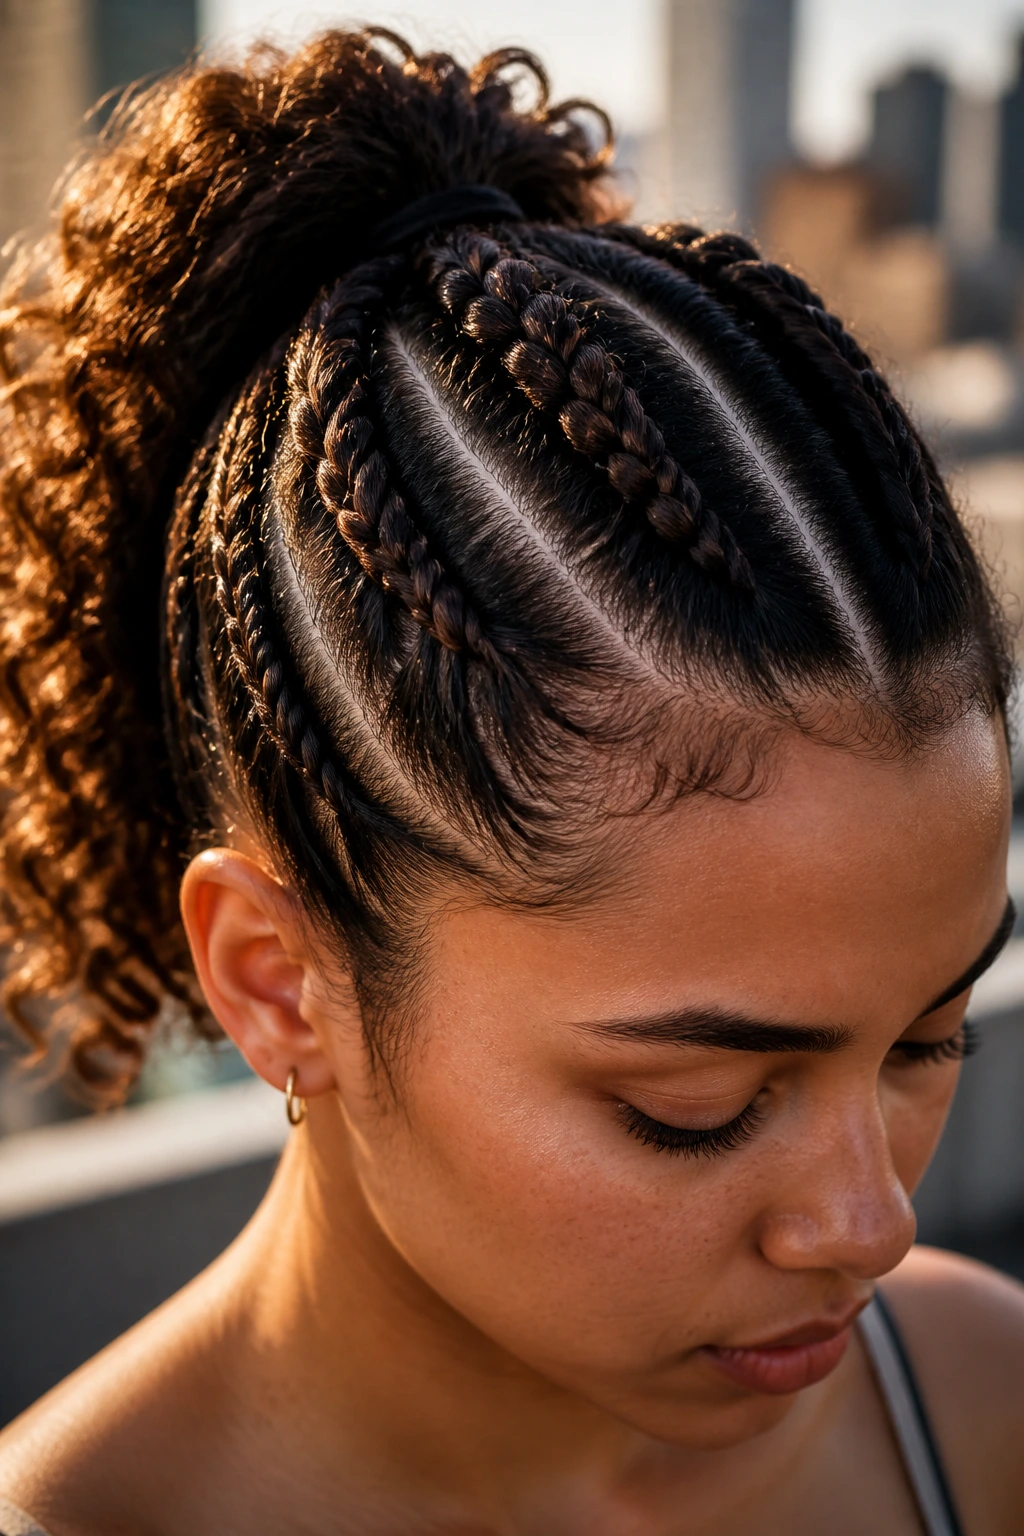
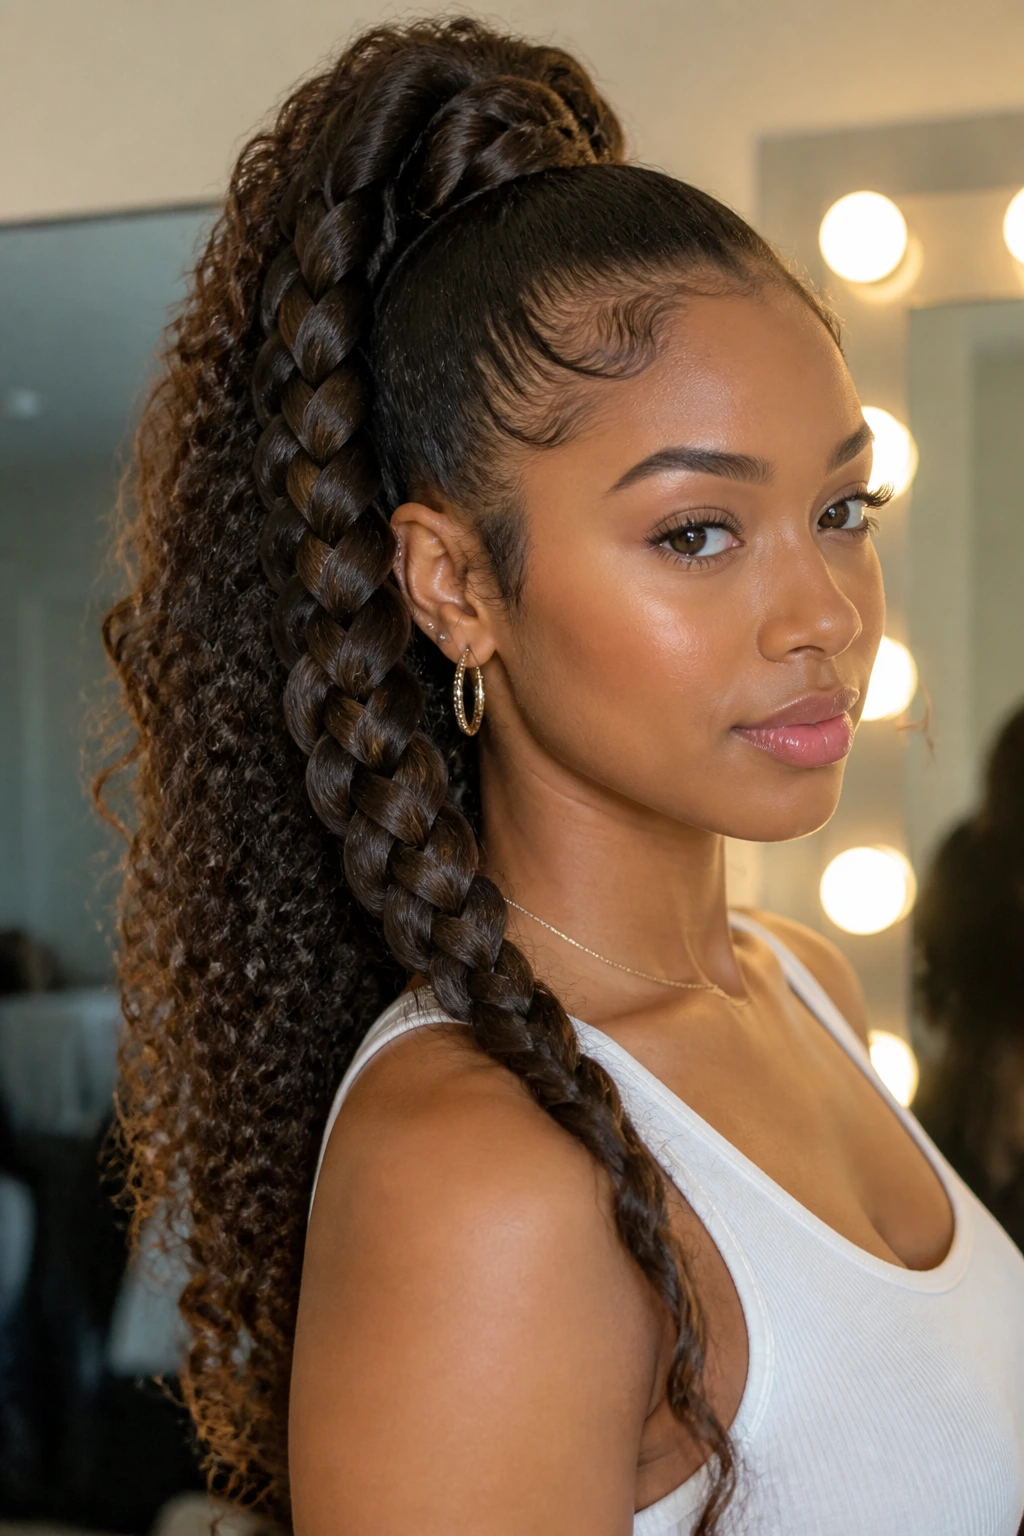
5. The Curly High Ponytail Braid
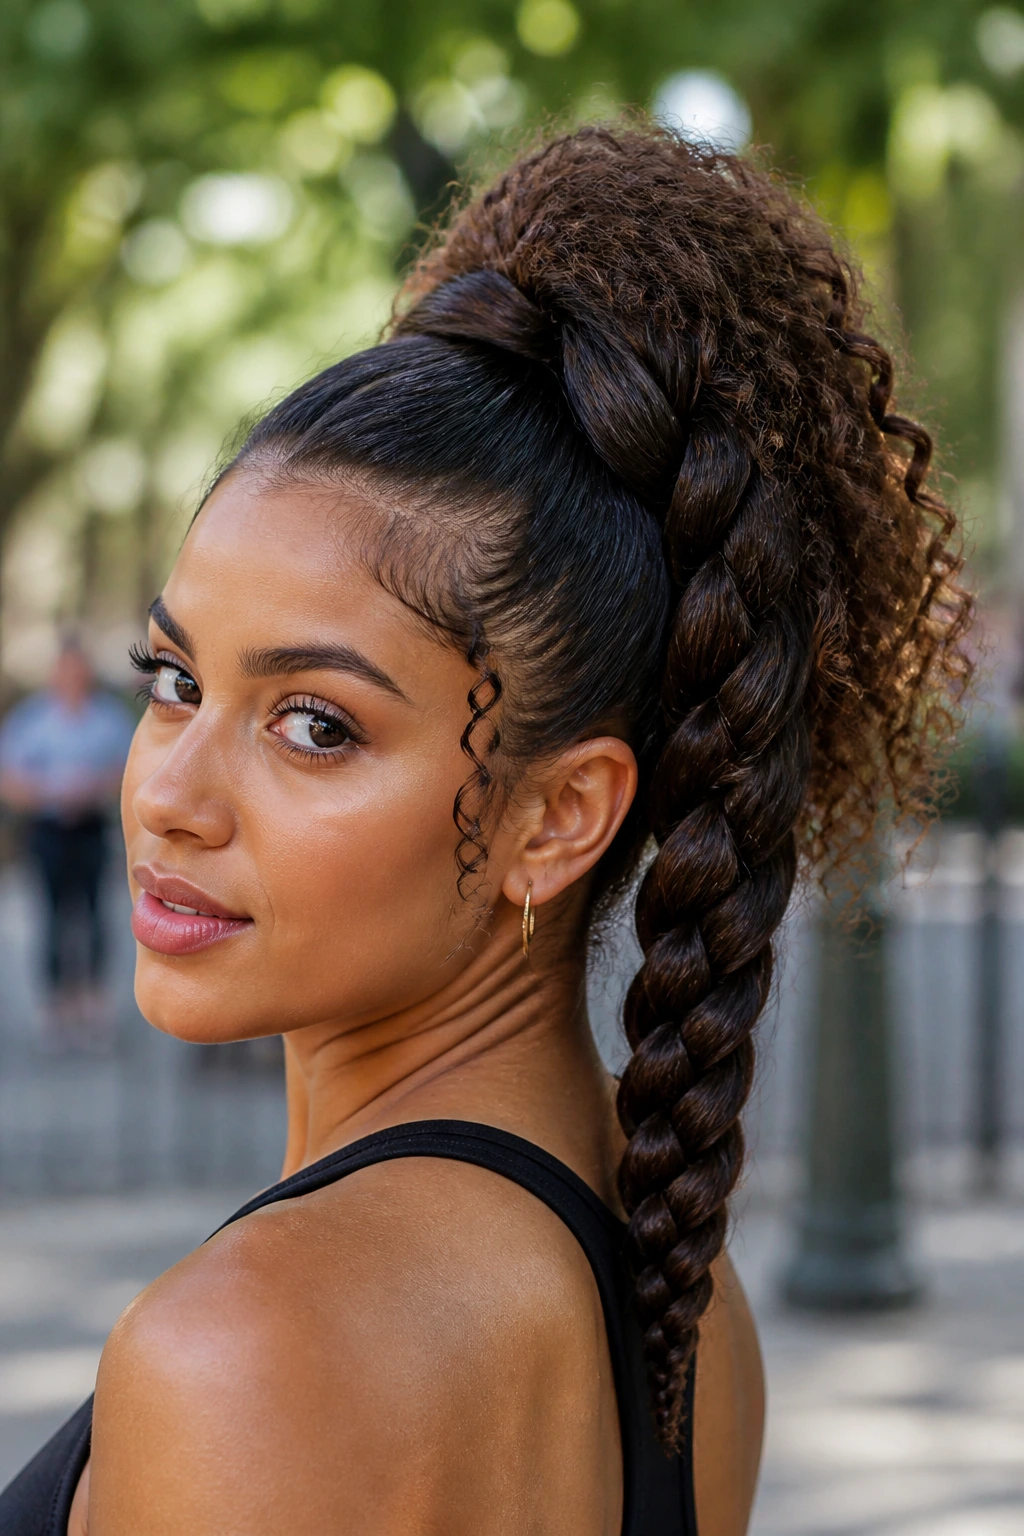
Combining a high ponytail with a braid is a clever way to control the weight of thick, curly hair. It prevents the “heavy” feeling that can come from a standard ponytail and keeps the hair away from your face throughout a busy day.
Getting the Tension Right
- Flip your head upside down and gather your curls at the crown.
- Secure with a sturdy, fabric-covered band. Do not use rubber bands, as they will snap your strands and create knots that are nearly impossible to remove.
- Divide the ponytail into three equal sections and create a standard three-strand braid.
- Once you reach the end, fluff the braid by gently pulling on the edges to increase the volume.
6. The Messy Boho Fishtail
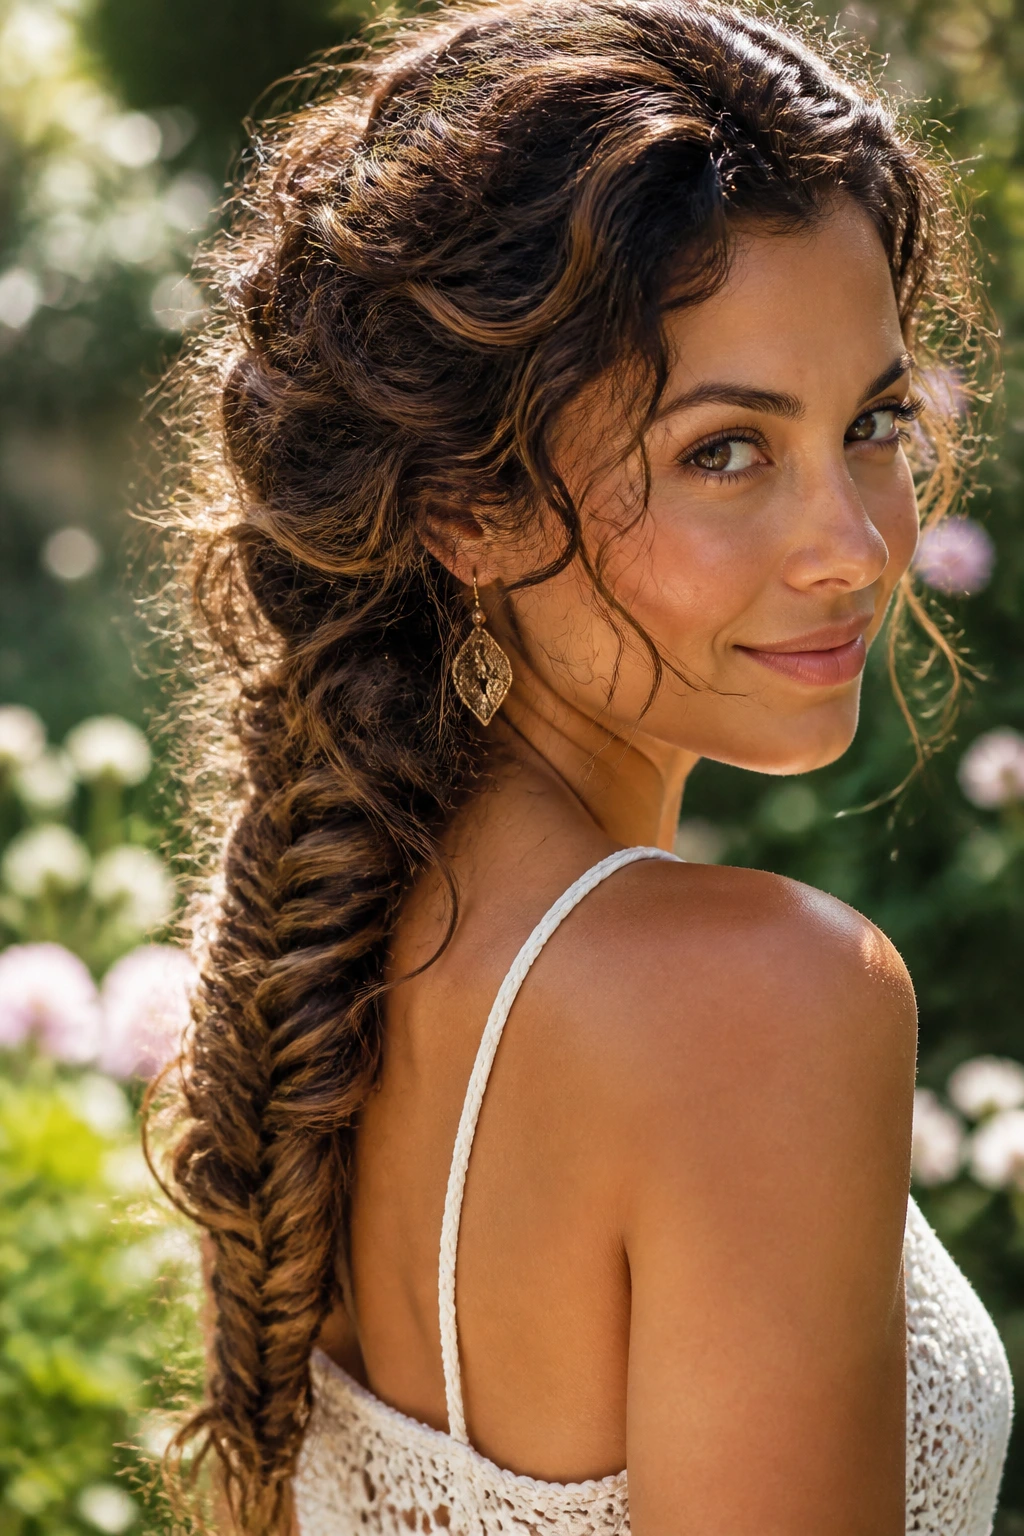
Fishtail braids are notoriously tedious on straight hair, but on curly hair? They are a dream. The natural texture provides enough “fuzz” to keep the braid from unraveling, meaning you don’t have to pull it so tight it hurts your scalp.
Why Curls Make It Easier
The secret to a good fishtail is having a bit of grit in the hair. Since curly hair is already textured, you can skip the texturizing spray entirely. Start by pulling your hair into a low side ponytail to make the weaving process easier to see.
The Weaving Process
- Split the ponytail into two main sections.
- Take a thin strand from the outside of the left section and cross it over to the inside of the right section.
- Repeat on the other side.
- Keep the tension consistent. It is easy to let the braid get loose, so keep your hands relatively close to the braid as you work down the length.
7. The Braided Faux-Hawk
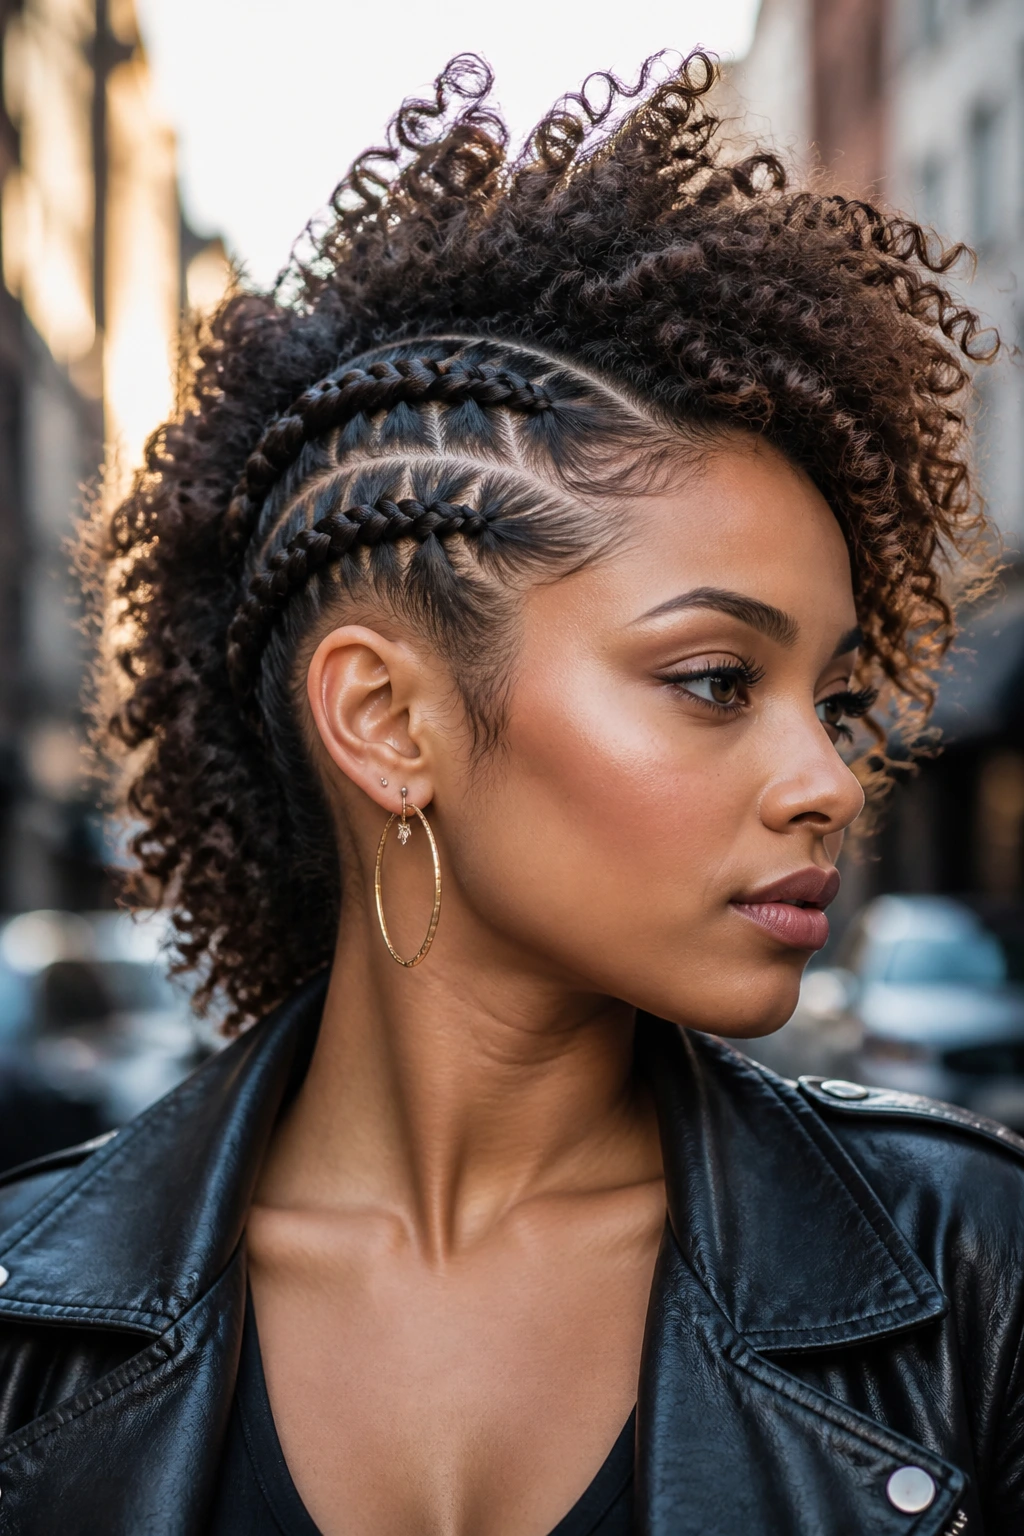
This style brings a bit of edge to your look. It mimics the silhouette of a mohawk by pinning the sides of your hair tight to the head, using braids to create the “spine” of the style.
How to Construct the Shape
- Use two Dutch braids on either side of your head, starting from the hairline and moving toward the nape of the neck.
- When you reach the back, pin the ends of the braids together.
- Use a wide-tooth comb to fluff the center section of your curls, creating a voluminous mohawk effect.
This style is perfect for shorter, shoulder-length curls where a full-length braid might be difficult to manage. It relies on the volume of the hair rather than the length, making it incredibly versatile for those with tight curl patterns.
8. The Twisted Waterfall Braid
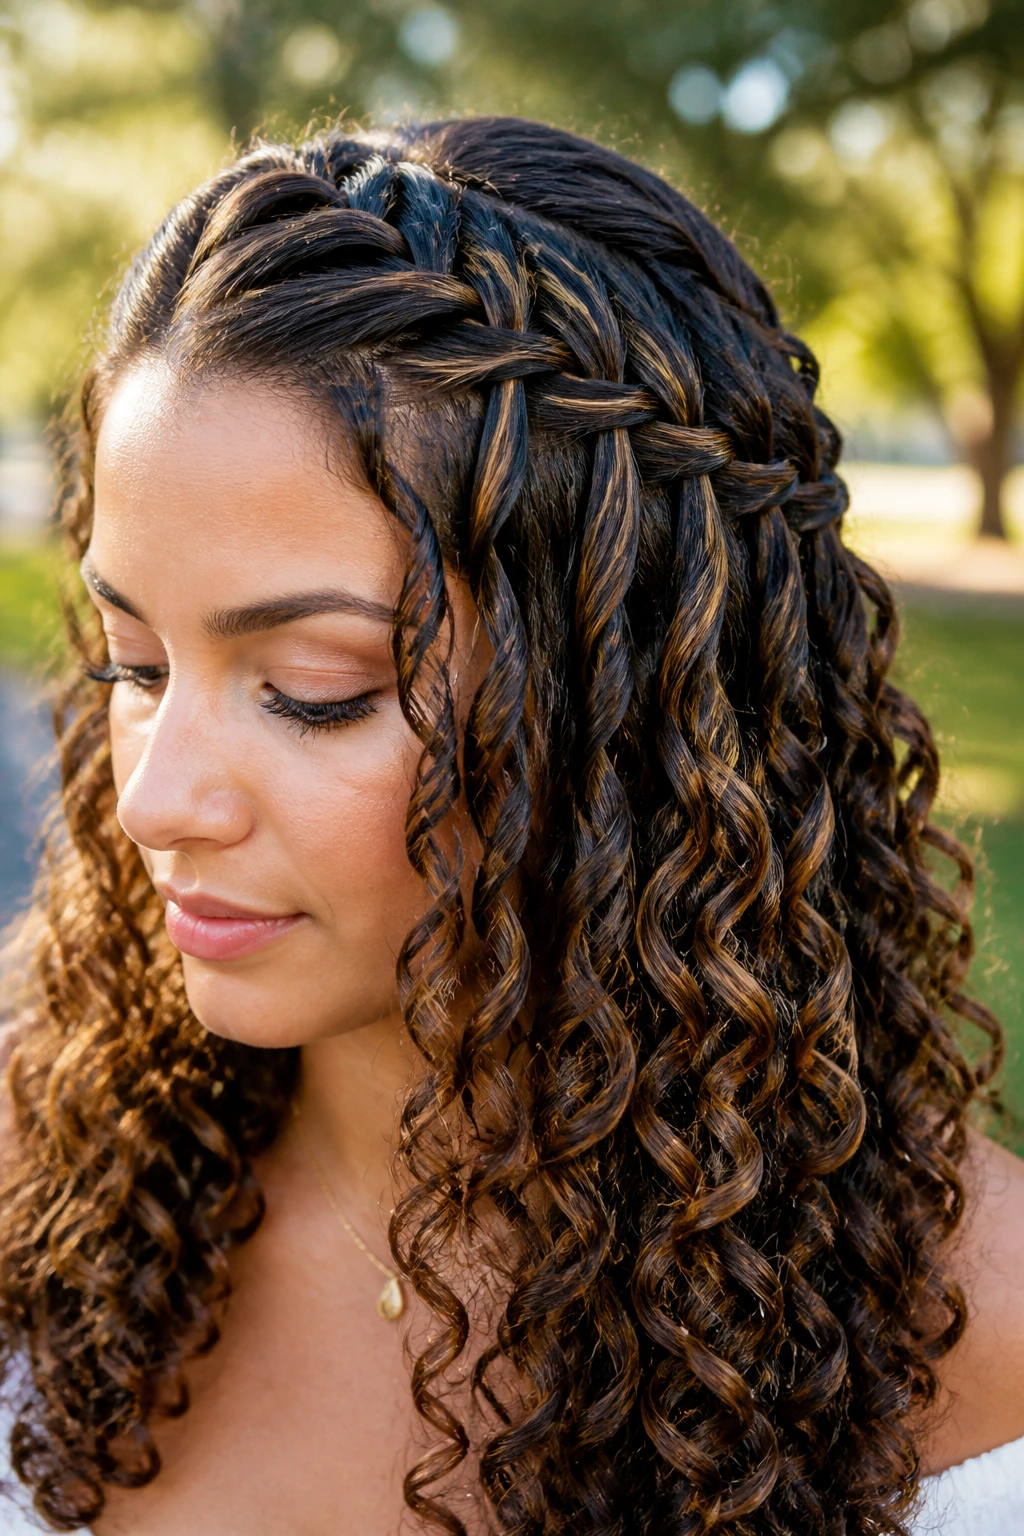
The waterfall braid is a classic, but for curly hair, a twisted version is much easier to maintain. Instead of weaving individual strands through the braid, you are simply twisting sections and letting them “fall” through.
Why This Style Is Unique
Most braids pull all your hair into the structure. The waterfall braid leaves about 70% of your hair loose, which makes it perfect for showing off a fresh twist-out or a wash-and-go. It functions like a headband but looks much more sophisticated.
Tips for Maintenance
Because the hair is mostly left loose, ensure your curls are well-defined before you start. A curl-enhancing cream or mousse is necessary here to prevent the loose sections from turning into frizz by midday. Keep the twists tight, but let the ends curl naturally around your shoulders.
9. The Headband Braid
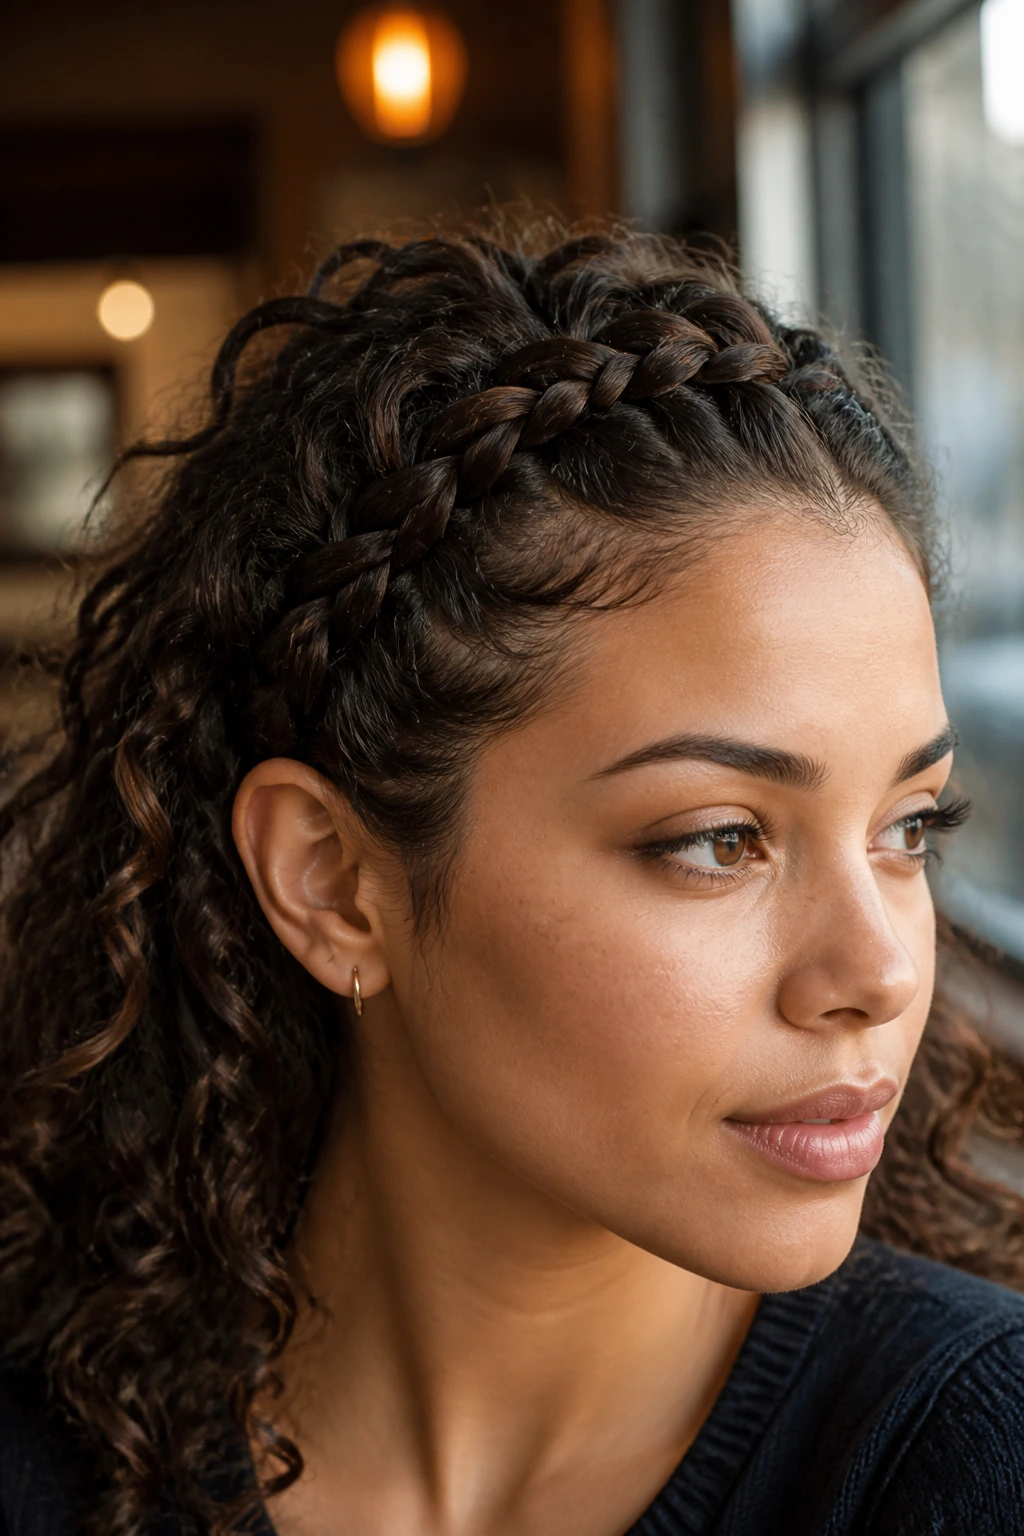
If you have bangs or shorter face-framing layers, the headband braid is the best way to keep them out of your face without using pins. It runs along the front hairline, acting as a functional barrier against flyaways.
Creating a Secure Hold
- Start a Dutch braid at one temple.
- Work your way across your forehead, picking up small sections of hair as you go.
- Stop when you reach the opposite ear.
- Secure the braid with a clear elastic and pin it behind your ear, tucking it under the loose hair so the elastic isn’t visible.
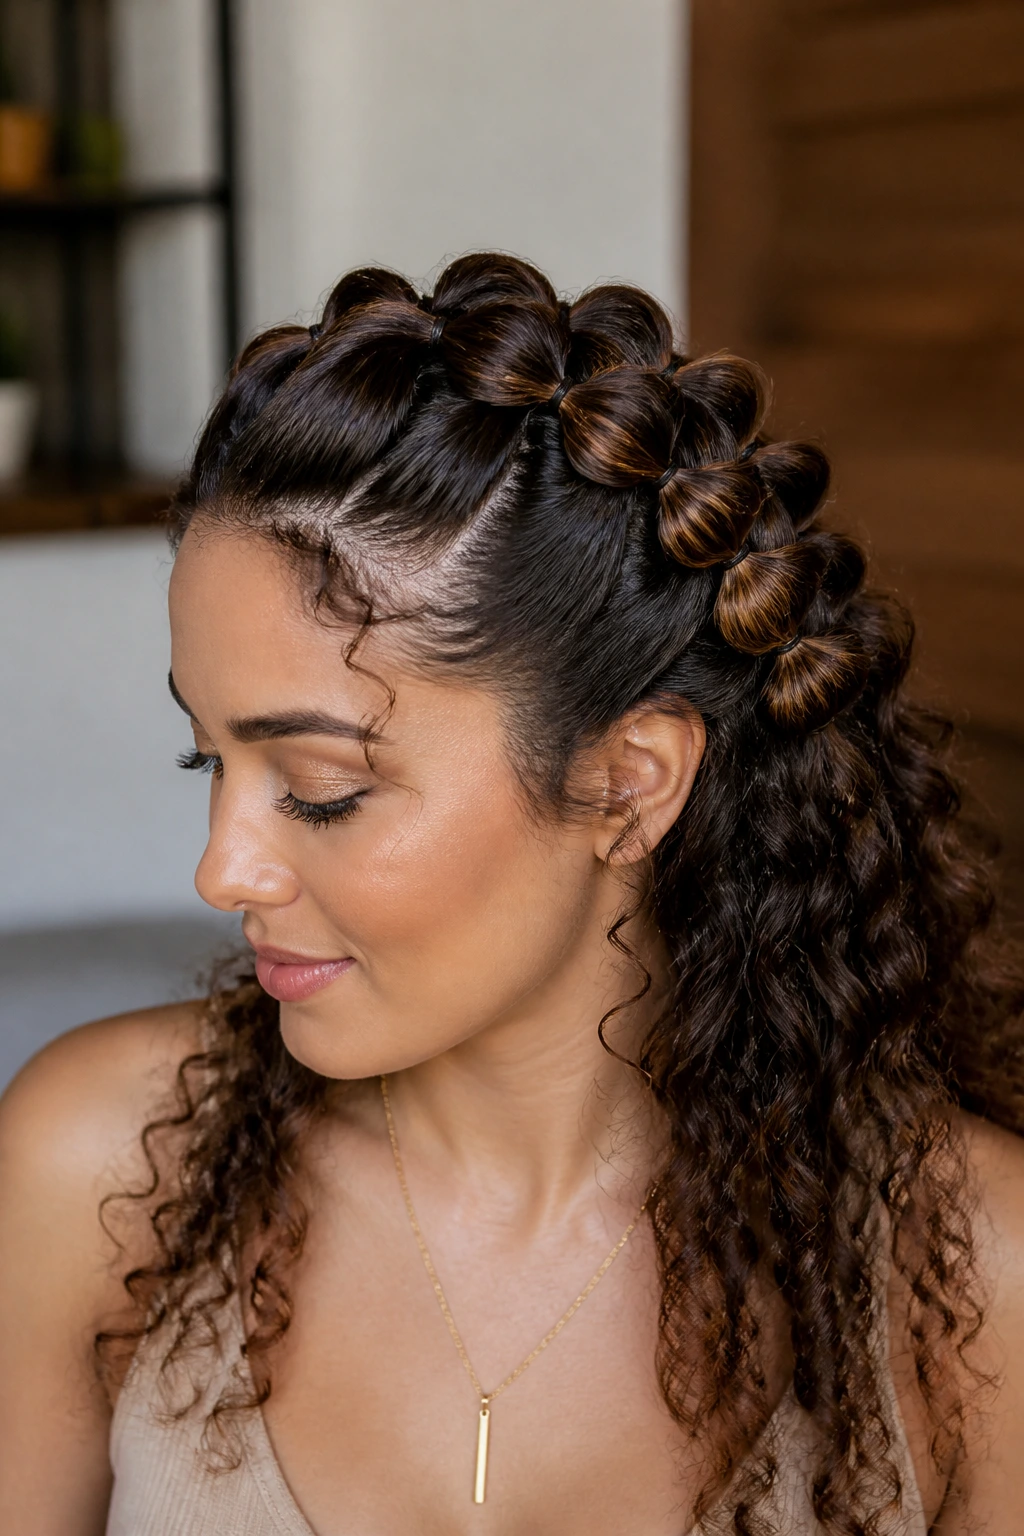
10. The Braided Space Buns
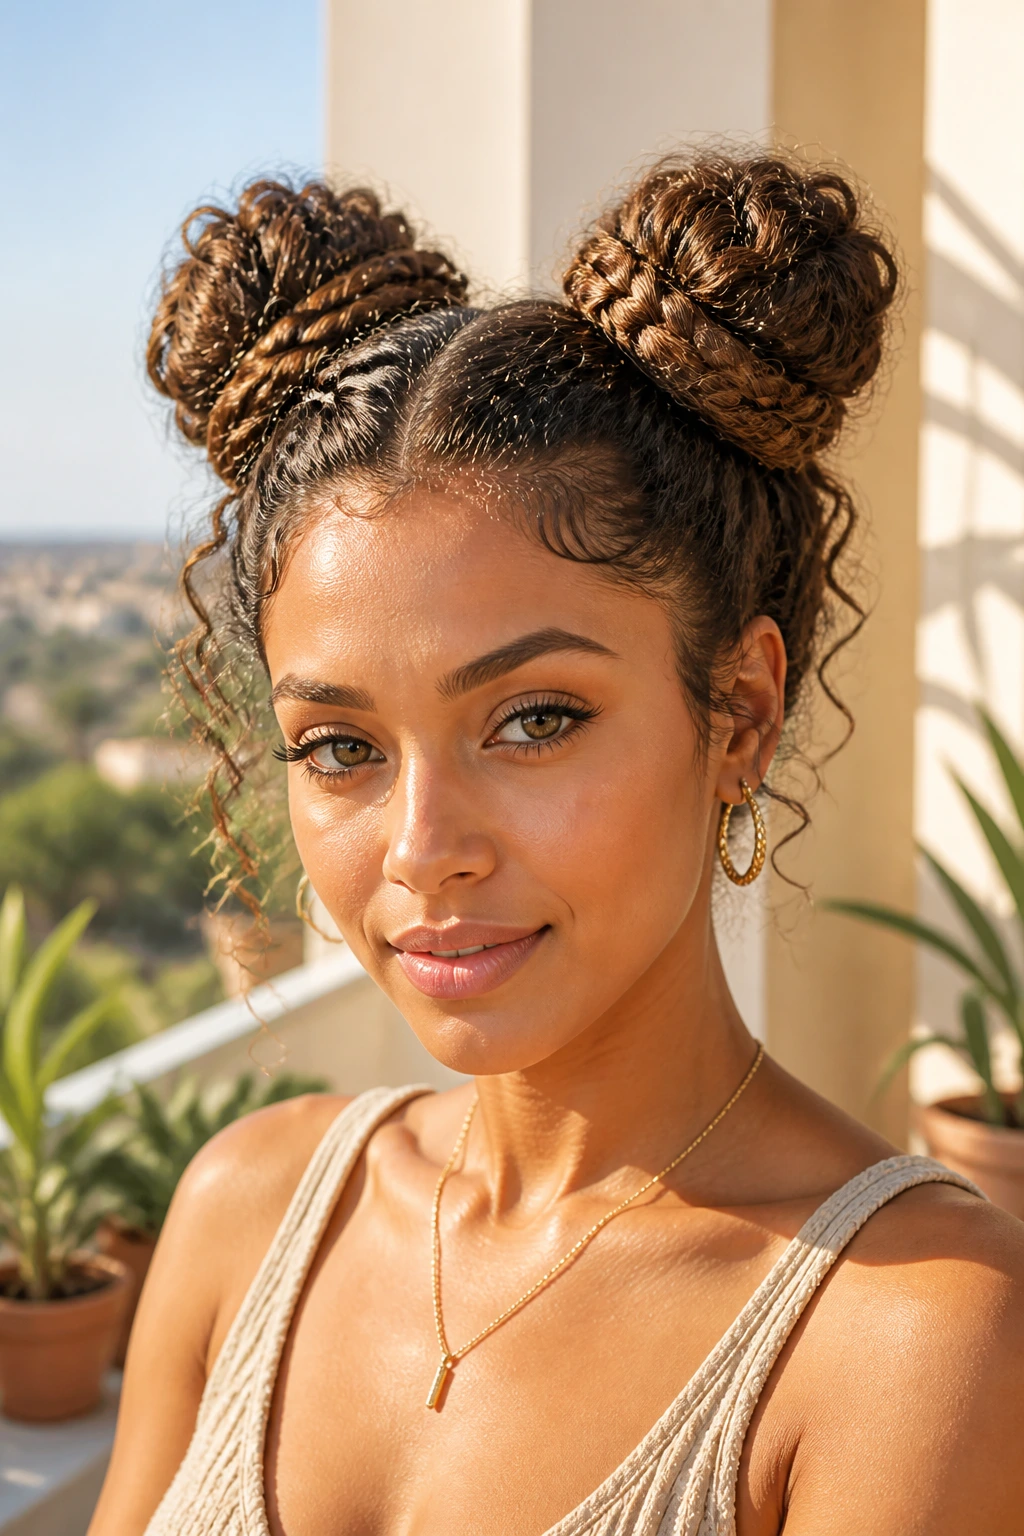
Space buns are fun, but when you add a braided element, they become a legitimate style that can be worn in casual settings. They are excellent for keeping hair completely off the neck during warmer weather.
Shaping the Buns
- Part your hair down the center from your forehead to your neck.
- Create two high pigtails.
- Braid each pigtail and wrap them around their respective bases.
- Secure with bobby pins.
- To keep the look from feeling too “young,” try to make the braids a bit messy by pulling on the loops before wrapping them into the bun. This creates a larger, more sculptural look.
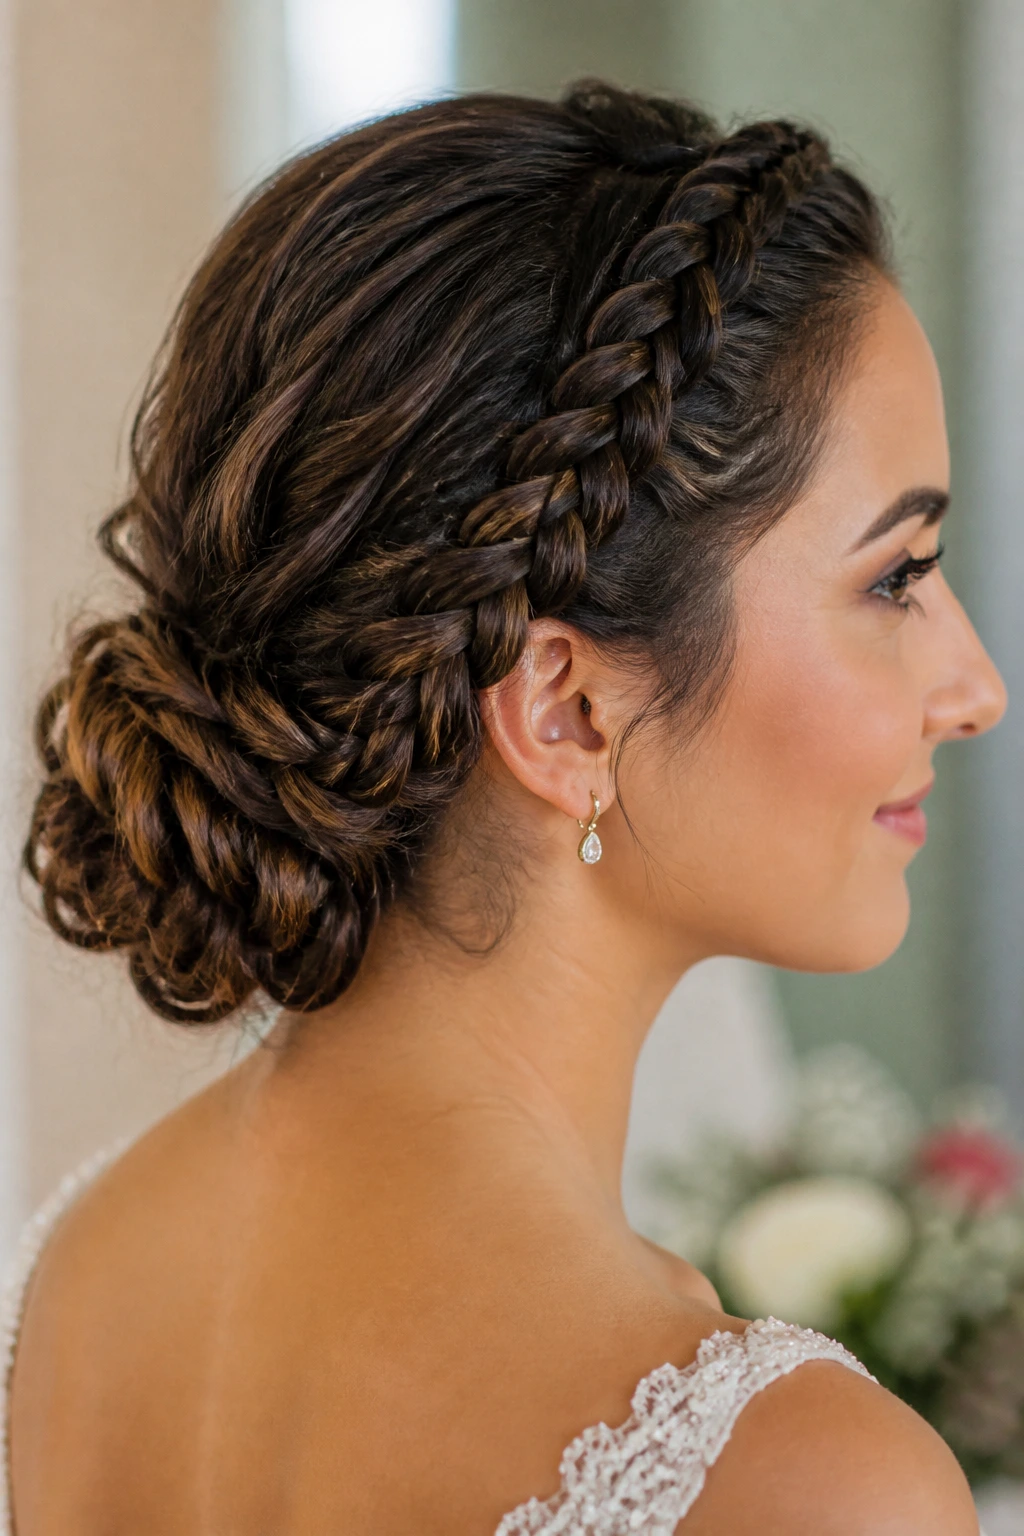
11. The Wrapped Chignon Braid
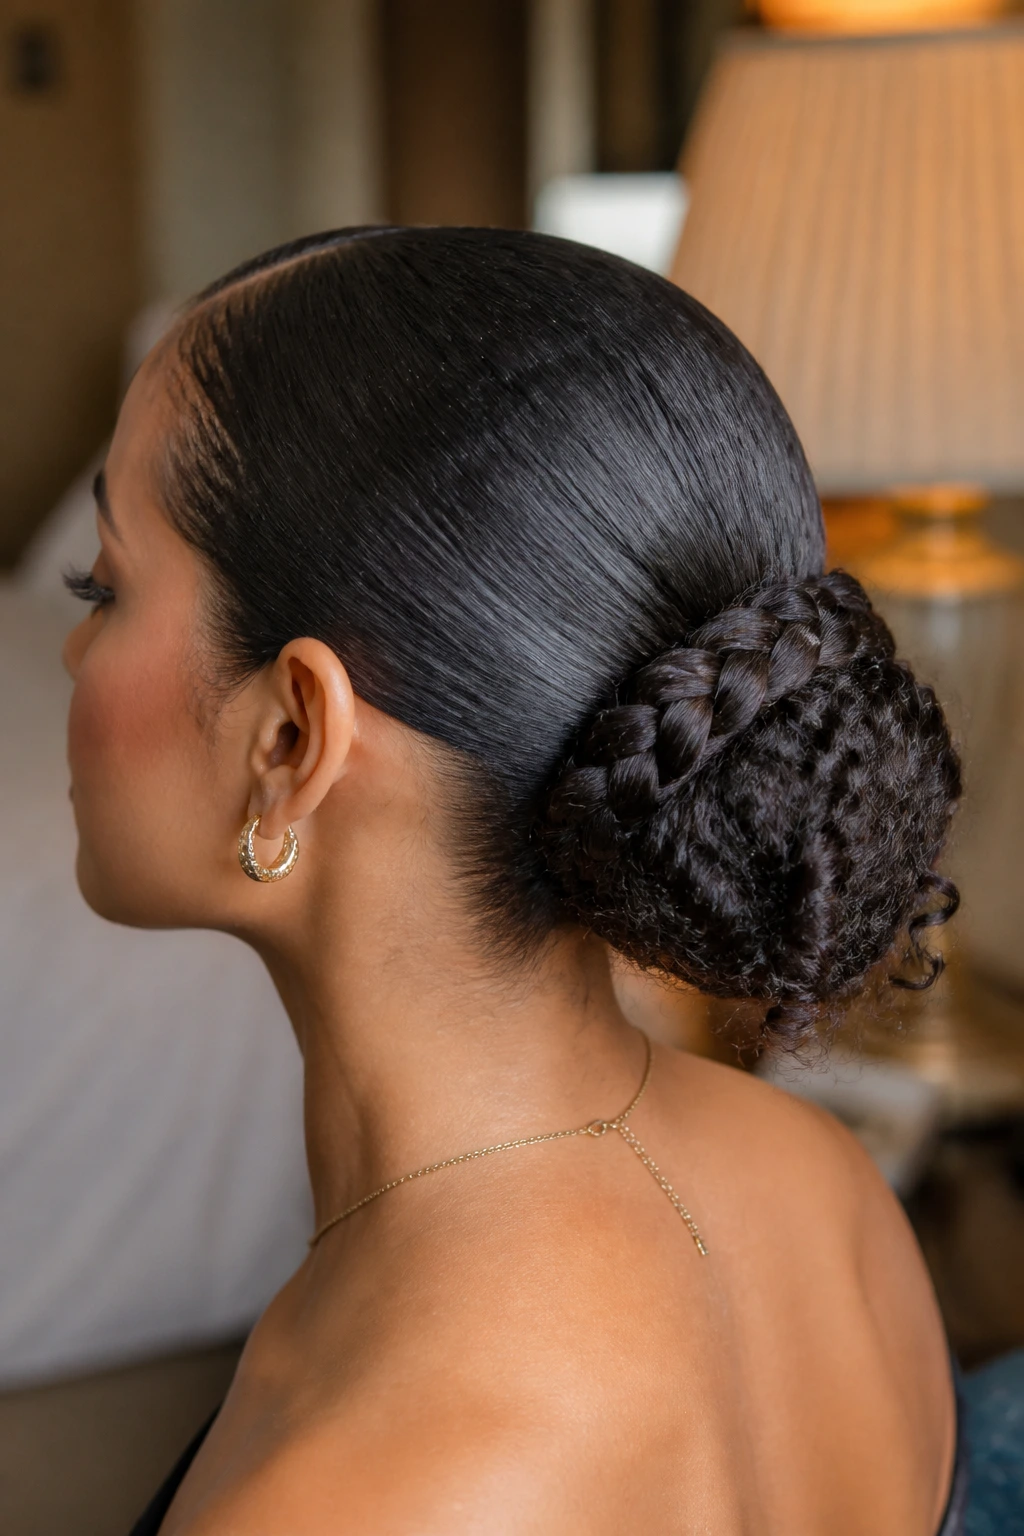
This is the most formal option on the list. It takes your curly hair and turns it into a sleek, sophisticated bun that hides the “messiness” of curls while keeping the texture visible in the details.
Assembling the Chignon
- Pull your hair into a low, loose ponytail.
- Braid the ponytail and wrap it into a bun.
- The beauty of this style is in the contrast between a smooth, gelled hairline and the highly textured, coiled bun. Use a small amount of pomade to smooth the top section, then let the bun remain as voluminous and curly as possible.
12. The Triple-Threat Braided Pony
If you have a lot of hair, one braid might not be enough. This style uses three distinct braids that feed into one ponytail, distributing the weight of the hair across three anchor points.
The Benefits of Triple Braids
It sounds complicated, but it is actually quite simple. Part your hair into three horizontal sections (front, middle, back). Braid each section toward the back of your head. Once all three braids are complete, pull them together into a ponytail. This keeps the hair very tight to the scalp, which is excellent for those who struggle with “puffy” roots.
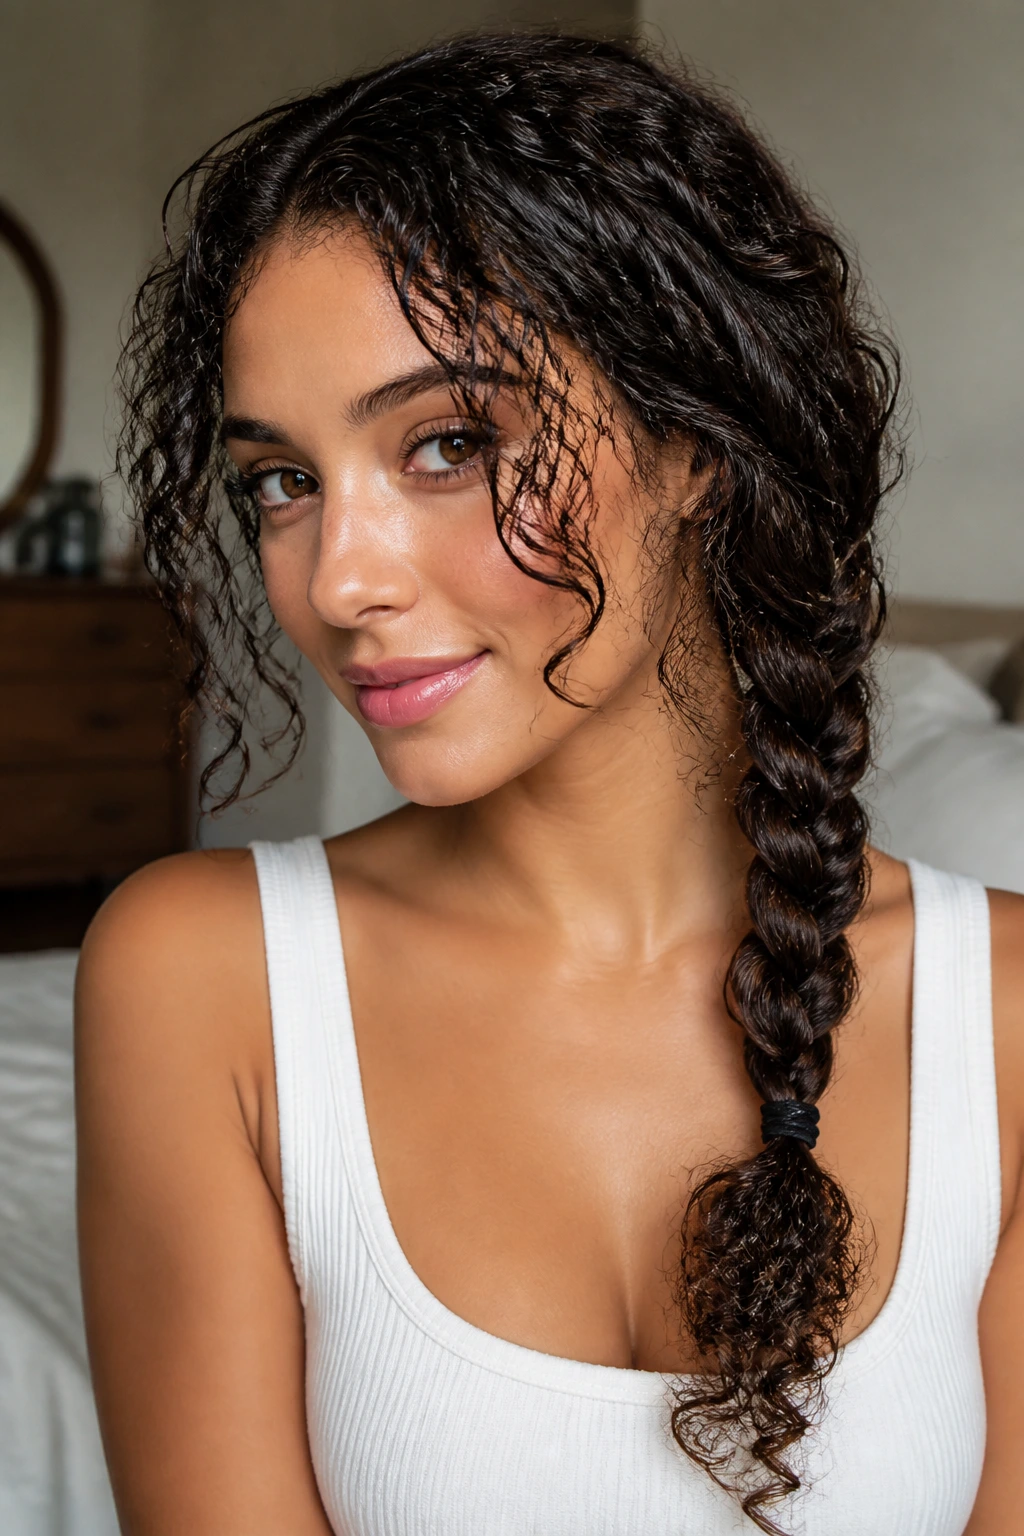
13. The Side-Swept Rope Braid

Rope braids are much faster than traditional three-strand braids because you are only dealing with two sections. You twist each section individually, then twist them around each other in the opposite direction.
The Secret to the Rope Twist
- Create two equal sections of hair.
- Twist the left section to the right.
- Twist the right section to the right.
- Cross the left over the right.
- It sounds confusing, but once your hands find the rhythm, it goes incredibly fast. Because curly hair has so much texture, the rope braid will hold its shape much better than it would on straight hair.
14. The Braided Ponytail Extension
If you are worried that your hair isn’t long enough to braid into a dramatic look, this is your solution. It’s essentially a “braided ponytail.”
How to Fake Length
- Create a high ponytail.
- If you have extensions, attach them at the base of the ponytail.
- Braid the entire mass. The curls in your natural hair will mingle with the extensions, making the braid look seamless and incredibly thick. This is a common trick for red-carpet styling where volume is the primary goal.
15. The Pull-Through “Braid”
Technically, this isn’t a braid at all—it’s a series of elastics. But on curly hair, it creates the illusion of a massive, chunky braid that looks like it took hours to weave.
Why It’s Perfect for Curly Hair
The pull-through method allows you to “pancake” every single section to its maximum capacity. You aren’t limited by the mechanics of weaving strands. You are simply creating a line of ponytails and looping them through one another. It is the best way to get a “big braid” look without actually having to braid a single strand.
16. The Accent Braid
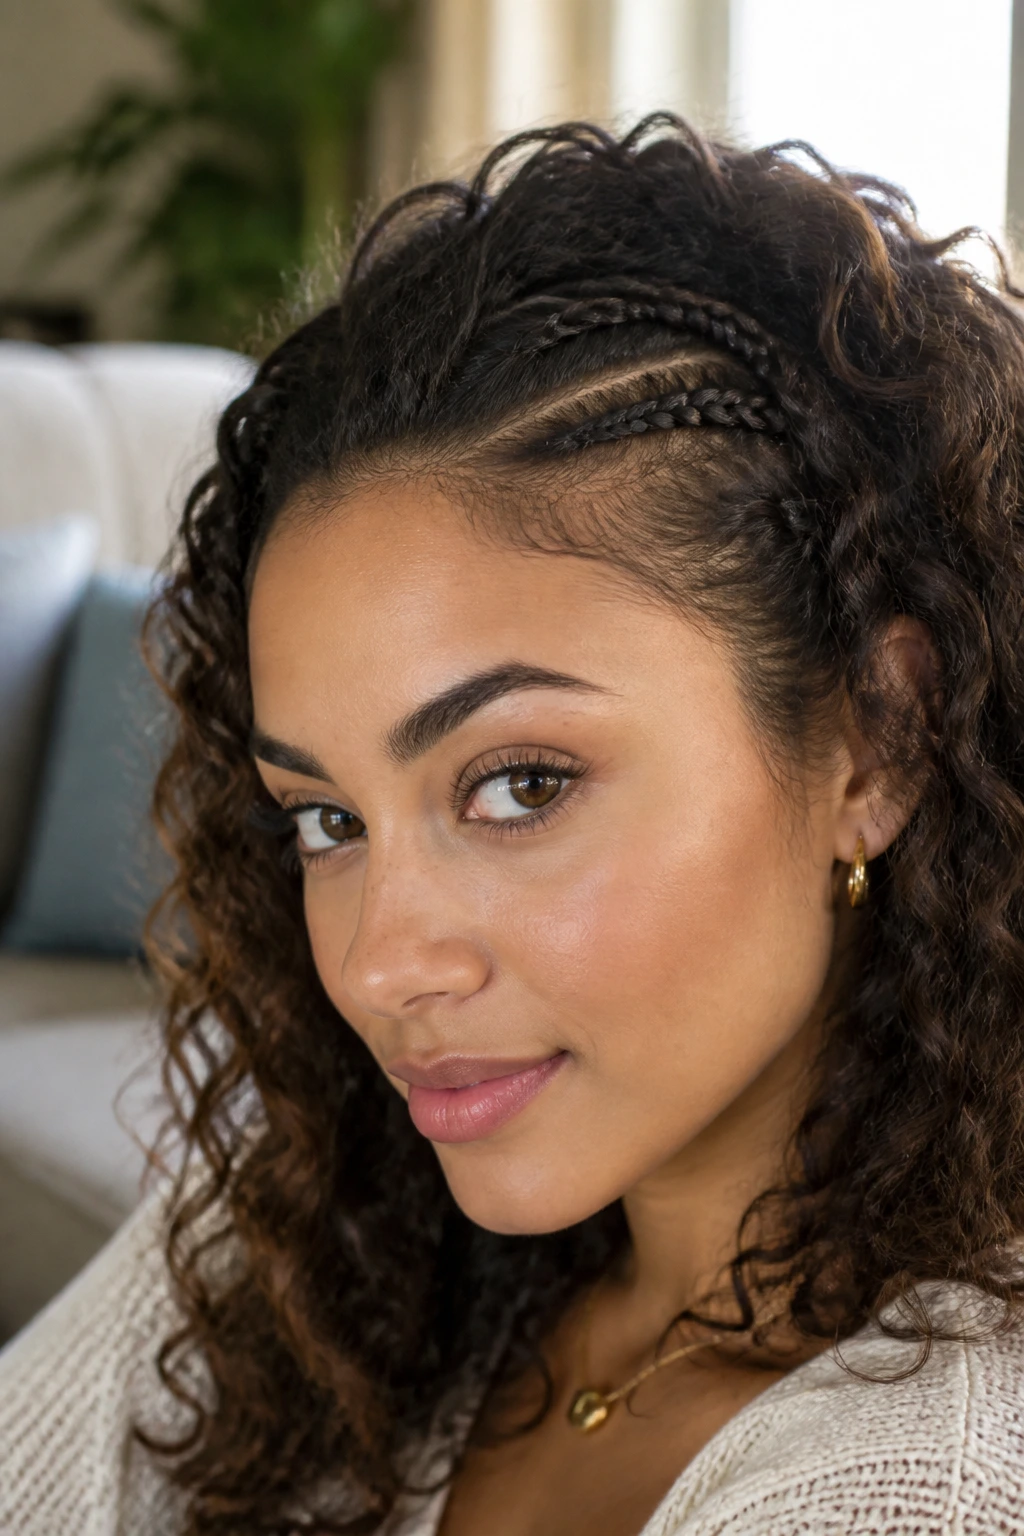
Sometimes you don’t want your whole head braided. Sometimes you just want a single, small detail that breaks up the monotony of your curls.
Placement Matters
- Try a tiny accent braid right at the hairline.
- Secure it with a small bead or a metallic cuff to give it a bit of shine.
- It draws attention to your face and adds a touch of bohemian style to a simple wash-and-go.
17. The Nape-of-Neck Braided Updo
For those who want an updo but don’t like the feel of a high bun, a low braided updo at the nape of the neck is the answer. It is secure, comfortable, and looks intentional.
Construction Tips
- Start with a deep side part.
- Braid along the hairline toward the nape.
- When you get to the back, roll the remaining hair into a small, loose bun tucked into the nape.
- This creates a soft, draped look that works beautifully for weddings or dinners.
18. The “Twist-Braid” Hybrid

This style combines the ease of a two-strand twist with the security of a three-strand braid. It is ideal for transitioning hair where the ends might be a bit more fragile.
Managing Different Textures
- Twist the roots to keep them tight and frizz-free.
- As you reach the mid-lengths, switch to a braid.
- This gives you the control of a twist at the scalp where flyaways usually form, and the durability of a braid at the ends where you need the style to hold its shape.
Practical Tips and Common Mistakes to Avoid

Braiding curly hair isn’t just about the finished look; it is about the health of your curls while they are in the style. The most common mistake is braiding too tightly while the hair is dry. Always ensure your hair is slightly damp or coated in a leave-in conditioner to provide the necessary slip. If you feel tension on your scalp, stop immediately. Tight braids lead to traction alopecia, and no hairstyle is worth damaging your hair follicles.
Another common pitfall is leaving the style in for too long. While protective styles are great, your scalp needs to breathe. Aim to take your braids down every few days to allow your curls to spring back and to give yourself a chance to deep condition. When removing the braids, don’t just rip the bands out—use a pair of hair scissors to carefully cut the elastic, taking care not to snip your hair.
Finally, consider the tools you use. Cheap plastic elastics are the enemy of curly hair. They snag the cuticle and cause breakage. Invest in silk or satin scrunchies and snag-free, fabric-covered bands. Your hair will thank you, and you will notice significantly less frizz when you take the style down.
Variations and Adaptations

The beauty of these styles is that they are all “base” styles that can be adapted to your specific curl pattern. If you have Type 4 coils, your braids will naturally be tighter and smaller, which is an advantage for detailed work like halo braids. If you have Type 2 or 3 curls, your braids will be softer and need a bit more gel to hold the shape.
You can also adapt any of these for different lengths. A shorter cut might not be able to pull off a halo braid, but a braided faux-hawk is actually easier on short hair because the ends don’t get in the way. Don’t be afraid to add accessories. Bobby pins, metal cuffs, and even small flowers can turn a simple braided ponytail into a formal style in seconds.
Storage and Make-Ahead Guidance
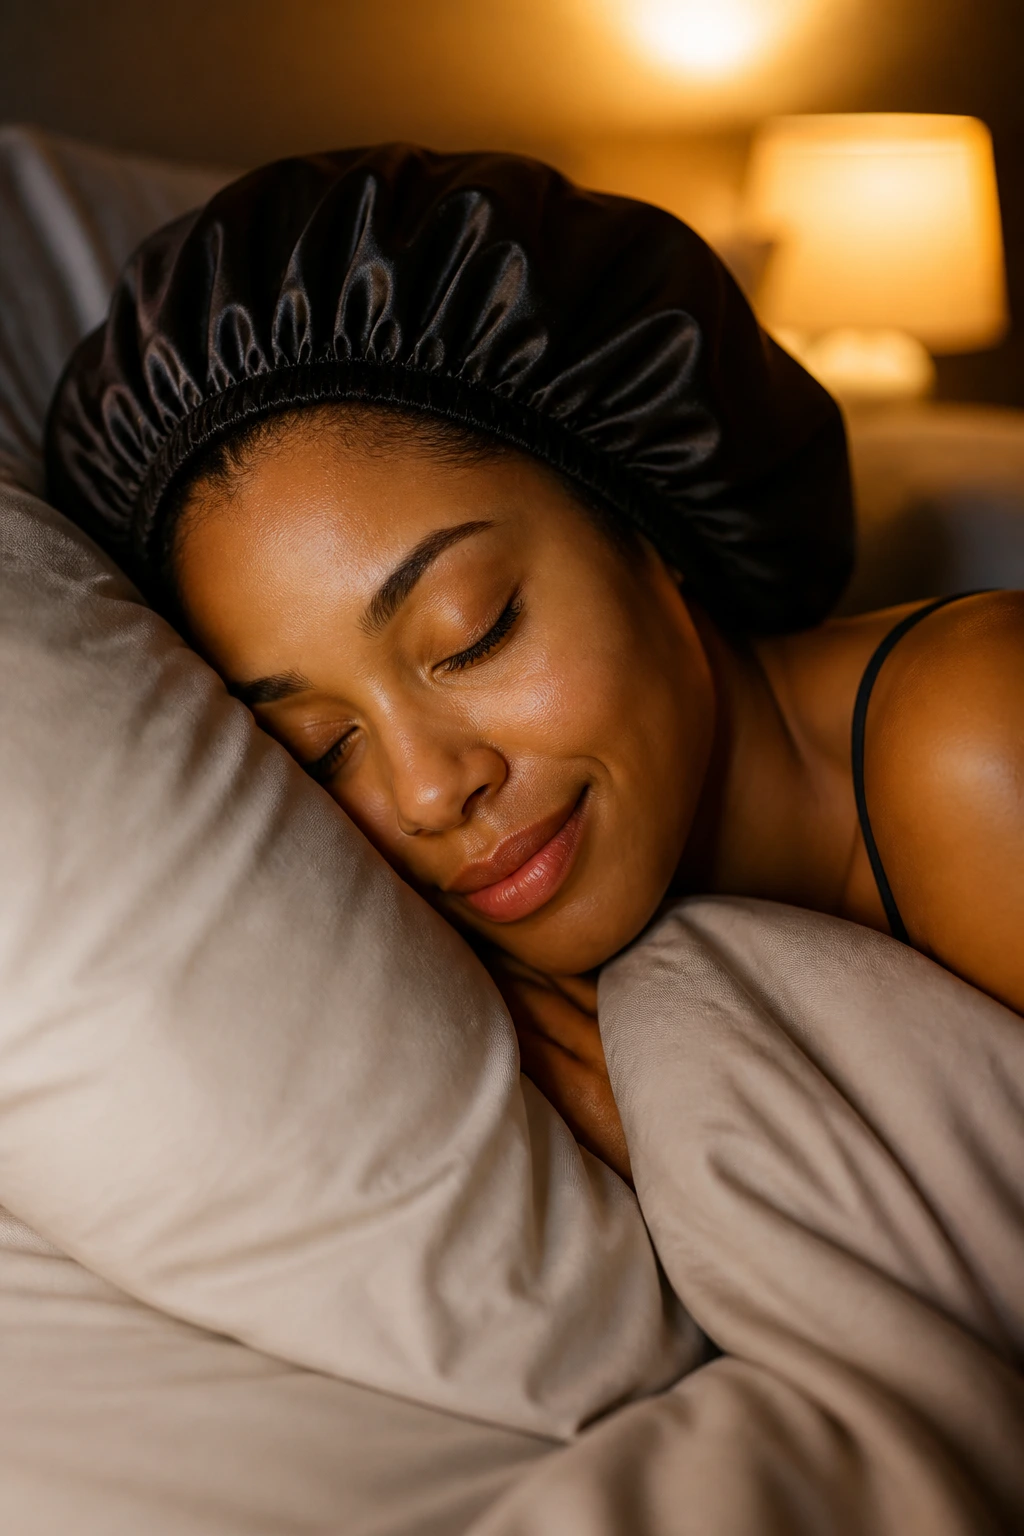
If you are braiding your hair as a “protective style” to last through the work week, wrap your hair in a silk or satin bonnet at night. This is non-negotiable for curly hair. Cotton pillowcases absorb moisture and cause friction, which will result in a fuzzy, undefined mess by the time you wake up.
If you are planning a braided style for an event, you can absolutely prep the day before. Braids often look better on “day two” hair, as the natural oils have had time to settle into the strands, providing a bit of extra grip and shine. Just ensure you refresh the hairline with a tiny bit of water and edge control before you leave the house.
Serving Suggestions and Pairings
A braided style for curly hair pairs best with accessories that complement, rather than compete with, your texture. If you have a large, voluminous braid, opt for simple earrings like small hoops or studs. If your braid is sleek and pulled back, you have more freedom to go bold with your jewelry.
Occasion-wise, these braids run the gamut. A double Dutch braid is perfect for a weekend hike or a casual coffee date. A braided chignon is entirely appropriate for a business setting or a formal wedding. Ultimately, the best way to “serve” a braided style is with confidence. Braids are a visual statement; when you wear them, you are telling the world that you are in control of your hair, not the other way around.
Final Thoughts
Curly hair is a gift, but it is one that requires a bit of maintenance. Braids offer you a way to harness that energy without constantly reaching for the flat iron or the diffuser. By learning just a few basic techniques—the Dutch under-weave, the simple three-strand, and the rope twist—you unlock a wardrobe of styles that can get you through any situation.
Experiment with these looks on a day when you don’t have to be anywhere important. That way, you can figure out what amount of tension works for your scalp and which styles suit your face shape. The most important thing is to have fun with it. Your curls are resilient and playful; your styles should be, too. Keep them moisturized, be gentle with the tension, and let your natural texture be the star of the show.